Try ShortPoint now
TL;DR: You can add a custom Design Element from ShortPoint Generator to a SharePoint page the same way you add any other ShortPoint element. Edit the page and open the ShortPoint web part. Click the plus icon where you want the element to go. Scroll to the Custom section at the bottom of the element library, or search for your element by name, and select it. Fill in any editable fields, click the green checkmark, then save and publish the page.
Already have your custom Design Element? It’s time to make the most of it by adding it to your SharePoint pages.
The good news? It’s as easy as adding ShortPoint Design Elements! In this tutorial, we’ll show you where you can find custom Design Elements while editing your SharePoint page and how to add them to the page.
TIPIf you don’t have custom Design Elements, you can start creating them by following the steps in ShortPoint Generator: How to Create Custom Design Elements.
TABLE OF CONTENTS
- Prerequisites
- Where are Custom Design Elements Stored?
- Adding Custom Design Elements to SharePoint
- Frequently Asked Questions
Prerequisites
- You must have the latest version of ShortPoint SPFx installed.
- You must be a ShortPoint Designer with either a Pro or Enterprise license. For more information, check out Licensing Options.
Where are Custom Design Elements Stored?
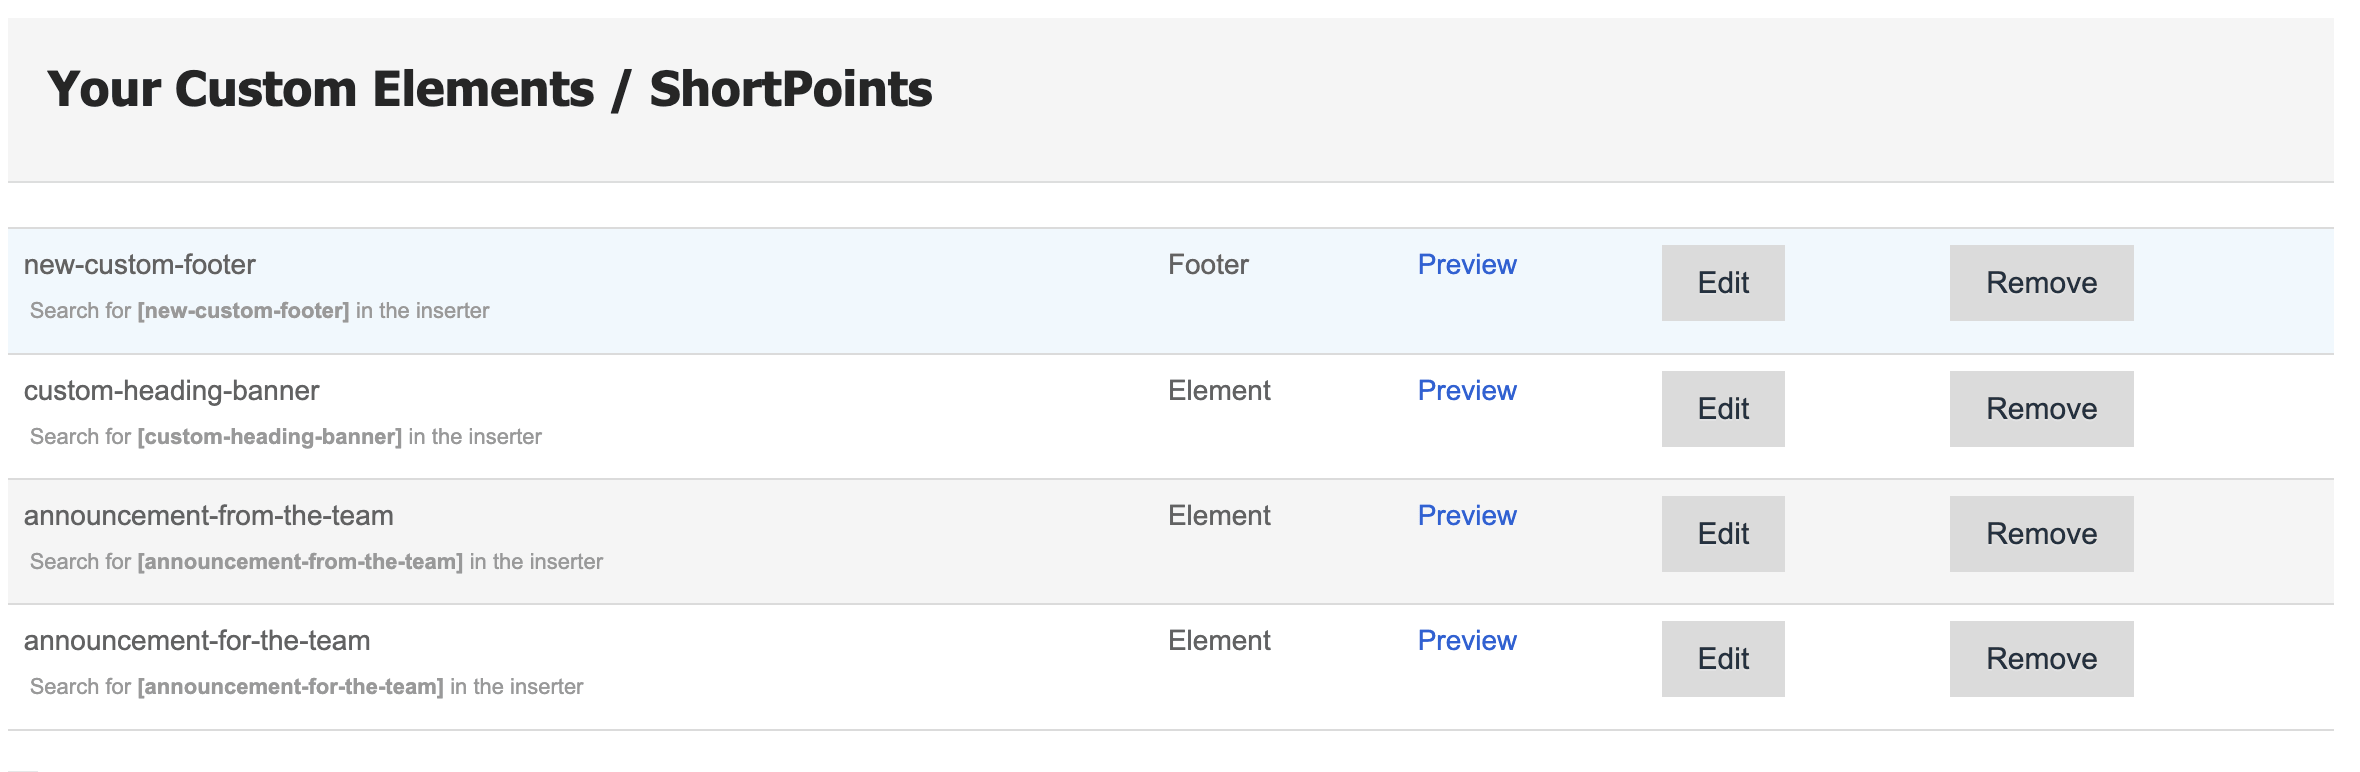
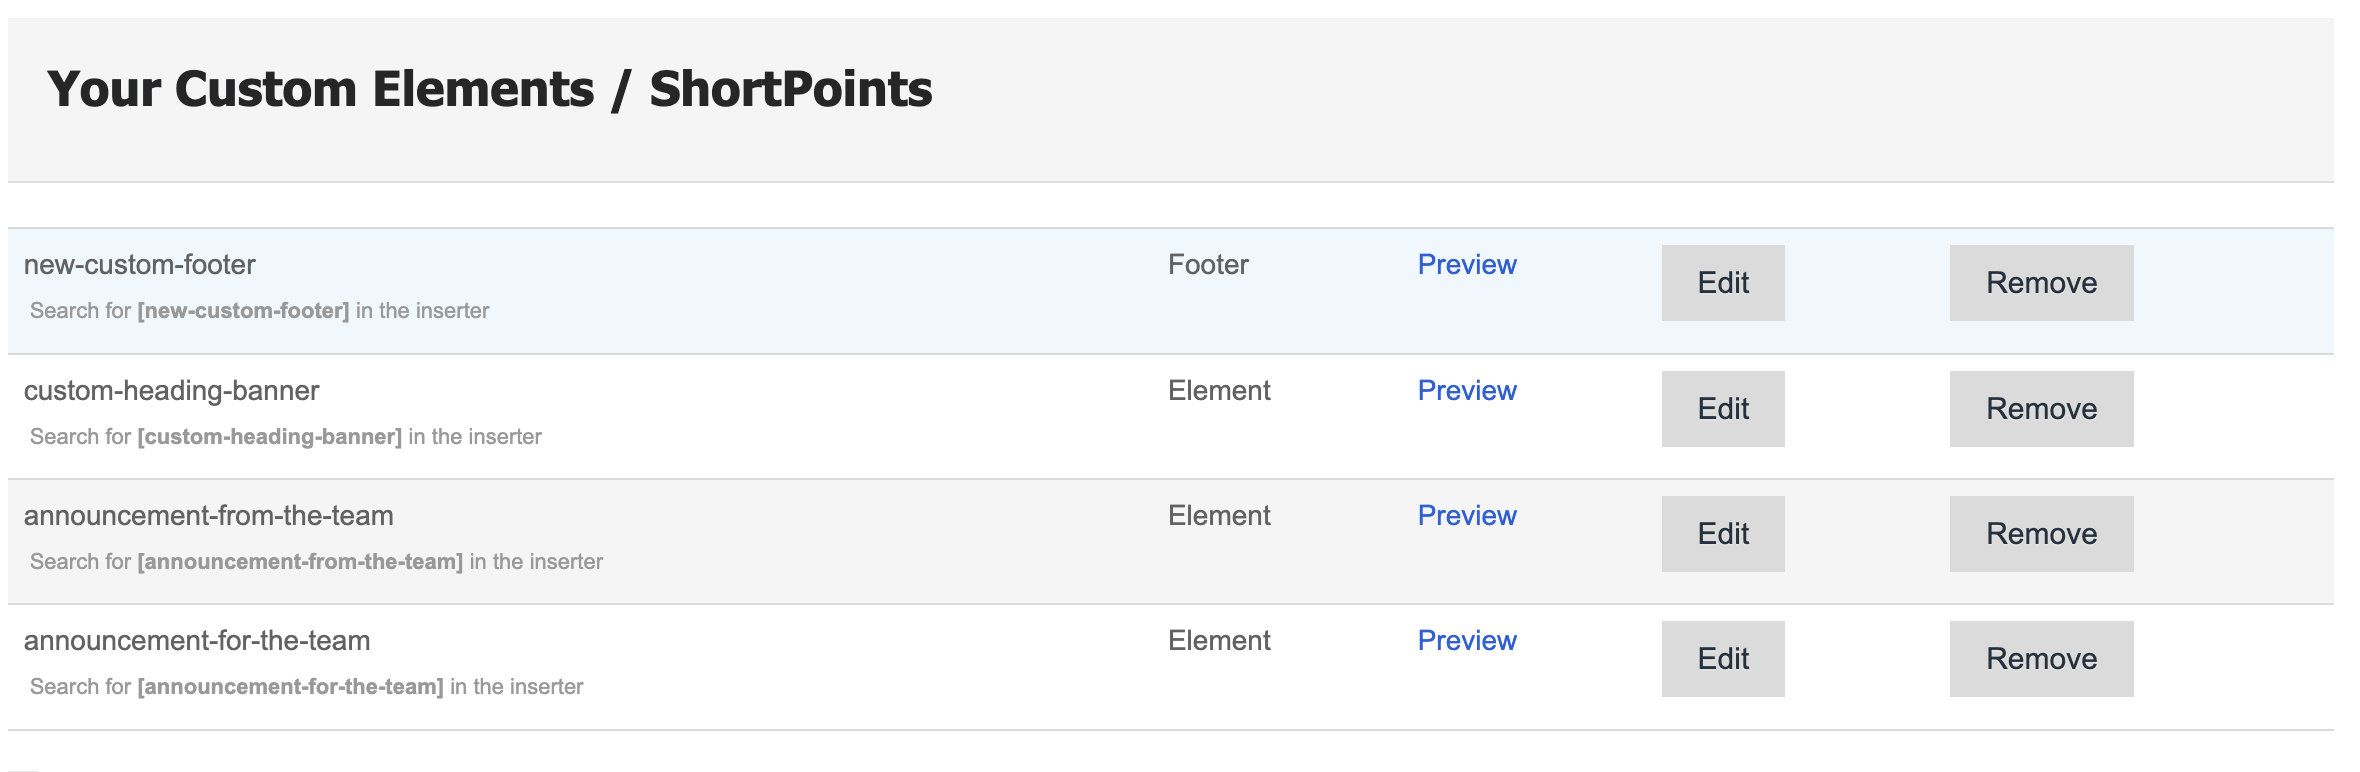
Once you create and save Custom Design Elements in ShortPoint Generator, you’ll see them stored under the Your Custom Elements / ShortPoints section. Here, you’ll be able to preview, edit, and remove them as needed:
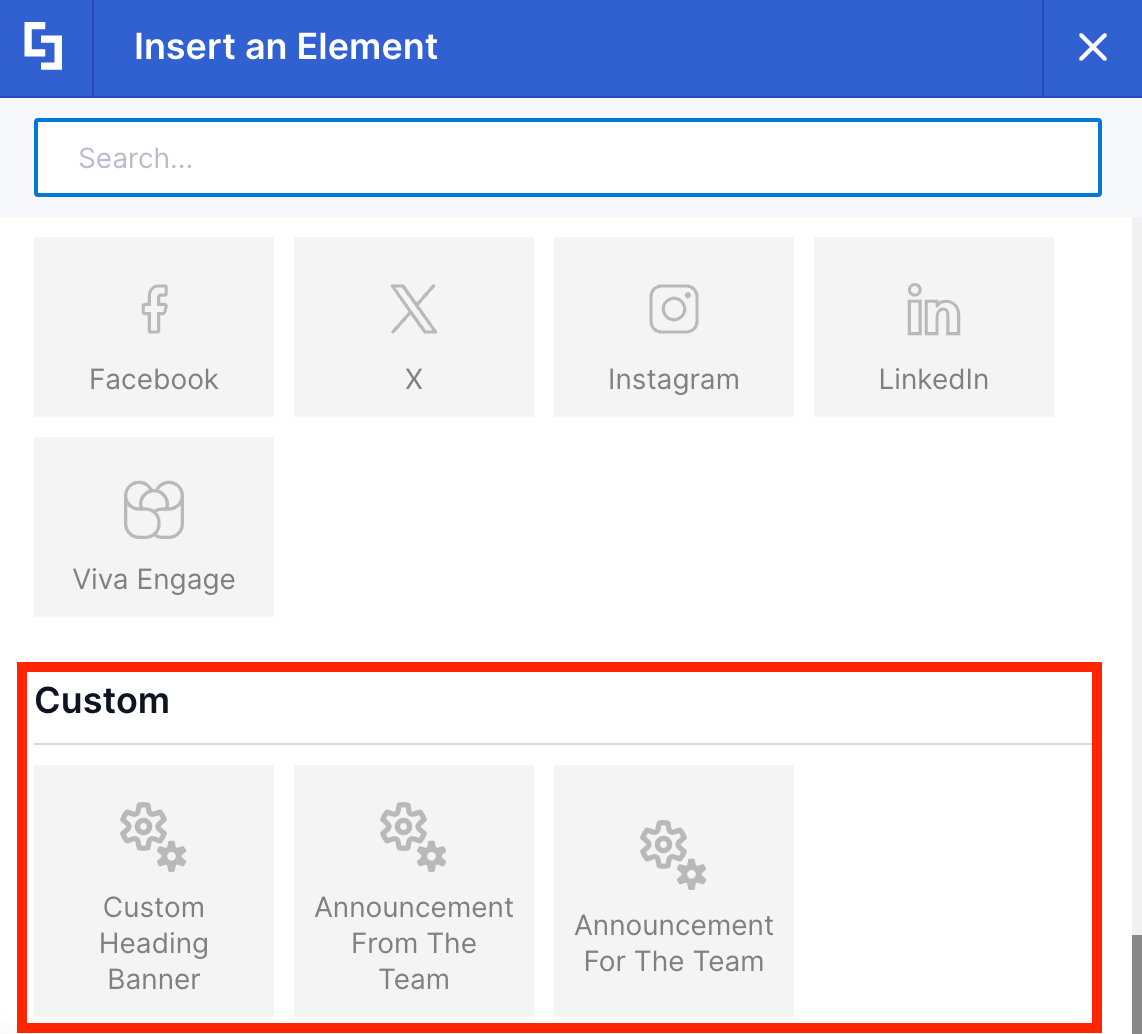
While editing your SharePoint page, you can find Custom Design Elements inside the actual library of Design Elements. They are located at the bottom of the library under the “Custom” section. Like any other Design Element, you can simply select a Custom Design Element and add it to your page:
Adding Custom Design Elements to SharePoint
Start the interactive tutorial to learn how to add Custom Design Elements to your page:
Step 1: Edit the ShortPoint Web Part
- Go to the SharePoint page where you want to add the Custom Design Element and click Edit:

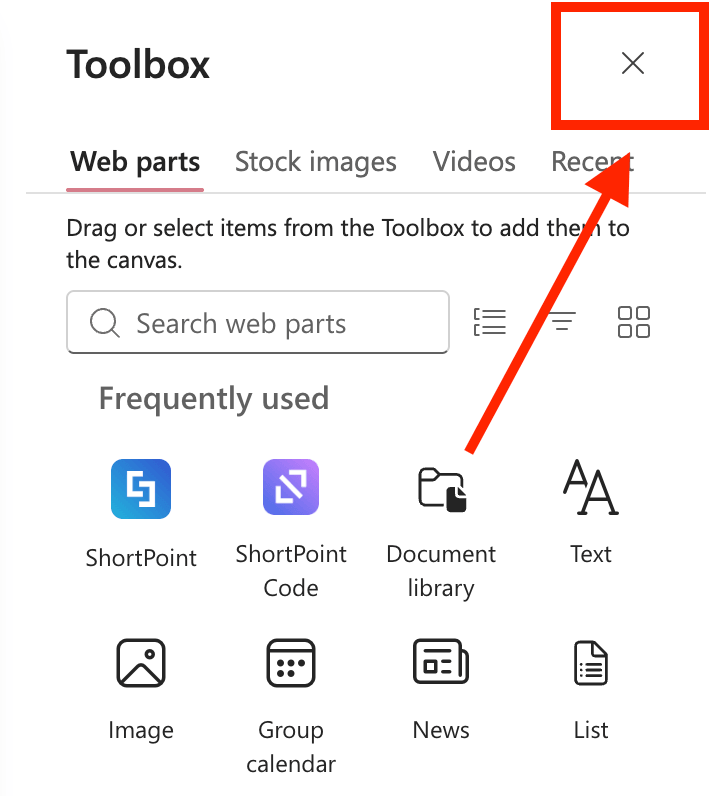
- Close the Toolbox:
- Click the Edit properties icon:

Step 2: Add the Custom Design Element
- Choose where you want to add the Custom Design Element and click the plus icon:

- Scroll down to the bottom of the library until you reach the Custom section. Then, select the Custom Design Element you want to use. You can also use the search bar to look for your custom element.
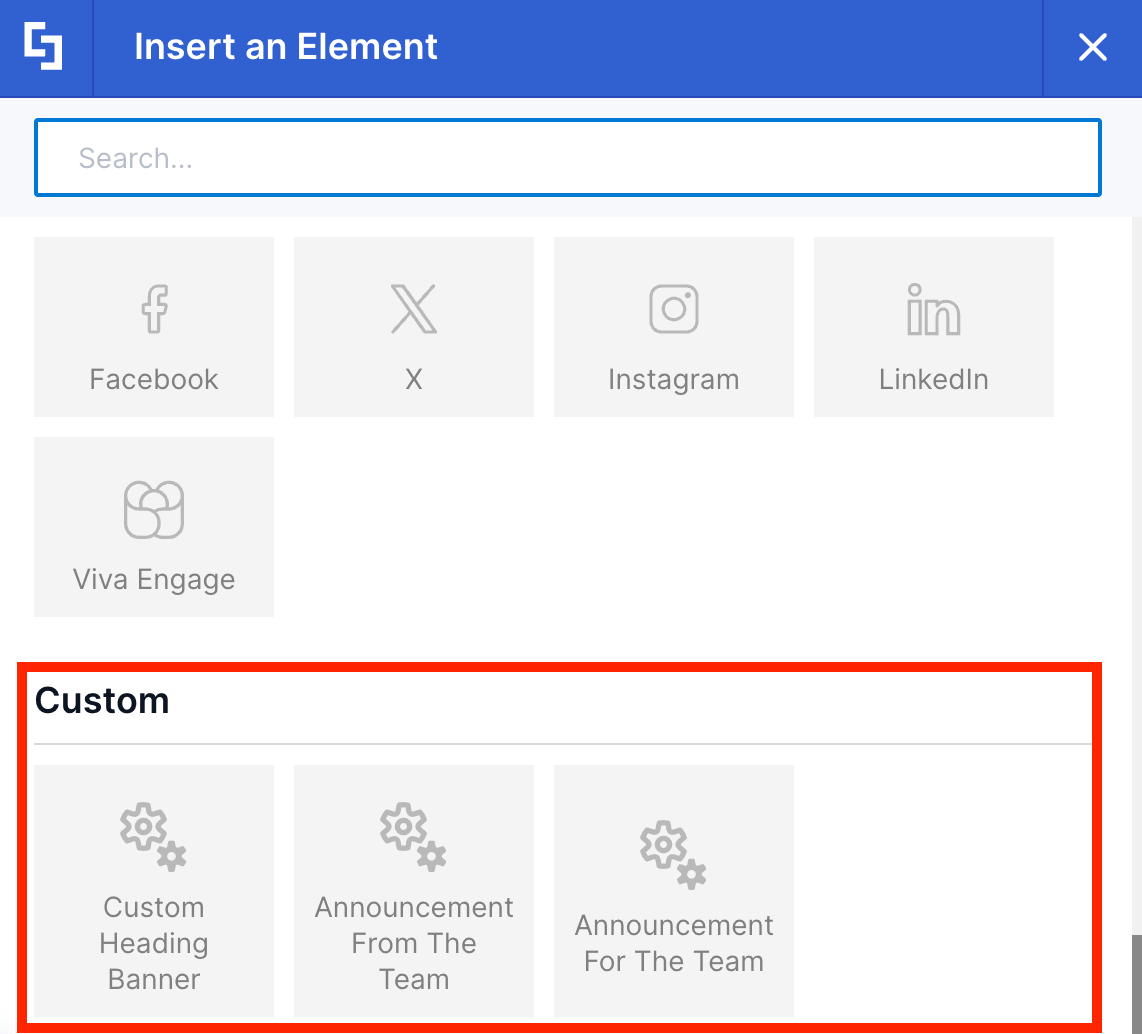
- (Optional) Add content to modifiable fields.
TIPCheck out How to Make Editable Custom Design Elements to learn how to make modifiable fields.
- Once done, click the green checkmark to apply your changes.

NOTEThe Custom Design Element will inherit the theme colors of your SharePoint site.
Step 3: Save
- Click Save.
- Publish your page.
It’s super easy, right?! You can now add your Custom Design Elements to SharePoint Pages.
Frequently Asked Questions
Where are Custom Design Elements stored in ShortPoint Generator?
Custom Design Elements are stored under the Your Custom Elements / ShortPoints section in ShortPoint Generator, where you can preview, edit, and remove them as needed.
How can I add a Custom Design Element to a SharePoint page?
While editing your SharePoint page, open the Design Elements library, scroll to the bottom of the library until you reach the “Custom” section, and select the desired Custom Design Element.
What are the steps to add a Custom Design Element using the ShortPoint Web Part?
First, edit the SharePoint page and open the ShortPoint Web Part properties. Then click the plus icon to add a new element, select your Custom Design Element from the Custom section, click the green checkmark to apply changes, save, and publish your page.
Related articles:
- ShortPoint Generator Basic Tutorial. Part 1: Creating Generated Content
- ShortPoint Generator: Introduction
- ShortPoint Generator: Make Parts of Predefined Elements Customizable