Try ShortPoint now
TL;DR: You can change how your ShortPoint custom footer looks using ShortPoint Theme Builder. Open Theme Builder and select Footer to see four groups of settings. General Layout lets you pin the footer to the bottom of the screen, stretch it to full width, and add a shadow. Background adds an image or color behind it, and Before & After adds dividers or space above and below it. Paddings & Margins control the space inside and around the footer.
ShortPoint Theme Builder allows you to further customize the look of your custom footer. In this article, you will learn more about the different layout options available for your footer, including General Layout, Background, Before & After, and Paddings & Margins.
TABLE OF CONTENTS
- Prerequisites
- Customizing Options
Prerequisites
- You must have the latest version of ShortPoint SPFx installed.
- You must be a ShortPoint Designer with either a Pro or Enterprise license. For more information, check out Licensing Options.
- You must already have a custom footer created in ShortPoint Generator. To learn how, check out How to Create a Custom SharePoint Footer Using ShortPoint Generator.
- You must already have the custom footer added to your site through Theme Builder. To learn how, check out How to Add Custom Footers to SharePoint Sites Using ShortPoint Theme Builder.
- Your site must use Modern SharePoint pages. Starting with ShortPoint SPFx version 9.5.0.0, Theme Builder no longer supports Classic pages. To learn how to switch, check out How to Convert Your SharePoint 2019/SE Classic Pages to Modern.
Customizing Options
In Theme Builder, there are four customizion options under Footer. They are General Layout, Background, Before & After, and Paddings & Margins.
To see these options, open Theme Builder and select Footer.
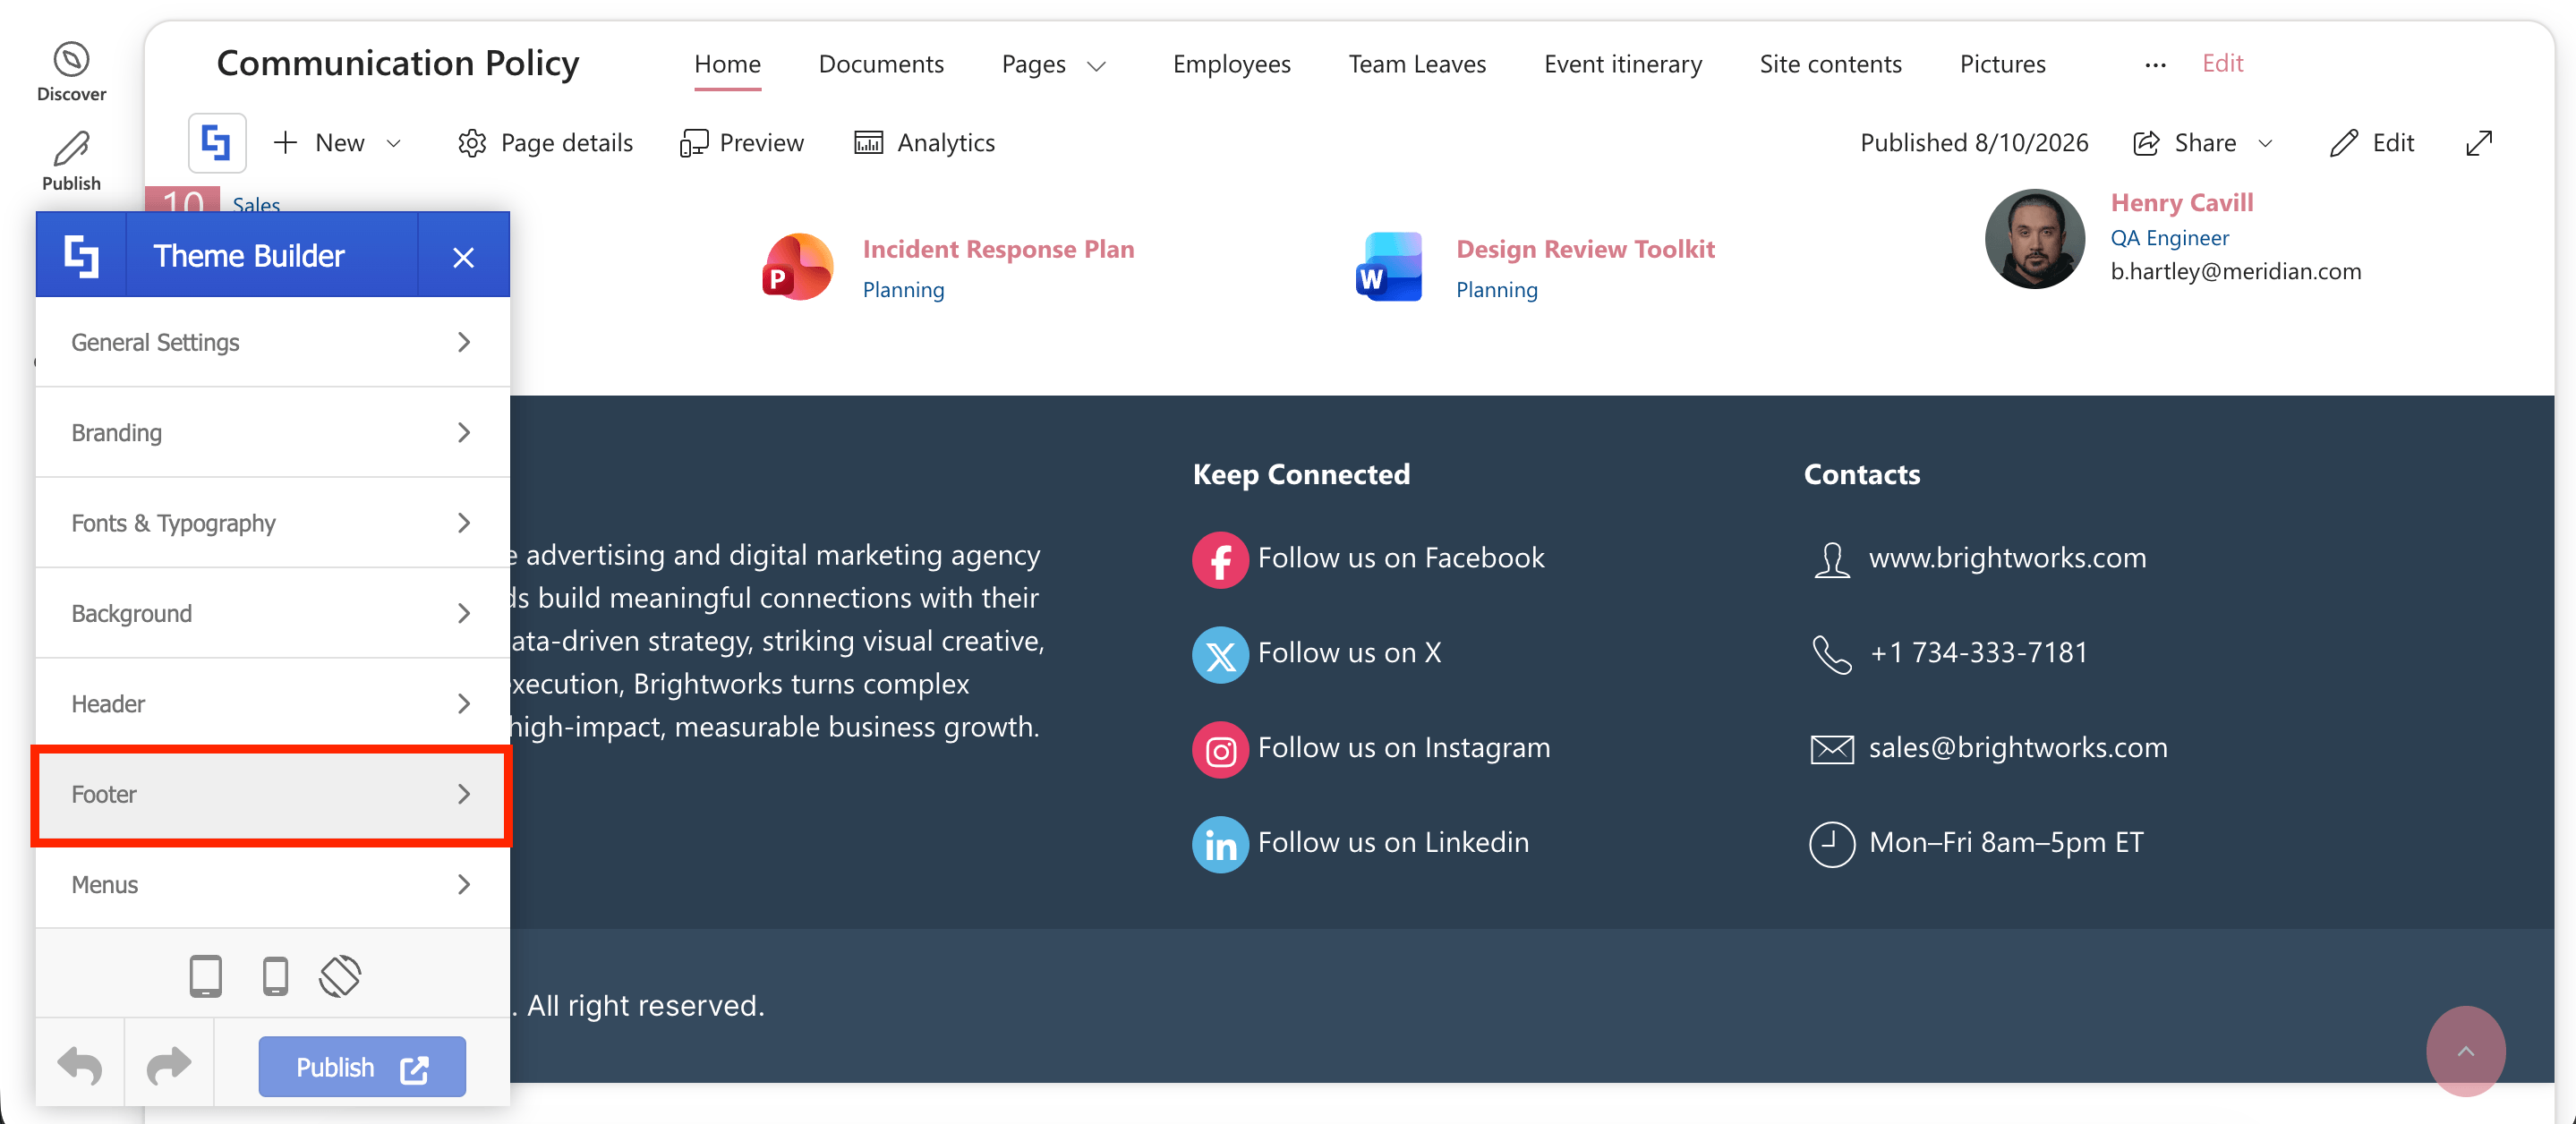
You will be redirected to the four customizing options, all of which you can use to personalize your footer according to your design needs. Proceed to the next section of this guide to learn how to make the most out of each option.
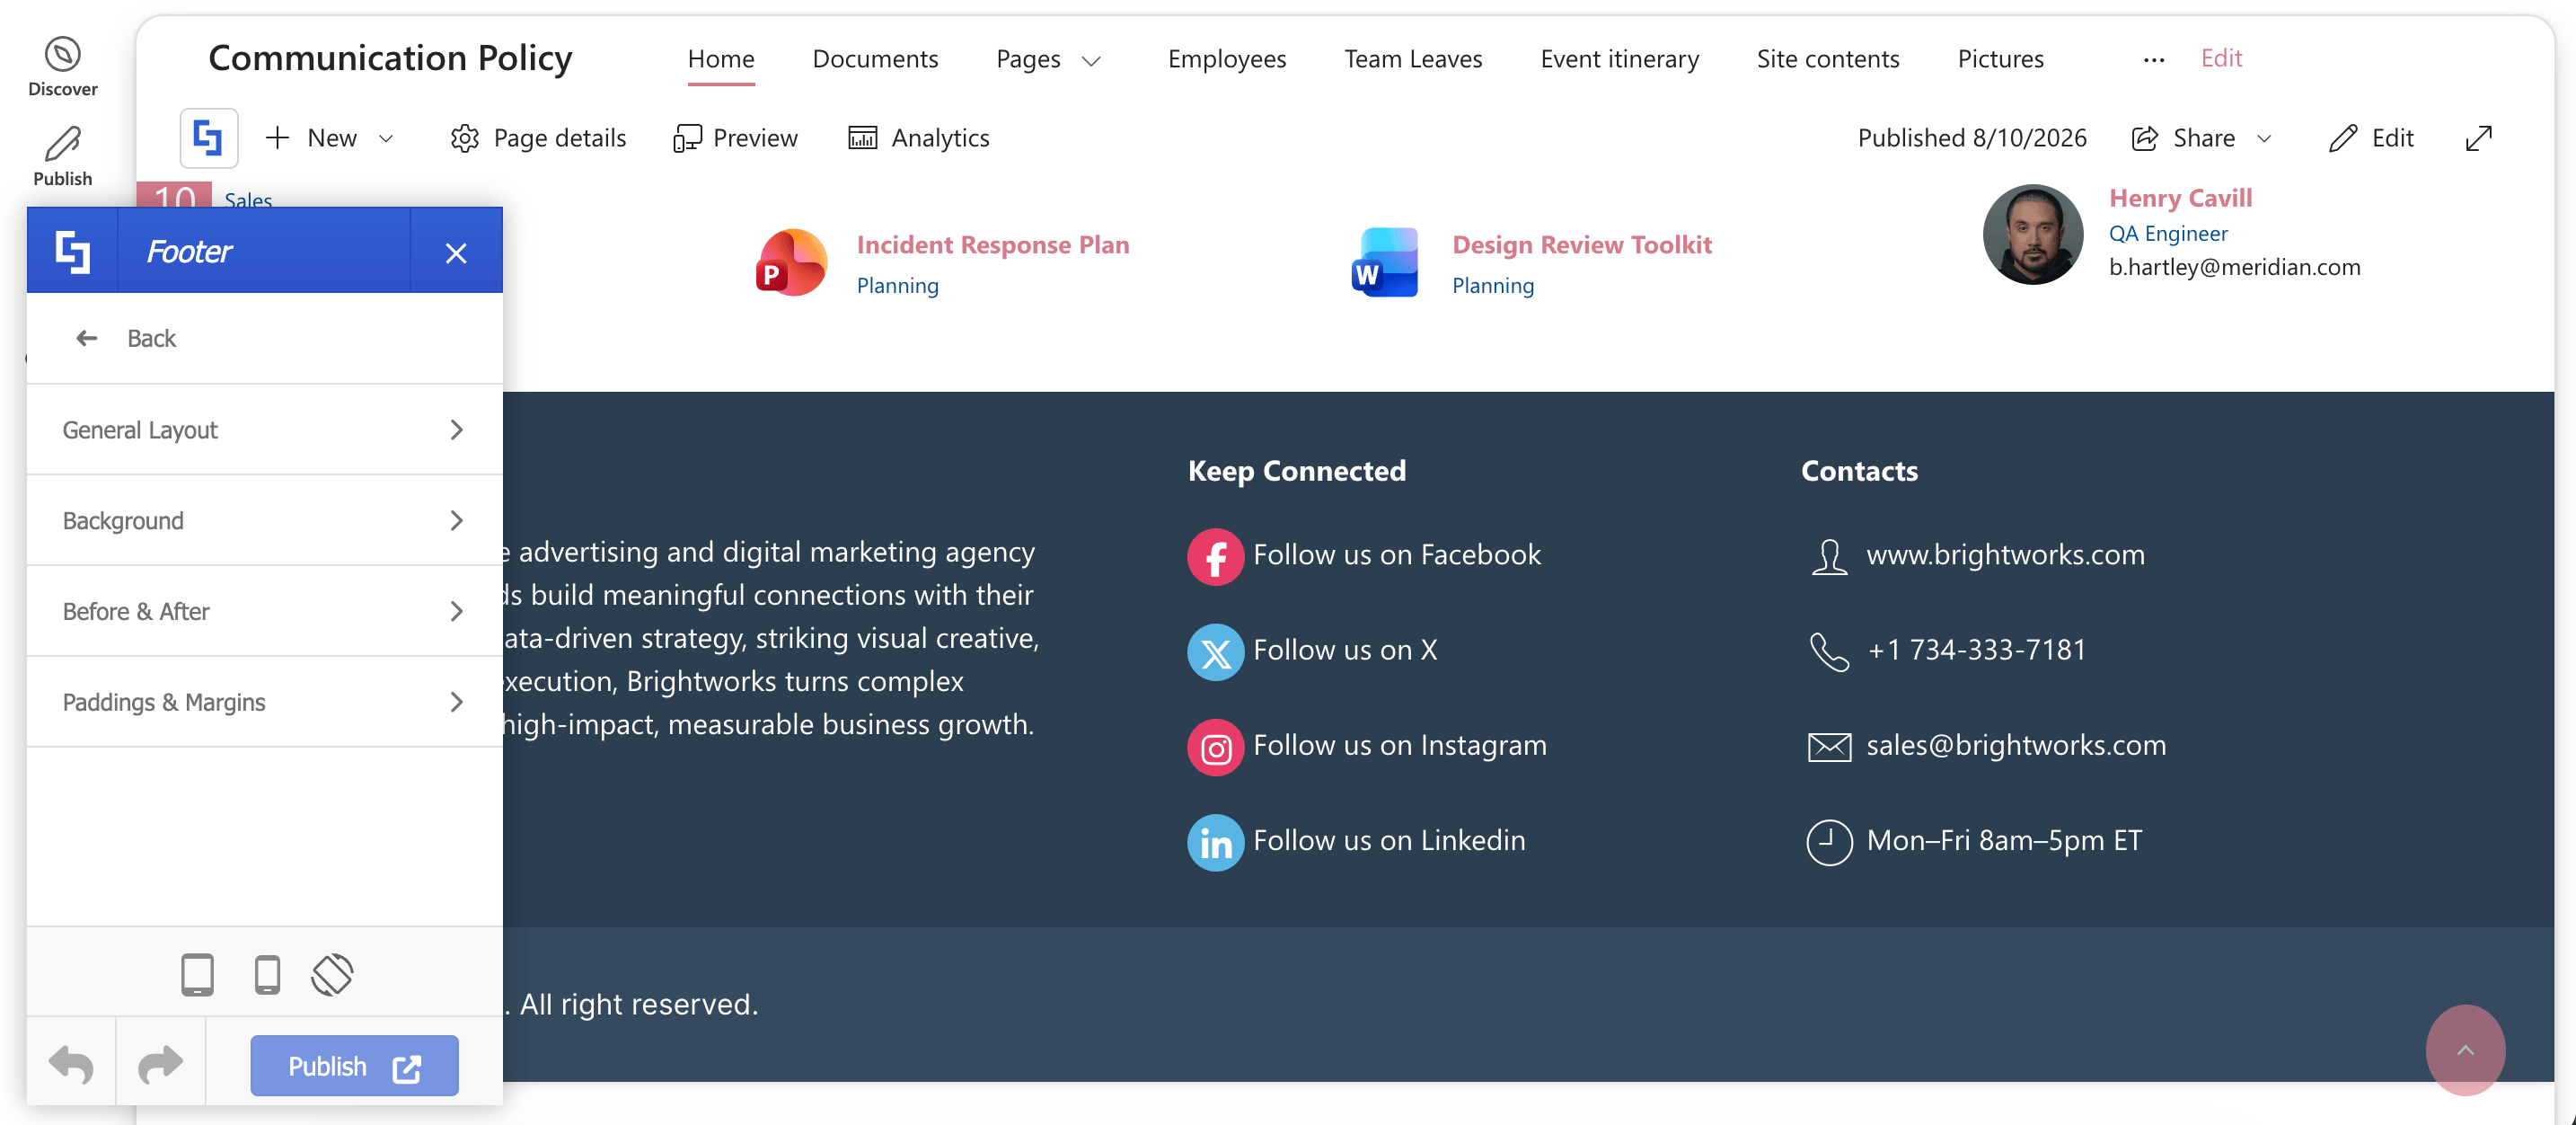
A. General Layout
General Layout is where you select a footer to add to your site. In addition to this, you also have four other options available: Fixed Footer, Full-Width Footer, Full-Width Footer Content, and Enable Footer Shadow.
1. Fixed Footer
As the name suggests, Fixed Footer fixes your footer at the bottom of your screen, allowing it to stay visible as you scroll through the page.
This is how your site will look once you enable the Fixed Footer feature.
2. Full-Width Footer
Enabling the Full-Width Footer feature allows you to expand the footer to fit the whole width of the screen. However, you can only see this option when the site layout is either Boxed or Frame.
To change your site layout, select General Settings.
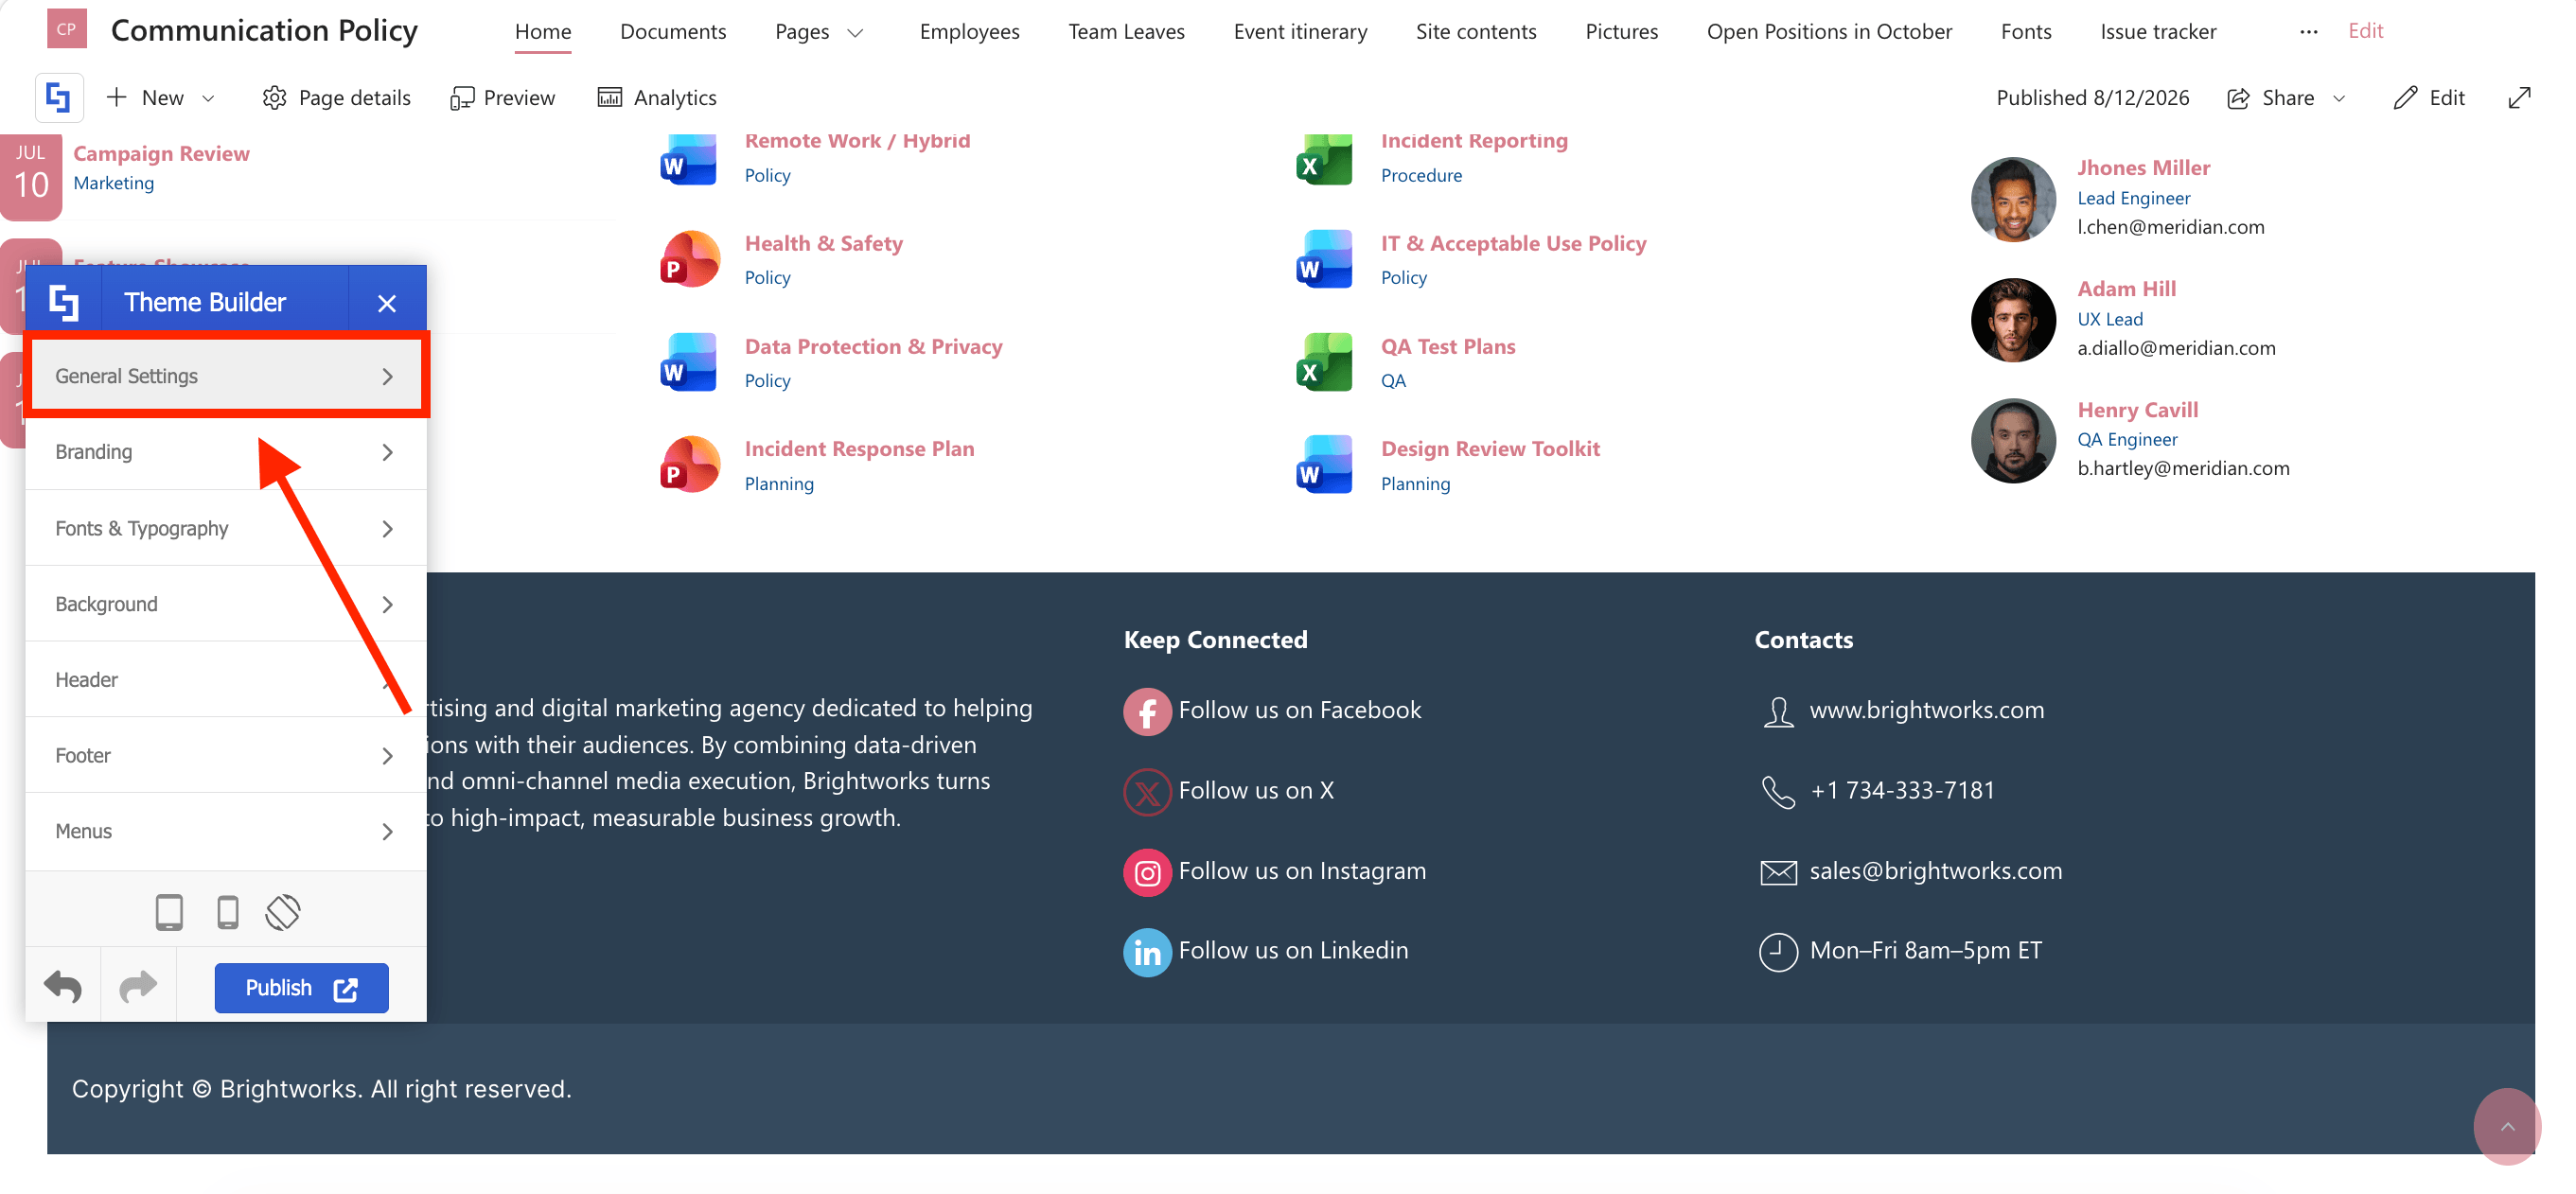
Then, click General Layout.
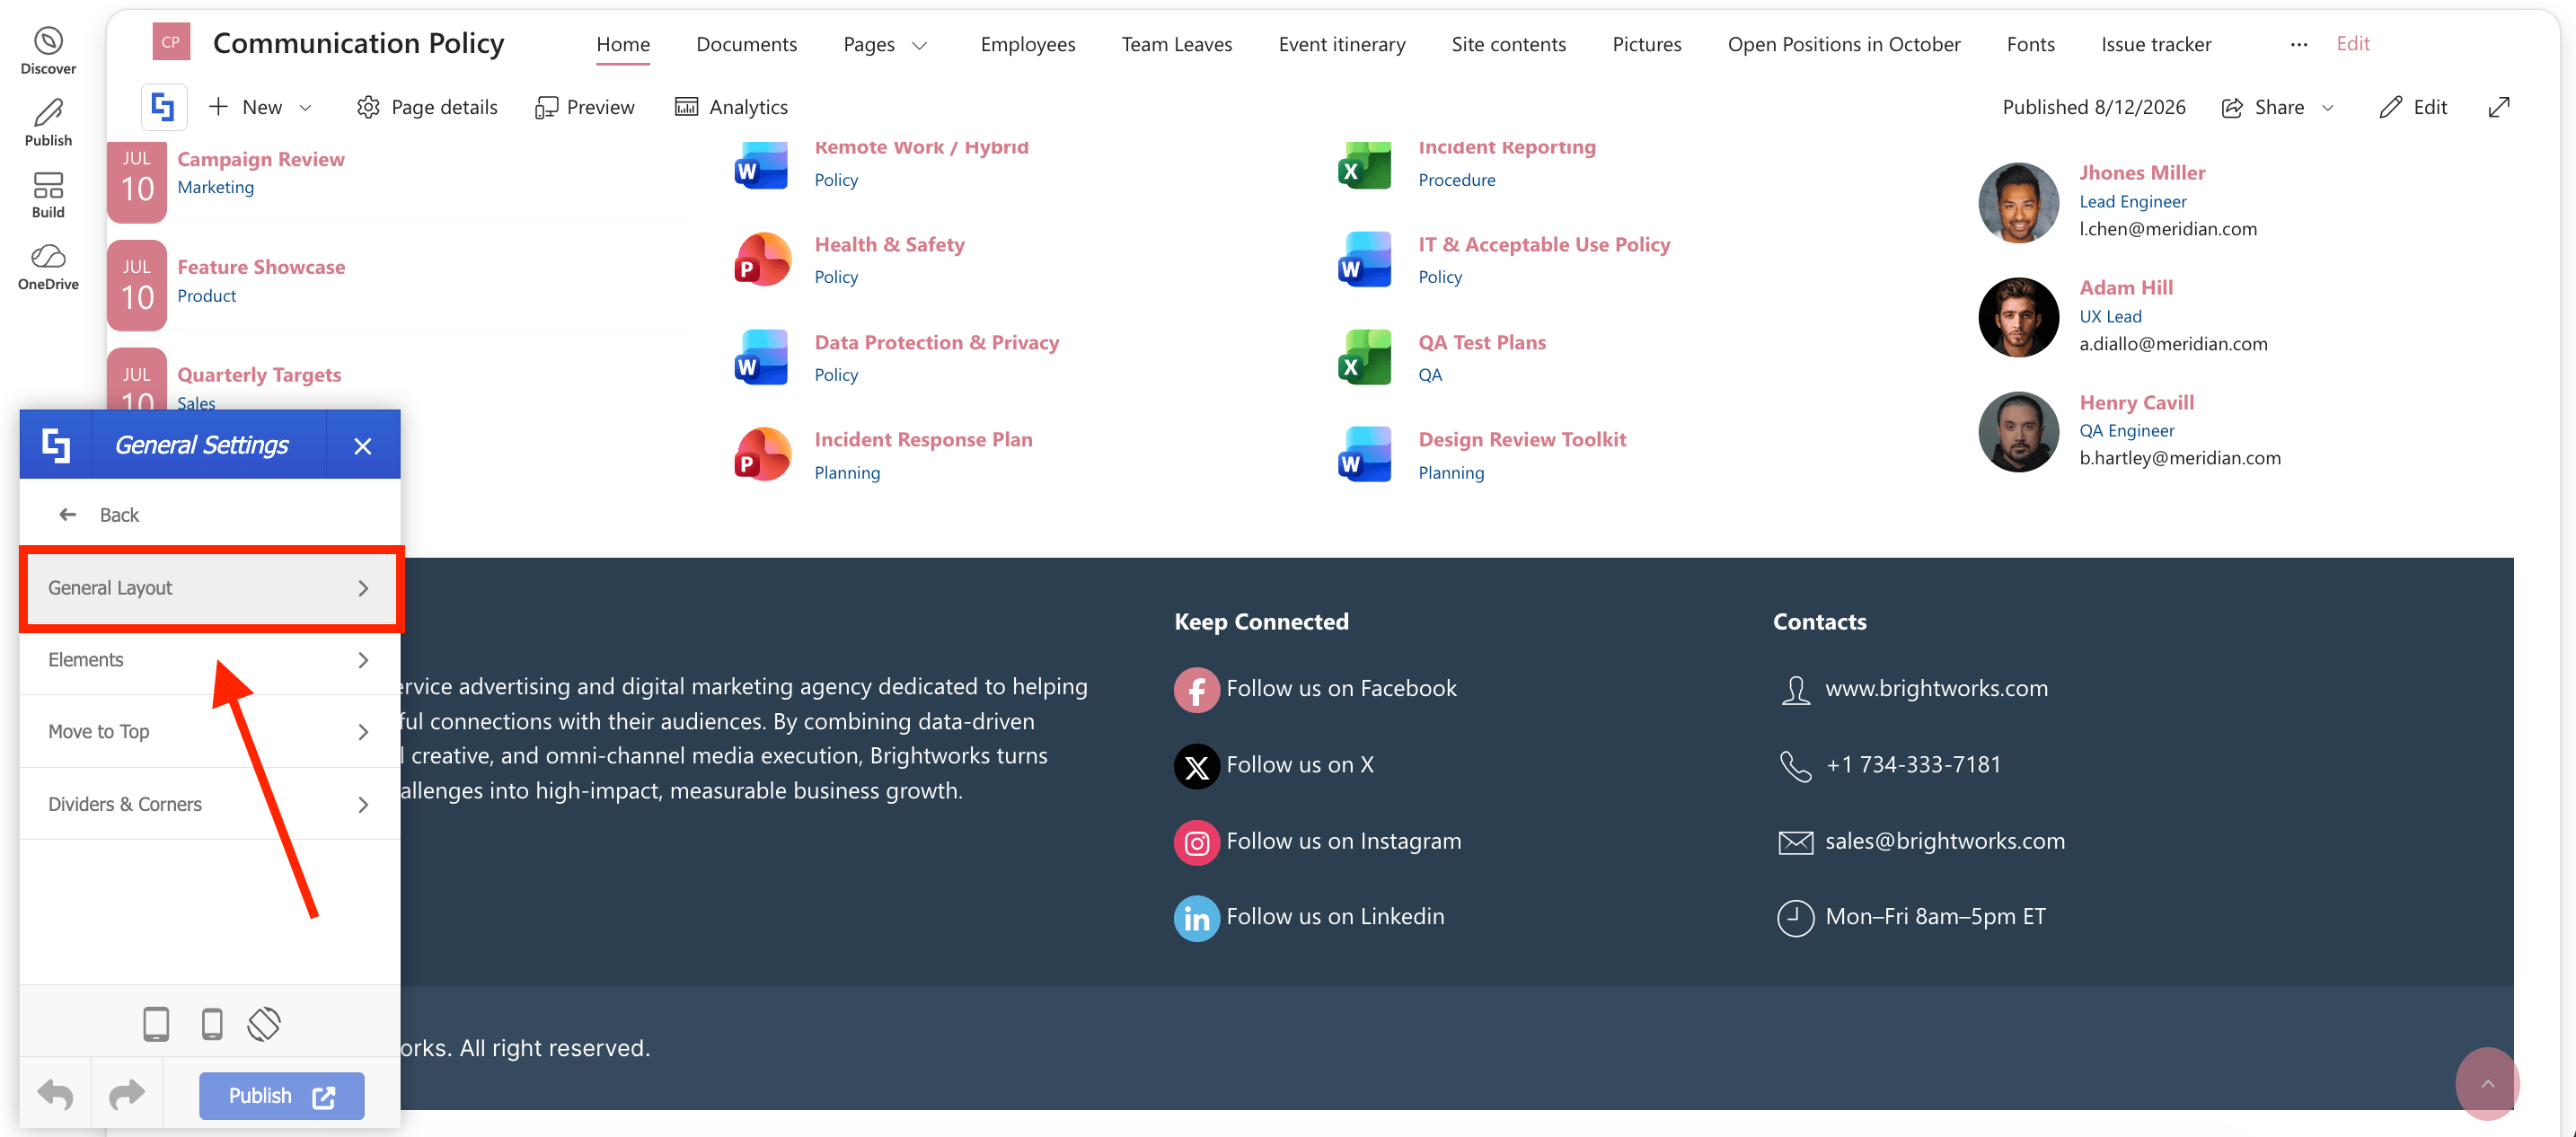
From the Layout drop-down, choose either Boxed or Frame.
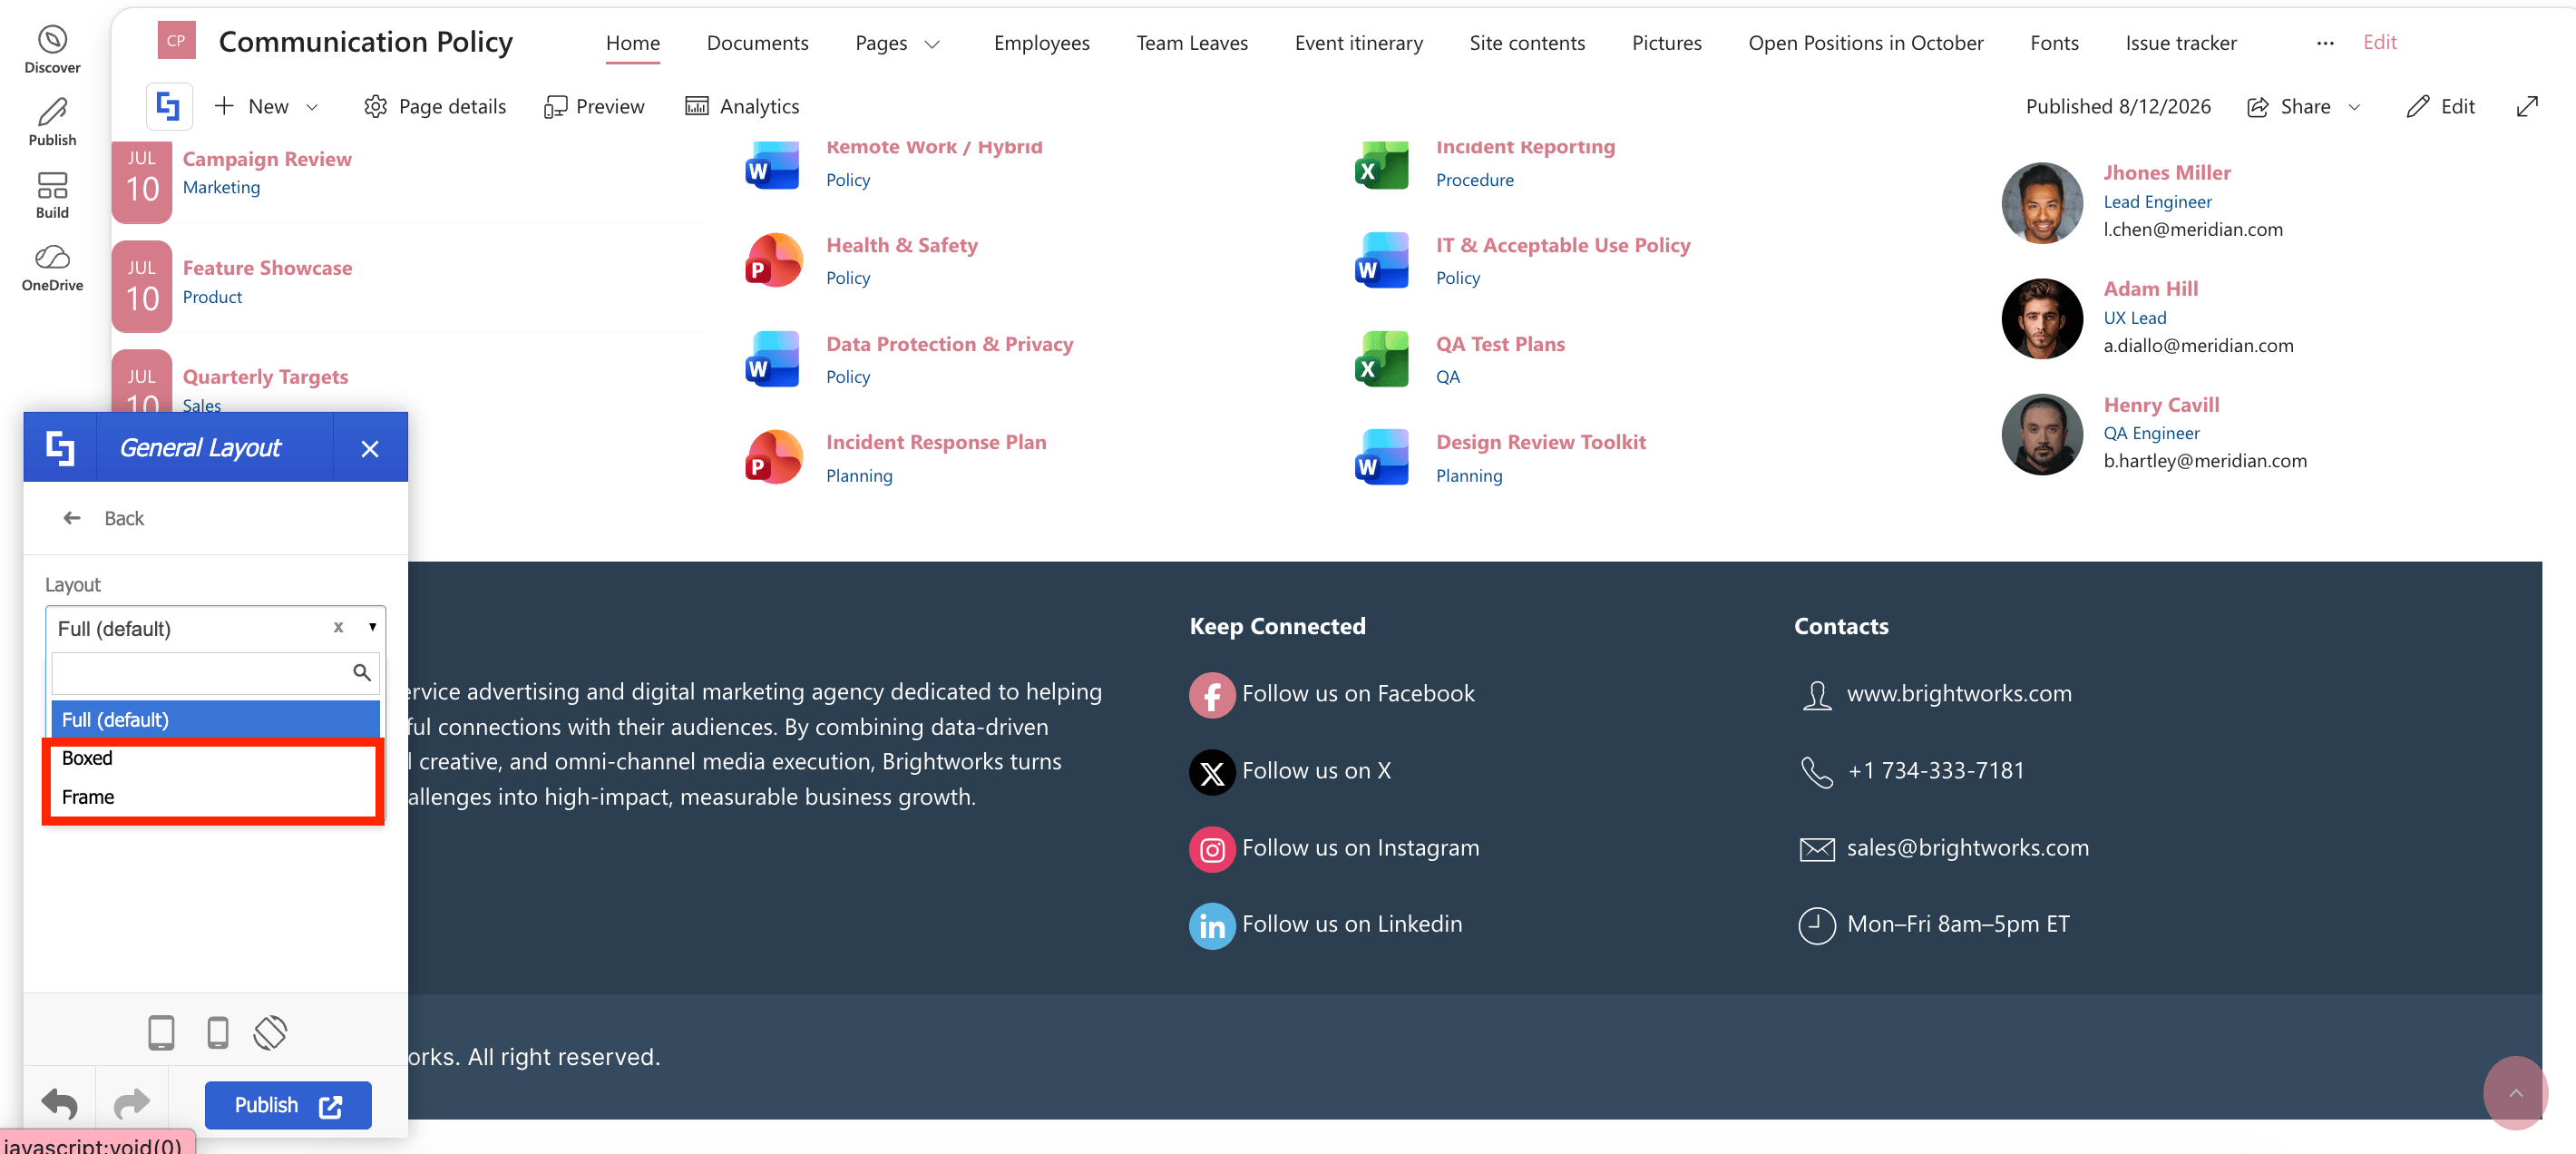
Once you have changed your site layout to either Boxed or Frame, you can now enable the Full-width Footer feature.
This is how your site will look based on your site's layout:
- Boxed
- Frame
NOTE: Make sure to toggle on Fixed Footer in the General Layout as well. Otherwise, you will not be able to see Full-Width Footer in the list of options available.
3. Full-Width Footer Content
Enabling the Full-Width Footer Content will expand the footer's content to fit the whole screen. This option is best to use when you have the Full layout.
4. Enable Footer Shadow
This feature allows you to add a shadow behind your footer. Once enabled, you can even control the depth of the shadow by dragging your mouse across the bar line.
NOTE: Make sure to toggle on Fixed Footer in the General Layout as well. Otherwise, you will not be able to see the shadow effect.
B. Background
This allows you to add a background behind your footer. There are two options available: Footer Background Image and Footer Color Overlay.
1. Footer Background Image
As the name implies, this option allows you to add an image behind your footer. You also have the ability to modify the image by enabling advanced settings for Footer Background Image.
This is what it will look like.
2. Footer Color Overlay
This allows you to add a background color behind your footer. You can choose from the list of colors available on the drop-down list.
C. Before & After
Before & After allows you to add dividers and spaces before and after your footer. There are four options available: Enable Divider Before Footer, Enable Divider After Footer, Add Space Before Footer, and Add Space After Footer.
1. Enable Divider Before Footer
This adds a divider at the top of your footer. You can even customize the color and size of the divider.
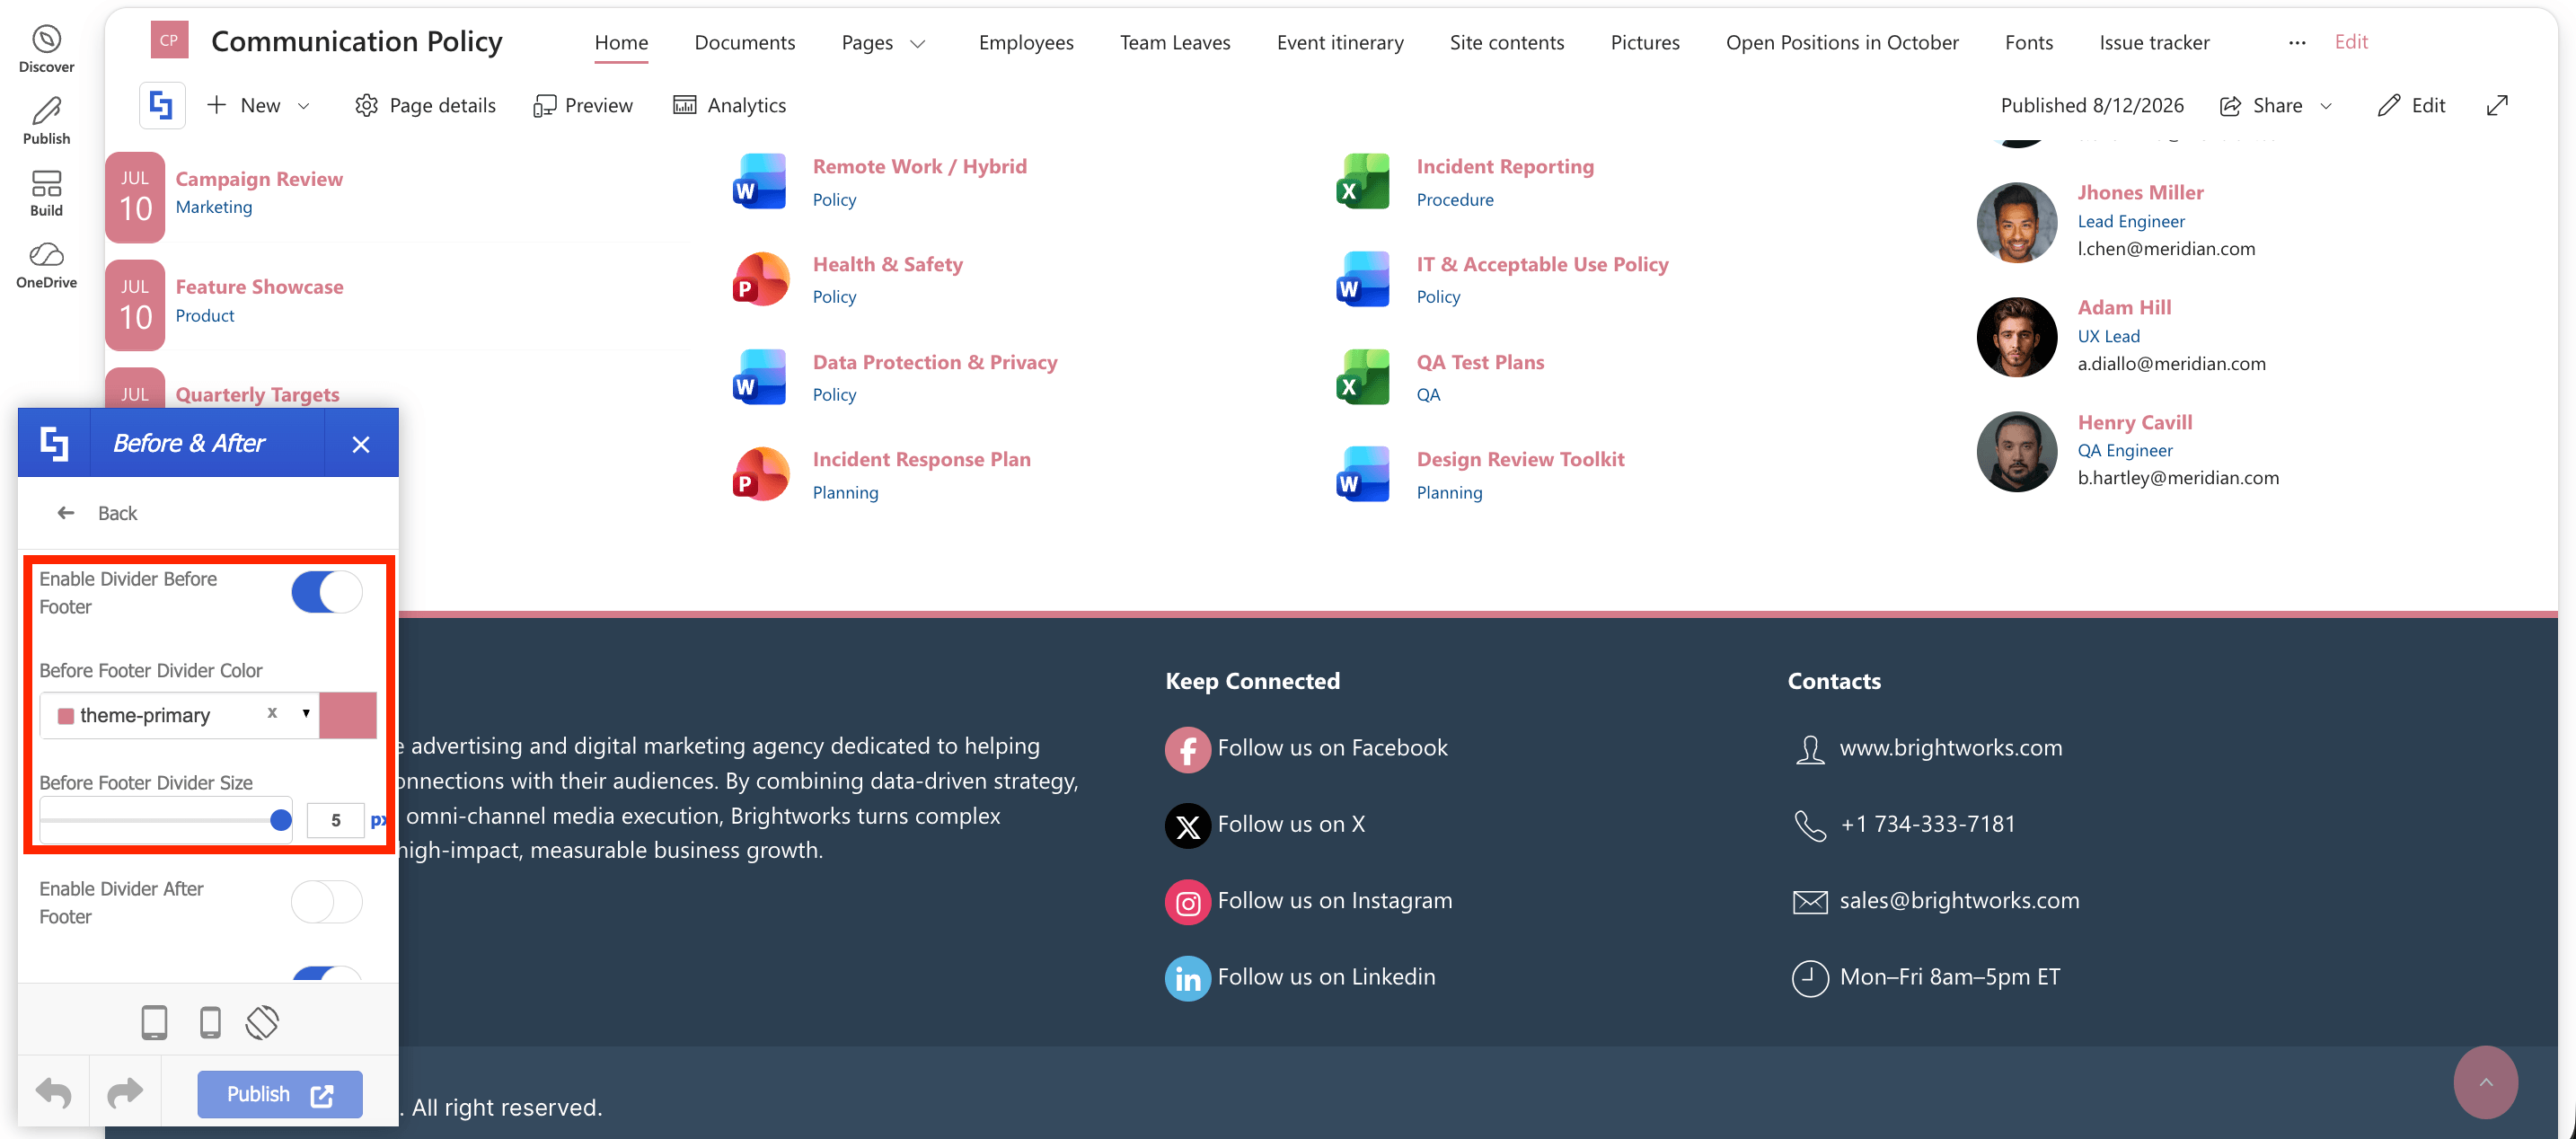
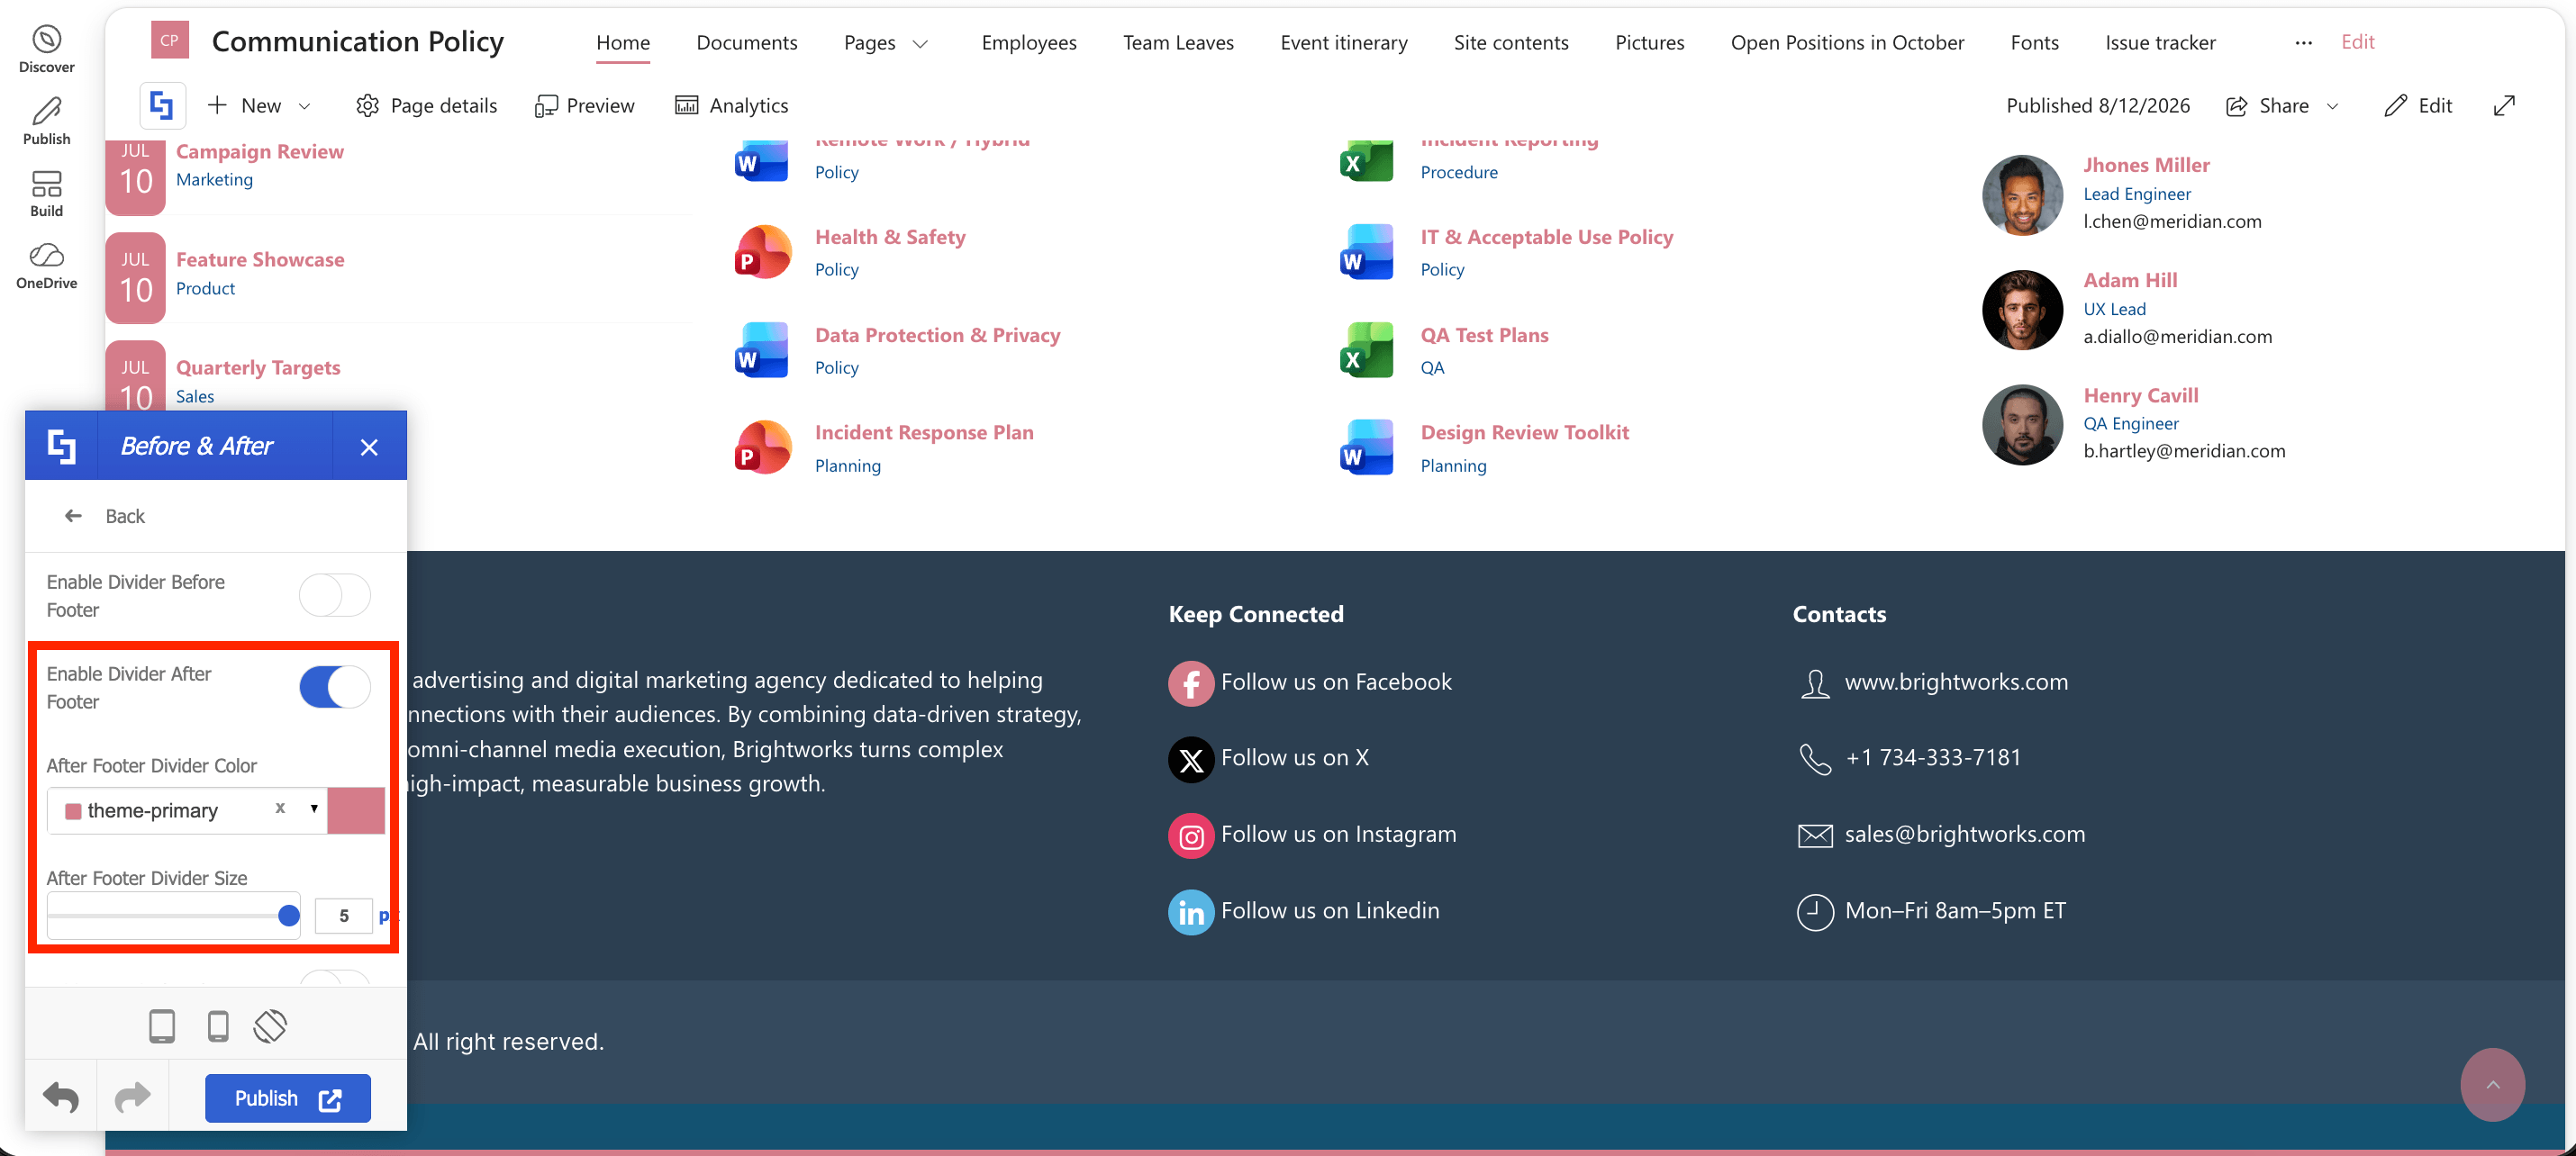
2. Enable Divider After Footer
This adds a divider at the bottom of your footer. You can also customize the color and size of the divider.
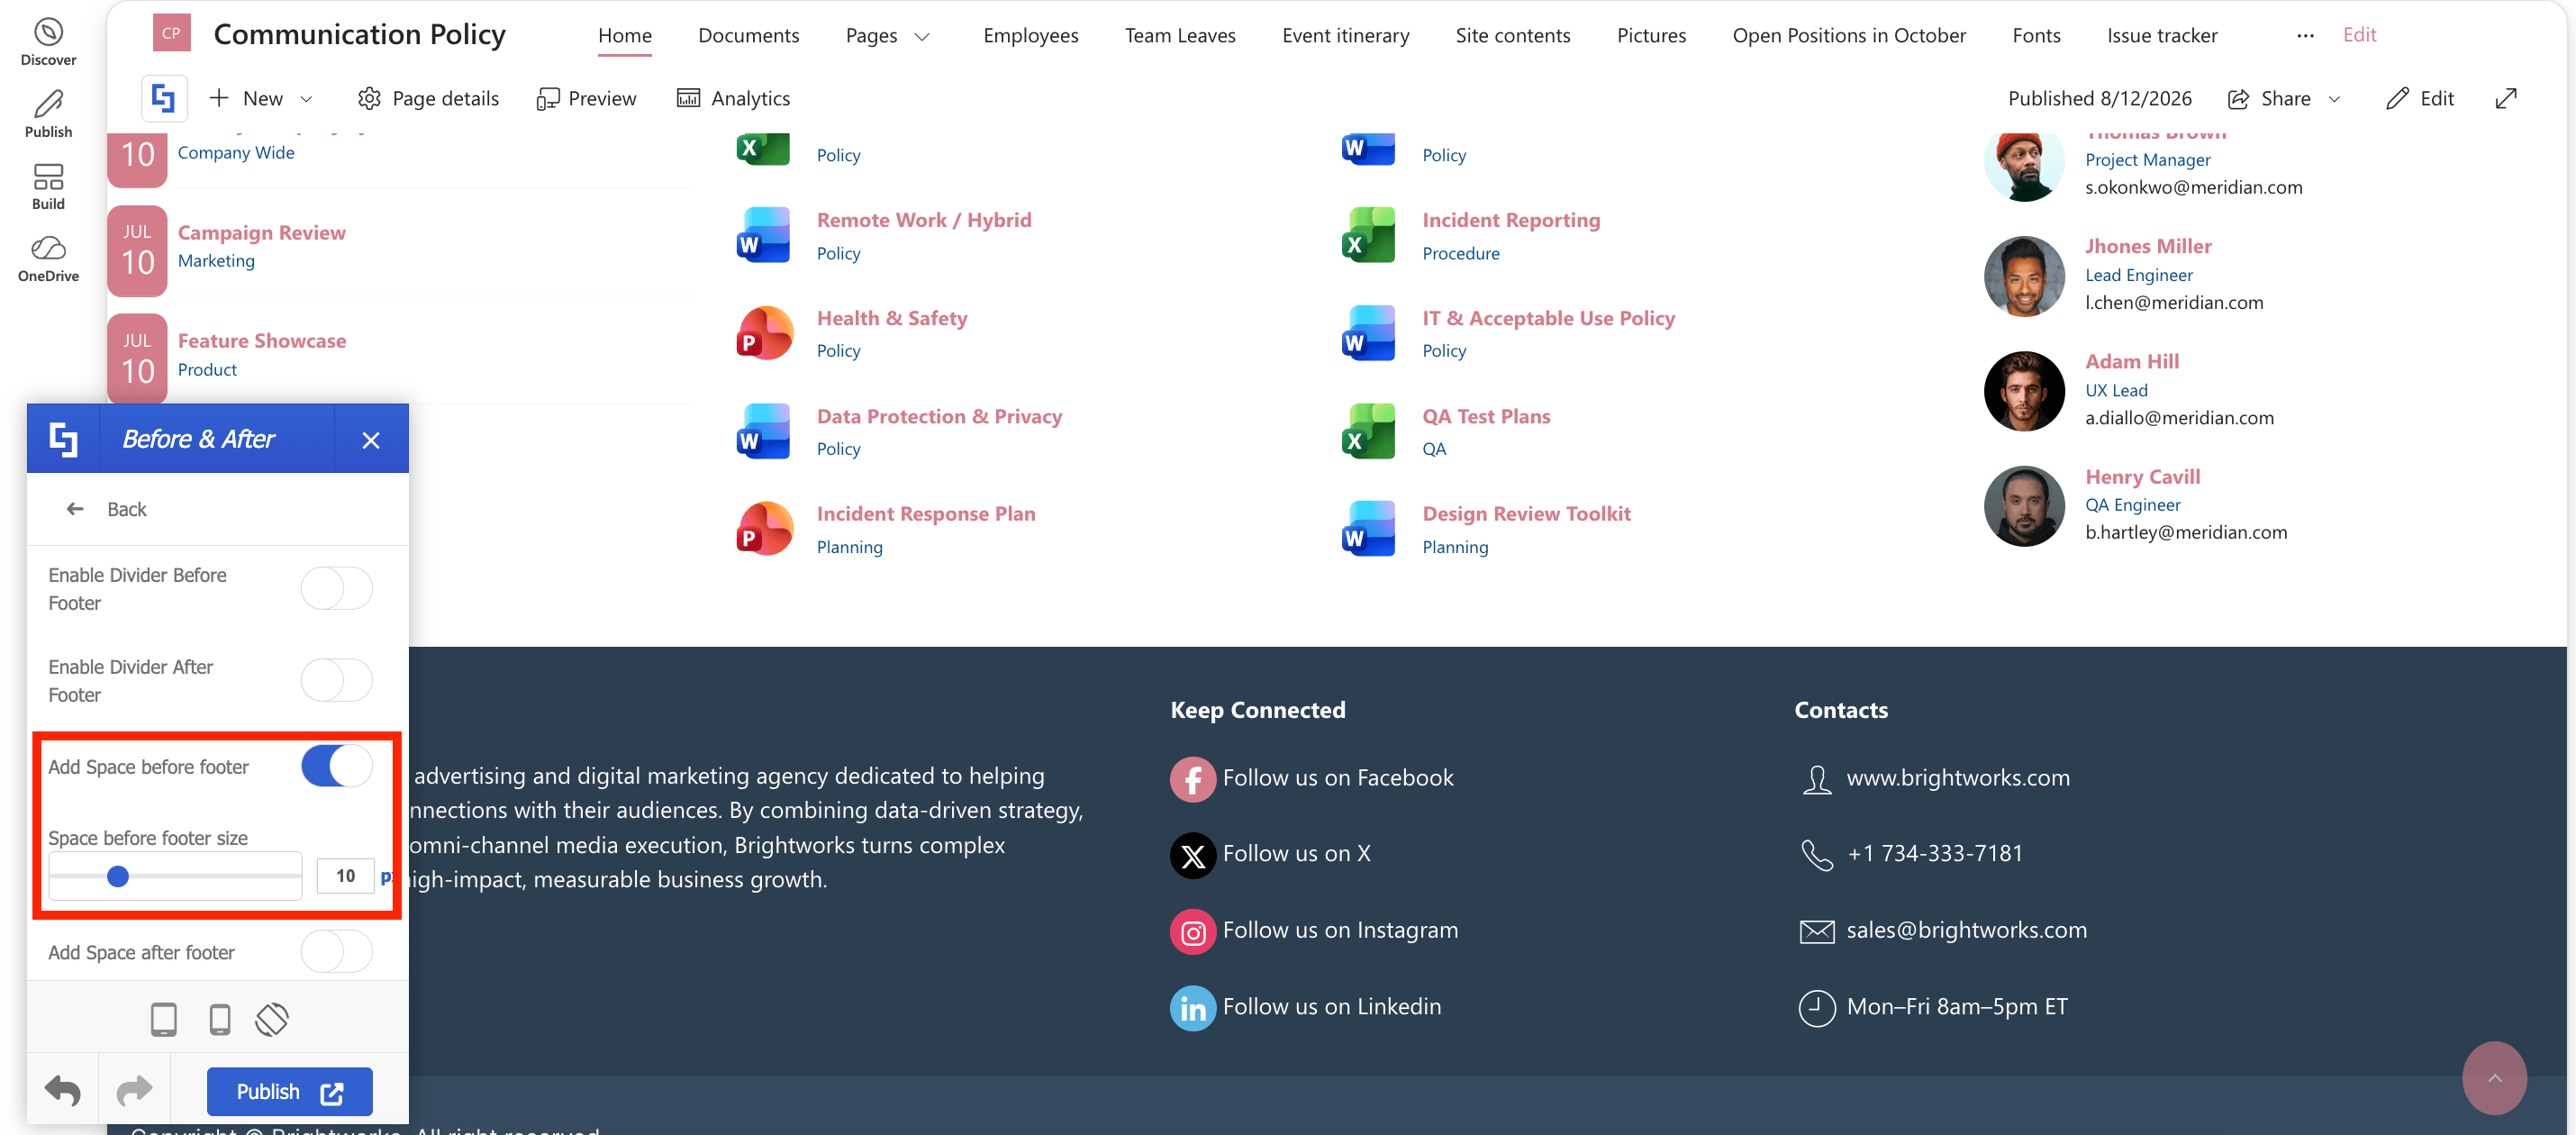
3. Add Space Before Footer
Enabling this will add space at the top of your footer. You can even customize the amount of space you add.
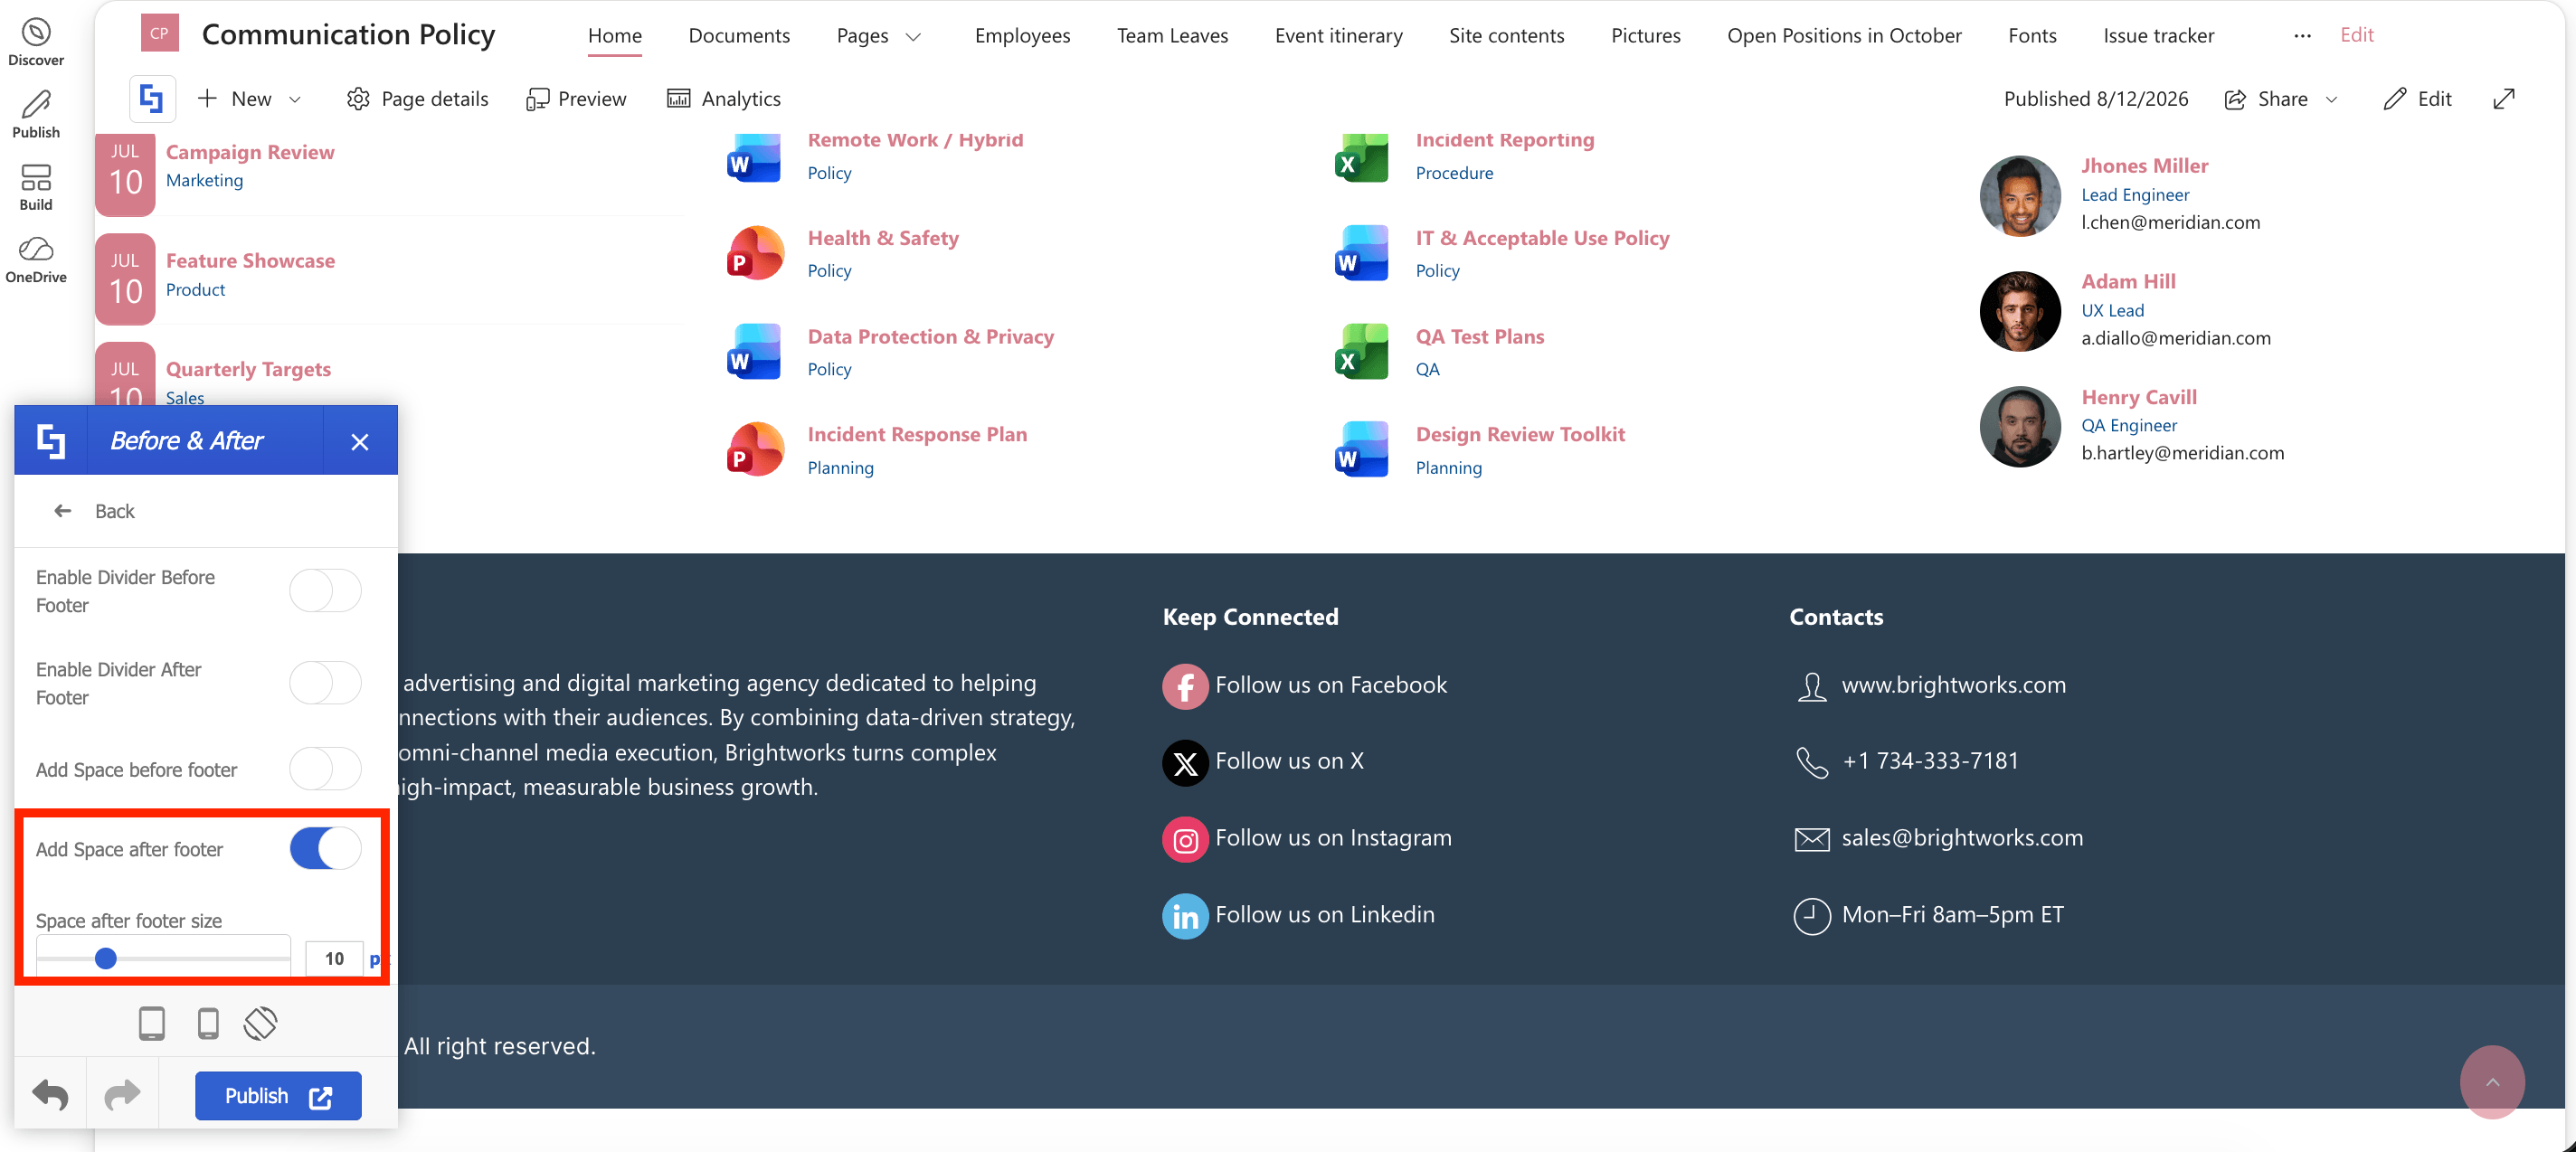
4. Add Space After Footer
Enabling this will add space at the bottom of your footer. You will also be able to adjust the amount of space you add.
D. Paddings & Margins
Paddings & Margins allow you to add space around your footer. There are eight options available: Footer Padding Top, Footer Padding Bottom, Footer Padding Left, Footer Padding Right, Footer Margin Top, Footer Margin Bottom, Footer Margin Left, and Footer Margin Right.
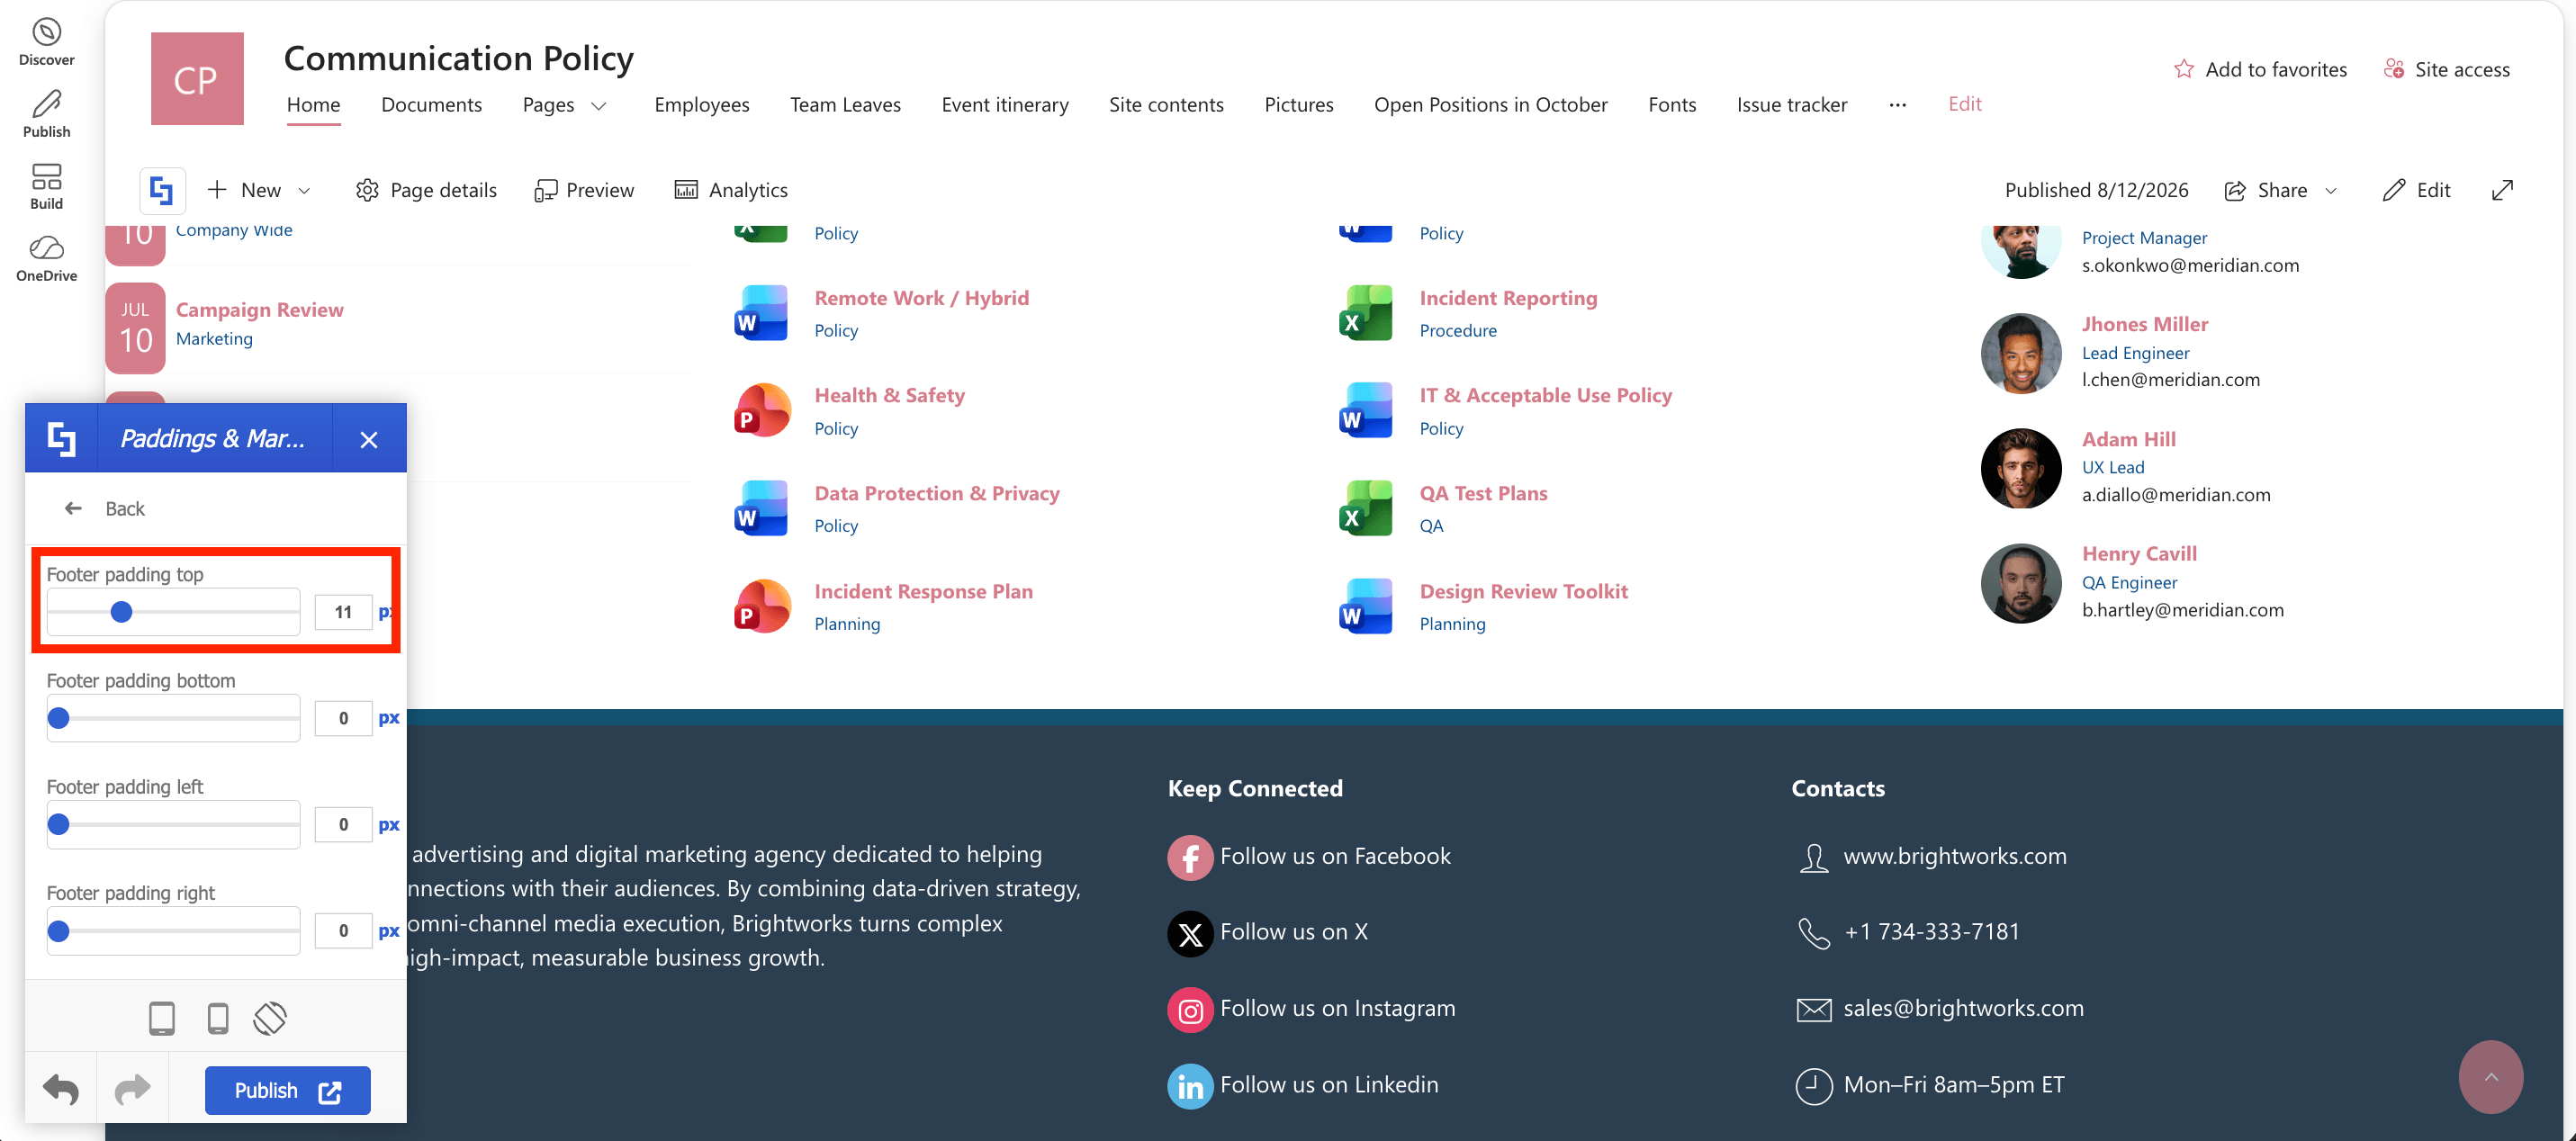
1. Footer Padding Top
This allows you to add padding at the top of your footer.
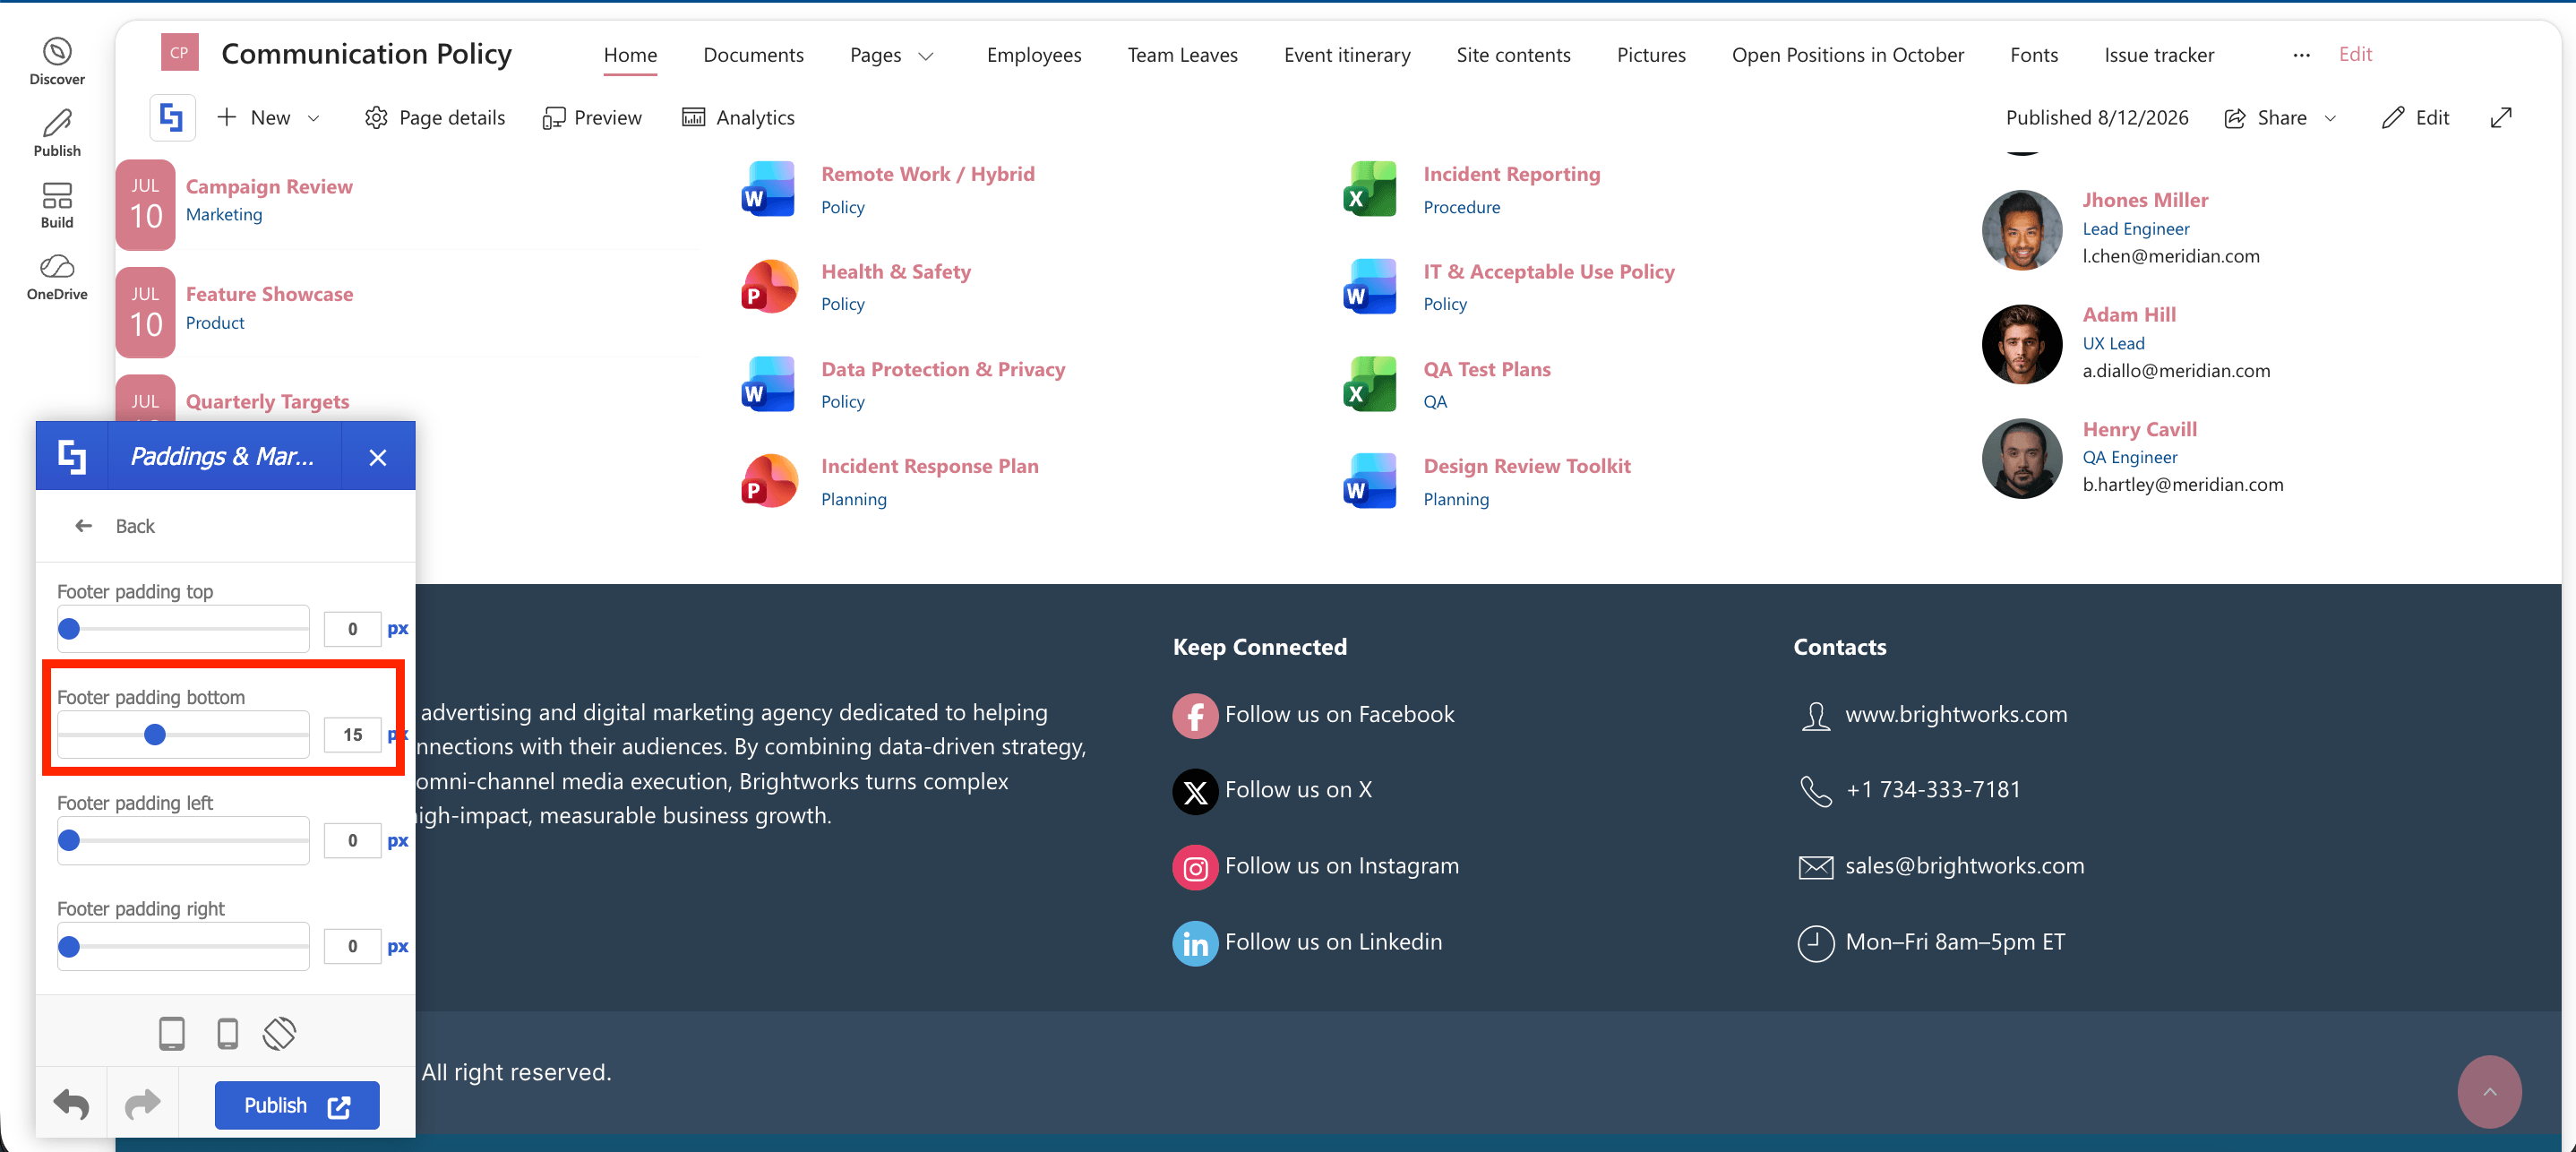
2. Footer Padding Bottom
This allows you to add padding at the bottom of your footer.
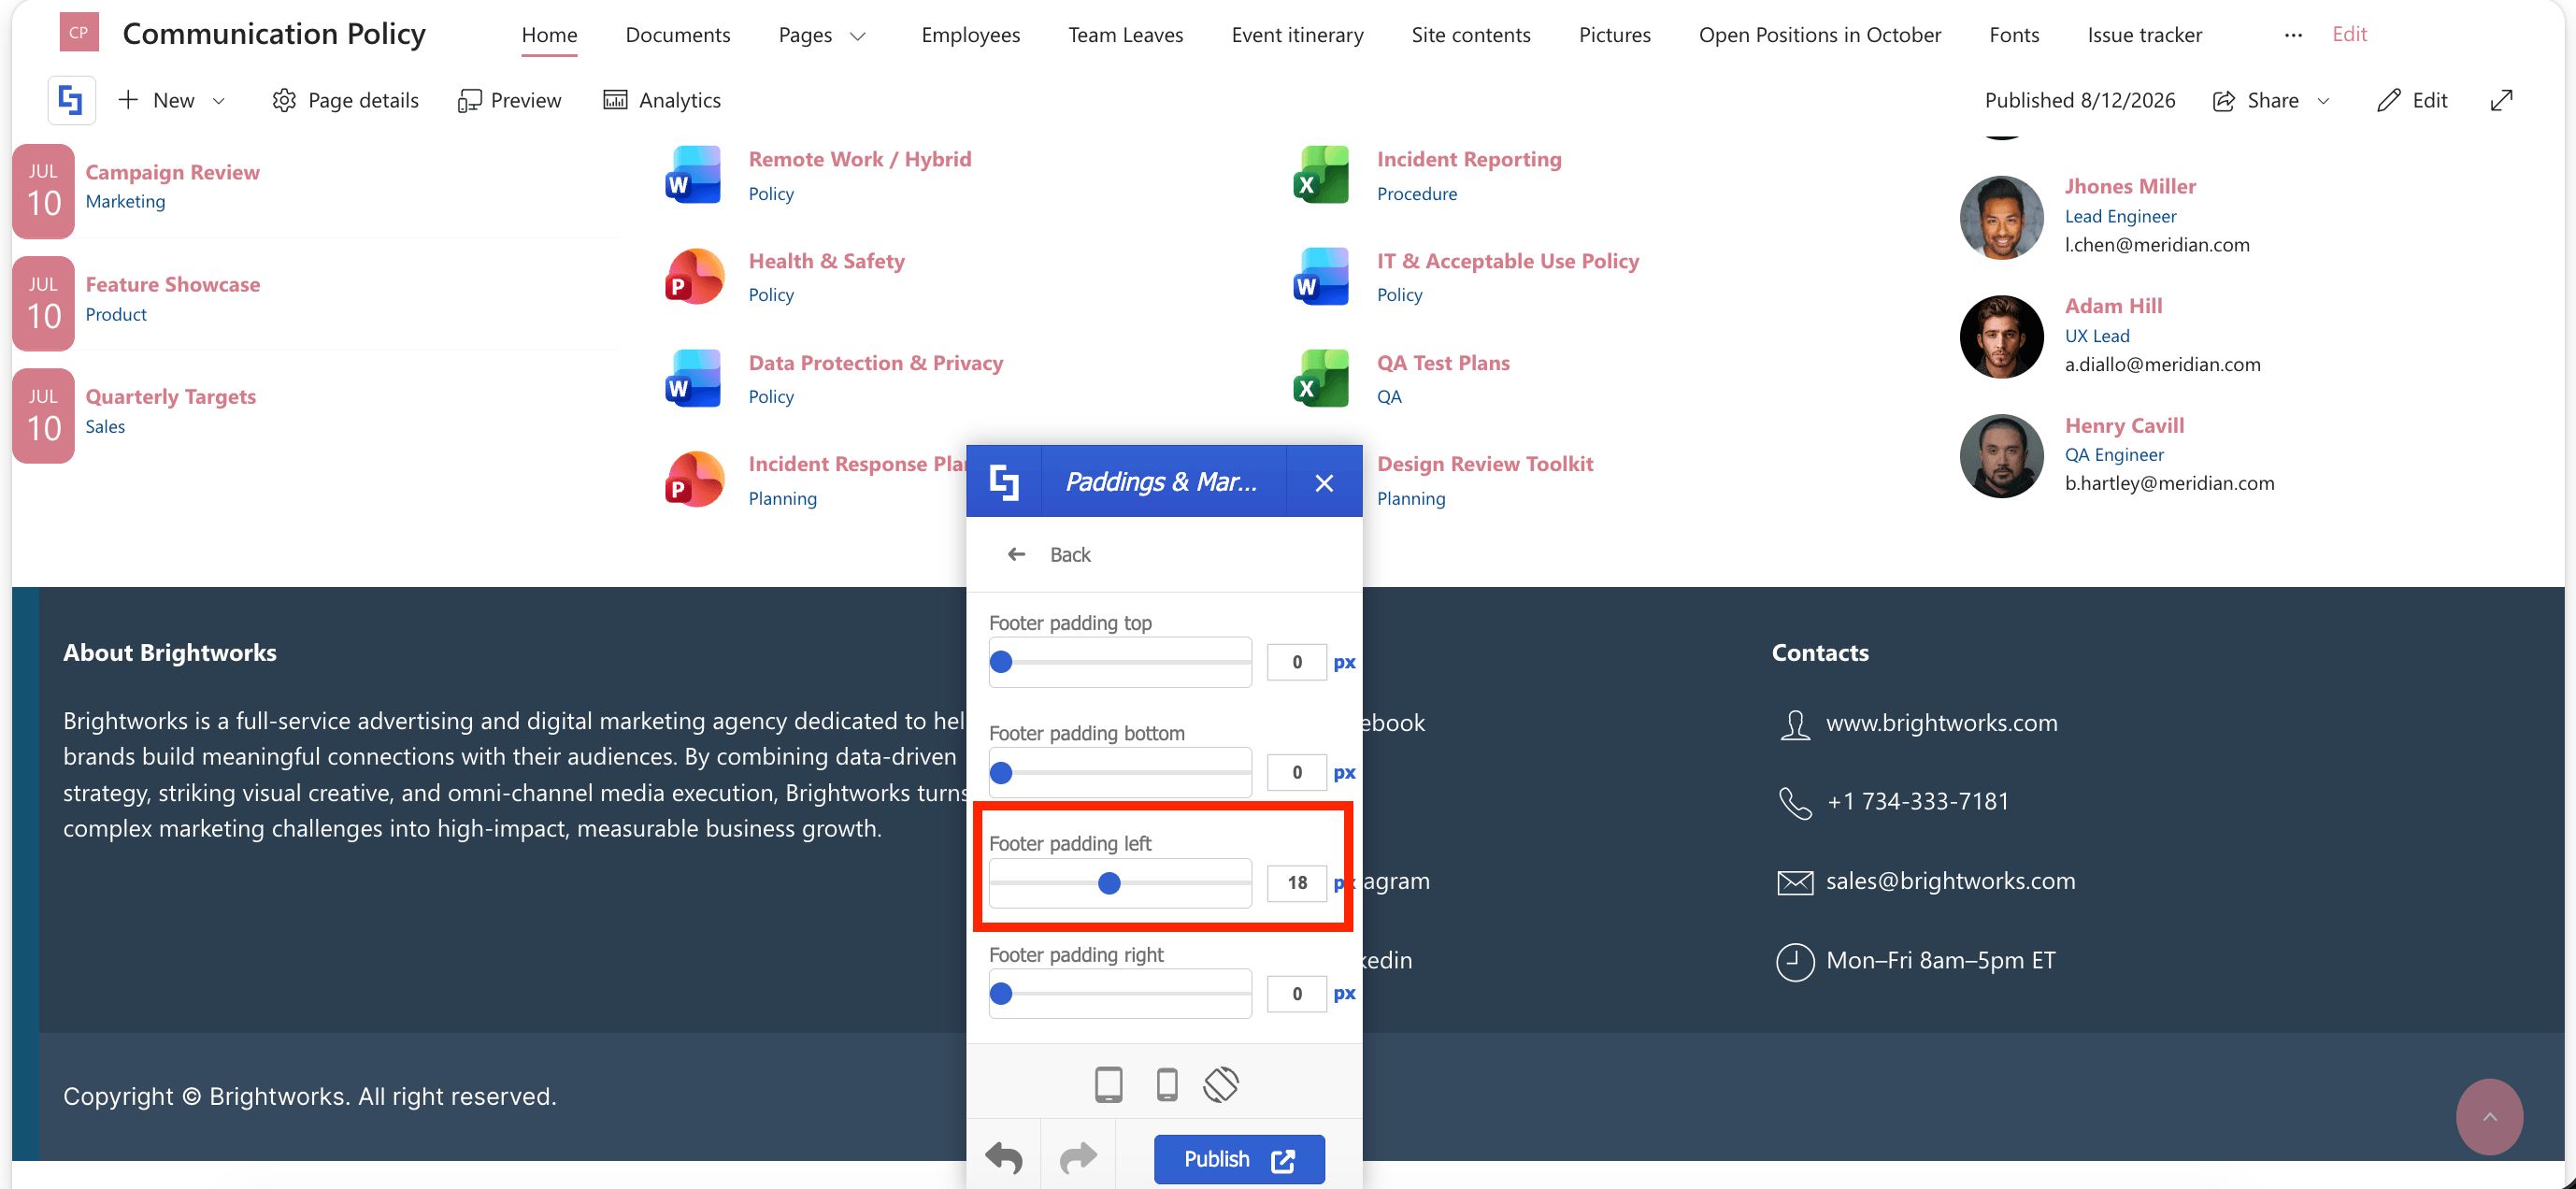
3. Footer Padding Left
This allows you to add padding at the left side of your footer.
4. Footer Padding Right
This allows you to add padding at the right side of your footer.
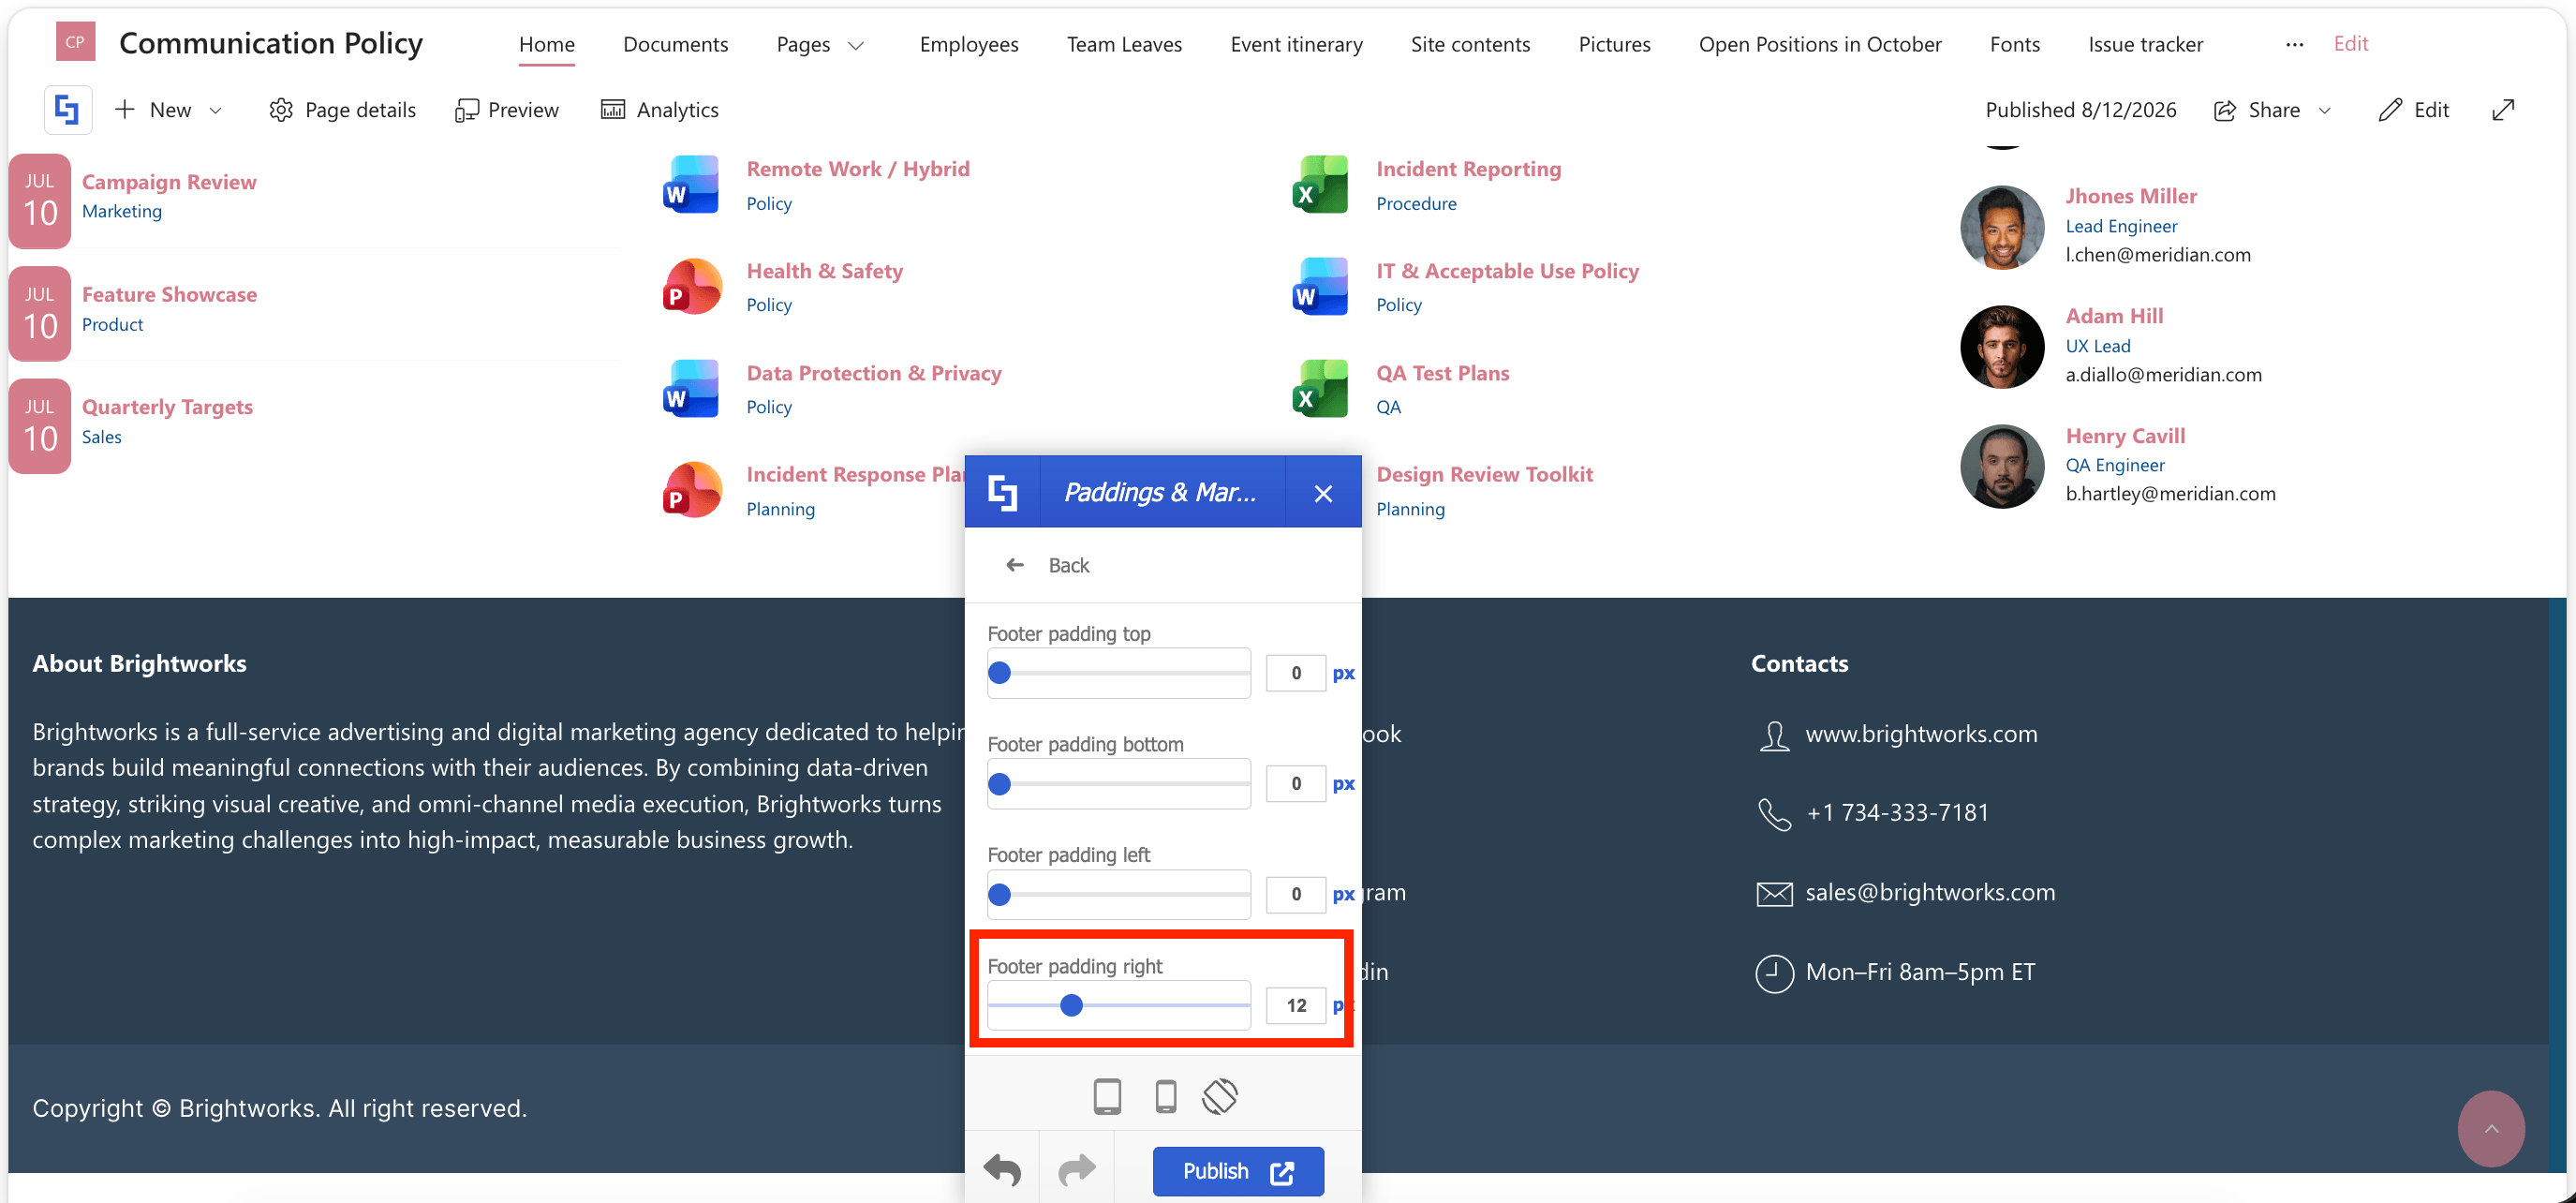
DESIGN TIP: It is best to add a background (color or image) when you want to have padding around your footer. This will add a pop of color to your footer design.
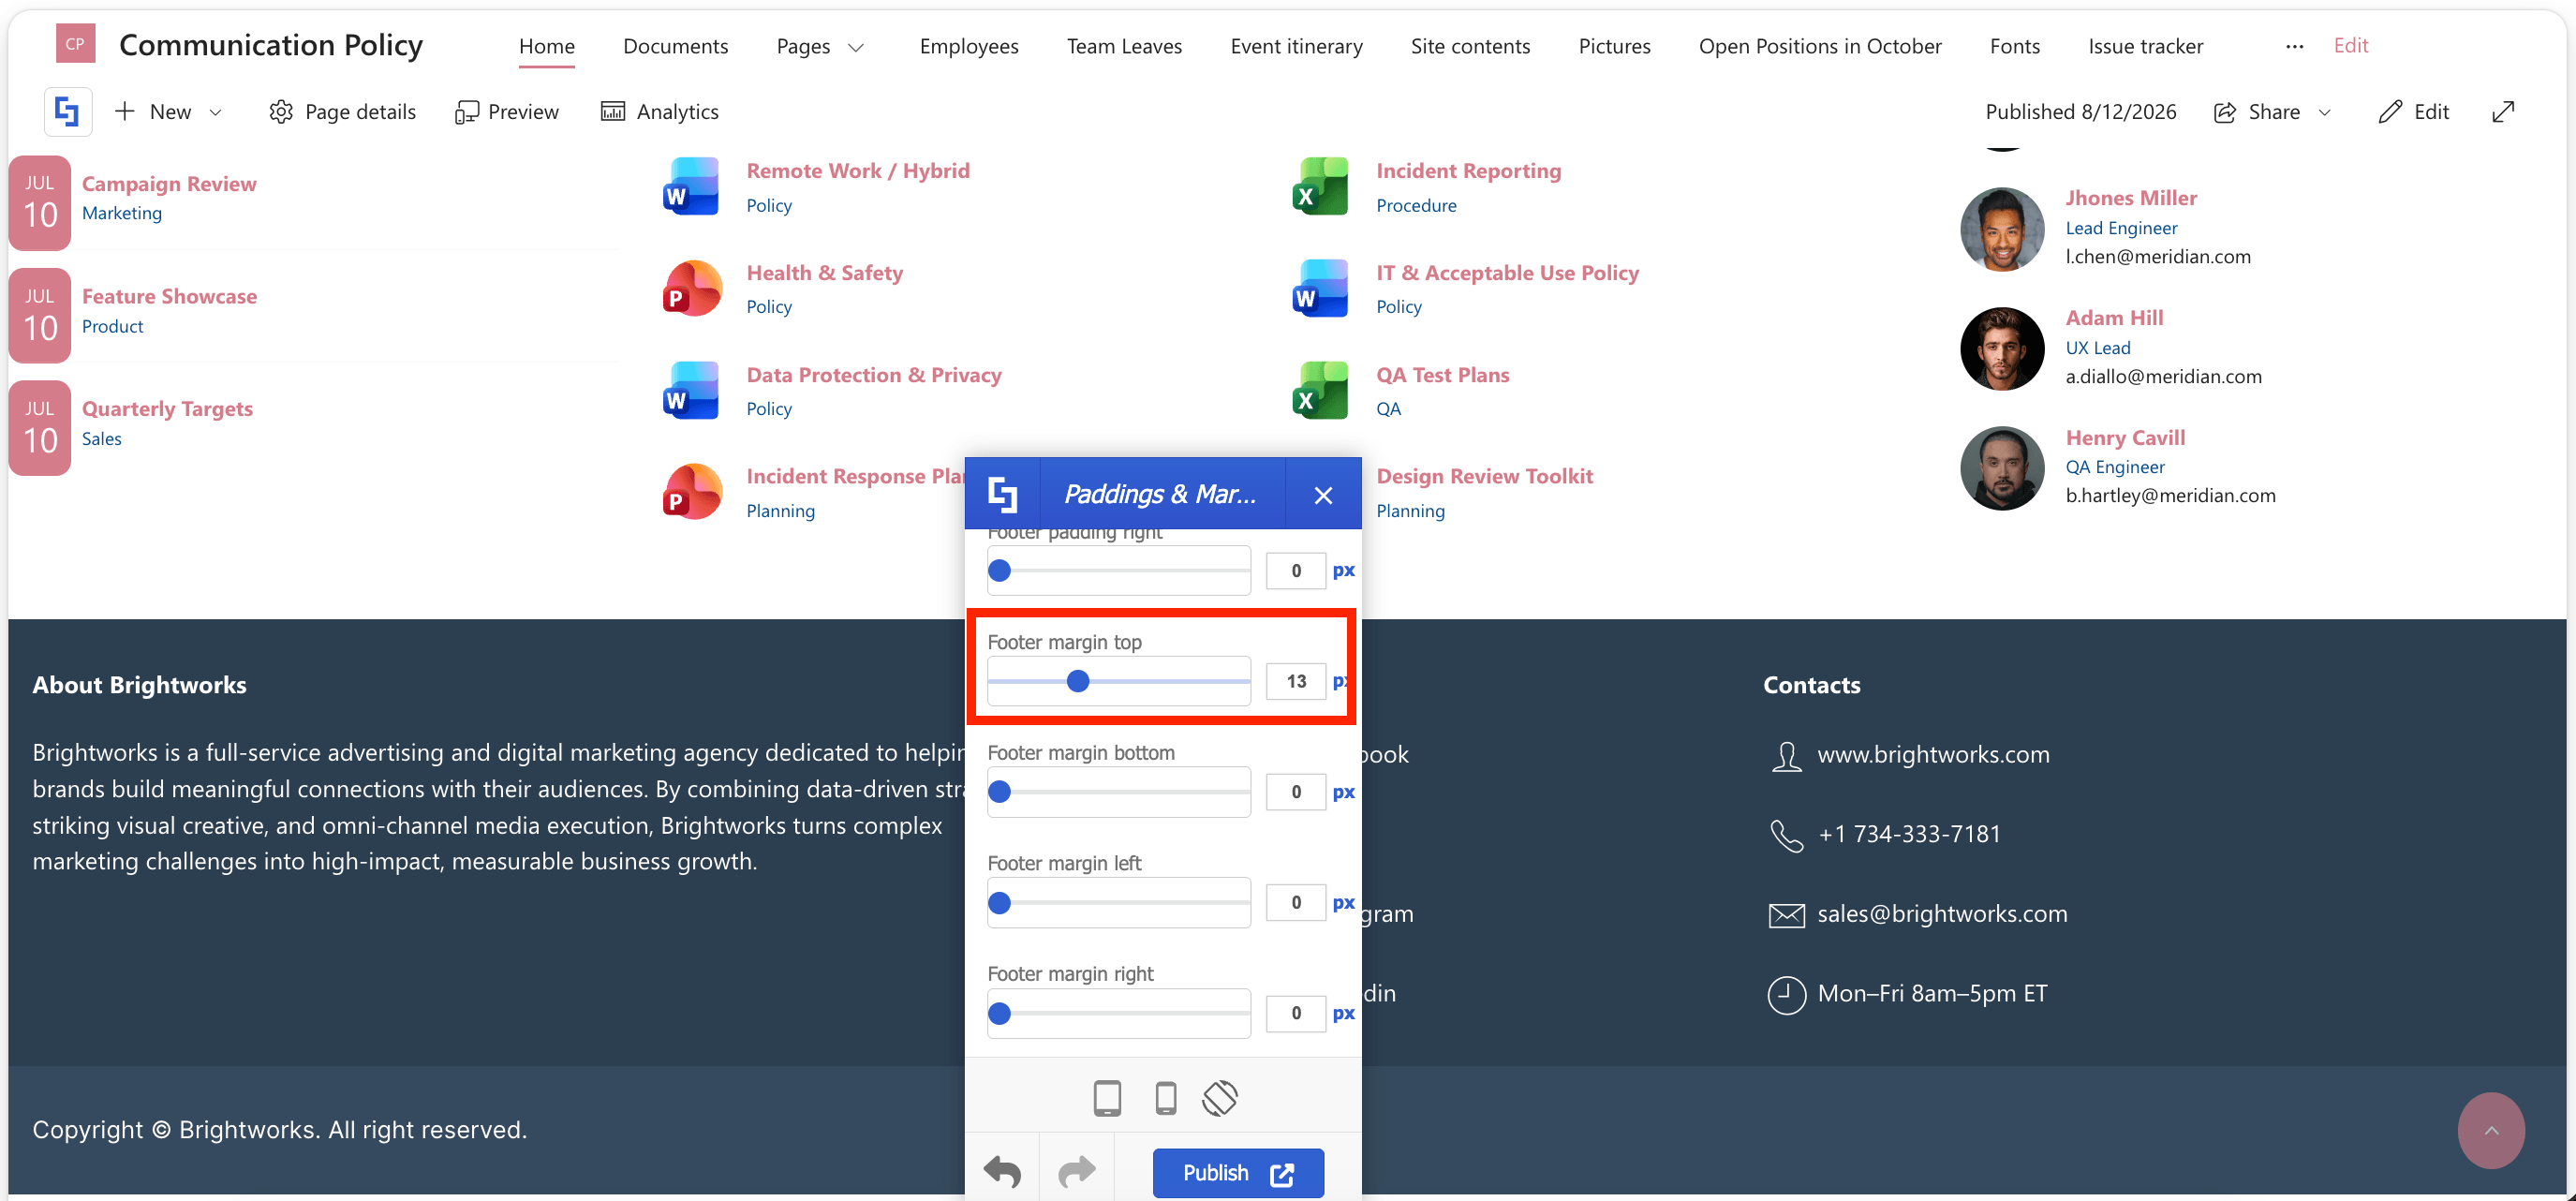
5. Footer Margin Top
This allows you to add white space at the top of your footer.
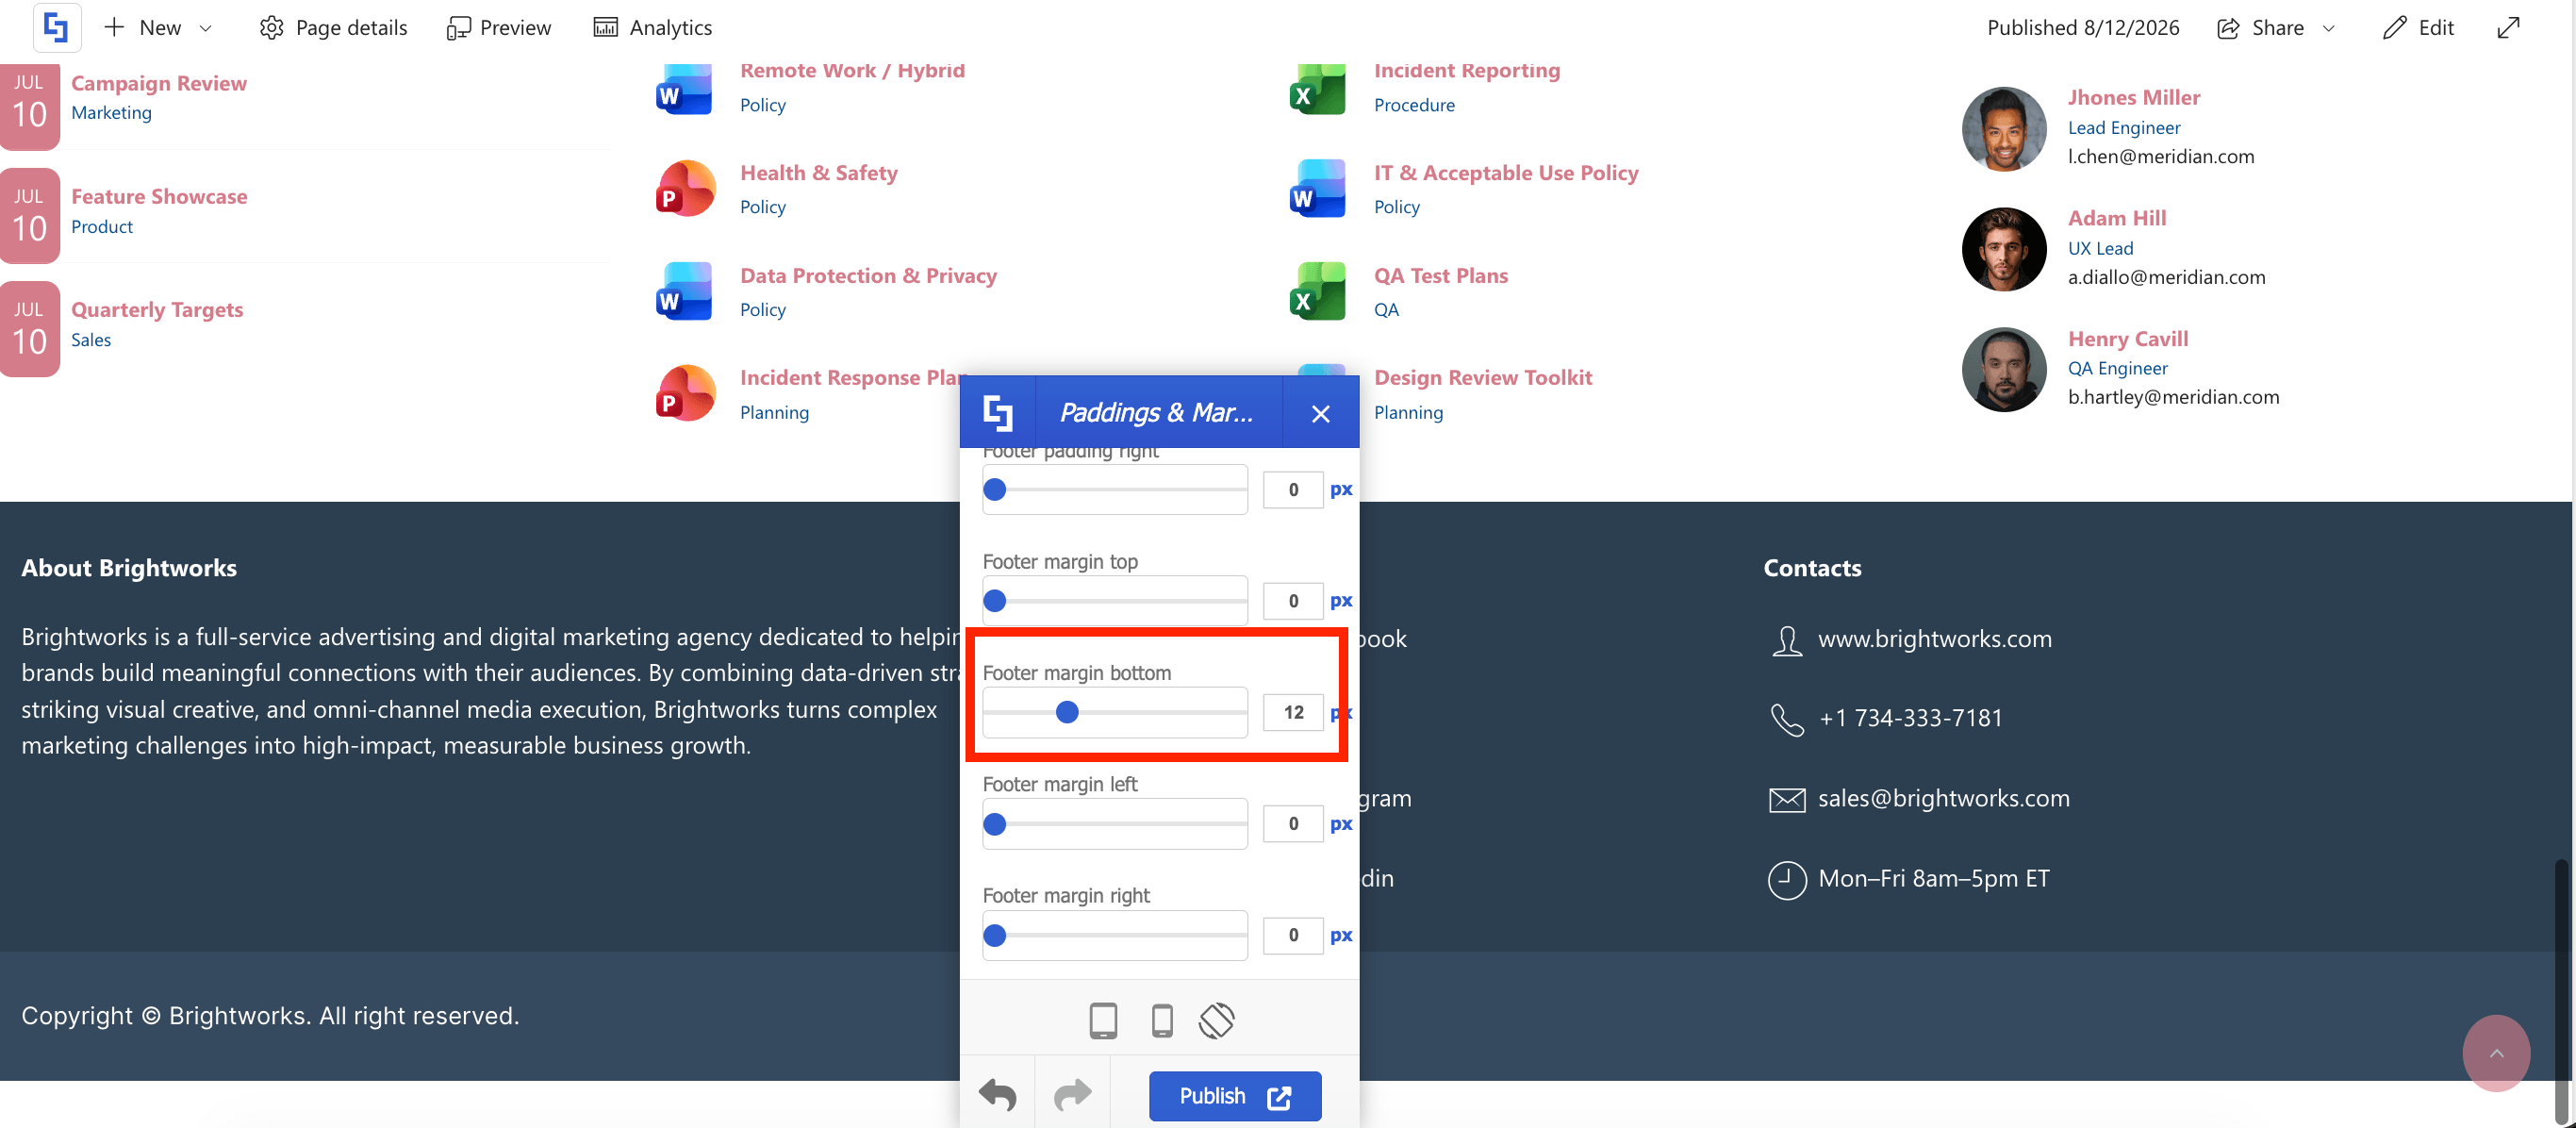
6. Footer Margin Bottom
This allows you to add white space at the bottom of your footer.
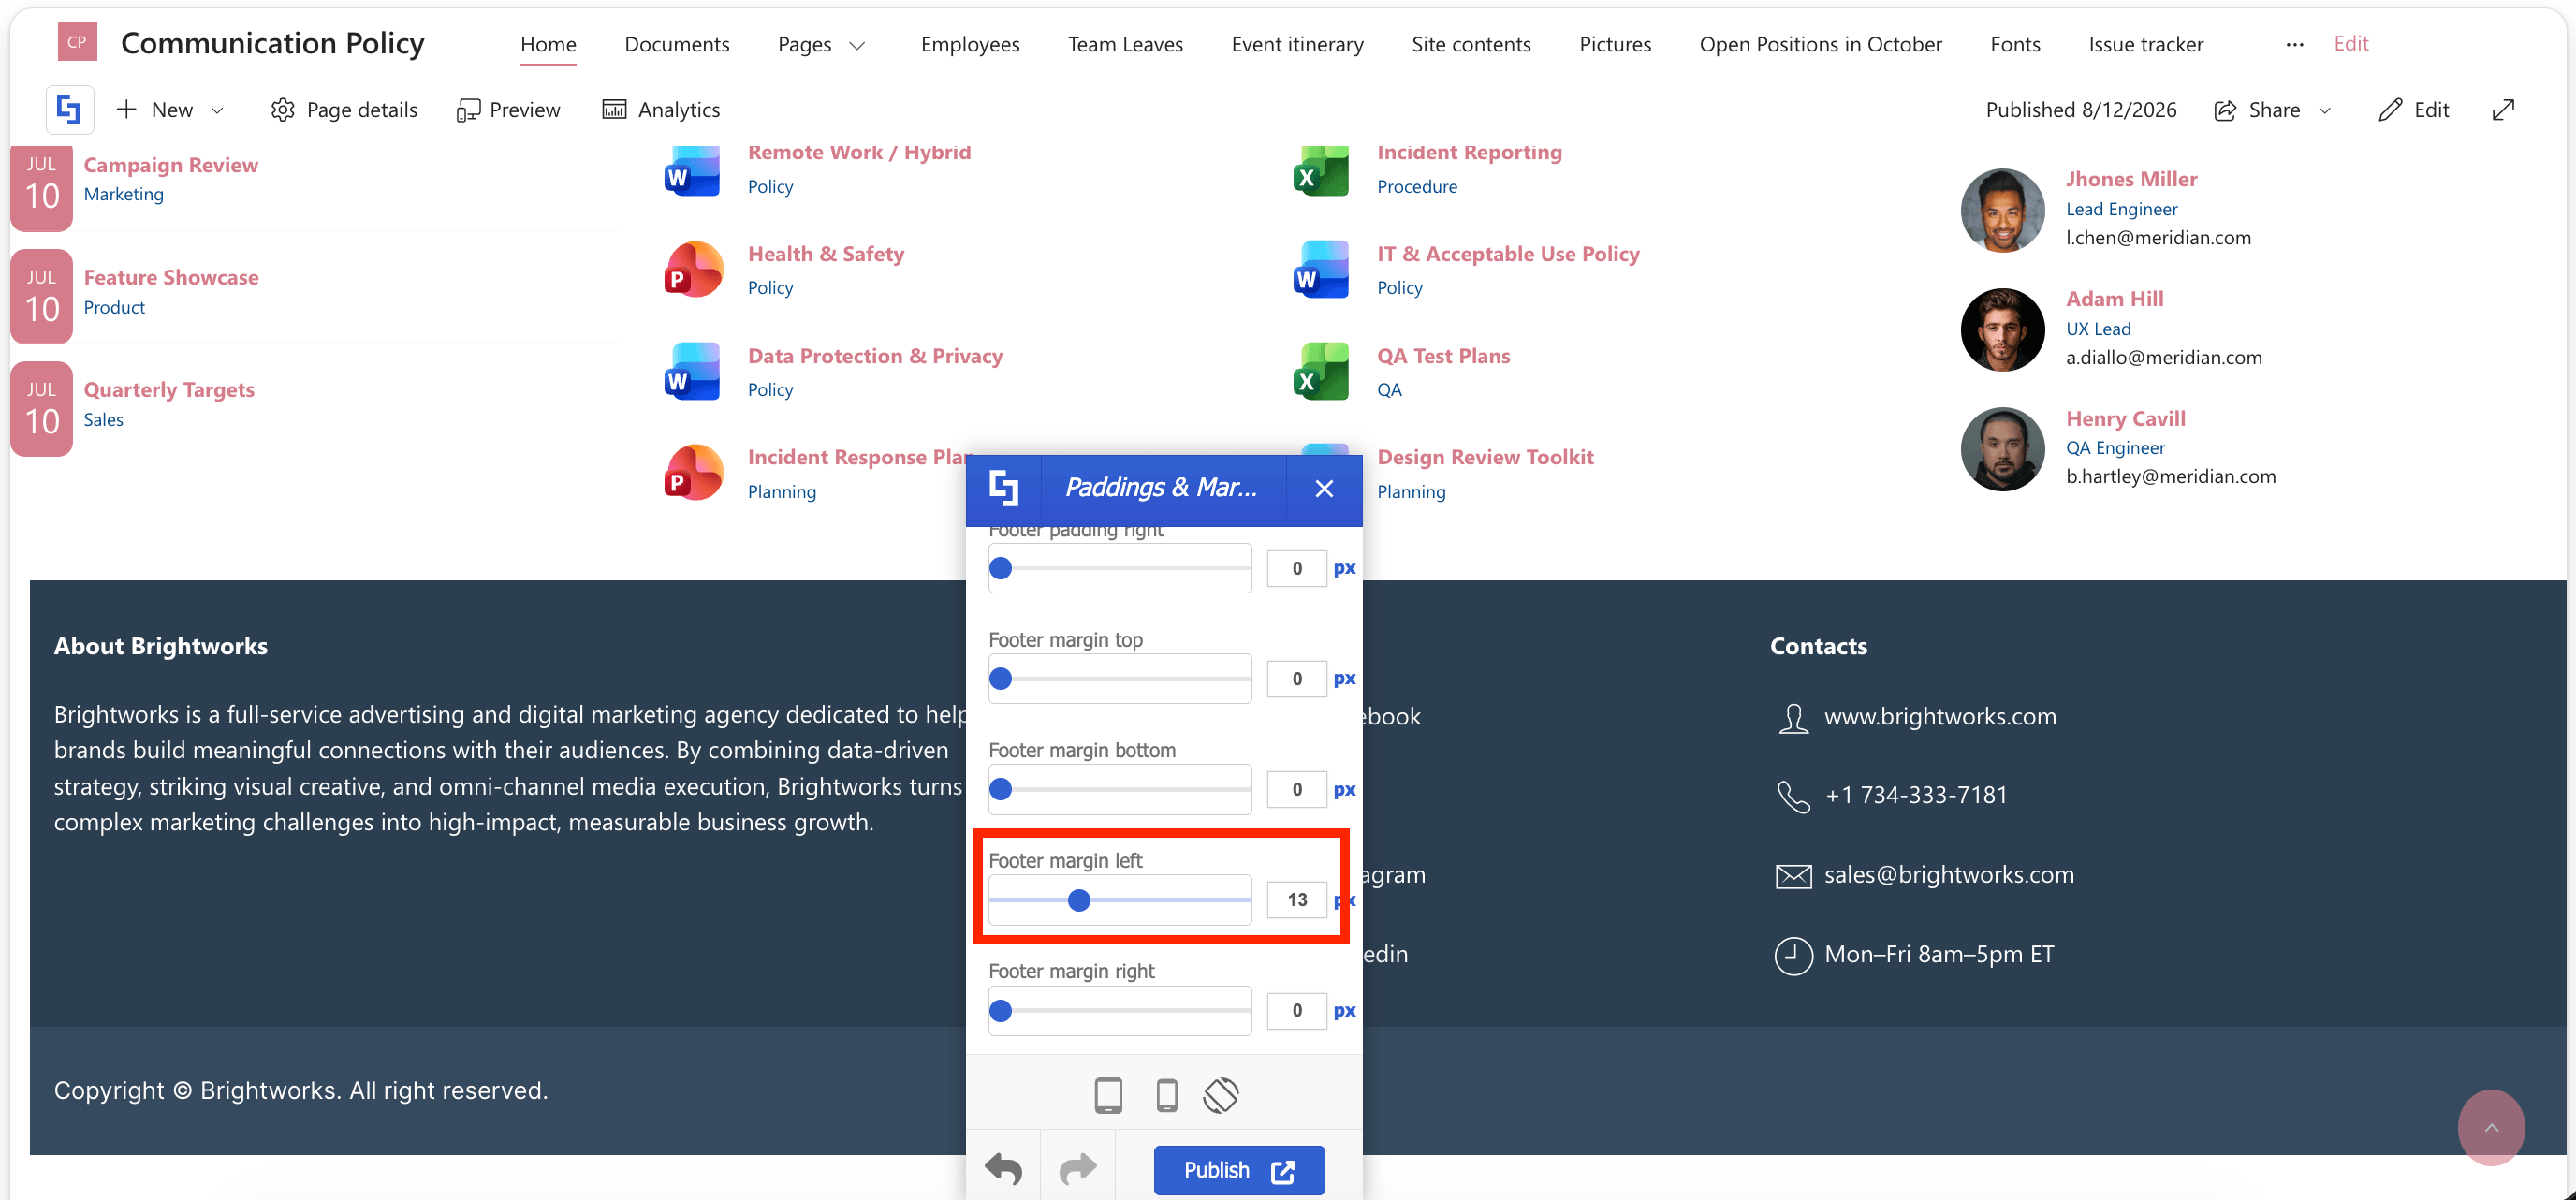
7. Footer Margin Left
This allows you to add white space on the left side of your footer.
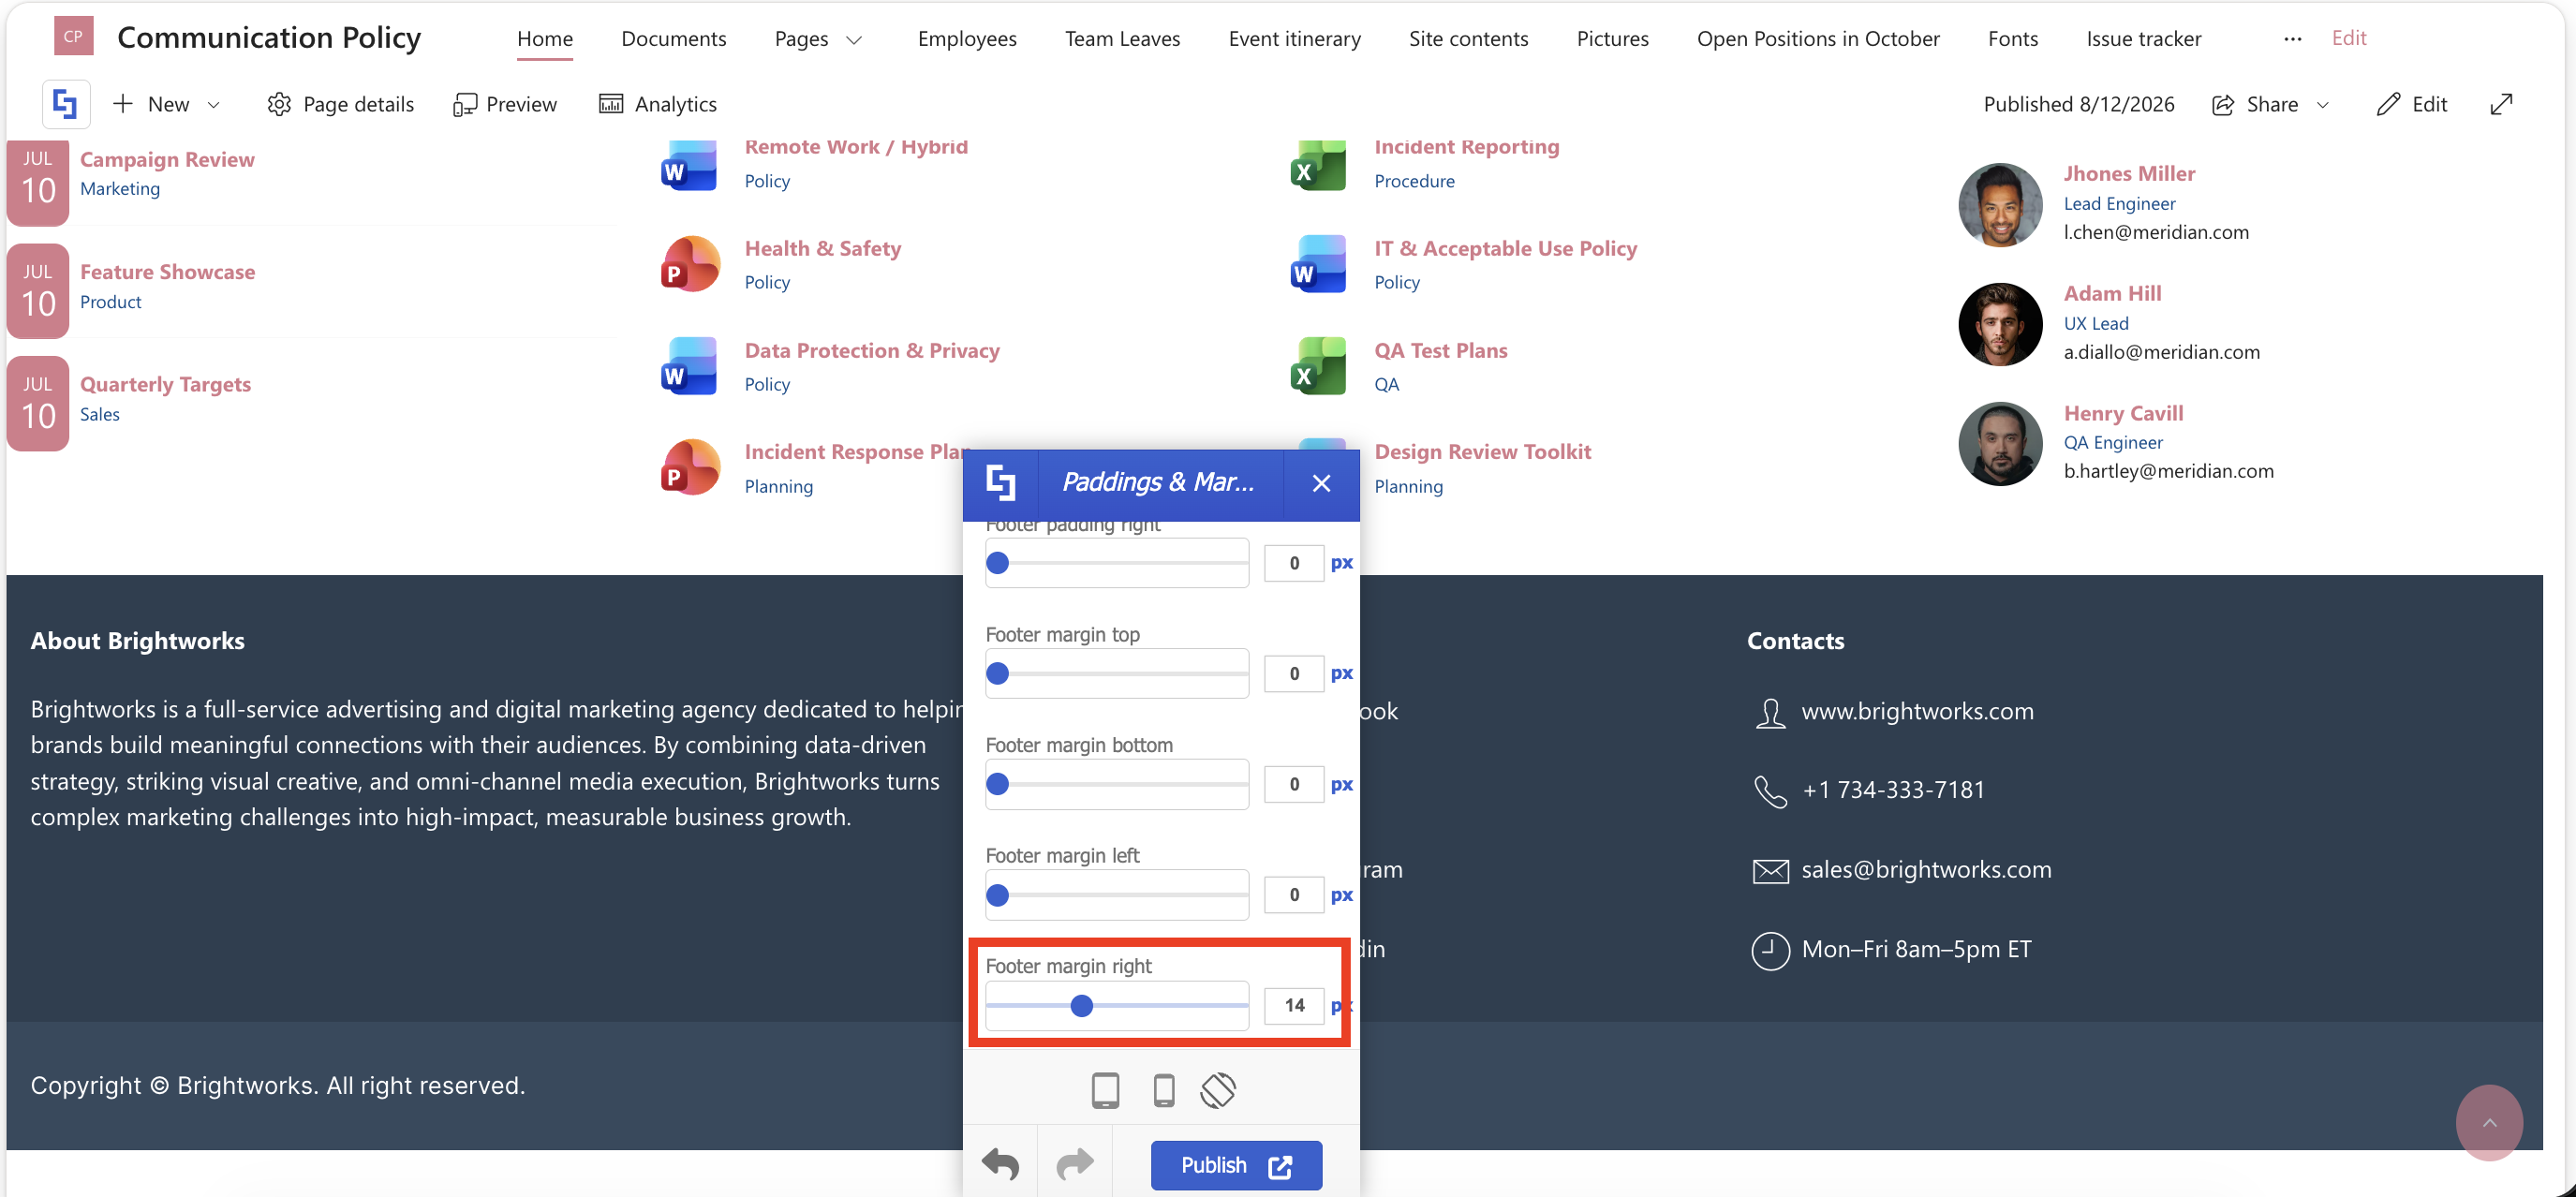
8. Footer Margin Right
This allows you to add white space on the right side of your footer.
That's it! You now know the customizing features of your footer. Make sure to make the most out of them and enjoy designing beautiful intranet sites.
Related articles