Try ShortPoint now
TL;DR: You can add a ShortPoint template to your SharePoint page in three ways, right from the Templates Library. Open the library from an empty ShortPoint Section and hover over a template to see three icons. Click the eye icon to preview the full design before you insert it. Click the plus icon to add it right away, or click the sparkle icon to have AI Designer change it based on your request. When you’re done, save and publish the page.
Ever used the ShortPoint Templates Library to kick off your page designs? If you have, you've probably noticed that when you hover over a template, you'll see three icons: preview, add, and AI Designer. Each one adds the template to your page in a different way: you can preview it first, insert it right away, or let AI Designer adapt it for you. This article explains the three options and walks you through each one, step by step.
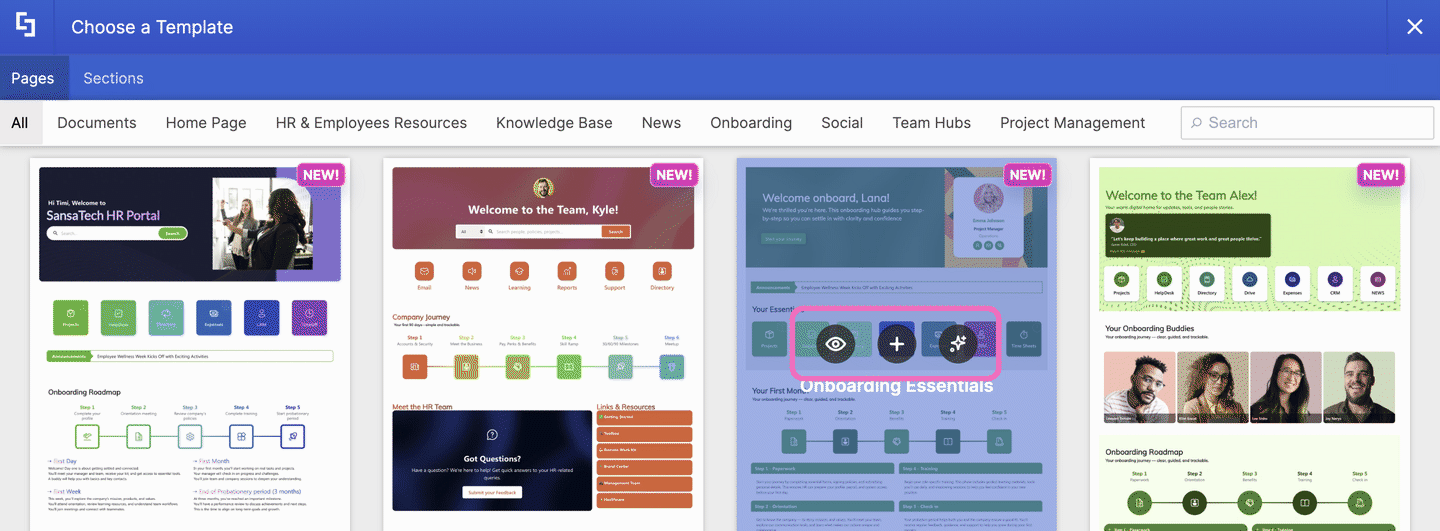
TABLE OF CONTENTS
- Prerequisites
- Three Ways to Add ShortPoint Templates to a Page
- Interactive Tutorial
- Step-by-step Tutorial
- Frequently Asked Questions
- What's the difference between the three icons on a template?
- Can I switch to AI Designer from the preview window?
- Why don't I see the Open Templates icon?
- Why don't I see the AI Designer icon?
- Does using AI Designer use AI credits?
- Can I add more than one template to the same page?
- I inserted the wrong template. How do I undo it?
- Do I need to publish after adding a template?
Prerequisites
- You have the latest version of ShortPoint SPFx installed on your SharePoint environment.
- You are a ShortPoint Designer with an active license.
- You have permission to edit the SharePoint page.
- For Option 3 only: you have a Pro or Enterprise license, AI Designer is enabled in the ShortPoint Admin page, and you have AI credits available. For more information, check out What is AI Designer.
Three Ways to Add ShortPoint Templates to a Page
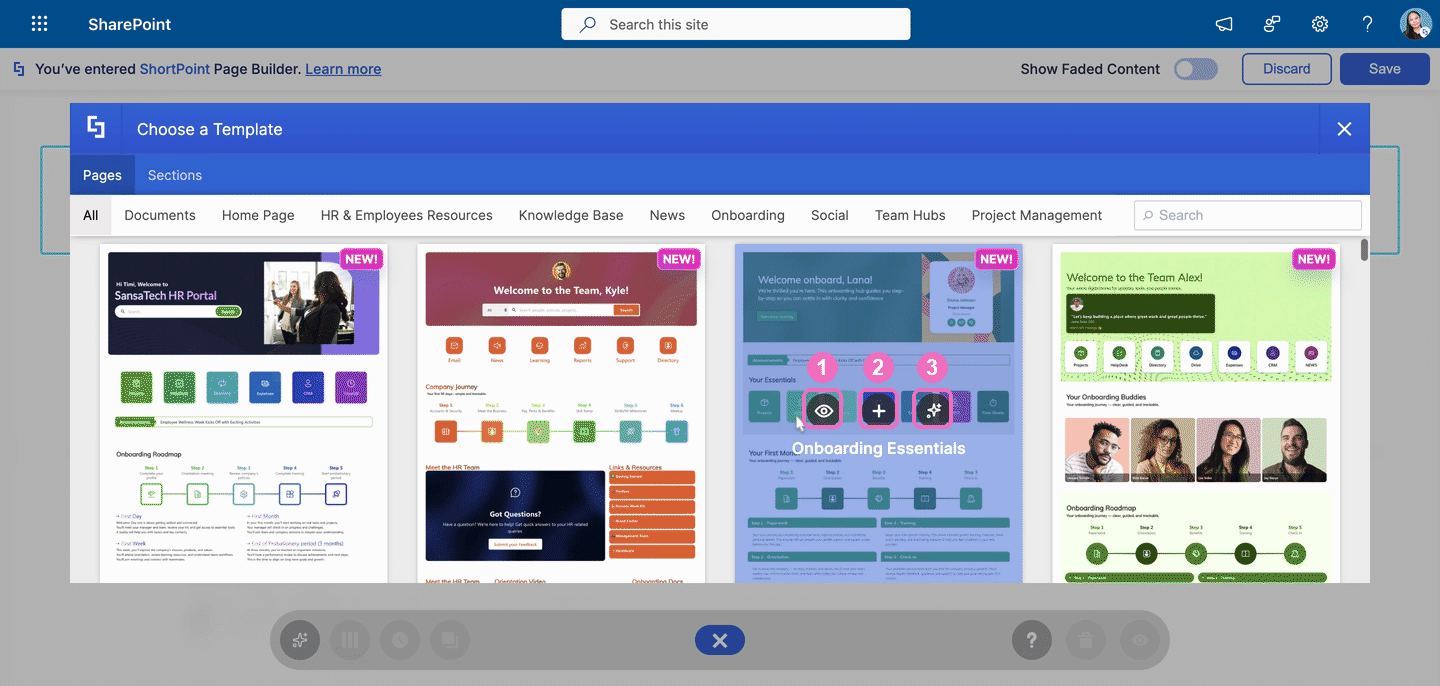
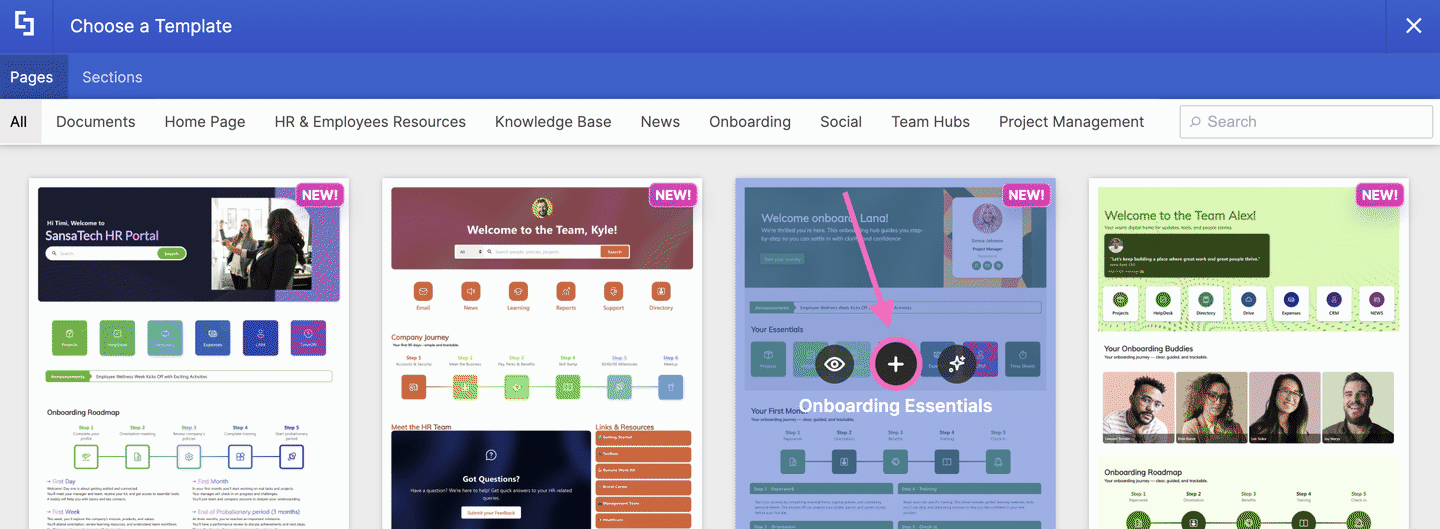
Hover over any template in the Templates Library and three icons appear on it:
- Preview (eye icon)
- Insert (plus icon)
- AI Designer (sparkle icon)
All three add the template to your page. The difference is what happens before the template lands on your page.
Option 1: Preview Template and Insert
Best when you want to see the whole template before you commit to it.
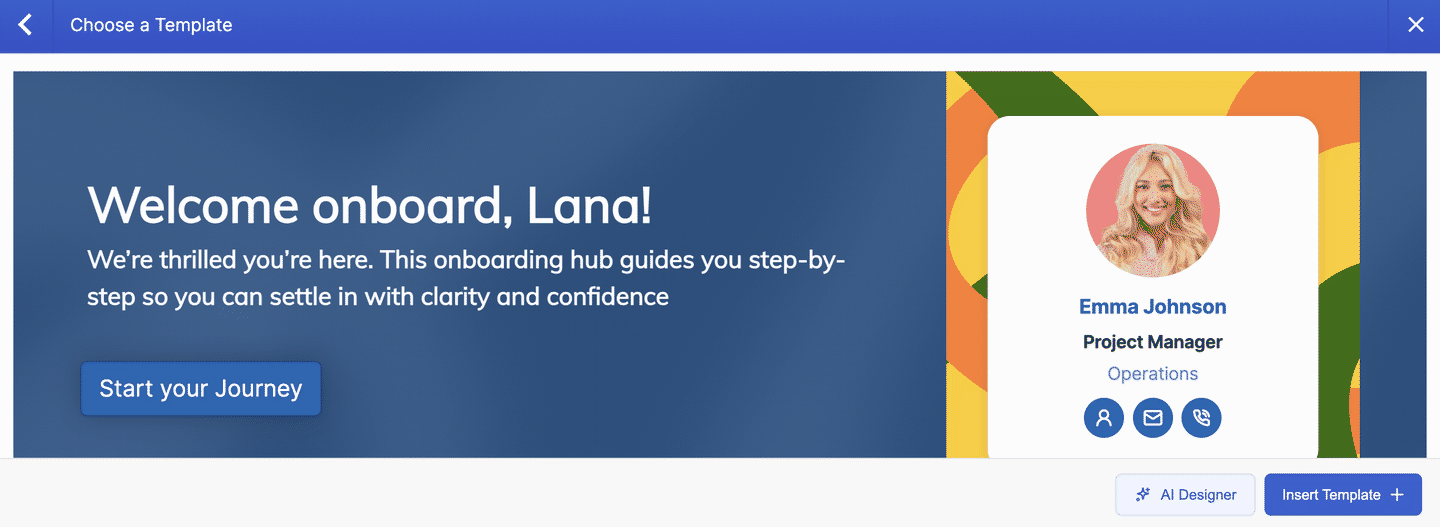
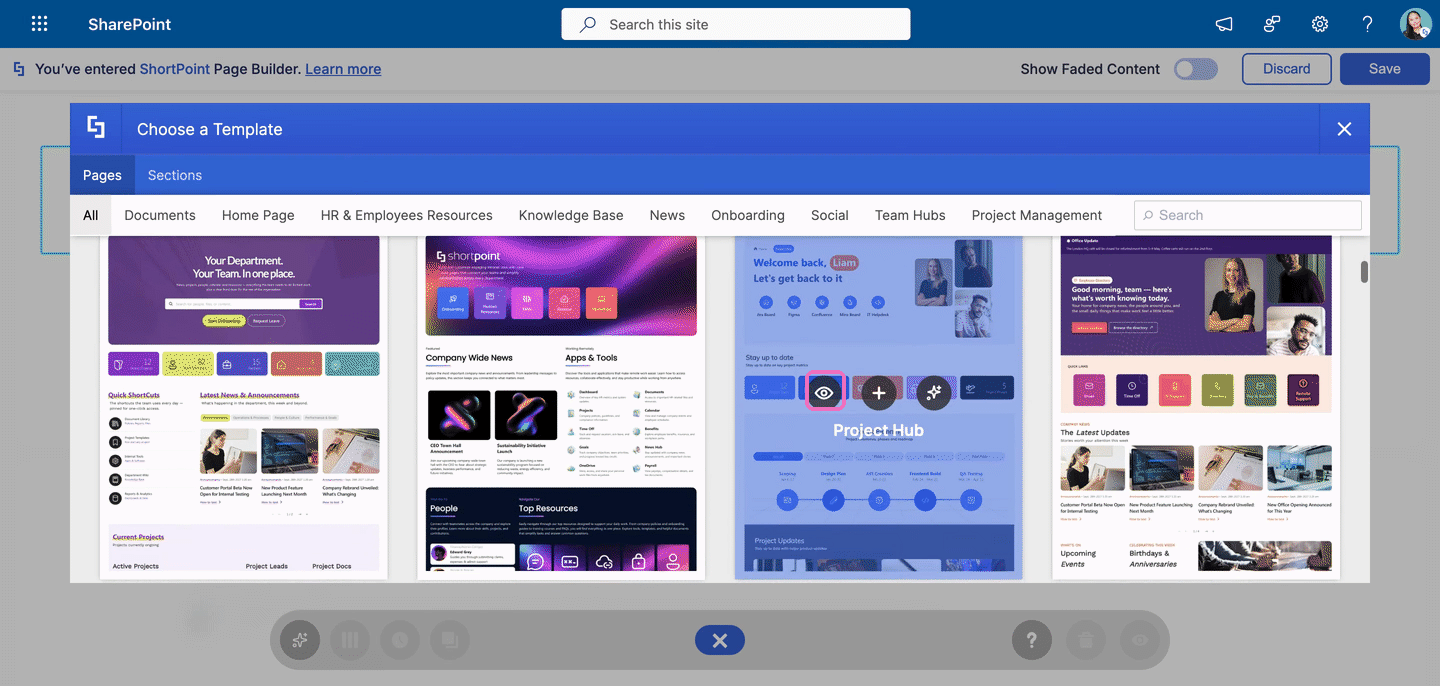
Template thumbnails are small, so it's not always easy to tell what's inside a design. The Preview icon opens the template in a larger window where you can scroll through the full layout, including every section, list, and card.
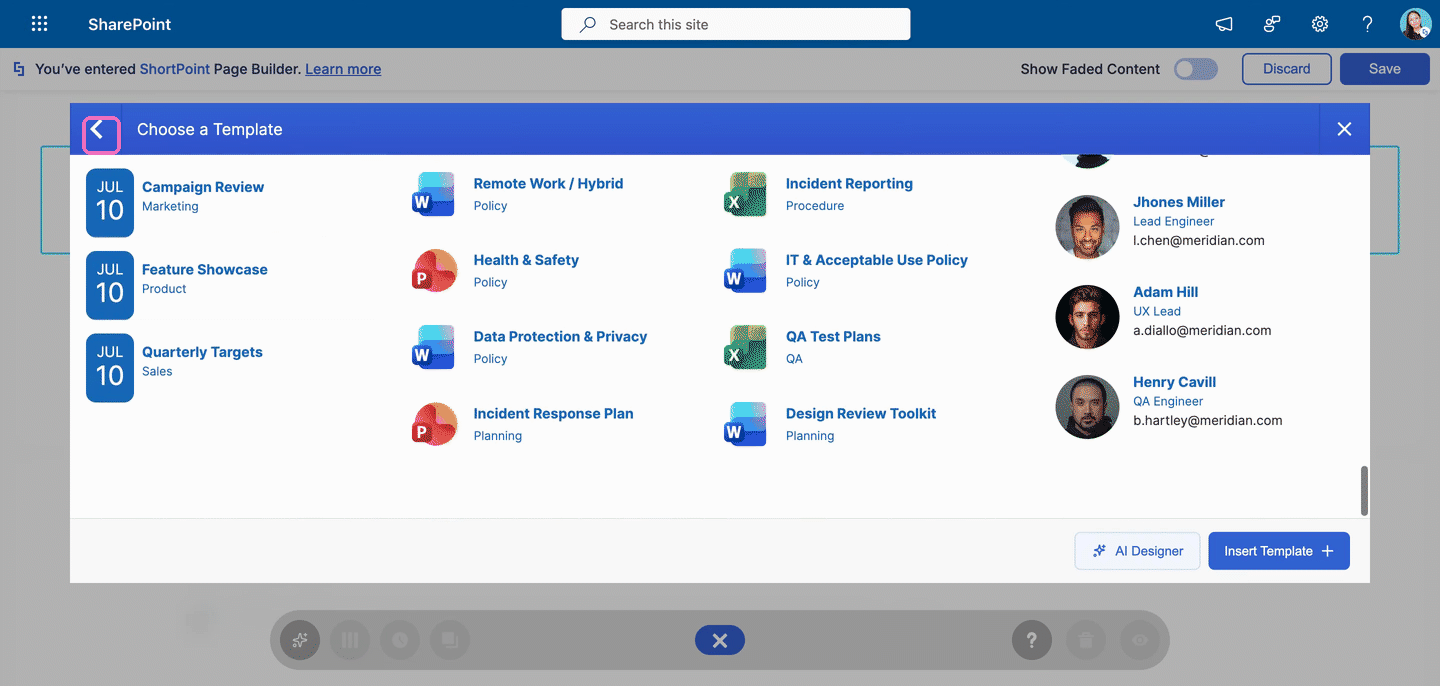
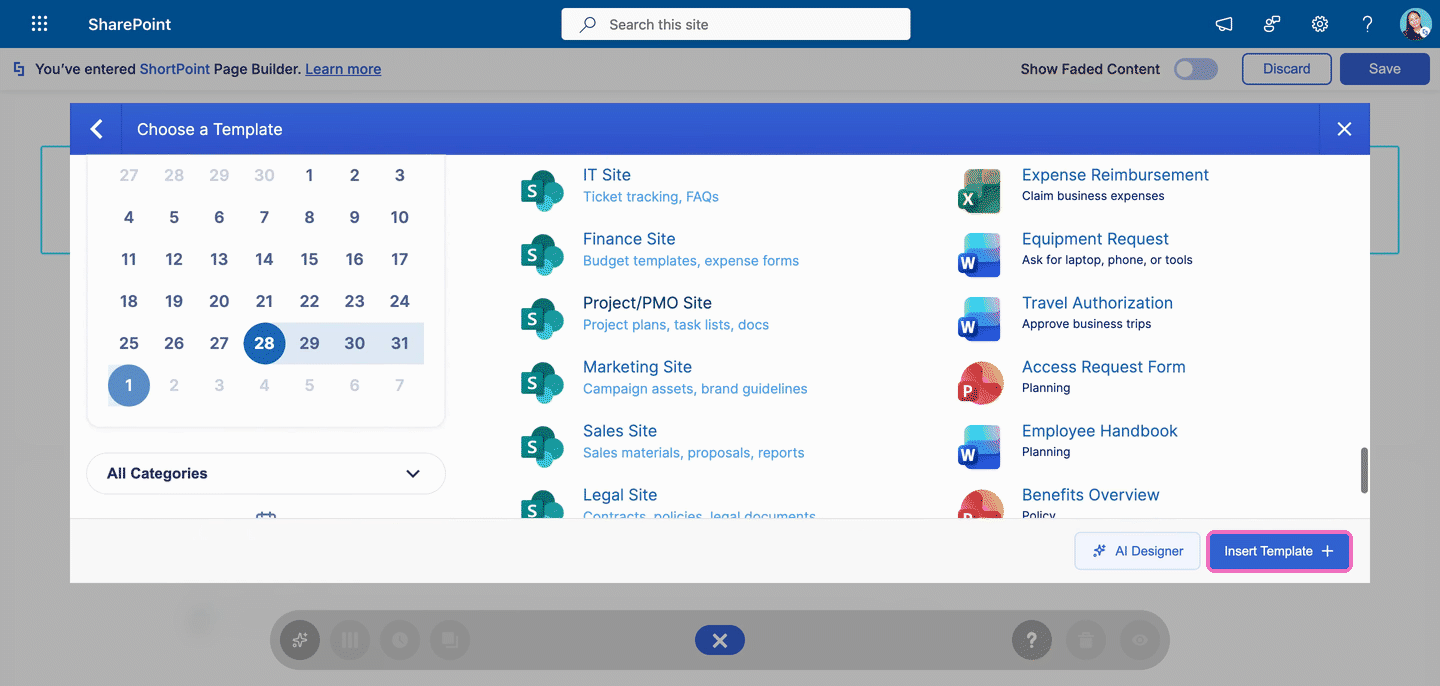
If you like what you see, click Insert Template to add it to your page. If not, click the back arrow to return to the library and preview another one. Nothing is added to your page until you click Insert Template.
Why choose this option:
- No surprises. You see exactly what you're getting before it's on your page.
- Easy to compare. Jump between previews until you find the right fit.
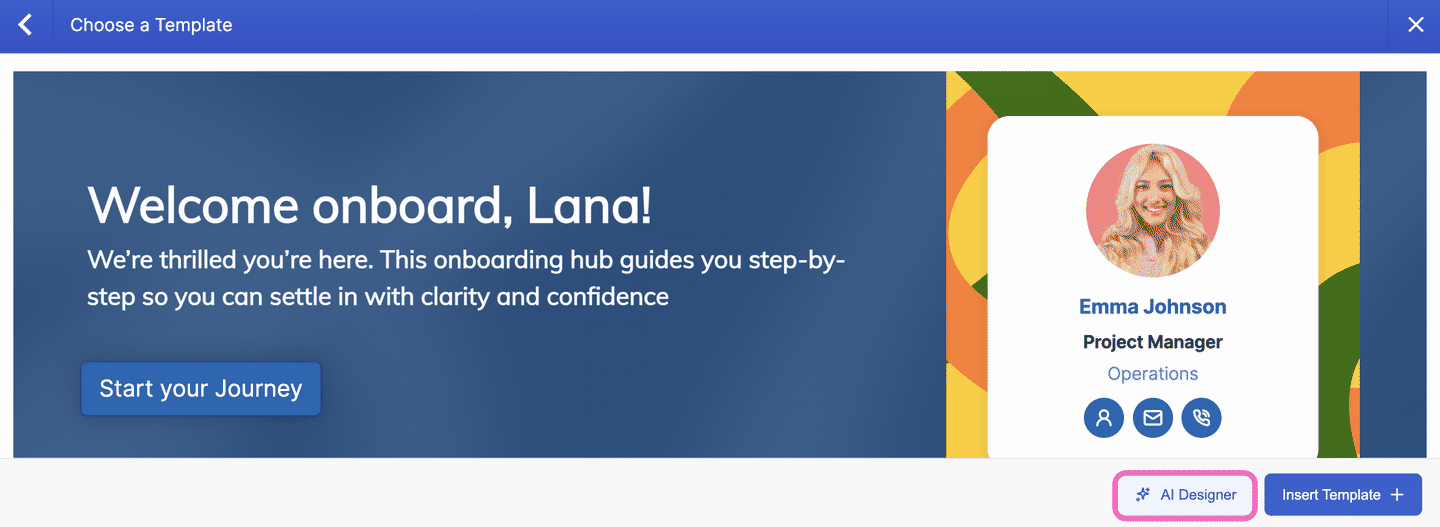
- More choices from the same window. The preview window also has an AI Designer button, so you can switch to Option 3 if you decide the template needs changes.
Option 2: Directly Insert the Template
Best when you already know which template you want.
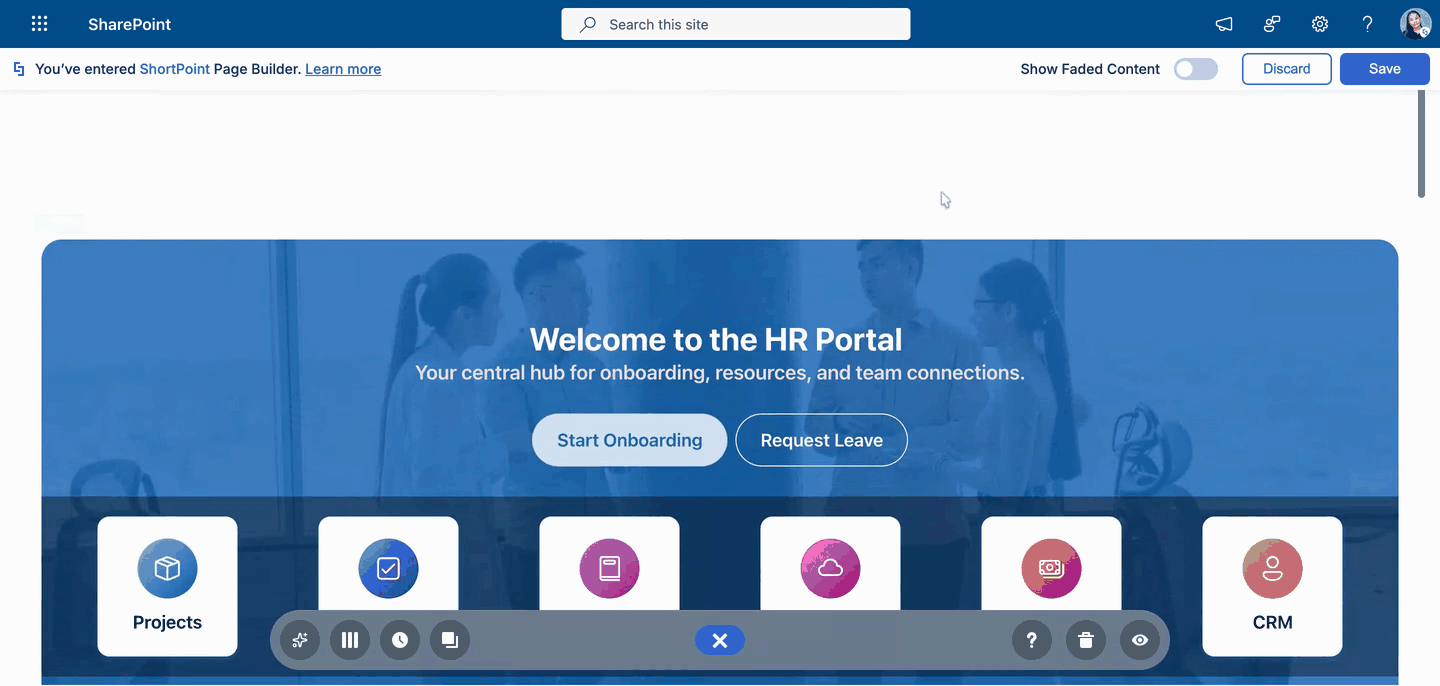
This is the quickest way to add a template. Click the plus icon on the template, and it's added to your page right away, with no extra windows or steps. You can then edit the text, images, and links just like any other ShortPoint design.
Why choose this option:
- It's the fastest. One click and the template is on your page.
- Great for familiar templates. If you've used a template before, there's no need to preview it again.
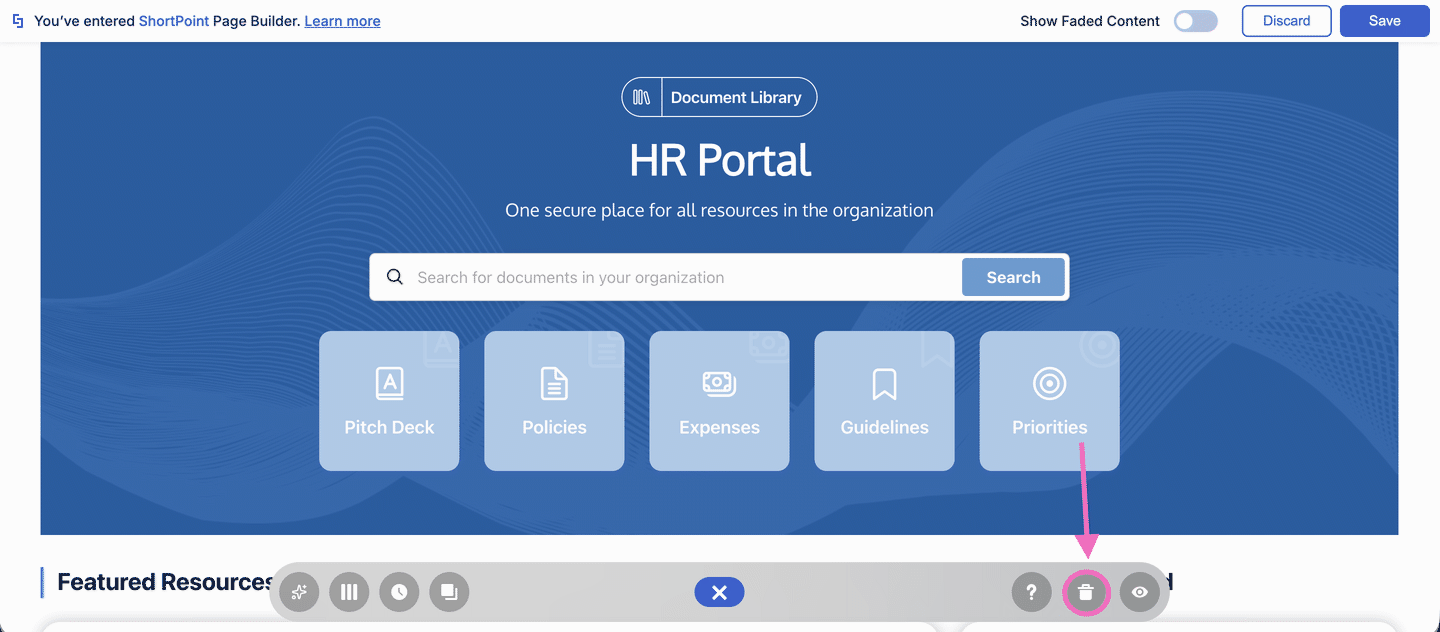
TIPIf the template turns out not to be what you wanted, you can click the trash icon to undo your unsaved changes, then try another one.
Option 3: Customize with AI Designer
NOTETo use this option, you must have a Pro or Enterprise Designer license, have AI Designer enabled in the ShortPoint Admin page, and must have enough AI credits. For more information, check out What is AI Designer.
Best when you like a template but want to add or change parts of it.
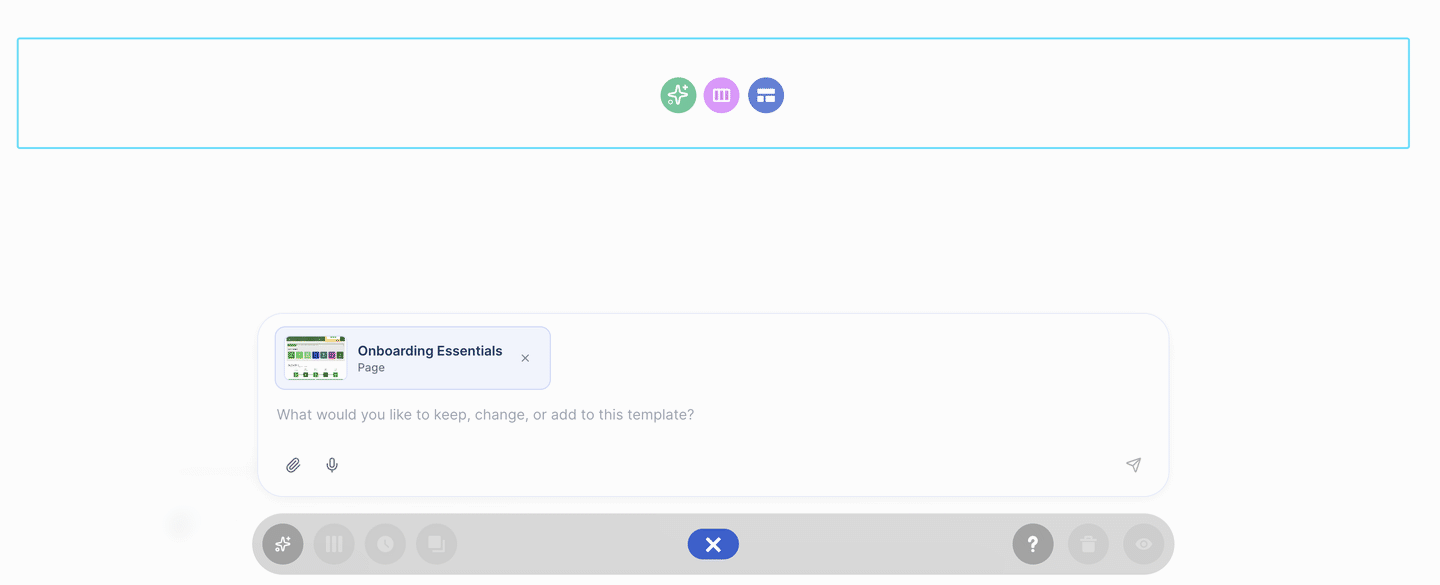
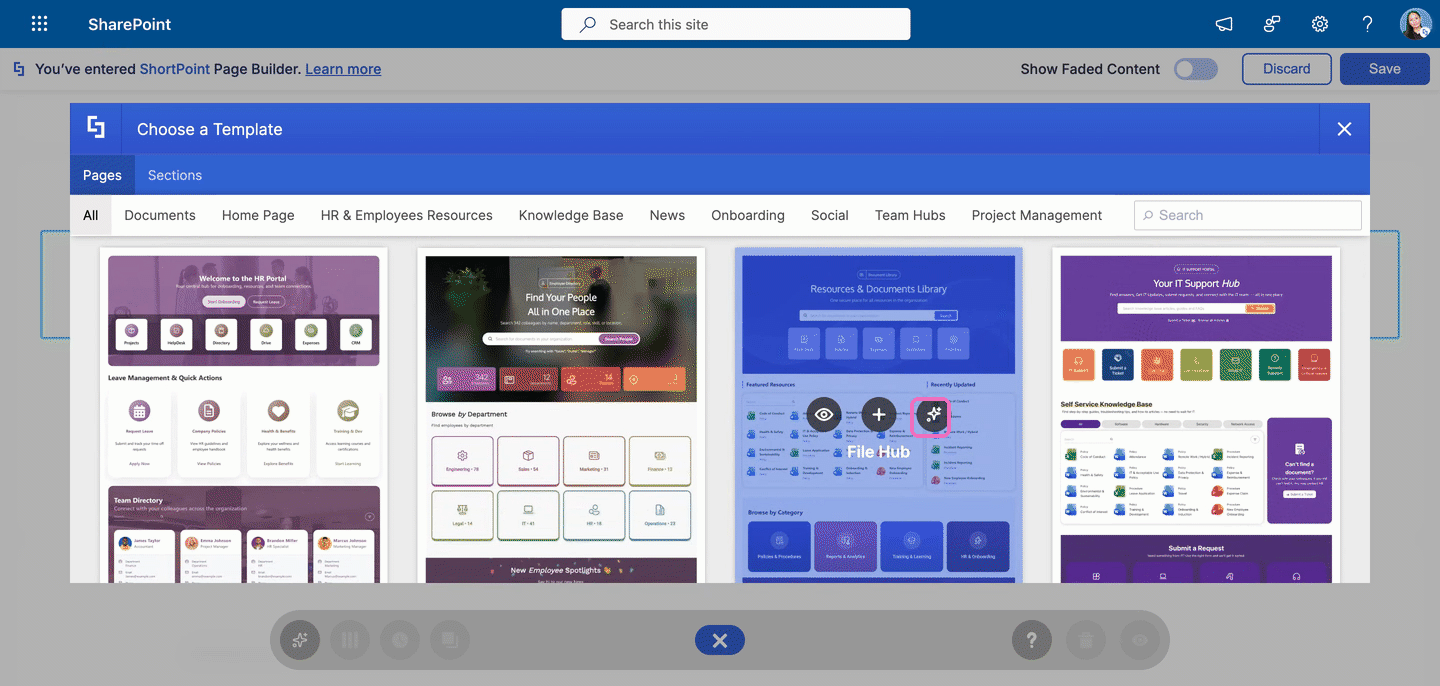
The AI Designer icon opens ShortPoint's AI Designer with the template already attached. You describe what you'd like to keep, change, or add, such as "Add an Employees Directory with pagination turned on", and AI Designer builds the adapted design for you. You can keep refining it with more prompts, or close the AI Designer panel and edit the page by hand.
Why choose this option:
- Start from a proven design, then tailor it. You don't have to build new sections from scratch.
- No code needed. Add sections, change fonts, or connect to Microsoft Graph by describing what you want.
- Keep the conversation going. Each new prompt builds on the last result.
To learn everything AI Designer can do with templates, see How to Use ShortPoint AI Designer to Edit an Existing ShortPoint Template.
Interactive Tutorial
Click Get Started to try it yourself:
Step-by-step Tutorial
Step 1: Edit Your SharePoint Page
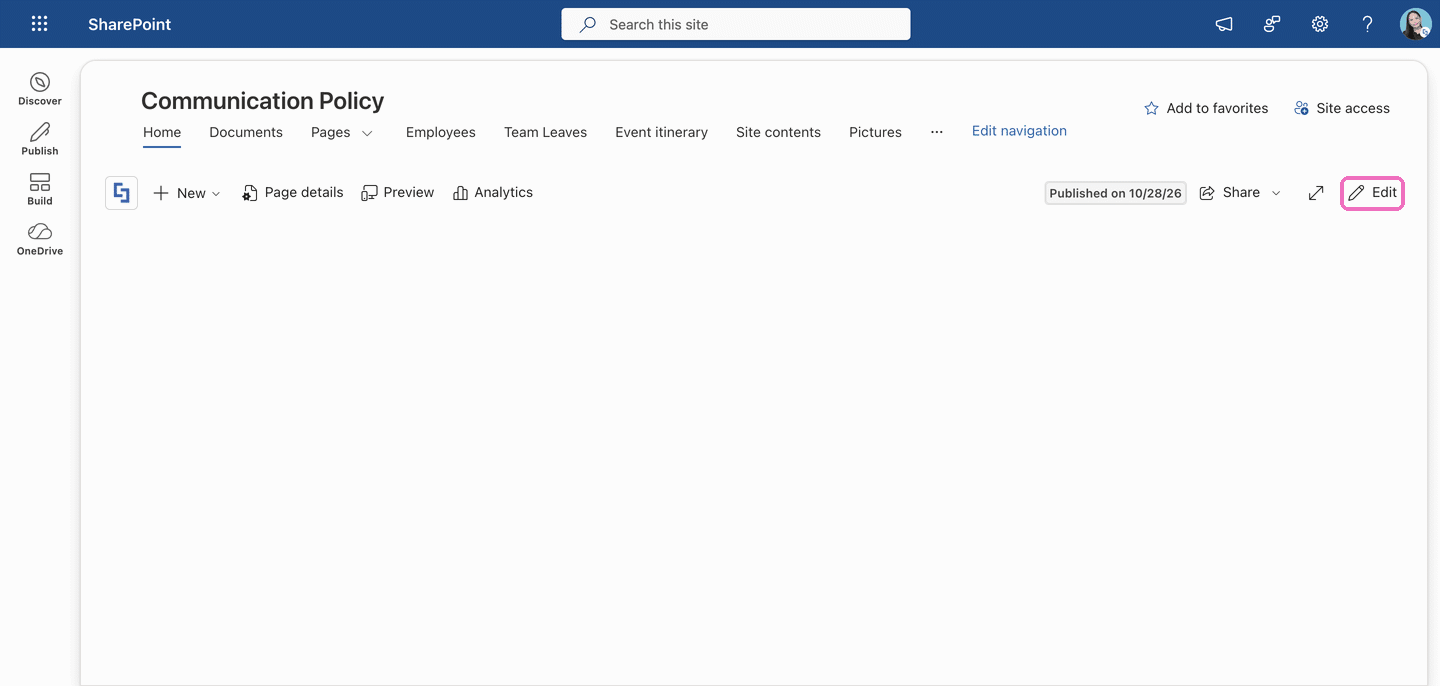
- Go to the SharePoint page you want to use and click Edit.
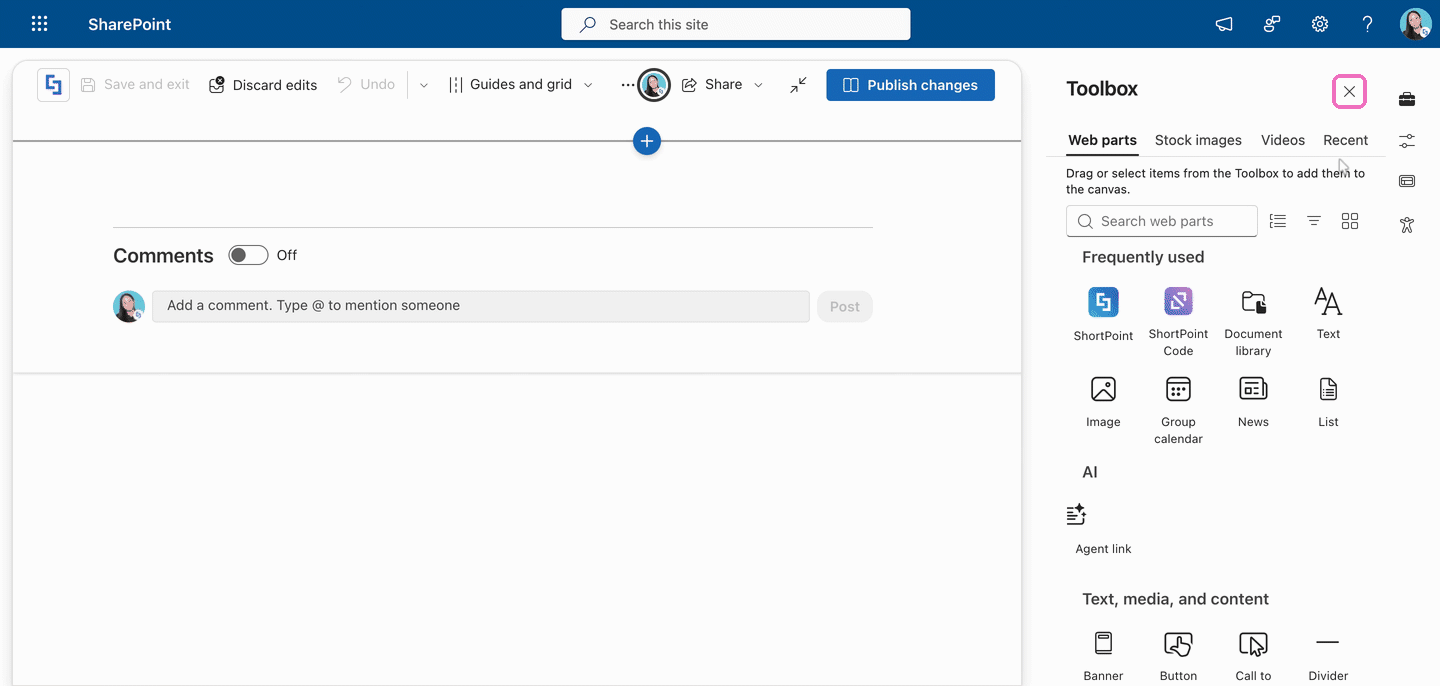
- Close the Toolbox.
Step 2: Add the ShortPoint Web Part
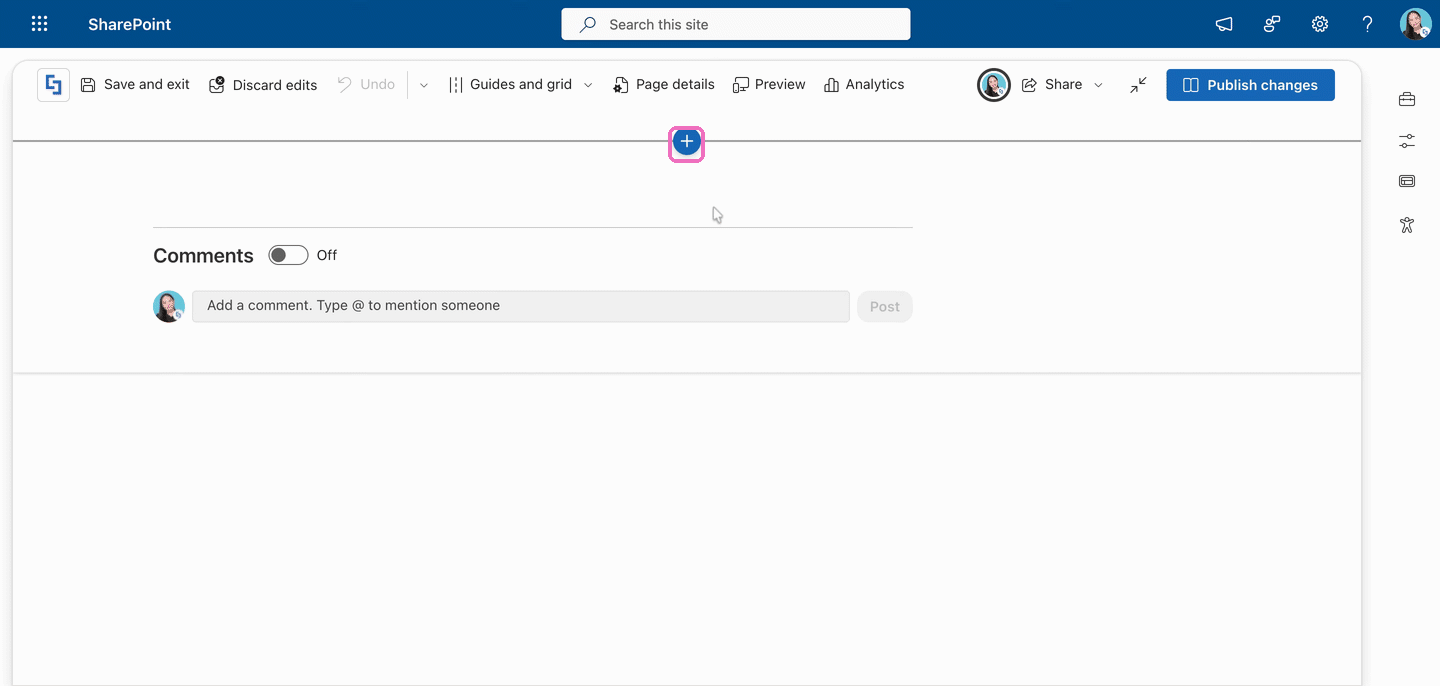
- Click the blue plus icon to add a new SharePoint section, then choose a layout, such as Full-width section.
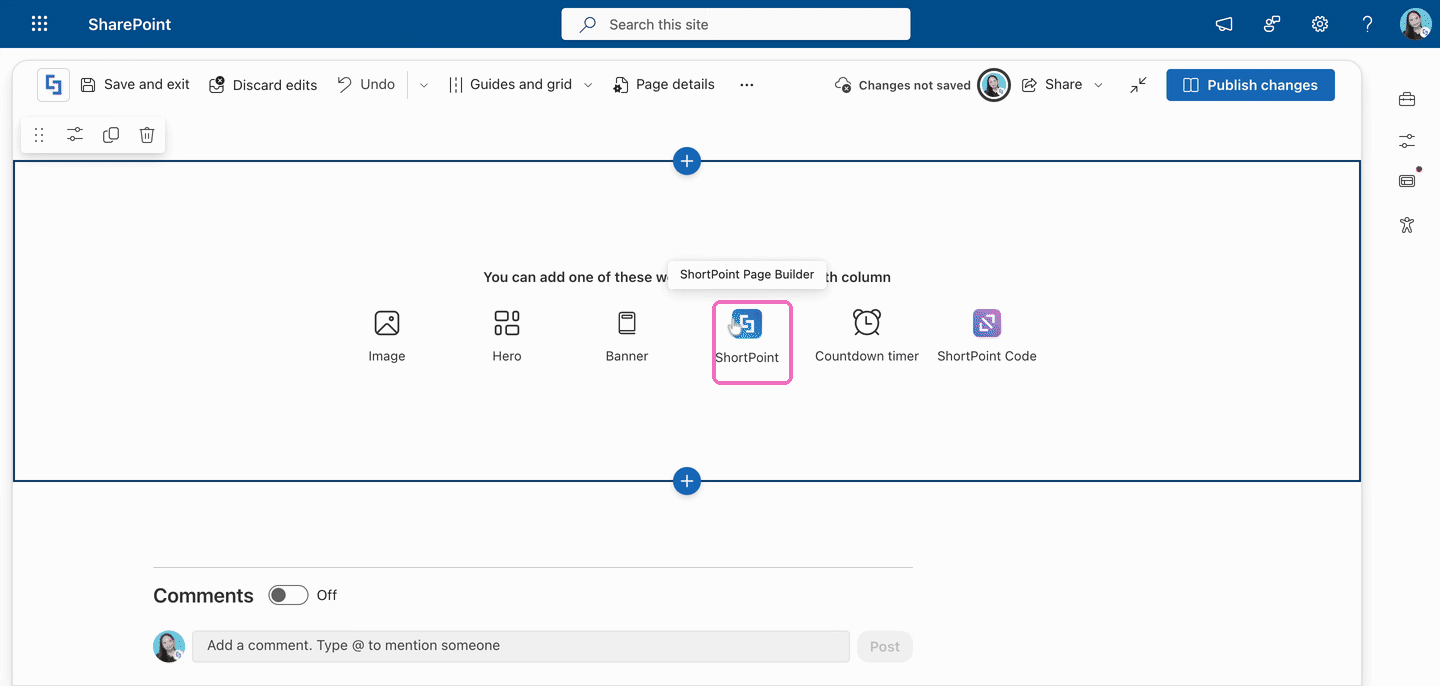
- Choose ShortPoint from the list of web parts.
TIPDoes your page already have ShortPoint content? Skip this step. Instead, click the edit web part icon on the ShortPoint web part, hover over a Section, and click the blue plus icon to add a new, empty ShortPoint Section below it. To learn more, check out Option 2 of How to Access the Templates Library.
Step 3: Open the Templates Library
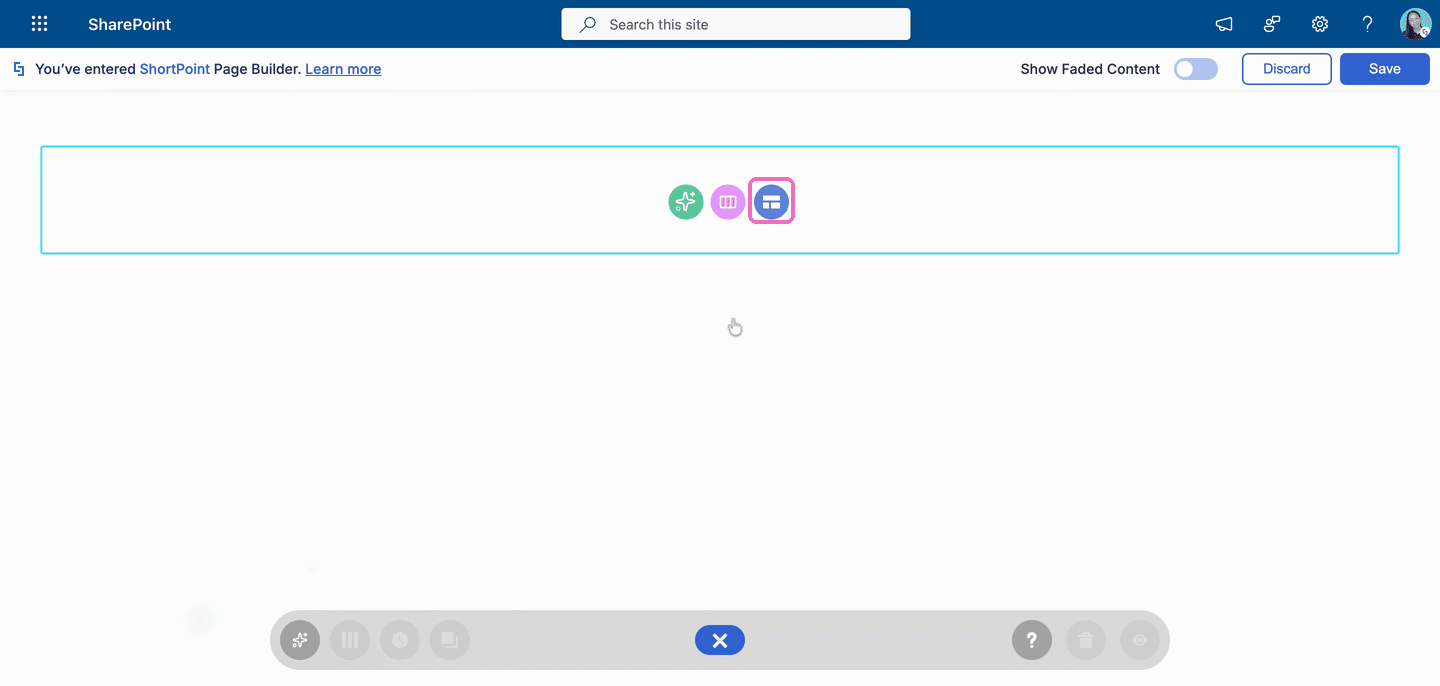
- Click the Open Templates icon.
Step 4: Add a Template
Browse the library and choose one of the three options below:
Option 1: Preview Template and Insert
- Hover over a template and click the Preview (eye) icon. A window opens showing the whole template.
- Don't like it? Click the back arrow to return to the library, then preview another template.
- When you find the one you want, click Insert Template.
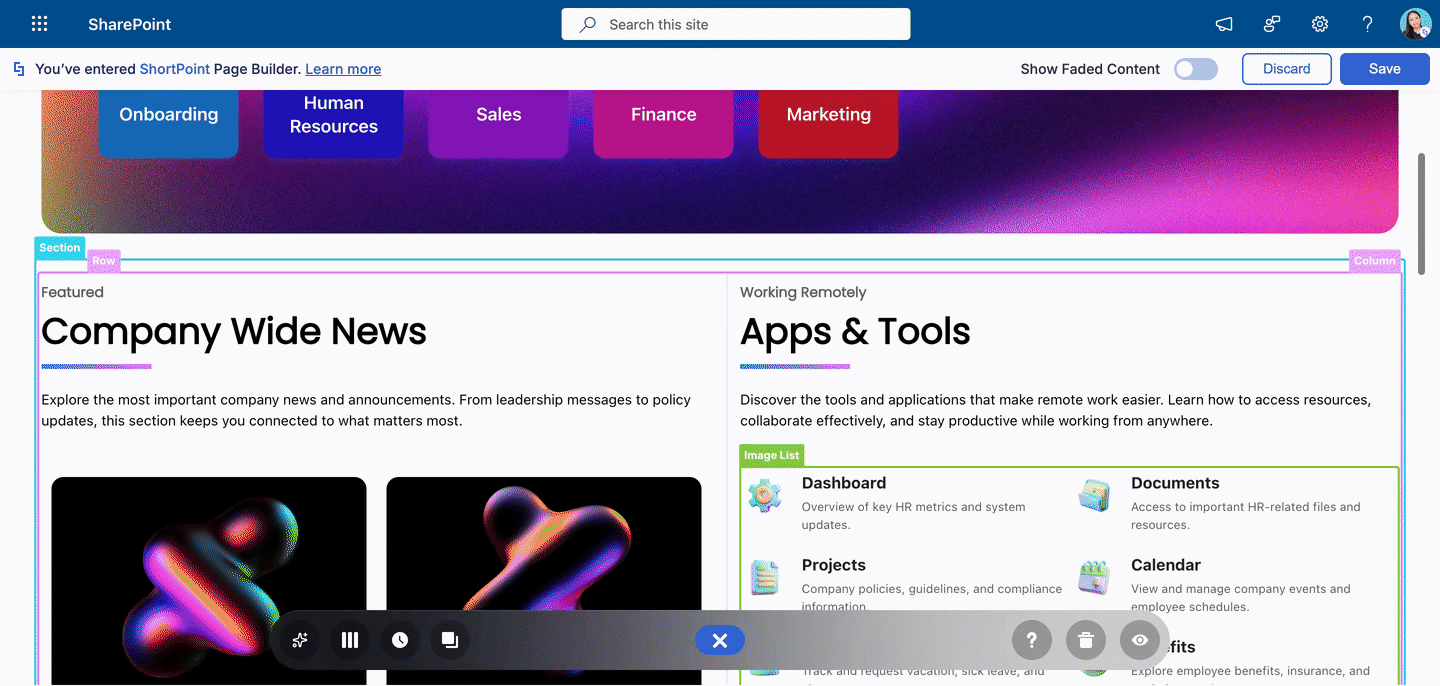
The template is added to your page. You can now edit it as you like.
Option 2: Directly Insert the Template
- Hover over the template you want and click the plus icon.
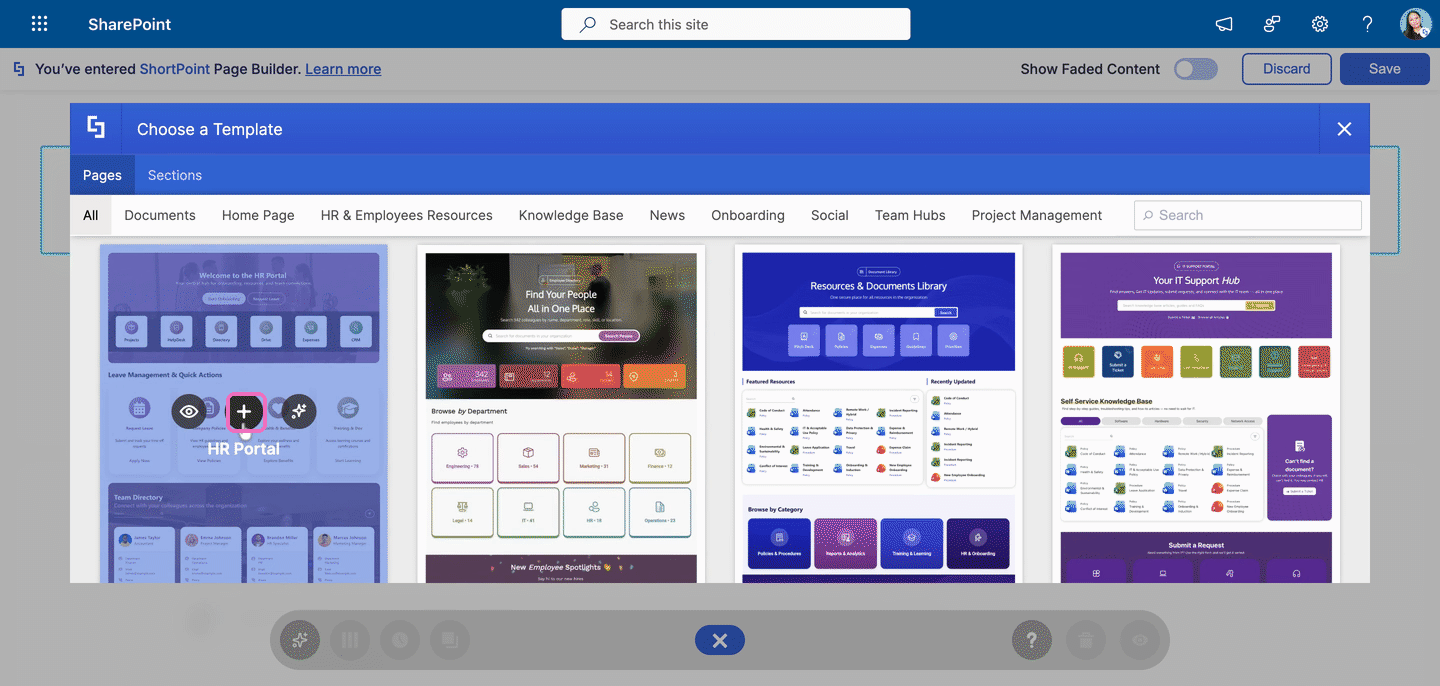
The template is added to your page right away. You can now edit it to fit the page you're building.
Option 3: Customize with AI Designer
- Hover over a template and click the AI Designer (sparkle) icon.
- The AI Designer prompt box opens with your template attached. Describe what you'd like to keep, change, or add to the template.
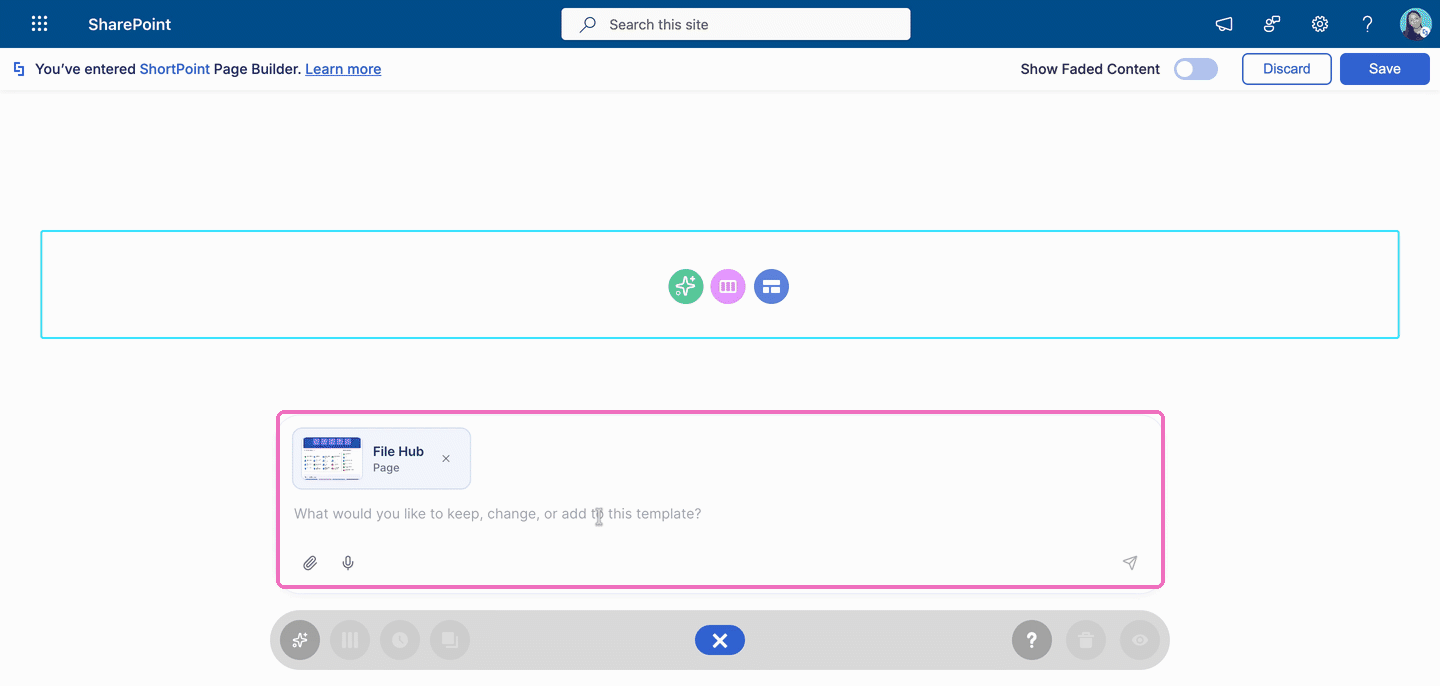
- Click the send arrow (or press Enter).
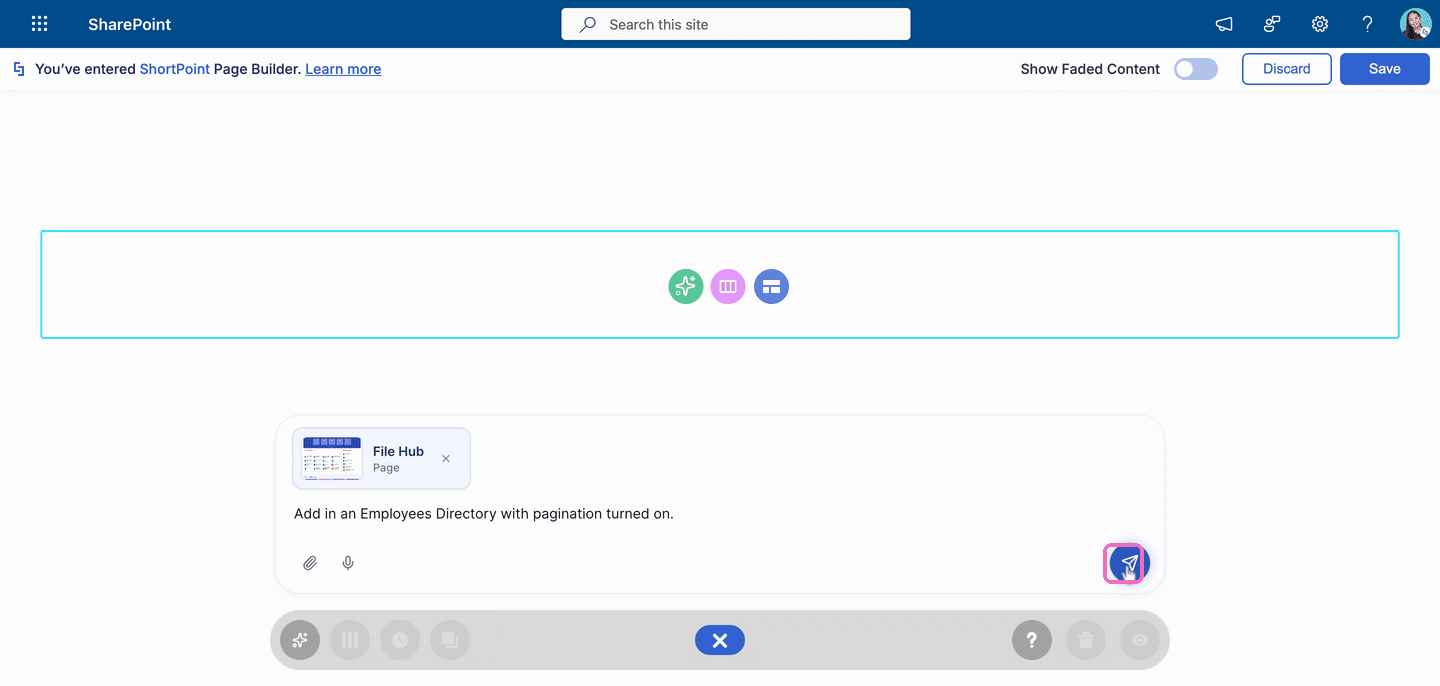
- AI Designer does the heavy lifting and applies the changes for you.
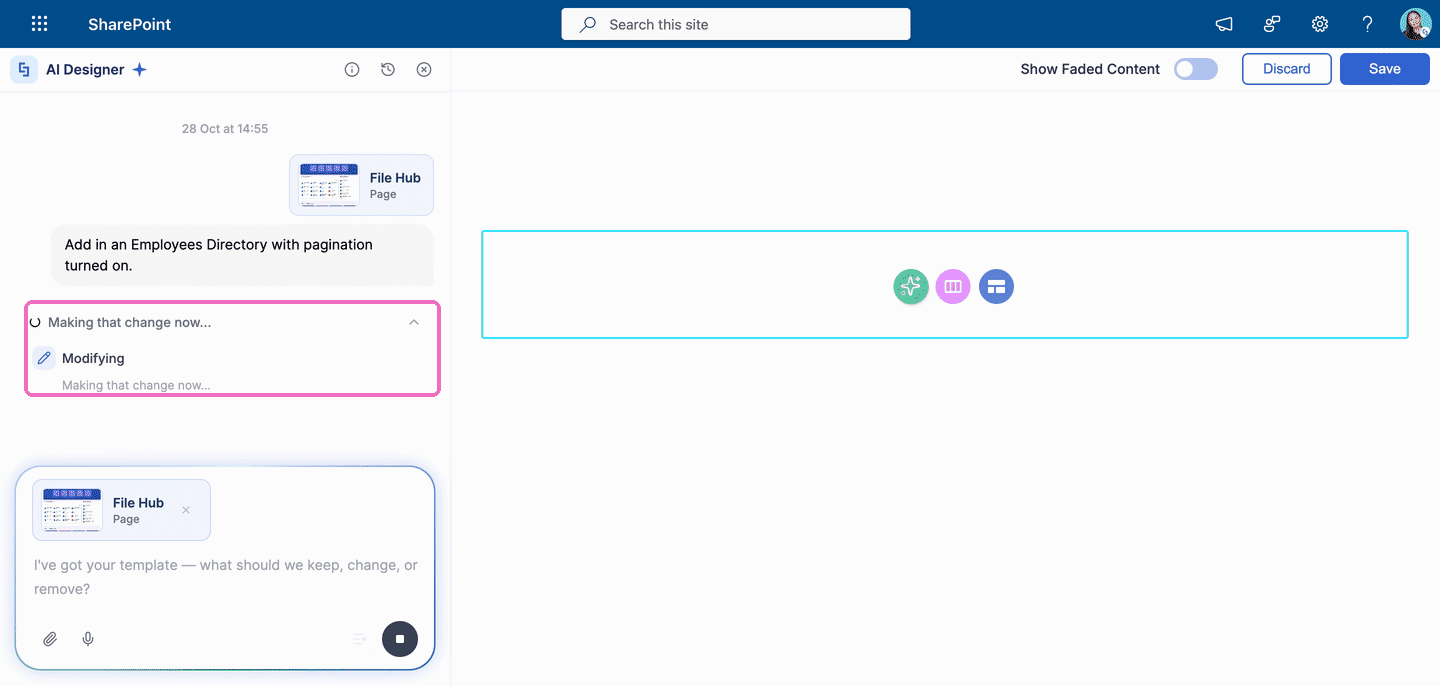
- When AI Designer is done, you can type a new prompt to make more changes. To edit the page by hand instead, click the close icon to close the AI Designer panel.
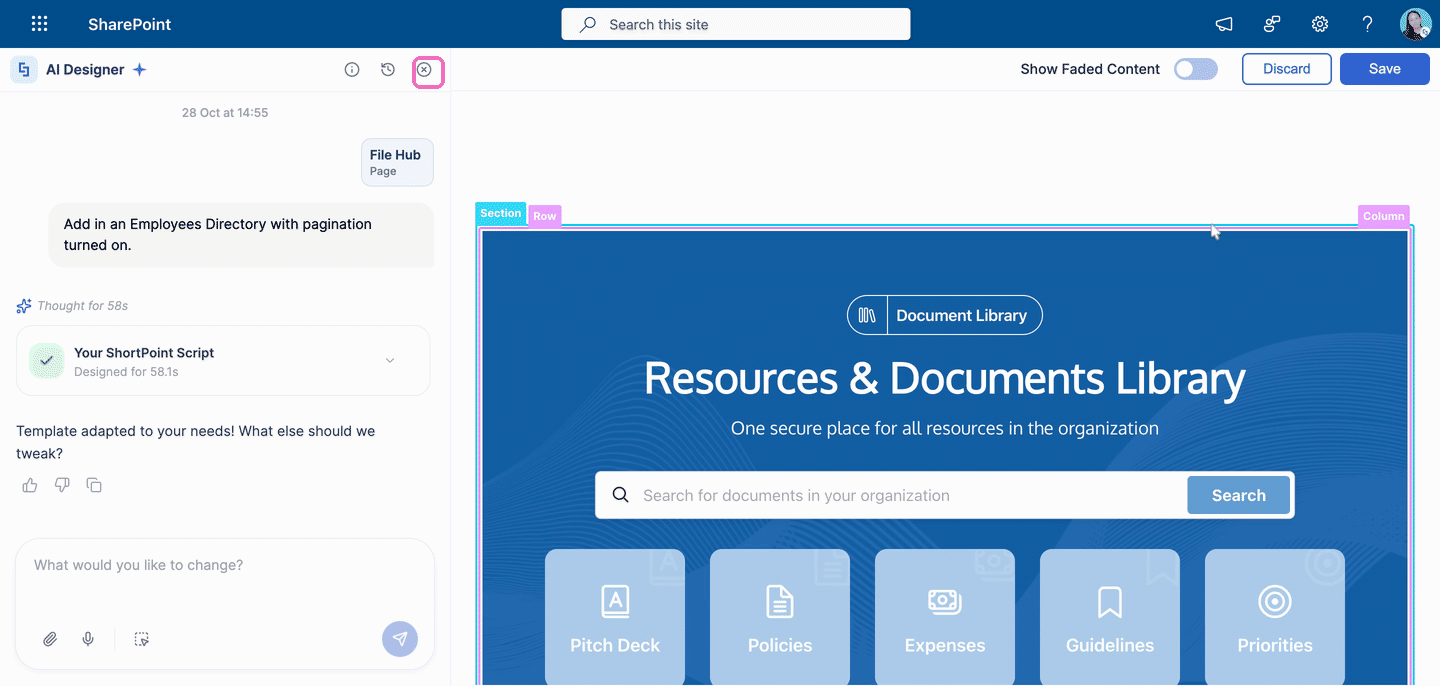
TIPWant a more detailed overview of this option? See How to Use ShortPoint AI Designer to Edit an Existing ShortPoint Template.
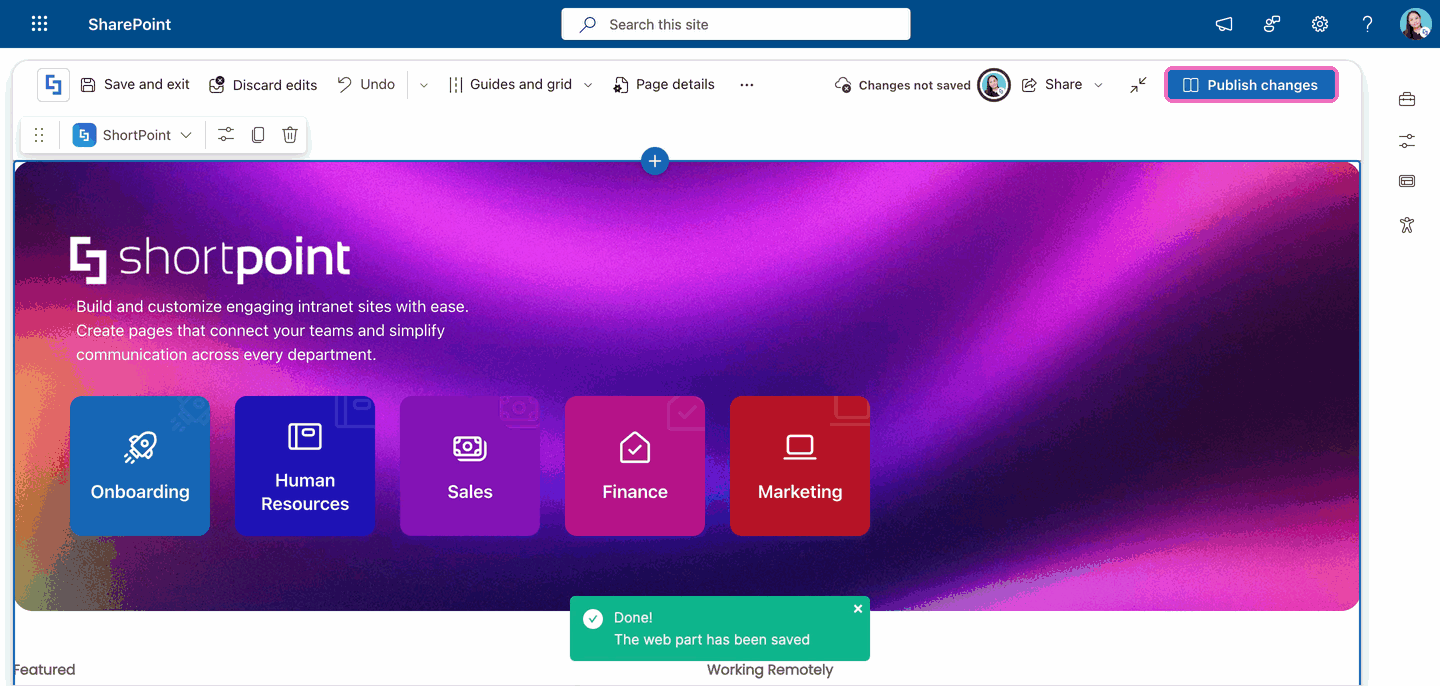
Step 5: Save and Publish
- Once you're happy with your page, click Save.
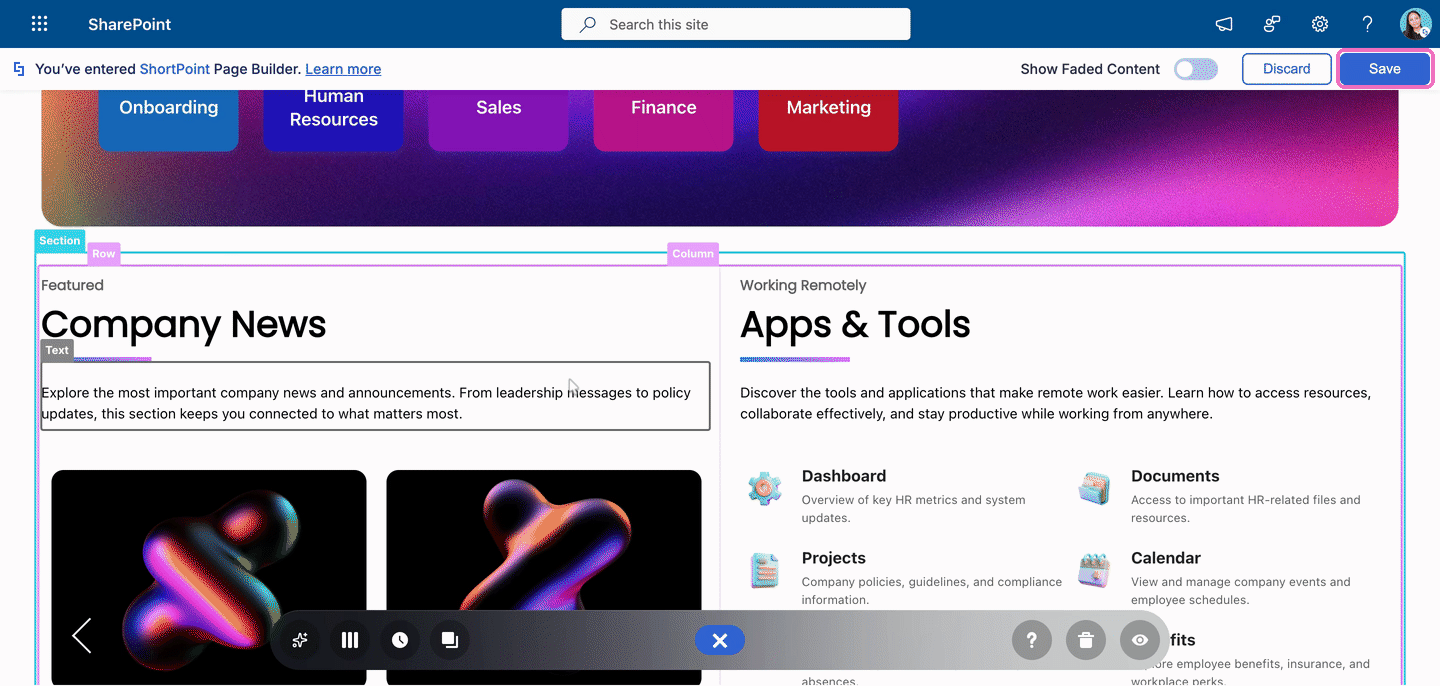
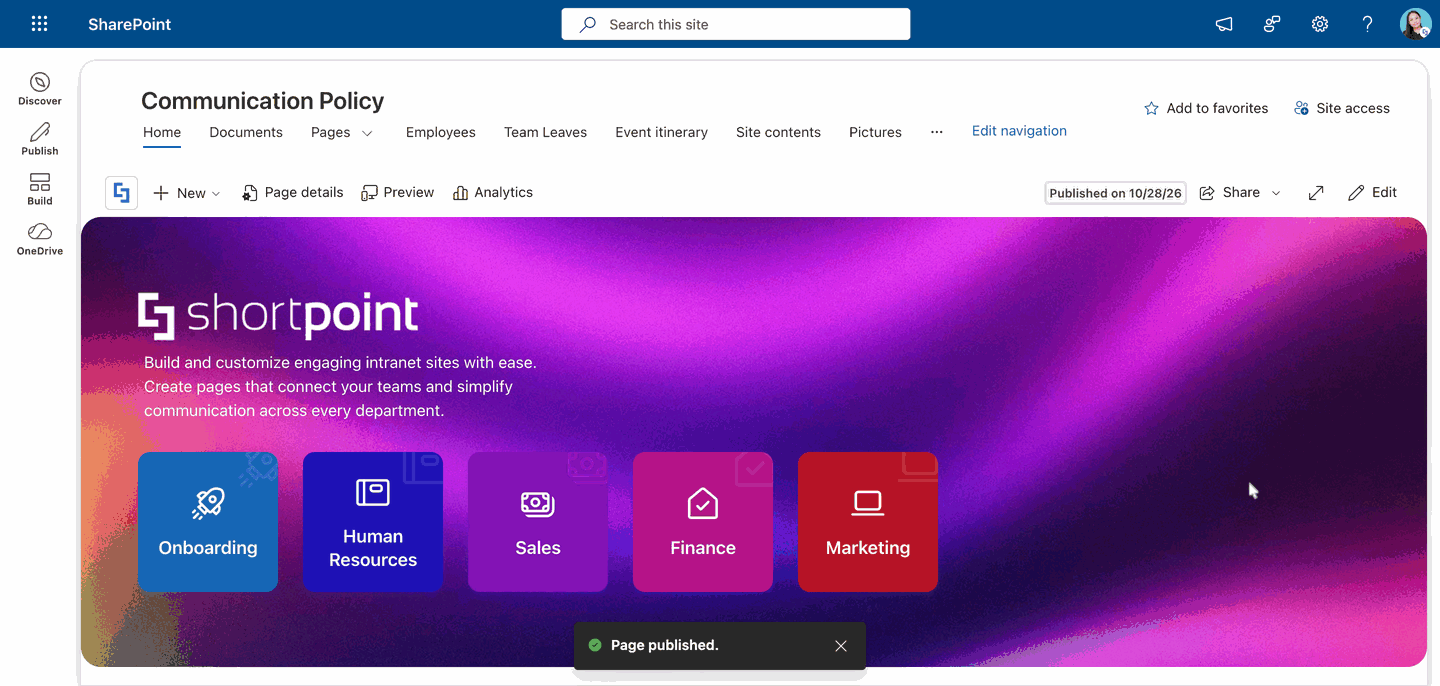
- Click Publish changes.
Congratulations! You've added a template from the Templates Library to your page.
Frequently Asked Questions
What's the difference between the three icons on a template?
All three add the template to your page. The eye icon lets you preview the full template first, the plus icon adds it right away, and the sparkle icon opens AI Designer so you can change the template before it's added.
Can I switch to AI Designer from the preview window?
Yes. The preview window has an AI Designer button next to Insert Template. Click it to customize the template you're previewing.
Why don't I see the Open Templates icon?
The icon only appears inside an empty ShortPoint Section. If your page already has content, add a new ShortPoint Section first, then open the Templates Library from it.
Why don't I see the AI Designer icon?
AI Designer must be enabled in the ShortPoint Admin page, and you need a Pro or Enterprise Designer license. If you still don't see it, ask your ShortPoint administrator to check your license and settings.
Does using AI Designer use AI credits?
Yes. Each AI Designer request uses AI credits. For more information, check out What is AI Credits. On the other hand, other options like Previewing or directly inserting a template don't use AI.
Can I add more than one template to the same page?
Yes. Add a new, empty ShortPoint Section for each template, then open the Templates Library from each one.
I inserted the wrong template. How do I undo it?
If you don't have existing content on your page, click the trash icon in the Toolbar to remove your unsaved changes. If you have existing content, you can use the clock icon to undo your changes.
Do I need to publish after adding a template?
Yes. Click Save in Page Builder, then Publish changes in SharePoint, so your viewers can see the updated page.
Related articles