Try ShortPoint now
TL;DR: You can make a ShortPoint page template fill the whole width of the screen in two ways. If you haven’t added the template yet, add a full-width section to your SharePoint page, put the ShortPoint web part in it, and insert your template. If the template is already on your page, open each ShortPoint Section’s settings and turn on Force full screen width.
Want your ShortPoint page template to stretch from one edge of the screen to the other? By default, SharePoint keeps page content inside a fixed-width area, which leaves empty space on the left and right of wide screens. This article shows you two ways to make a full-width page template: using a full-width SharePoint section, or turning on the Force full screen width option in ShortPoint.
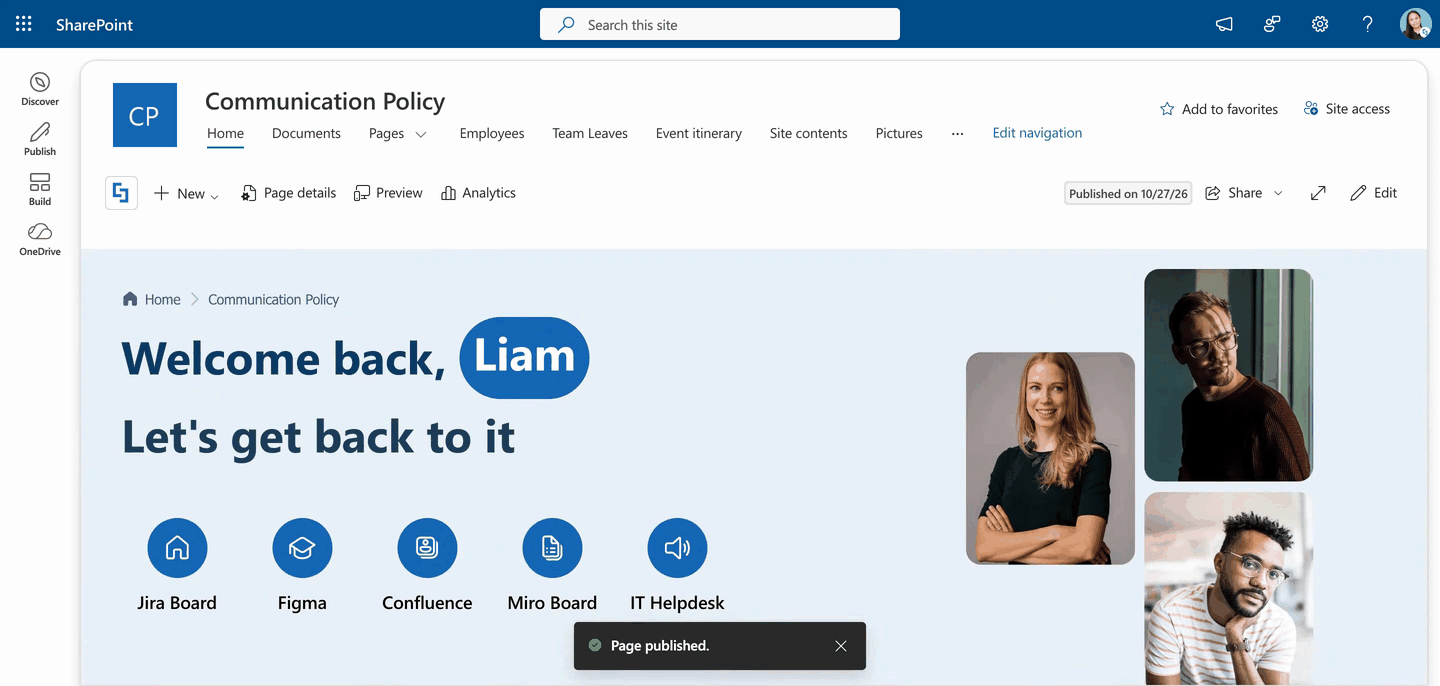
TABLE OF CONTENTS
- Prerequisites
- Two Ways to Make a Full-Width Page Template
- Interactive Tutorial
- Step-by-step Tutorial
- Frequently Asked Questions
Prerequisites
- You have ShortPoint SPFx installed on your SharePoint environment.
- You are a ShortPoint Designer with an active license.
- You have permission to edit the SharePoint page.
Two Ways to Make a Full-Width Page Template
There are two ways to make your page template full width. Both give you the same result: a page that fills the whole screen. The best one for you depends on whether you've already added a page template to your SharePoint page.
Option 1: Using Full-Width SharePoint Sections
Recommended if you haven't added a page template from the Templates Library yet.
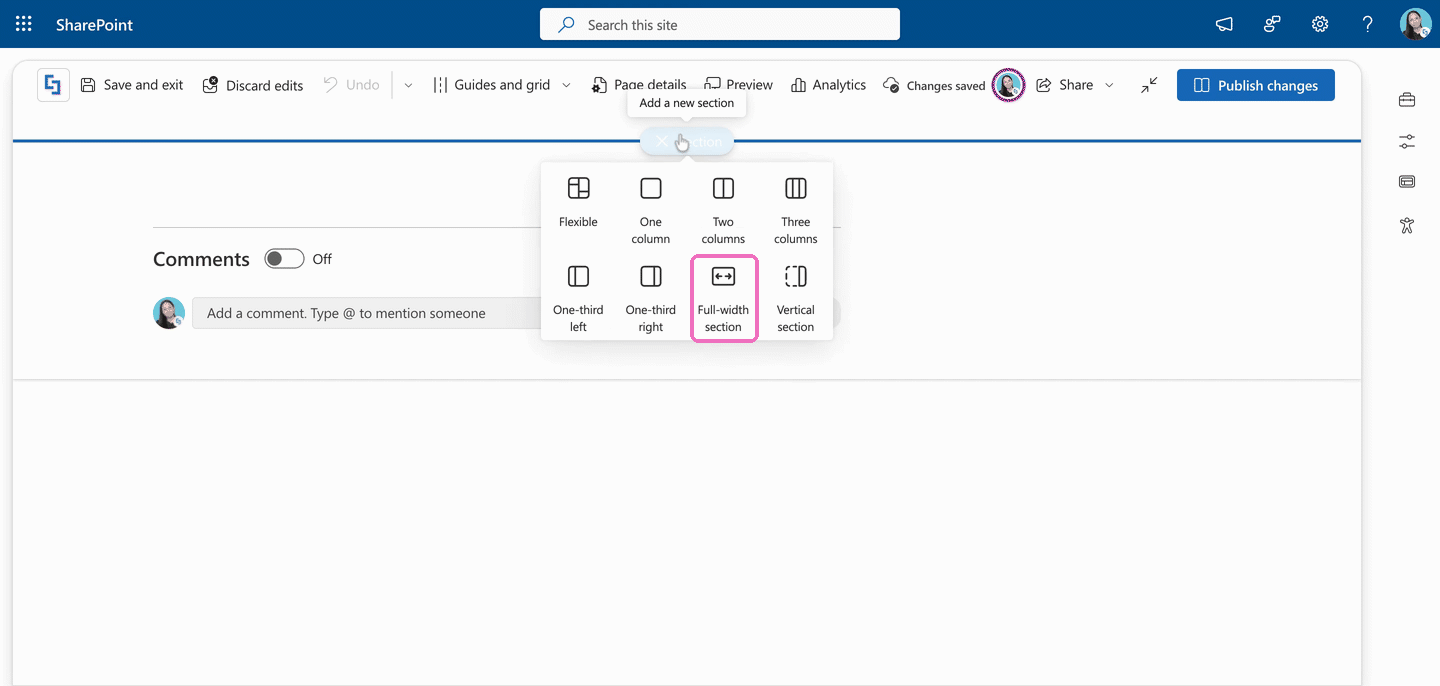
SharePoint pages are built from sections. Most section layouts (one column, two columns, and so on) keep your content inside a fixed-width area in the middle of the page. A Full-width section is different: it stretches across the whole width of the page.
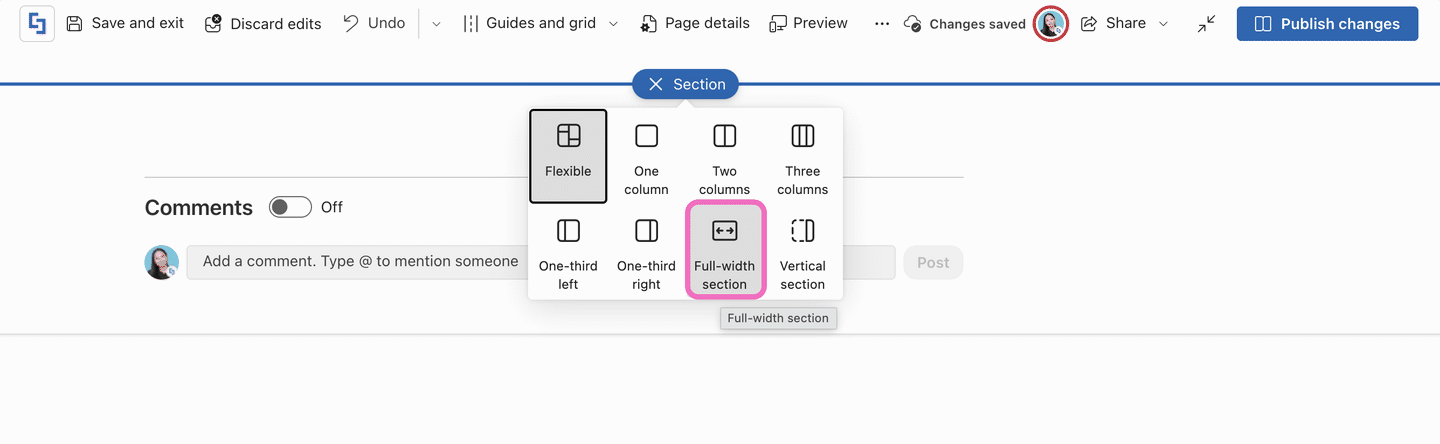
With this option, you add a full-width section first, put the ShortPoint web part inside it, and then insert your page template. Because the web part already sits in a full-width section, everything you add to it fills the screen automatically. You don't have to change any ShortPoint settings.
Why choose this option:
- It's set once. Every section of the page template you add is full width right away.
- It's great for new pages. You build the page the right way from the start.
If your page template is already in a regular section, you'd need to add it again in a full-width section. In that case, Option 2 is quicker.
Option 2: Using the Force Full Screen Width Option
Recommended if you've already added a page template to your SharePoint page.
Every ShortPoint Section has a Force full screen width setting under Design > Size. When you turn it on, that Section stretches to fill the whole screen, even if the ShortPoint web part sits in a regular SharePoint section.
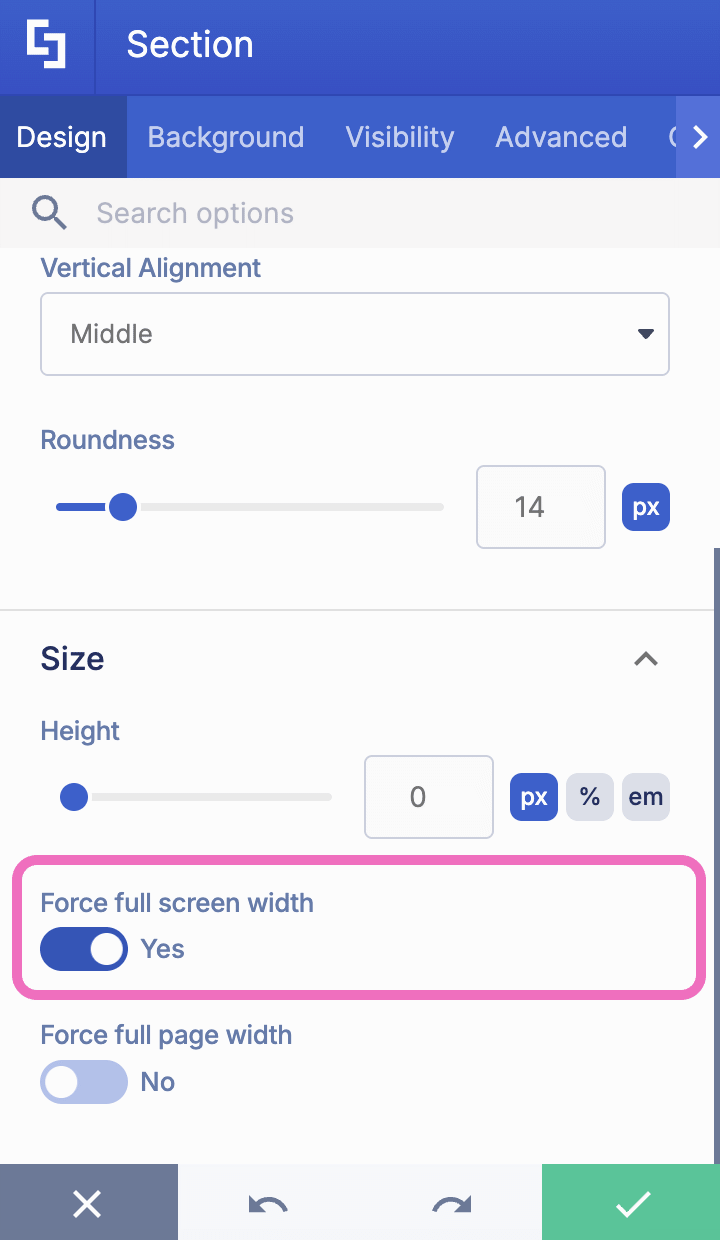
With this option, you keep your page exactly where it is and switch the setting on for each Section of your page template.
Why choose this option:
- There's no need to rebuild your page. It works on page templates you've already added and customized.
- You're in control. You can make some Sections full width and keep others at the normal width.
NOTEThe setting applies to one Section at a time. To make the whole page full width, turn it on for every Section in your page template. If you add new Sections later, remember to turn the setting on for them too.
Interactive Tutorial
Click Get Started to try it yourself:
Step-by-step Tutorial
Option 1: Using Full-Width SharePoint Sections
NOTEThe steps here are only applicable for ShortPoint Communication Sites. If you're using a Team Site, go to How to Use the SharePoint Drag and Drop Feature to Create a Full-width ShortPoint Section.
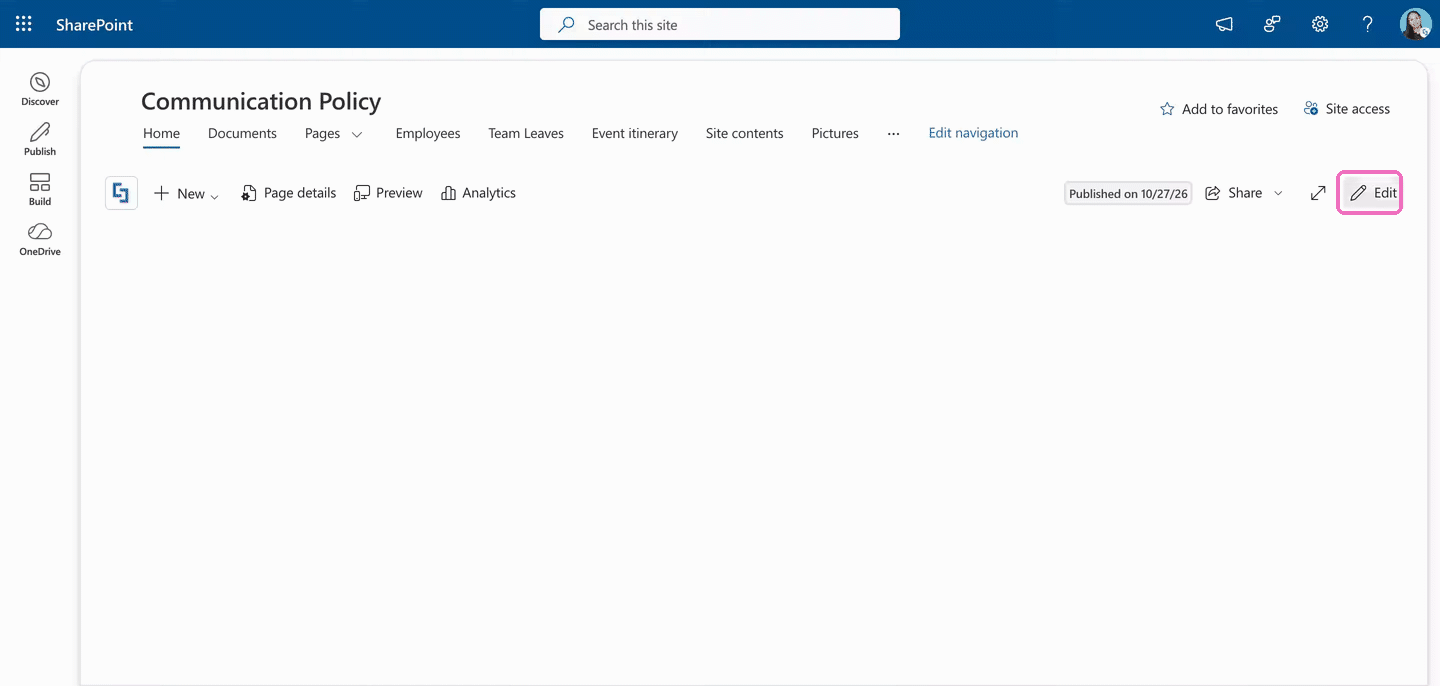
Step 1: Edit Your SharePoint Page
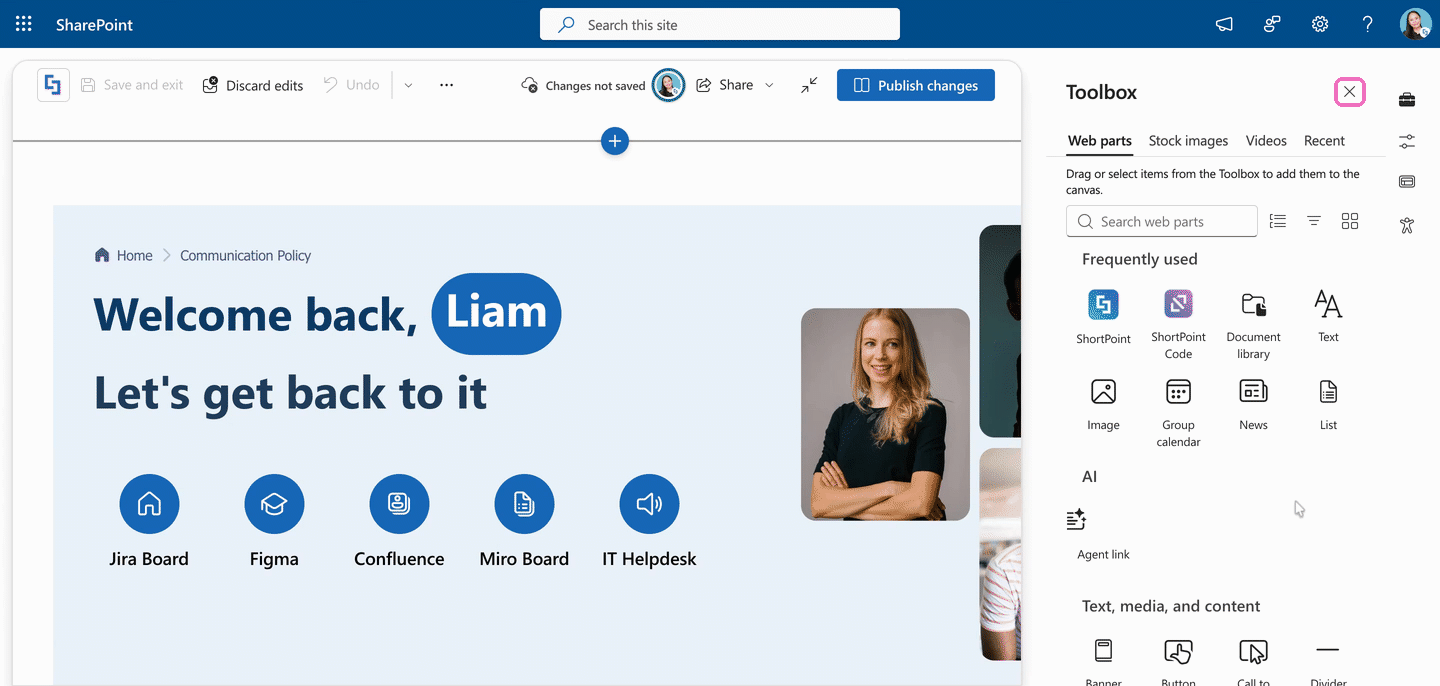
- Go to the SharePoint page you want to use and click Edit.
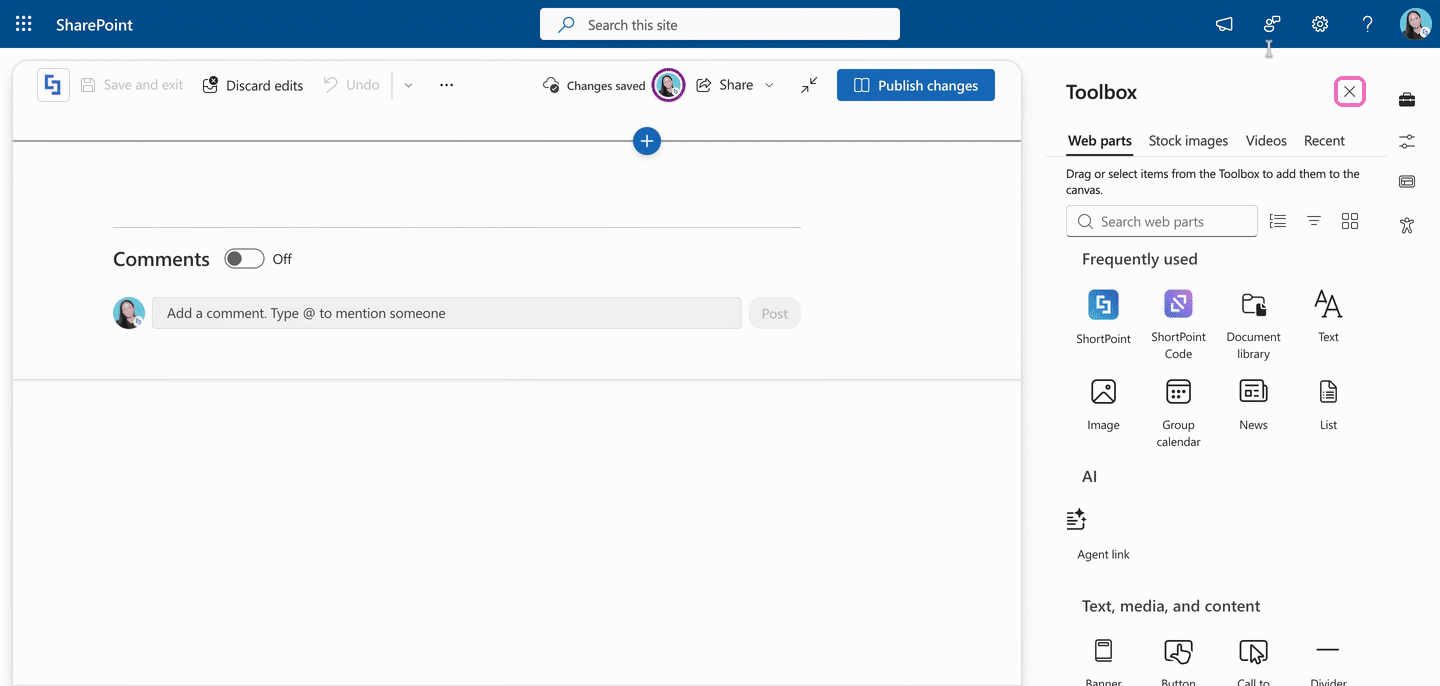
- Close the Toolbox so you have more room to work.
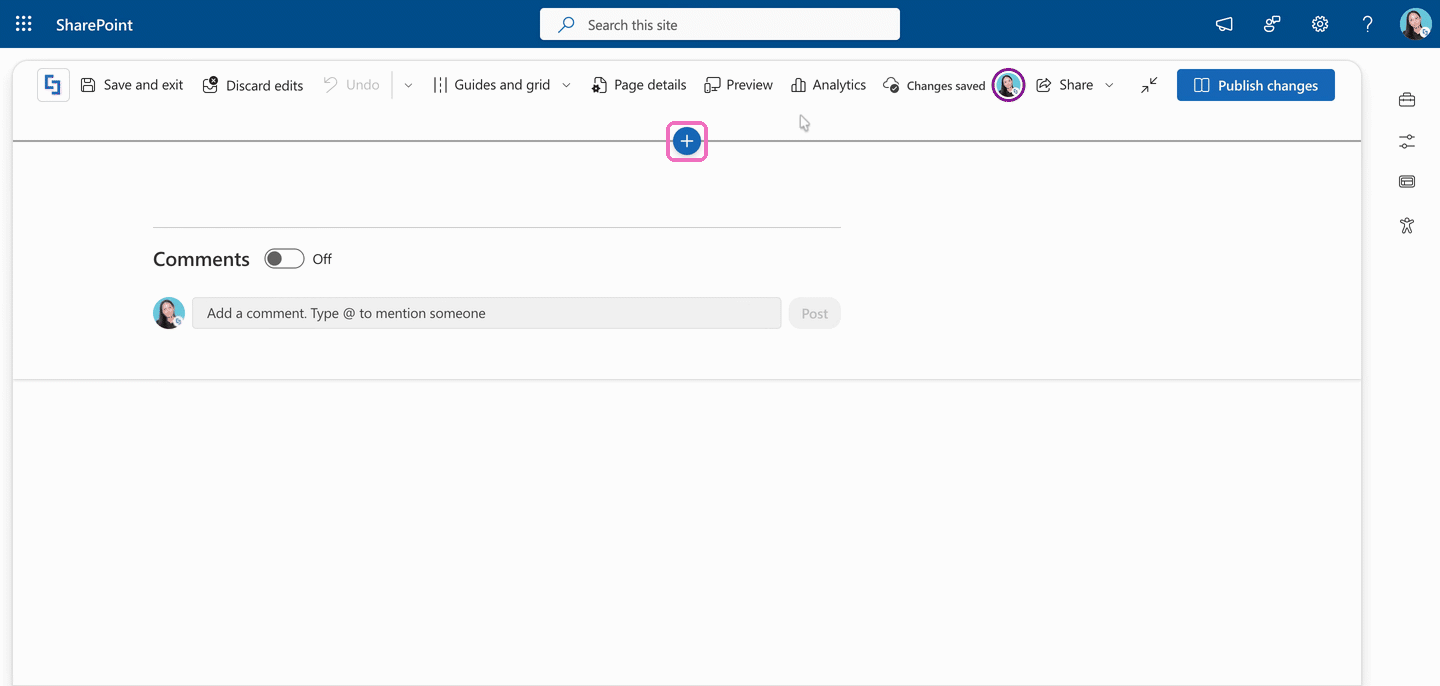
Step 2: Add a Full-Width Section
- Click the blue plus icon to add a new section.
- Select Full-width section.
Step 3: Add the ShortPoint Web Part
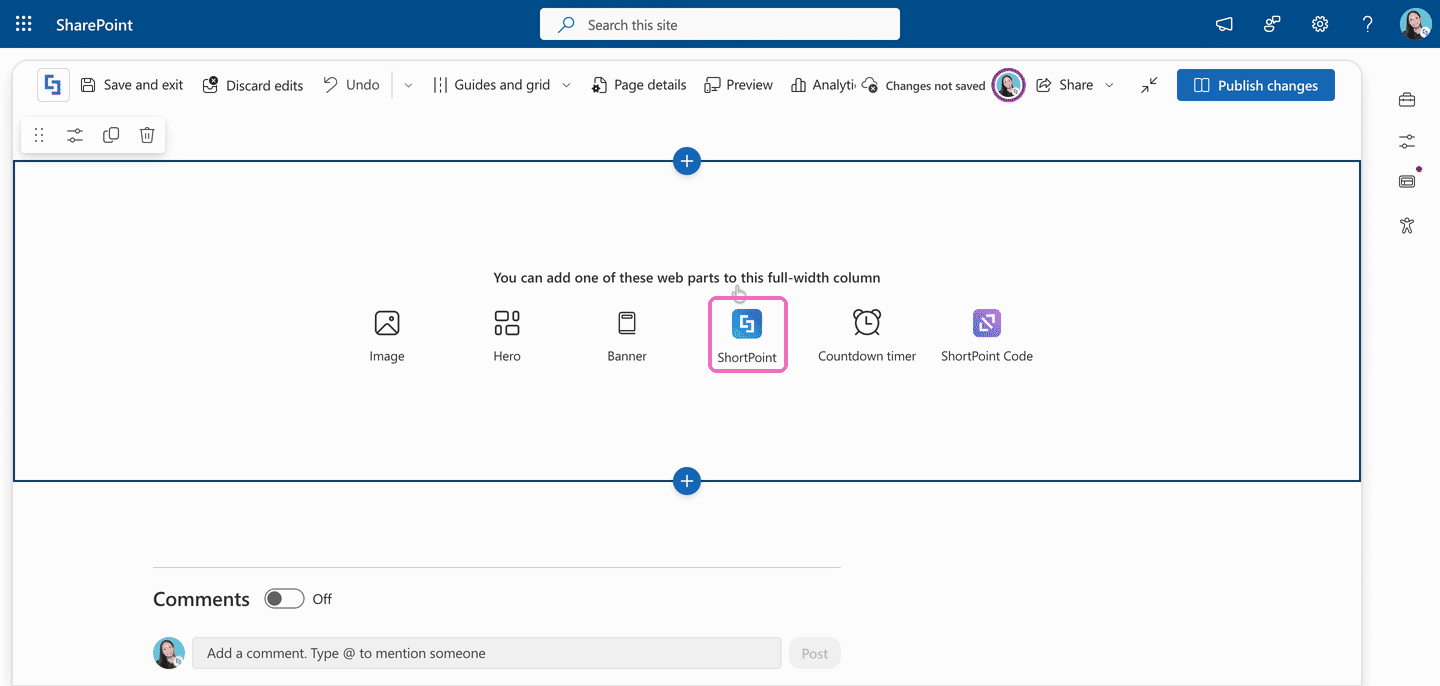
- You'll see the list of web parts you can add to a full-width section. Select ShortPoint.
Step 4: Insert a Page Template
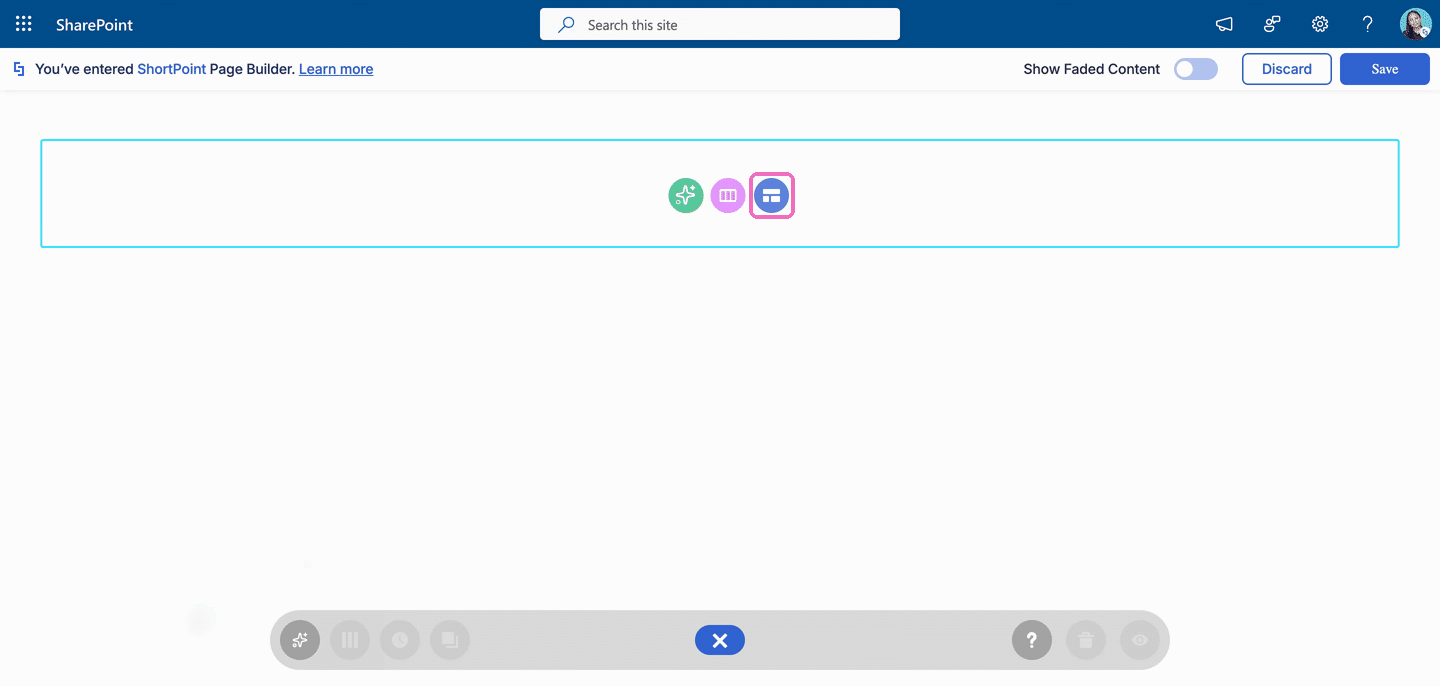
- Open the Templates Library by clicking the blue icon.
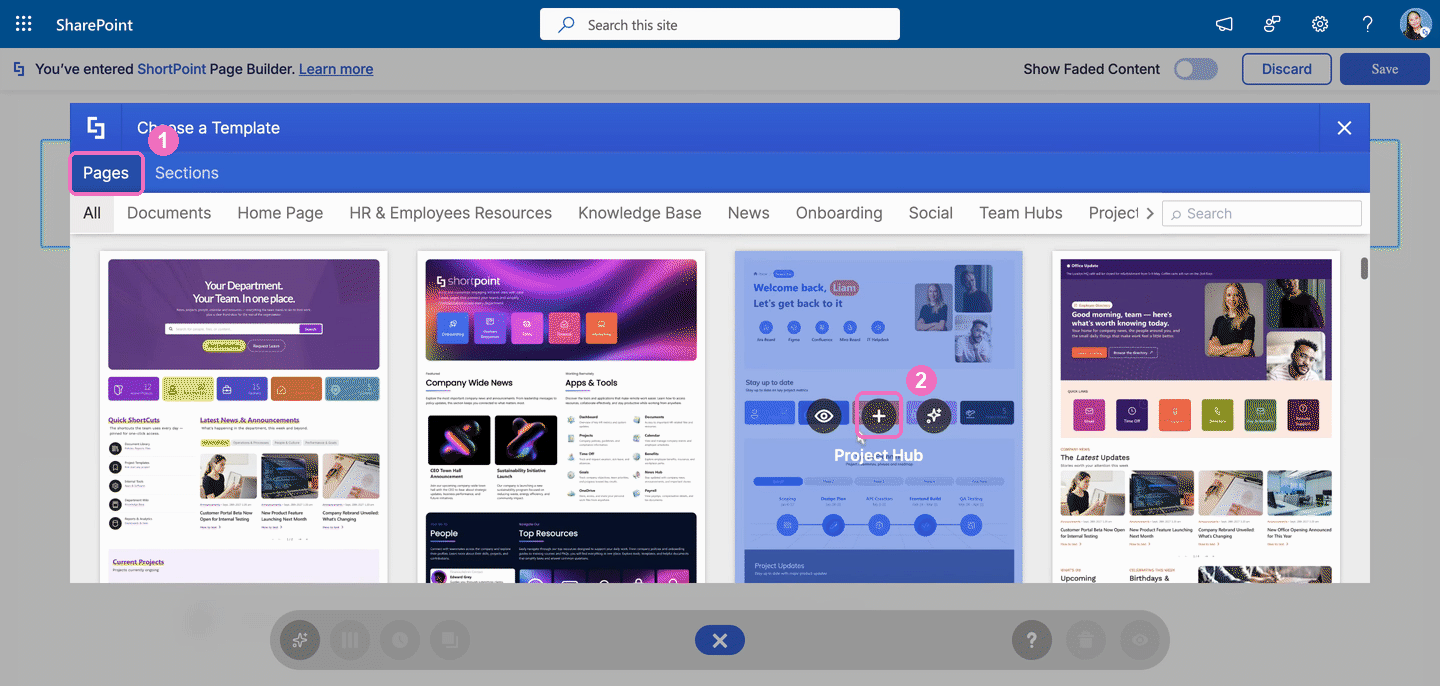
- Go to the Pages tab (1). Browse through the library, hover over the page template you want to use, and click the plus icon (2).
Step 5: Customize, Save, and Publish
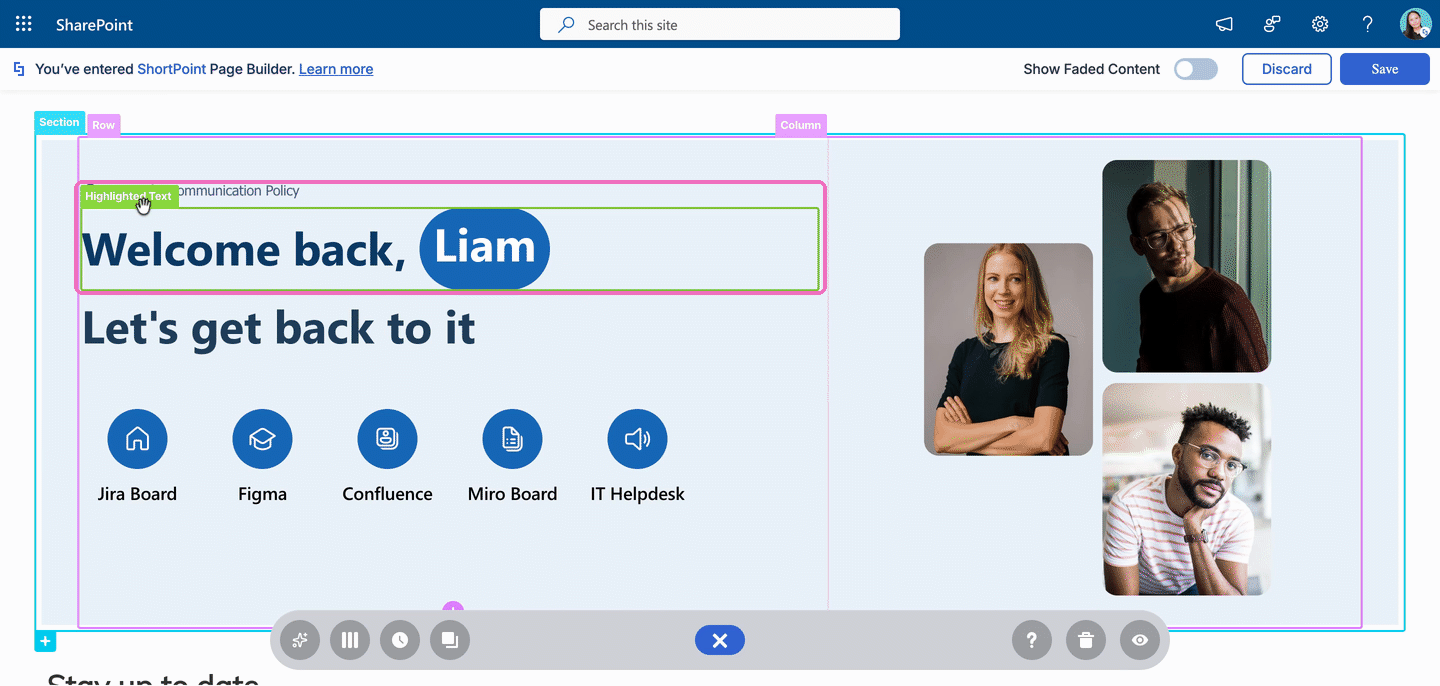
- Customize the page template as you like. For example, click a text element to change its content.
- Once done, click Save to save your changes.
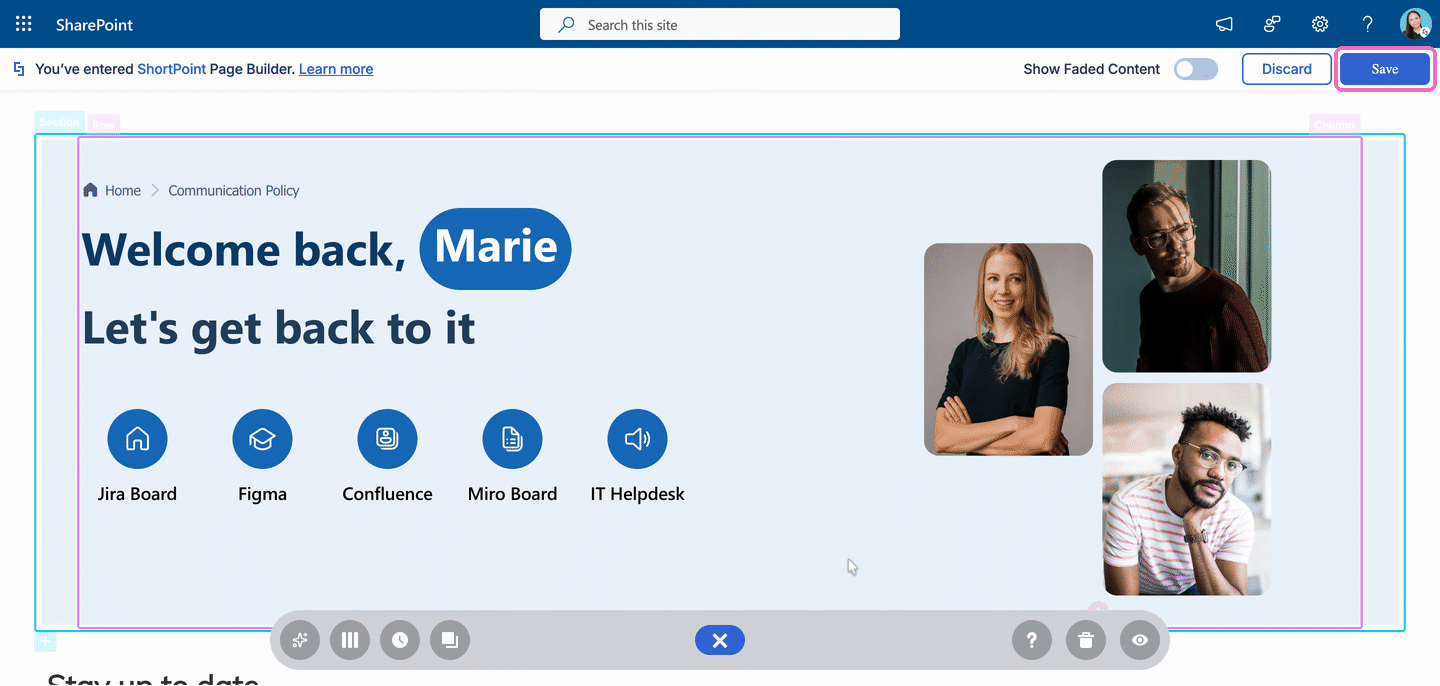
- Click Publish changes to publish your page.
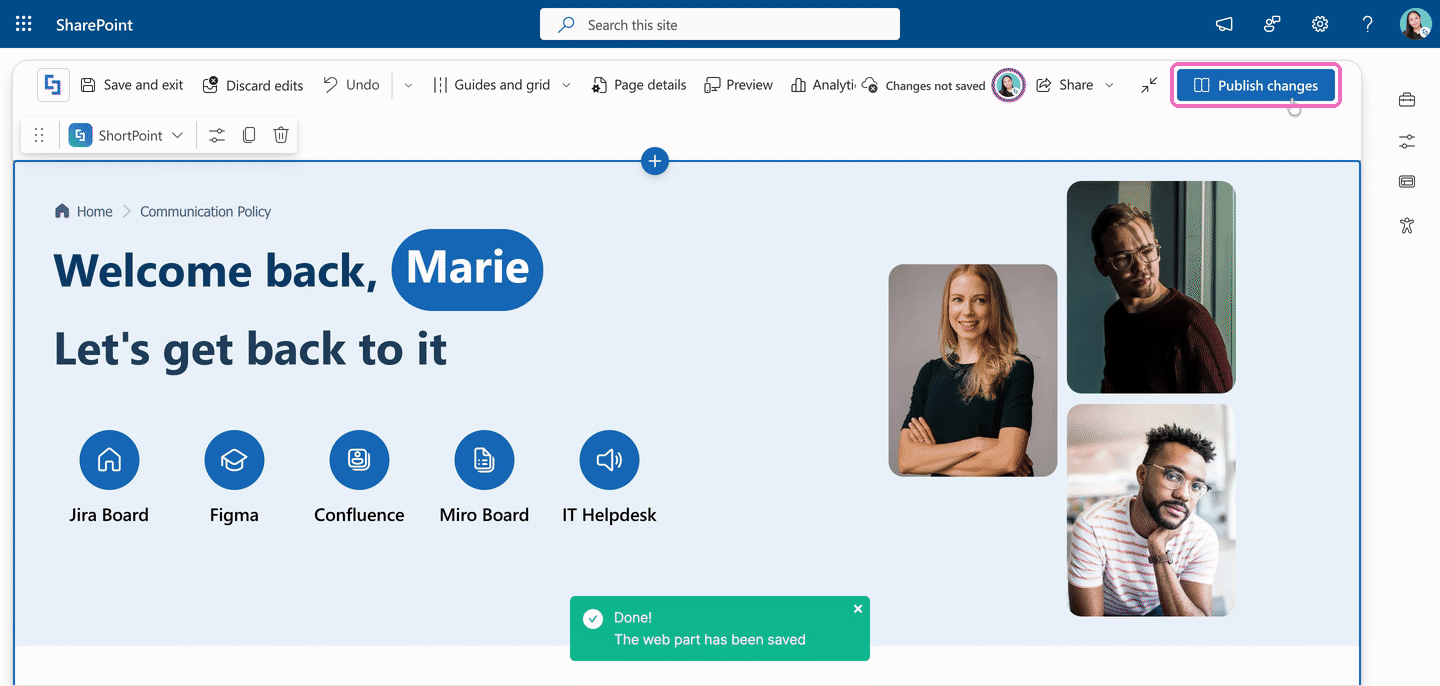
Amazing! You now have a full-width page.
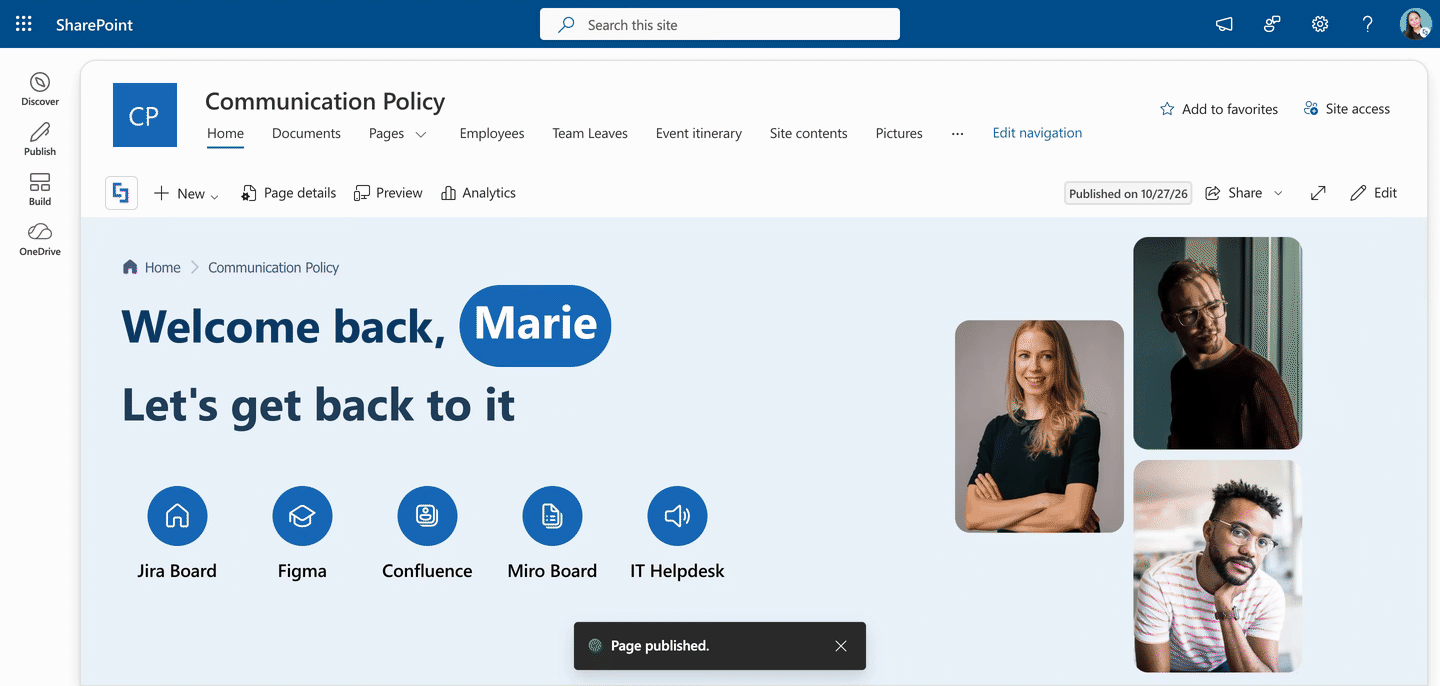
Option 2: Using the Force Full Screen Width Option
Step 1: Open the ShortPoint Page Builder
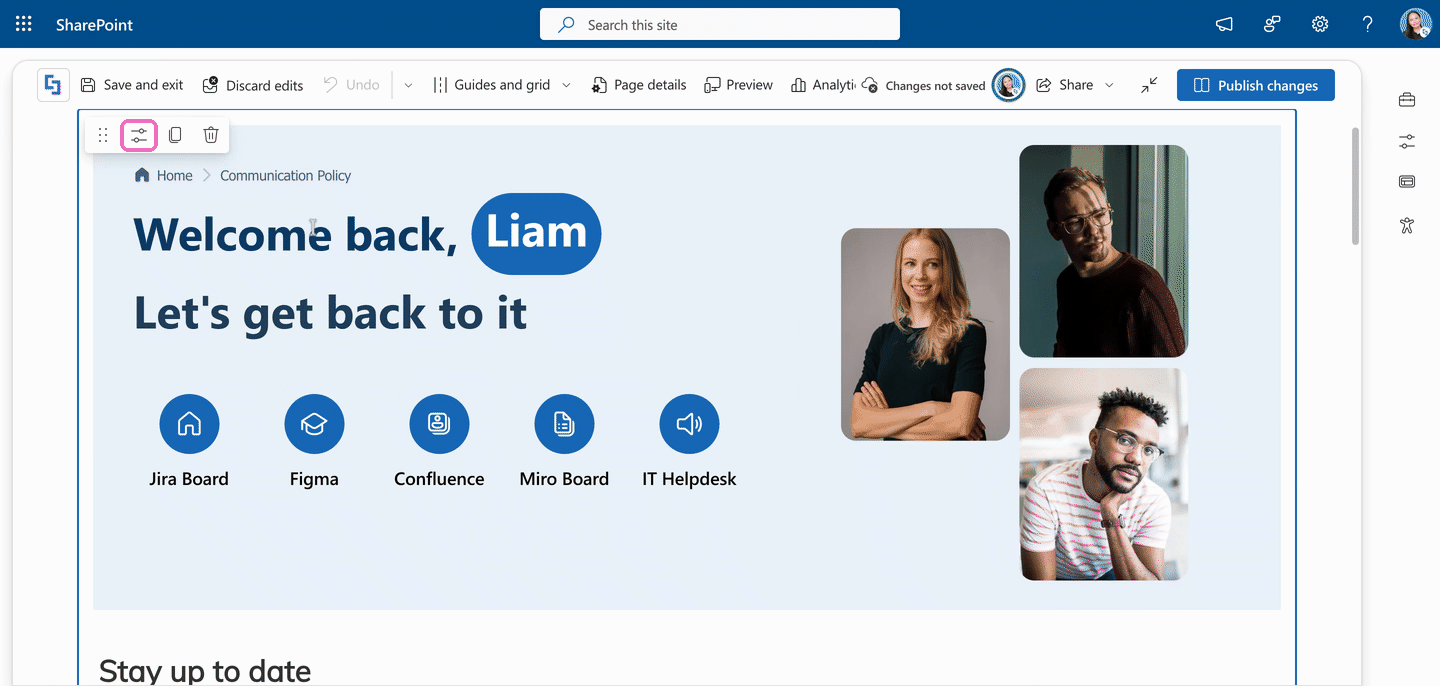
- Go to the SharePoint page with your page template and click Edit.
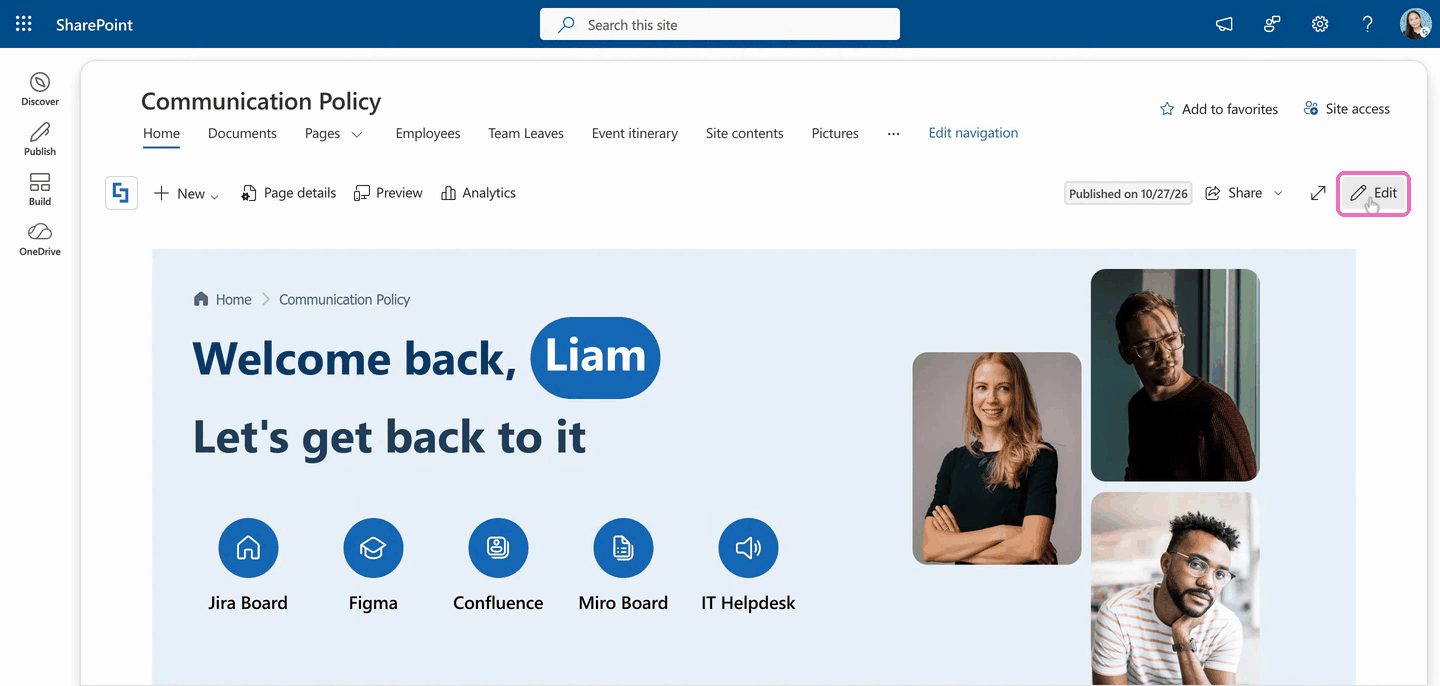
- Close the Toolbox.
- Click the Edit web part icon on the ShortPoint web part.
Step 2: Open the Section Settings
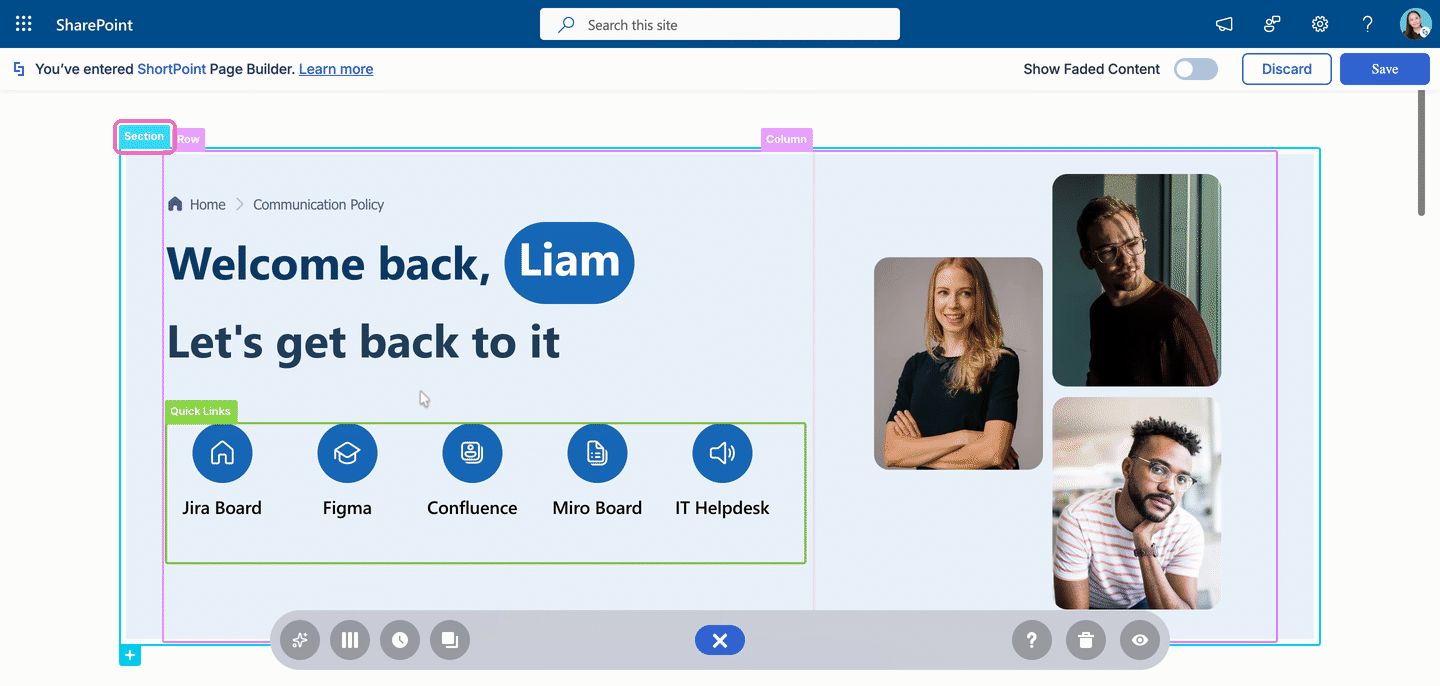
To create a full-width page, you must turn on the Force full screen width option for every Section.
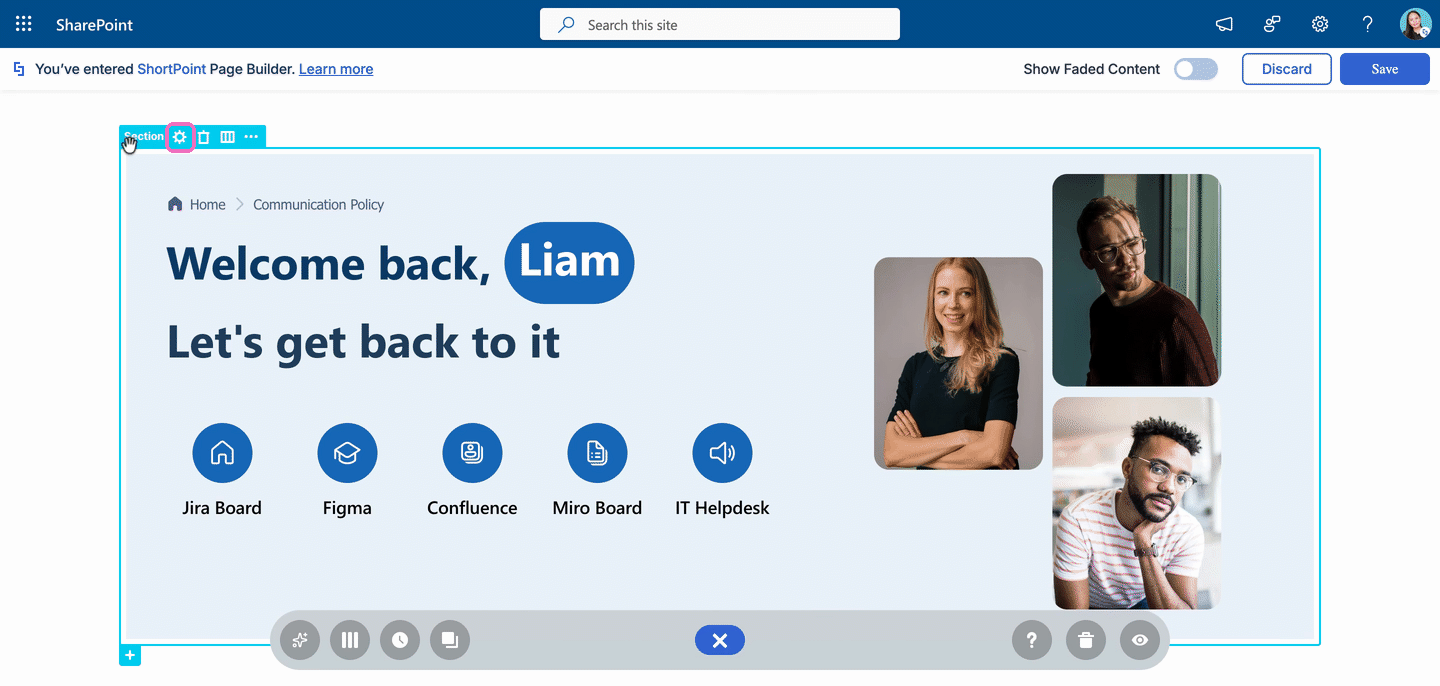
- Click the Section tag of the first Section.
- Select the cogwheel icon.
Step 3: Turn On Force Full Screen Width
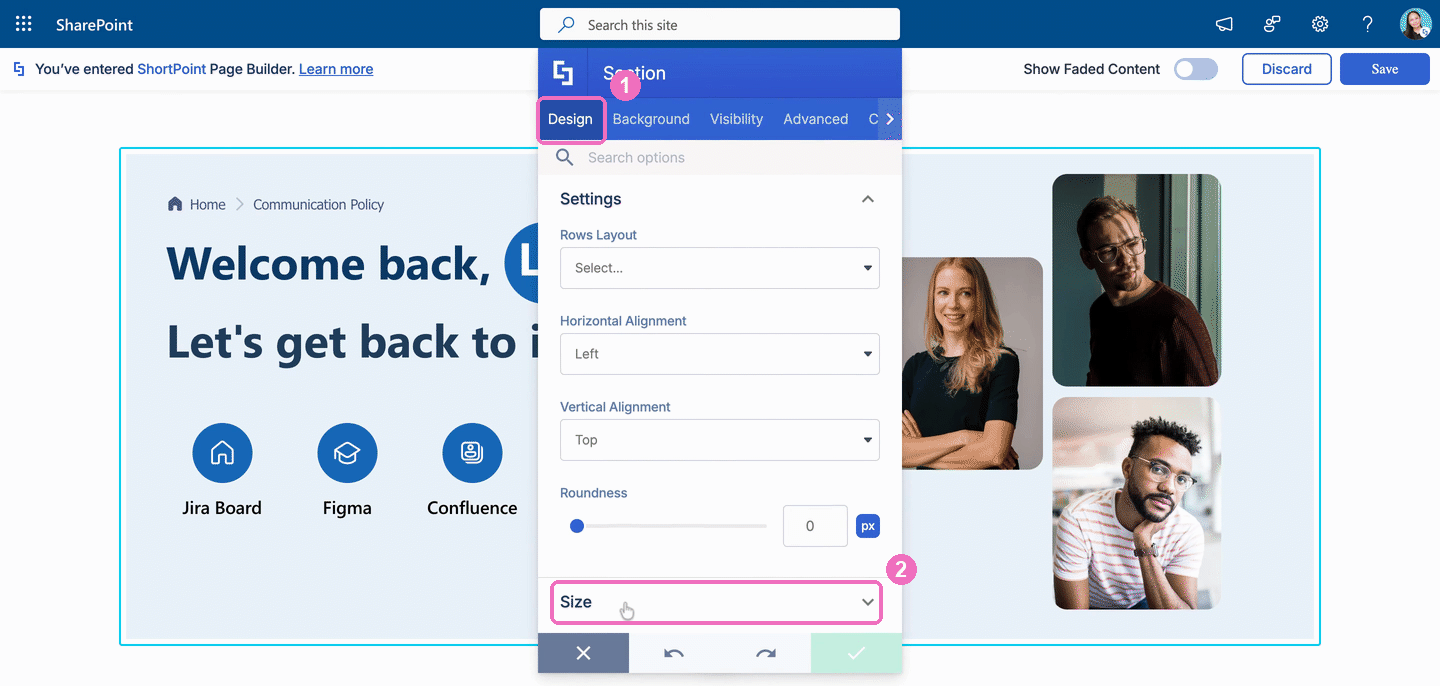
- Go to the Design tab (1) and expand the Size option (2).
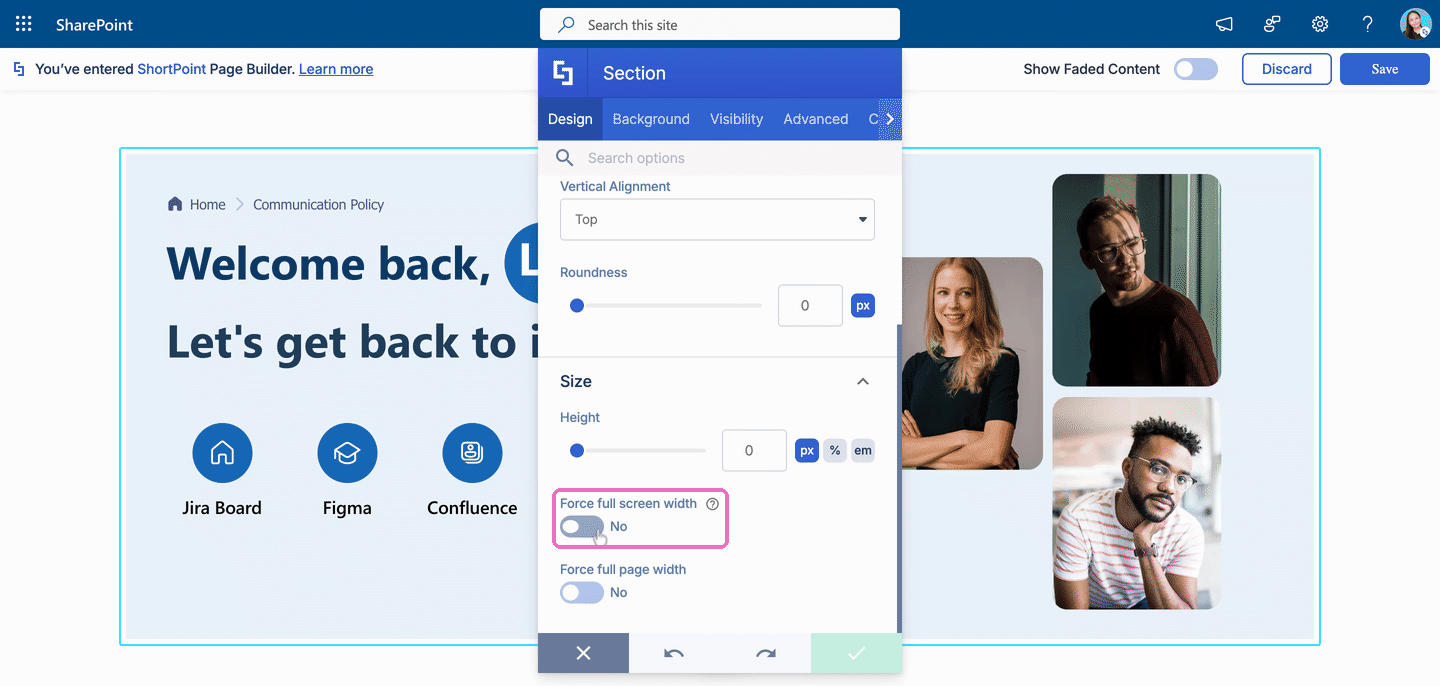
- Toggle on Force full screen width.
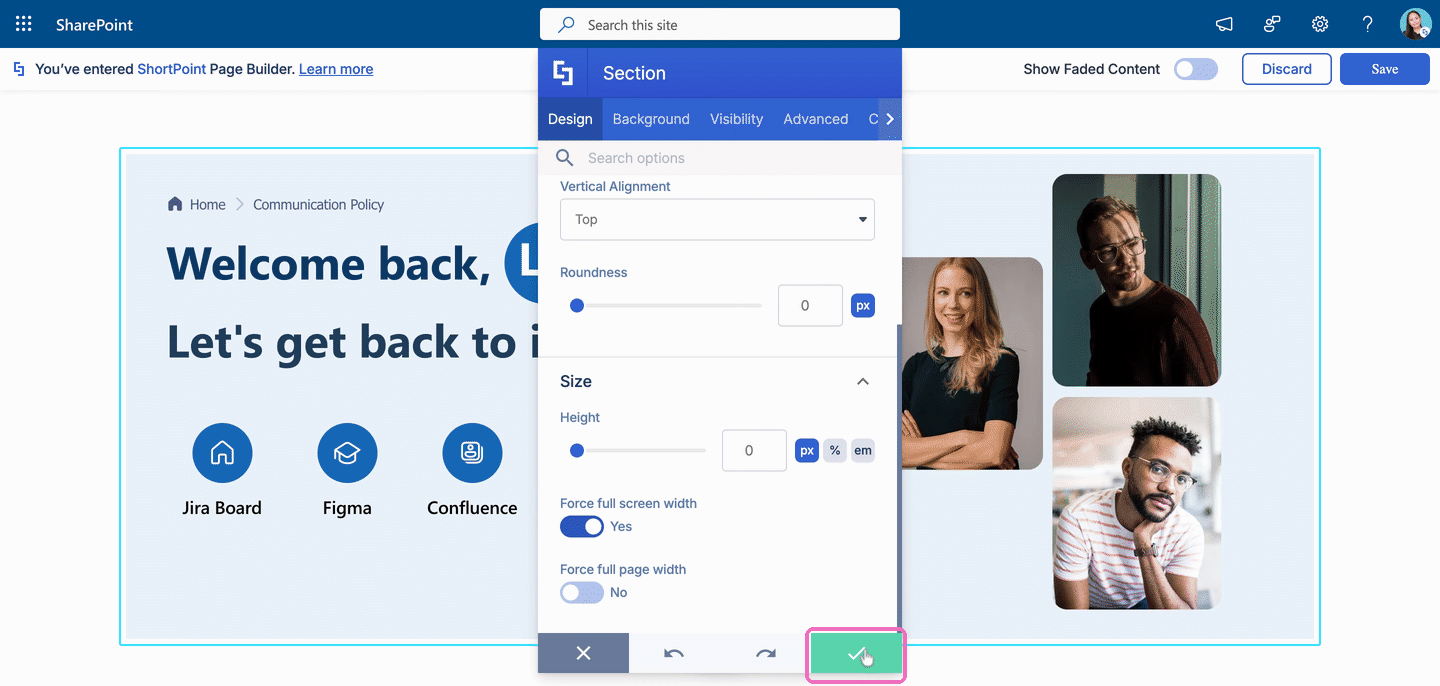
- Click the green checkmark to apply your changes.
Step 4: Repeat for Every Section
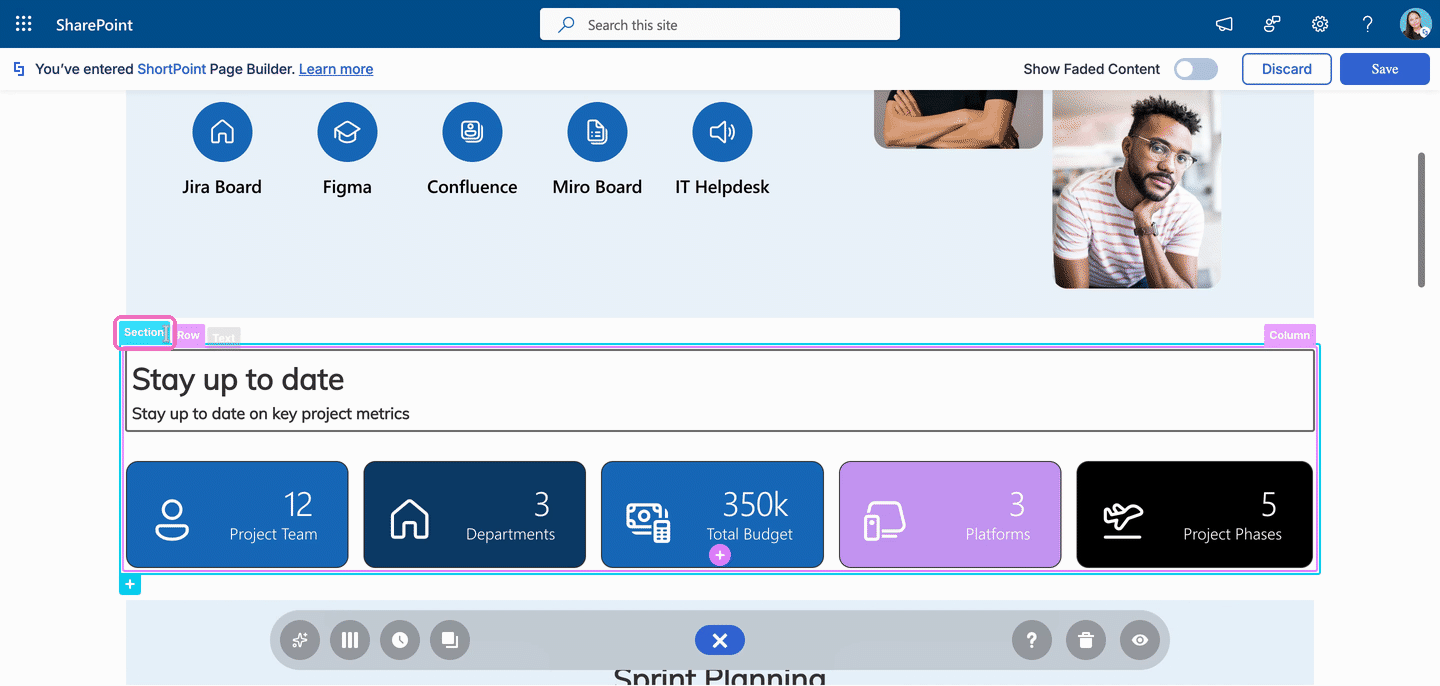
- Repeat Steps 2 and 3 for all the Sections on your page. Scroll down, click the next Section tag, and turn on Force full screen width for it.
Step 5: Save and Publish
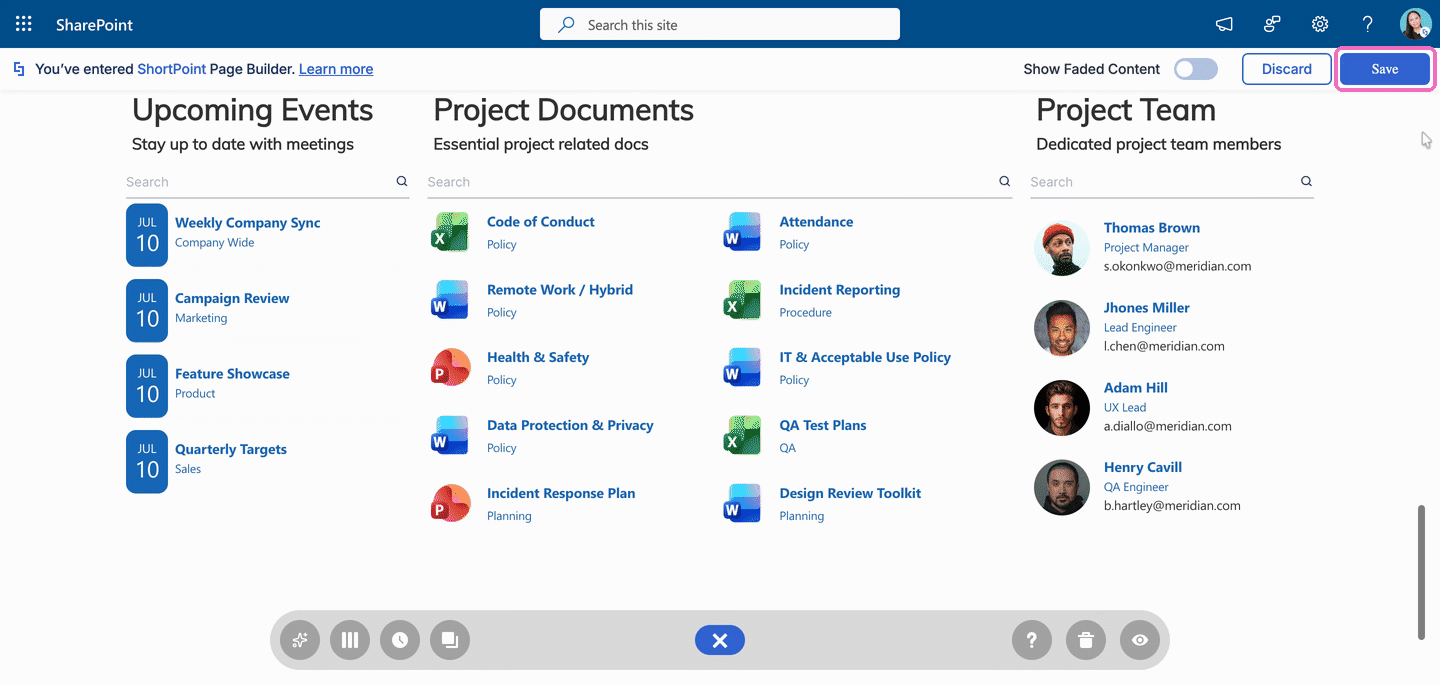
- Once done, click Save to save your changes.
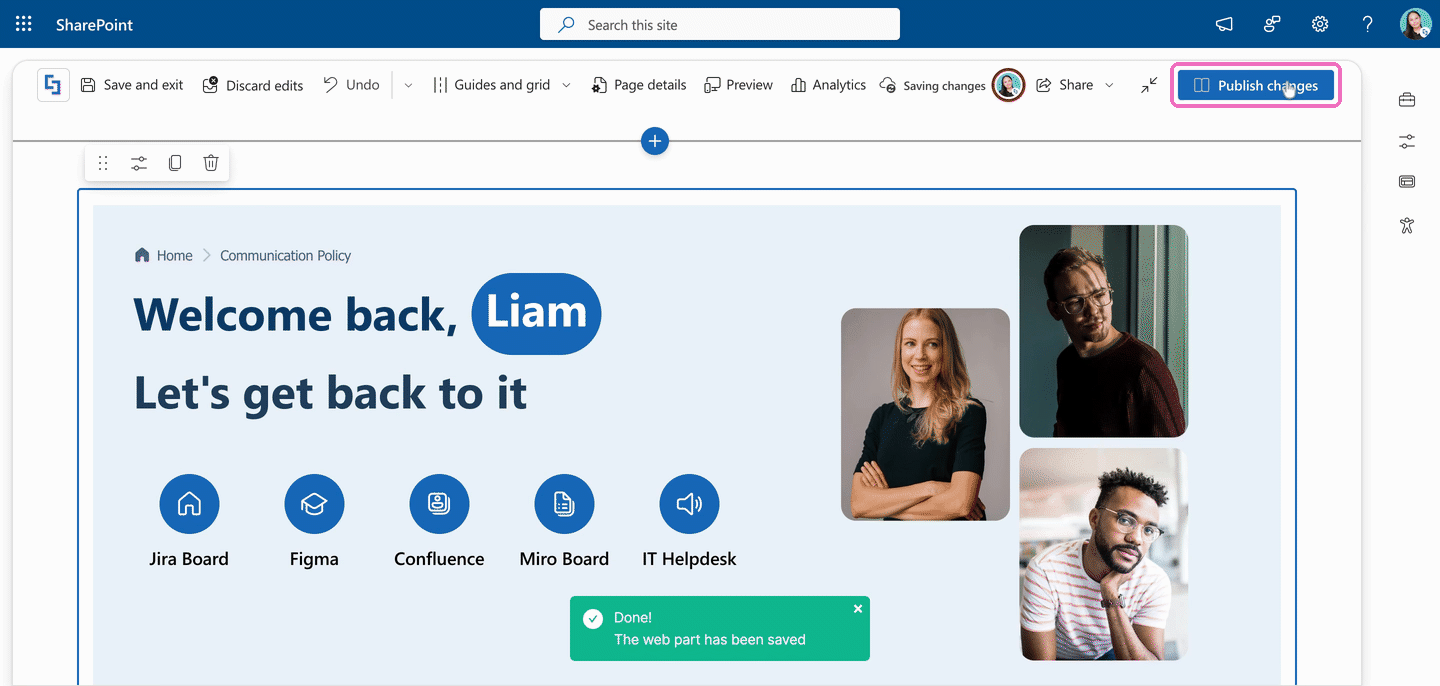
- Click Publish changes to publish your page.
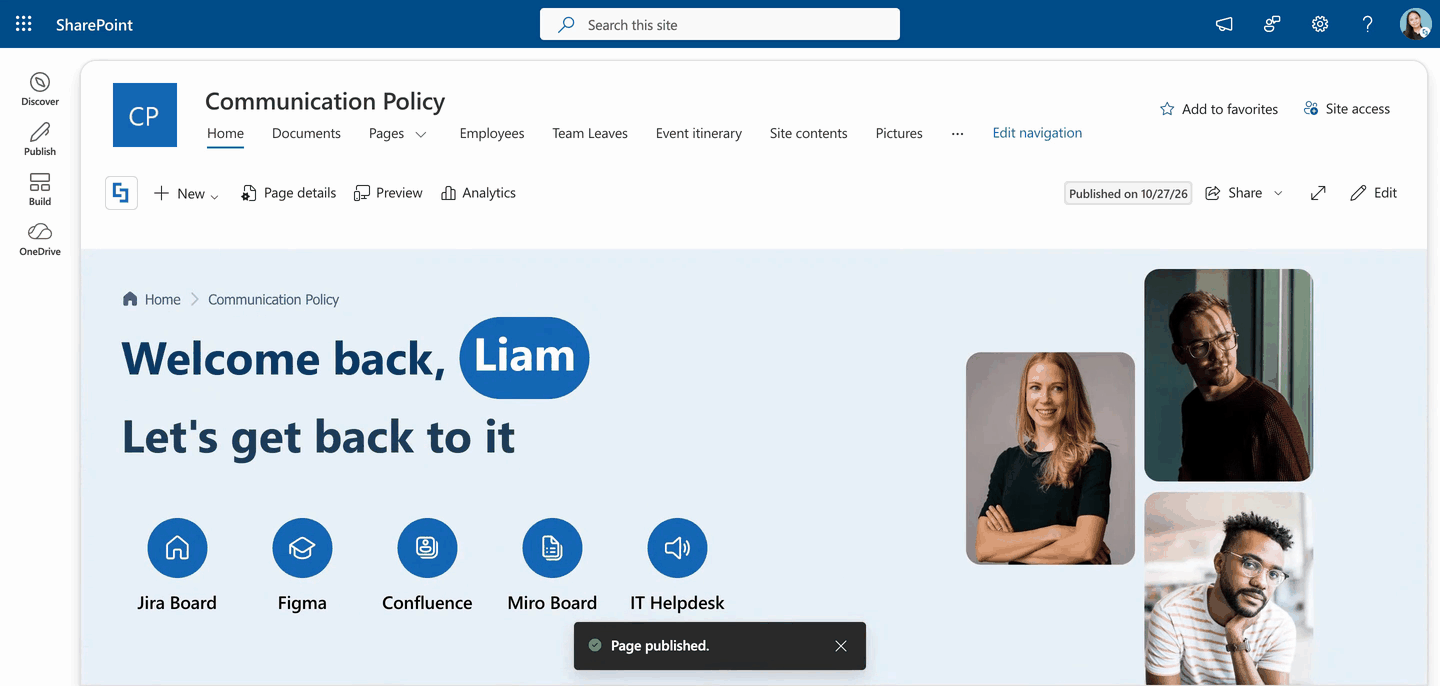
That's it! You now have a full-width page.
TIPSkipped a Section? It stays at the normal width, so it's easy to spot when you publish the page. Just open its settings and turn the option on.
Frequently Asked Questions
What's the difference between the two options?
Option 1 makes the space around the ShortPoint web part full width, so everything inside it fills the screen. Option 2 makes each ShortPoint Section full width on its own, wherever the web part is. Both give you a full-width page.
I already added a page template. Do I need to start over?
No. Use Option 2 and turn on Force full-screen width for every Section in your page template. Your content and customizations stay exactly as they are.
Can I make only some Sections full width?
Yes, with Option 2. Turn on Force full screen width only for the Sections you want to stretch. The rest keep the normal page width.
I turned on Force full screen width, but part of my page is still narrow. Why?
The setting works one Section at a time. Check each Section on your page and make sure the option is turned on for all of them, including any you added after the page template.
Still need help?
If your page still doesn't fill the screen, submit a ticket and our support team will help you.
Related articles: