 Try ShortPoint now
Are you a SharePoint user with tons of Microsoft Planner plans? If you are, you shouldn't miss out on the power of Planner Plan IDs.

The Plan ID is the secret key you need to showcase specific plans on your SharePoint sites. Just imagine the increase in productivity! Your teammates can easily see and access all their important tasks right on your SharePoint page. No more going back and forth.

But, first things first: what exactly is a Plan ID, how do you get it, and why does it even matter? Let's break it down in a way that's super easy to understand.
TABLE OF CONTENTS
- What Is a Planner Plan ID?
- Finding the Planner Plan ID
- Using the Plan ID
- Best Practices for Using Plan IDs
- The Power of Plan ID
- Frequently Asked Questions
What Is a Planner Plan ID?
A Microsoft Planner Plan ID is a unique identifier assigned to each plan you create. It's kind of like a fingerprint. No two plans share the same Plan ID, making it the definitive way to reference a specific plan within Microsoft's ecosystem.
Typically, the Plan ID consists of 28 characters, combining both numbers and letters. Here's an example of how it may look:
oUHpnKBFakqfGE_yrWk1pZcAGqLp
Unlike the plan name, which can be changed by users, the Plan ID is automatically generated when you create a new plan. It is globally unique across the entire Microsoft 365 environment and remains constant throughout the plan's lifetime. This makes it the most reliable way to reference a specific plan in technical implementations. For example, you can use it to integrate Planner with other tools like Power Automate or Graph API.
Finding the Planner Plan ID
Now that you know what a Plan ID is, let's tackle how to find it. It's super easy, especially if you know where to look. We've compiled three ways to do it. Follow the option that best suits your needs:
Option 1: Using Microsoft Planner
Step 1: Open a Plan
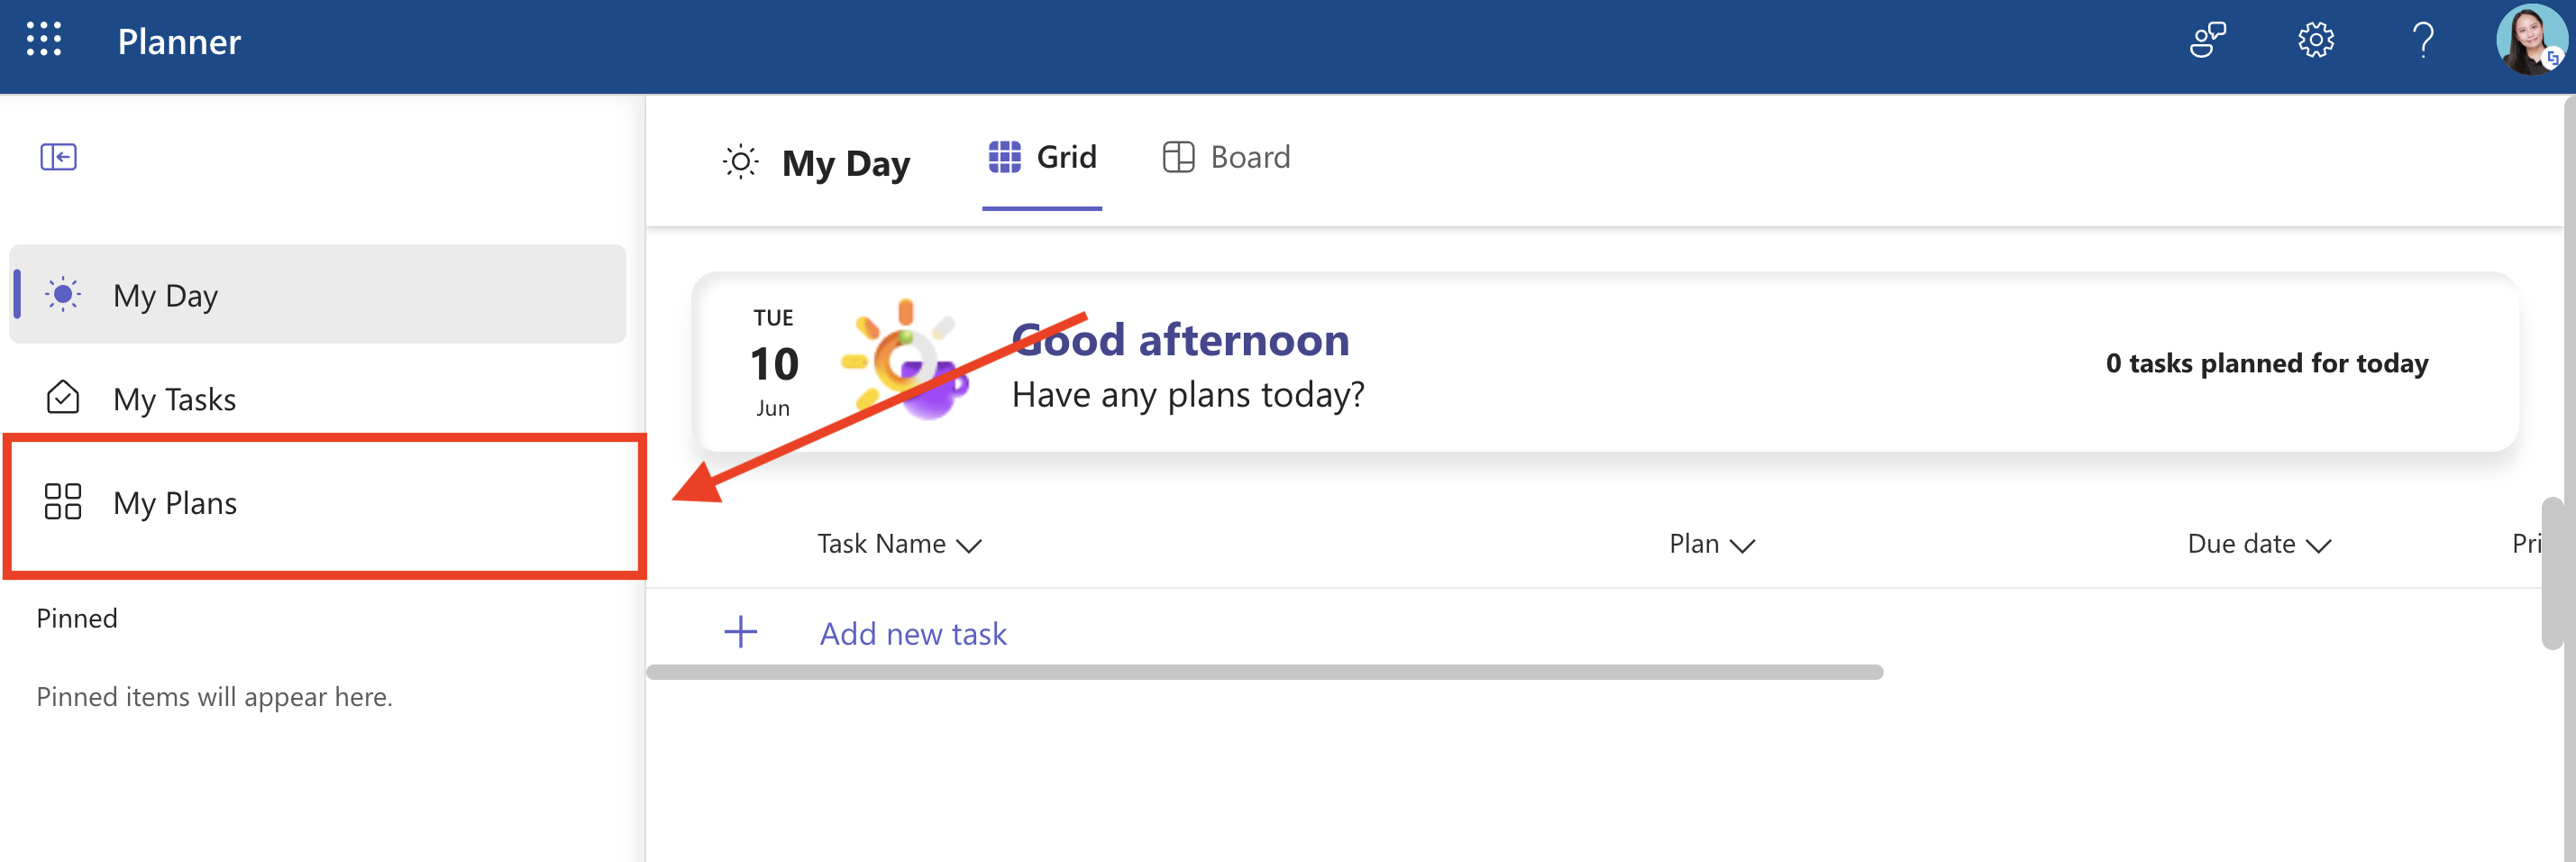
Go to your Planner:

Select My Plans:
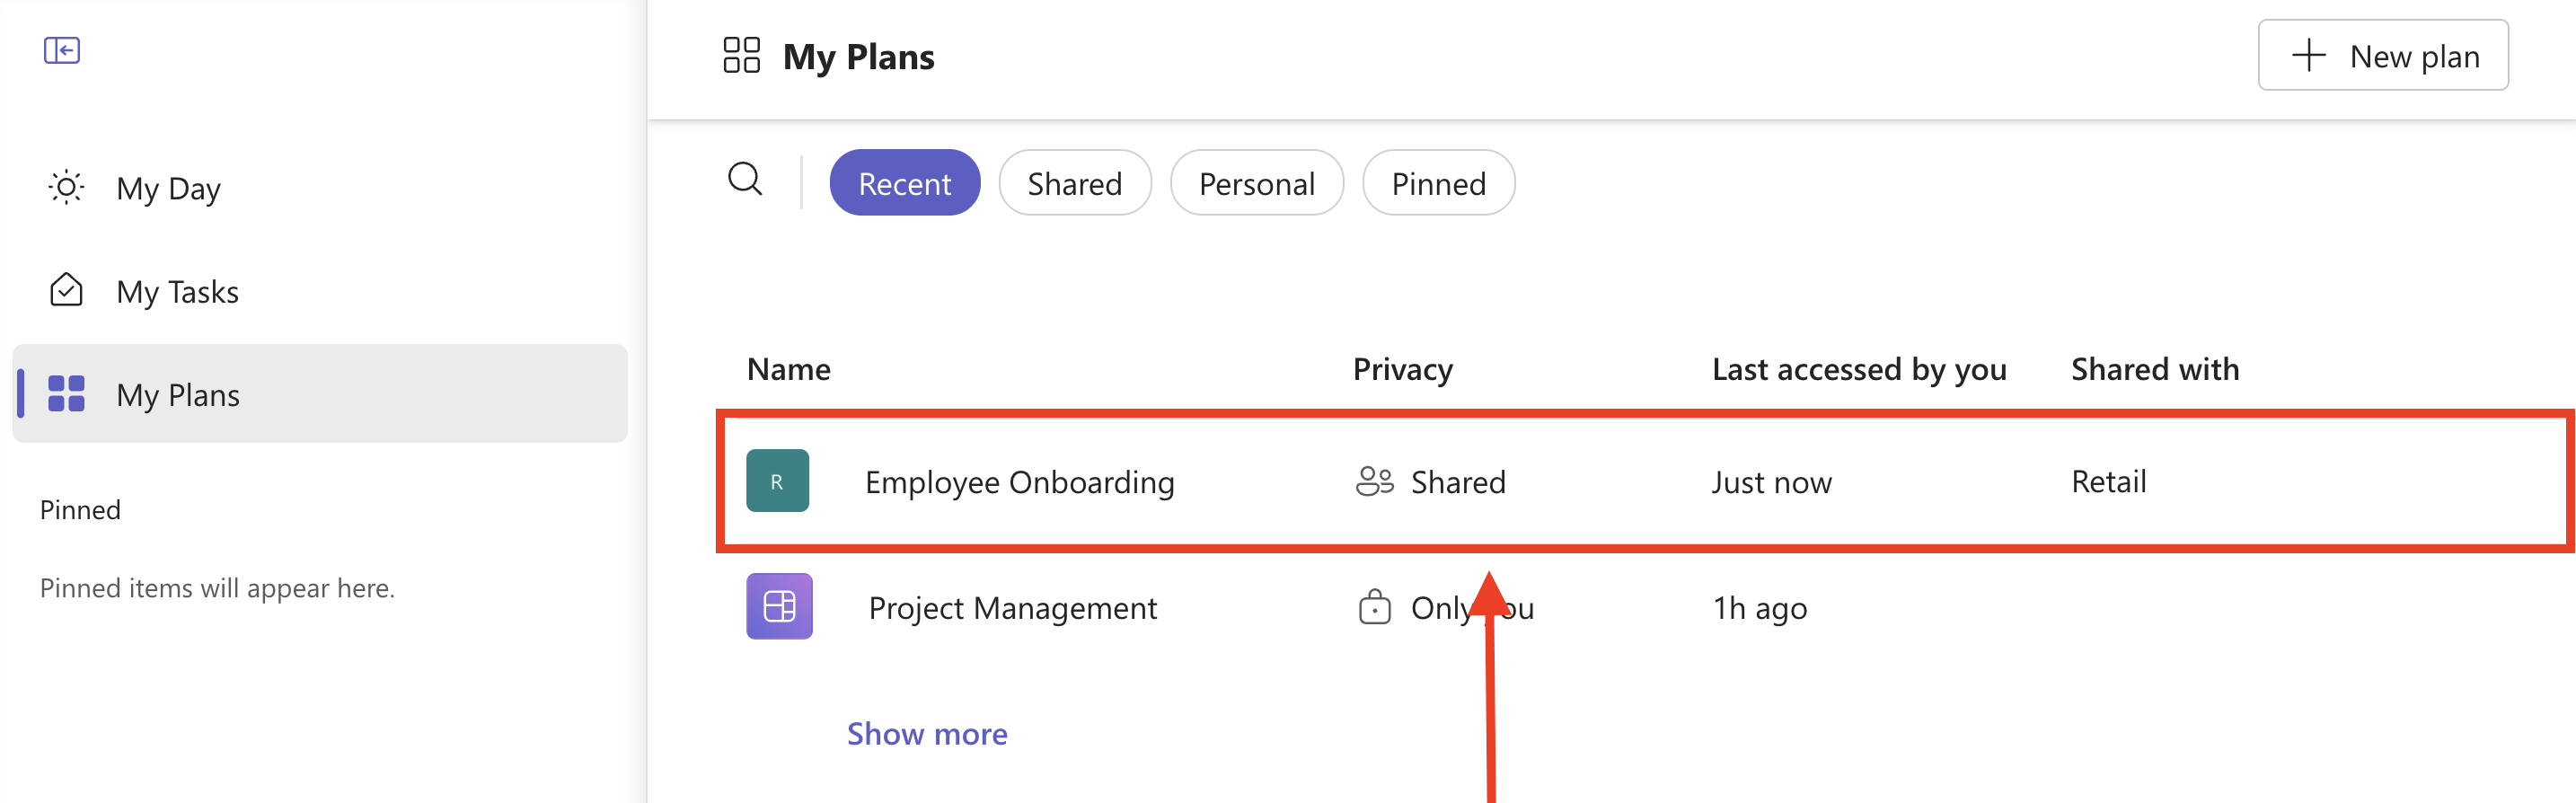
Open the Plan you want to use:
Step 2: Copy ID
You will notice that the URL changed. Copy the line after plan/ and before /view. That is your Plan ID.

Option 2: Using the Microsoft Graph API connection
NOTEYou must be a ShortPoint Designer with an active license and enable the Microsoft Graph API connection to use this option.
Step 1: Edit the ShortPoint Web Part
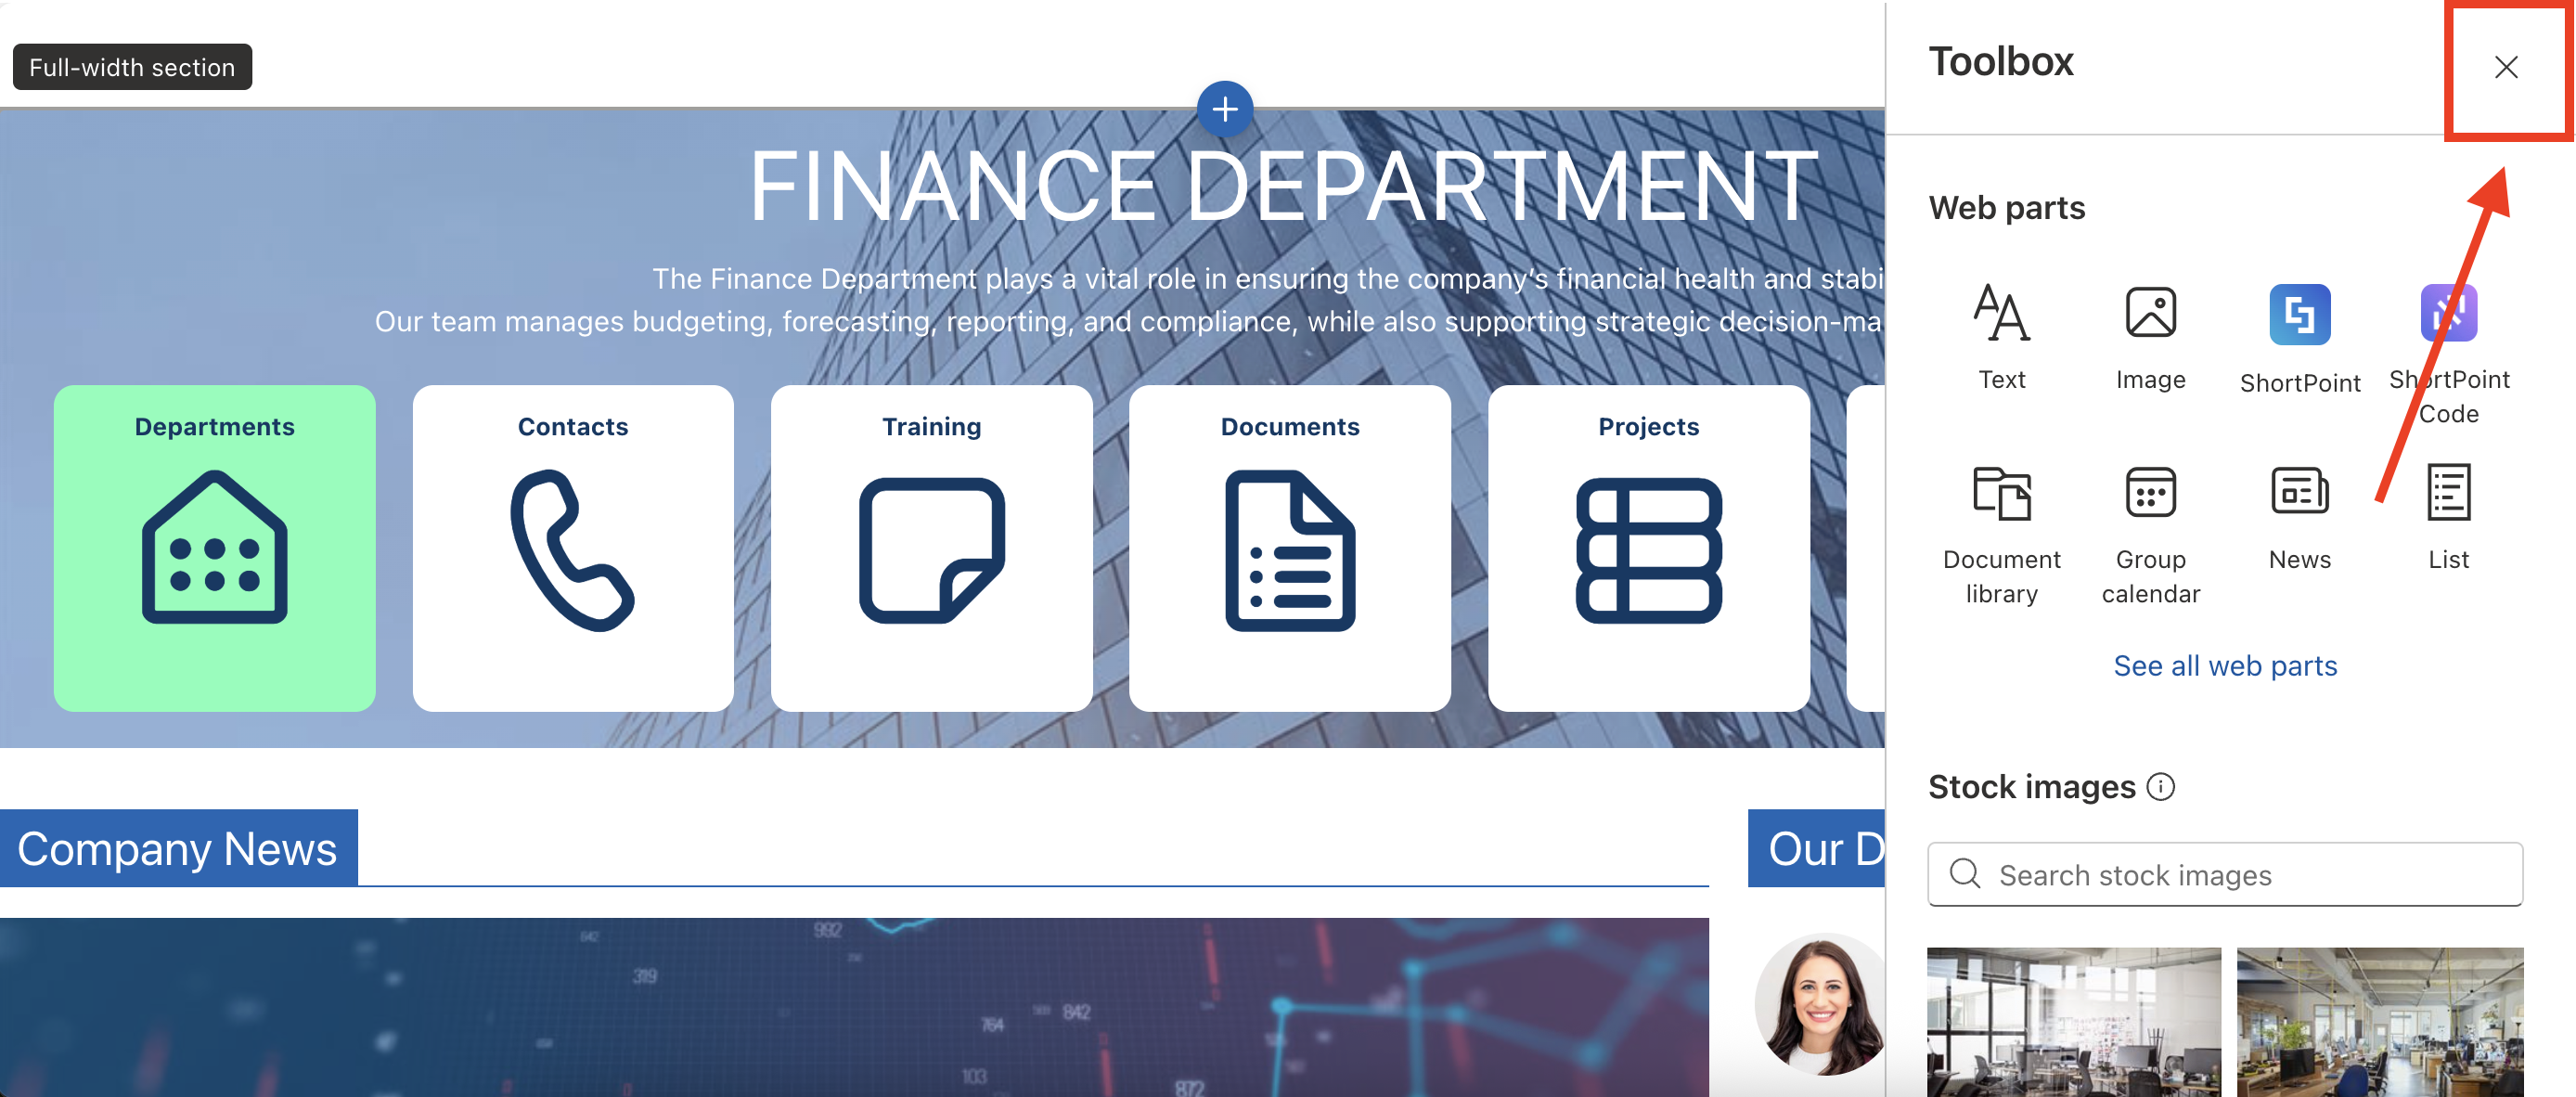
Go to the SharePoint page you want to use and click Edit:

Close the Toolbox:
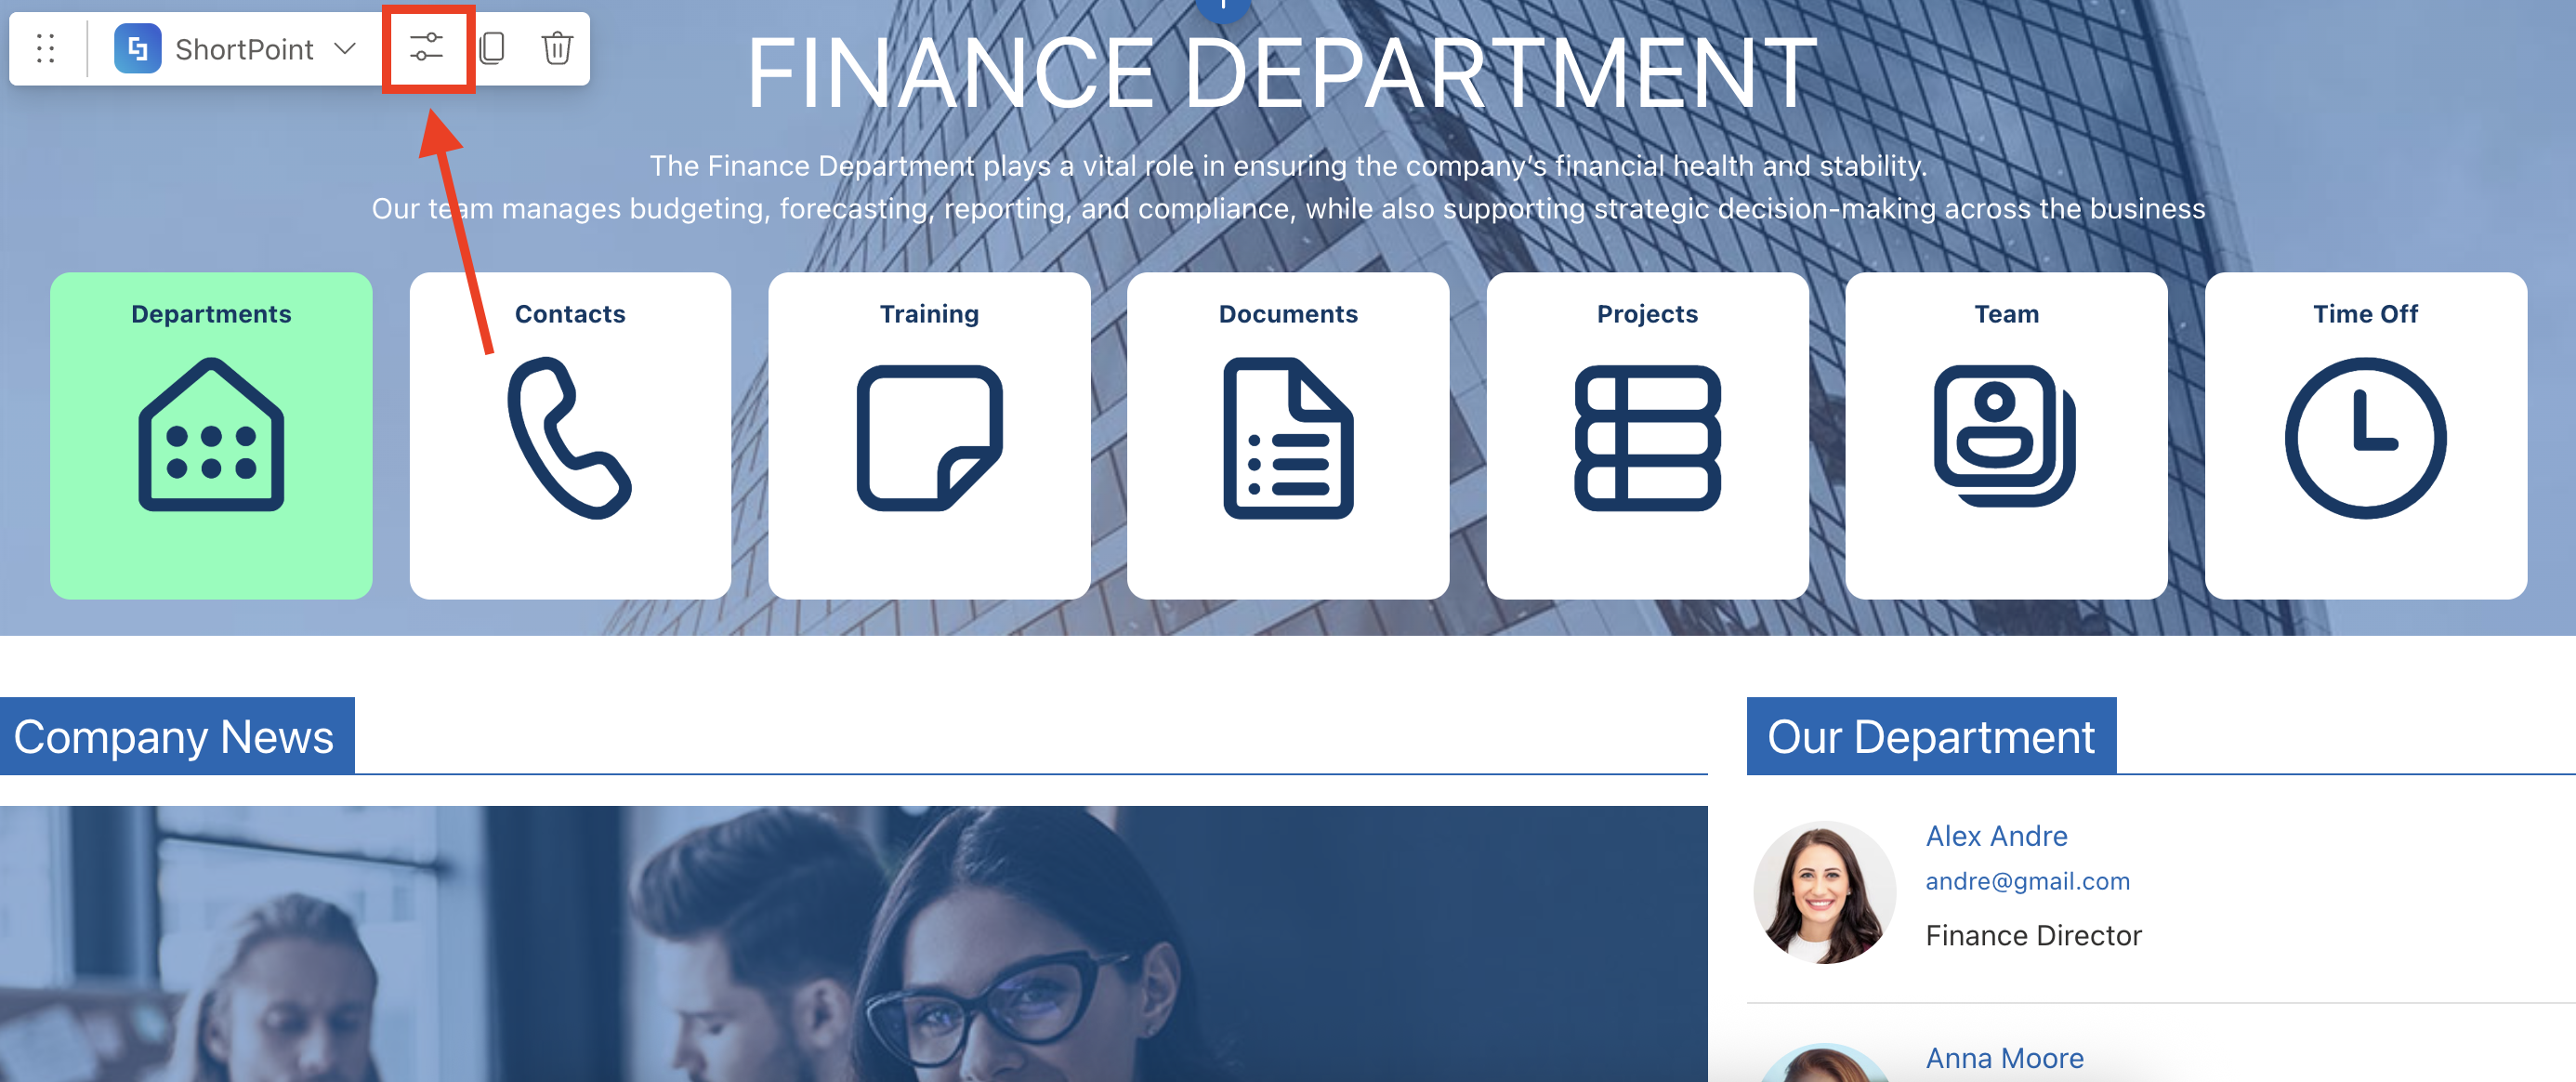
Edit the ShortPoint web part:
Step 2: Switch to Grid Mode
In edit mode, click the Switch to Grid Mode icon:

Step 3: Edit a Design Element
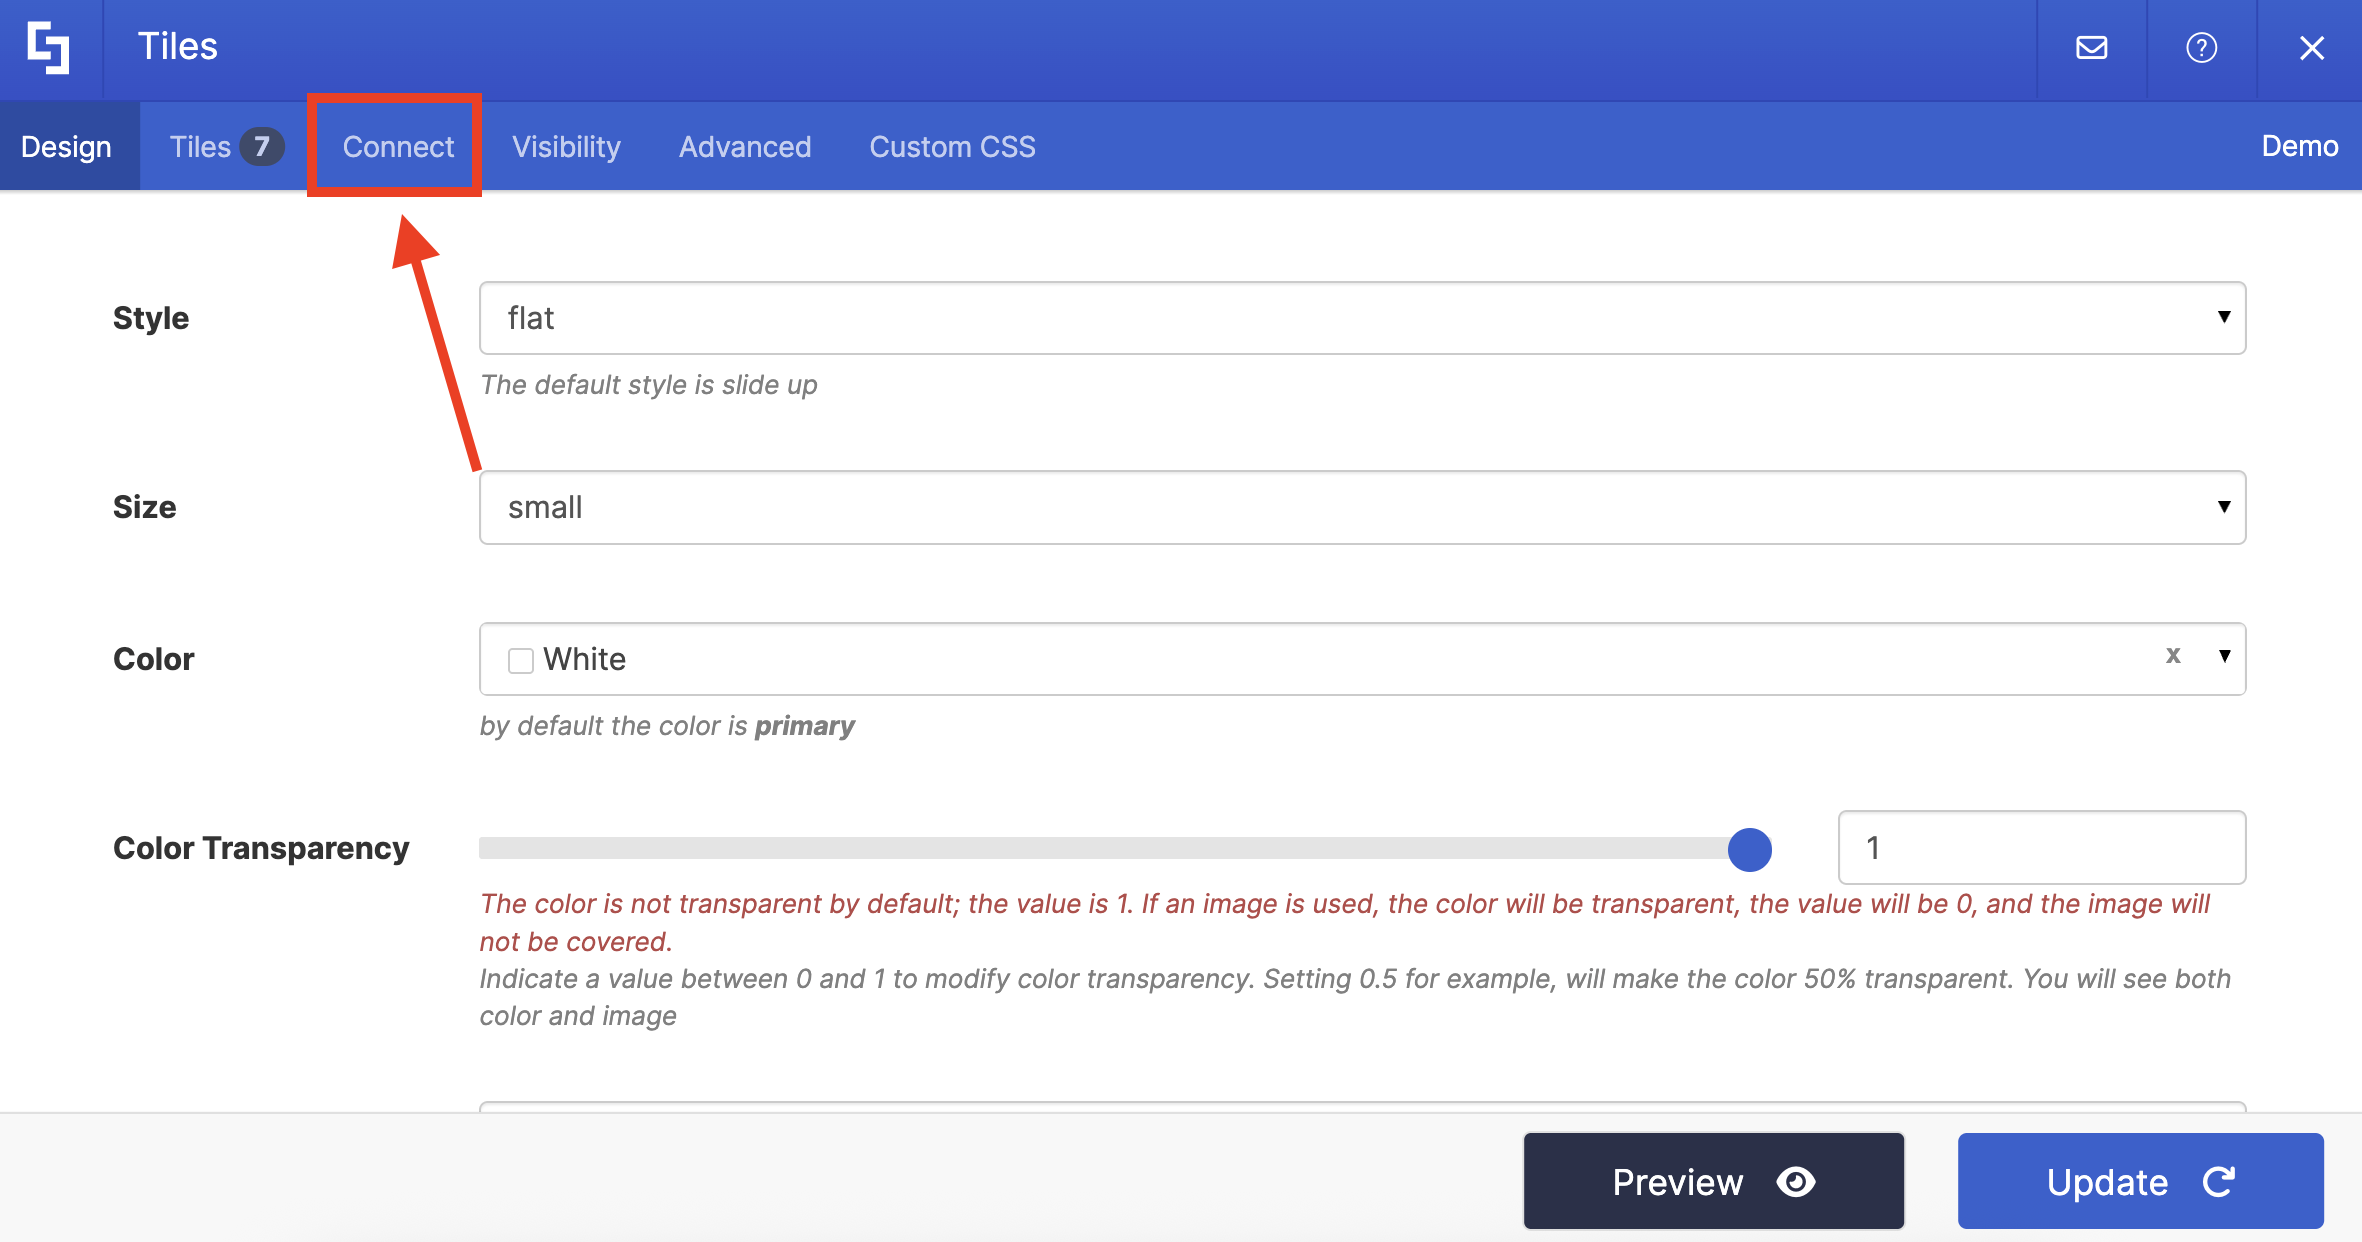
Click the cogwheel icon of any Design Element on your page. For this guide, we’ll use Tiles:

Step 4: Run My Planner Plans Use Case
Go to the Connect tab:
Select Microsoft Graph API:
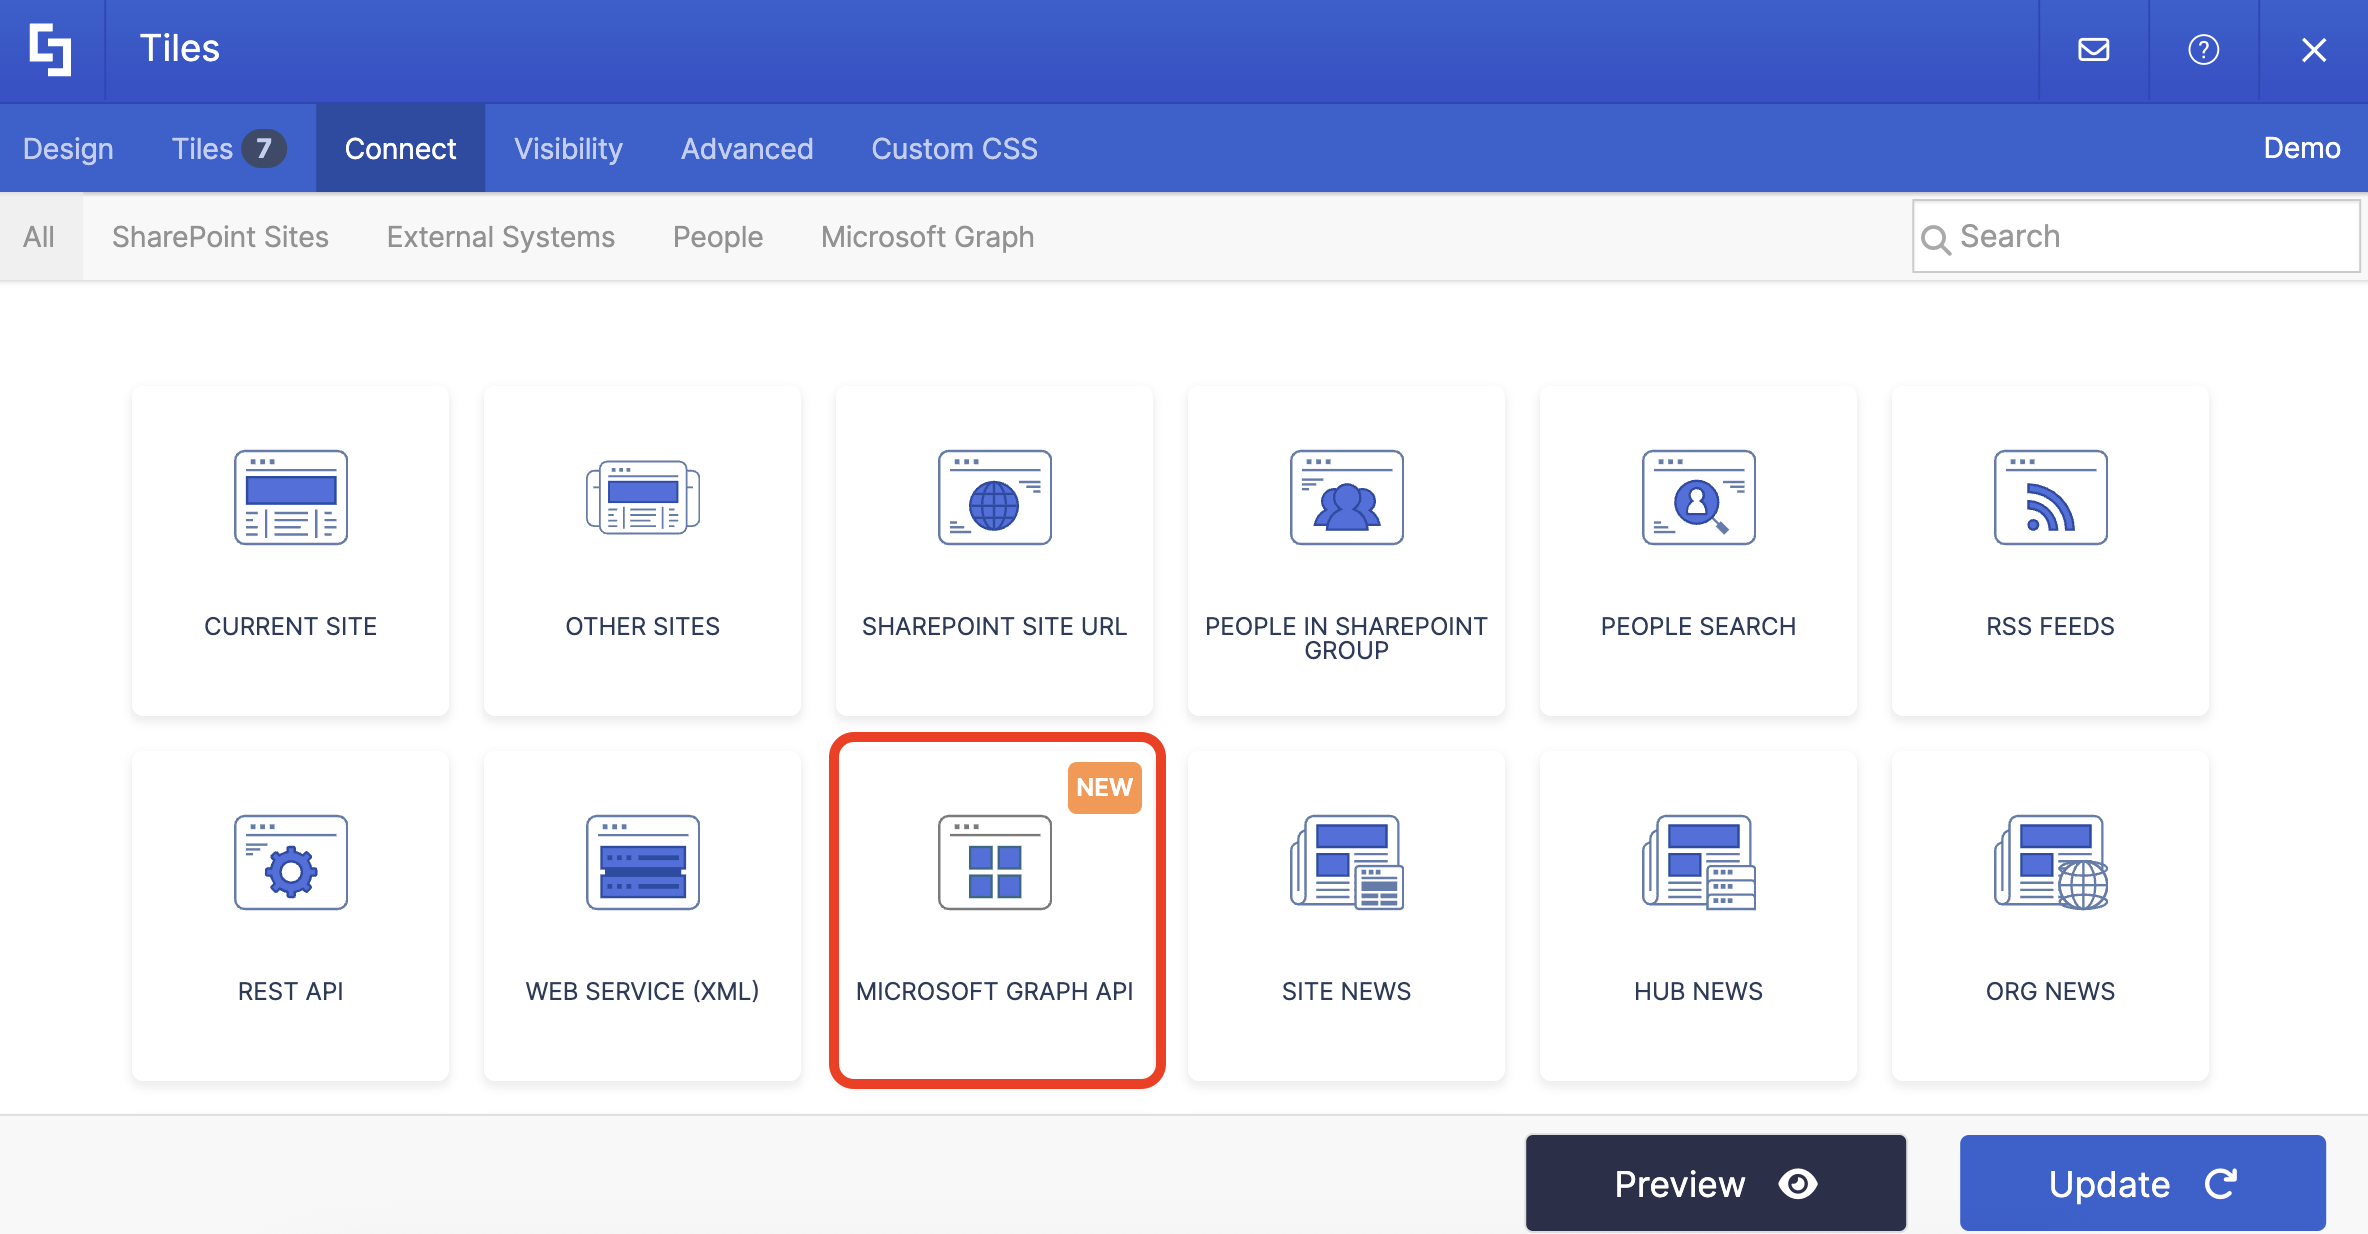
Use the search bar to look for My Planner Plans and select it:

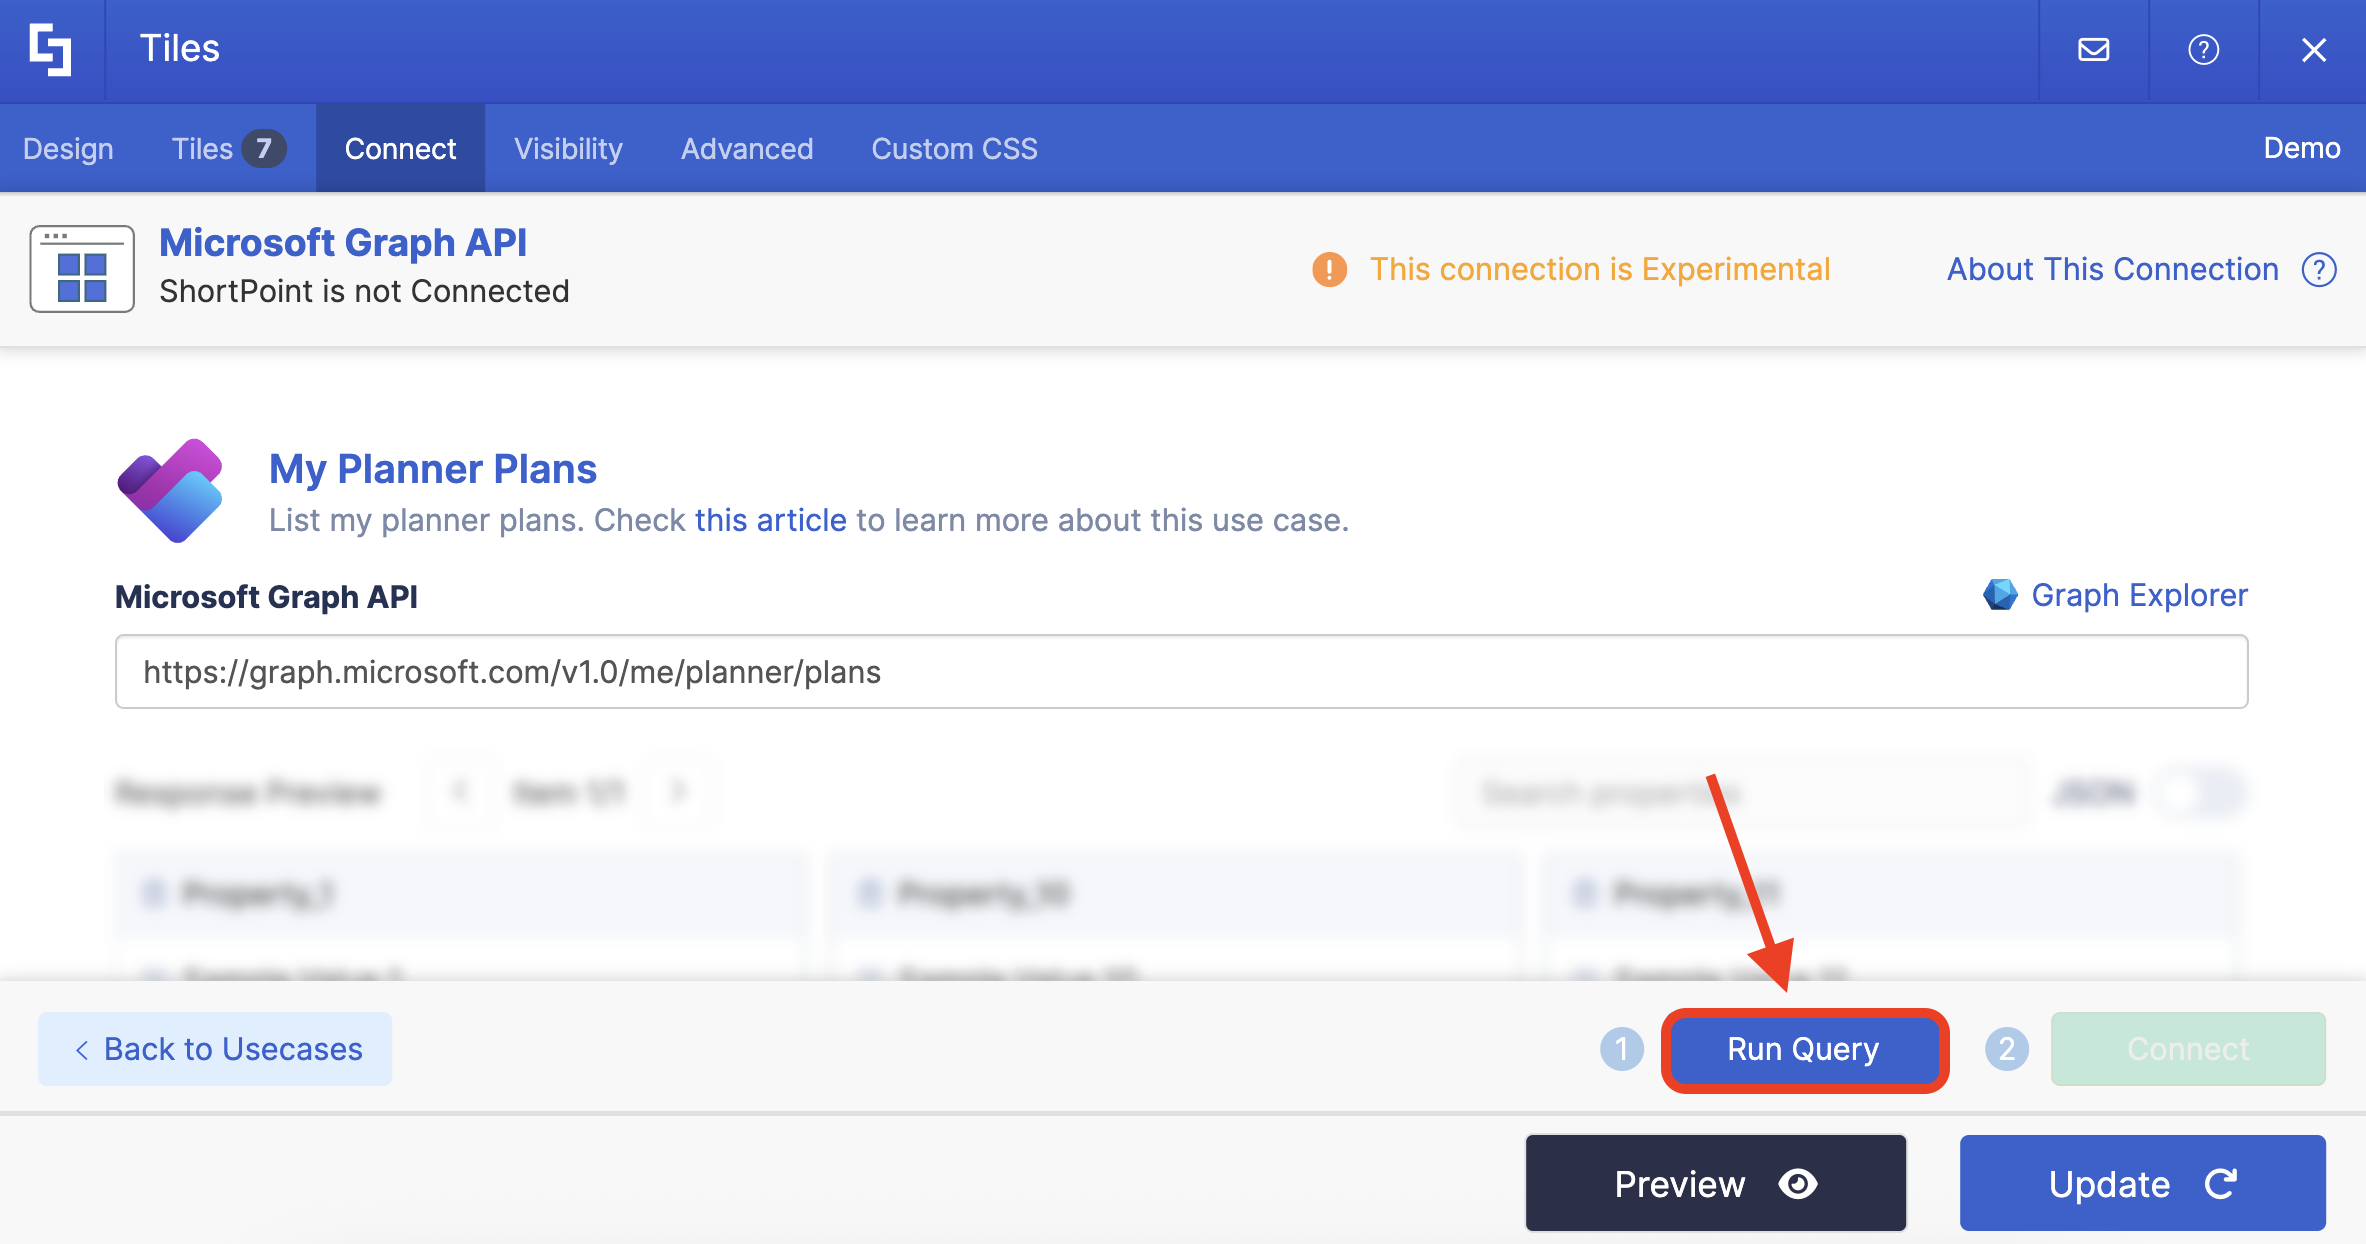
Click Run Query:
Step 5: Copy Plan ID
Under the Response Preview, look for the title of your Plan and copy its id. In our case, we will be using the Employee Onboarding:

Awesome! You now have your Plan ID.
Option 3: Using Graph Explorer
Step 1: Open Graph Explorer
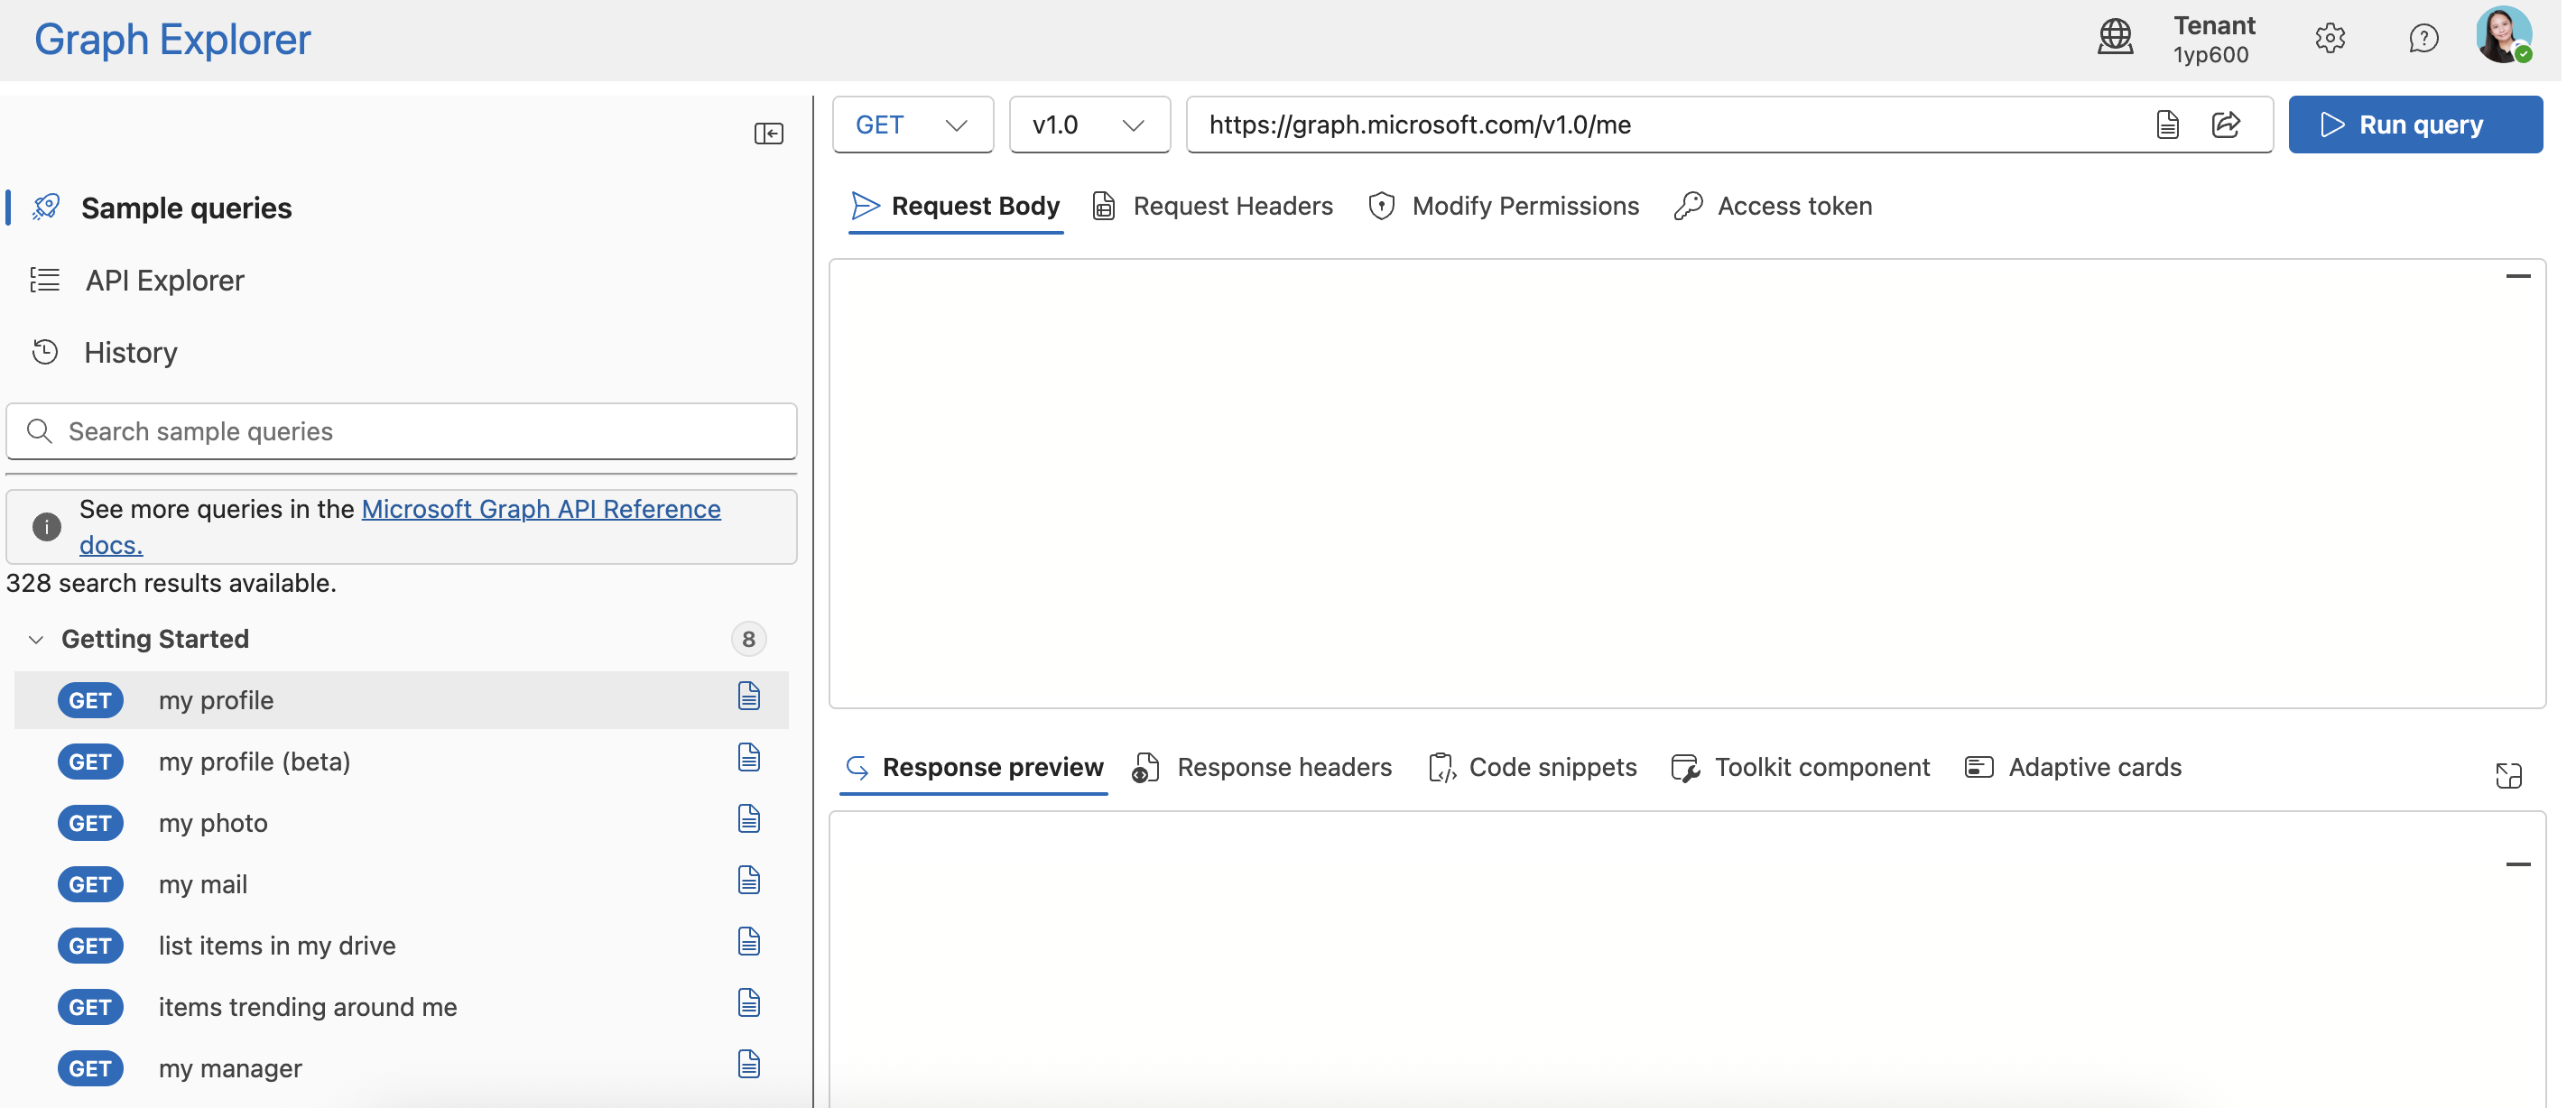
Go to Graph Explorer and log in:
NOTEBefore proceeding, make sure you log in to Graph Dev Center. You can only access the Graph Explorer if you have the necessary permissions.
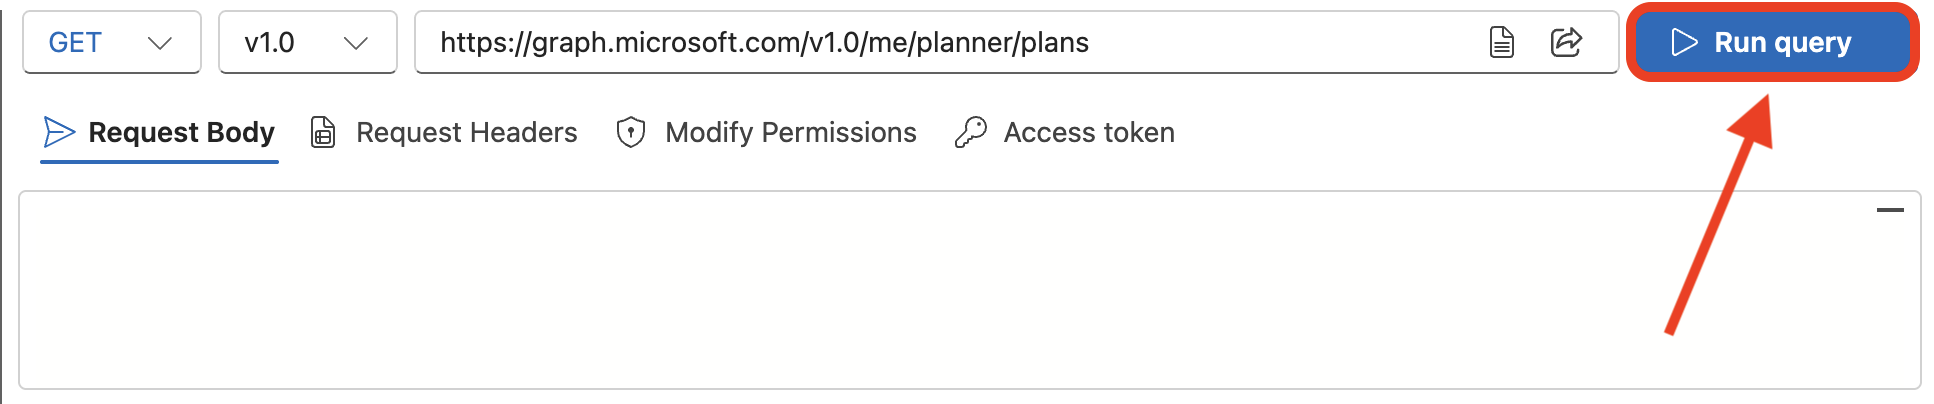
Step 2: Copy and modify the GET Query
Copy the GET query below:
https://graph.microsoft.com/v1.0/me/planner/plans
Step 3: Paste GET Query
Make sure that it is set to GET:

Paste the GET query in the field provided:

Click Run Query:
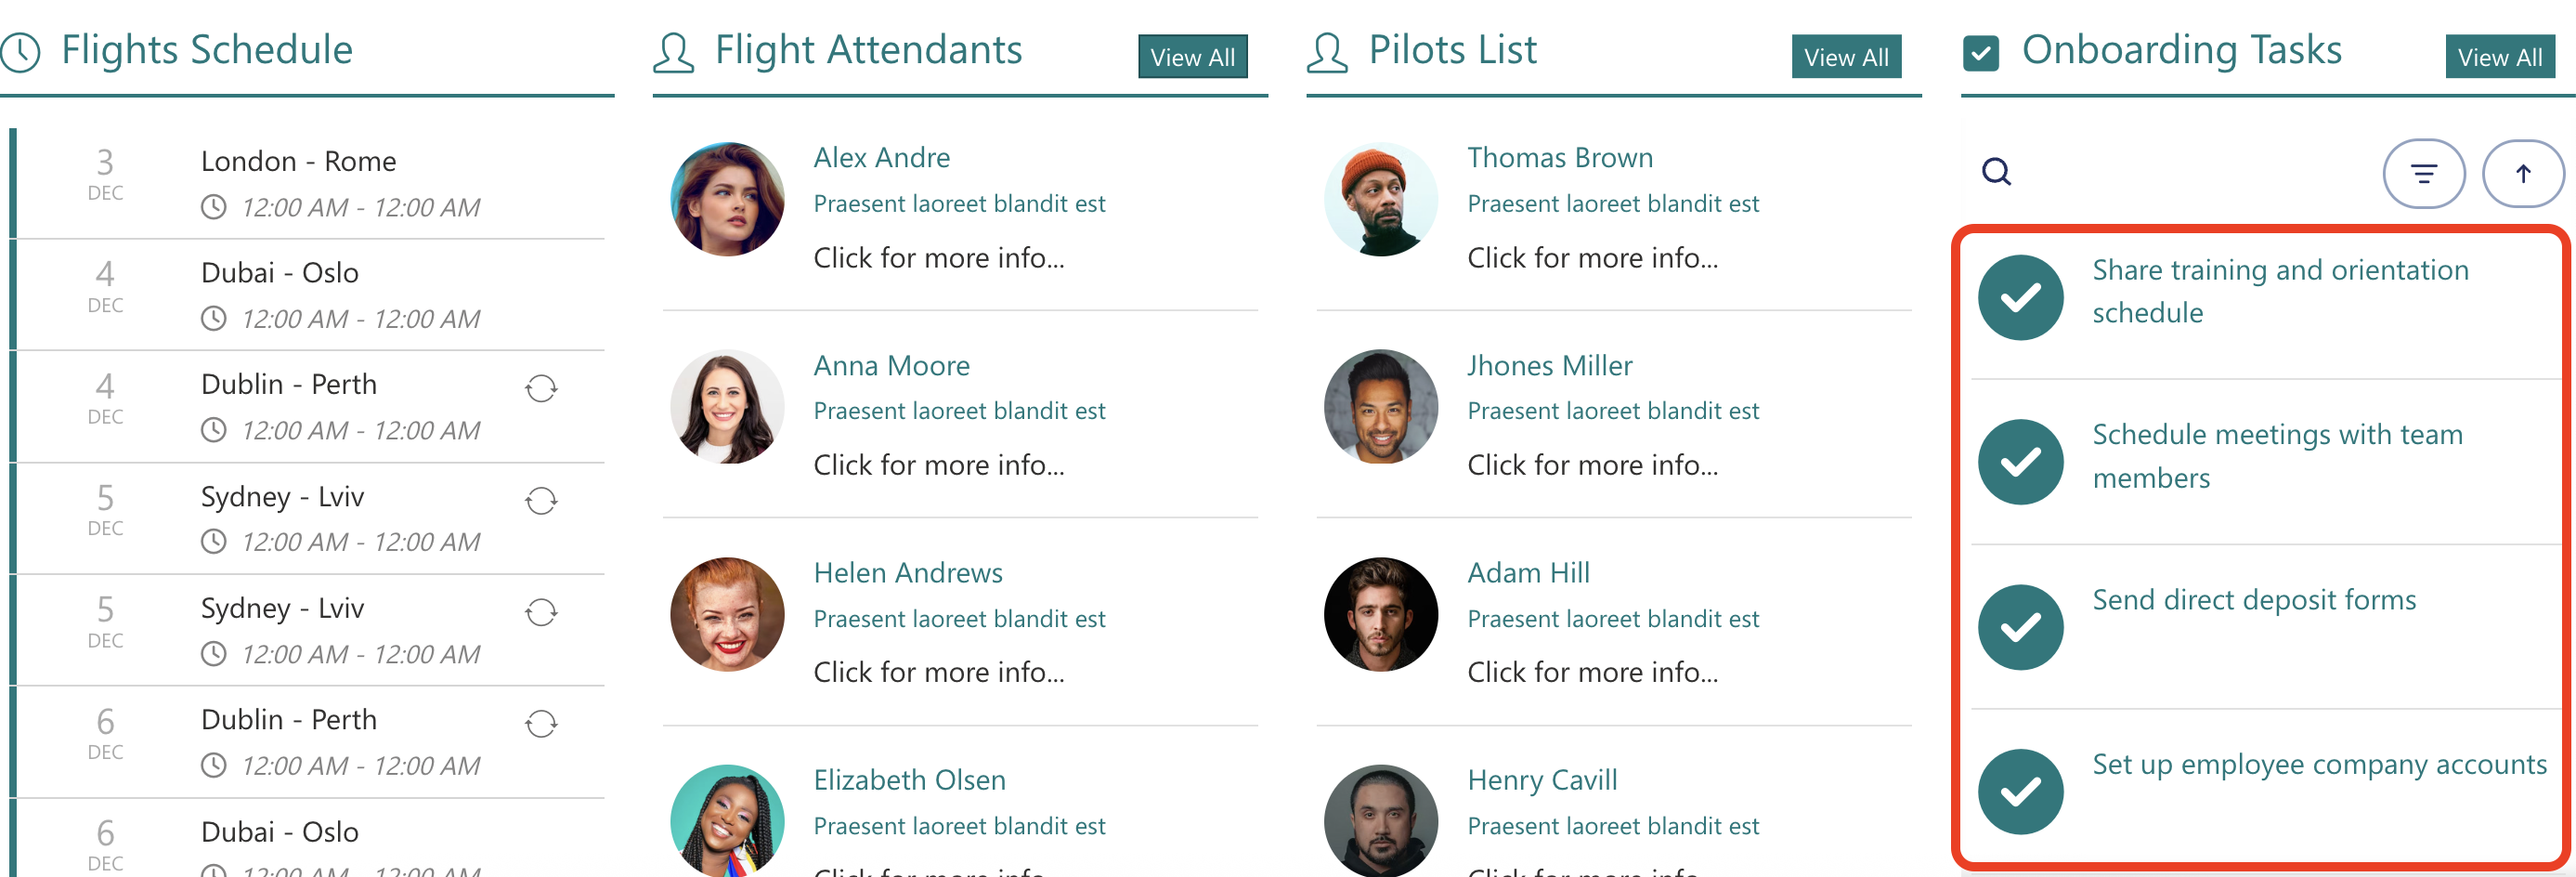
Step 4: Copy Plan ID
In the Response preview section, look for the title of your Plan:

Copy the ID:

Congratulations! You have successfully retrieved your Plan ID.
Using the Plan ID
Understanding when and where to use Plan IDs can unlock powerful capabilities. Here are some common scenarios where it plays a crucial role:
Power Automate Flows
When creating automated workflows in Power Automate (formerly Microsoft Flow), you'll often need to specify which plan you're working with. While some actions let you select plans from a dropdown, more advanced flows may require you to input the Plan ID directly as a custom value, especially when dealing with dynamic scenarios or plans created programmatically. This method helps avoid errors like returning null values or incorrect data, providing a more reliable way to check and manage your Planner content.
Microsoft Graph API
Remember what we said earlier that you can show your plans on your SharePoint sites? This is where Microsoft Graph API comes in! It simplifies the process of integrating SharePoint data with other Microsoft 365 services. Developers use it as a single endpoint to connect to individual APIs for each Microsoft service (SharePoint API, Outlook API, and Teams API).
But what if you're not a developer? Good thing, ShortPoint created the Microsoft Graph API connection! It is the perfect solution for non-technical users. It simplifies the process of retrieving data using the Graph API. Plus, it allows you to display the retrieved data on your SharePoint pages.

You even get to pick the data you want to be shown. This way, your page viewers will only see the information that matters most to the whole team.

Here's a use case you can apply using the ShortPoint Microsoft Graph API connection:
- Show Tasks from a Specific Planner Plan
The Planner Tasks from a Specific Plan use case retrieves all the tasks in a specific Planner Plan. It allows your users to quickly access their core daily tasks and removes the need to transfer between tools.
To learn how to apply this use case on your SharePoint sites, check out How to Show All the Tasks from a Specific Planner Plan.
Want to use the Microsoft Graph API connection in your SharePoint sites? Tapping into this powerful connection is super easy. If you're already a ShortPoint Designer with an active license, simply upgrade your current ShortPoint version to 8.6.0.0 or later and follow the steps in How to Enable Microsoft Graph Integration for MS Graph API Connections.
If you aren't a ShortPoint Designer yet, you can reach out to our experts to help you get started, plus get a FREE 15-day trial from us.
Best Practices for Using Plan IDs
Working with Planner Plan IDs effectively requires some thoughtful planning (no pun intended). Here are some best practices to keep in mind when managing your data and automations:
Maintain a Plan ID Registry
If your organization uses multiple Planner plans, consider maintaining a central document or database that maps plan names to their Plan IDs. This makes it much easier to find the correct ID when building integrations or troubleshooting issues. Include additional metadata like the plan's purpose, team owner, creation date, and associated tags for better organization and quick search capabilities.
Use Descriptive Plan Names
While Plan IDs are the technical identifier, human-readable plan names are what most users see. Create clear, descriptive plan names that make it easy to identify the correct plan when you're looking up its ID. This reduces confusion and errors when setting up integrations, especially when using Power Automate or custom flow configurations that require entering a custom value.
Limit Access to Sensitive Plans
Remember that anyone with a Plan ID and appropriate permissions can access that plan through APIs or tools like Power Automate and the Graph API. Apply the principle of least privilege. Only grant access to Plan IDs and plans for users who genuinely need it.
By following these best practices, you can manage your plans more securely and efficiently. It also ensures that your automation workflows and integrations work smoothly without exposing sensitive data.
The Power of Plan ID
Understanding Planner Plan IDs opens up a world of possibilities for customizing and extending Microsoft Planner's functionality. Whether you're automating routine tasks with Power Automate or integrating Planner with Microsoft Graph API, the Plan ID is your key to unlocking these capabilities.
Frequently Asked Questions
Q: Can I change a Plan ID?
No, Plan IDs cannot be changed once a plan is created. If you need to reorganize your plans, you'll have to create a new plan (which will have a new Plan ID) and migrate your content accordingly.
Q: What happens to the Plan ID if I delete a plan?
When you delete a plan, its Plan ID becomes invalid and cannot be reused. Any integrations, Power Automate flows, or API calls referencing that Plan ID will fail. This is why it's essential to update your configuration files, documentation, or scripts that utilize the Plan ID when plans are deleted or archived.
Q: Do Plan IDs expire?
No, Plan IDs don't expire as long as the plan exists. However, access tokens used to authenticate API calls do expire and need to be refreshed according to Microsoft's authentication protocols.
Q: Are Plan IDs visible to regular users?
Plan IDs aren't prominently displayed in the standard Planner interface. Most regular users won't see or need to interact with them. They are primarily used by developers, administrators, and power users working with integrations, automation, or custom php scripts that require it to access task or plan details.
Q: Can two plans have the same ID?
No, each Plan ID is globally unique across the entire Microsoft 365 environment. You'll never encounter duplicate Plan IDs, which is why they're so reliable for programmatic access and automation workflows.
Q: Is it safe to share Plan IDs?
A Plan ID alone doesn't grant access to a plan—users still need appropriate permissions. However, treat Plan IDs with the same care you'd give to other organizational identifiers. Don't share them publicly or unnecessarily, as they could be used by unauthorized users to access plan data through APIs.
Related articles:
