Try ShortPoint now
TL;DR: You can show the items in a ShortPoint list side by side in rows instead of one long column. This works for Date, File, Icon, Image and Simple Lists. Open the list’s settings, go to the Design tab, and turn on Horizontal View. Then enter how many items you want in each row in the Maximum Items Per Row field. If you leave it empty, ShortPoint shows two per row.
By default, a ShortPoint List Design Element shows its items in a single column, one on top of the other. That works for short lists, but longer lists can take up a lot of space on your page. This article shows you how to turn on Horizontal View so your list items sit side by side in neat rows, and how to choose how many items appear in each row.
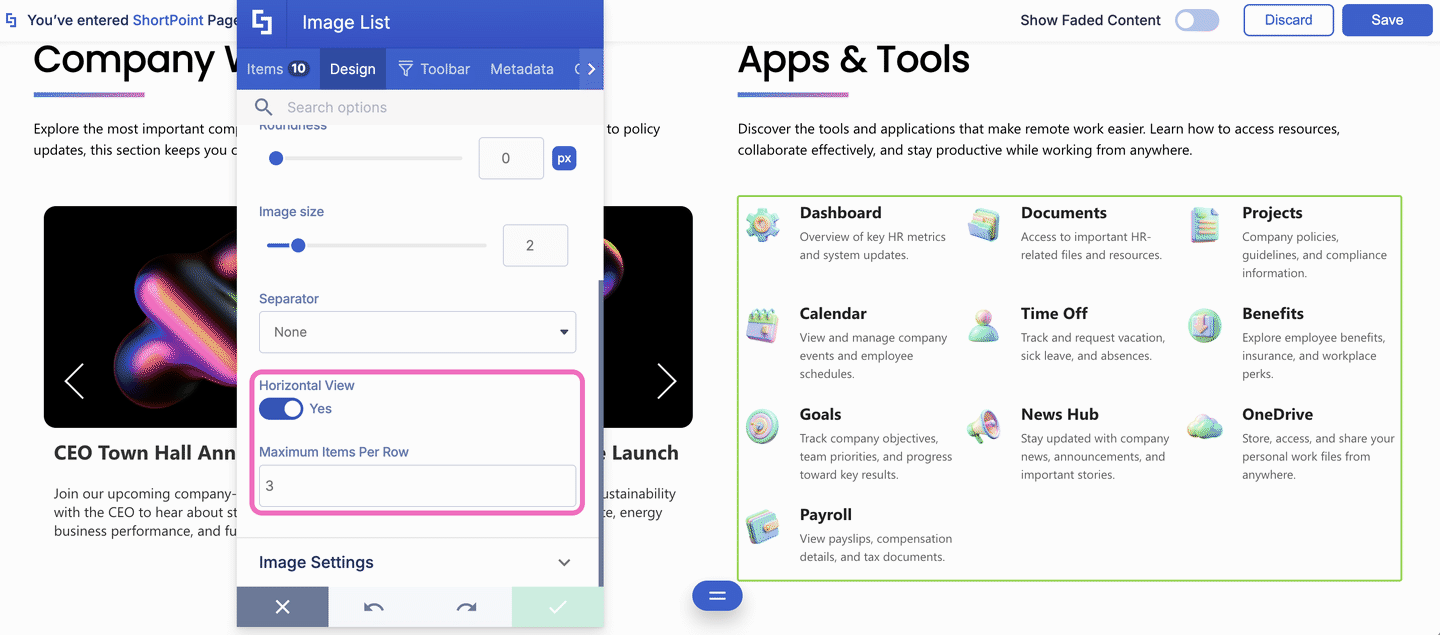
TABLE OF CONTENTS
- Prerequisites
- What is the Horizontal View Option?
- Interactive Tutorial
- Step-by-step Tutorial
- Examples of ShortPoint Lists in Horizontal View
- Frequently Asked Questions
- Which ShortPoint Design Elements have the Horizontal View option?
- I can't find the Maximum Items Per Row field. Where is it?
- What happens if I leave Maximum Items Per Row empty?
- My list has more items than the number I set. What happens to the rest?
- Can I go back to the single-column layout?
- Why do my list items look squeezed?
- Does Horizontal View change my list items?
Prerequisites
- You have ShortPoint SPFx installed on your SharePoint environment.
- You are a ShortPoint Designer with an active license.
- You already have a ShortPoint List Design Element (Date List, File List, Icon List, Image List, or Simple List) on your page. If you don't have one yet, see How to Insert a Design Element.
What is the Horizontal View Option?
Horizontal View is a design setting that changes how a list lays out its items. Instead of stacking every item in one long column, it places them next to each other in rows, like a grid. You'll find it on all ShortPoint List Design Elements: Date List, File List, Icon List, Image List, and Simple List.
Horizontal View is controlled by two settings in the Design tab of the list's settings: the Horizontal View toggle and the Maximum Items Per Row field.
The Horizontal View Toggle
The Horizontal View toggle switches the layout of your list:
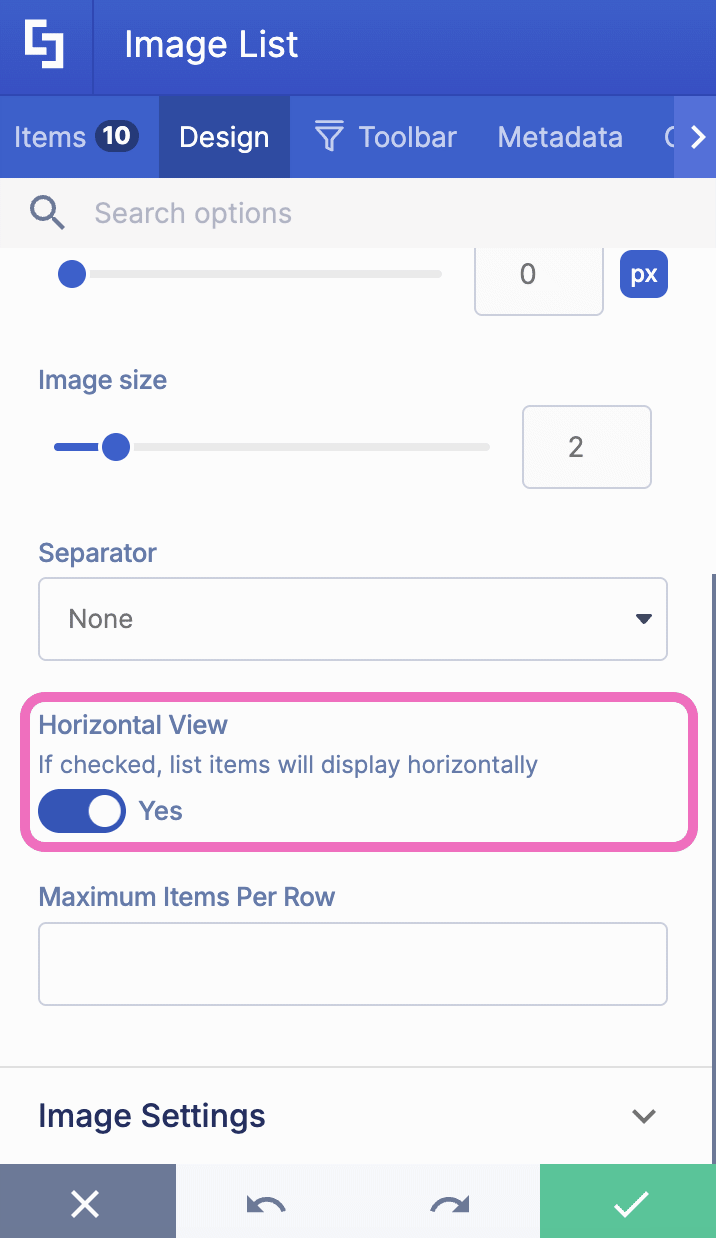
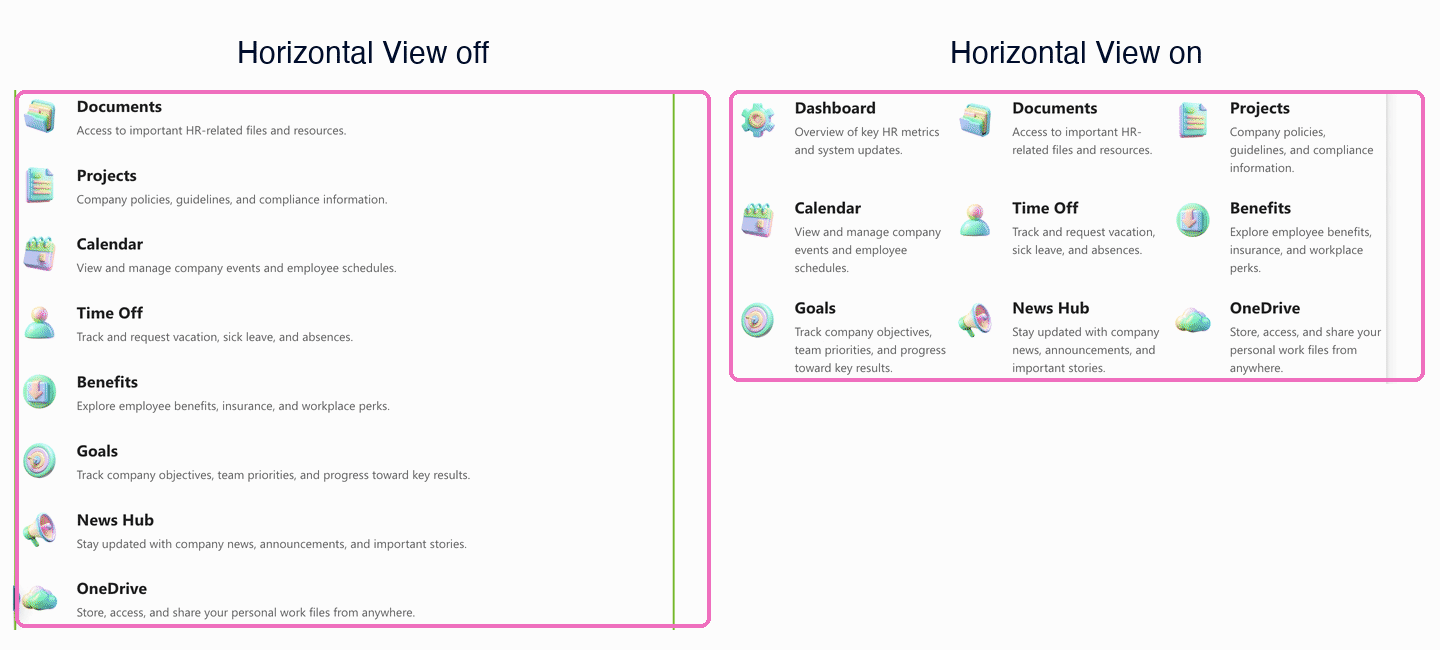
- No (off): This is the default. Items are shown in a single column, one below the other.
- Yes (on): Items are shown side by side in rows. When one row is full, the next items move down to a new row.
Why use it:
- It saves space. A list of nine items takes three short rows instead of nine long ones.
- It's easier to scan. Readers can see more items at a glance without scrolling.
- It looks like a menu or dashboard. Great for quick links, apps and tools, departments, or upcoming events.
NOTEThe Maximum Items Per Row field only appears after you turn on the Horizontal View toggle.
The Maximum Items Per Row Field
The Maximum Items Per Row field sets the most items that can sit next to each other in one row. Any extra items wrap to the next row. For example, if your list has 10 items and you enter 3, you'll get three rows of three items, plus a fourth row with the last item.
NOTEIf you leave the field empty, ShortPoint will display two items per row.
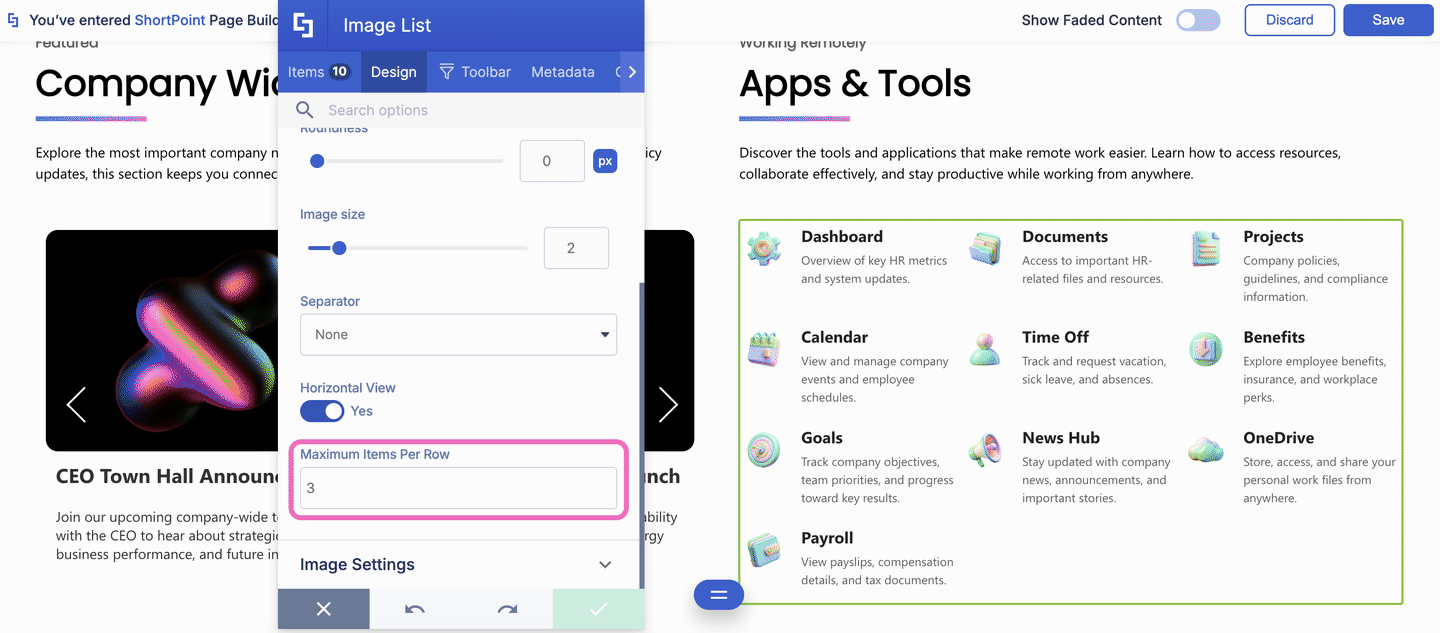
Tips for choosing a number:
- Think about the space you have. A list in a narrow column looks best with 2 items per row. A list that spans the full page has room for 3 or 4.
- Keep text readable. The more items per row, the narrower each item gets, and long descriptions wrap onto more lines.
- Check the result before saving. Your changes appear on the page right away, so try a few numbers and keep the one you like best.
Interactive Tutorial
Click Get Started to learn how to showcase ShortPoint List Design Elements in horizontal view:
Step-by-step Tutorial
NOTEThese steps work for every ShortPoint List Design Element: Date List, File List, Icon List, Image List, and Simple List. In this example, we'll be using an Image List.
Step 1: Open the ShortPoint Page Builder
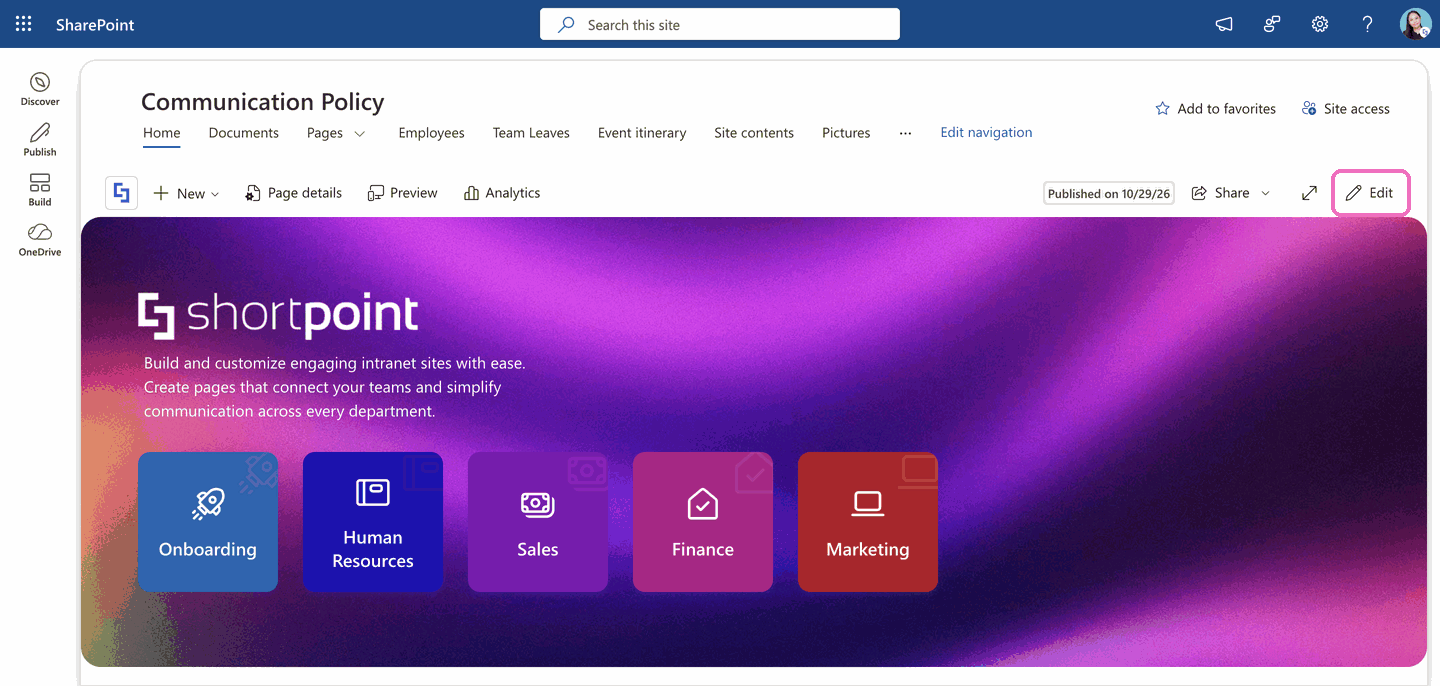
- Go to the SharePoint page you want to use and click Edit.
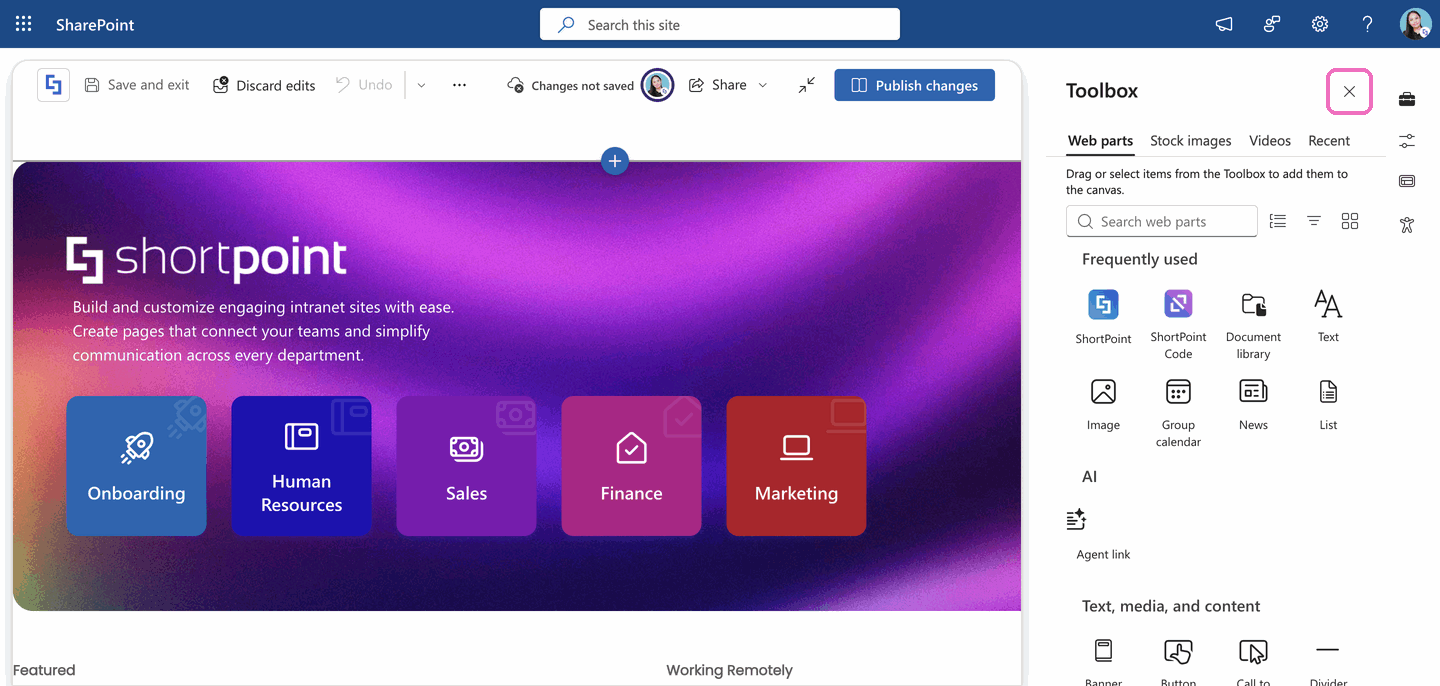
- Close the Toolbox.
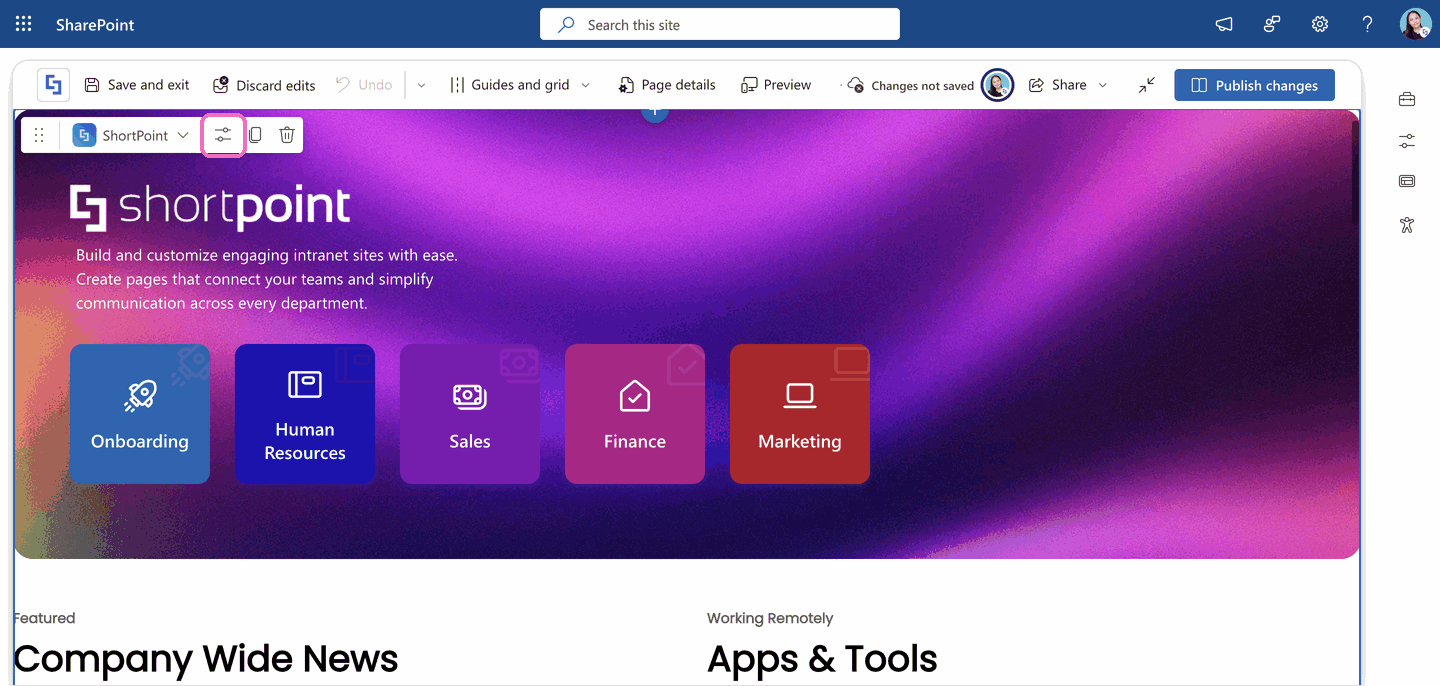
- Click the Edit web part icon on the ShortPoint web part.
Step 2: Open the List Settings
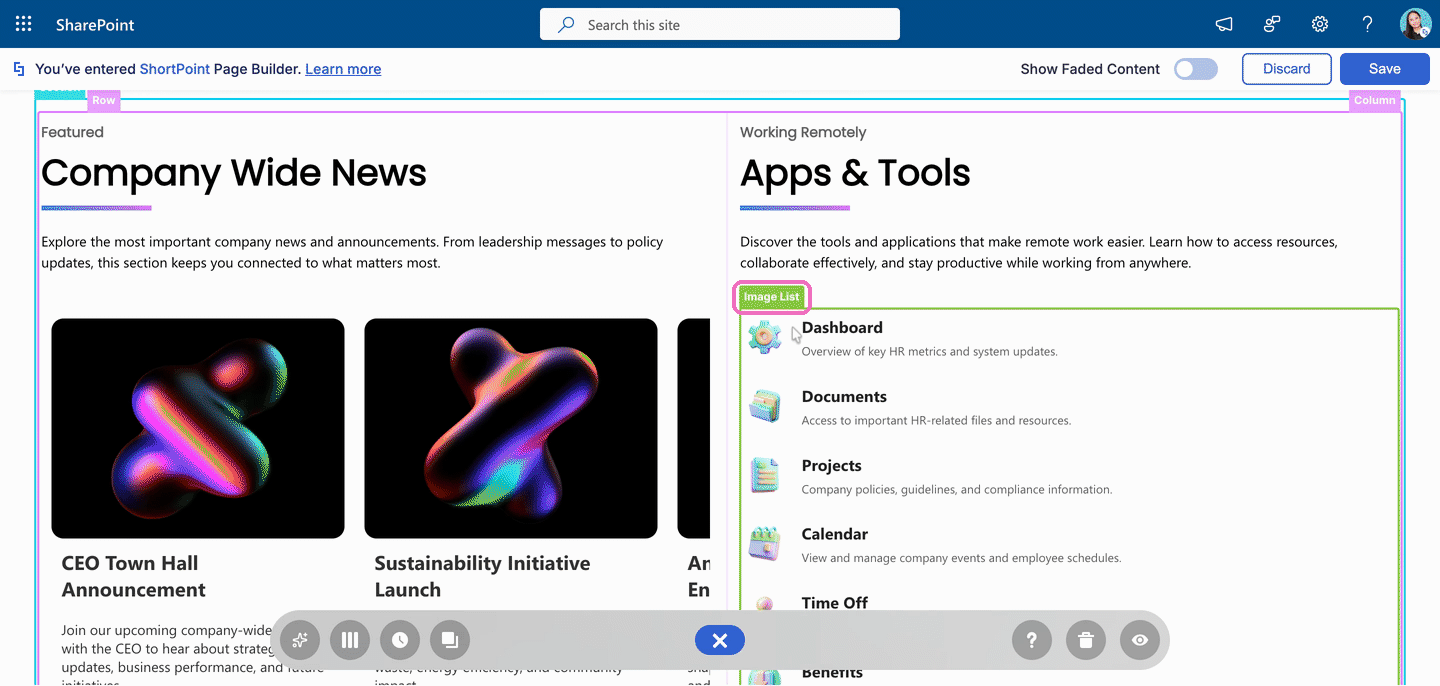
- Click the tag of your List Design Element. In this example, it's the Image List tag.
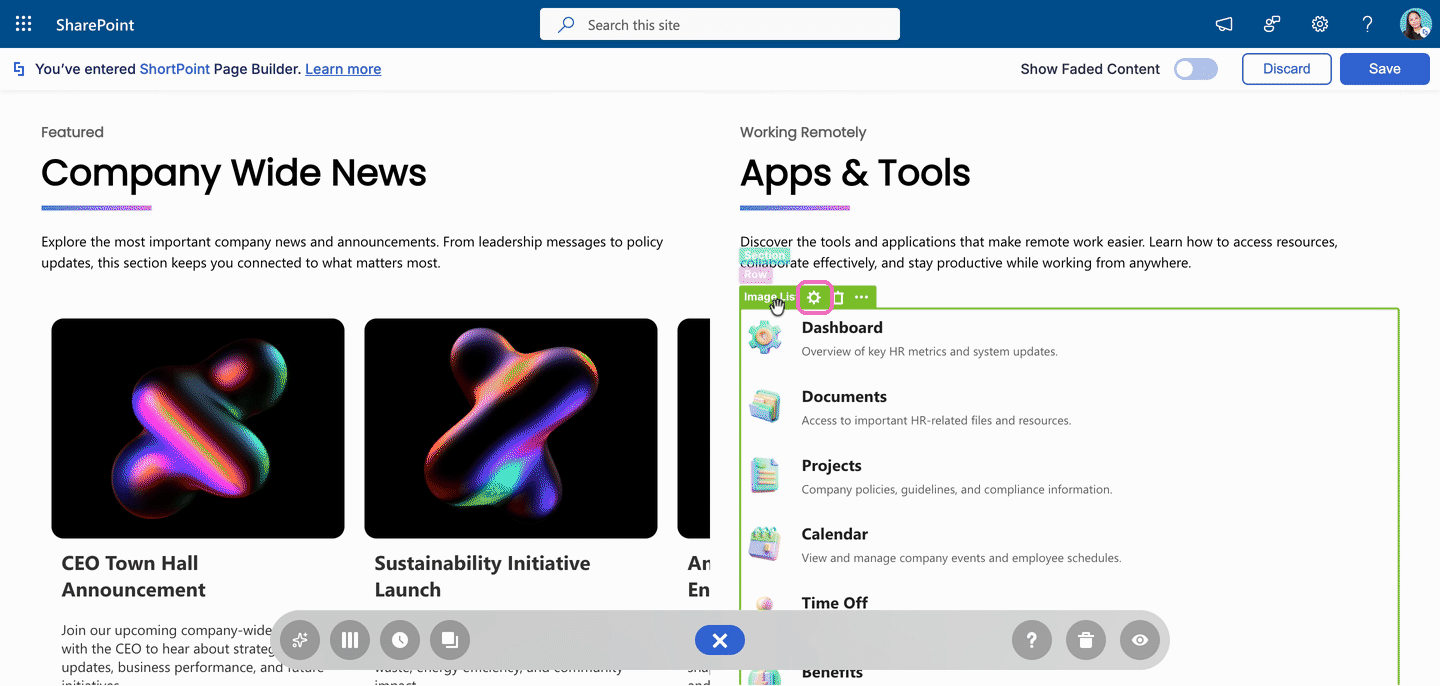
- Select the cogwheel icon.
Step 3: Turn On Horizontal View
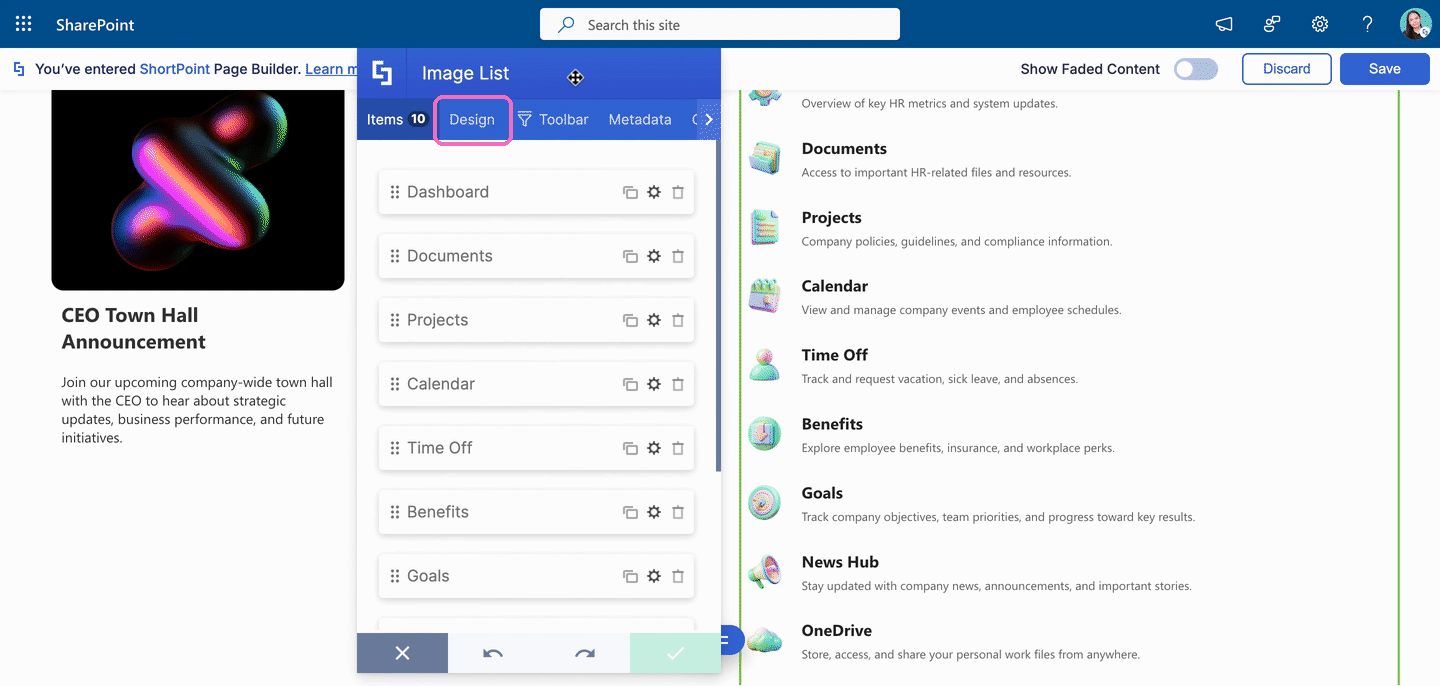
- Go to the Design tab.
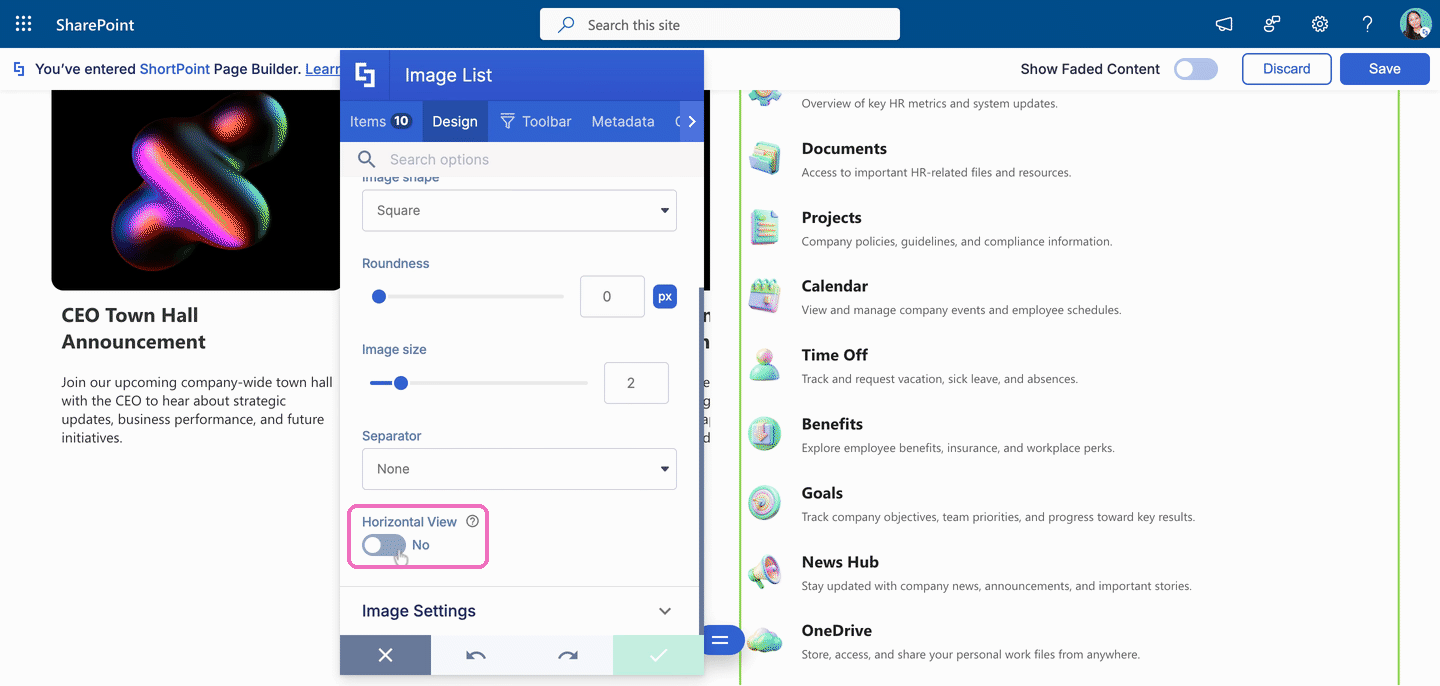
- Scroll down to Horizontal View and toggle it on.
Step 4: Set the Maximum Items Per Row
- In the Maximum Items Per Row field, enter the number of items you want to show in each row. In this example, we'll enter 3.
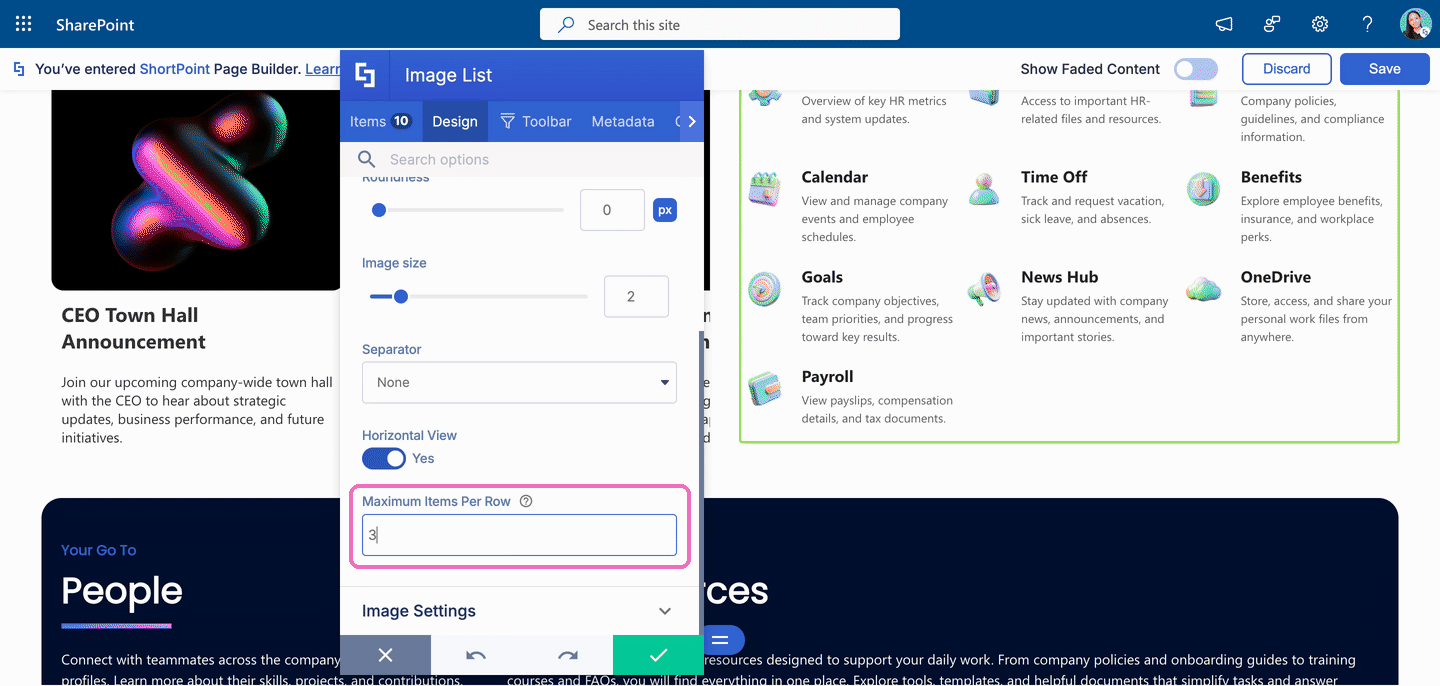
TIPYour changes appear on the page in real time, so you can see how the list looks before you apply them.
Step 5: Save and Publish
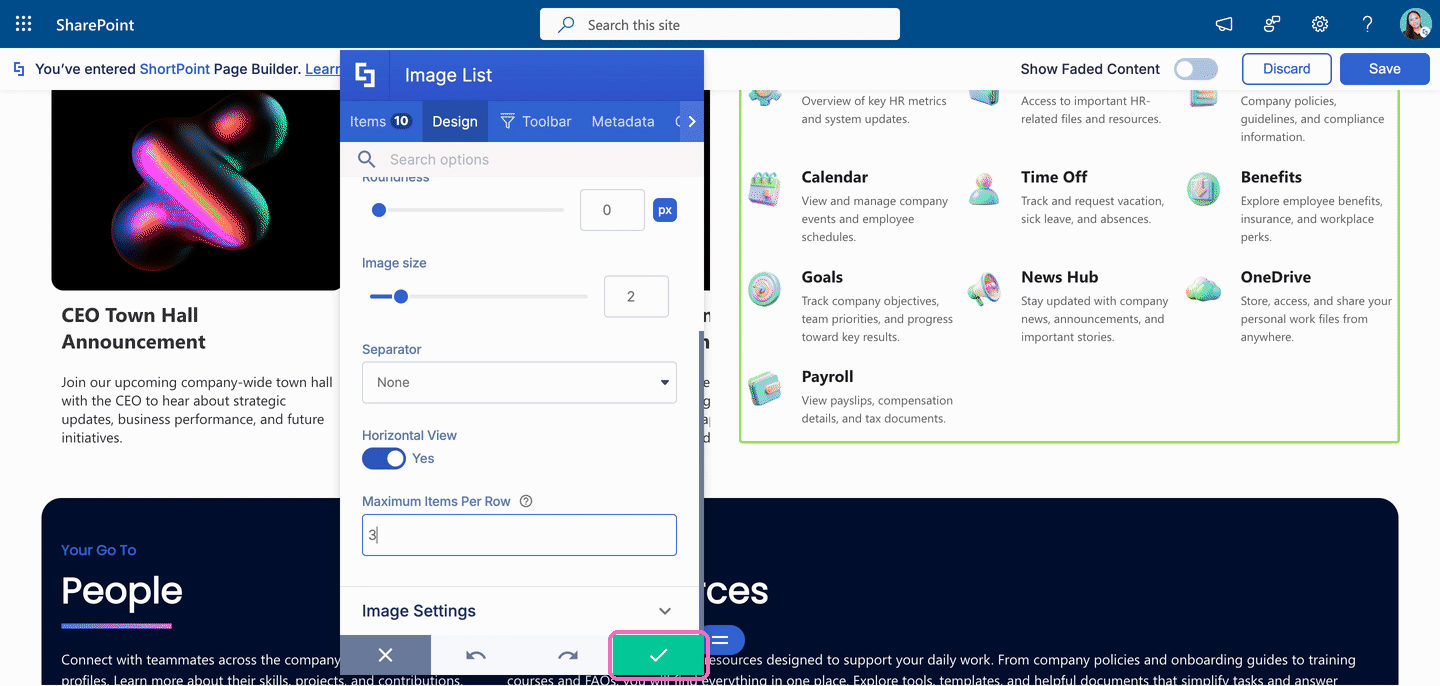
- Once you're happy with the layout, click the green checkmark to apply your changes.
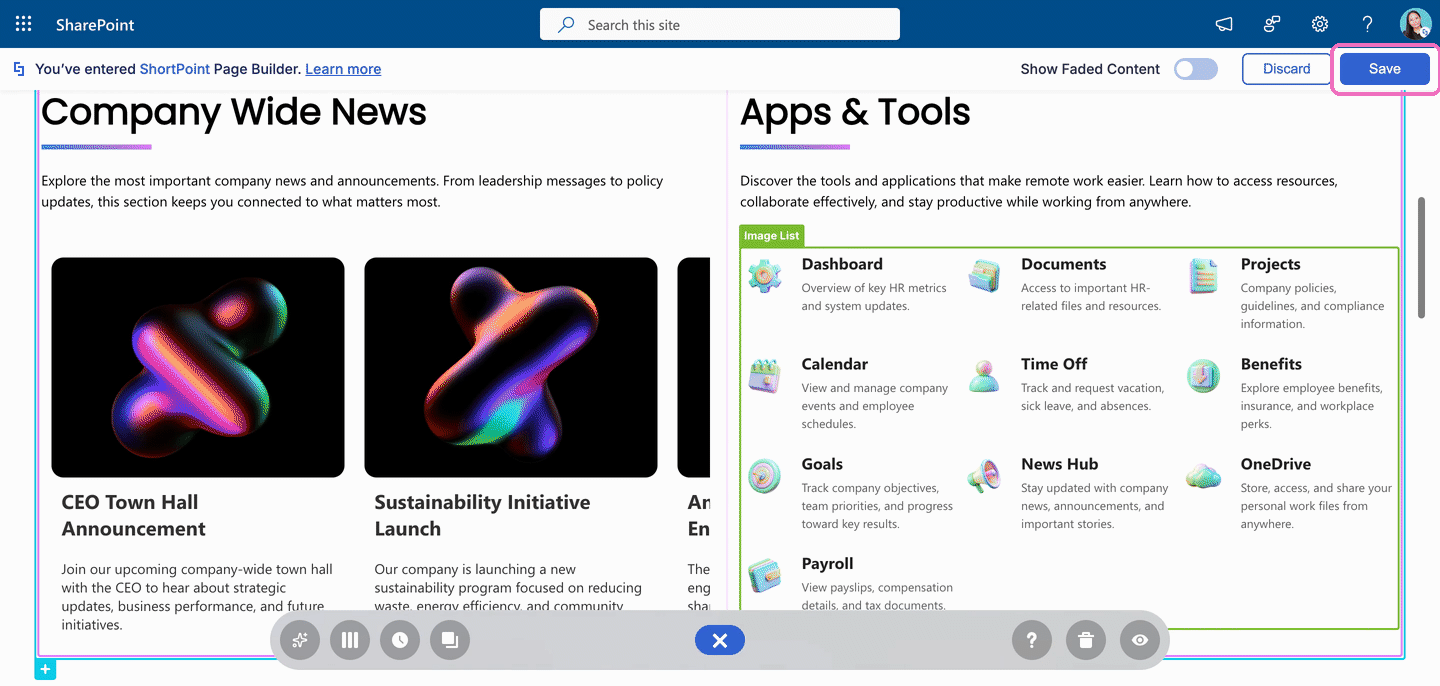
- Click Save to save your changes.
- Click Publish changes to publish your page.
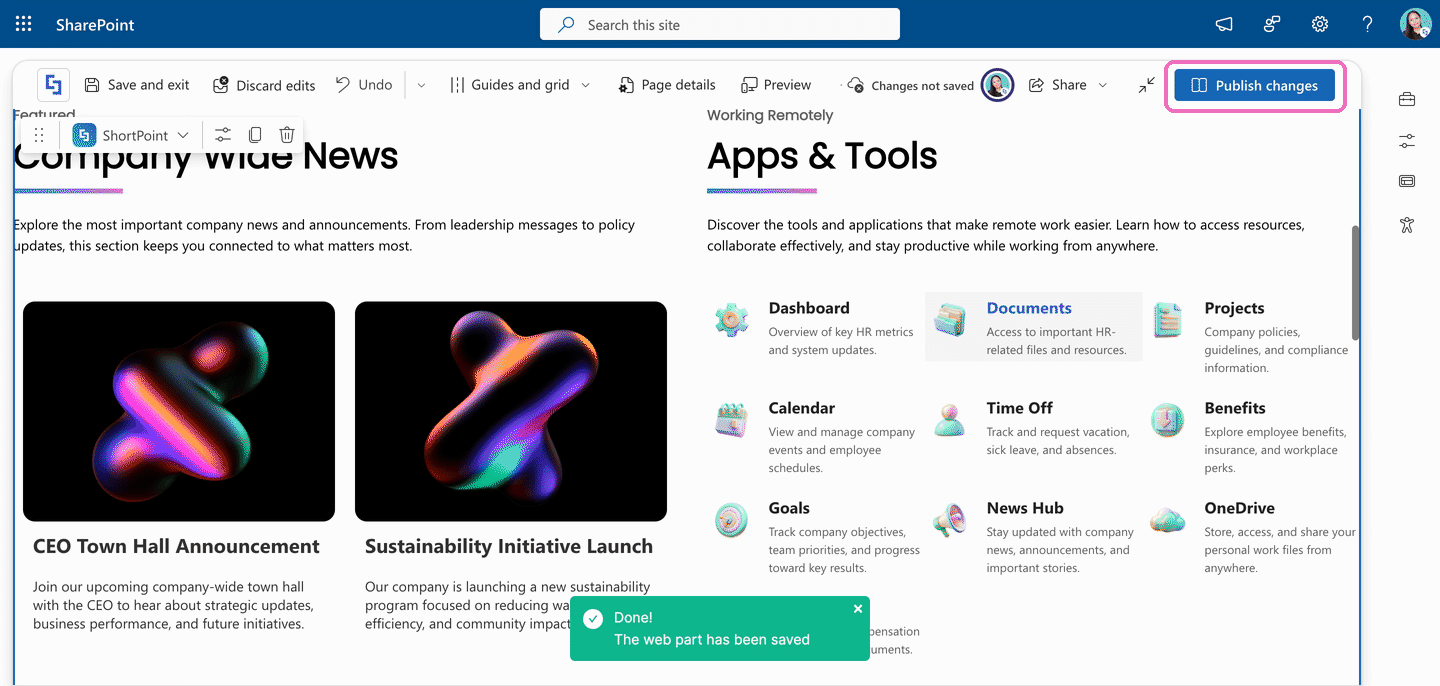
That's it! Your List Design Element now shows its items in horizontal view.
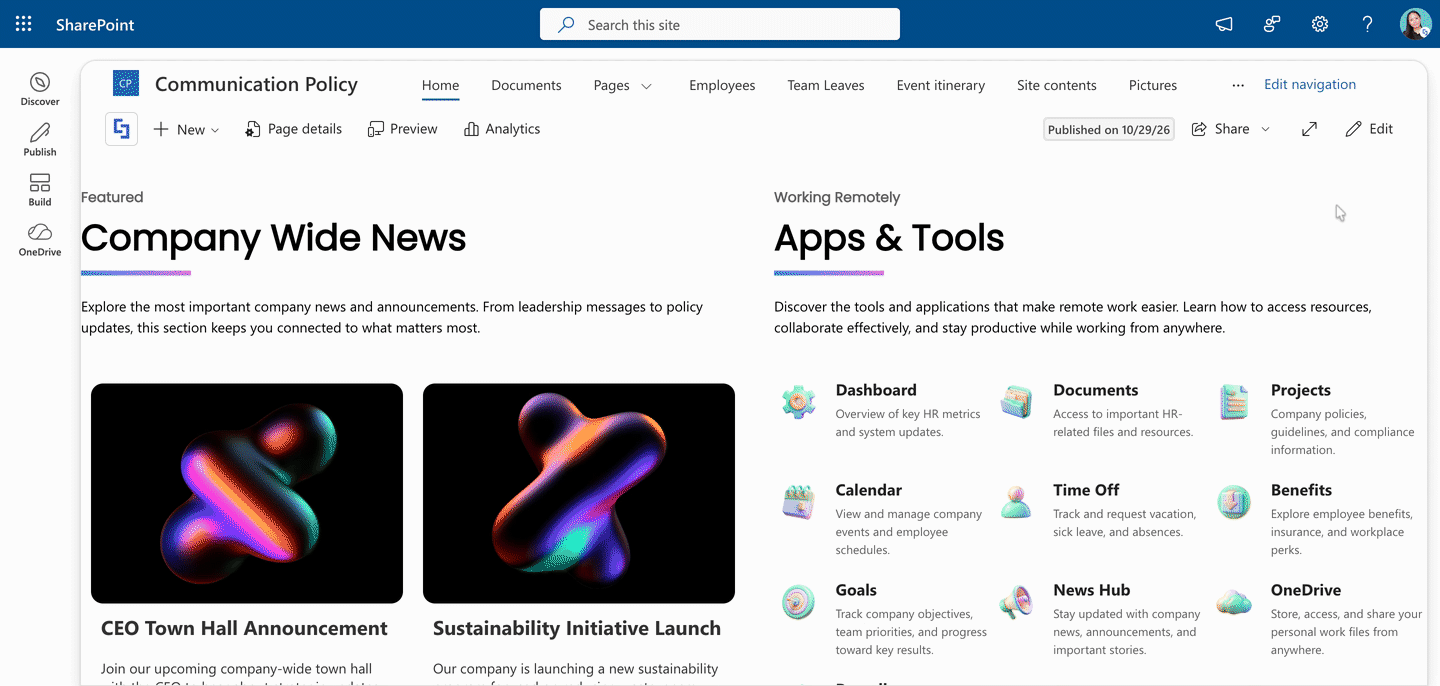
Examples of ShortPoint Lists in Horizontal View
Each ShortPoint List Design Element is built for a different kind of content, so Horizontal View gives each one a slightly different look. Here's what each list is best for and how it appears when its items sit side by side.
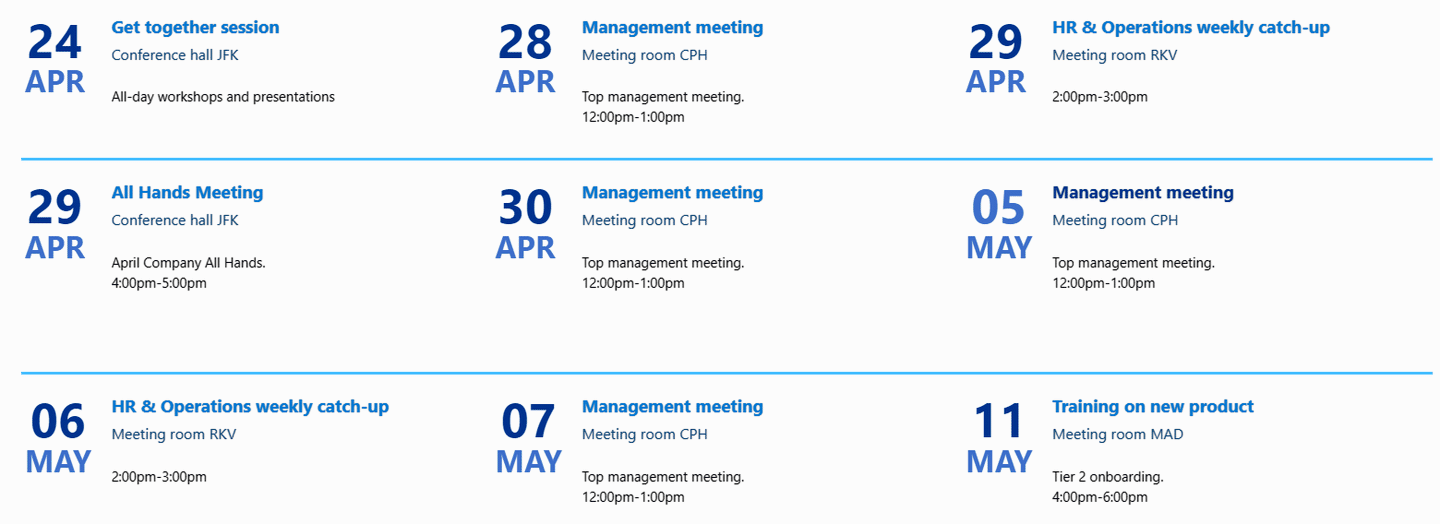
Date Lists
A Date List shows events, deadlines, or announcements with a large, easy-to-read date next to each item. It's perfect for meeting schedules, company events, training sessions, or holiday calendars.
In horizontal view, each date and its details form a small card, and the cards line up in rows like a calendar. Readers can see a whole week or month of events at a glance instead of scrolling down a long list.
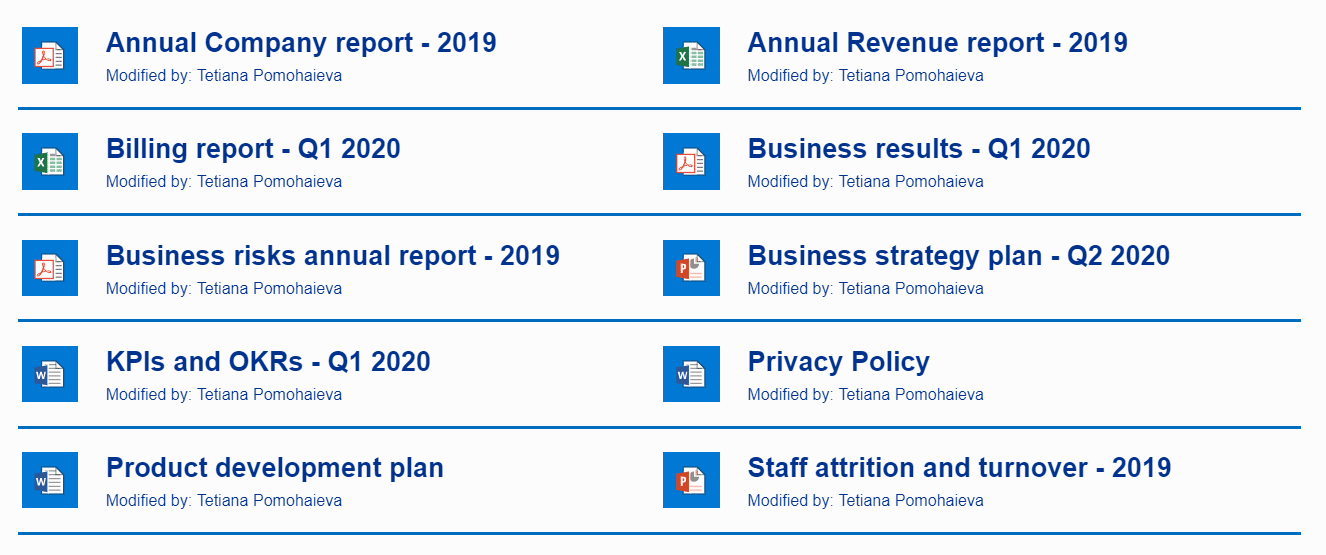
File Lists
A File List gathers important documents in one place, such as reports, policies, forms, and templates. Each item shows a file-type icon (Word, Excel, PDF, PowerPoint) with the file name and extra details like who last modified it.
In horizontal view, the files sit in neat columns, which makes a long document library feel tidy and easy to browse. Two or three items per row works well, so longer file names still have room.
Icon Lists
An Icon List pairs each item with a simple icon, so readers can recognize a topic at a glance. It's great for highlighting key numbers, services, features, or quick links.
In horizontal view, an Icon List turns into a clean, dashboard-style row of tiles. It works especially well for stats and KPIs, where each icon, number, and short note fits nicely in its own column.
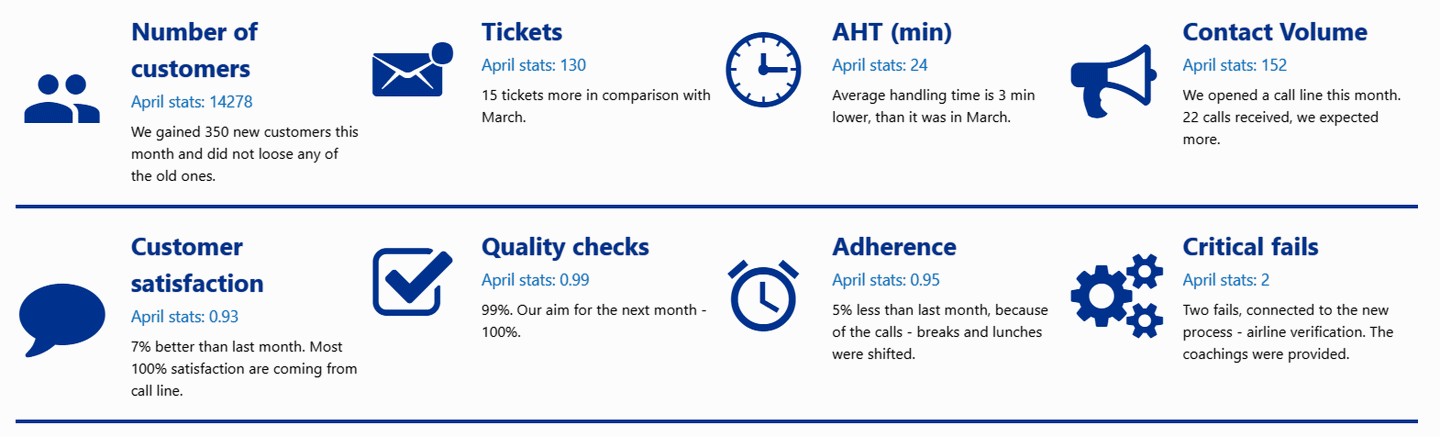
Image Lists
An Image List shows each item with a photo or illustration next to its title and description. Use it for team directories, new-joiner introductions, product showcases, or app and tool shortcuts.
In horizontal view, an Image List looks like a gallery or a team wall. It's a friendly way to show many people or items in a small space. Because each item is compact, you can usually fit four or five per row.

Simple Lists
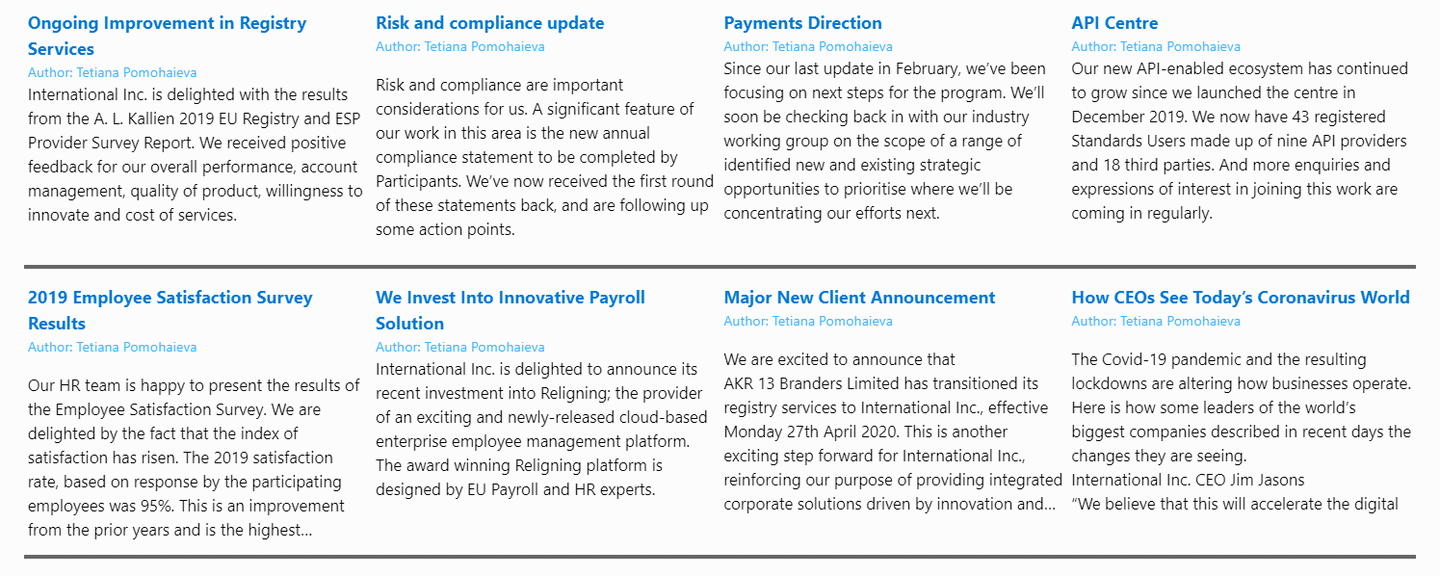
A Simple List keeps things clean, with just a title, an optional subtitle, and a short description. There are no icons or images. It's ideal for news updates, announcements, FAQs, or any text-focused content.
In horizontal view, a Simple List reads like a news grid, with headlines and short summaries side by side. To keep the text easy to read, use three or four items per row and keep descriptions short.
Frequently Asked Questions
Which ShortPoint Design Elements have the Horizontal View option?
All ShortPoint List Design Elements: Date List, File List, Icon List, Image List, and Simple List. You'll find the option in the Design tab of the element's settings.
I can't find the Maximum Items Per Row field. Where is it?
The field only appears after you turn on the Horizontal View toggle. Toggle it on, and the field shows up right below it.
What happens if I leave Maximum Items Per Row empty?
ShortPoint displays two items per row. To show a different number of items in each row, enter a number in the field.
My list has more items than the number I set. What happens to the rest?
Nothing is hidden. Extra items wrap onto a new row. For example, 10 items with a maximum of 3 per row gives you four rows, with one item in the last row.
Can I go back to the single-column layout?
Yes. Open the list's settings, go to the Design tab, and toggle off Horizontal View. Then click the green checkmark, save, and publish your page.
Why do my list items look squeezed?
There are too many items per row for the space available. Try a smaller number in Maximum Items Per Row, or place the list in a wider column.
Does Horizontal View change my list items?
No. It only changes the layout. Your item titles, descriptions, images, icons, and links stay the same.
Related articles:
- ShortPoint Connect: Basic Tutorial
- How to Add Sublist in List Elements
- How to Disable the Hover Behavior of Image List Item Titles
- How to Make a List Display Multiple Subtitles
- How to Display the Multiple Hyperlinks in ShortPoint List
- Modify the look of Image List Items with CSS (Border, Shadow and Rounded Corners)
- ShortPoint Date Lists Design Element