Try ShortPoint now
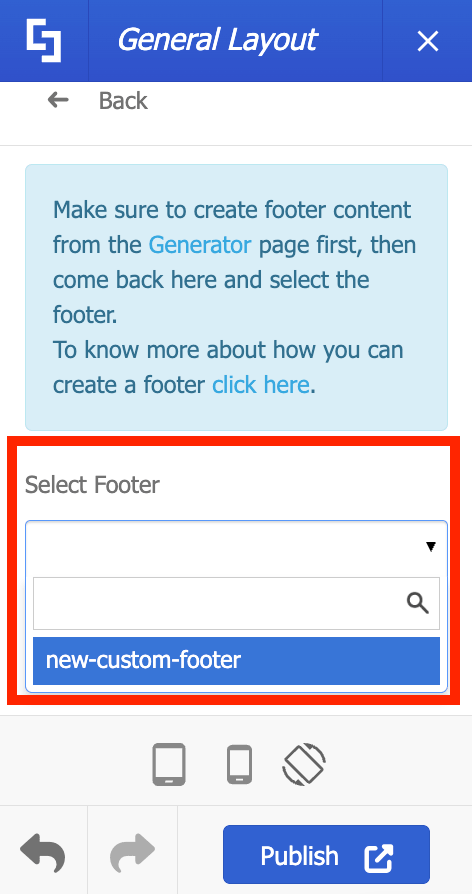
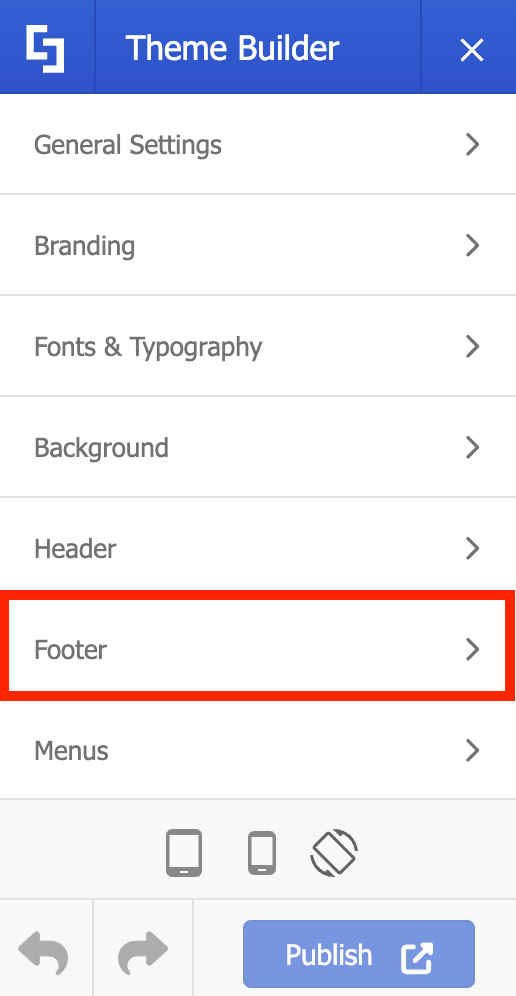
TL;DR: After you create a custom footer in ShortPoint Generator, you add it to your SharePoint site with ShortPoint Theme Builder. Open the ShortPoint menu on any page and choose Theme Builder. Go to Footer, then General Layout, and pick your footer from the Select Footer list. You can also adjust the layout, background and spacing around it. Click Publish, and the footer appears across your whole site collection.
Once you’ve created your custom footer in the ShortPoint Generator, bringing it to life on your SharePoint sites is straightforward.
Using ShortPoint Theme Builder, you can easily apply your new footer across your entire site collection in just a few steps. Check out the step-by-step tutorial below to get started!
TIPDon’t have a custom footer yet? Check out How to Create a Custom SharePoint Footer Using ShortPoint Generator to learn more.
TABLE OF CONTENTS
- Prerequisites
- What is the Footer Option in Theme Builder?
- Adding Custom Footer
- Frequently Asked Questions
Prerequisites
- You must have the latest version of ShortPoint SPFx installed.
- You must be a ShortPoint Designer with either a Pro or Enterprise license. For more information, check out Licensing Options.
- You must already have a Custom Footer created in ShortPoint Generator. To learn more, check out How to Create a Custom SharePoint Footer Using ShortPoint Generator.
What is the Footer Option in Theme Builder?
The Footer feature within Theme Builder makes it easy to apply the custom footer you created in ShortPoint Generator across your entire SharePoint site collection, ensuring a consistent look and feel throughout your sites.
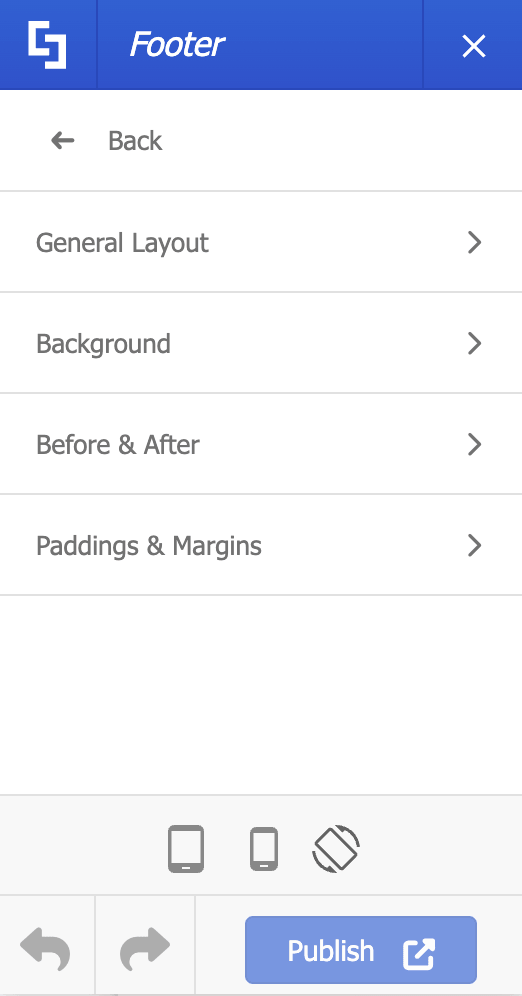
It also gives designers extra creative control, allowing you to fine-tune the overall layout, background, and spacing around your custom footer for a perfectly tailored finish.
NOTEFor more information on the customizing options under footer, check out How to Customize Custom Footers Using ShortPoint Theme Builder.
Adding Custom Footer
Start the interactive tutorial to learn how to add custom footers to your SharePoint site collection:
Step 1: Launch Theme Builder
- Go to a SharePoint page and click the ShortPoint shortcut:

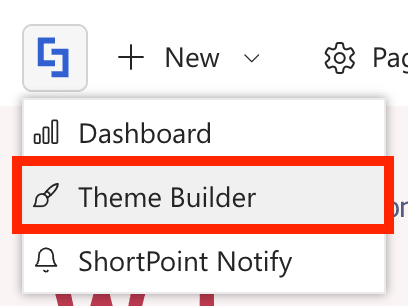
- Select Theme Builder:
Step 2: Open Footer Settings
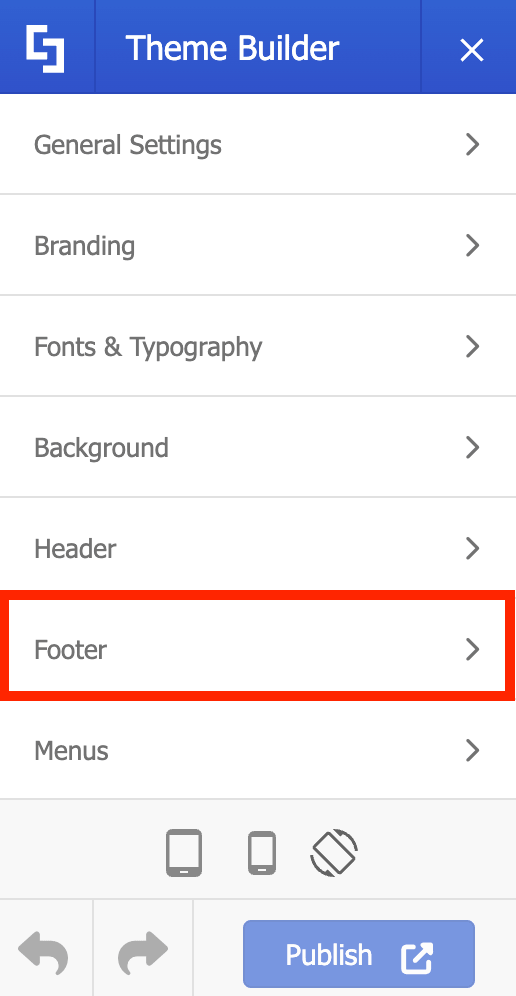
- Click Footer:
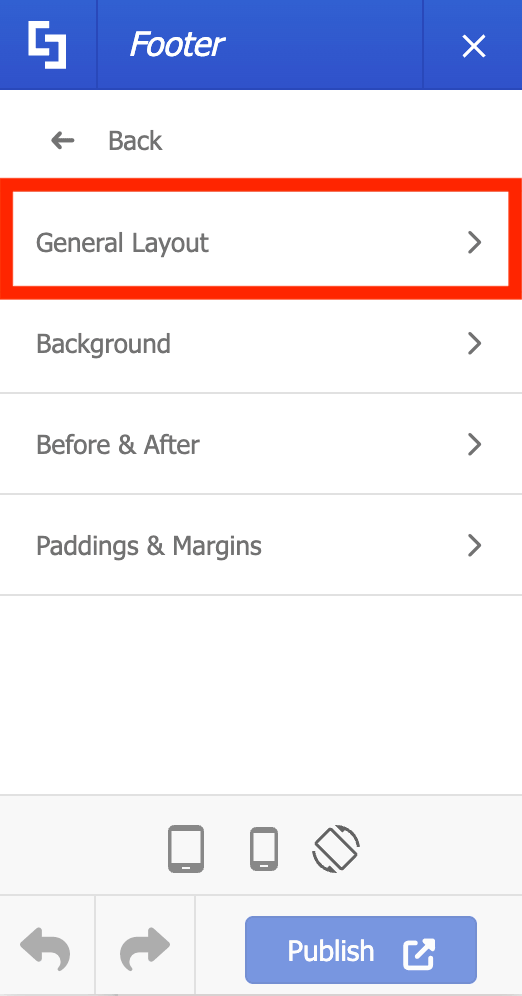
- Choose General Layout:
Step 3: Add Custom Footer
- Look for the Select Footer field and click the custom footer you want to use:
Step 4: Customize Footer (Optional)
- Modify the layout, spacing, etc of the footer to your liking:
NOTEFor more information about the options you can modify, go to How to Customize Custom Footers Using ShortPoint Theme Builder.
Step 5: Publish
- Once satisfied, click Publish to see your changes live:

Great work! You’ve successfully added the custom footer to your SharePoint site collection.
Frequently Asked Questions
What are the prerequisites for adding a custom footer?
You need the latest version of ShortPoint SPFx installed, an active license (Pro or Enterprise), and a custom footer created in ShortPoint Generator.
How do I launch the Theme Builder?
Go to a SharePoint page, click the ShortPoint shortcut, and select Theme Builder from the menu.
How do I add a custom footer to my SharePoint site?
In Theme Builder, click Footer, choose General Layout, select your custom footer, customize it if needed, and then publish your changes.
Can I customize the layout and spacing of the footer?
Yes, Theme Builder provides options to fine-tune the overall layout, background, and spacing around your custom footer.
Where can I find more information about customizing footers?
For detailed customization options, refer to the guide "How to Customize Custom Footers Using ShortPoint Theme Builder."
Related Articles