 Try ShortPoint now
In this article we are going to show you how to use ShortPoint Widget, to improve the look and feel of an existing Support Template.
Step 1: Create a new site from a Support Template
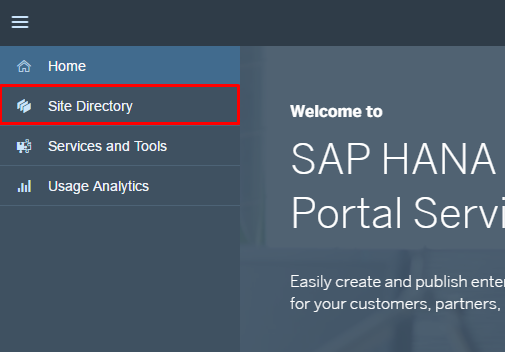
From the Admin Space, in SAP HANA Cloud Portal, go to Site Directory
Then Create a new site by clicking on the ( + ) button
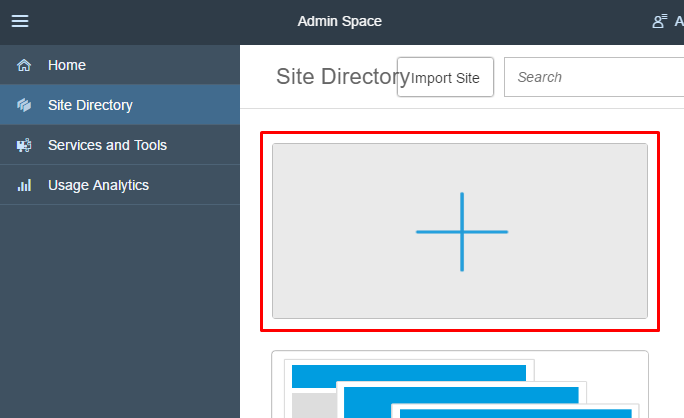
From the available Templates, choose Support Site

Step 2: Replace HTML Widget with ShortPoint Widget
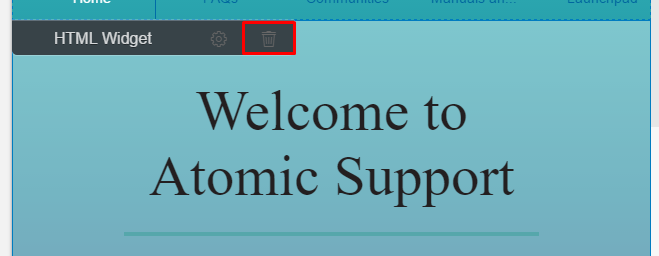
Now you have created a Site from Support Site Template, now navigate to Homepage from the menu on the left panel

Delete the first HTML Widget that contains the message Welcome to Atomic Support


Now you will see a big yellow info box, as in the next image.

Step 3: Add a Nice Background with a welcome message
Edit the ShortPoint Widget

Remove the default content that appears inside the editor


It will open ShortPoint Inserter Tool, that will allows you to pick design elements, and choose their options.

On the search box, type "Background" or any part of it

Now you can start customizing the "Background" ShortPoint, we'll start from the "Settings" tab,
Scroll down until you see the "Height" field, update its value to be 70% (this means the background image will fill up 70% of the screen)

Now navigate to the "Background" tab and fill the Image field with the value (http://www.shortpoint.com/wp-content/uploads/2015/08/rocky-beach.jpg), as shown in the next image

Then click Insert

Basically we have configured this element, to have an image background (to a nice beach), and we have set the height of this background element to 70%, which means that this background when it will be available in the view port, it will occupy 70% of the screen device's height.
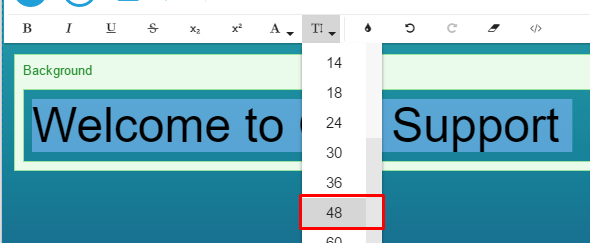
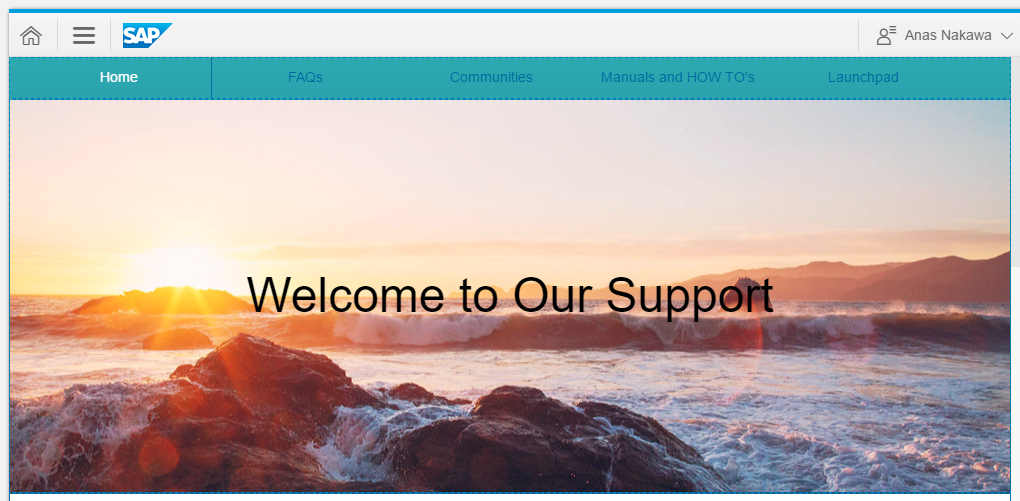
Now put the cursor inside the Background element, and type a Welcome Message,

Update the font size to make it big
And hit the Save button.

And now you have a nicely designed background banner for your support site!
Remember: You need to publish your page ( using the Publish button as shown in the next image ), in order to let your site visitors see your designed pages, otherwise only site page editors will be able to see your changes.

