Try ShortPoint now
Ready to convert your SharePoint 2019/SE Classic Pages to Modern? We’ve prepared a detailed step-by-step guide for you, so you can continue tapping into the amazing features ShortPoint has to offer once ShortPoint SPFx version 9.5.0.0 comes out.
NOTEStill on the fence? Check out the articles below to learn how you’ll benefit from this transition:

• Stay Ahead of the Curve: Why It’s Time to Move Your SharePoint 2019/ SE Classic Pages to Modern
• ShortPoint Says Goodbye to Grid Mode: Welcome to a Faster, Seamless Live Mode Experience
TABLE OF CONTENTS
- Prerequisites
- Understanding "Classic" vs. "Modern" in SharePoint
- Limitations
- Step-by-step Tutorial
- What’s Next?
Prerequisites
- You must have SharePoint 2019/SE Classic Pages with ShortPoint elements.
- You must be a ShortPoint Designer with an active license.
Understanding "Classic" vs. "Modern" in SharePoint
Before we delve into the how-to, it’s crucial to understand what “classic” and “modern” mean in SharePoint to avoid any confusion.
"Classic" and "Modern" can apply to three distinct layers within your environment:
First Layer: Sites and Site Collections
The SharePoint Site/Site Collection is your SharePoint environment’s top-level container. It holds all the assets, including lists, libraries, and pages.
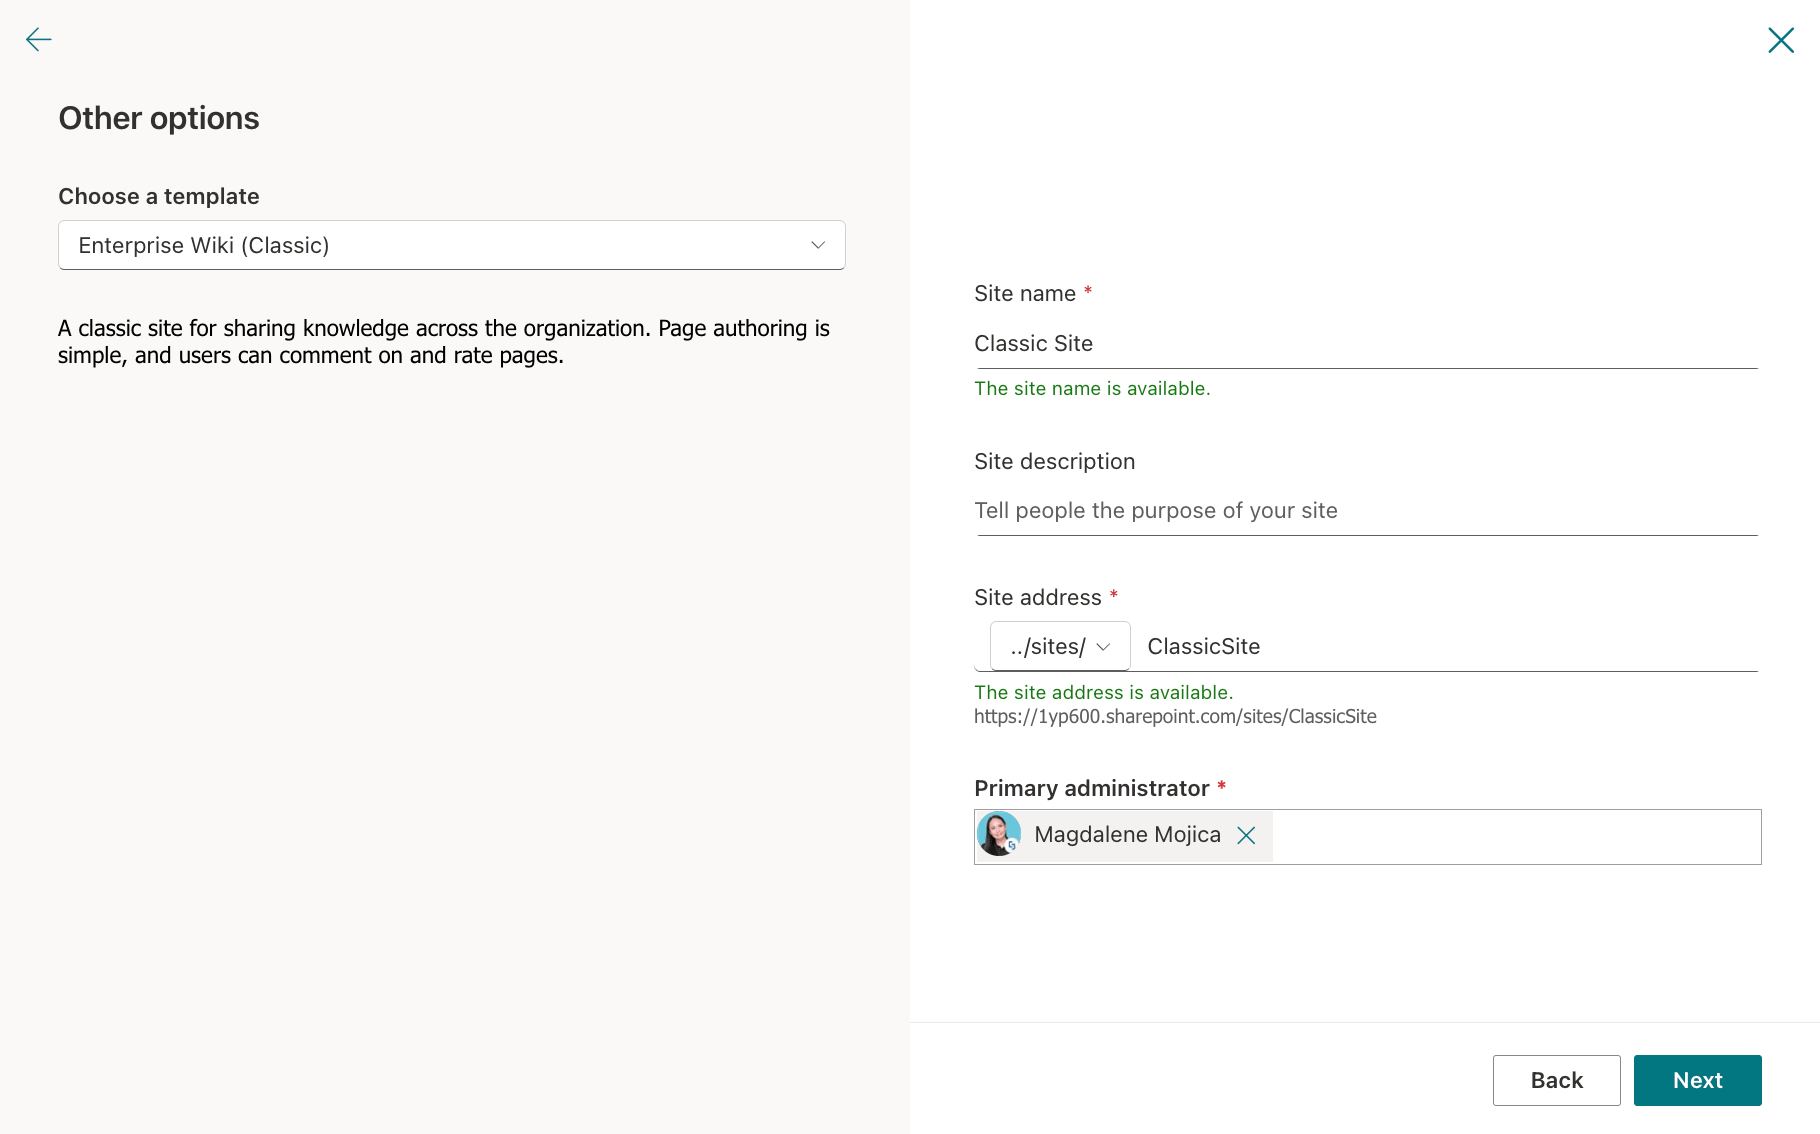
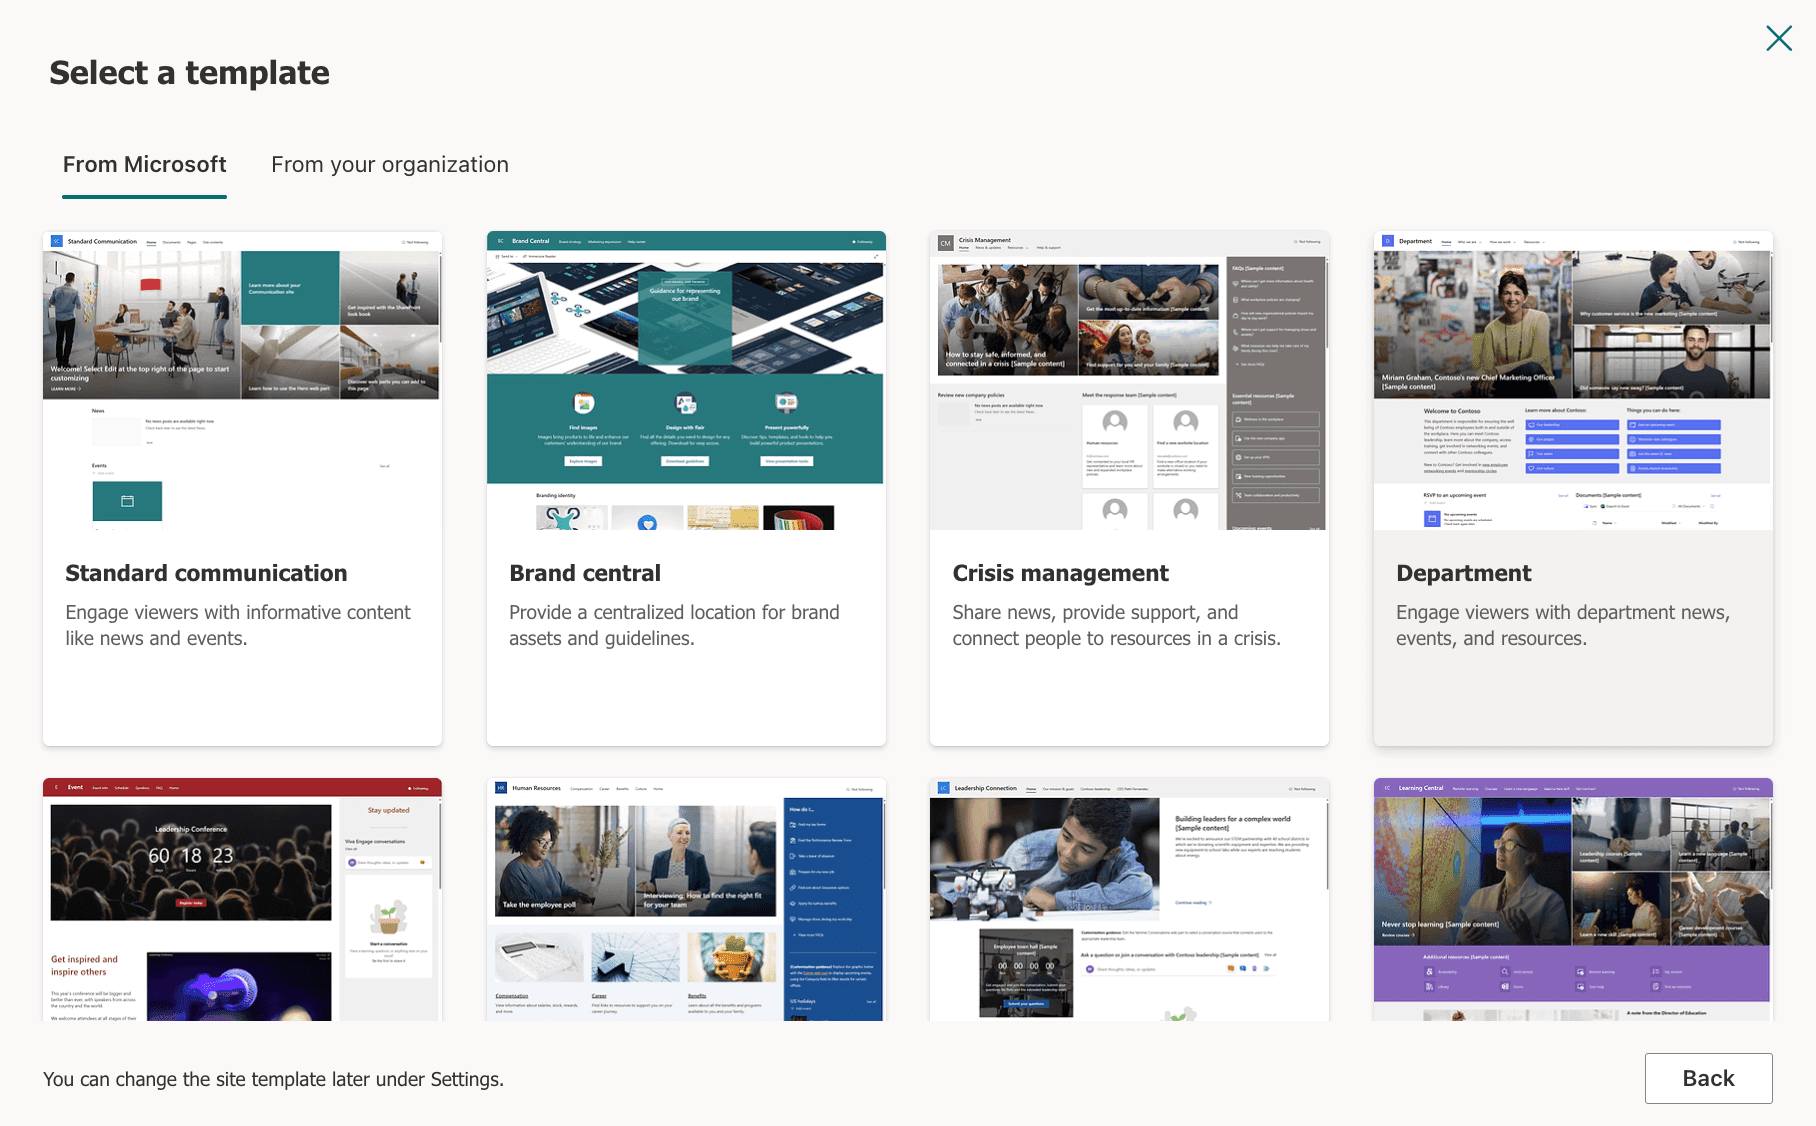
It becomes either “Classic” or “Modern” depending on the template you use to create it.
Classic Site Template | Modern Site Template |
 |  |
However, despite its category (Classic or Modern), you can have both Classic and Modern pages within it.
Second Layer: Lists and Libraries
Inside SharePoint sites are Lists and Libraries. Essentially, they act as the storage area. Document Libraries allow you to create dedicated folders for storing files, while Lists are used to track non-document data like project tasks, event sign-ups, etc.
Unlike sites, however, they aren’t strictly categorized as “Classic” or “Modern”. The terms “Classic” and “Modern” simply refer to the experience you want to be shown. For example, let’s take a look at the List below. You can easily switch between the Classic and Modern experience:
Third Layer: Individual Pages
Finally, there are the individual SharePoint pages. They hold all the web parts, and, in your case, ShortPoint Design Elements that your users interact with.
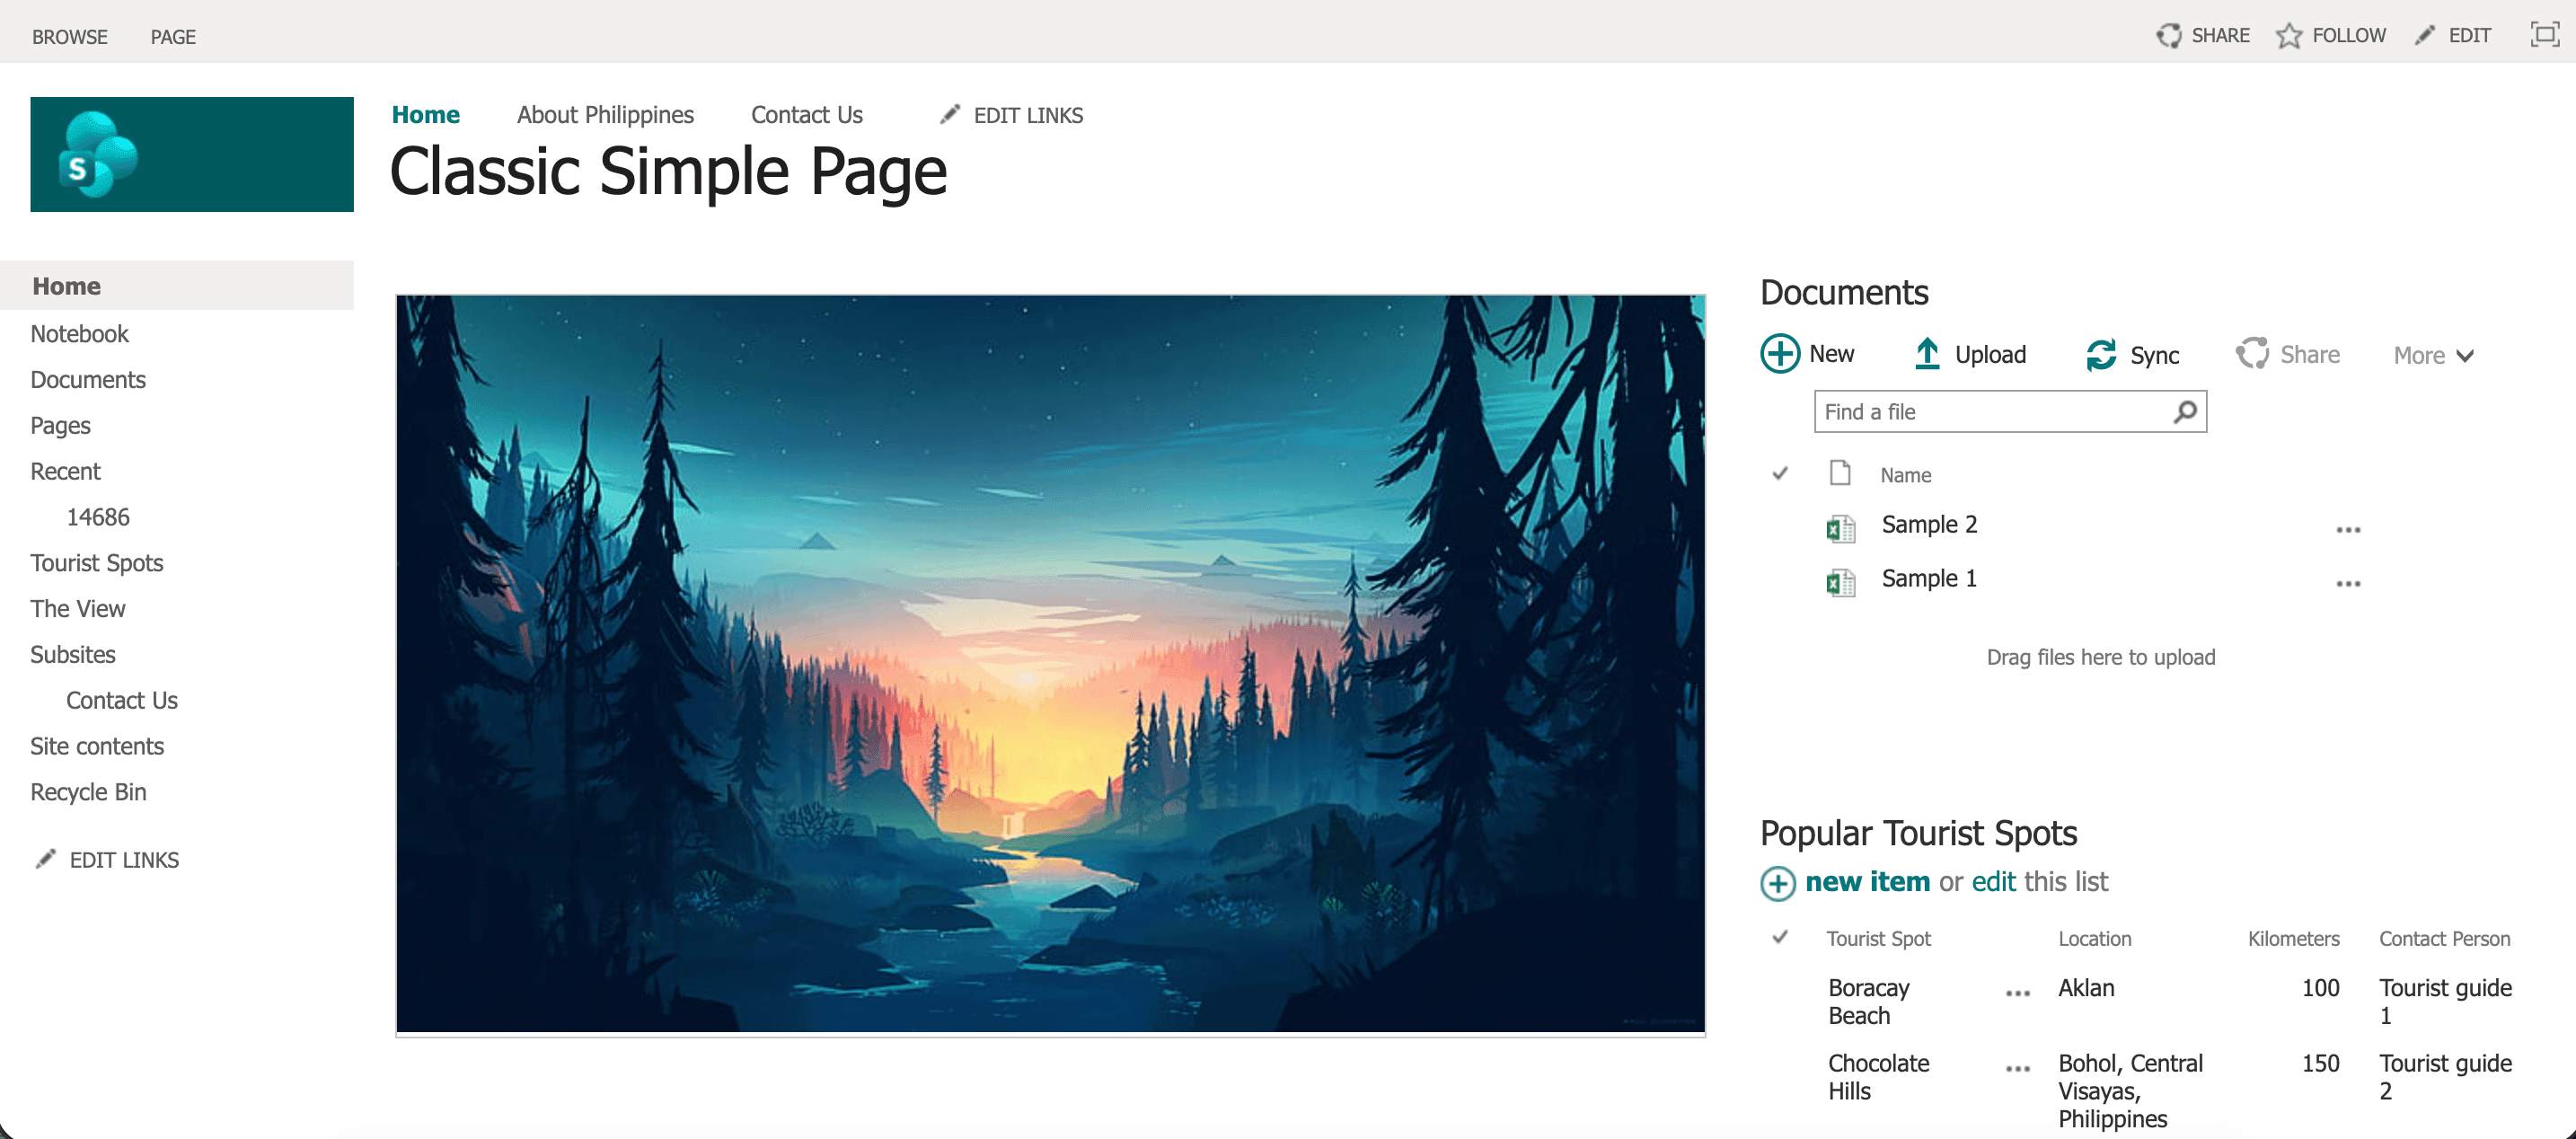
They can be explicitly assigned as either Classic or Modern.
Classic Page | Modern Page |
 | 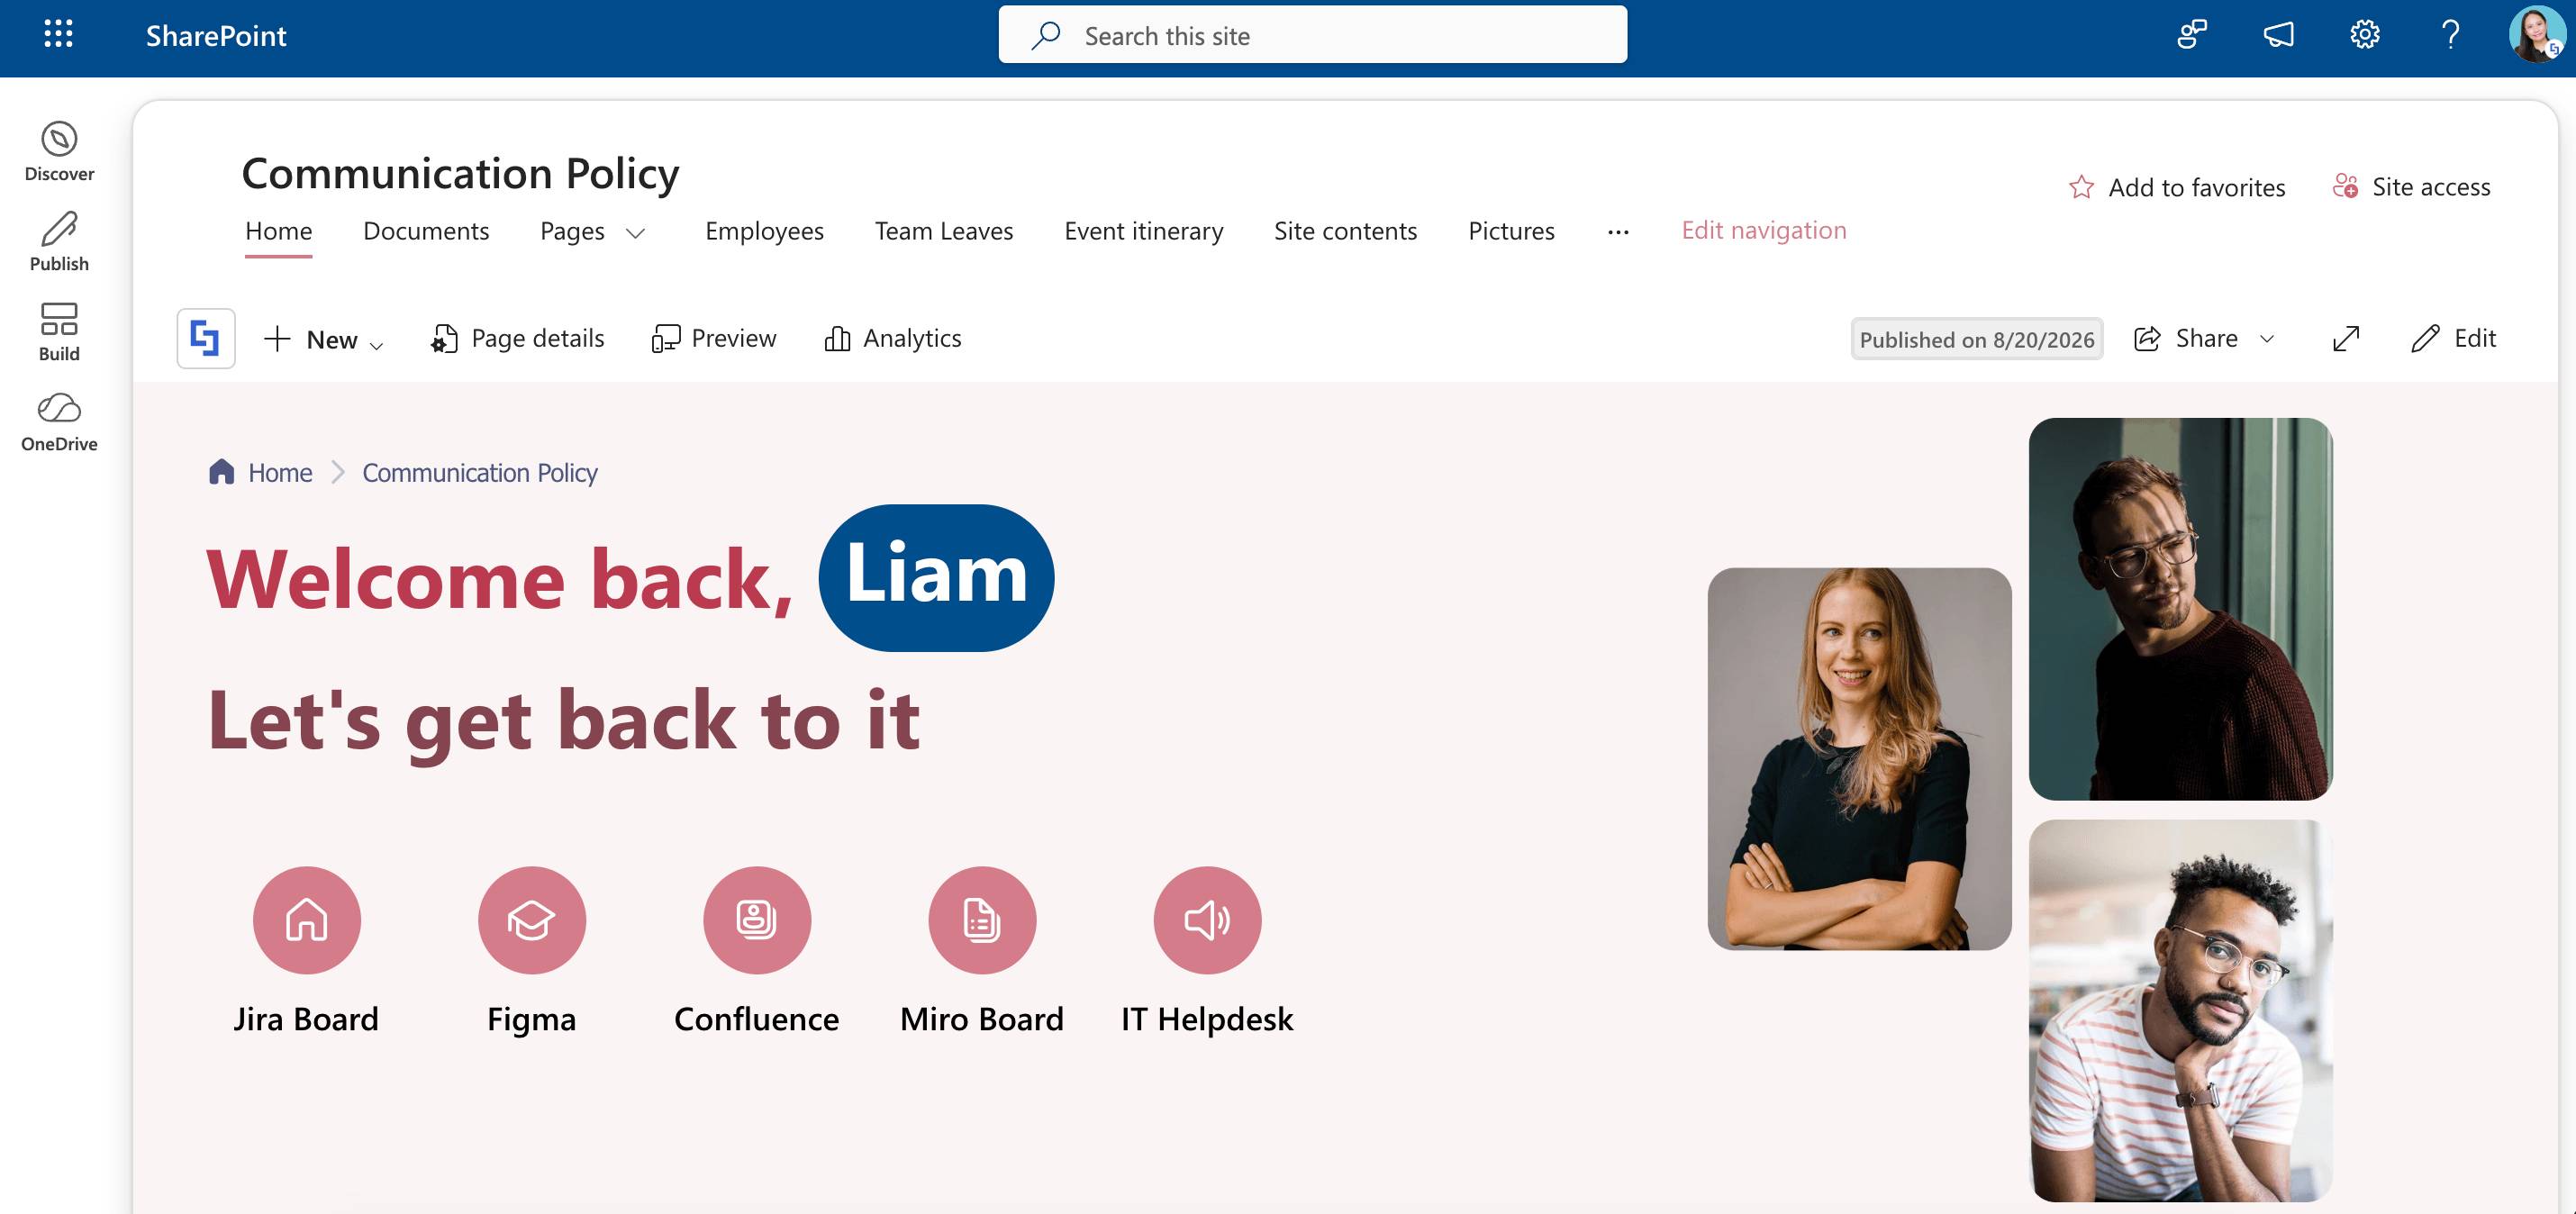 |
These individual SharePoint pages are what you will work with in this article. You will convert Classic Pages to modern ones.
Limitations
Before starting the tutorial, here are some things to keep in mind:
- You won’t be able to copy classic SharePoint web parts. As an alternative, you can use other ShortPoint Design Elements with the same function as a replacement. For example, you can use the File List Design Element as an alternative to the Document web part.
- You won’t be able to copy content inside the ShortPoint “Web Part Container” Design Element. This specific Design Element is only available on classic pages. As an alternative, you can use the “ShortPoint Embedded Web Part” Design Element instead.
- You won’t be able to copy web parts outside of the ShortPoint Web Part when you use the ?spcopy=1 command.
- You will not be able to add a pre-loader on Modern SharePoint pages using ShortPoint’s Modern Theme Builder.
- You will not be able to duplicate customizations done in the Classic Theme Builder. This is because Modern Pages use ShortPoint’s Modern Theme Builder.
- To keep your customizations, you can simply export what you have in the Classic Theme Builder and import it to the Modern Theme Builder. For more information, check out Export and Import Customizations.
- If you encounter any issues, we recommend manually copying the settings from Classic Theme Builder to Modern Theme Builder.
Step-by-step Tutorial
Follow the detailed guide below to learn how to transform your Classic Pages into Modern ones:
Part 1: Rename your Classic Page
This section shows you how to rename your Classic page so you can keep the same URL once you convert it to a Modern page.
Step 1: Edit your Classic Page
Go to the Classic SharePoint page you want to transform into a Modern page and click Edit:

Step 2: Rename your page
To retain the URL of the page, you will need to rename your Classic page. In our case, the name of the page is Communication Policy.aspx:
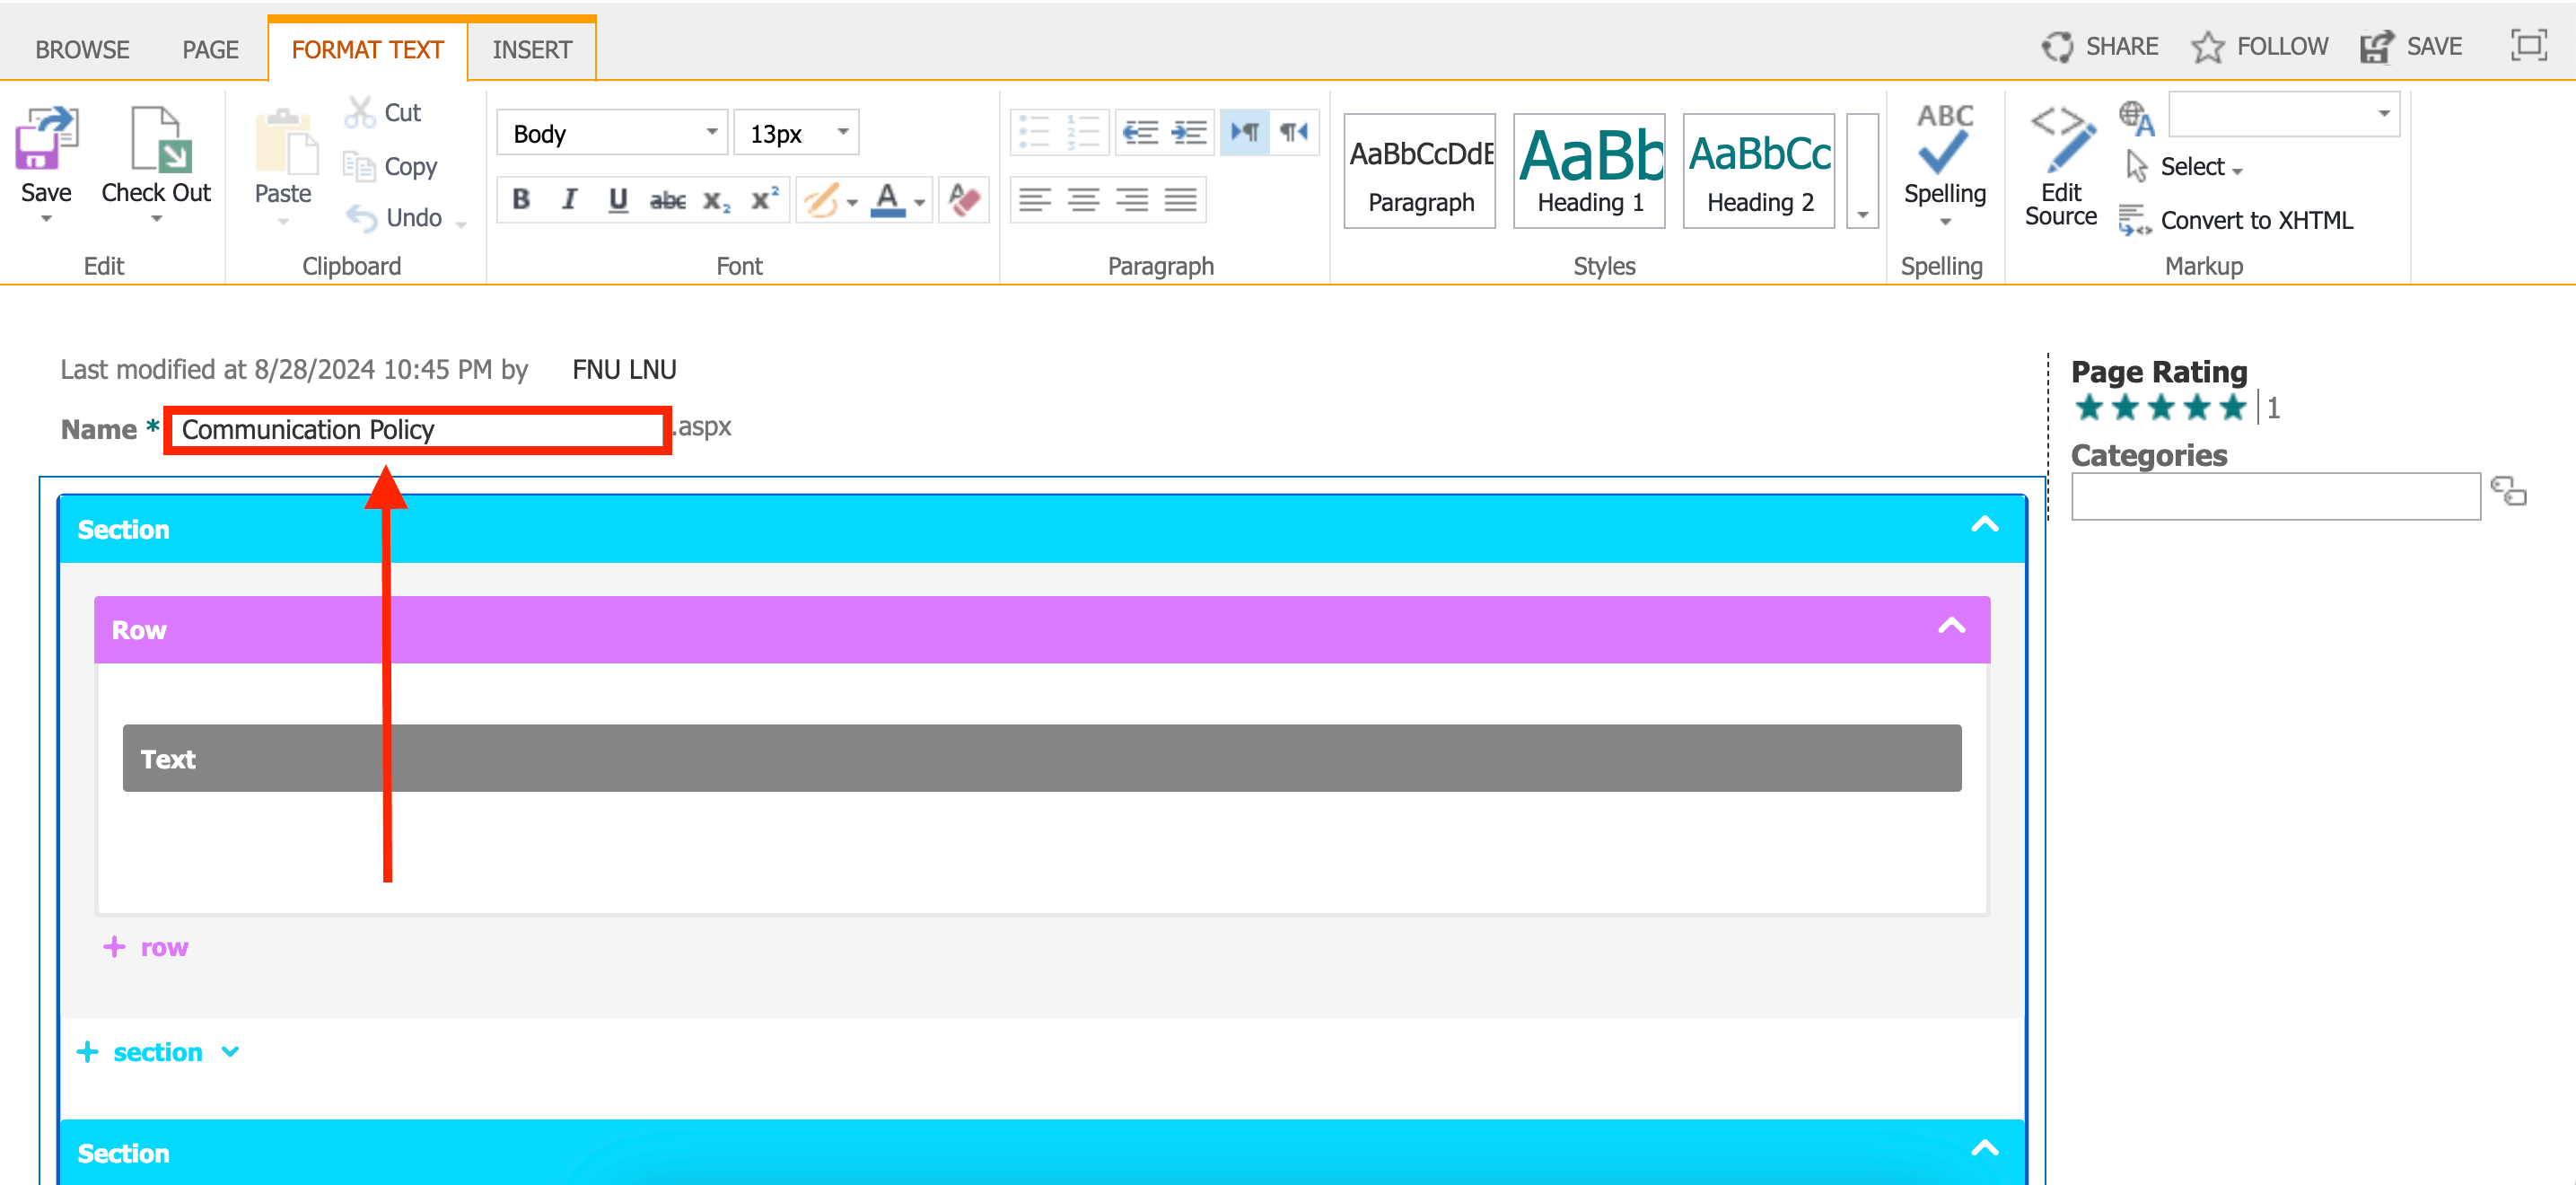
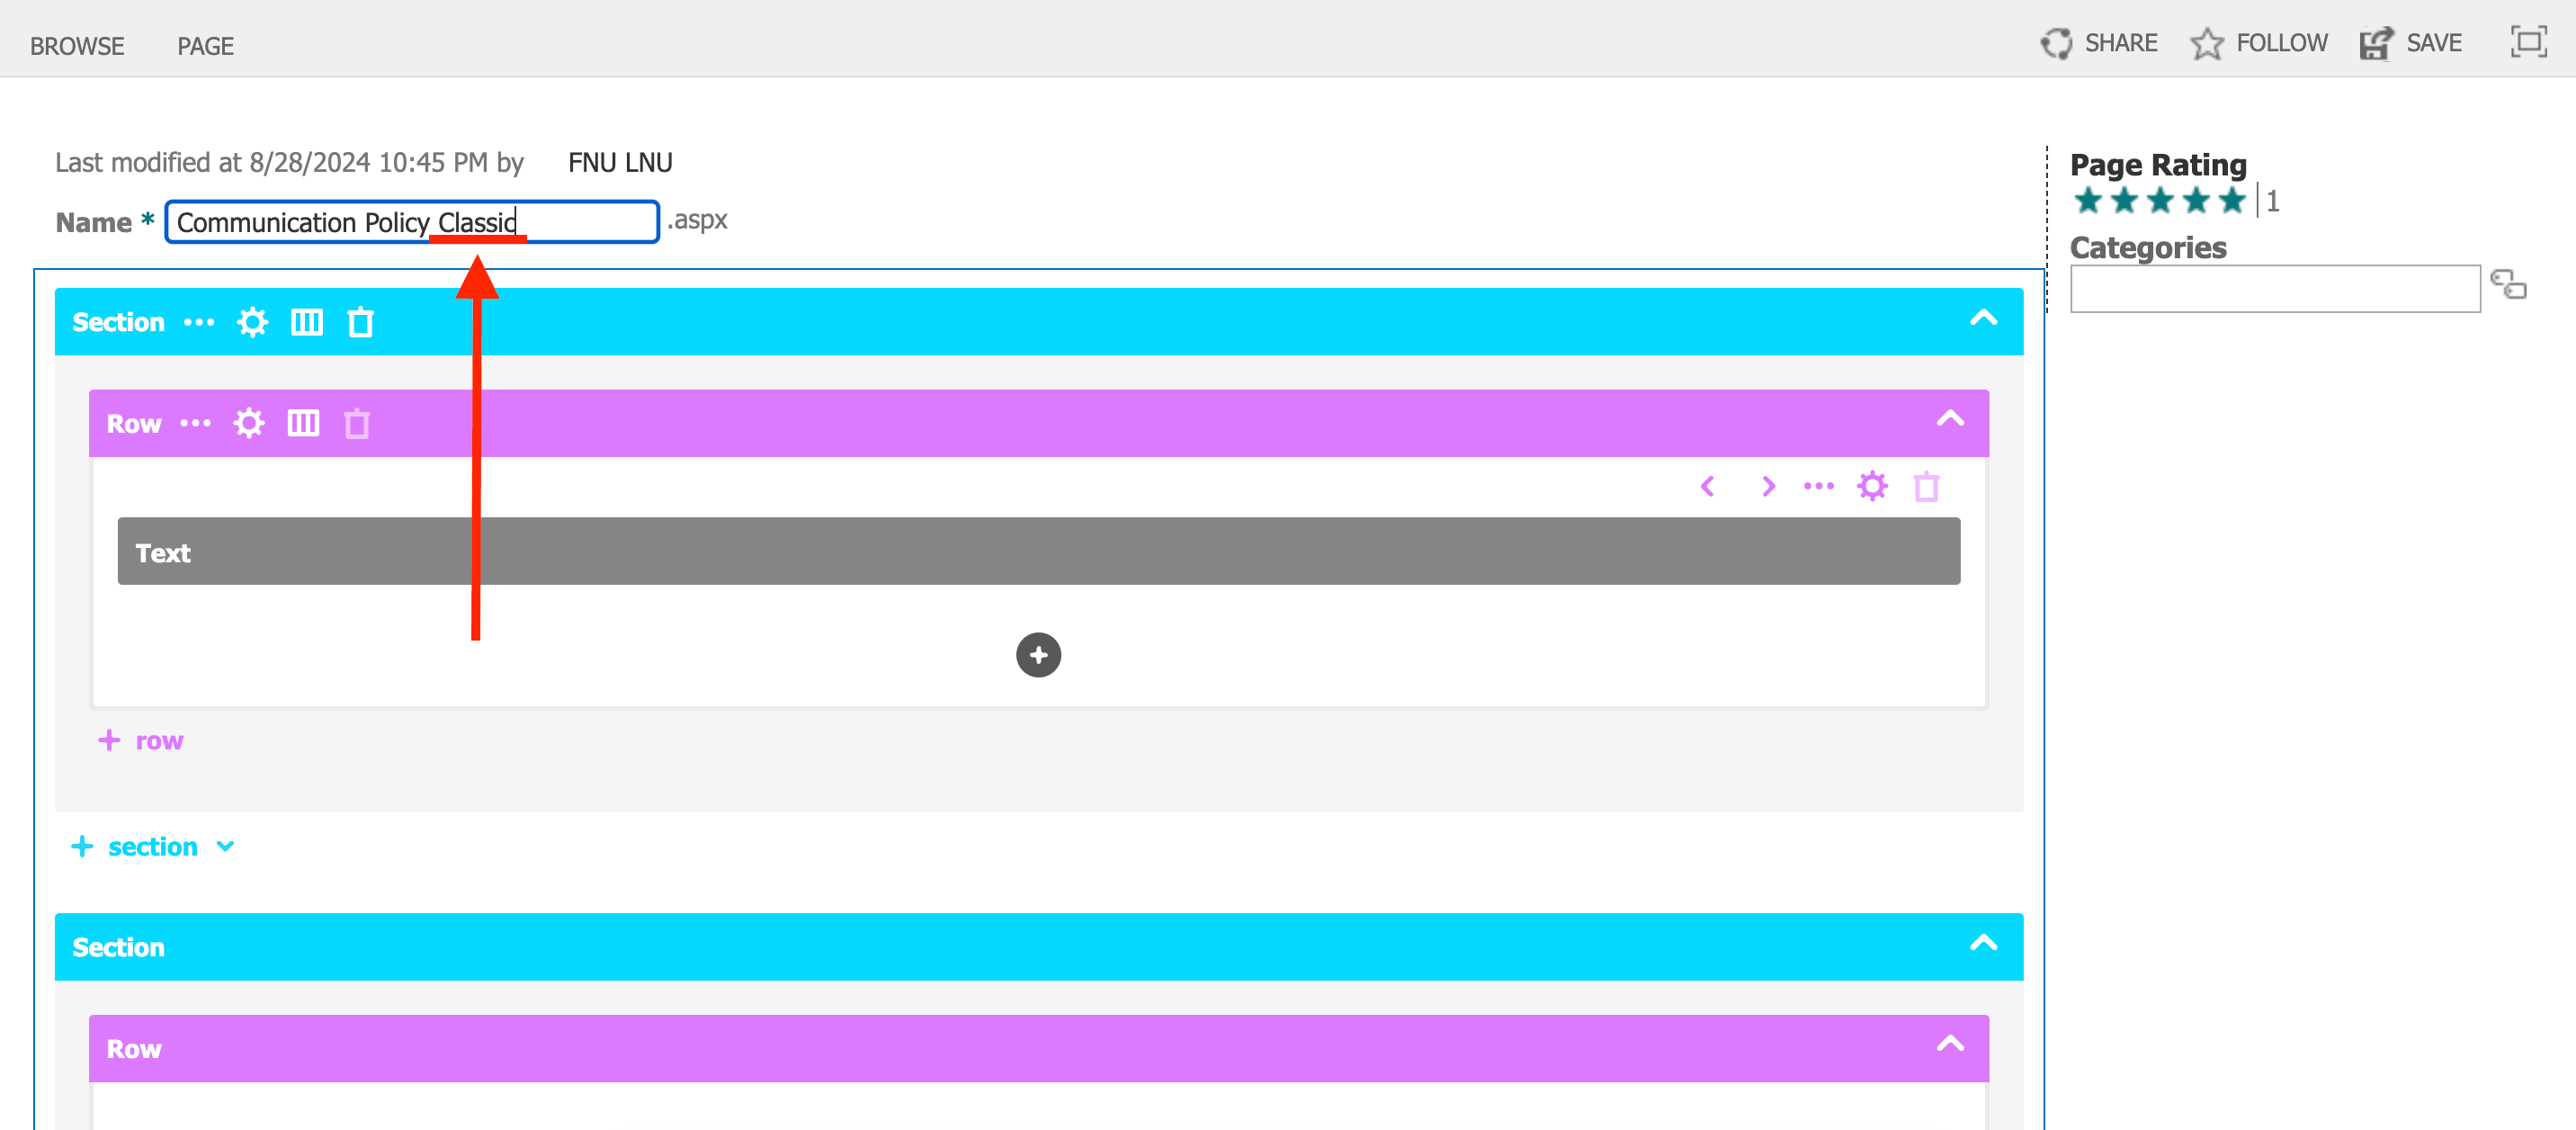
Simply add “Classic” to the page name.
Step 3: Save
Click Save to apply your changes:
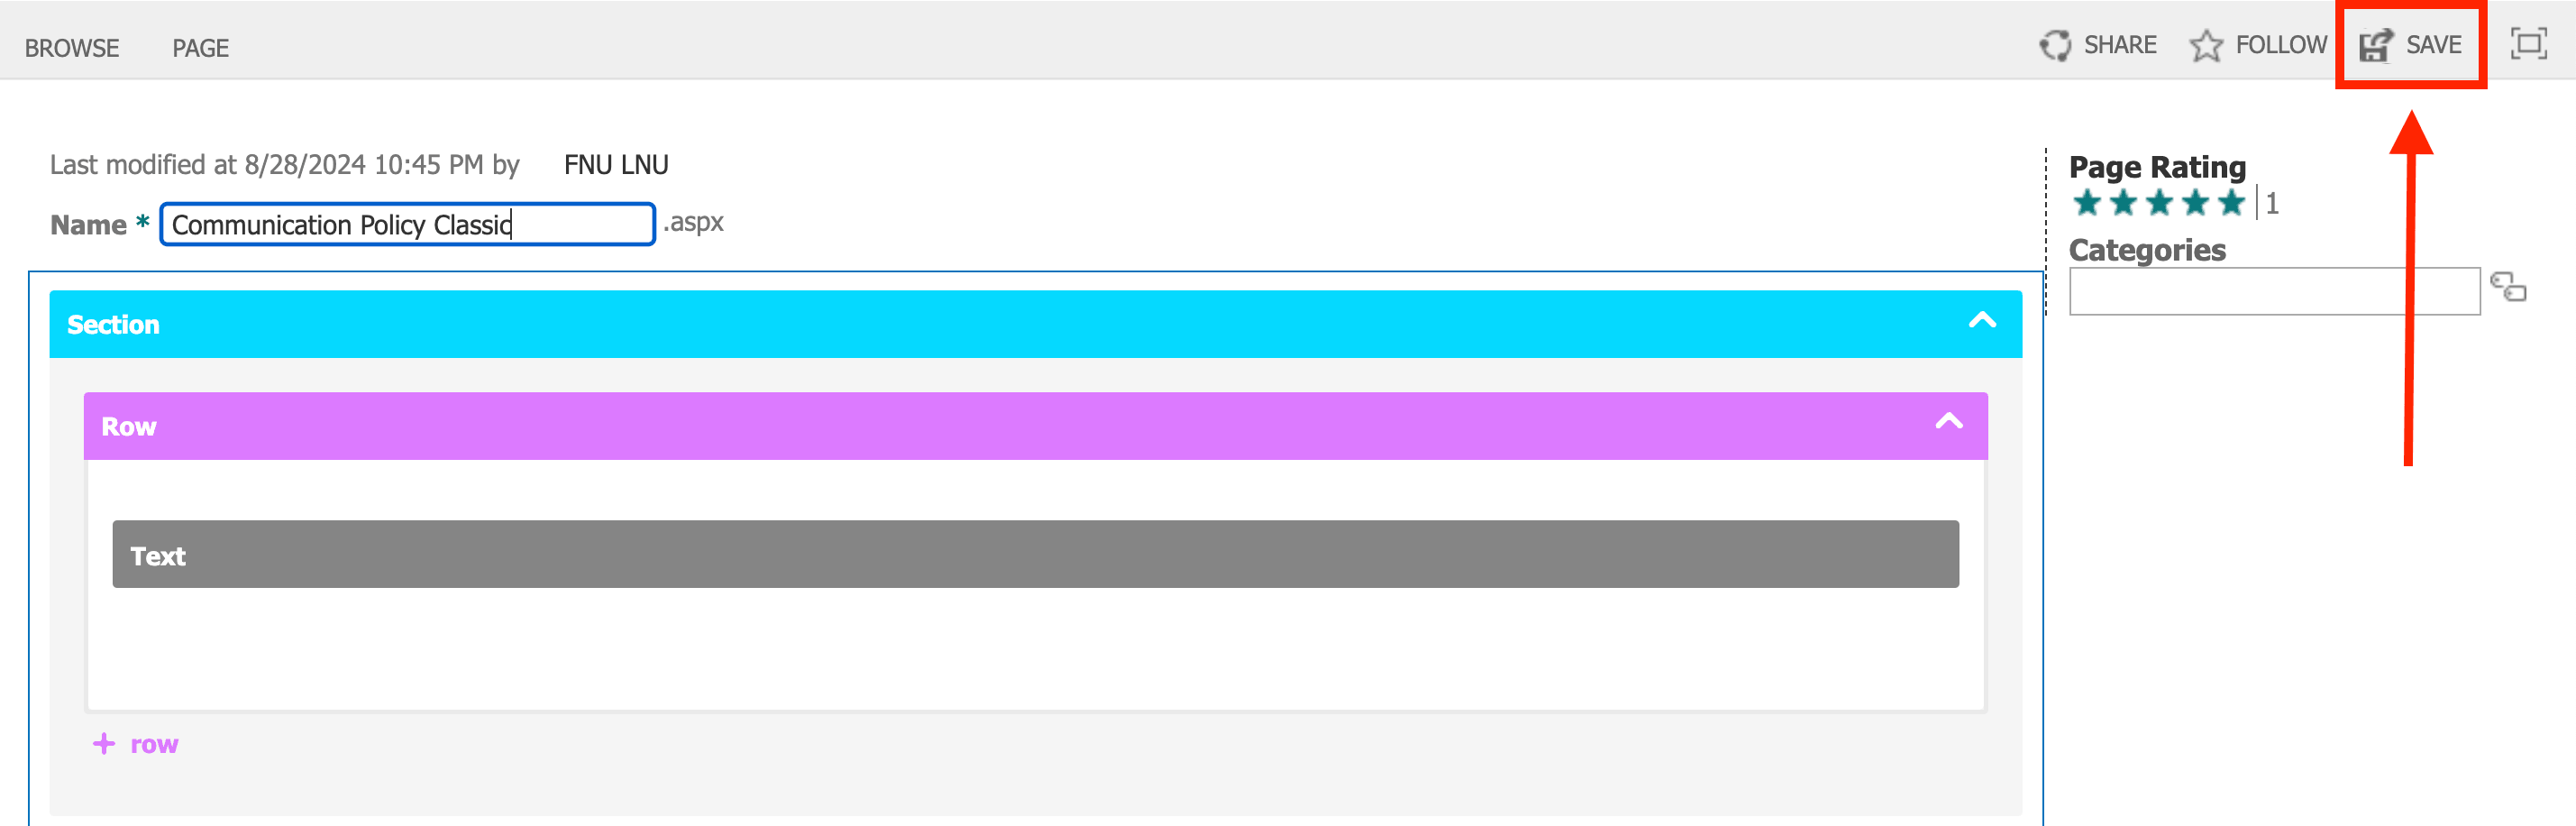
Awesome! You’ve successfully renamed your Classic Page. You can now proceed to Part 2.
Part 2: Copy the Classic Page
This section shows you how to copy your Classic Page.
Step 1: Add ?spcopy=1
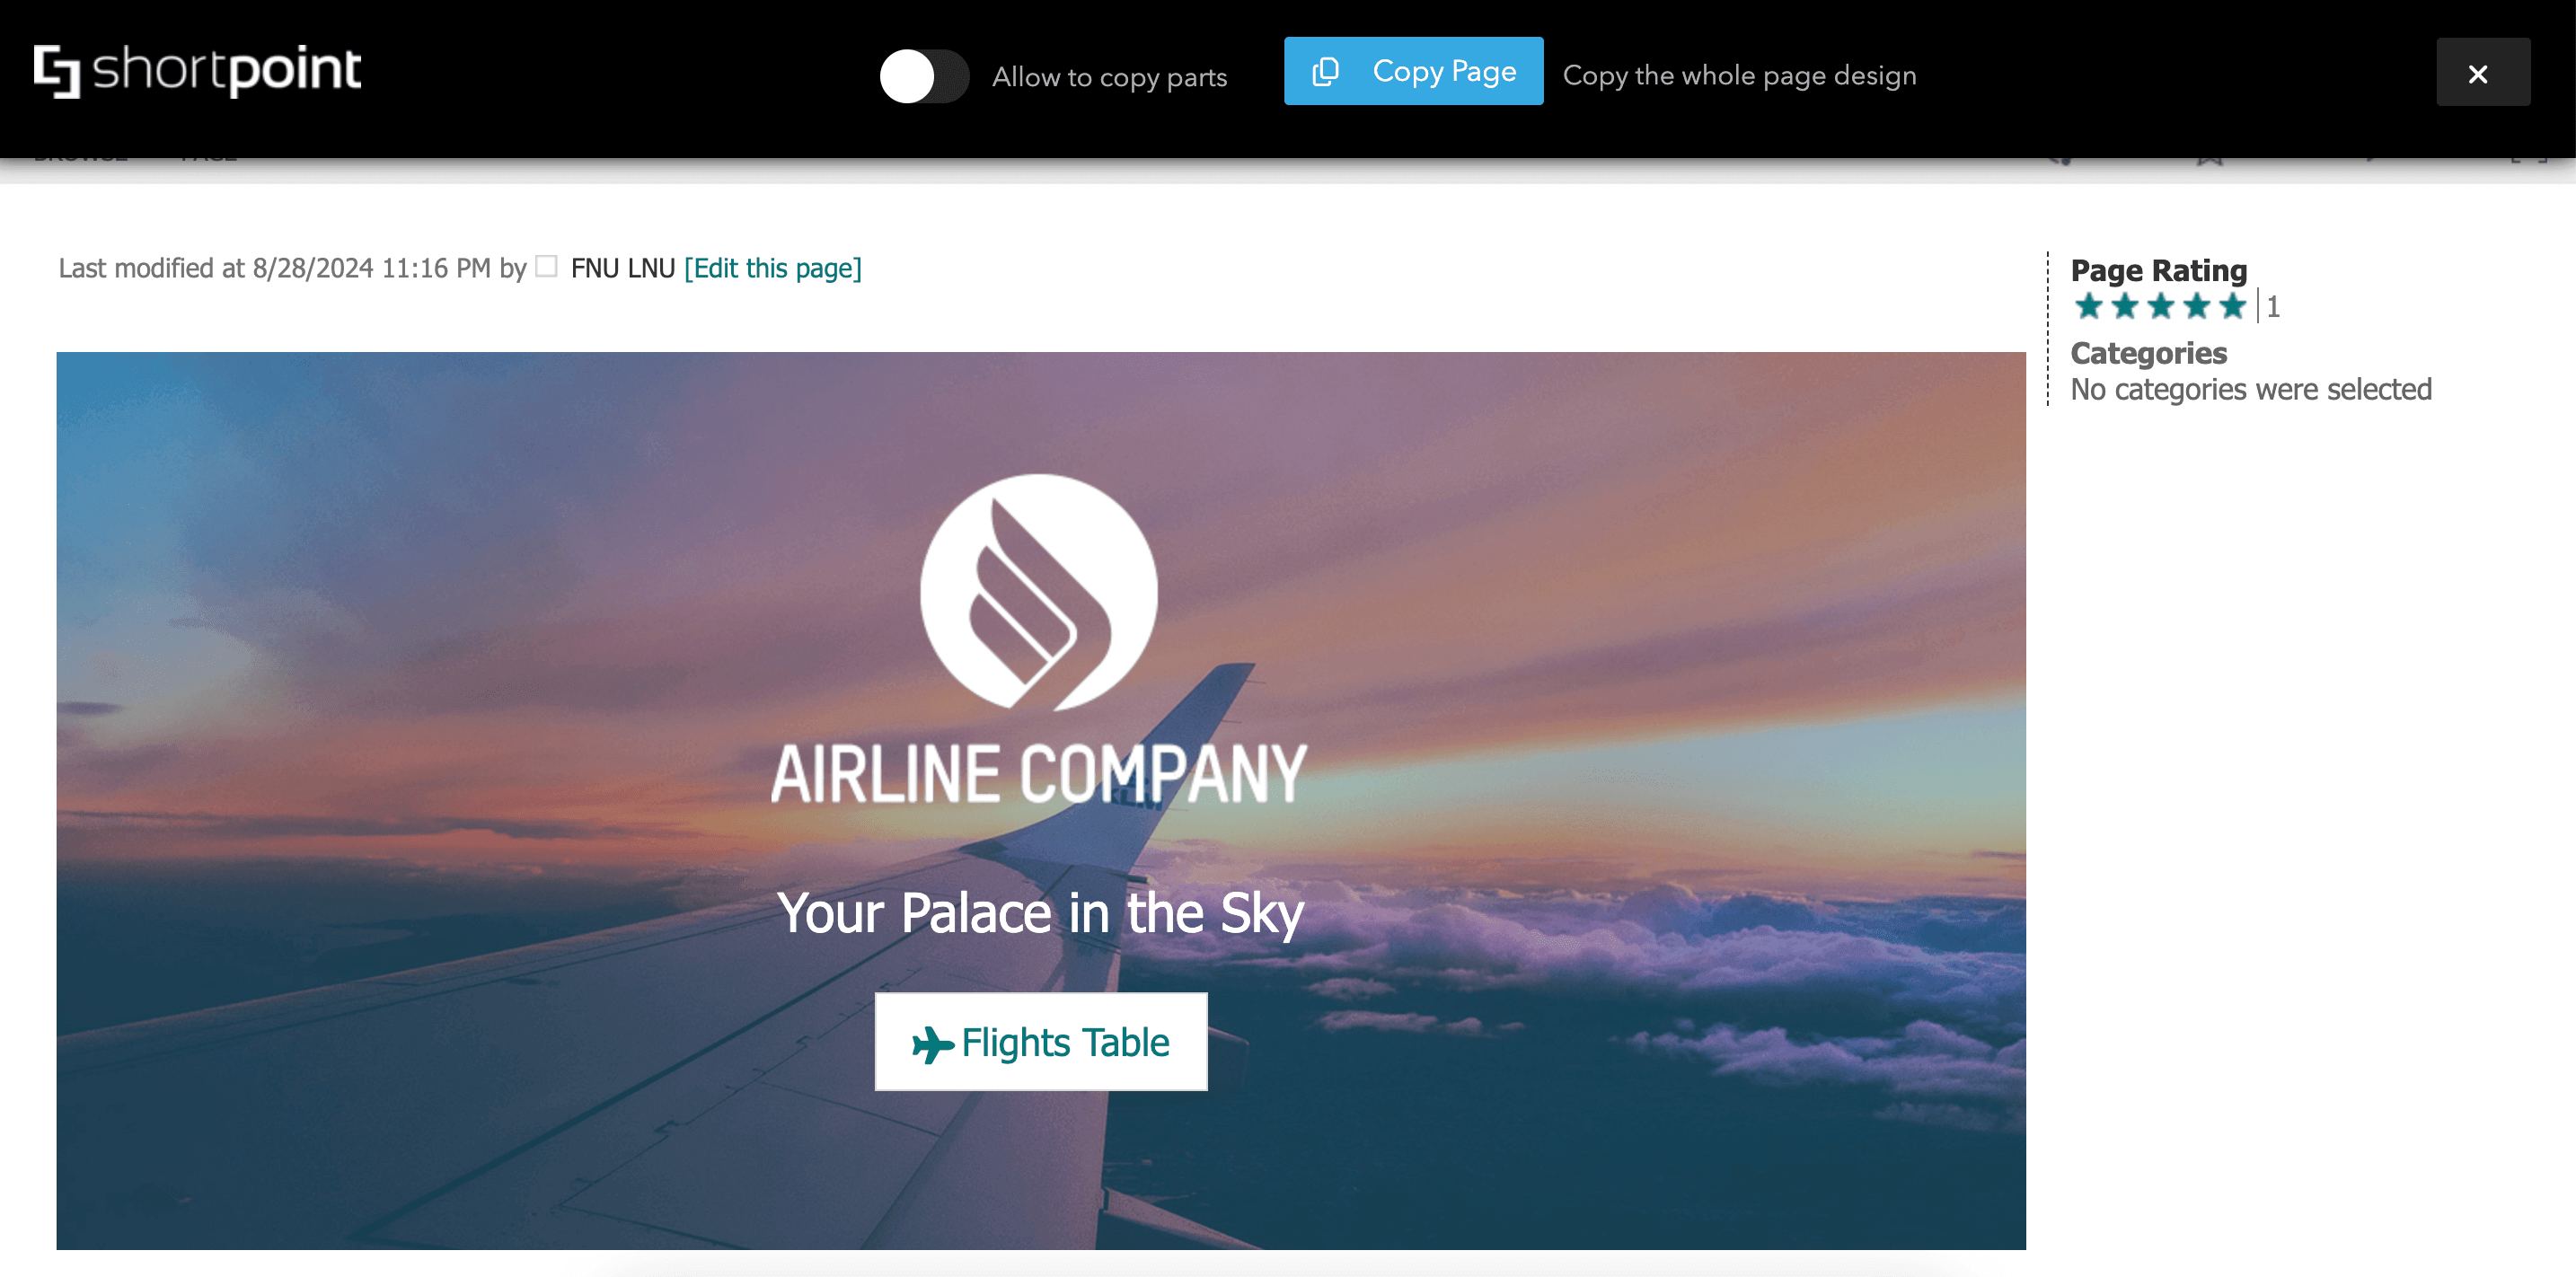
Add ?spcopy=1 at the end of your URL and press Enter to launch the ShortPoint Copy-Paste bar:
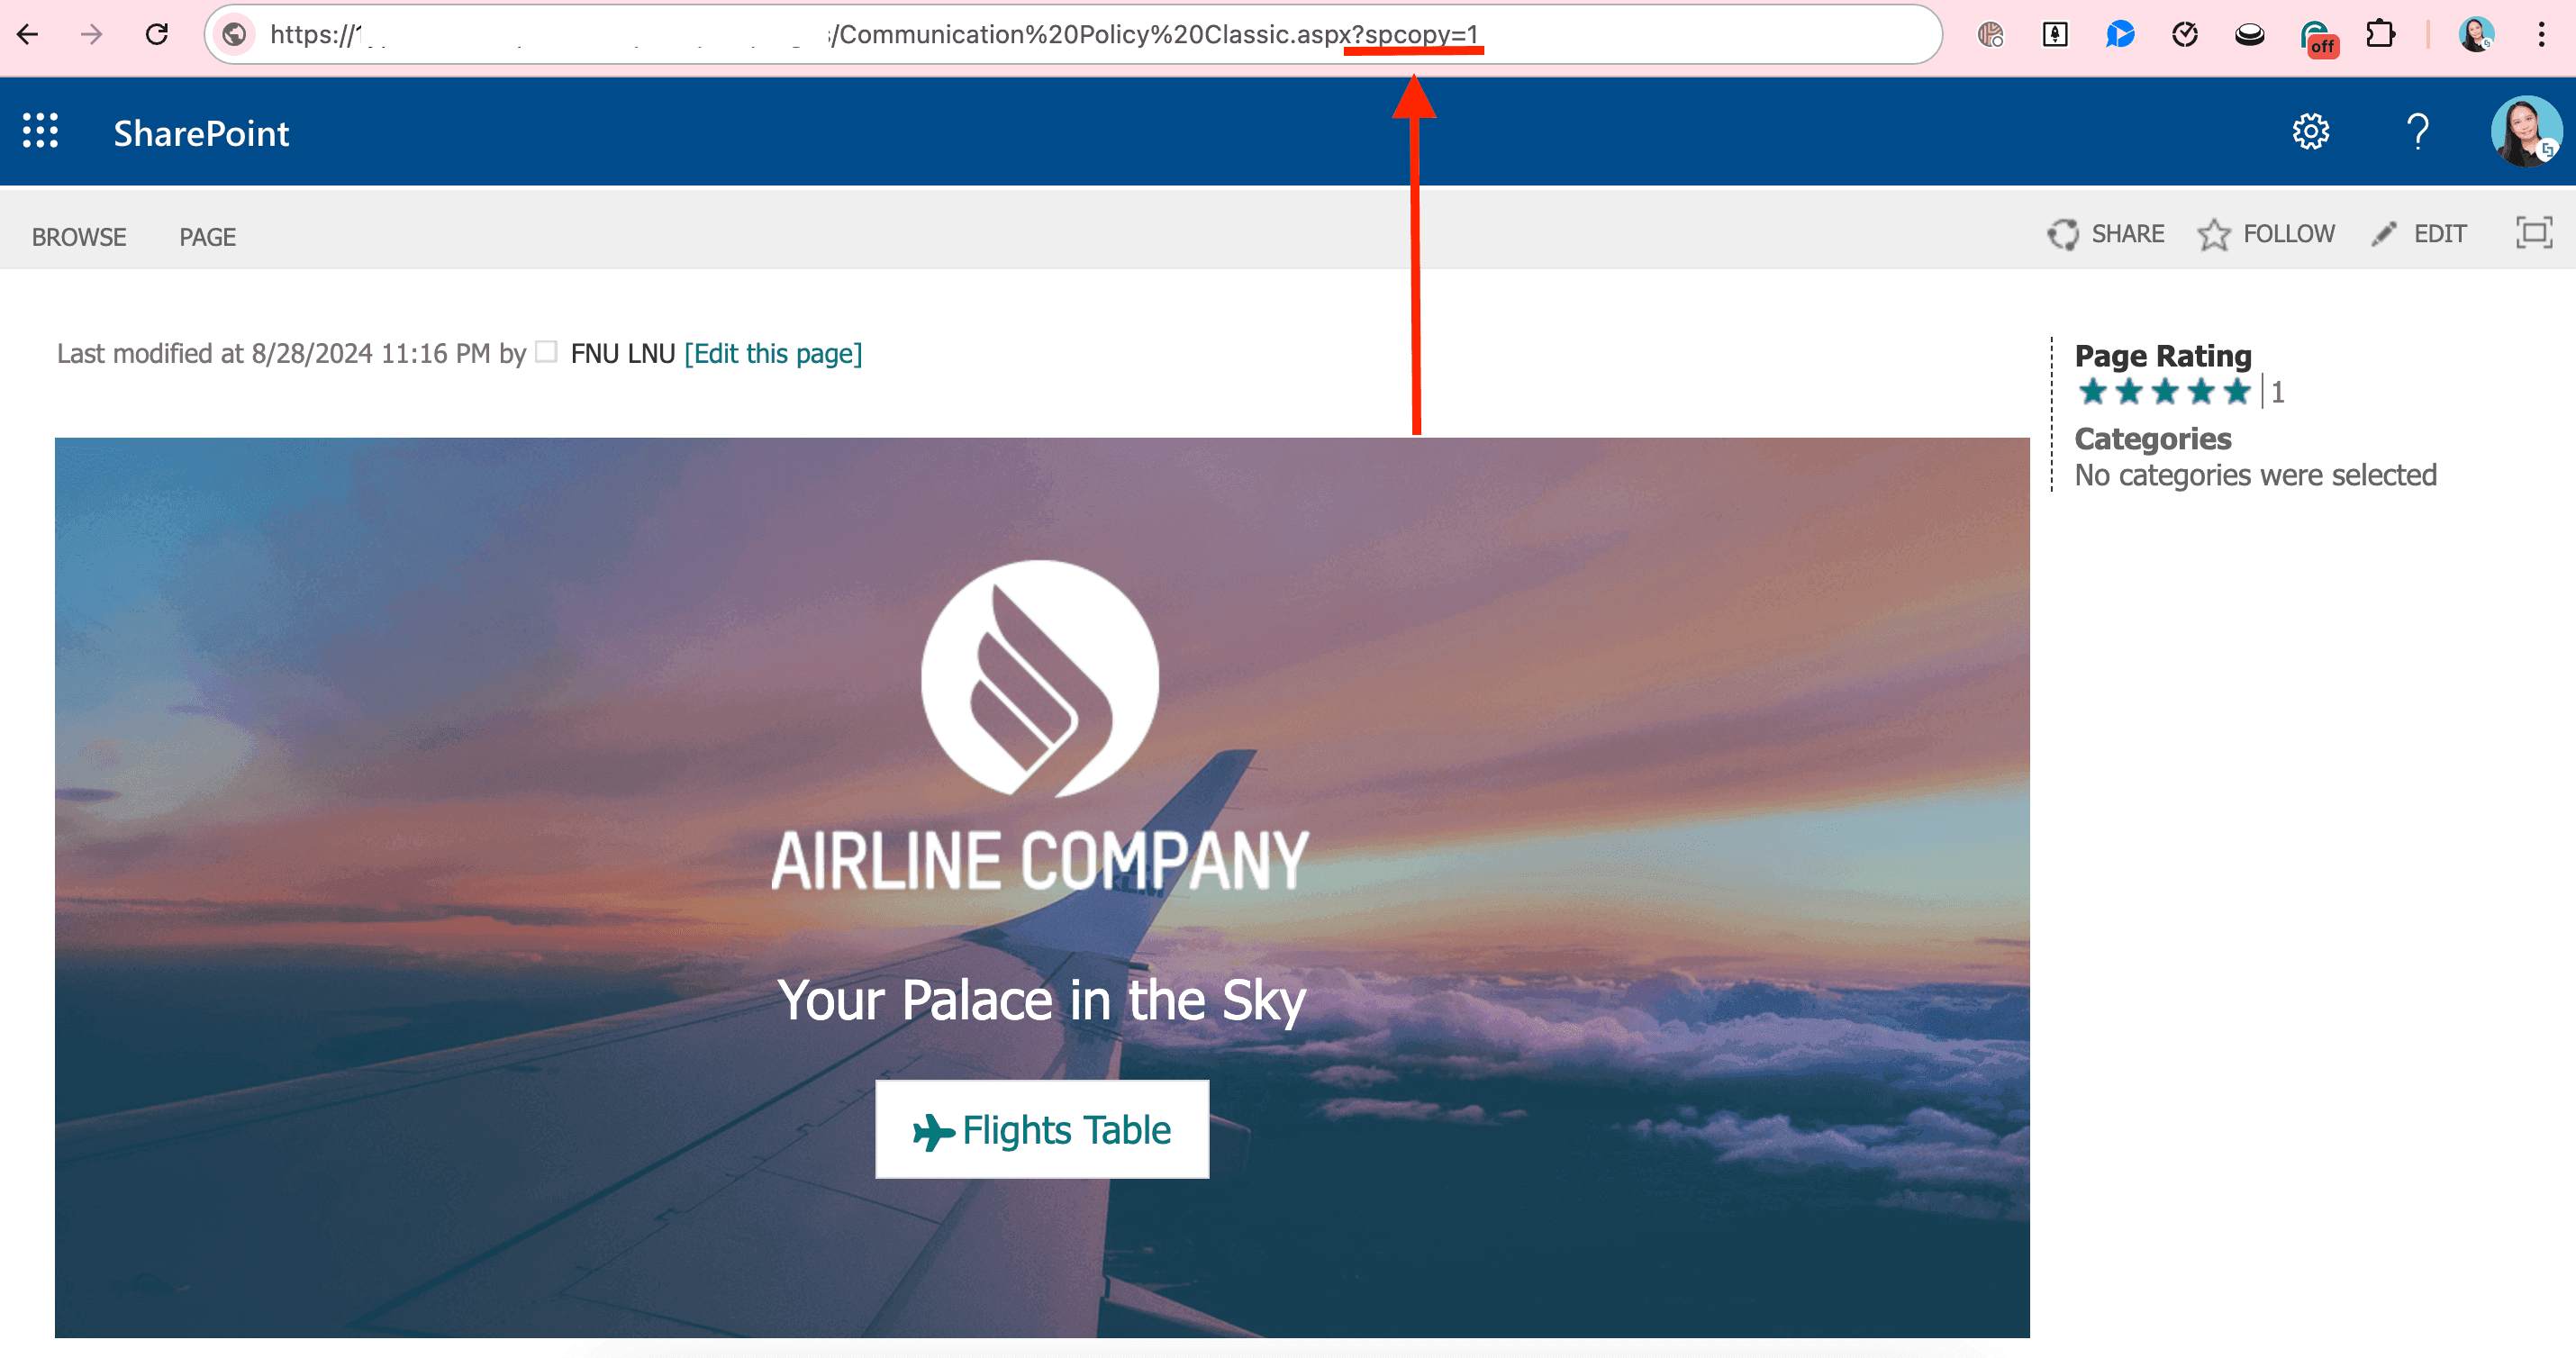
Once entered, you will see a black banner at the top of your page:
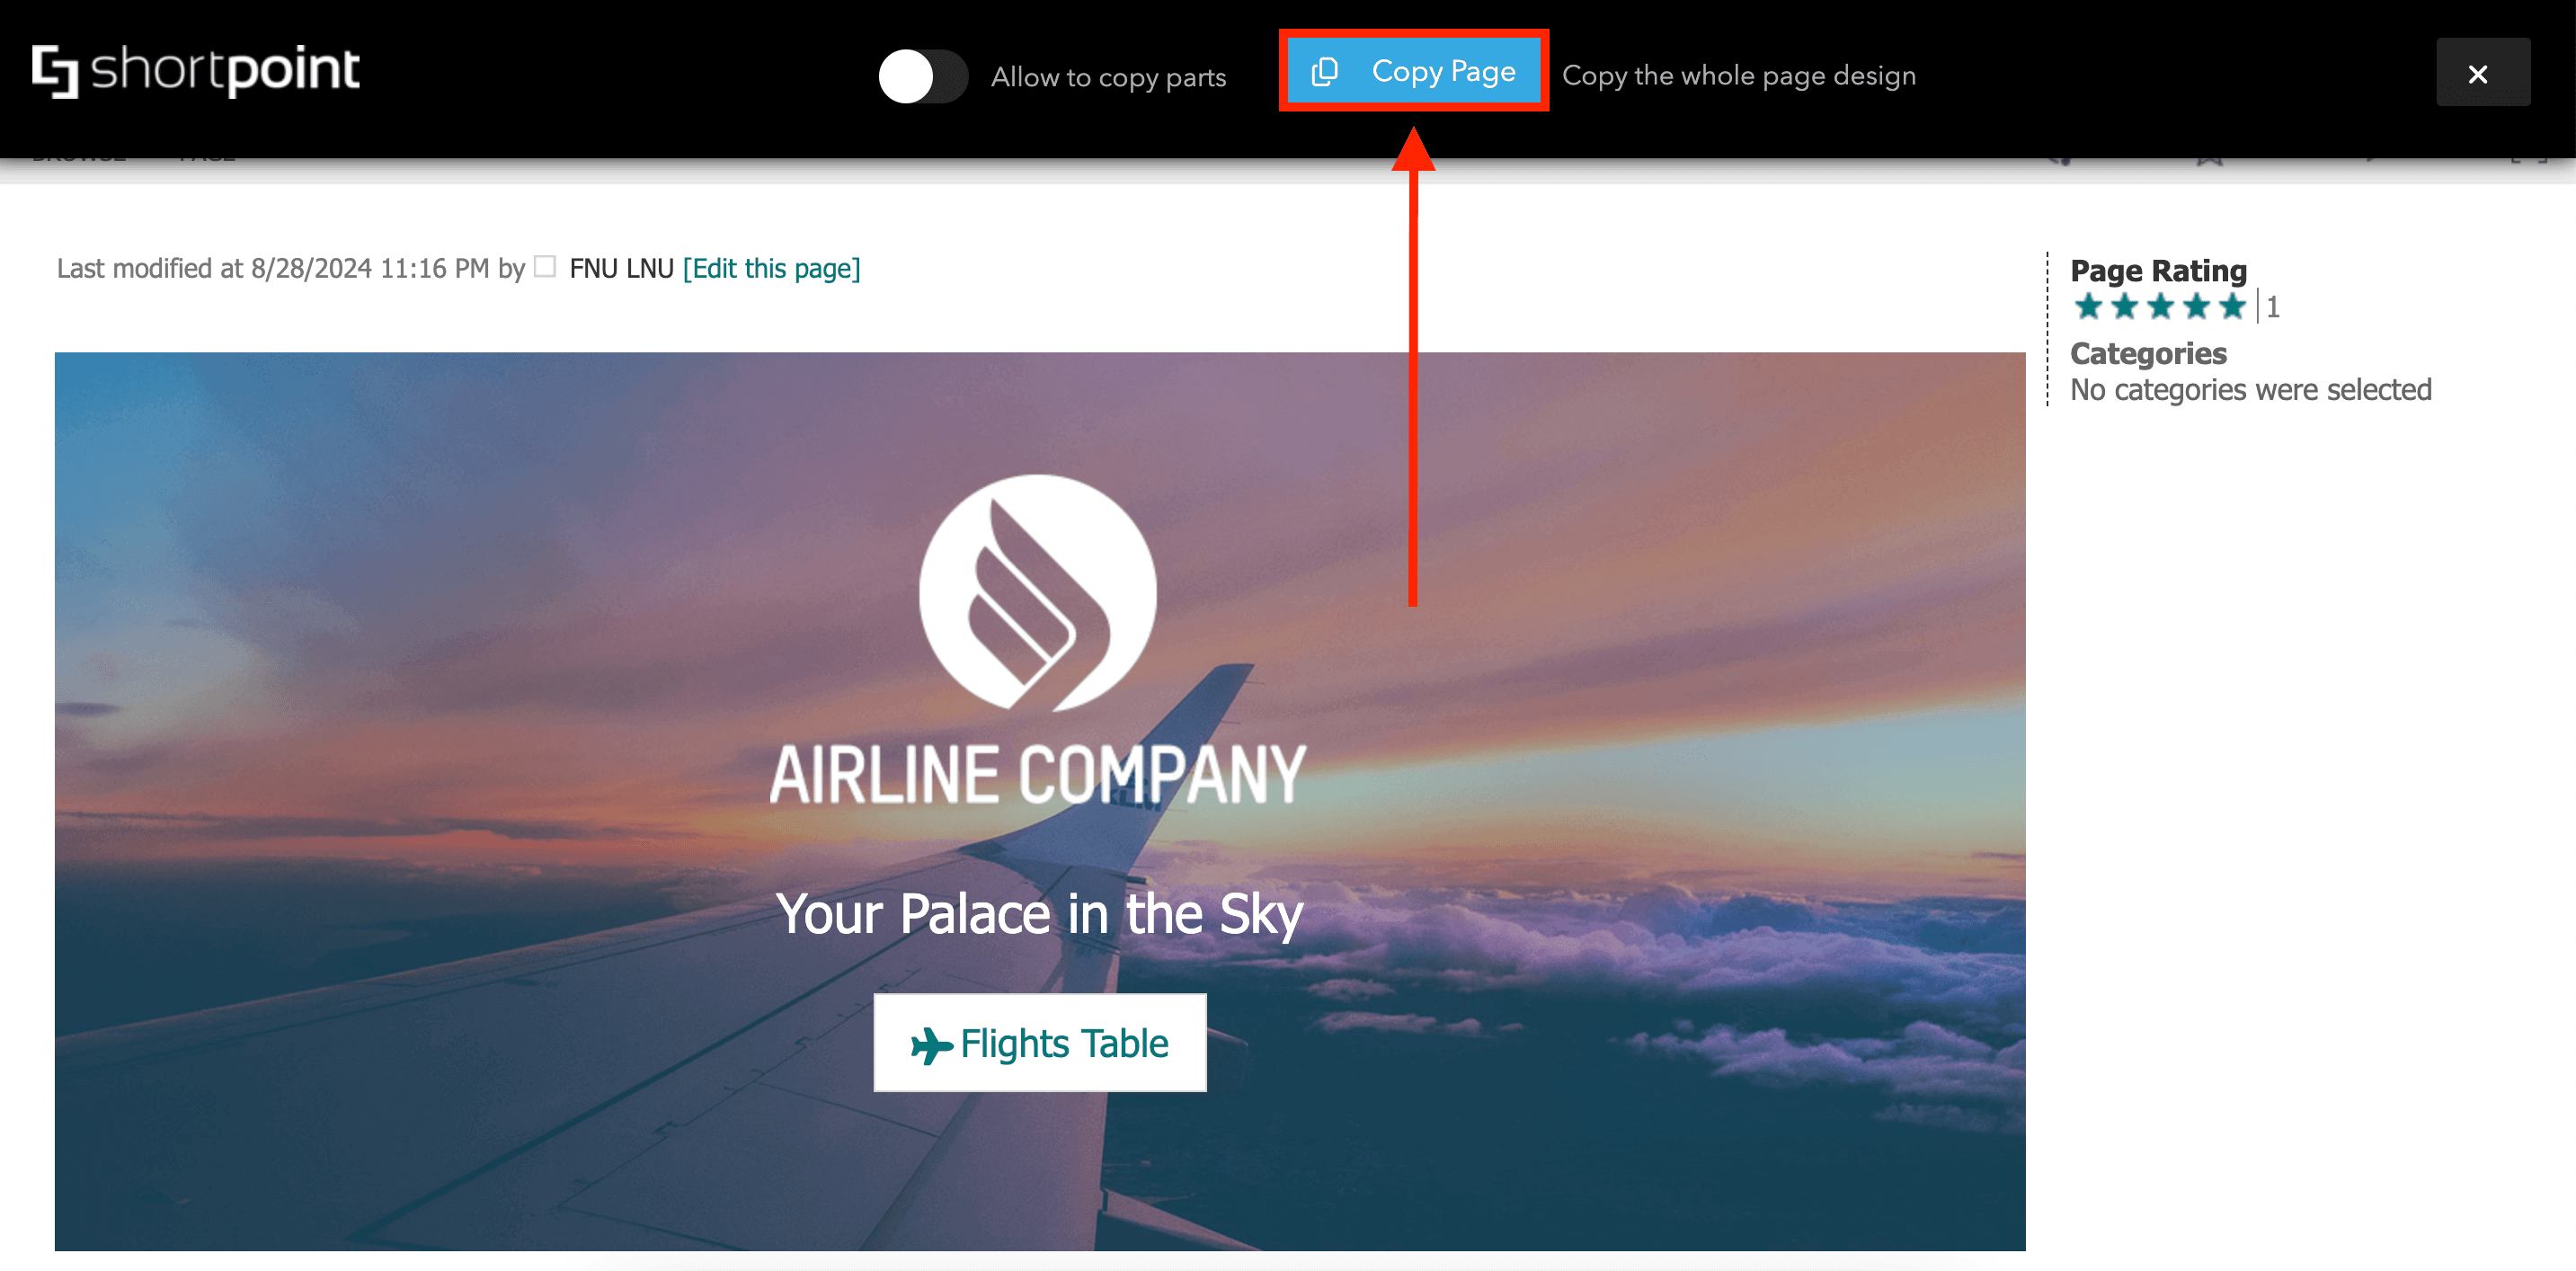
Step 2: Copy Page
Click Copy Page:
Part 3: Transfer Classic Page Content to a Modern Page
This section shows you how to transfer the content of your Classic Page to a Modern Page.
Step 1: Add a Page
Click the cogwheel icon:
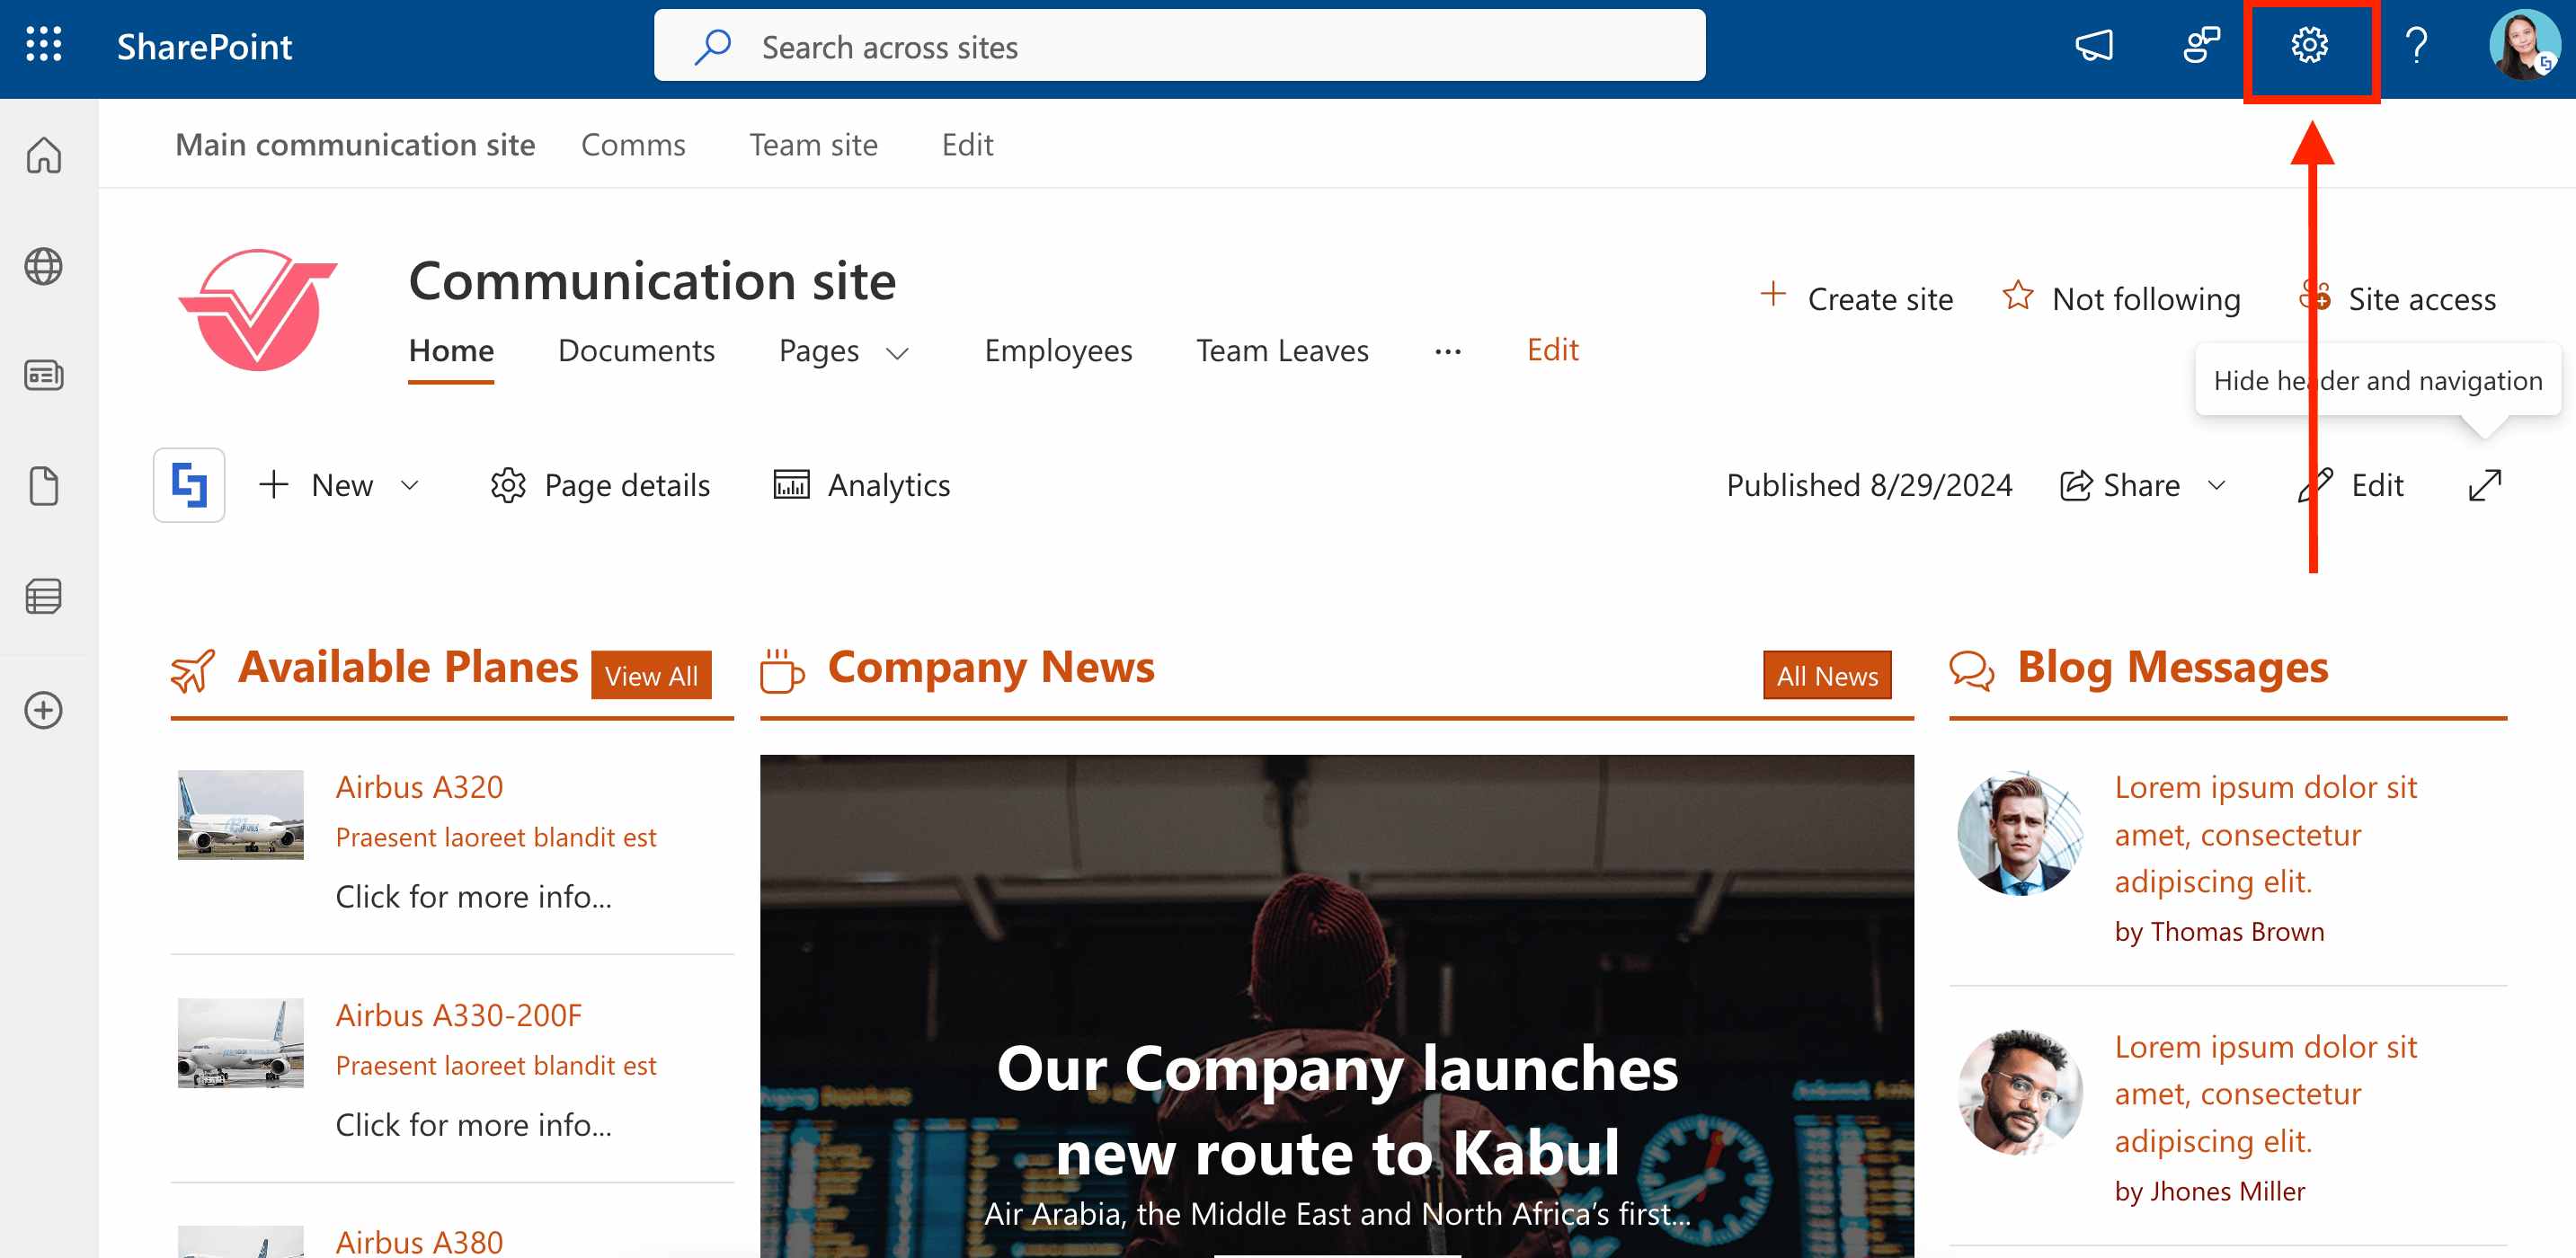
Select Add a page:
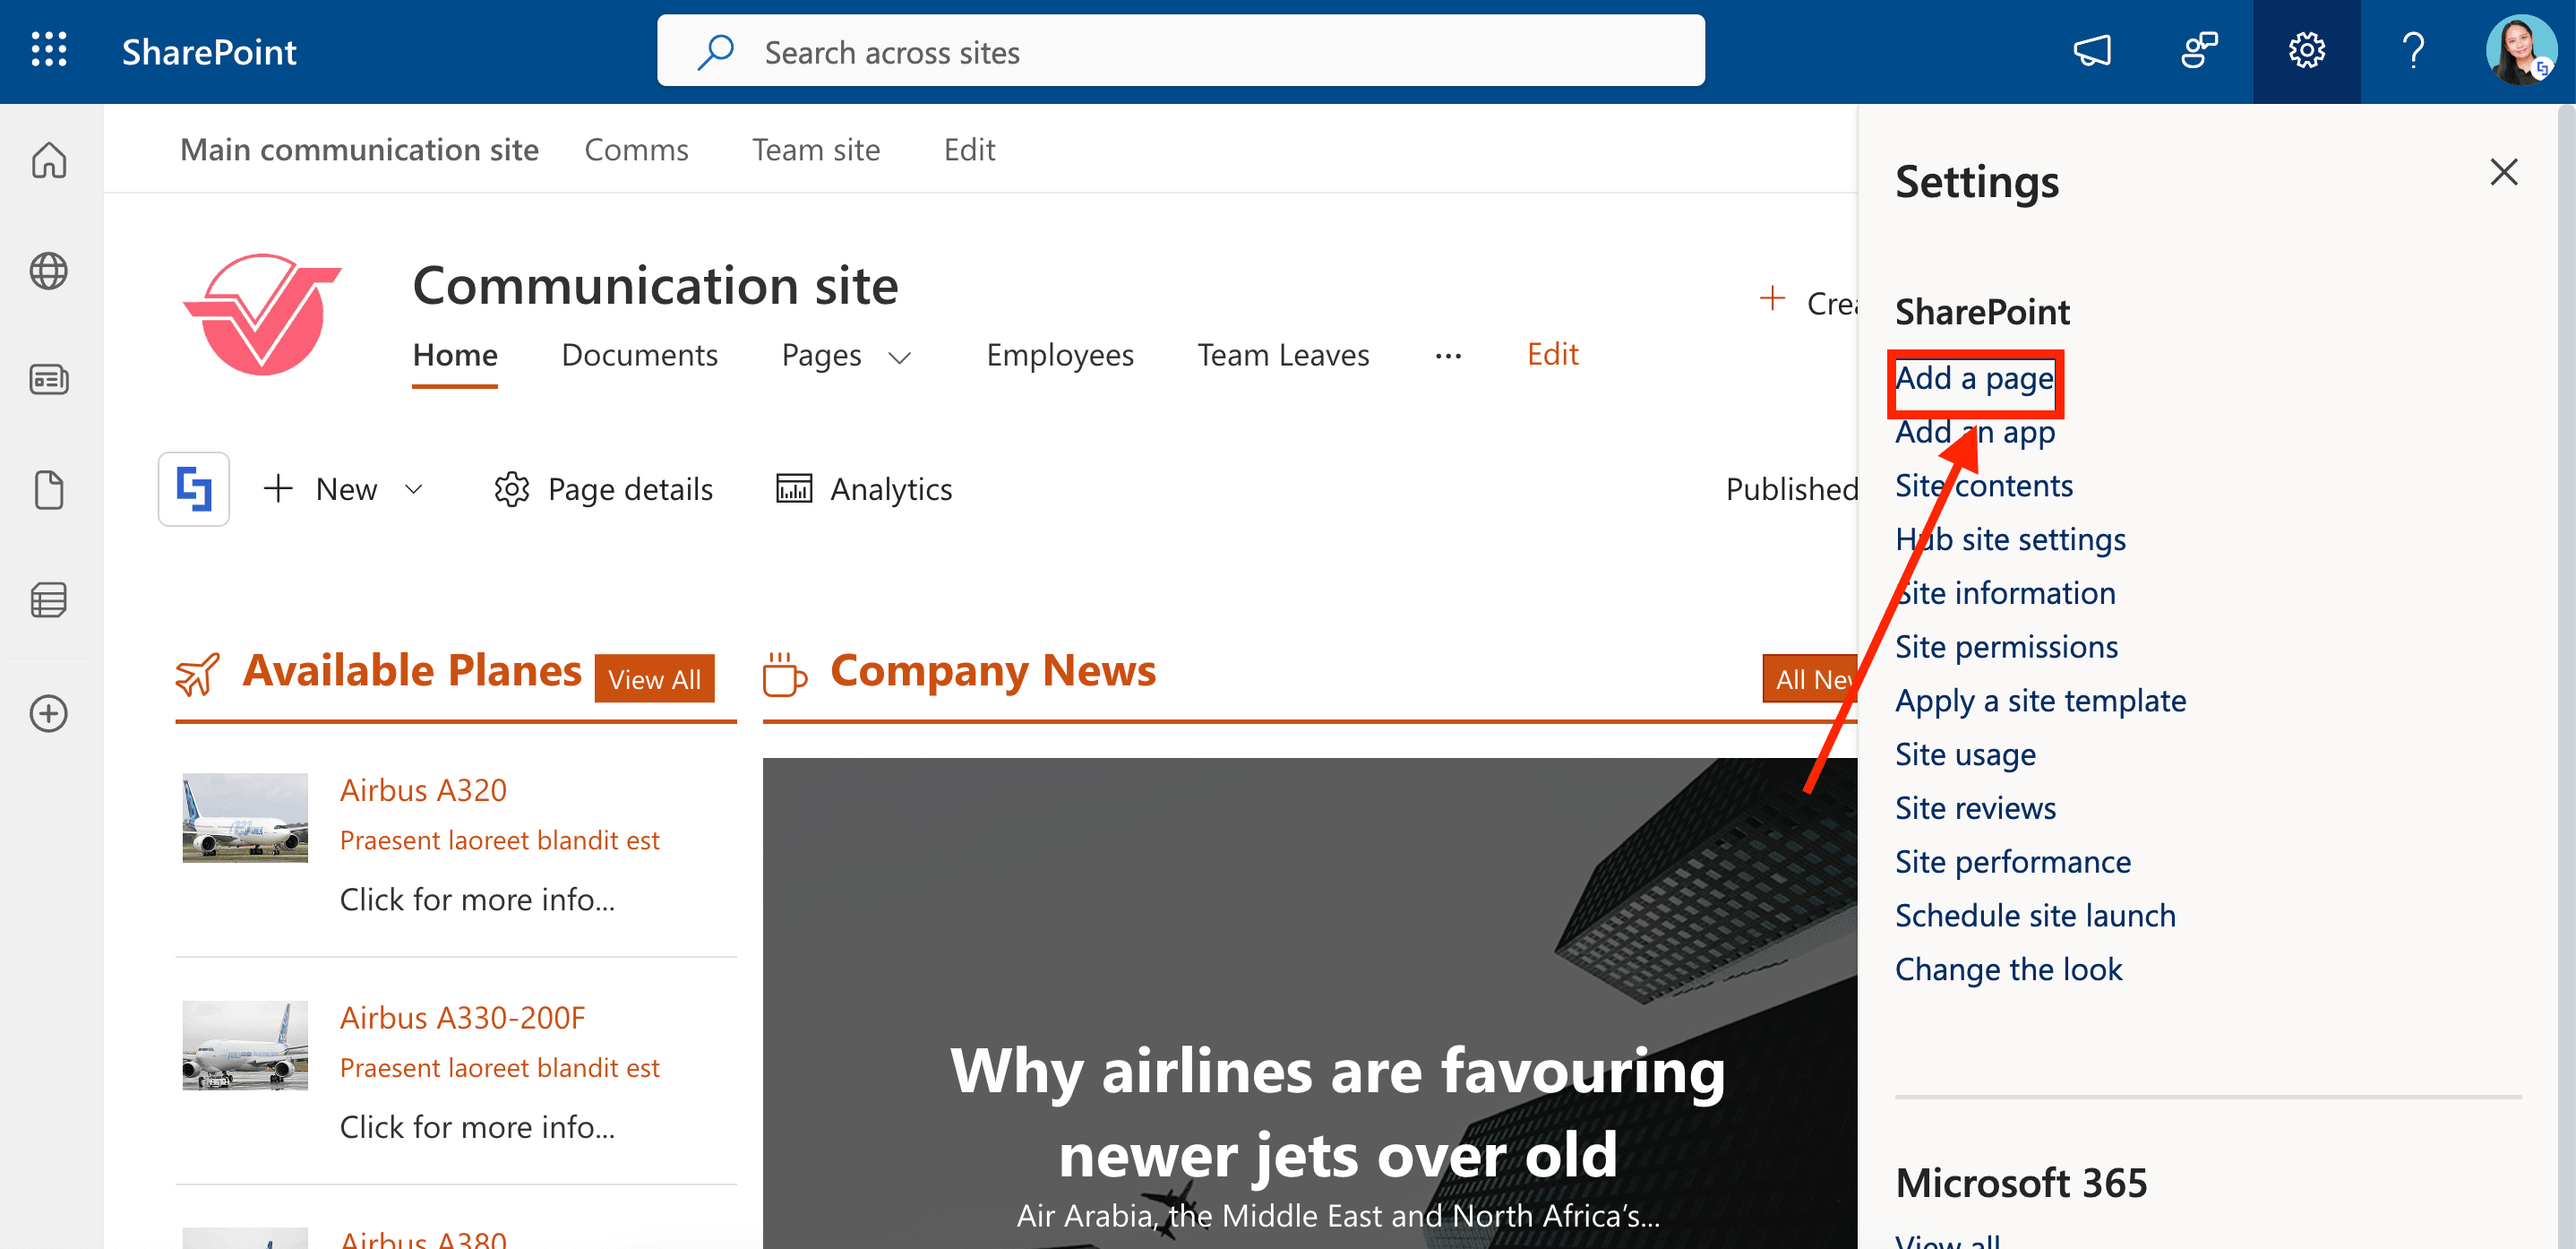
NOTEIf you do not see an option to "Add a page" in the SharePoint settings window or in the left AppBar "+" button options, you may have SharePoint Server Publishing Infrastructure enabled. Follow the steps in the How to Create New Modern Pages When You Have SharePoint Server Publishing Infrastructure Enabled to complete Part 3 of the transformation process.
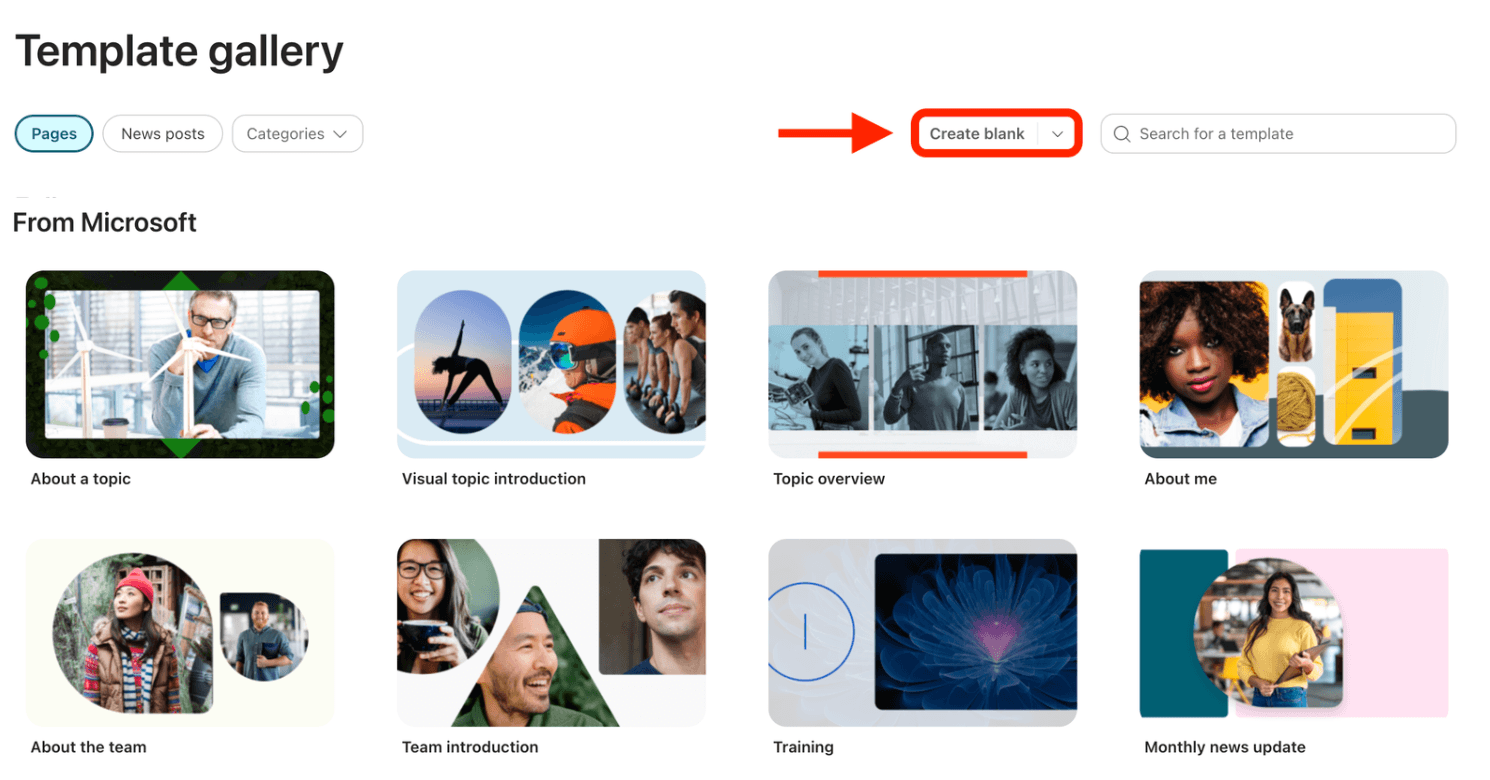
Step 2: Make a Blank page
Click Create Blank:
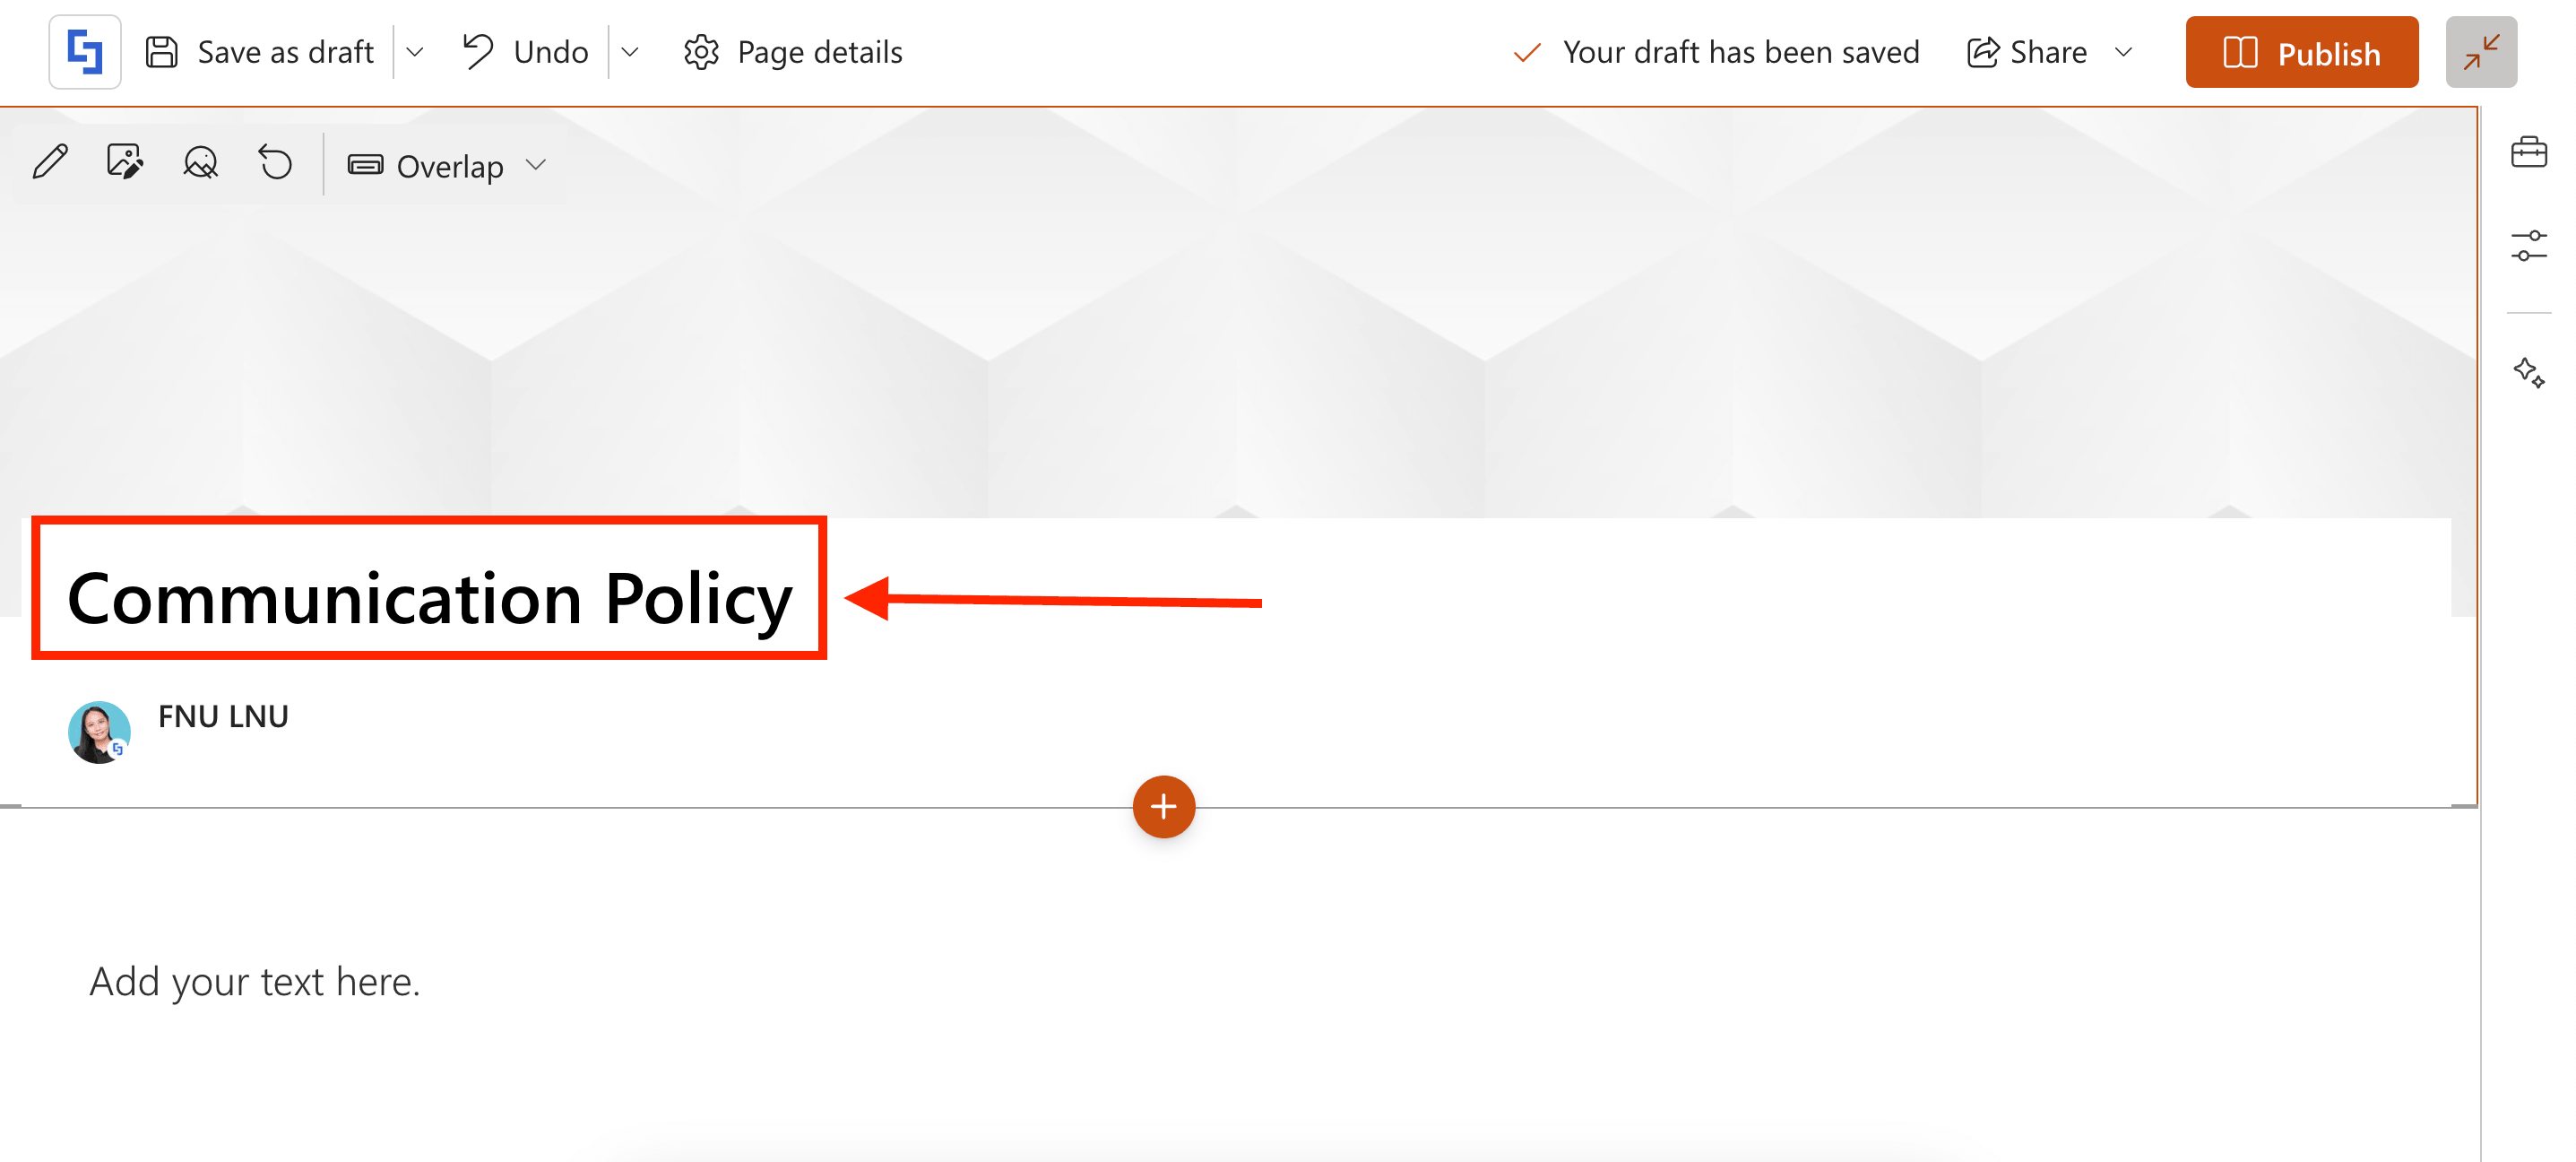
Step 3: Rename the page
Rename the page to the original name of your Classic Page. In our case, it’s ‘Communication Policy’:
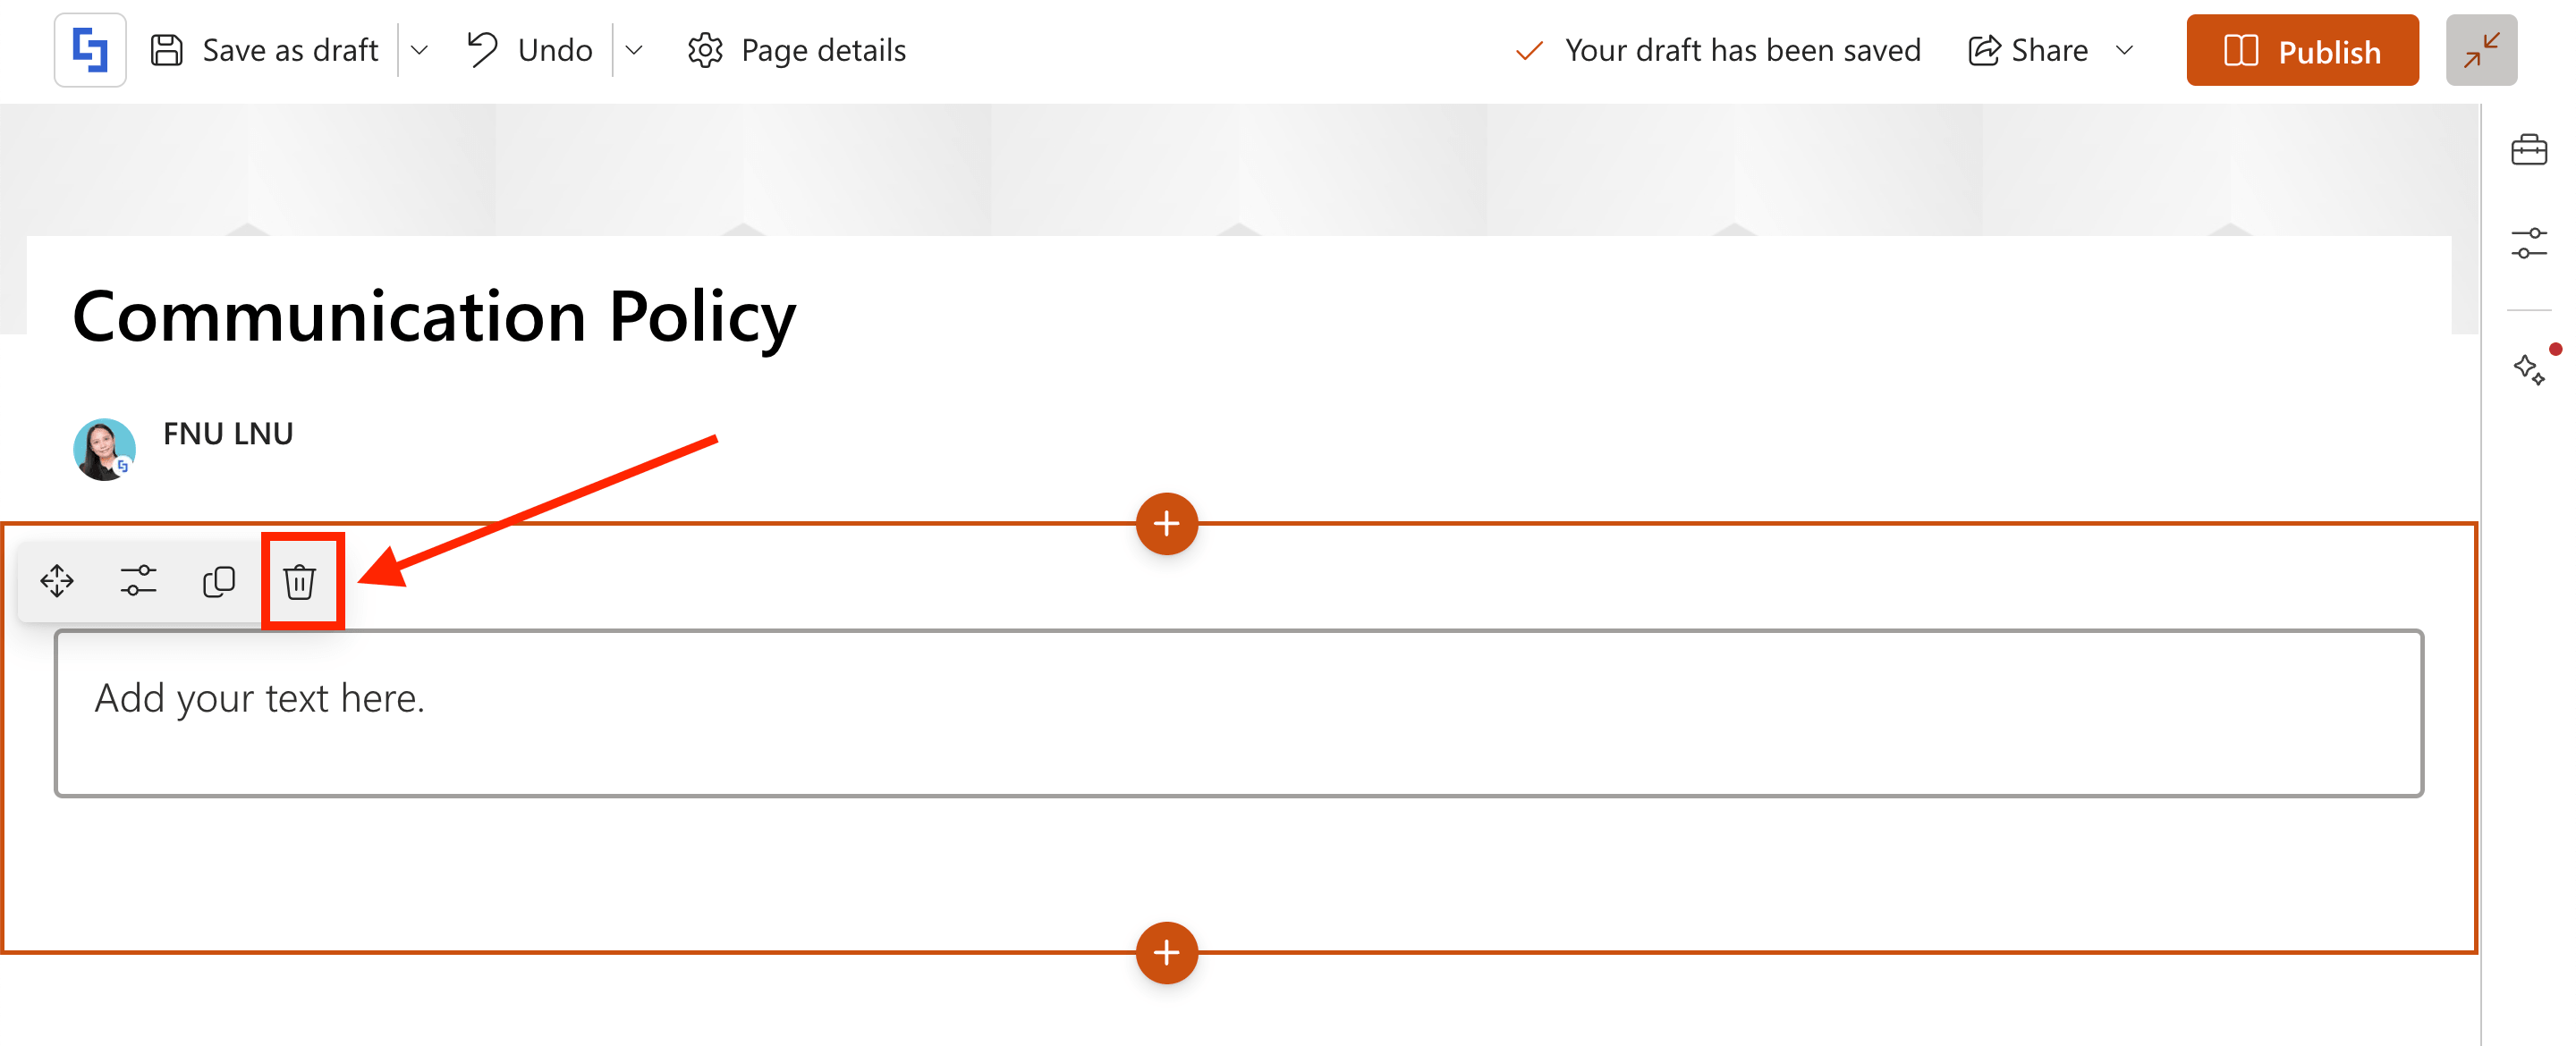
Step 4: Add the ShortPoint web part
Hover over the default content and click the trash icon:
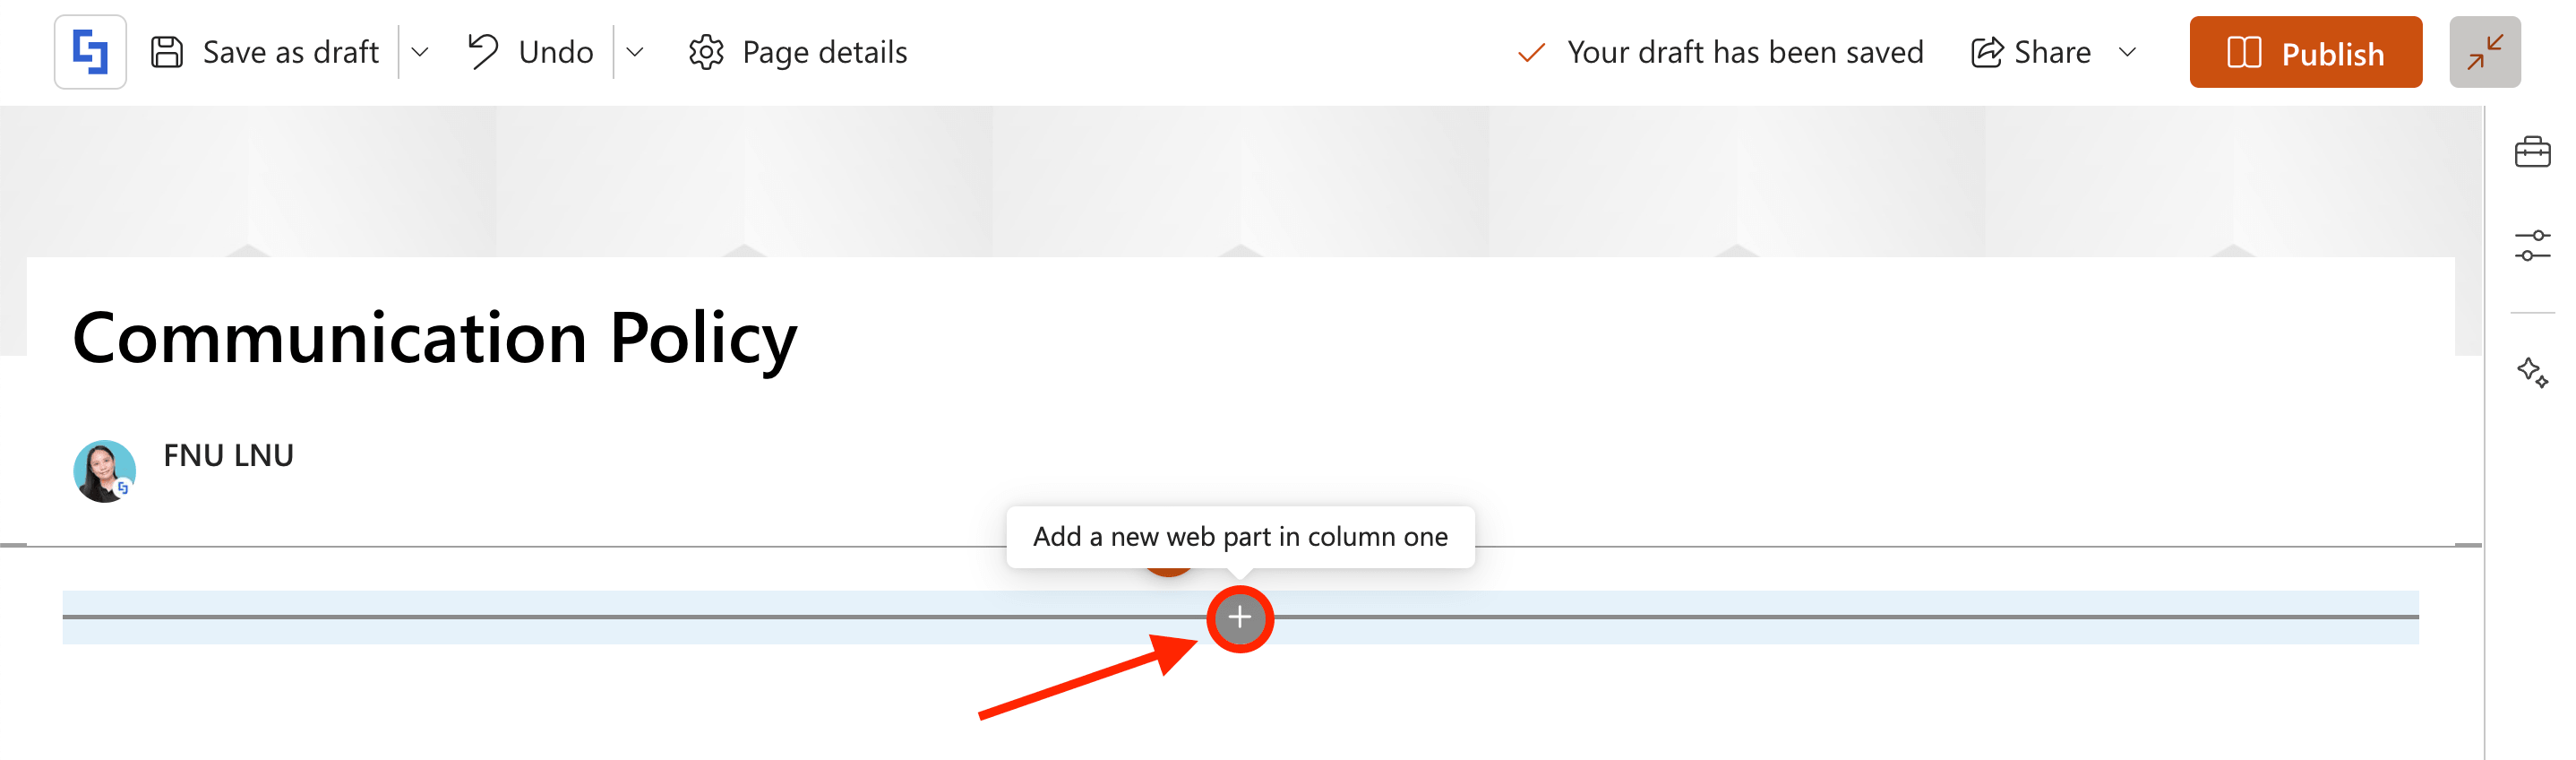
Then, hover over a section and click the gray plus icon:
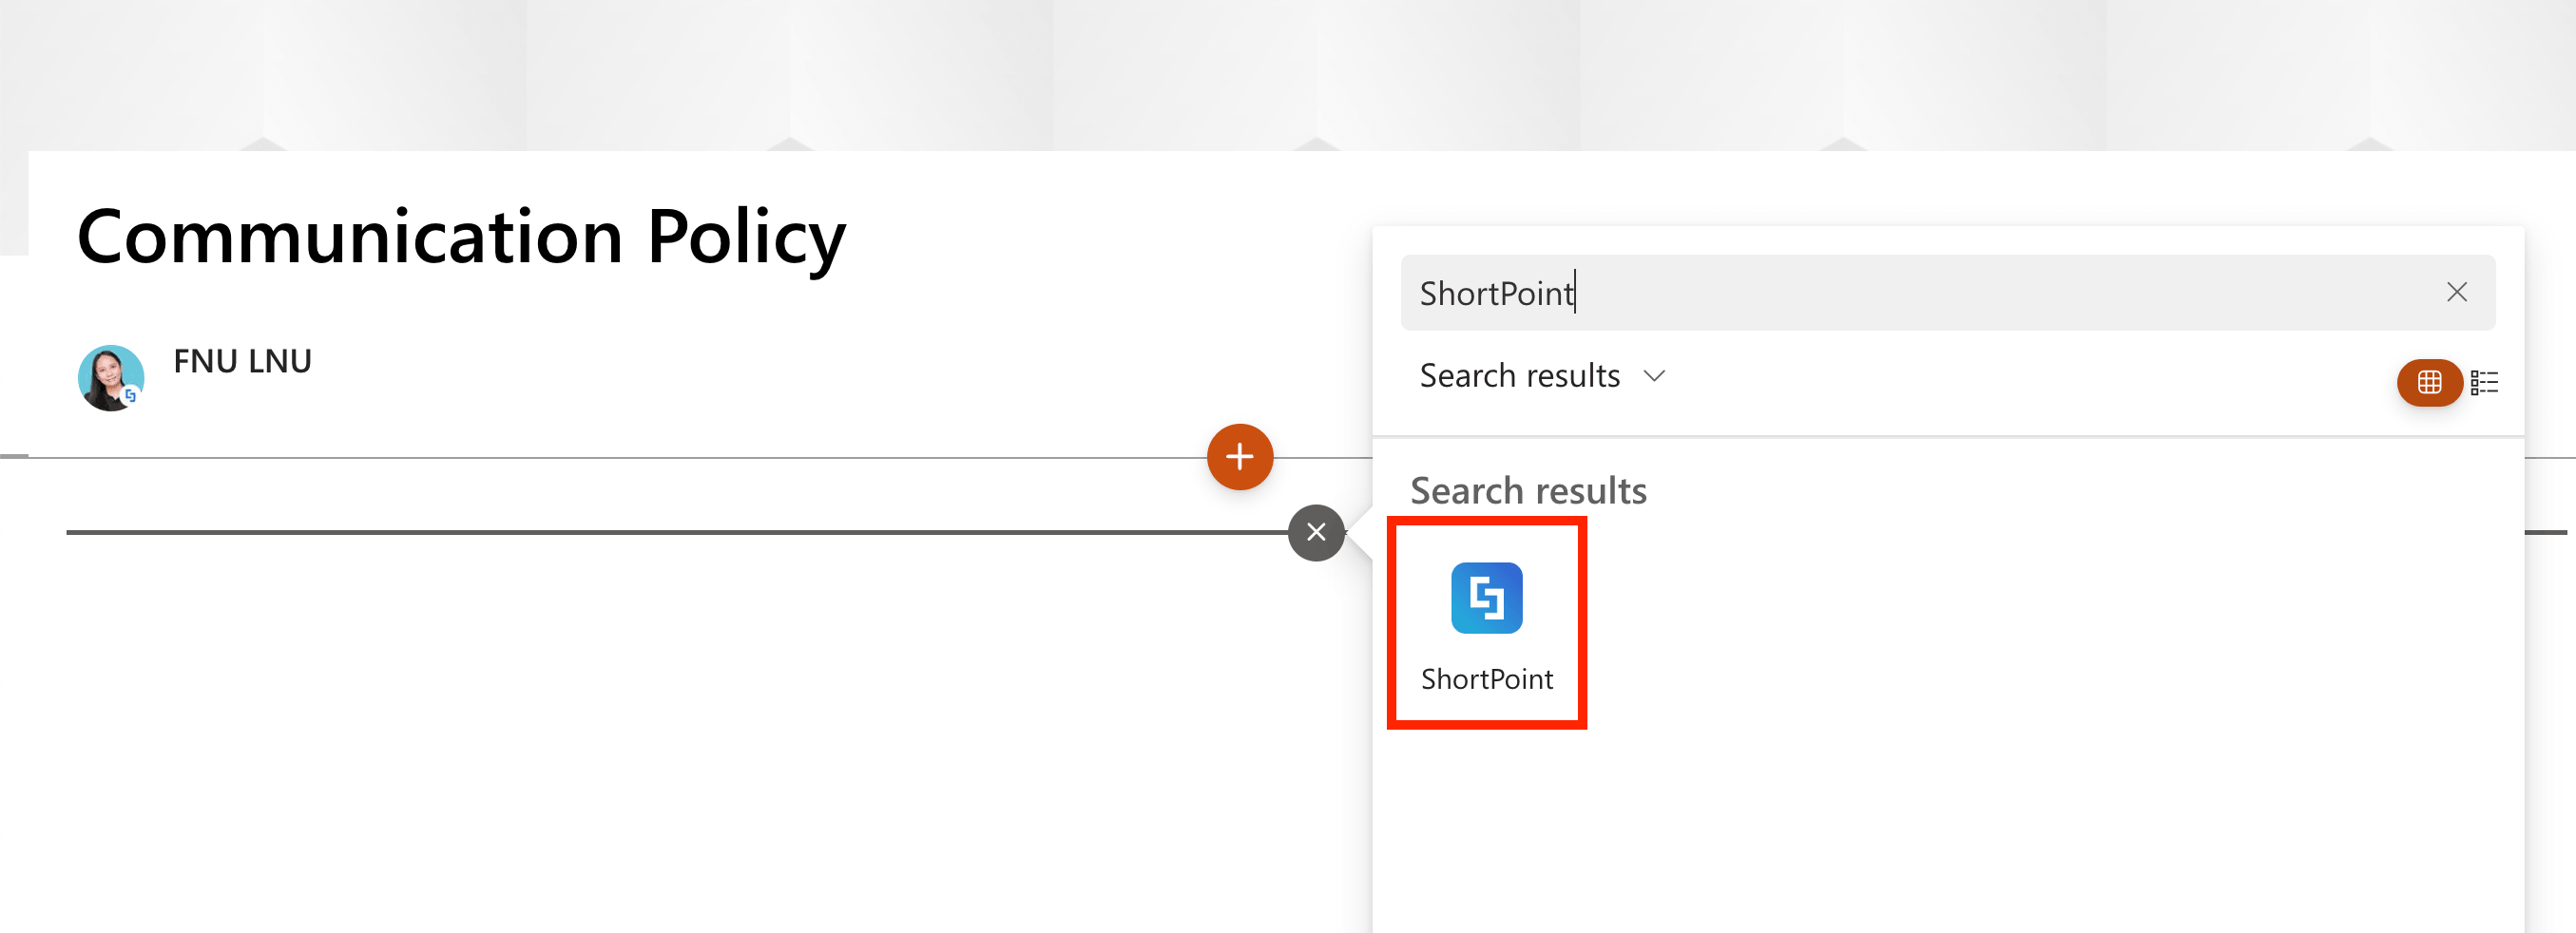
Use the search bar to look for ShortPoint and select it:
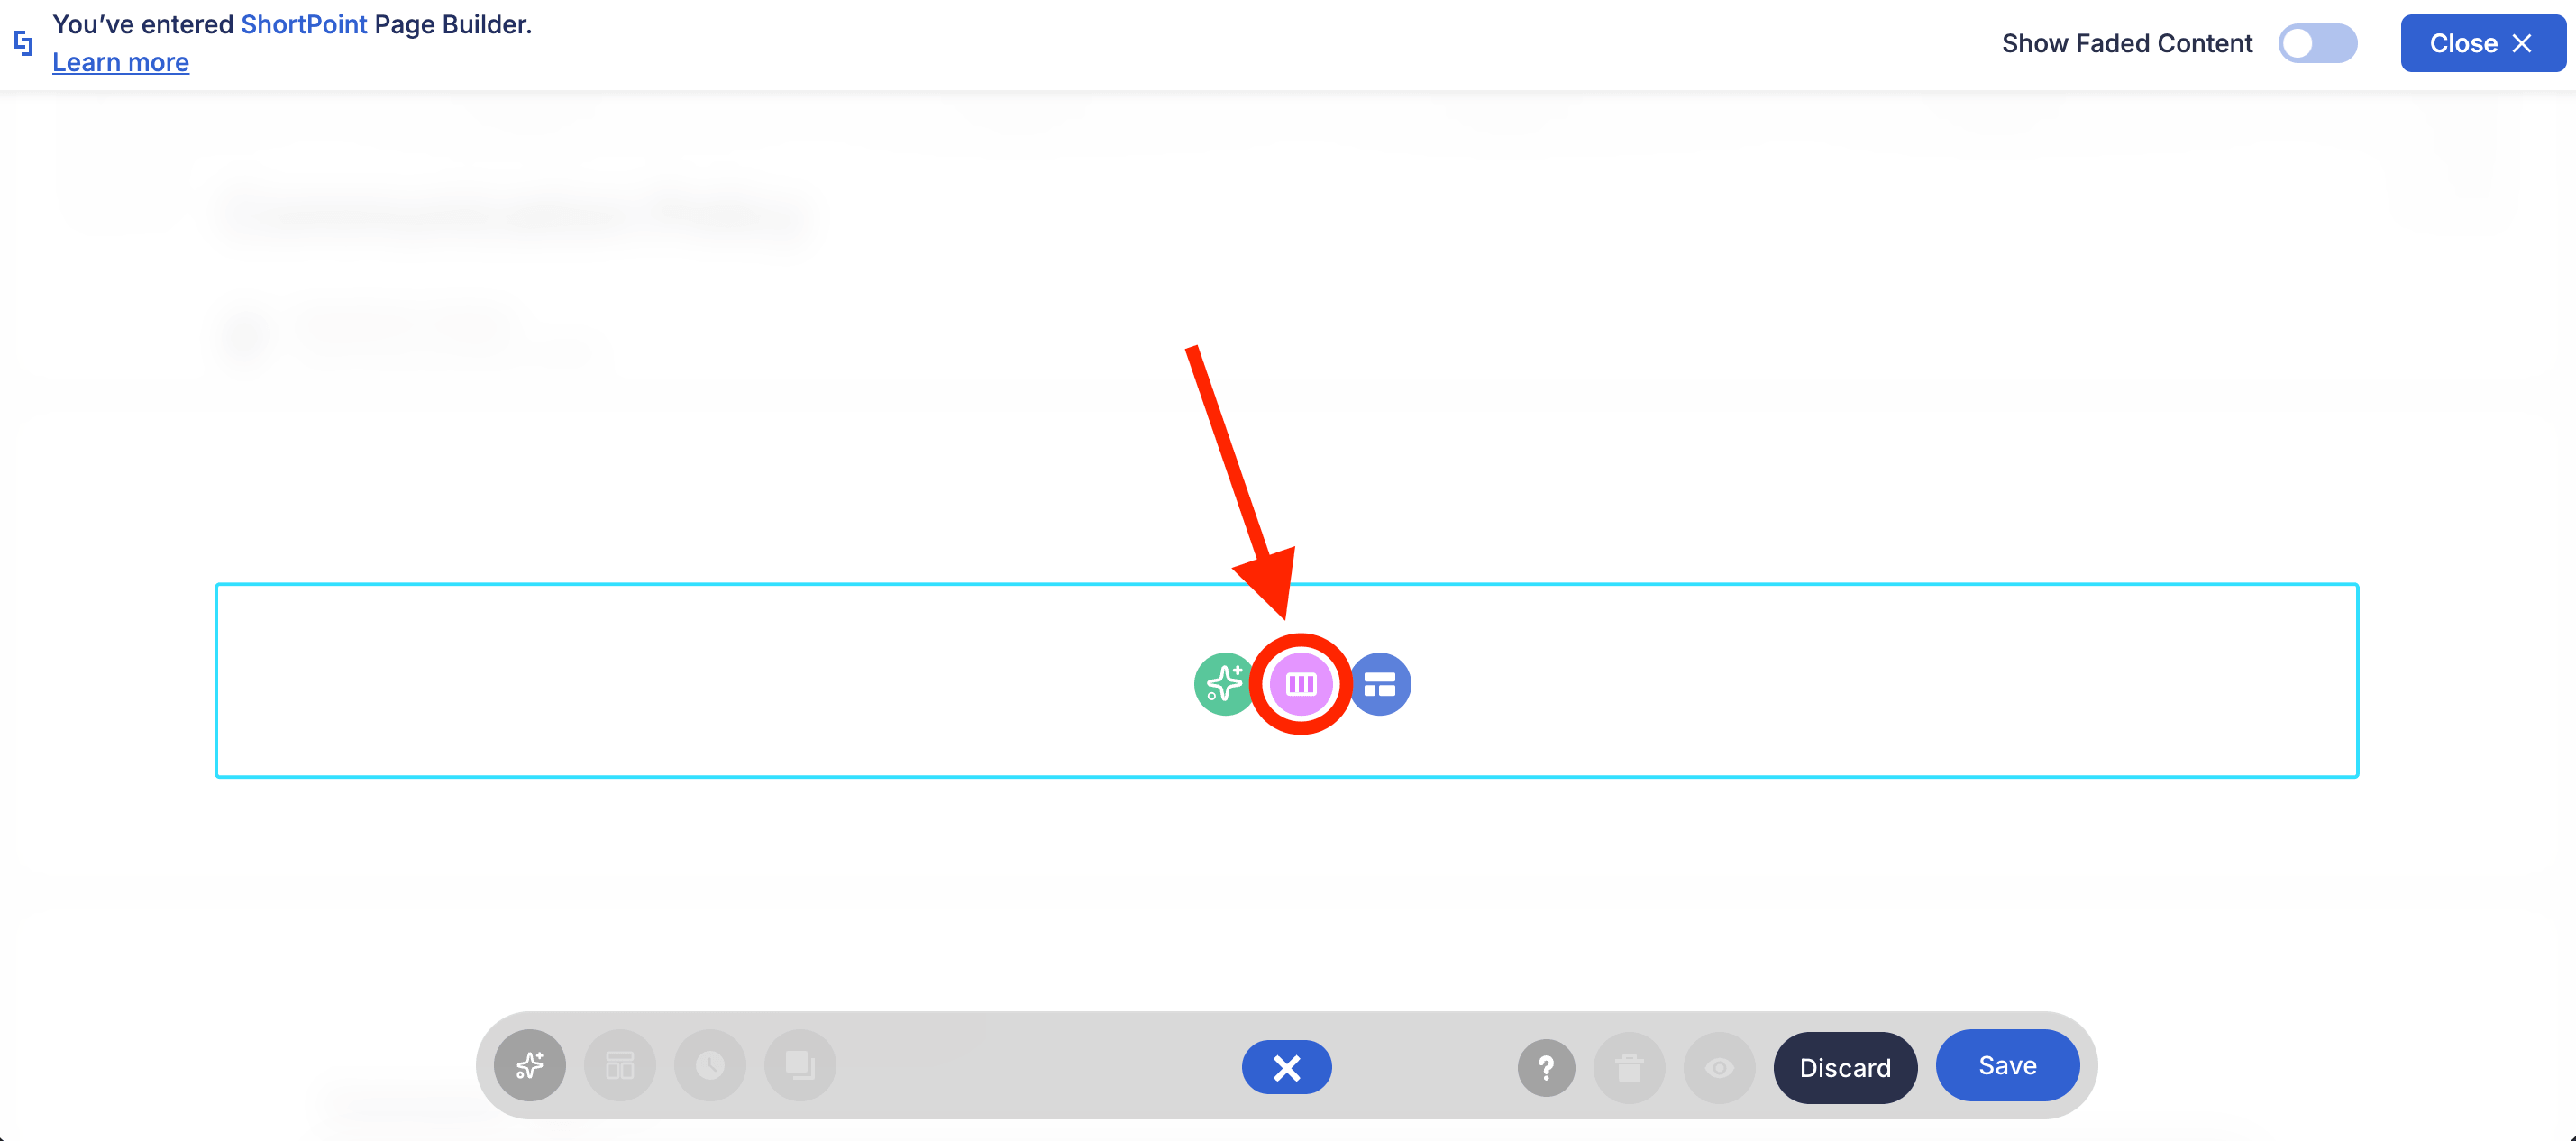
Select the Choose Layout icon:
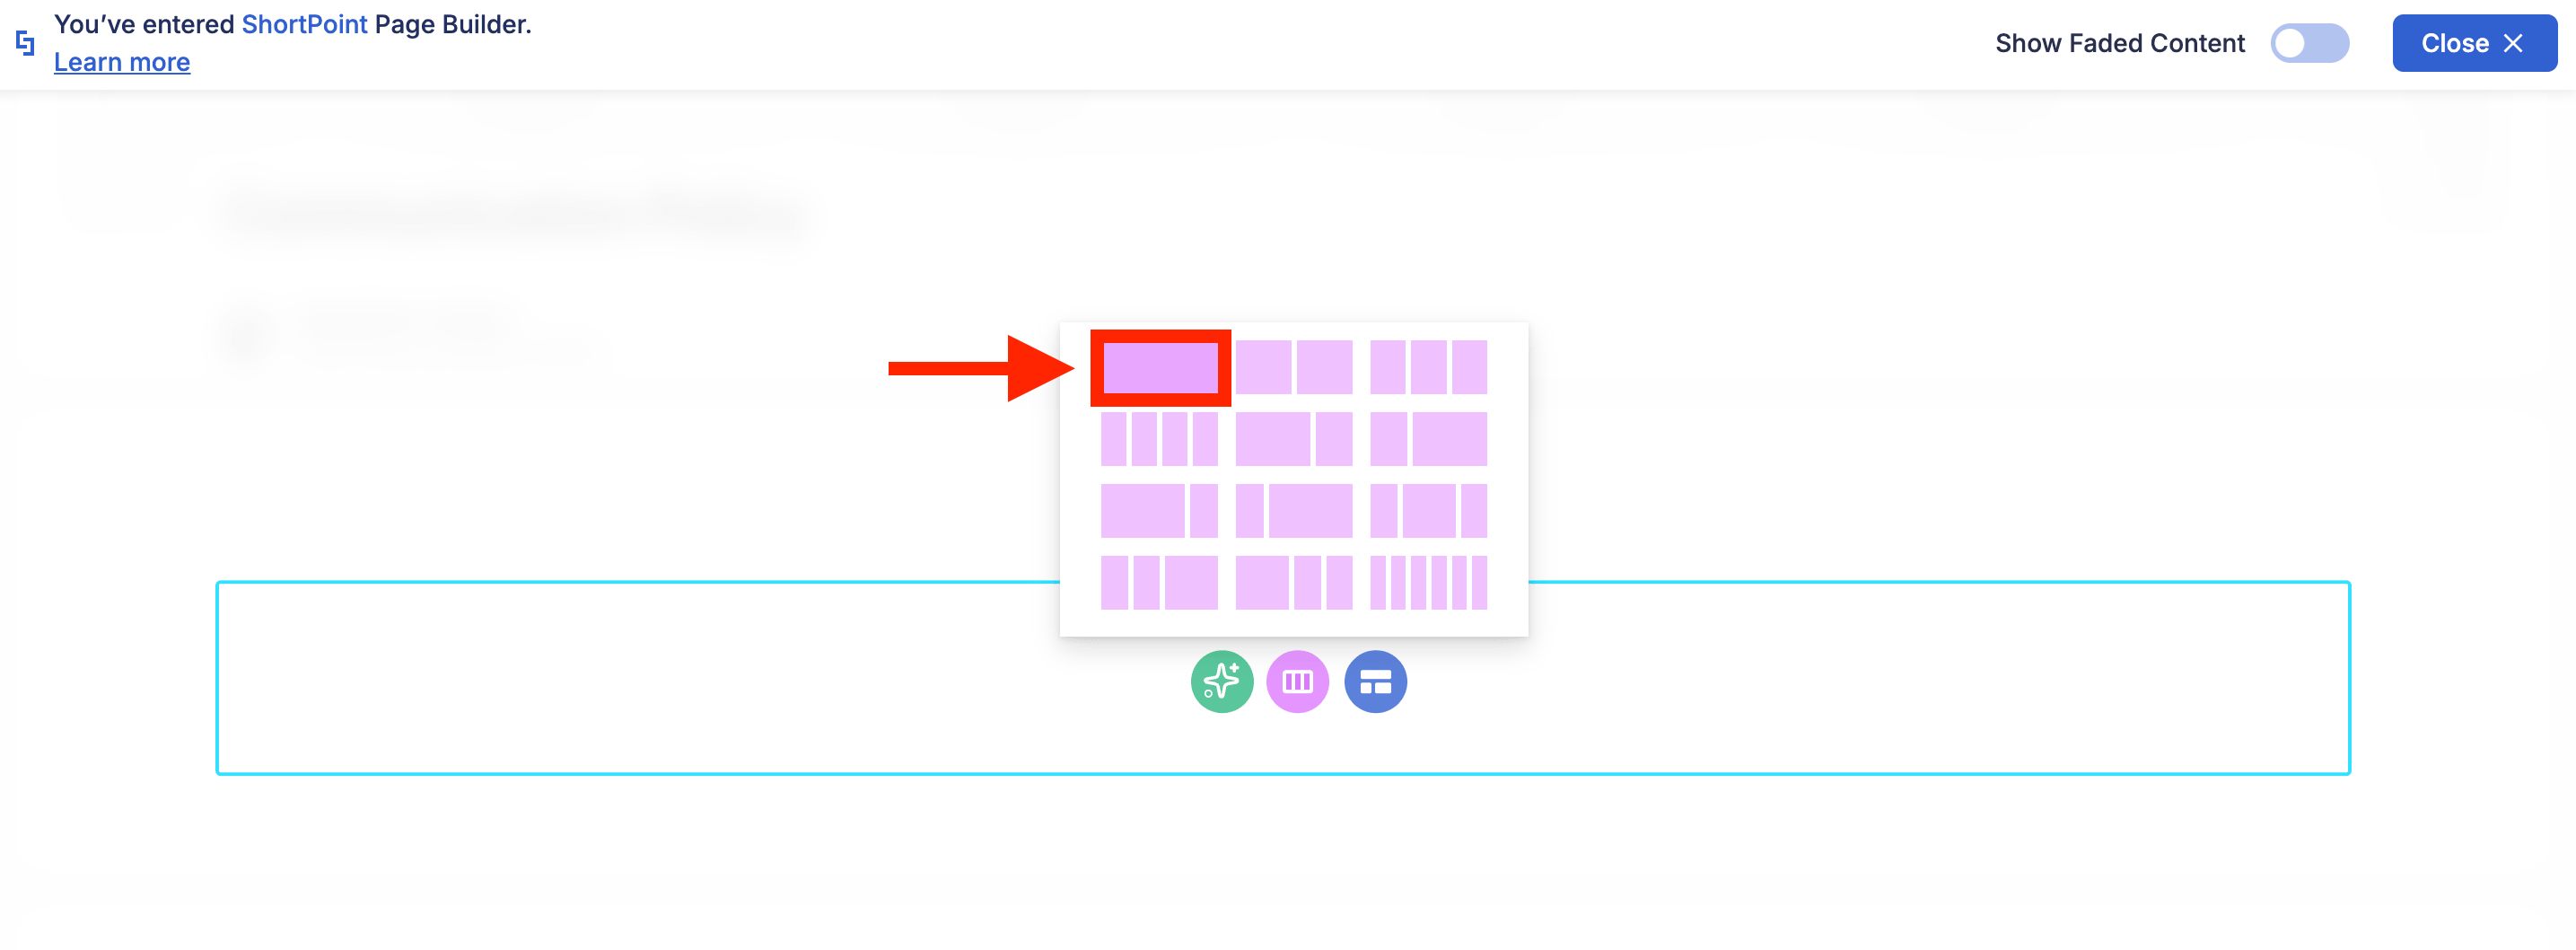
Select the single-row layout:
Step 5: Paste the copied Classic Page
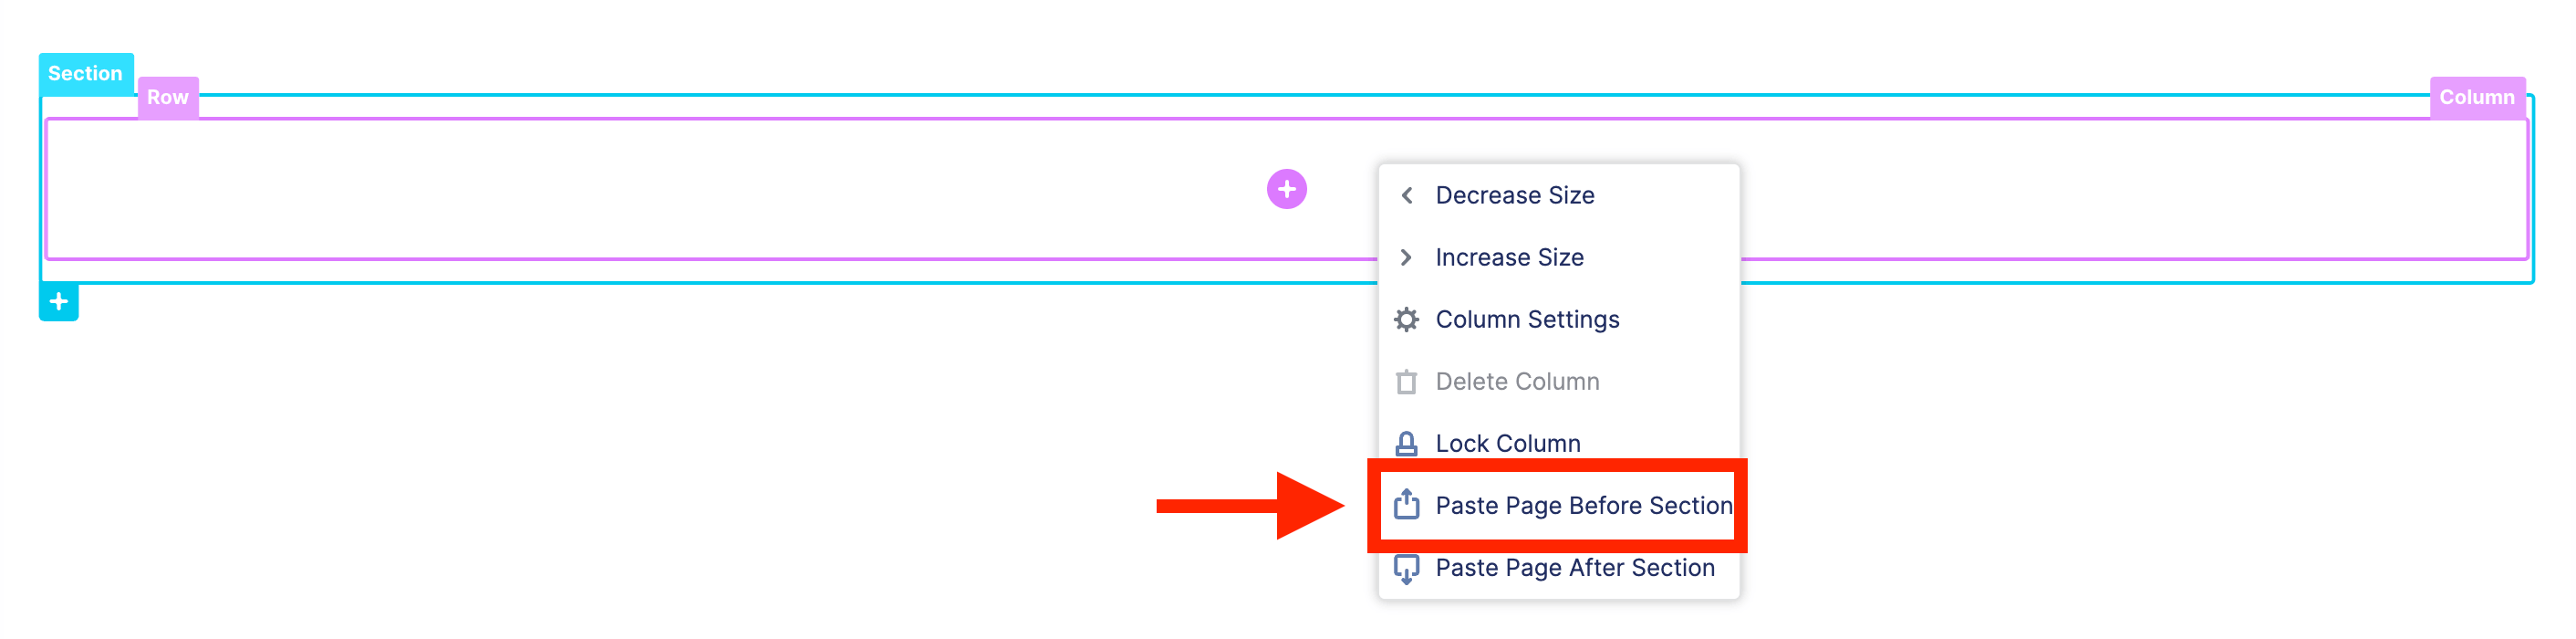
Right-click and select Paste Page Before Section:
Step 6: Save
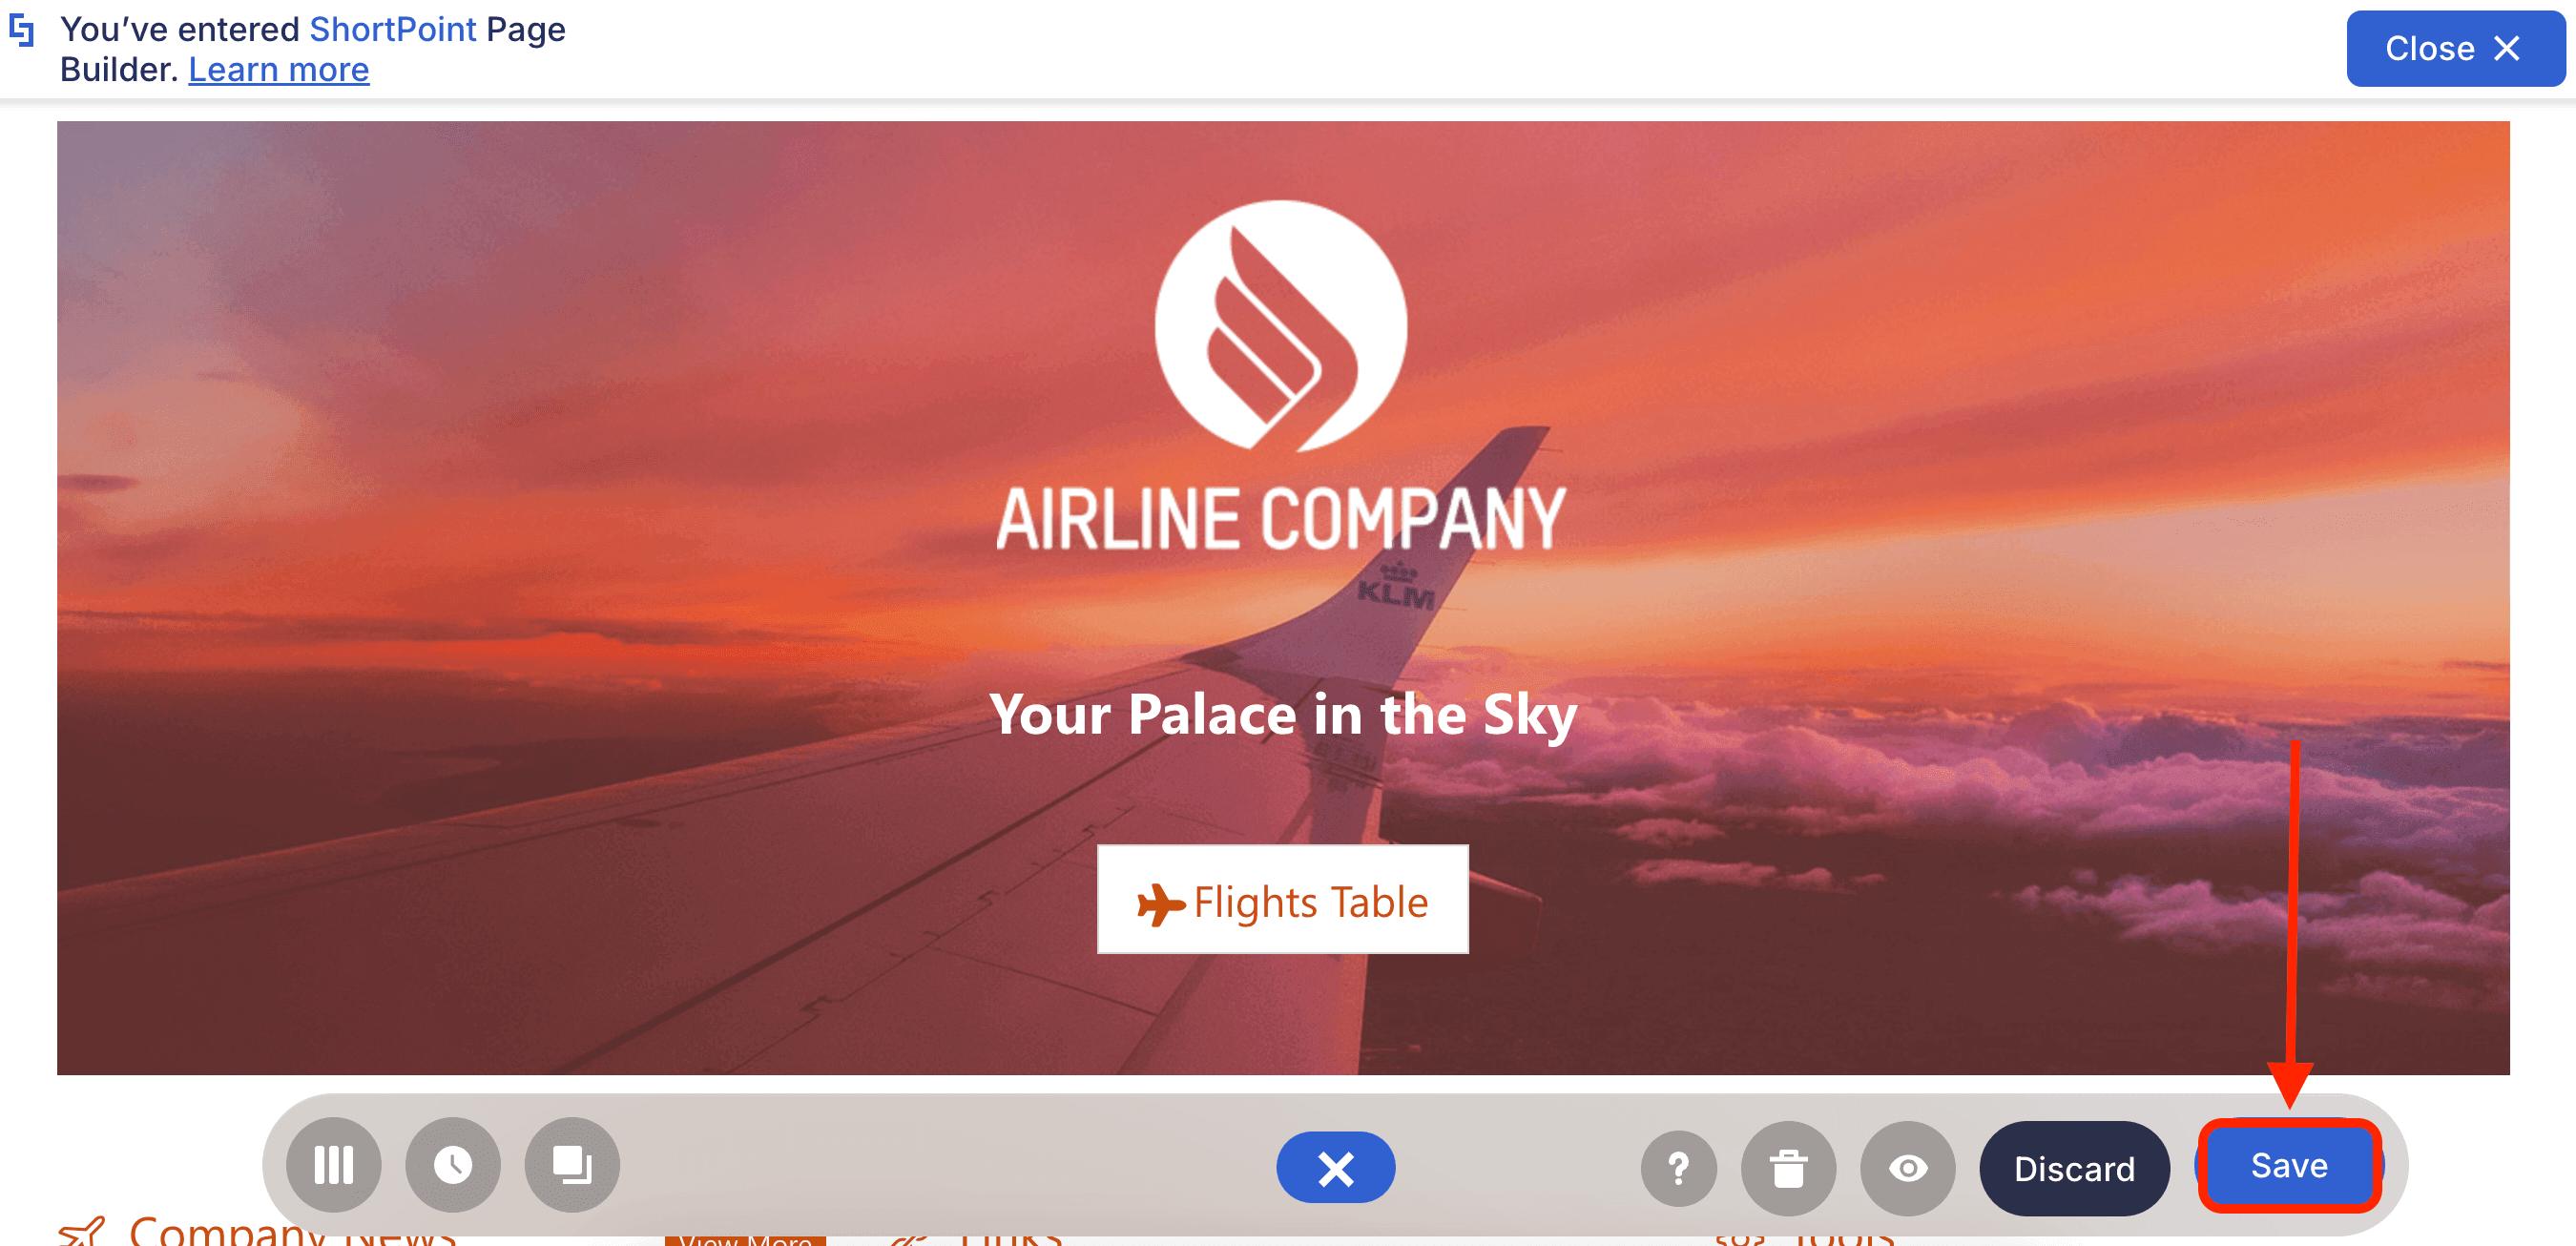
Click Save:
Then, click Publish:
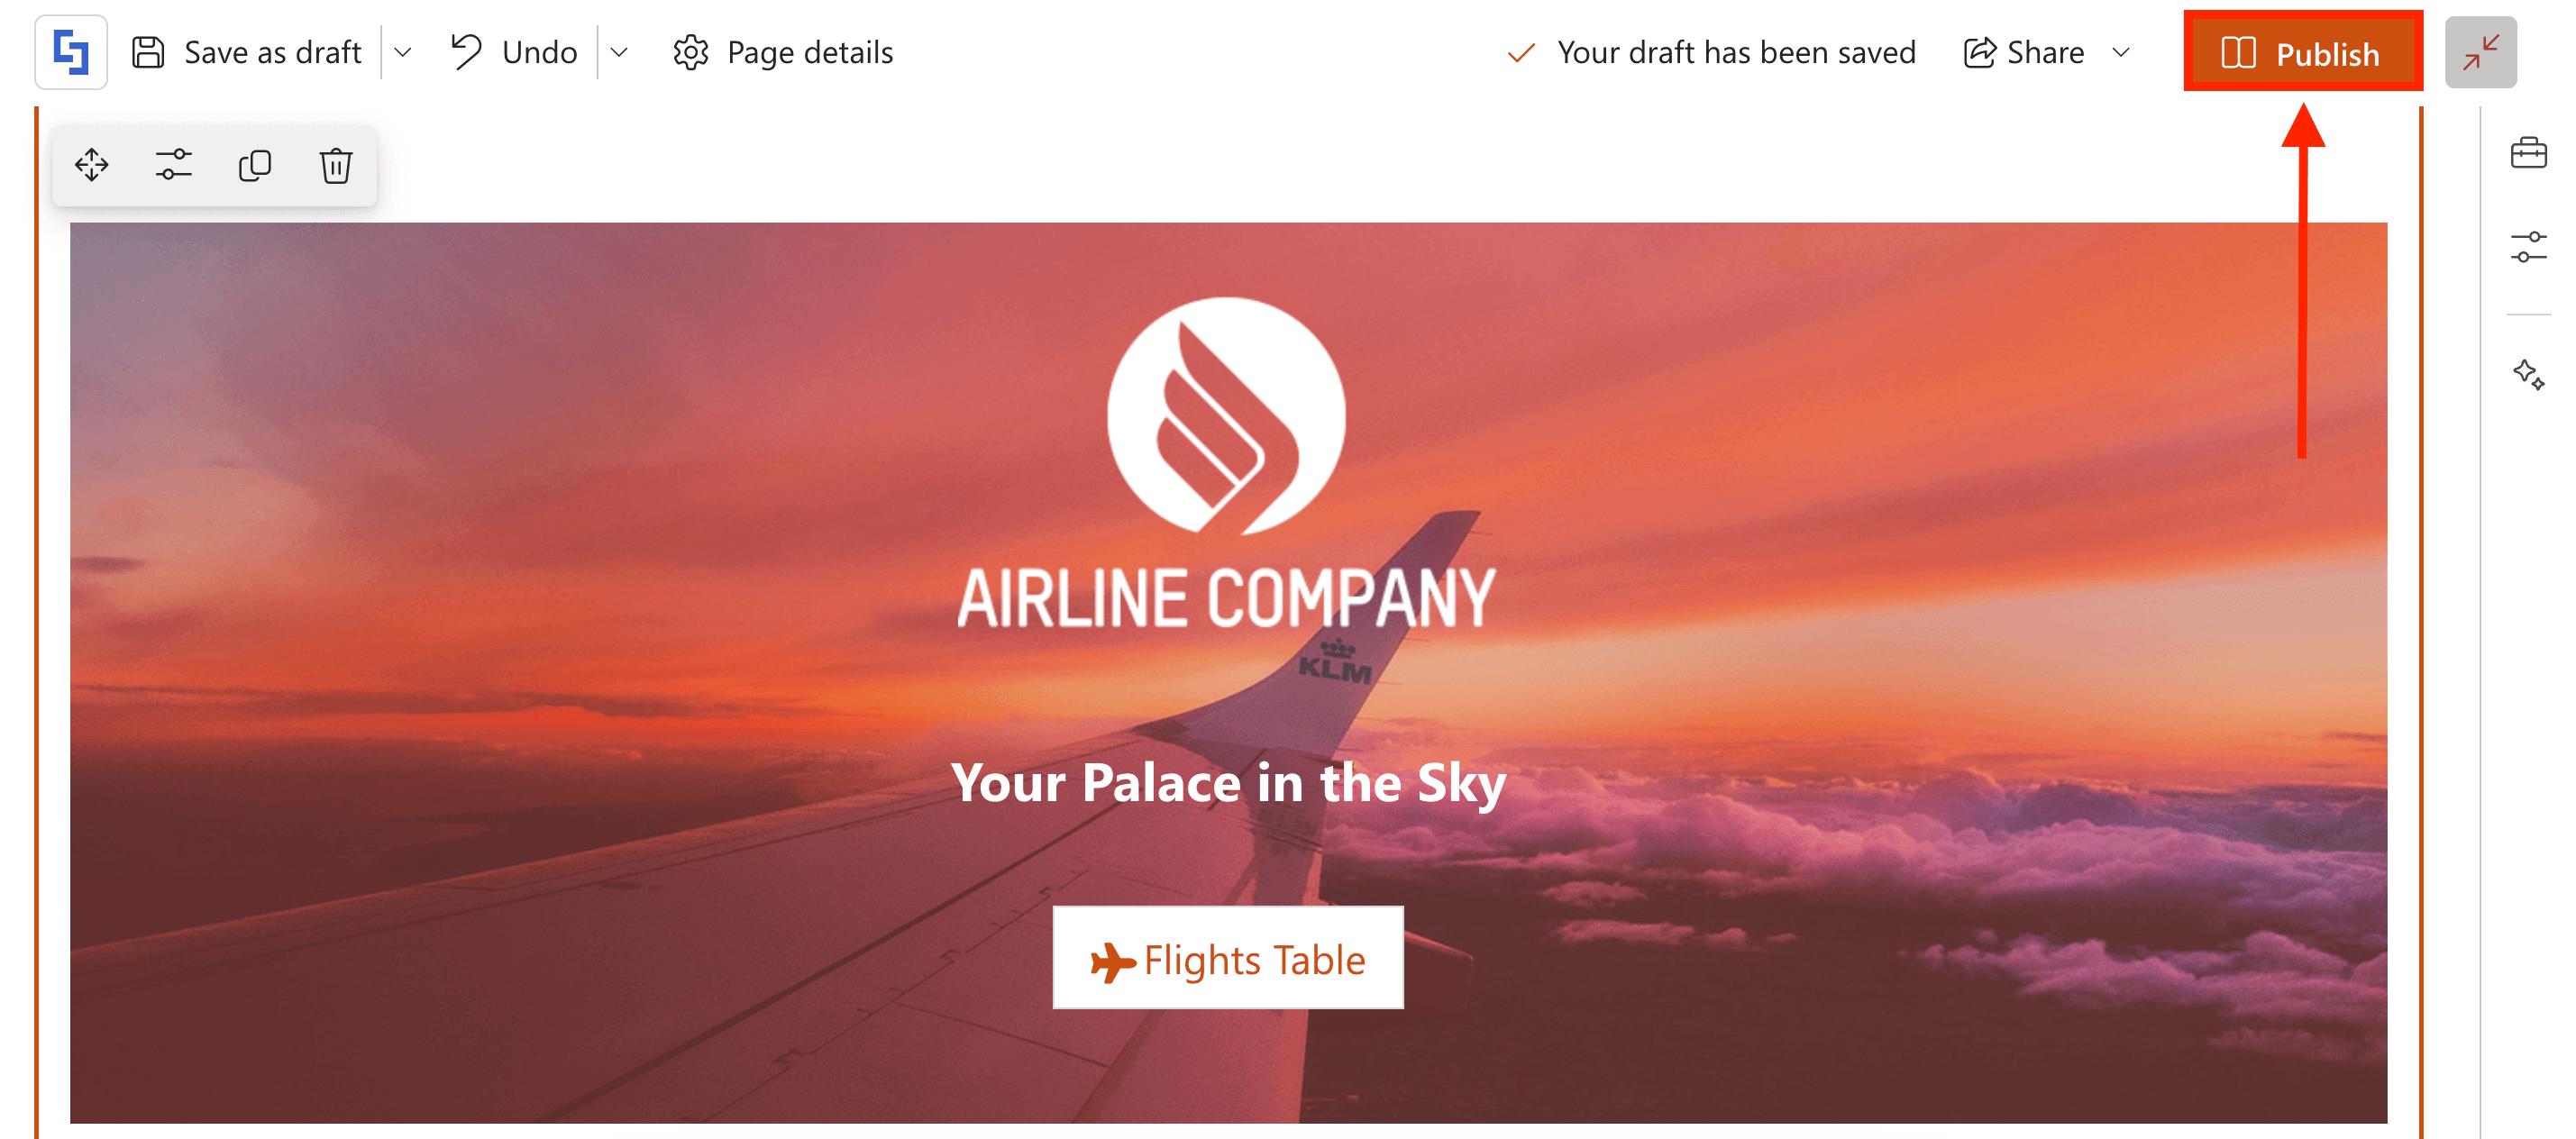
Congratulations! You have successfully converted your Classic page into a Modern page. Proceed to the last part to complete the tutorial.
Part 4: Re-install ShortPoint
Classic Pages use ShortPoint’s Classic Theme Builder. To use the Modern Theme Builder, you need to accomplish the steps below:
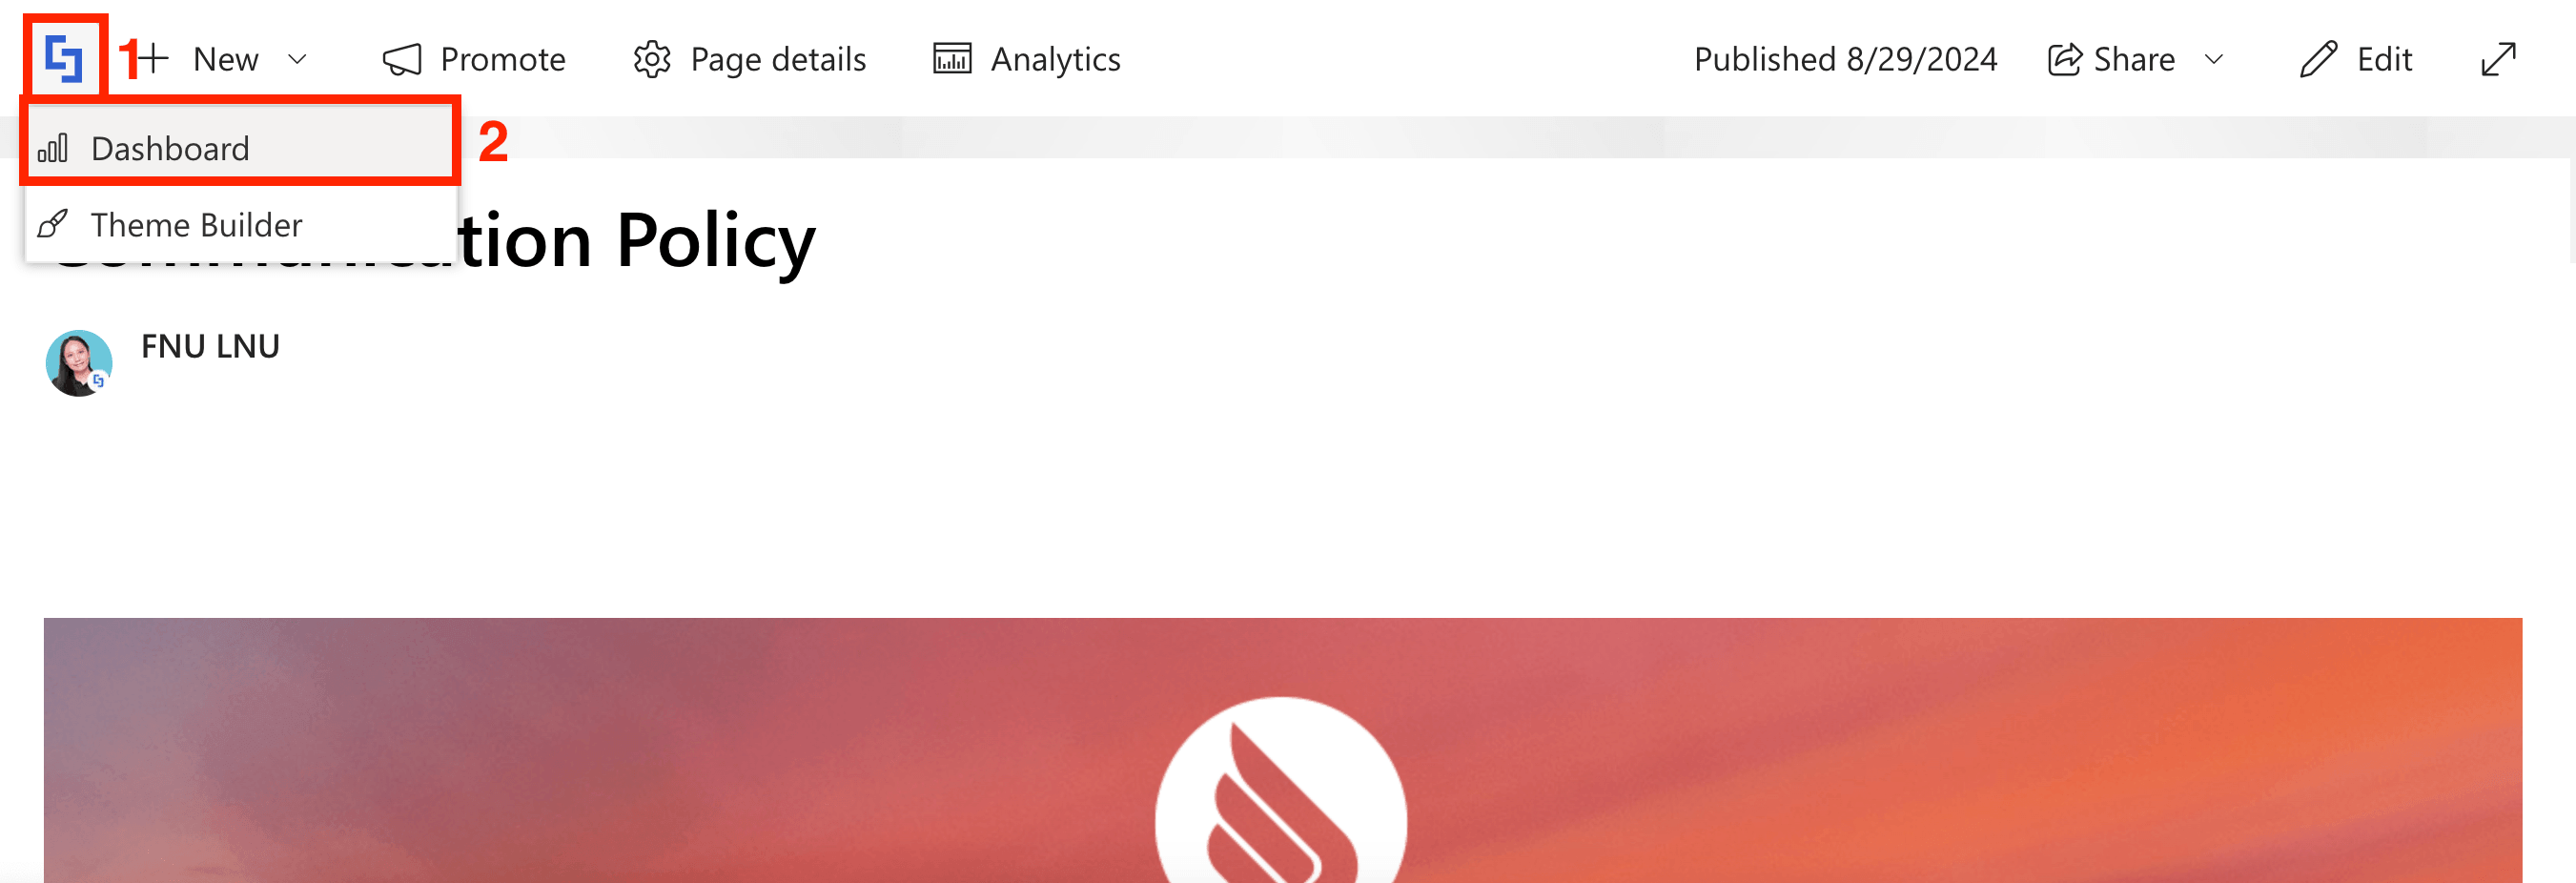
Step 1: Open the ShortPoint Dashboard
Click the [1] ShortPoint icon and select [2] Dashboard:
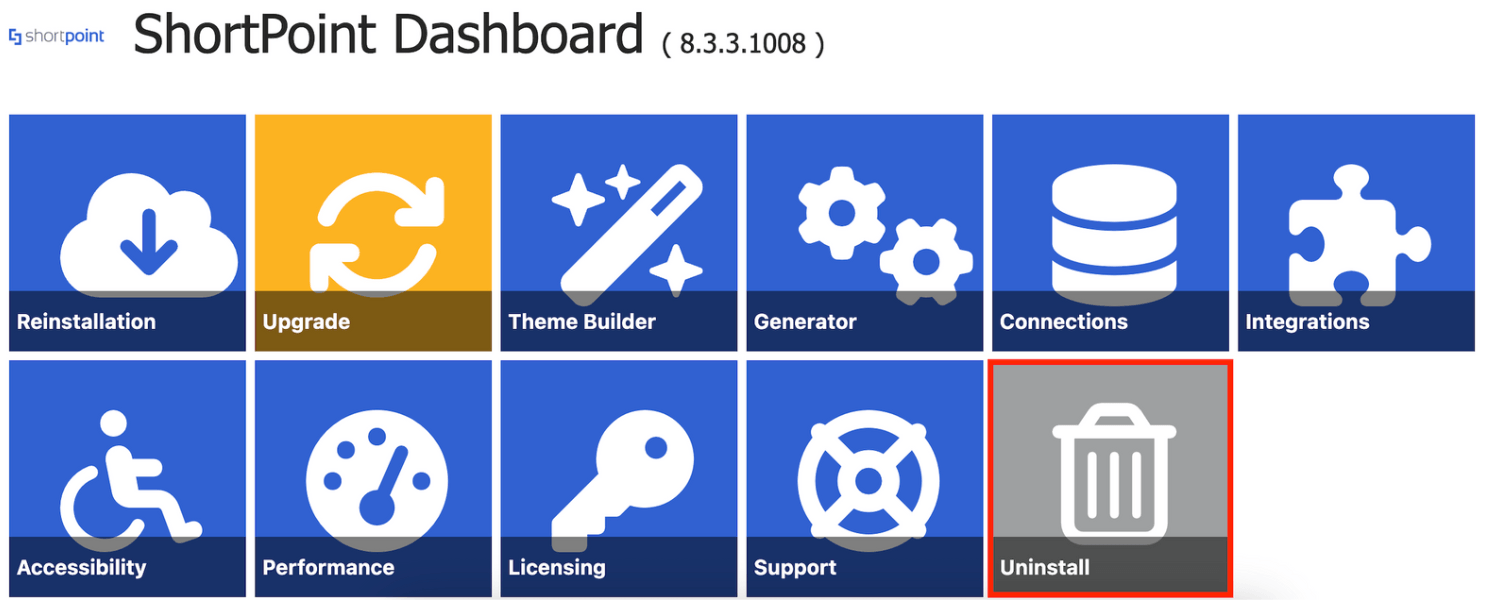
Step 2: Uninstall ShortPoint
Click Uninstall to open the Uninstall page:
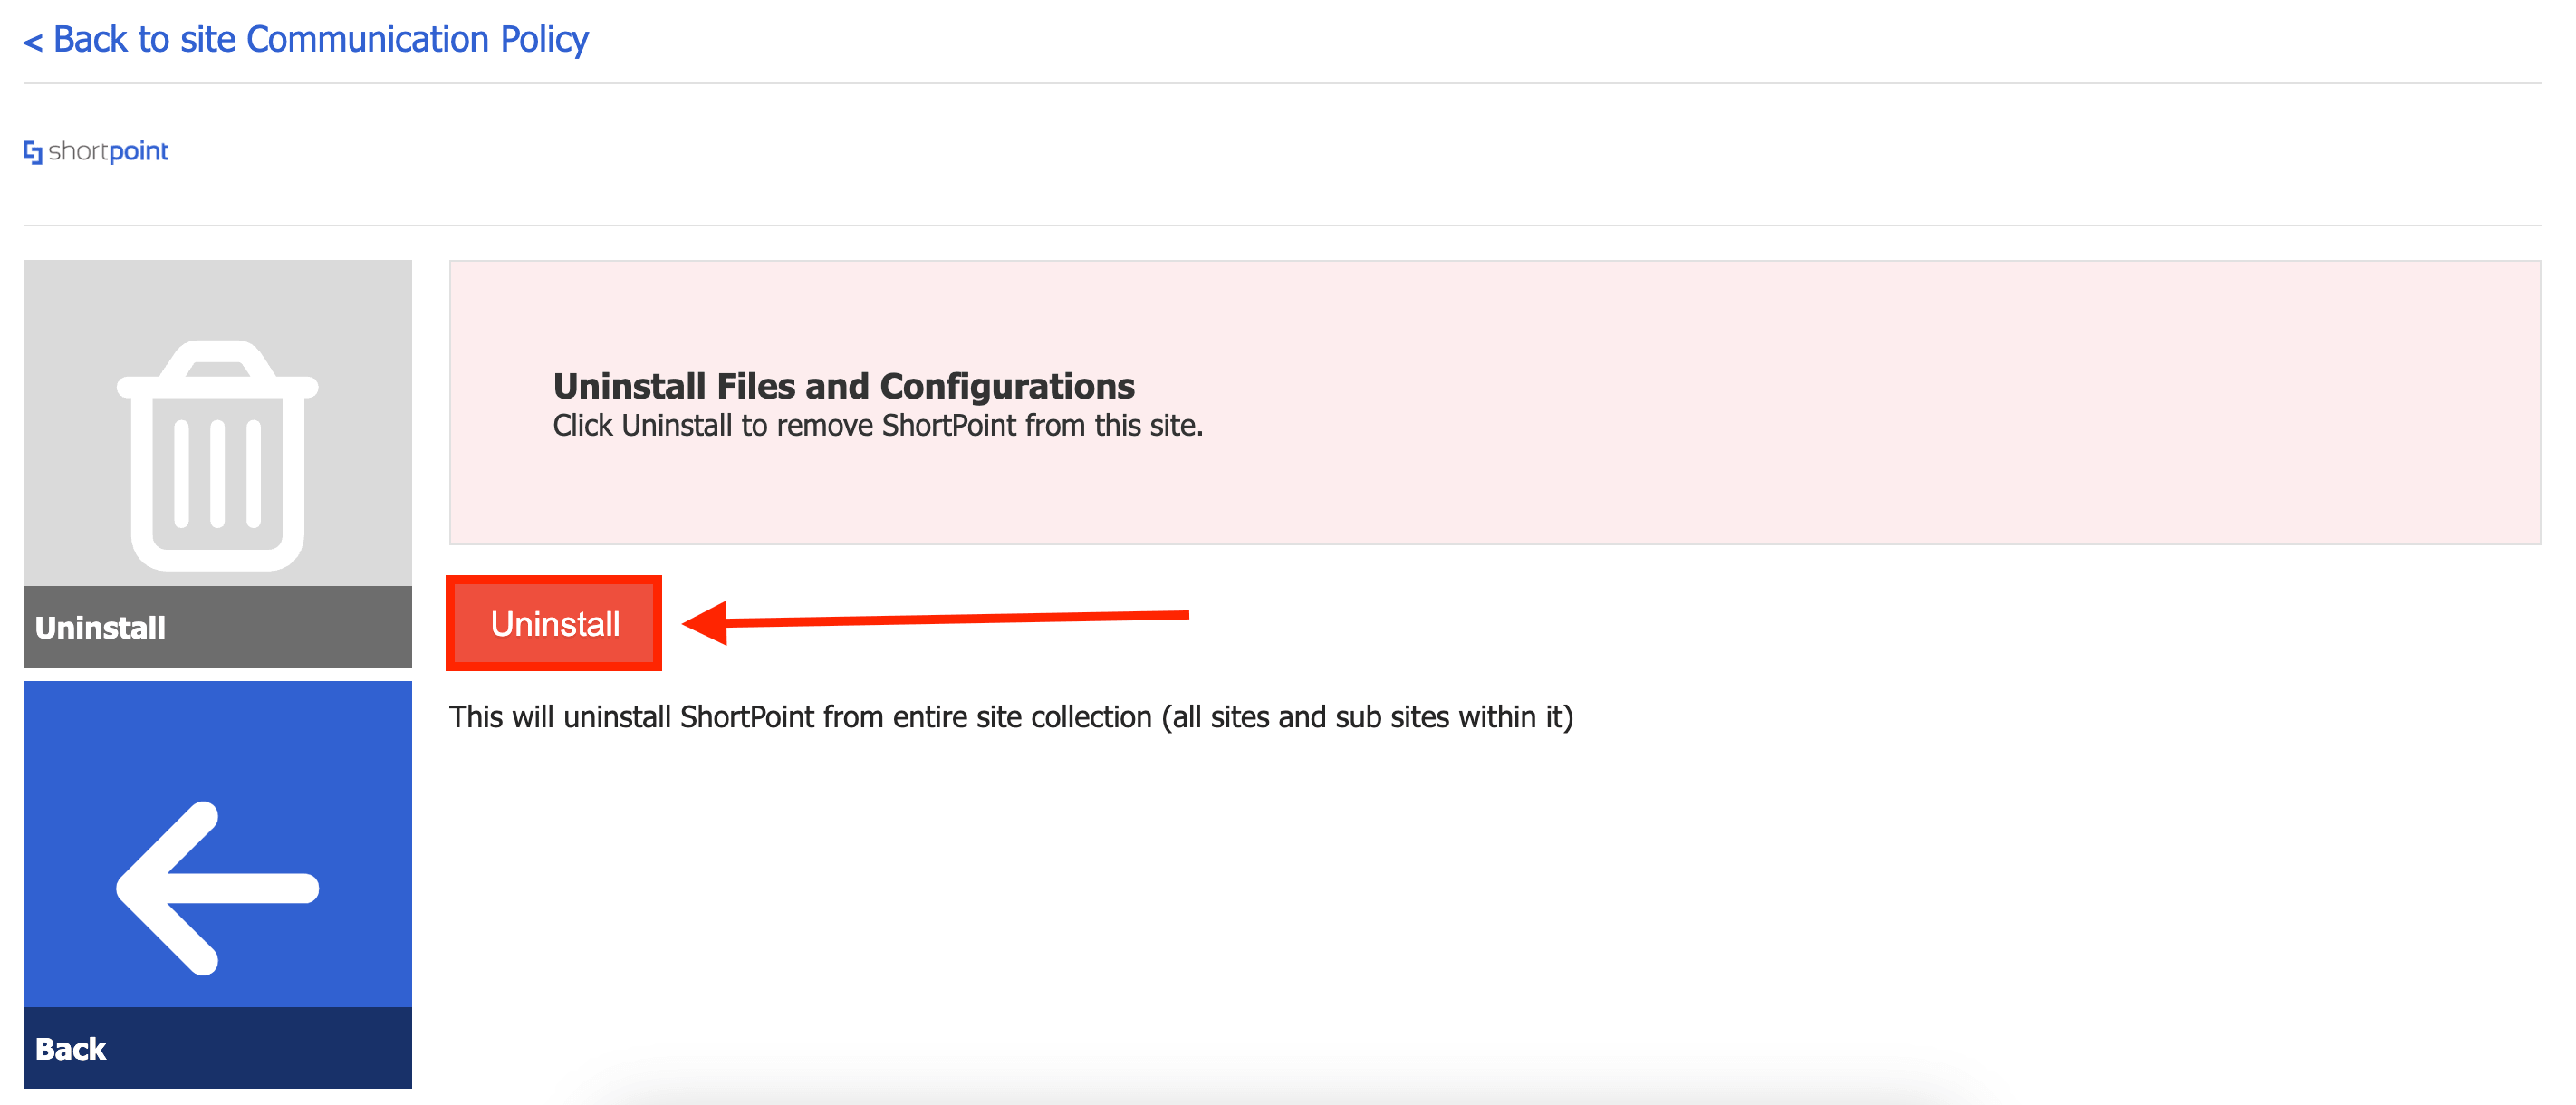
Click Uninstall:
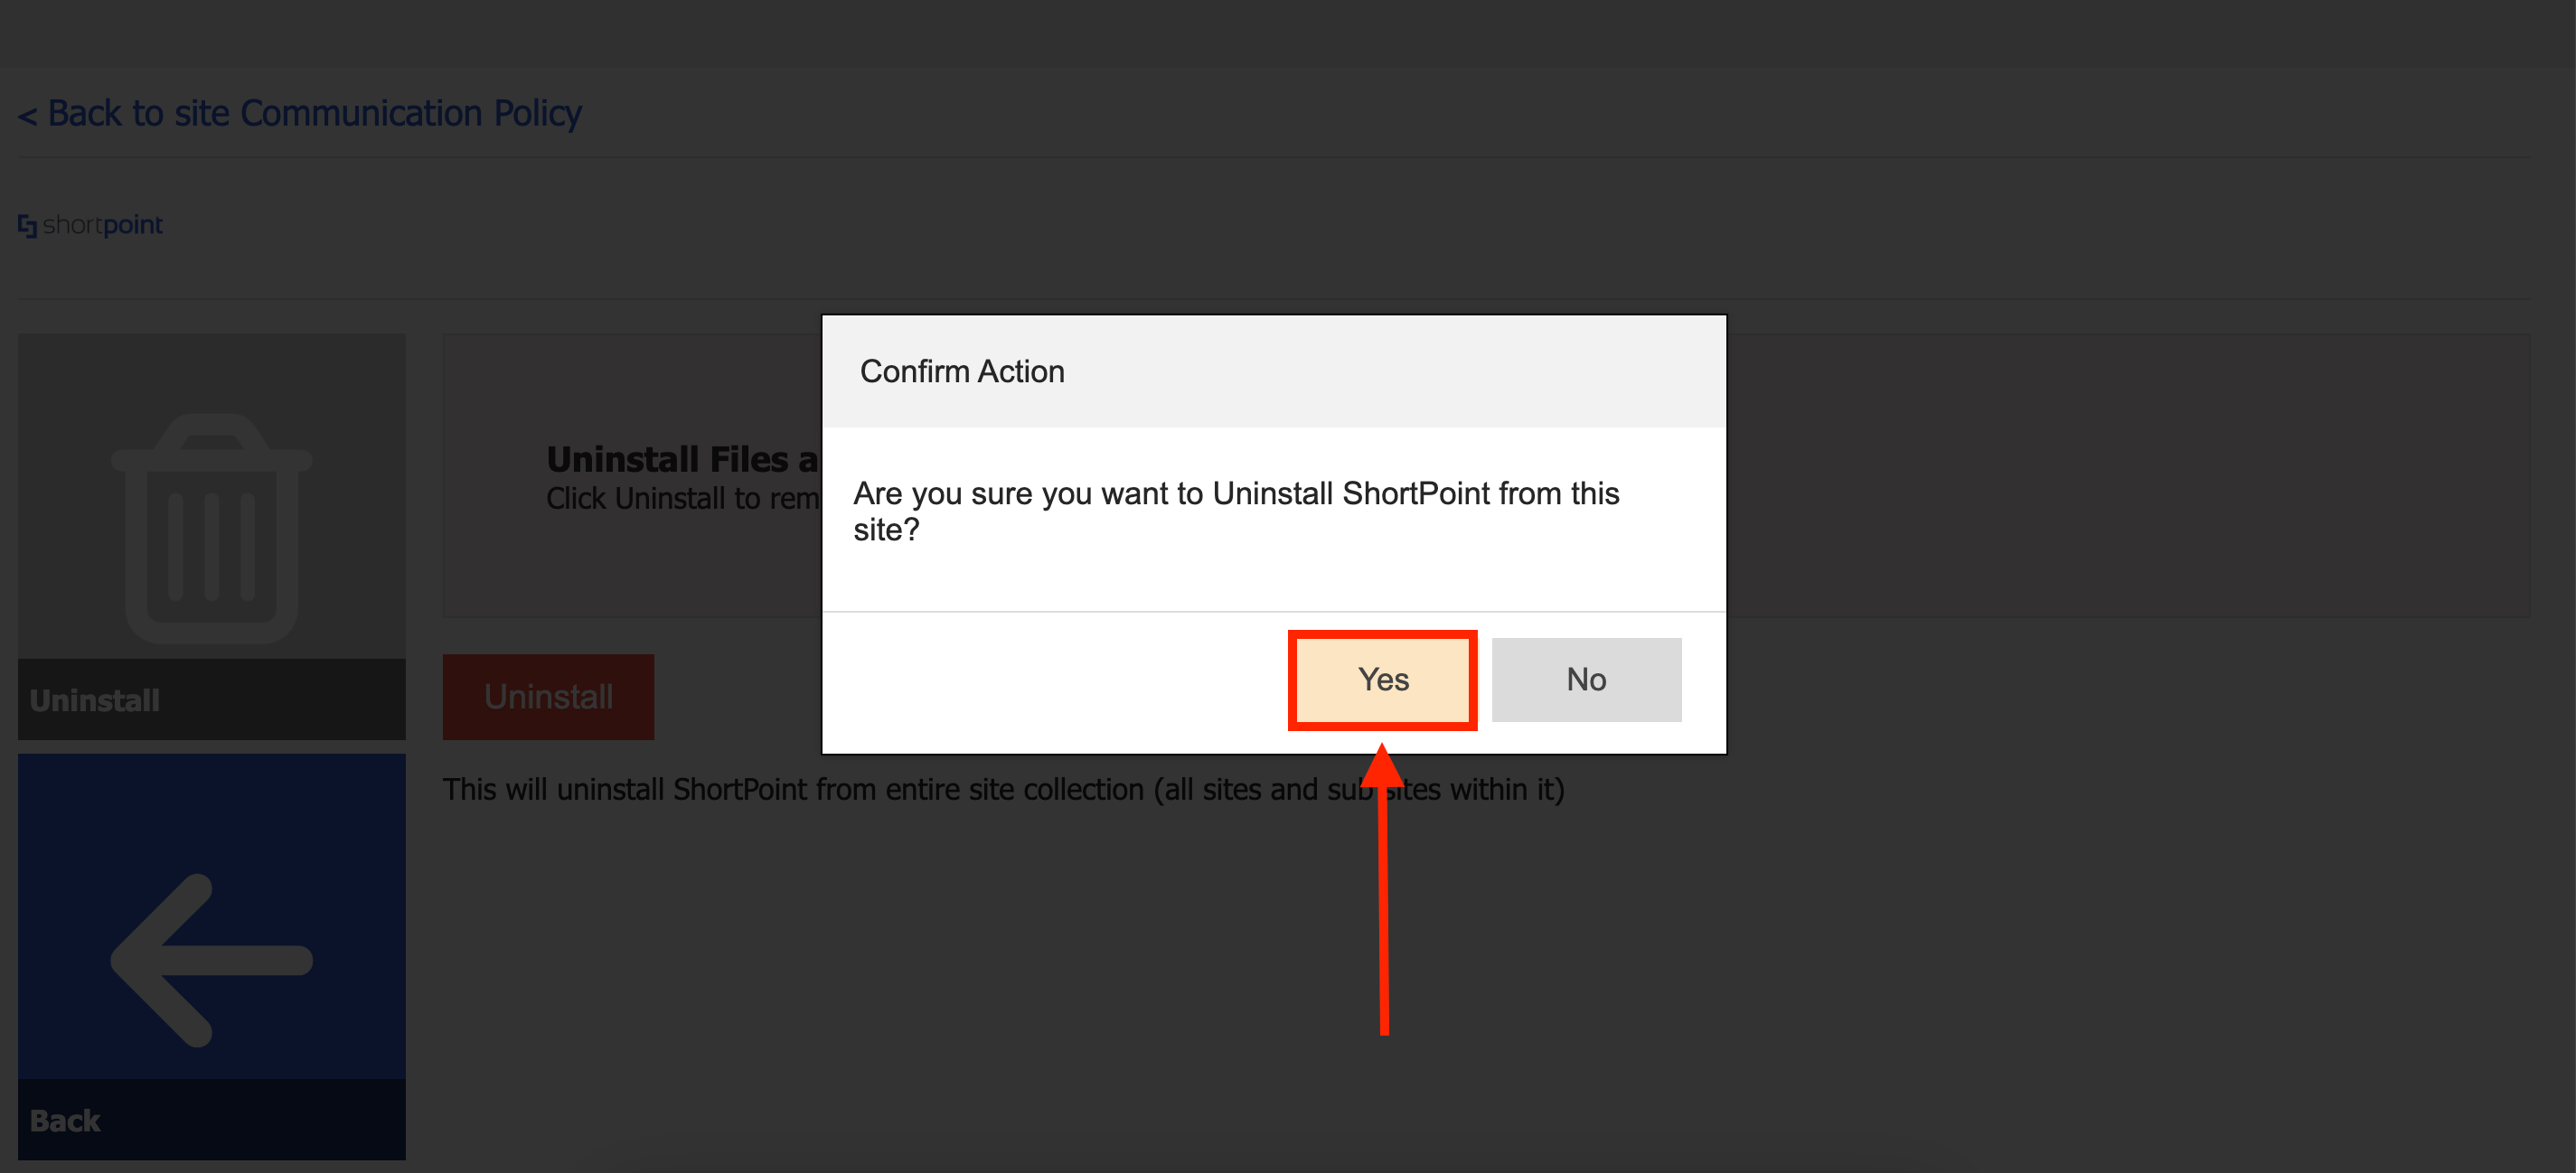
Click Yes:
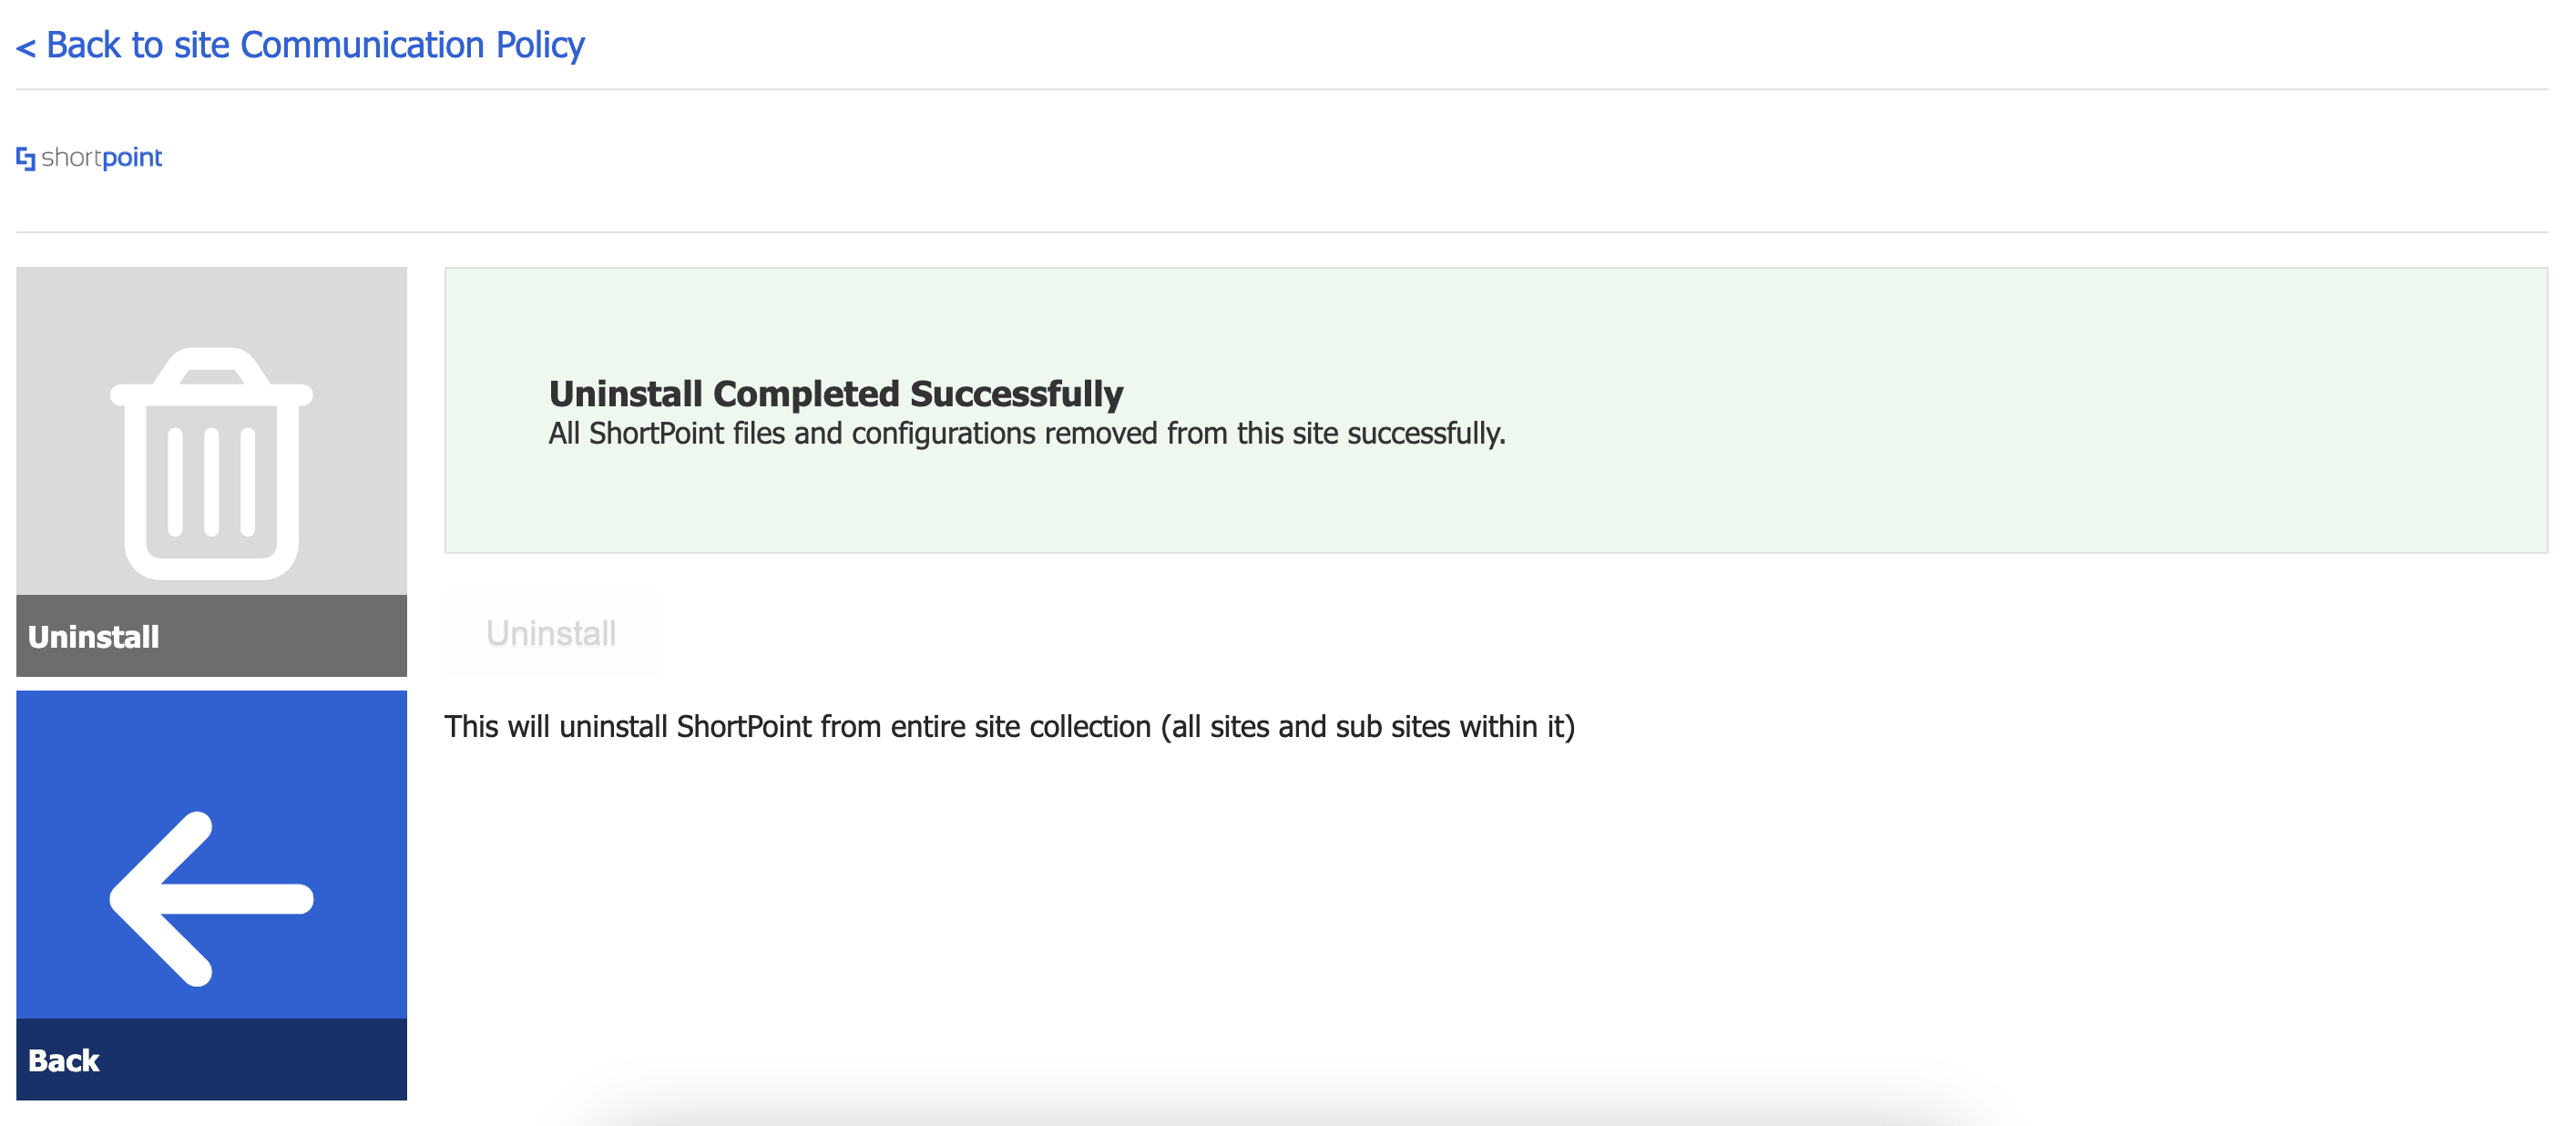
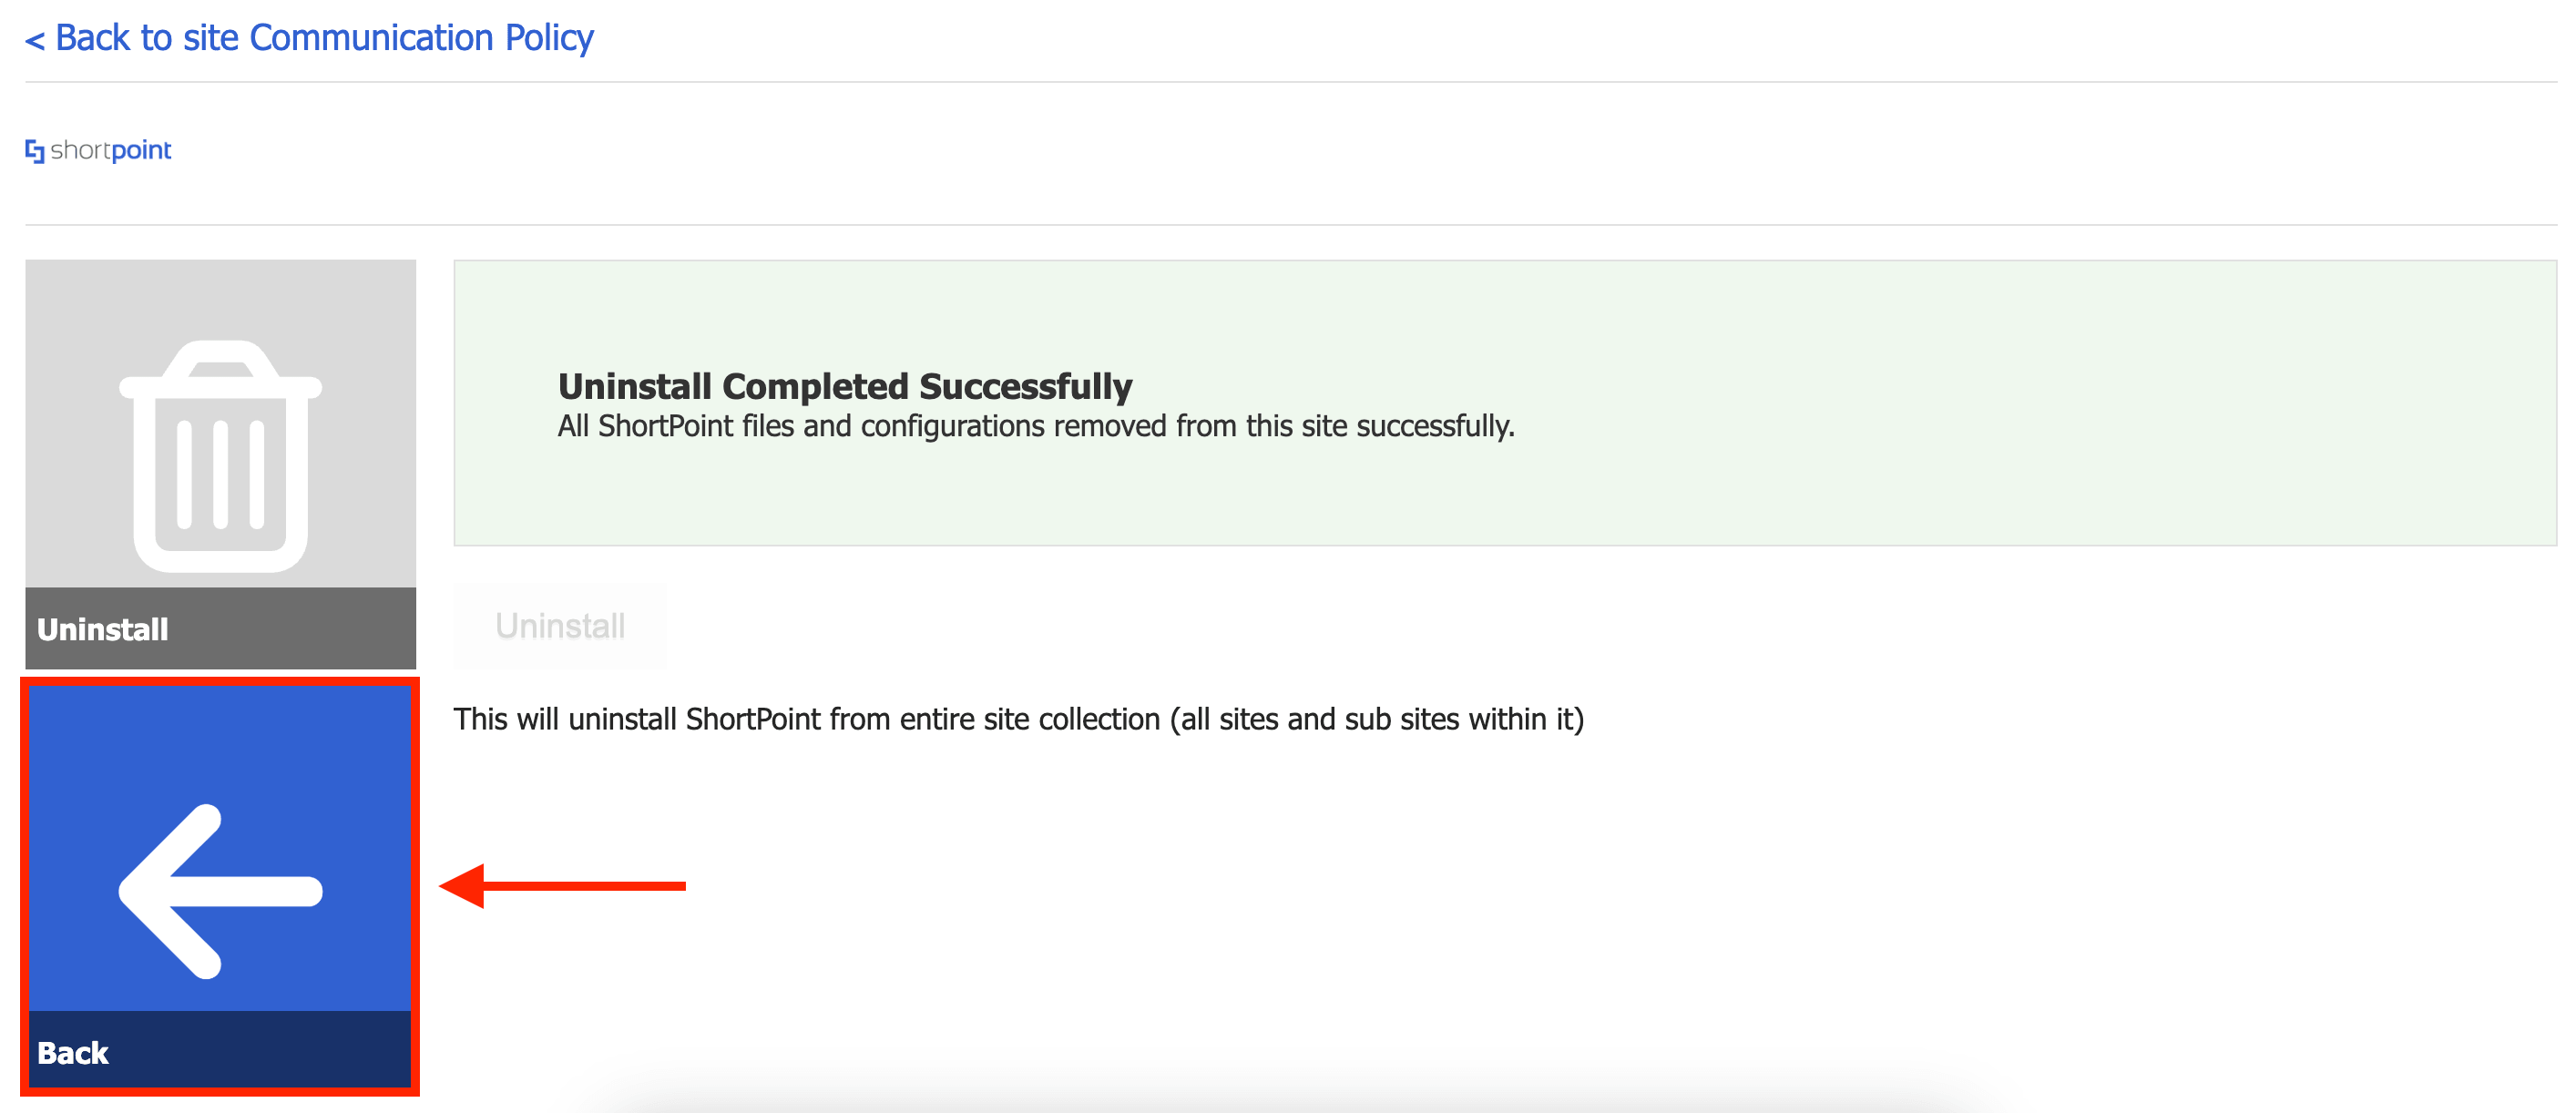
You will see this page once ShortPoint is uninstalled successfully:
Step 3: Reinstall ShortPoint
Click Back:
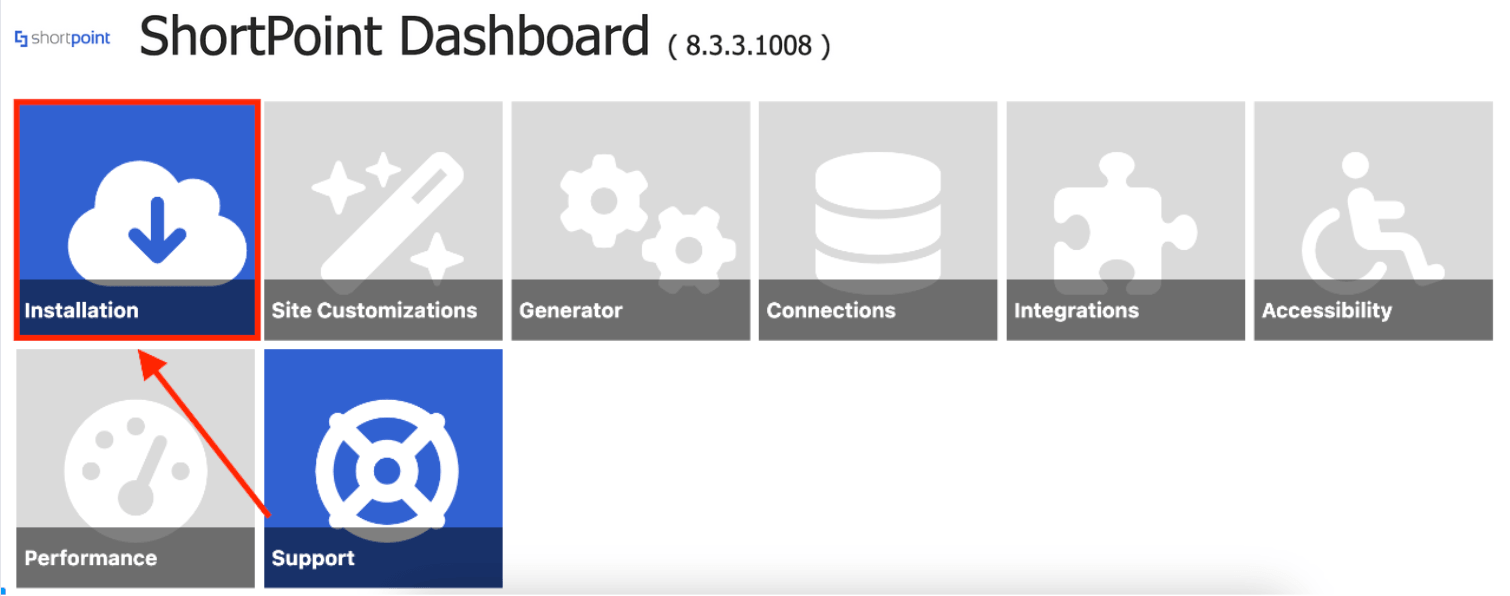
Click Installation to go to the Installation page:
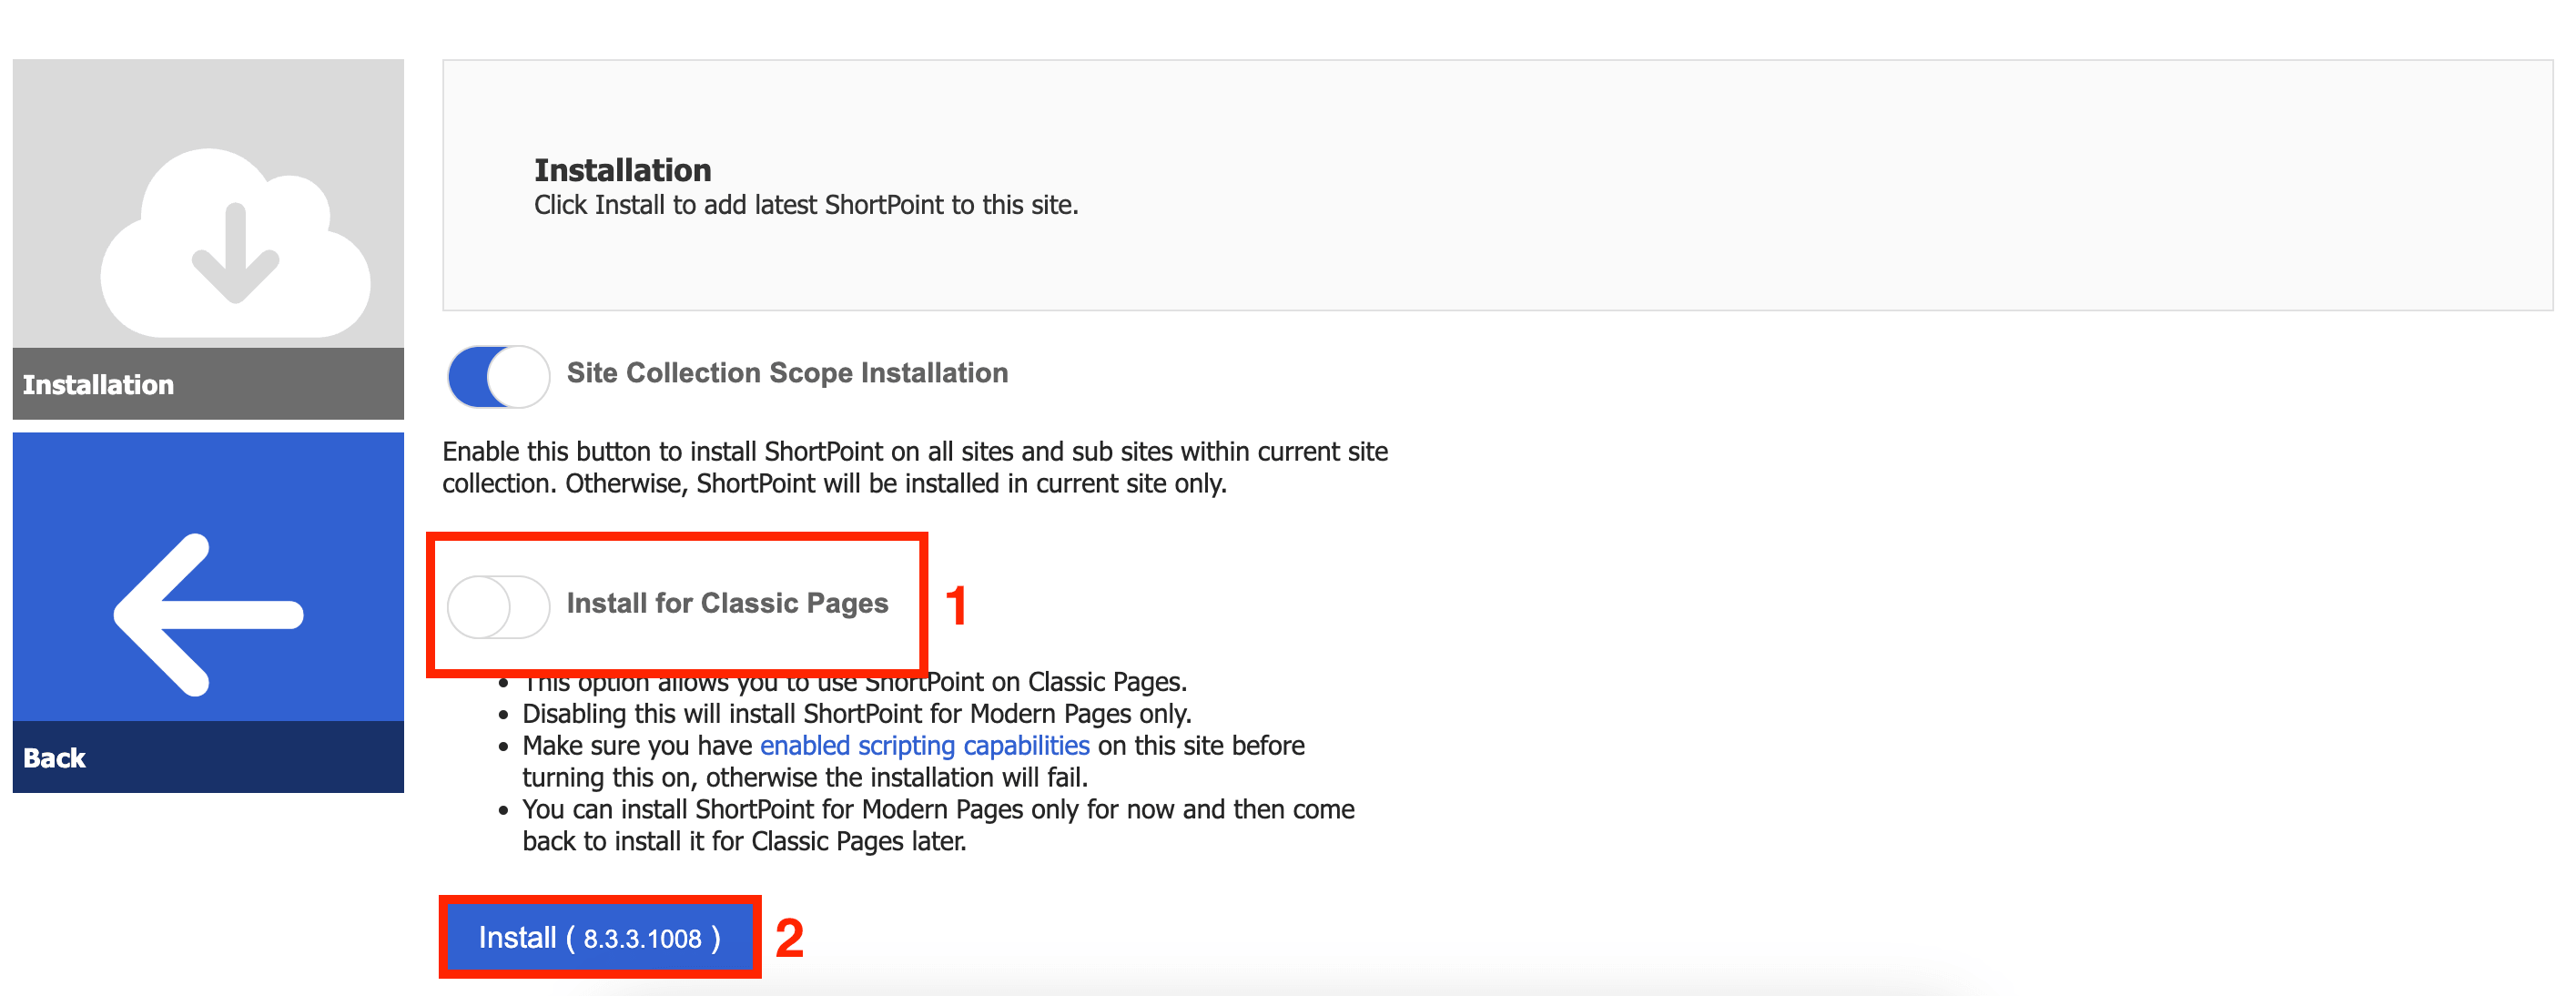
Make sure [1] Install for Classic Pages is disabled. Click [2] Install:
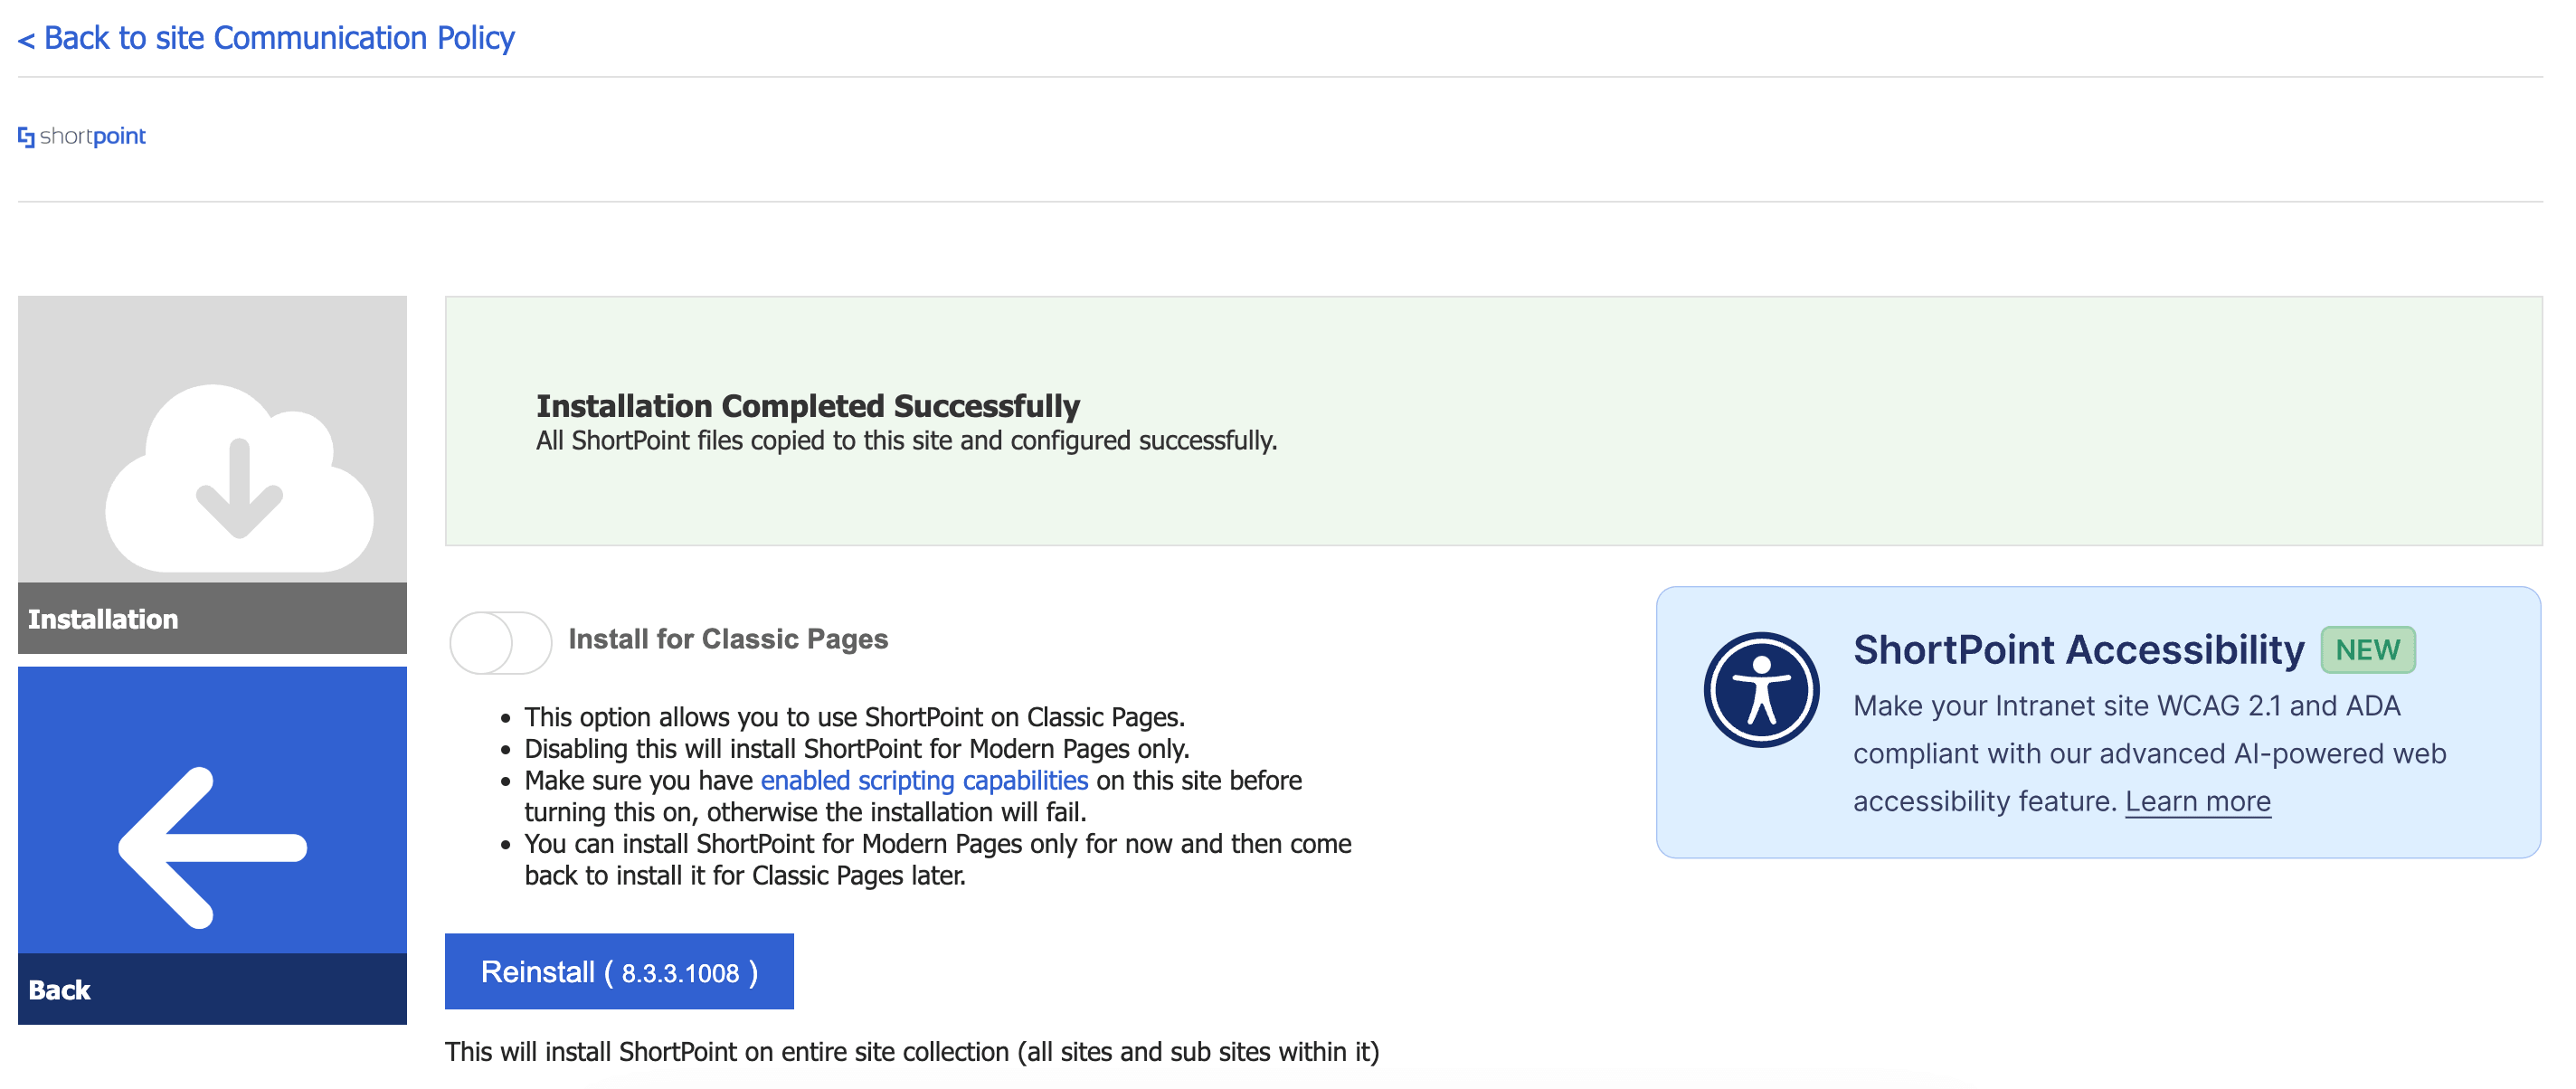
You have now successfully reinstalled ShortPoint:
What’s Next?
Now that you’ve successfully converted your SharePoint 2019/SE Classic Pages to Modern Pages, you're all set to enjoy the latest ShortPoint features.
ShortPoint SPFx version 9.5.0.0 is coming soon! There’s nothing extra you need to do right now; we’ll keep you posted as soon as it’s ready to launch.
Related articles: