Try ShortPoint now
ShortPoint’s Organization Chart is the best Design Element to use when it comes to showcasing your company’s internal structure. The best part? You can connect it to SharePoint’s User Profiles using ShortPoint’s People Search connection! This means that you won’t have to update the org chart manually once any change occurs.
Want to learn how this works? Follow our step-by-step tutorial to get you set up.
NOTEThere are two ways to create a dynamic Organization Chart using ShortPoint Connect. If you’re a ShortPoint Designer with a Pro or Enterprise License, we recommend following the steps in How to Create a Dynamic Organization Chart in SharePoint. If you have a Lite License, we recommend sticking to this tutorial.
TABLE OF CONTENTS
- Prerequisites
- Step-by-step Tutorial
- Frequently Asked Questions
- What is a dynamic organization chart?
- How does ShortPoint’s People Search connection help in building a dynamic org chart?
- What is the purpose of creating an EmailManager property in SharePoint User Profiles?
- How often should the dynamic org chart be updated?
- Can I customize the information shown on the org chart?
- Is the dynamic org chart suitable for large organizations?
- How does this dynamic org chart improve communication within the organization?
- What are the benefits of integrating the dynamic org chart with SharePoint?
- Can new hires use the dynamic org chart to understand the company’s structure?
- What is the role of the ManagerEmail managed property in the org chart setup?
Prerequisites
- You must have the latest version of ShortPoint SPFx installed on SharePoint.
- You must be a ShortPoint Designer with an active license.
- You must already have the Organization Chart Design Element on your page. For more information, check out Organization Chart Design Element: How to Create an Organizational Chart in SharePoint.
Step-by-step Tutorial
The steps have been divided into three parts for clarity. Make sure to follow each part closely to successfully establish the connection.
Part 1: Create an EmailManager Property
This section explains how to create an EmailManager property. This creates a new field in your User Profiles where you and your team can add their manager’s email address.
Step 1: Open the Manage User Properties Page
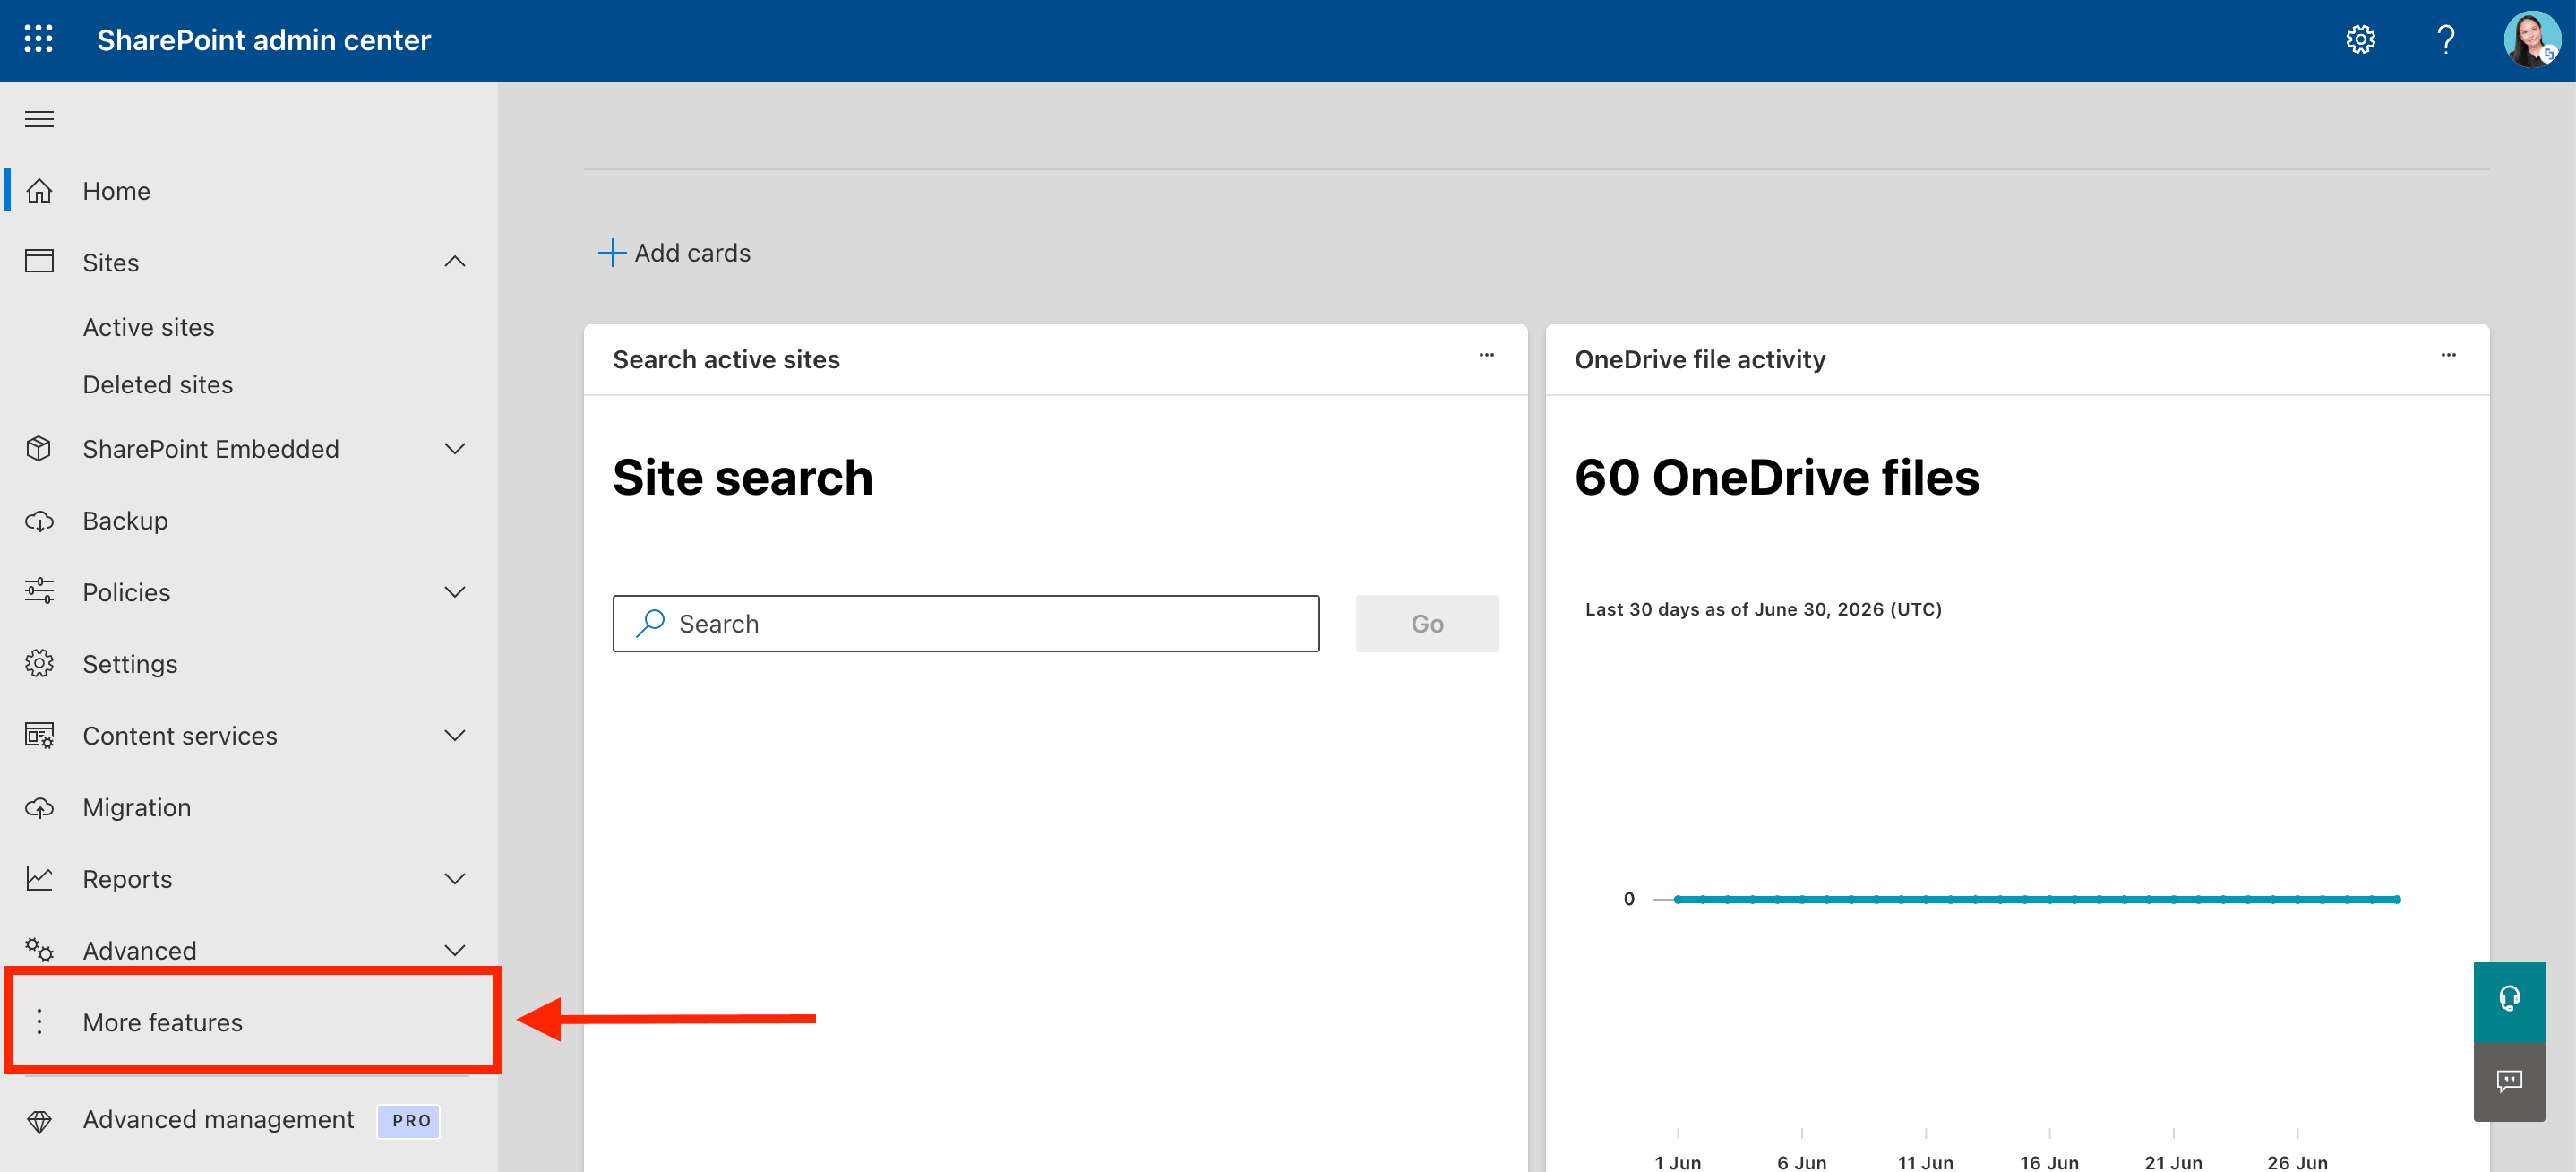
Go to the SharePoint Admin Center and select More Features:
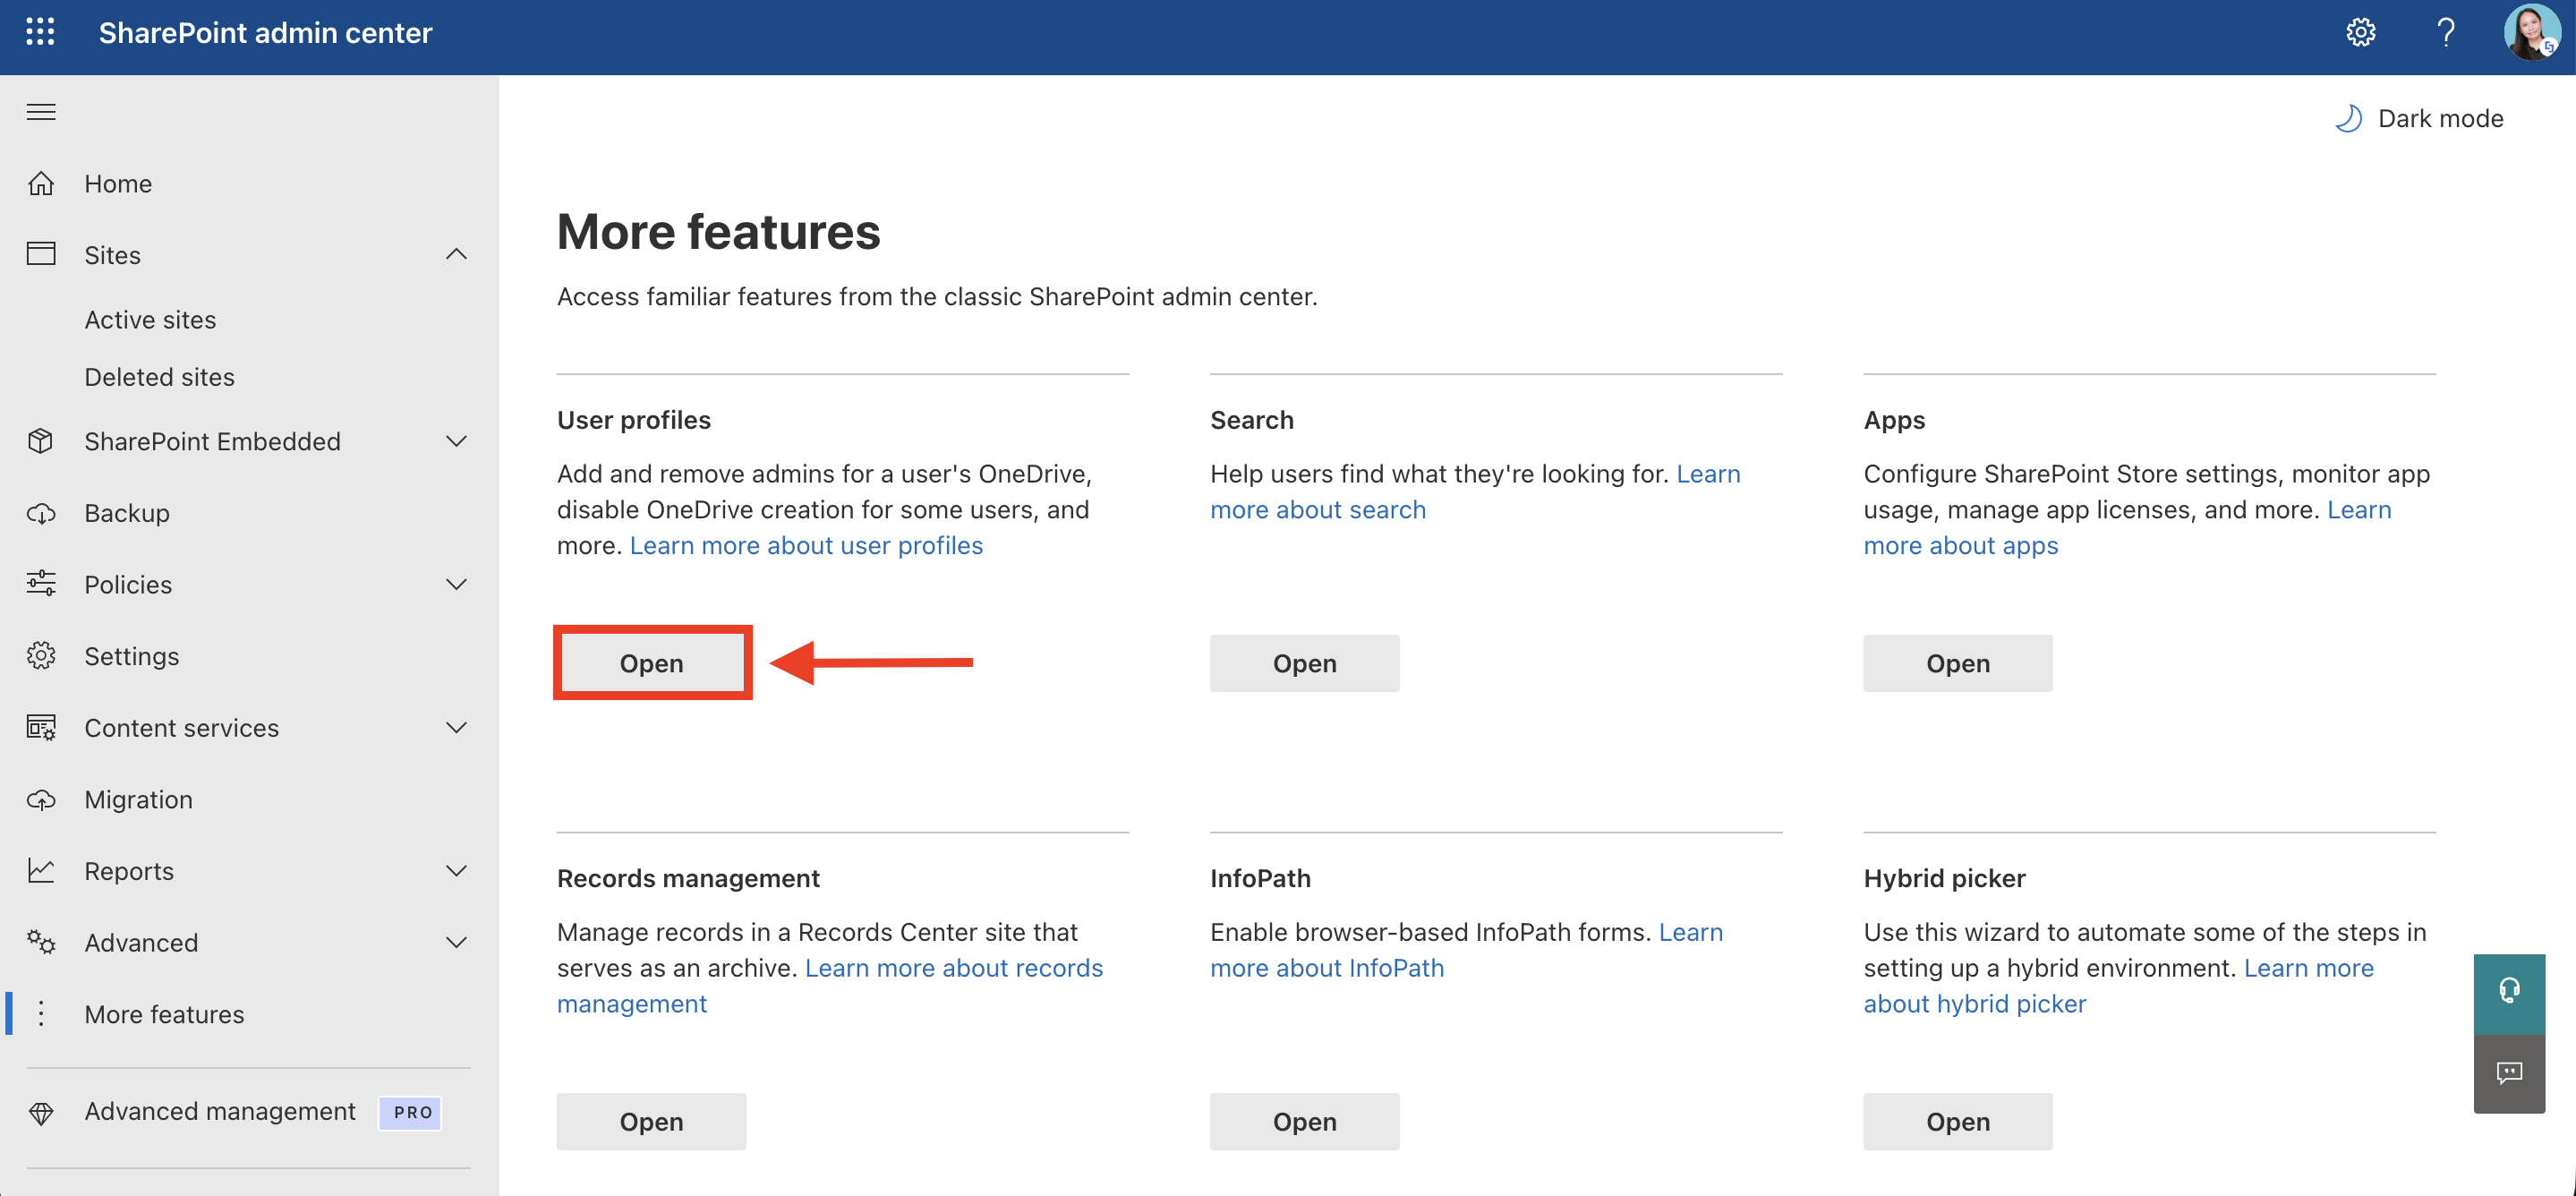
Under User Profiles, click Open:
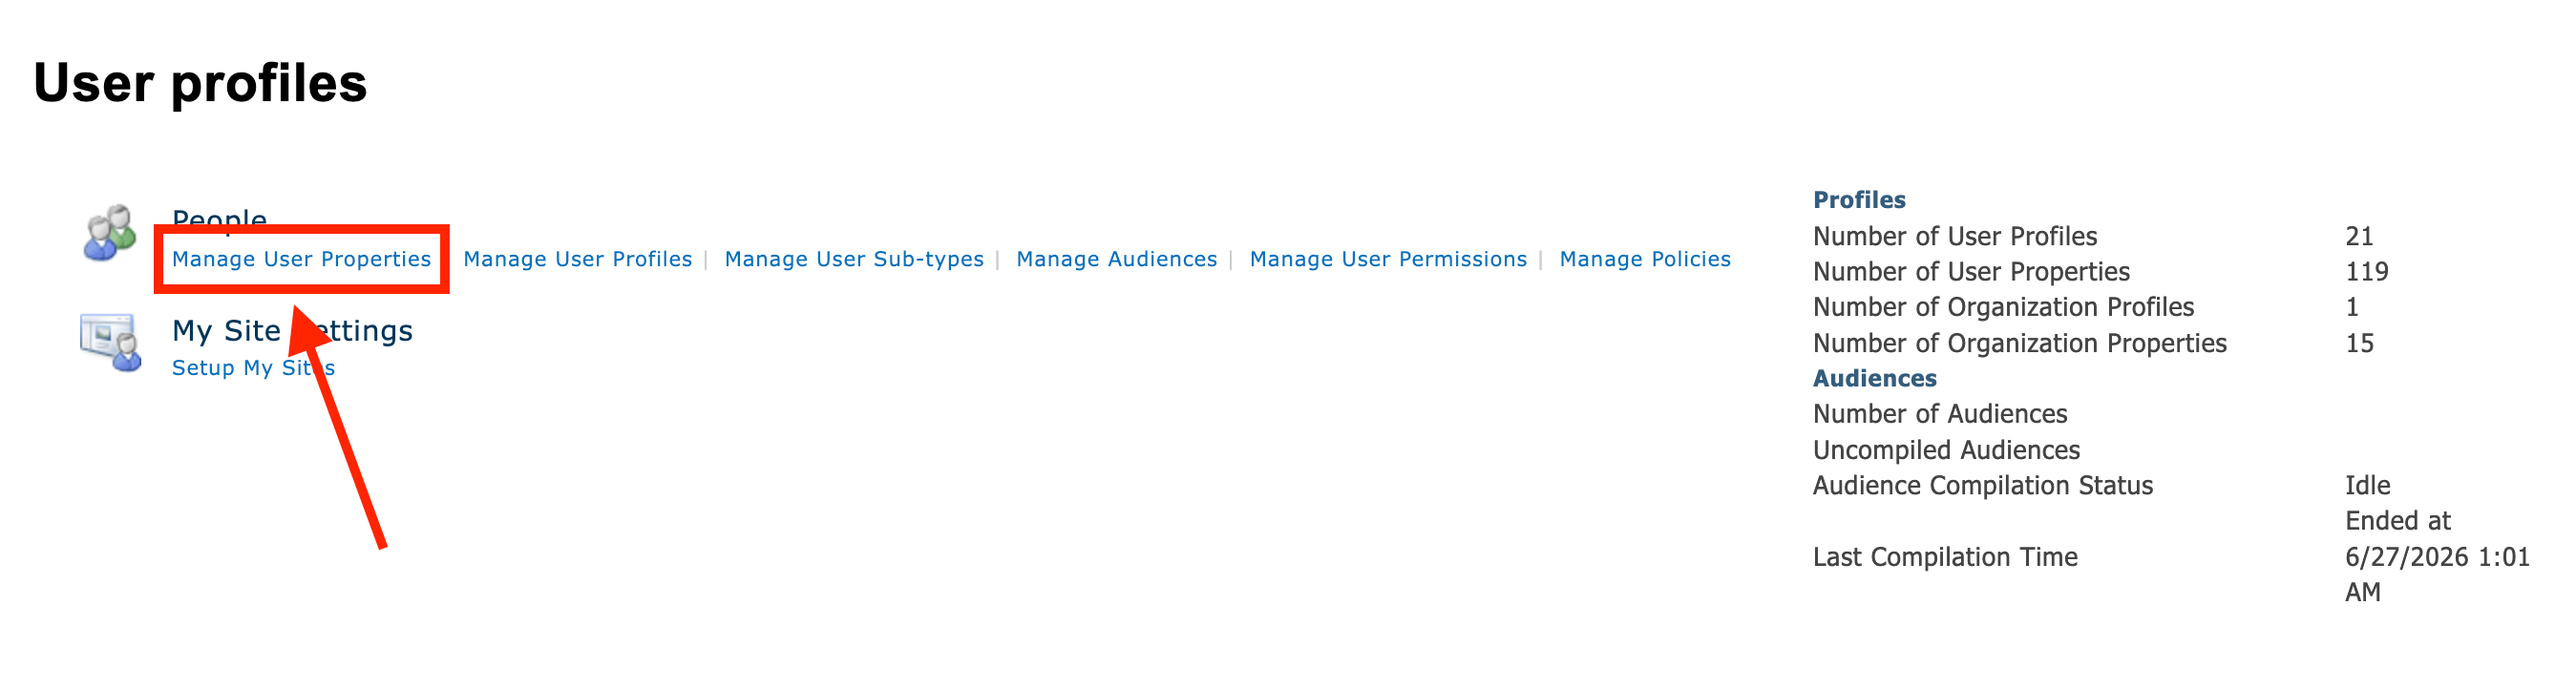
Select Manage User Properties:
Step 2: Create the new User Profile property
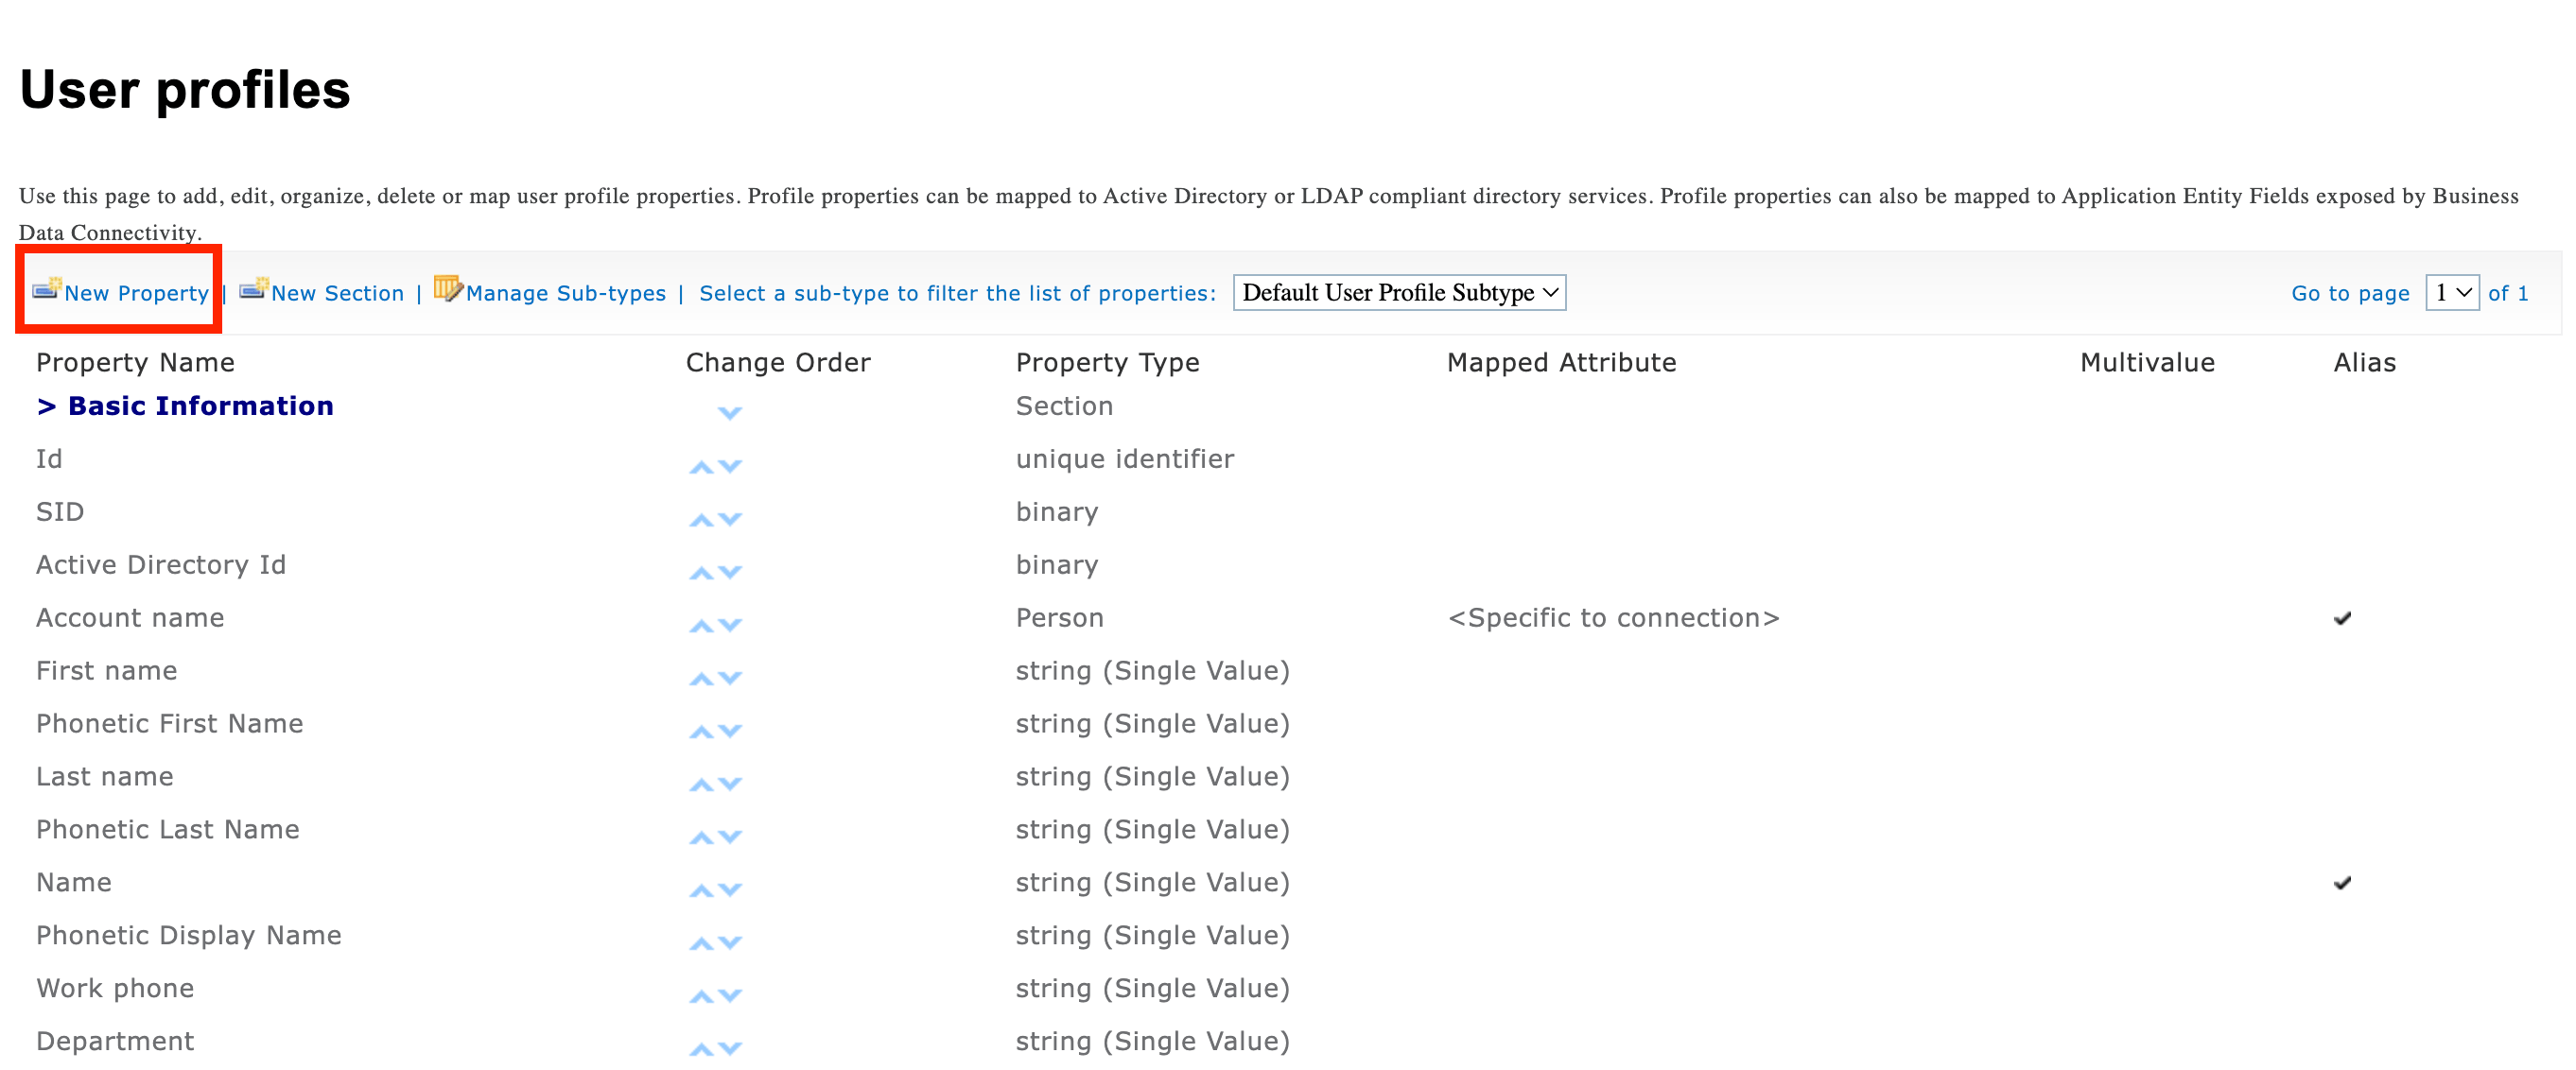
Click New Property:
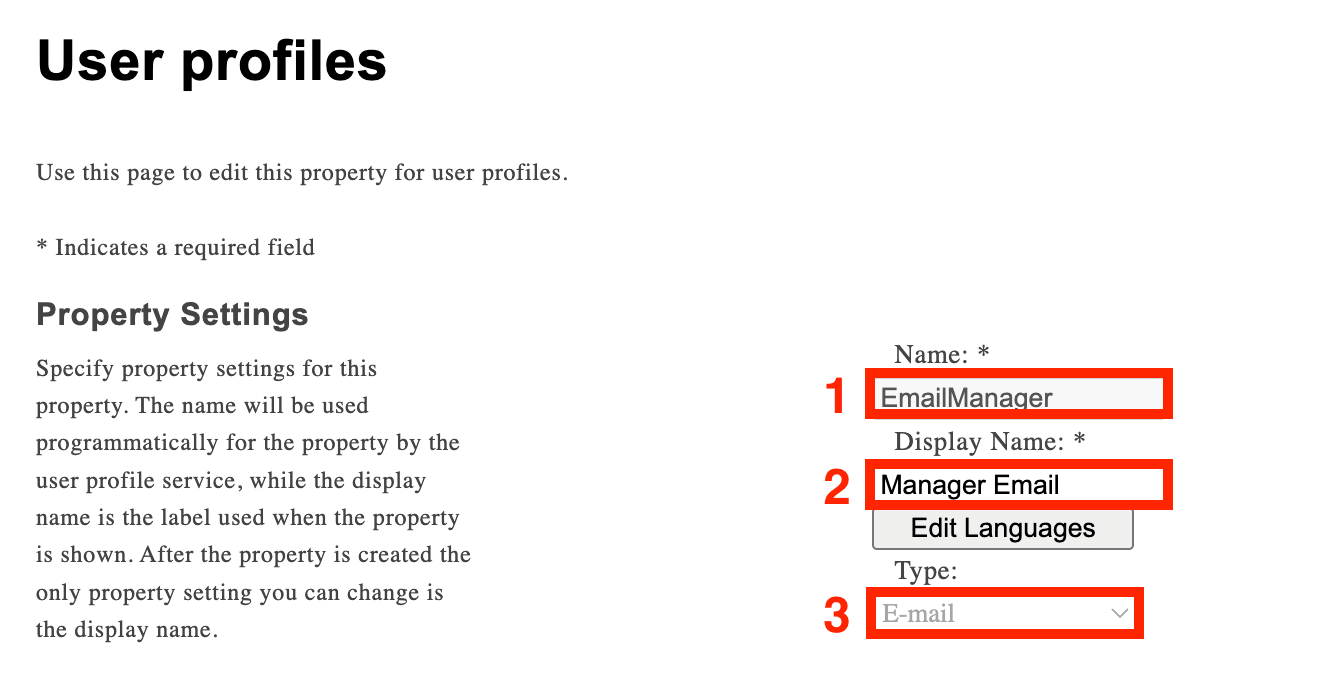
Add the following to Property Settings:
- EmailManager - this will serve as the Name of the property
- Manager Email - this will serve as the Display Name of the property
- E-mail - this is the type of content that will be added to the property.
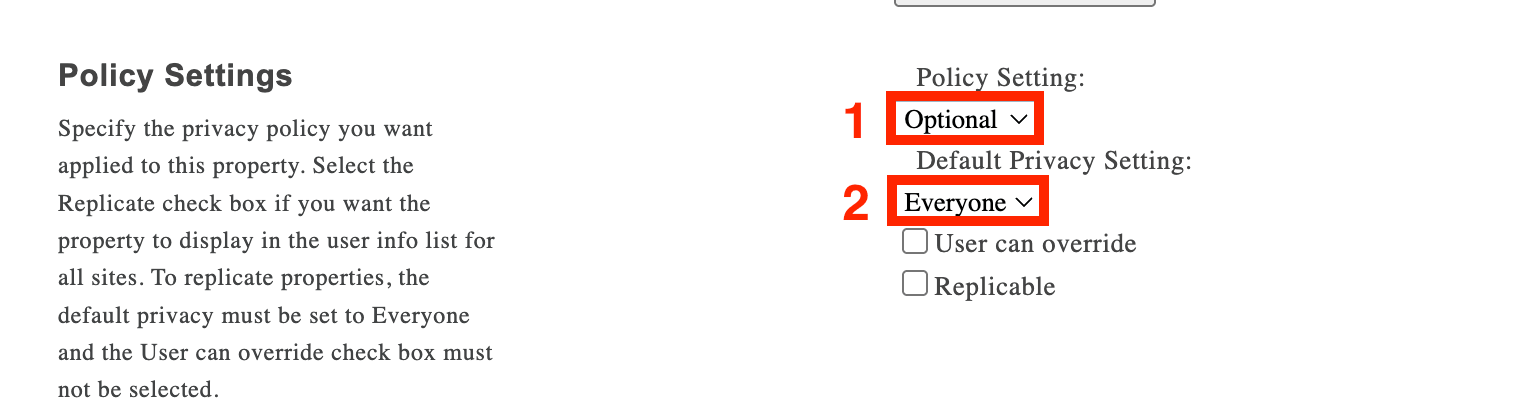
Add these details to Policy Settings:
- Optional - this means that users can leave this field blank. This is necessary as the top level of the org chart (CEO, for example) doesn’t necessarily have managers.
- Everyone - this means that everyone will be able to see this new field.
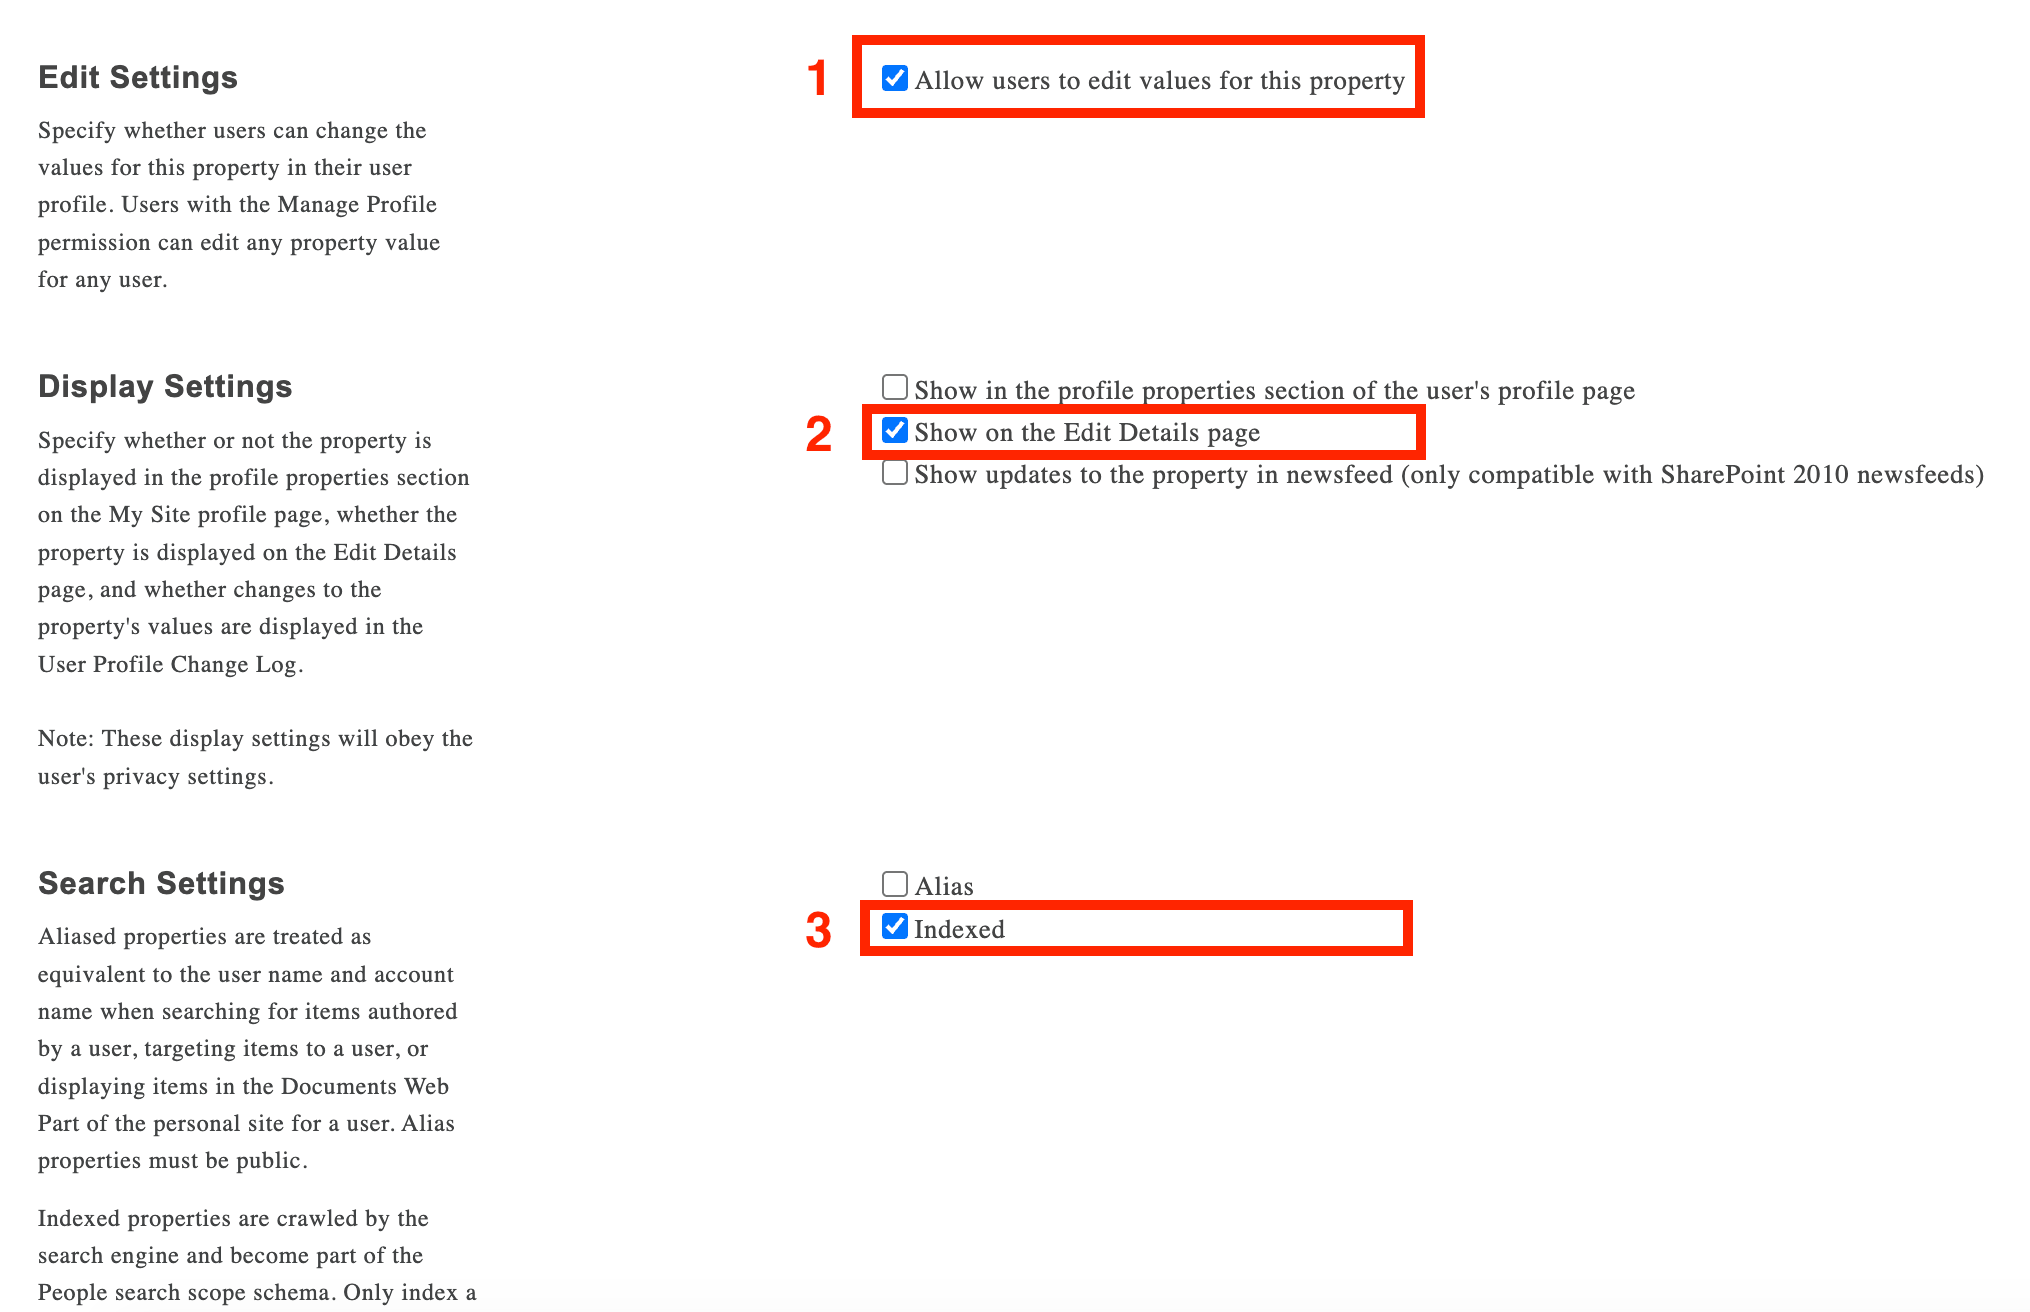
Toggle on the following settings:
- Allow users to edit values for this property
- Show on the Edit Details page
- Indexed
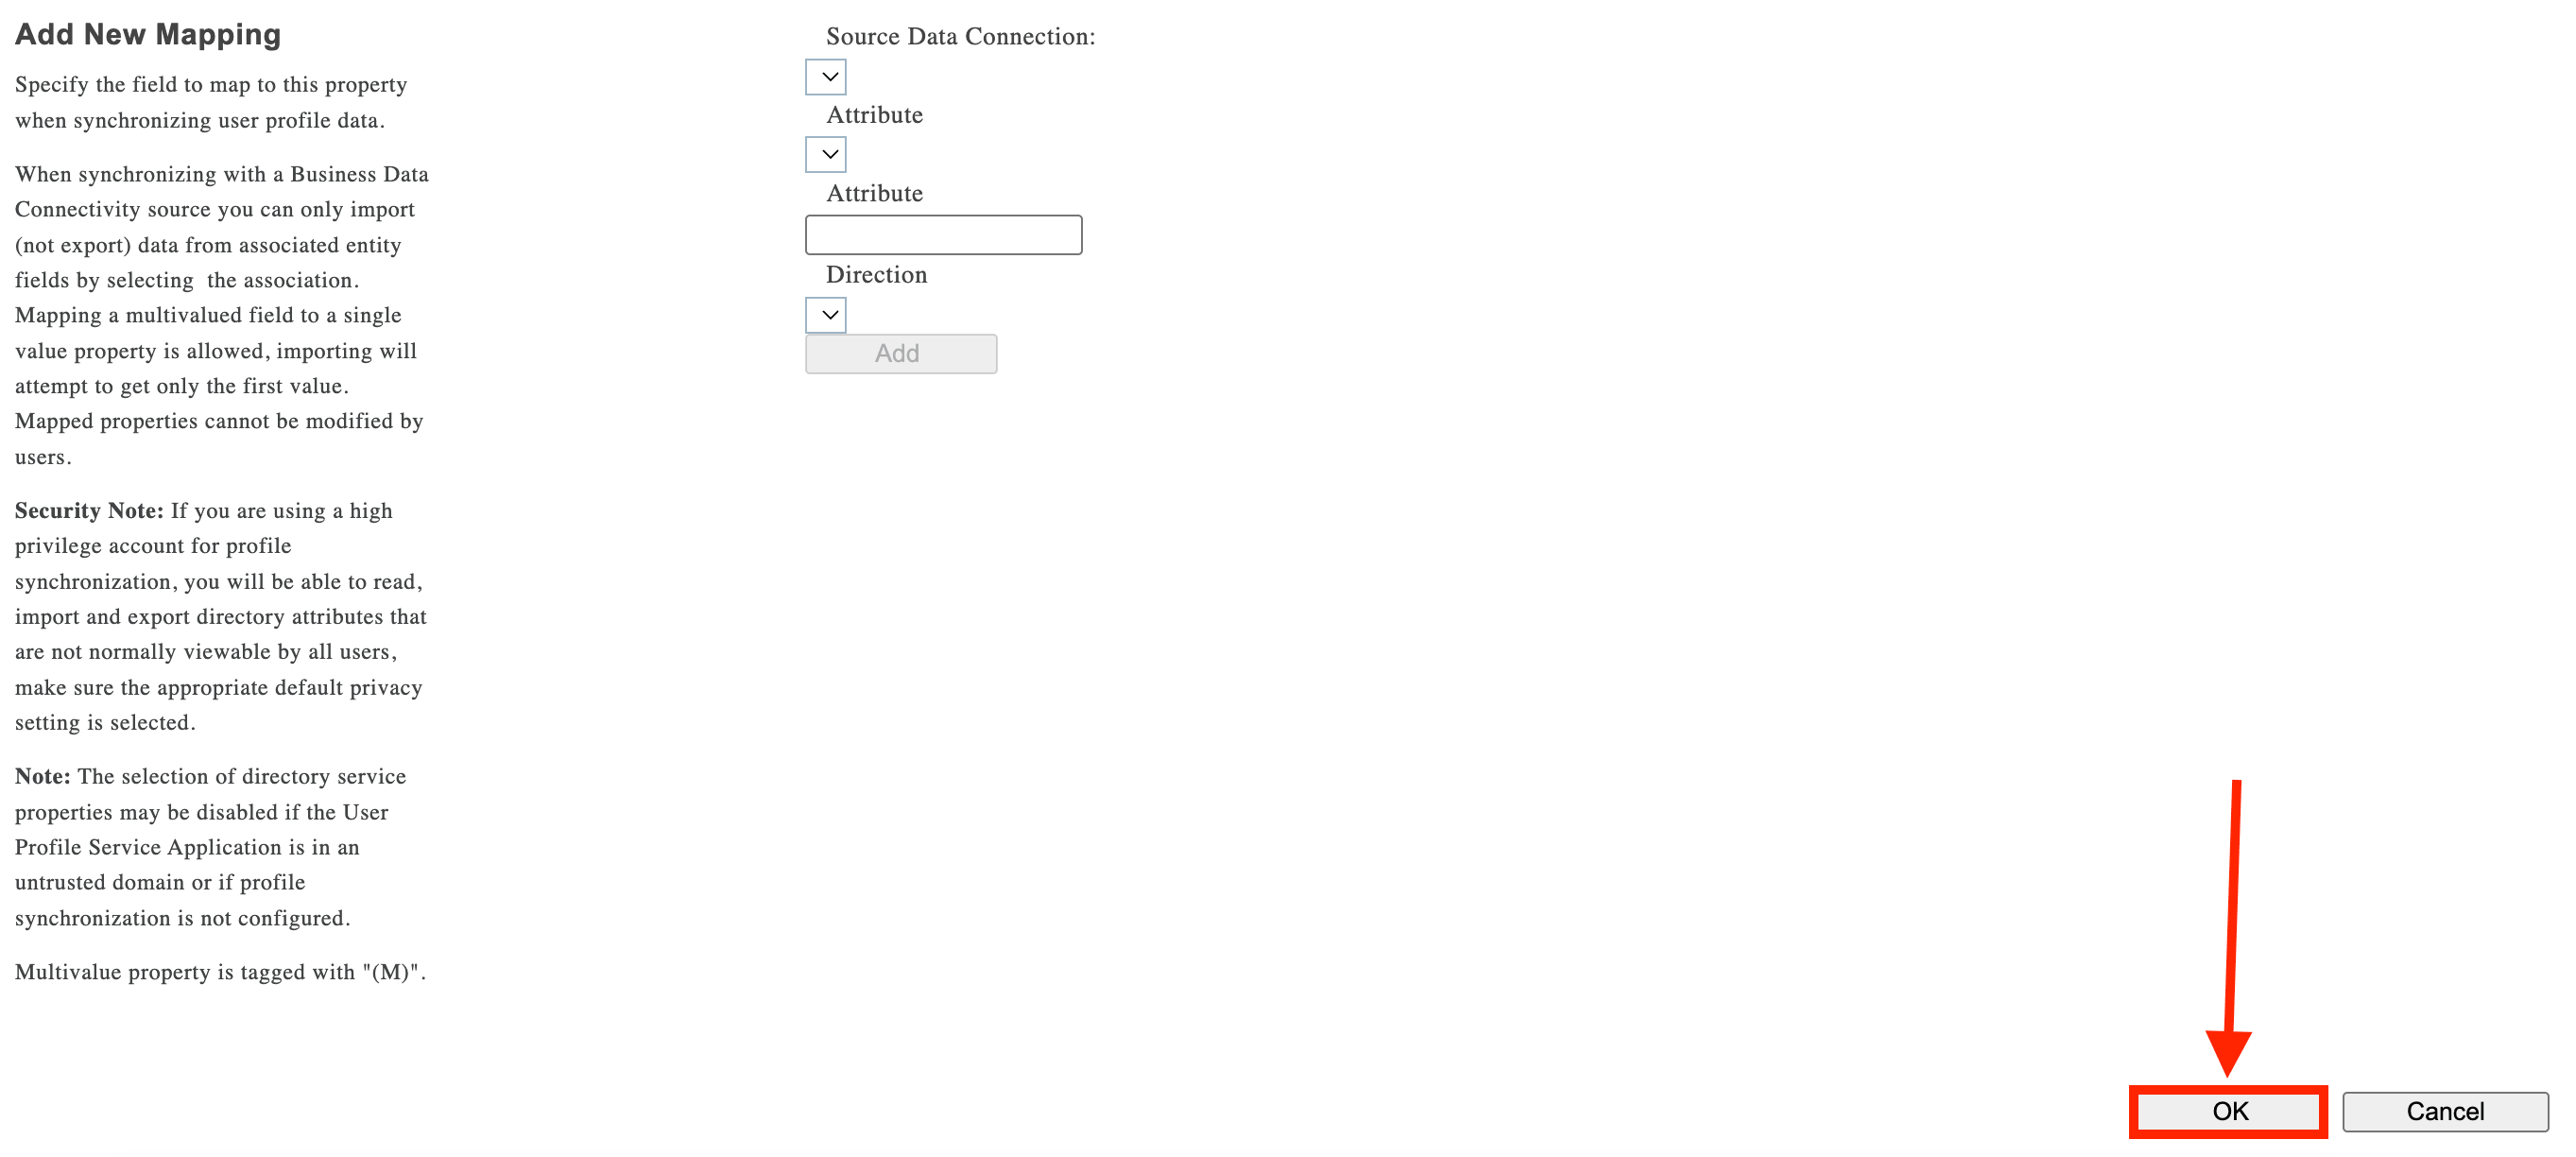
Once you have all the settings in place, click OK:
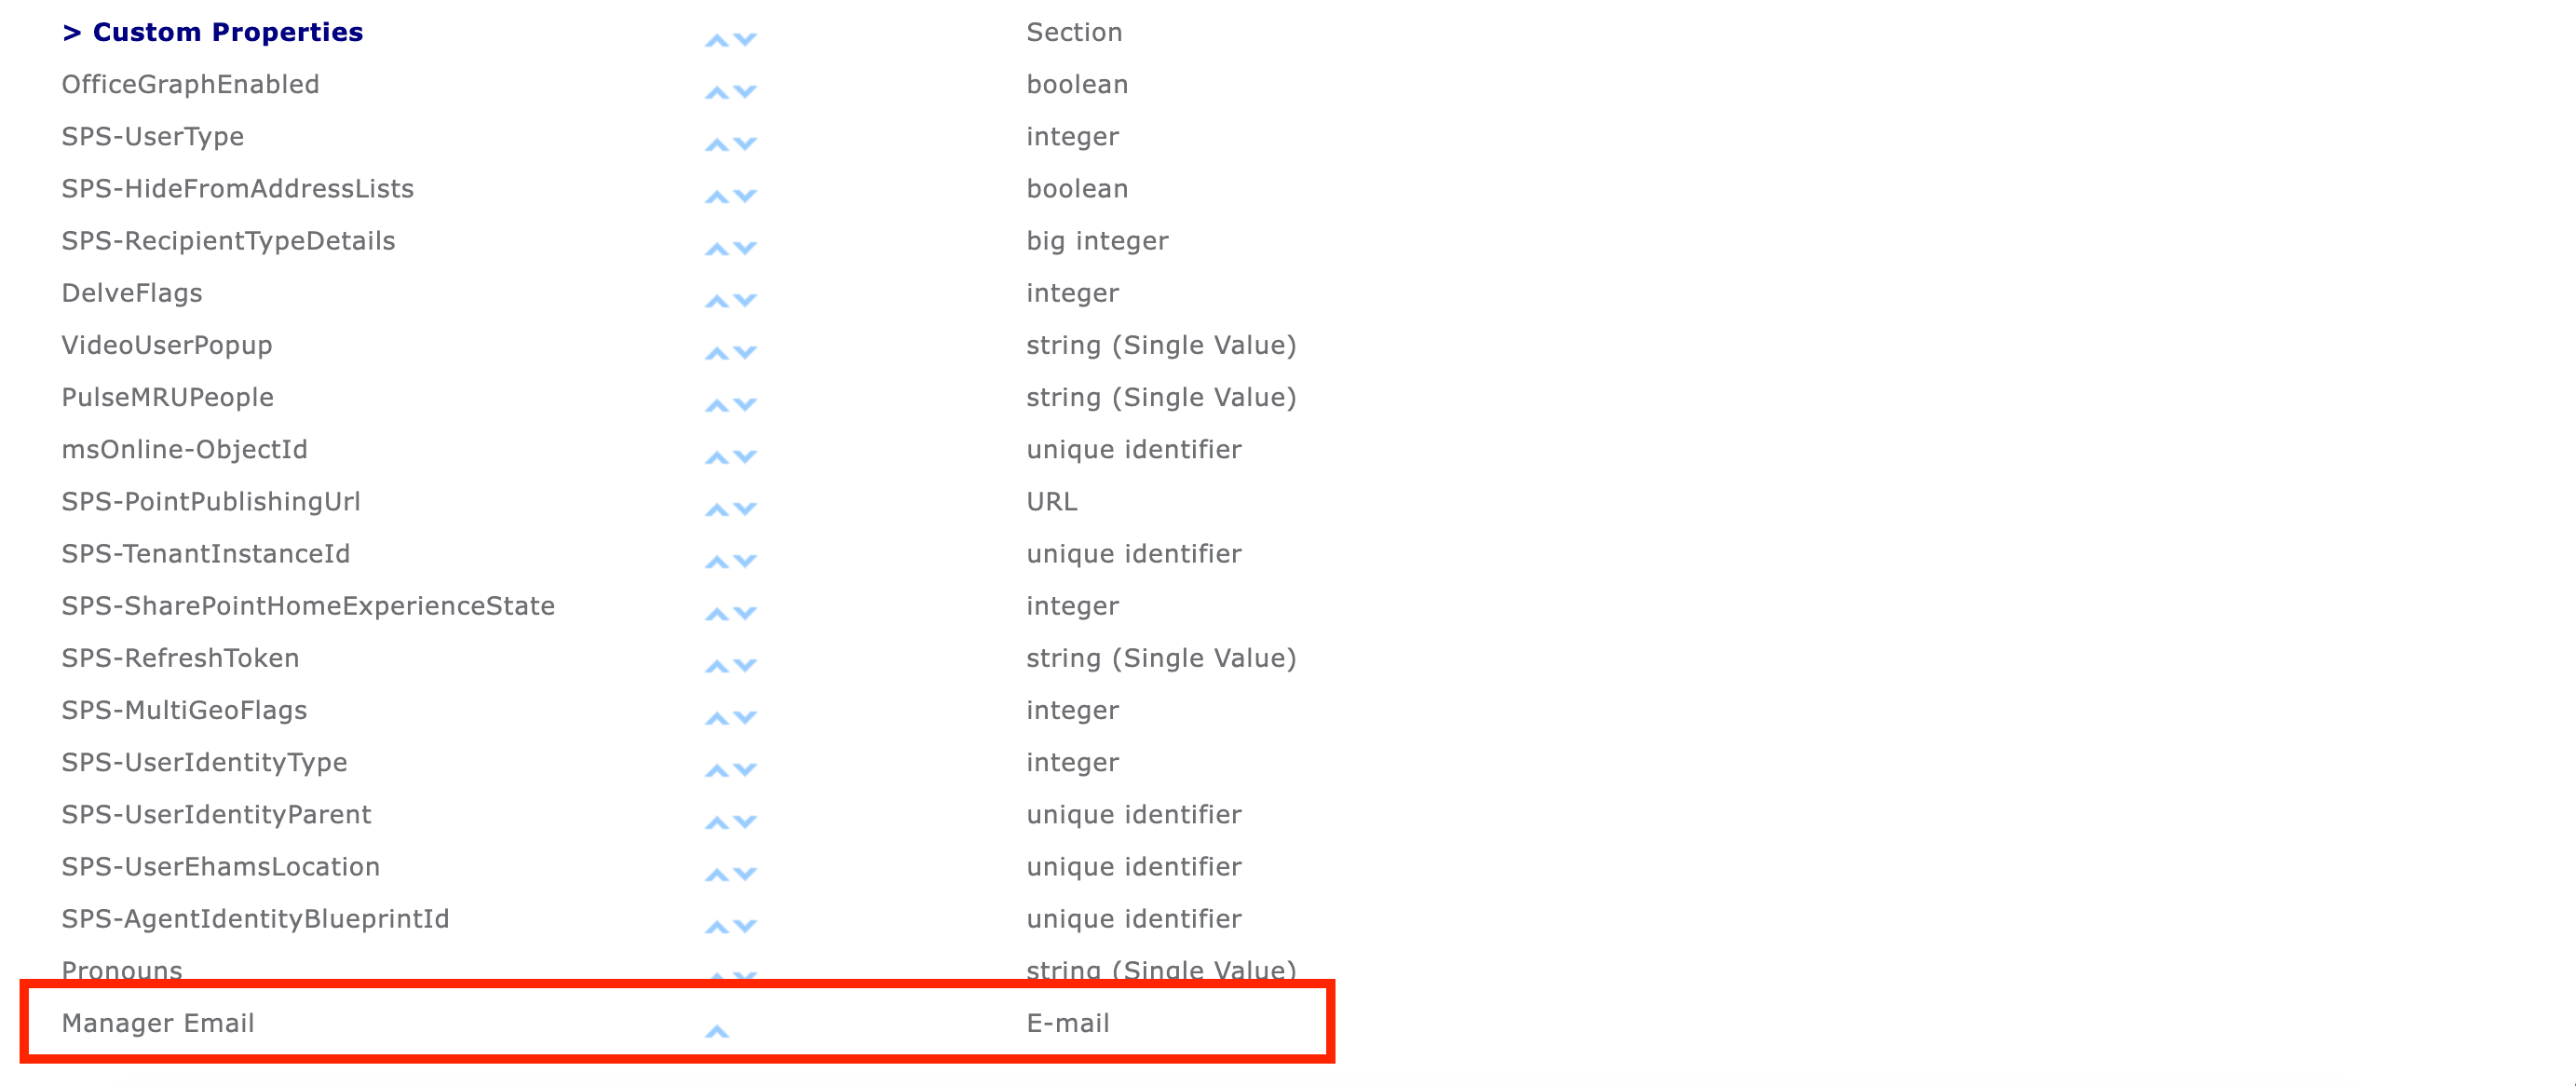
Great work! You will now see Manager Email under all your Custom Properties:
Part 2: Add User Details to the new EmailManager Property
This section will show you how to fill in the manager email addresses for each user. Having information inside this field is necessary for the new property to be crawled and searchable.
Step 1: Open the Manage User Profiles Page
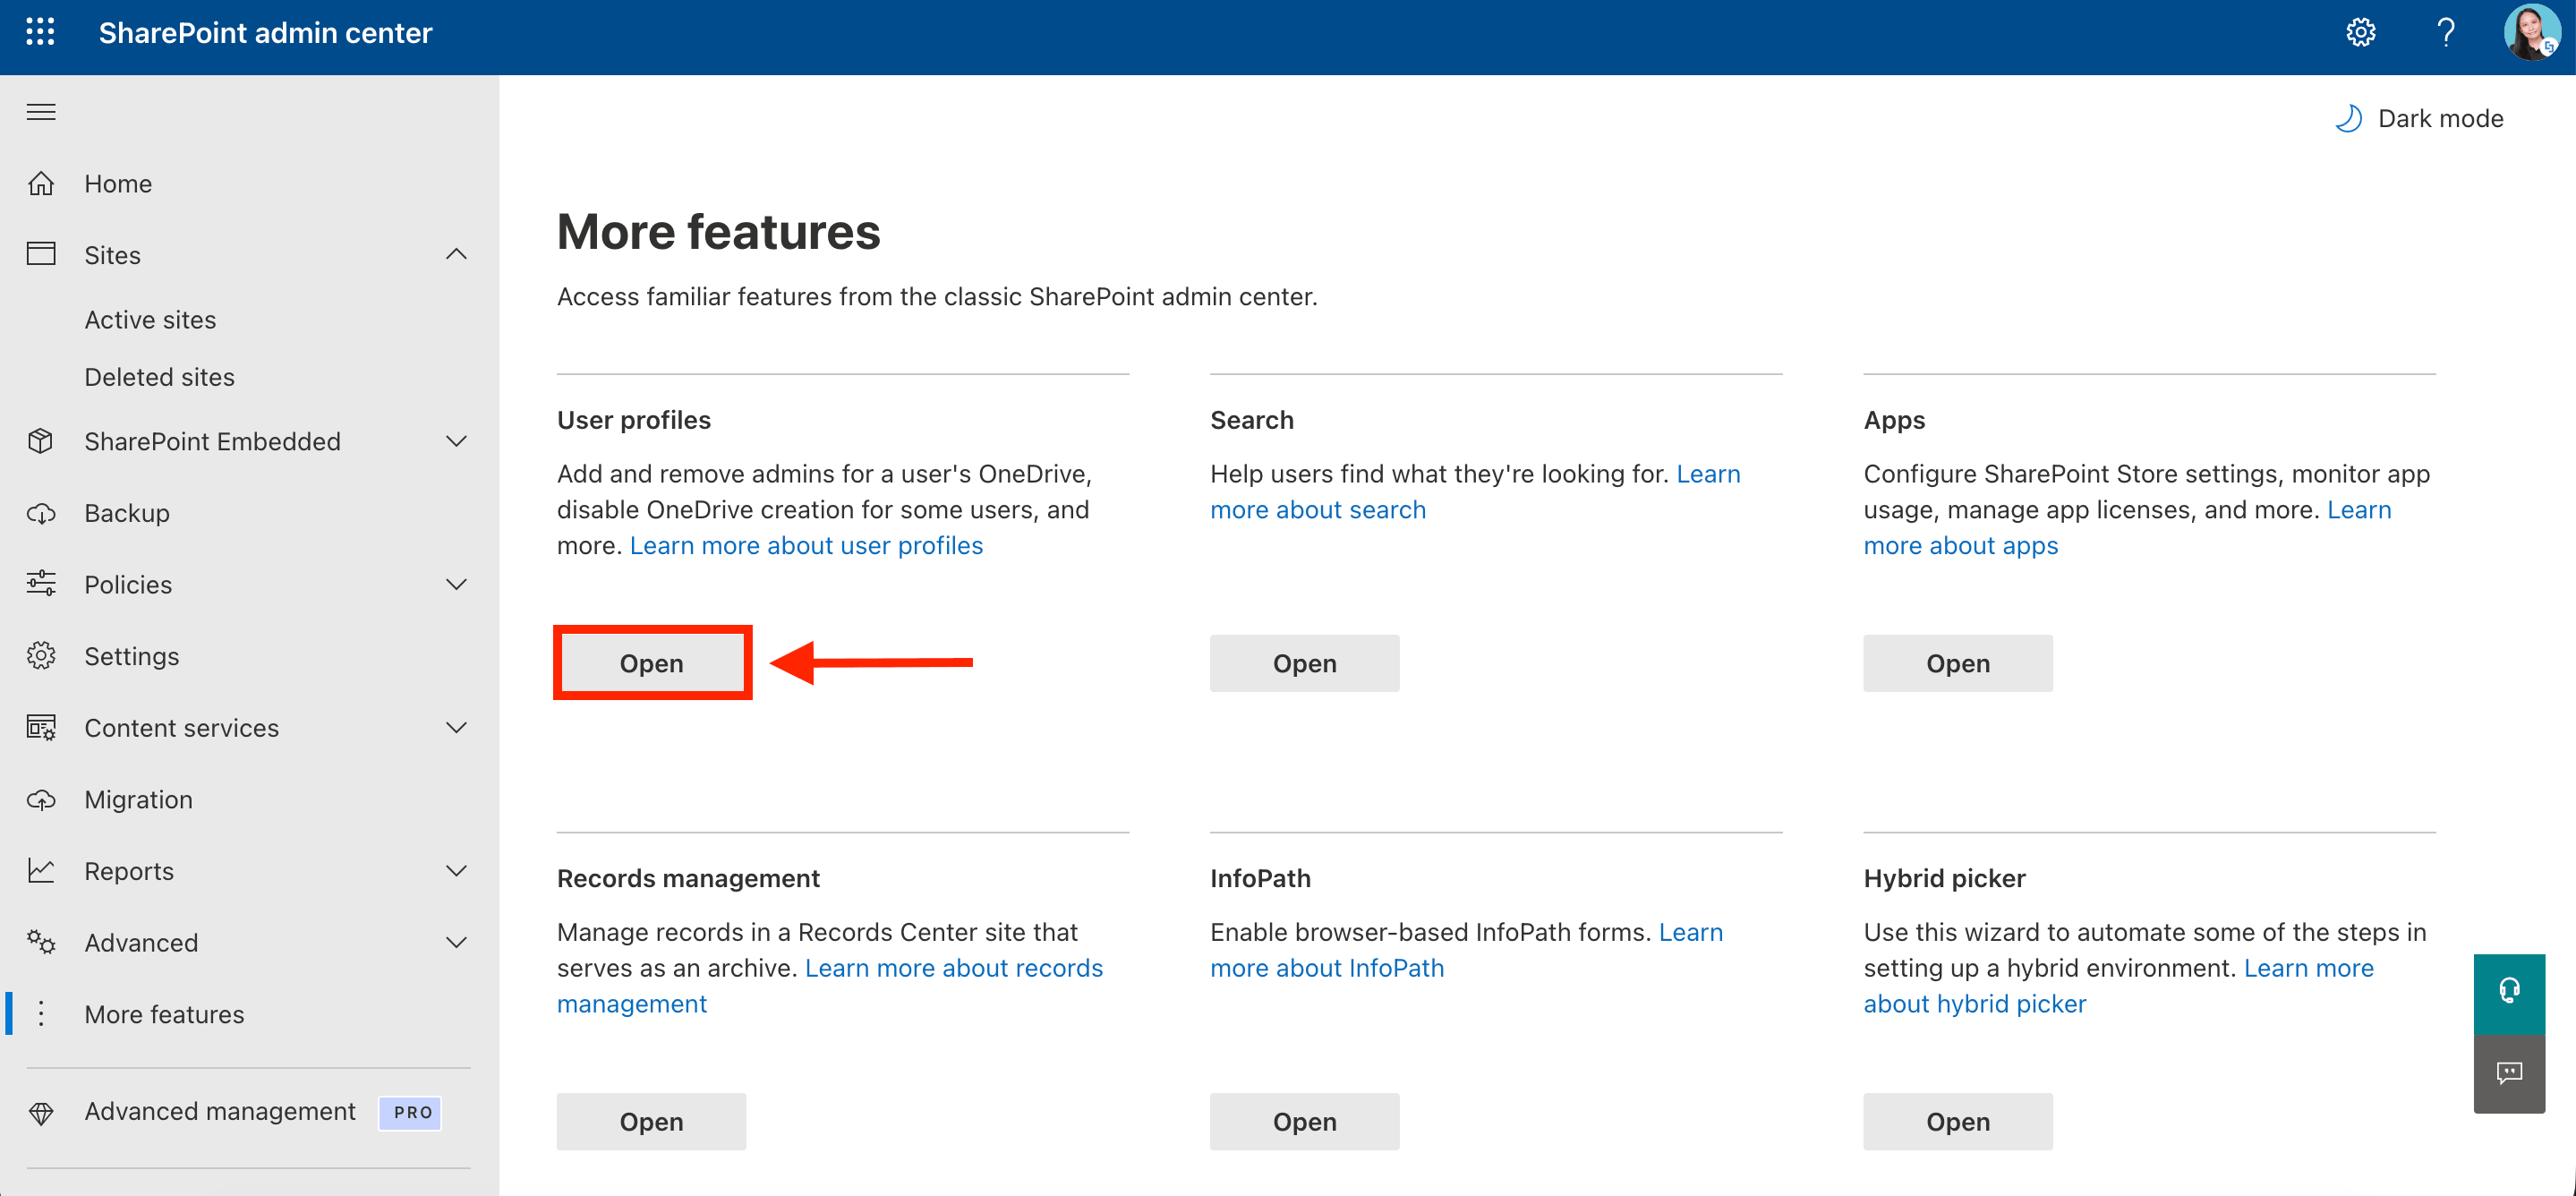
Go back to the SharePoint Admin Center and Open User Profiles:
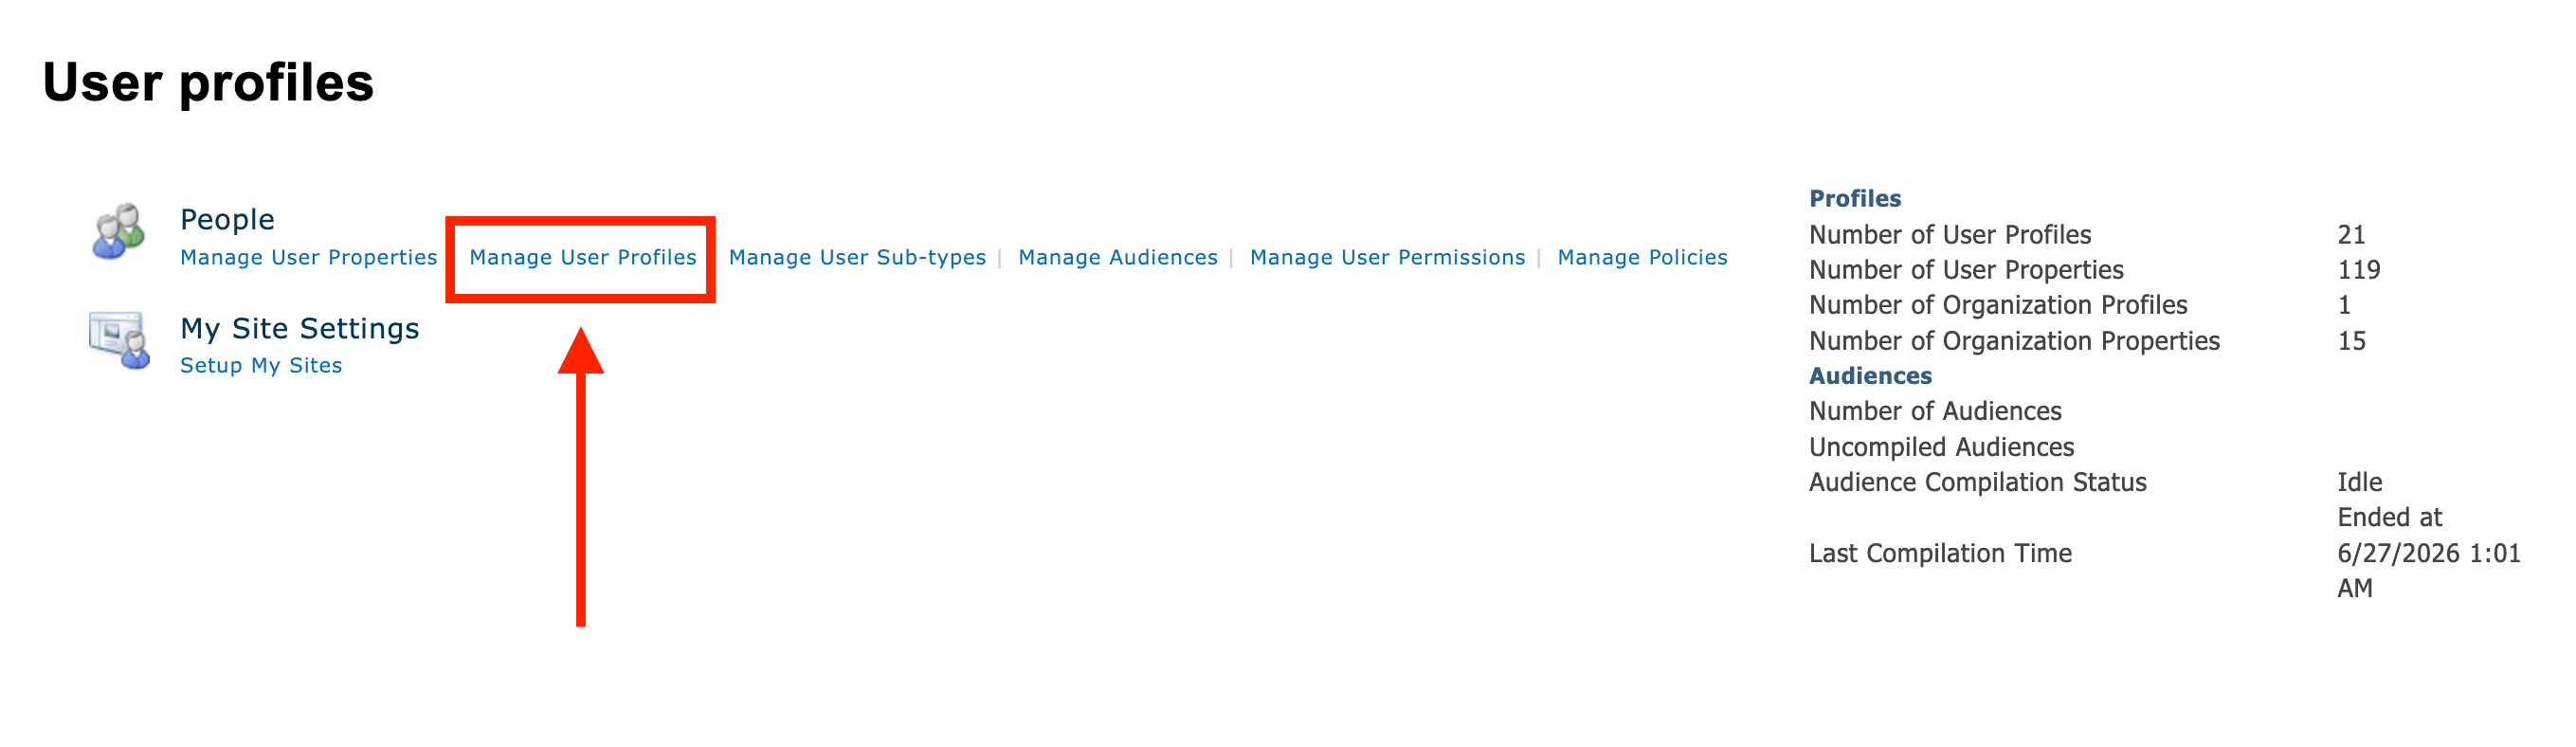
Select Manage User Profiles:
Step 2: Add User Details
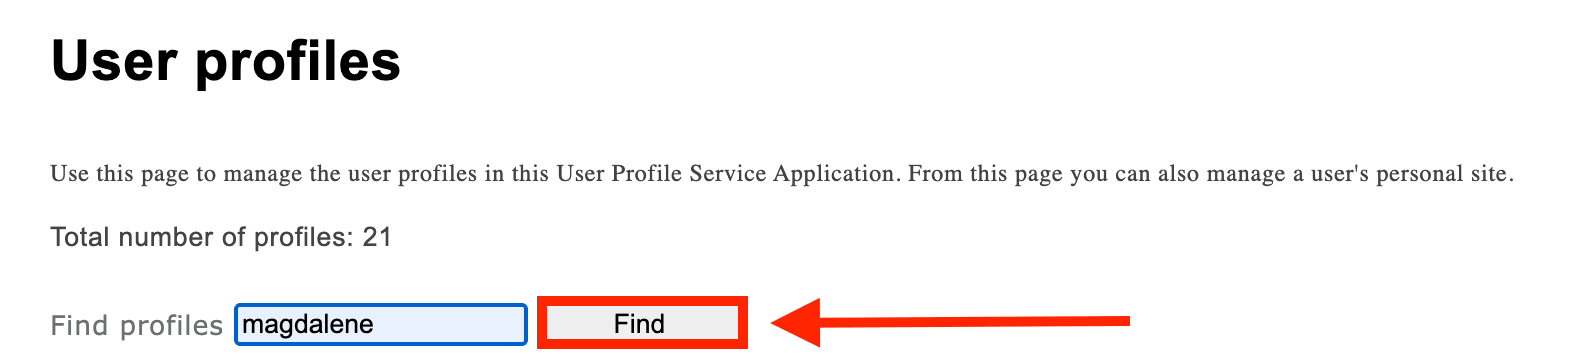
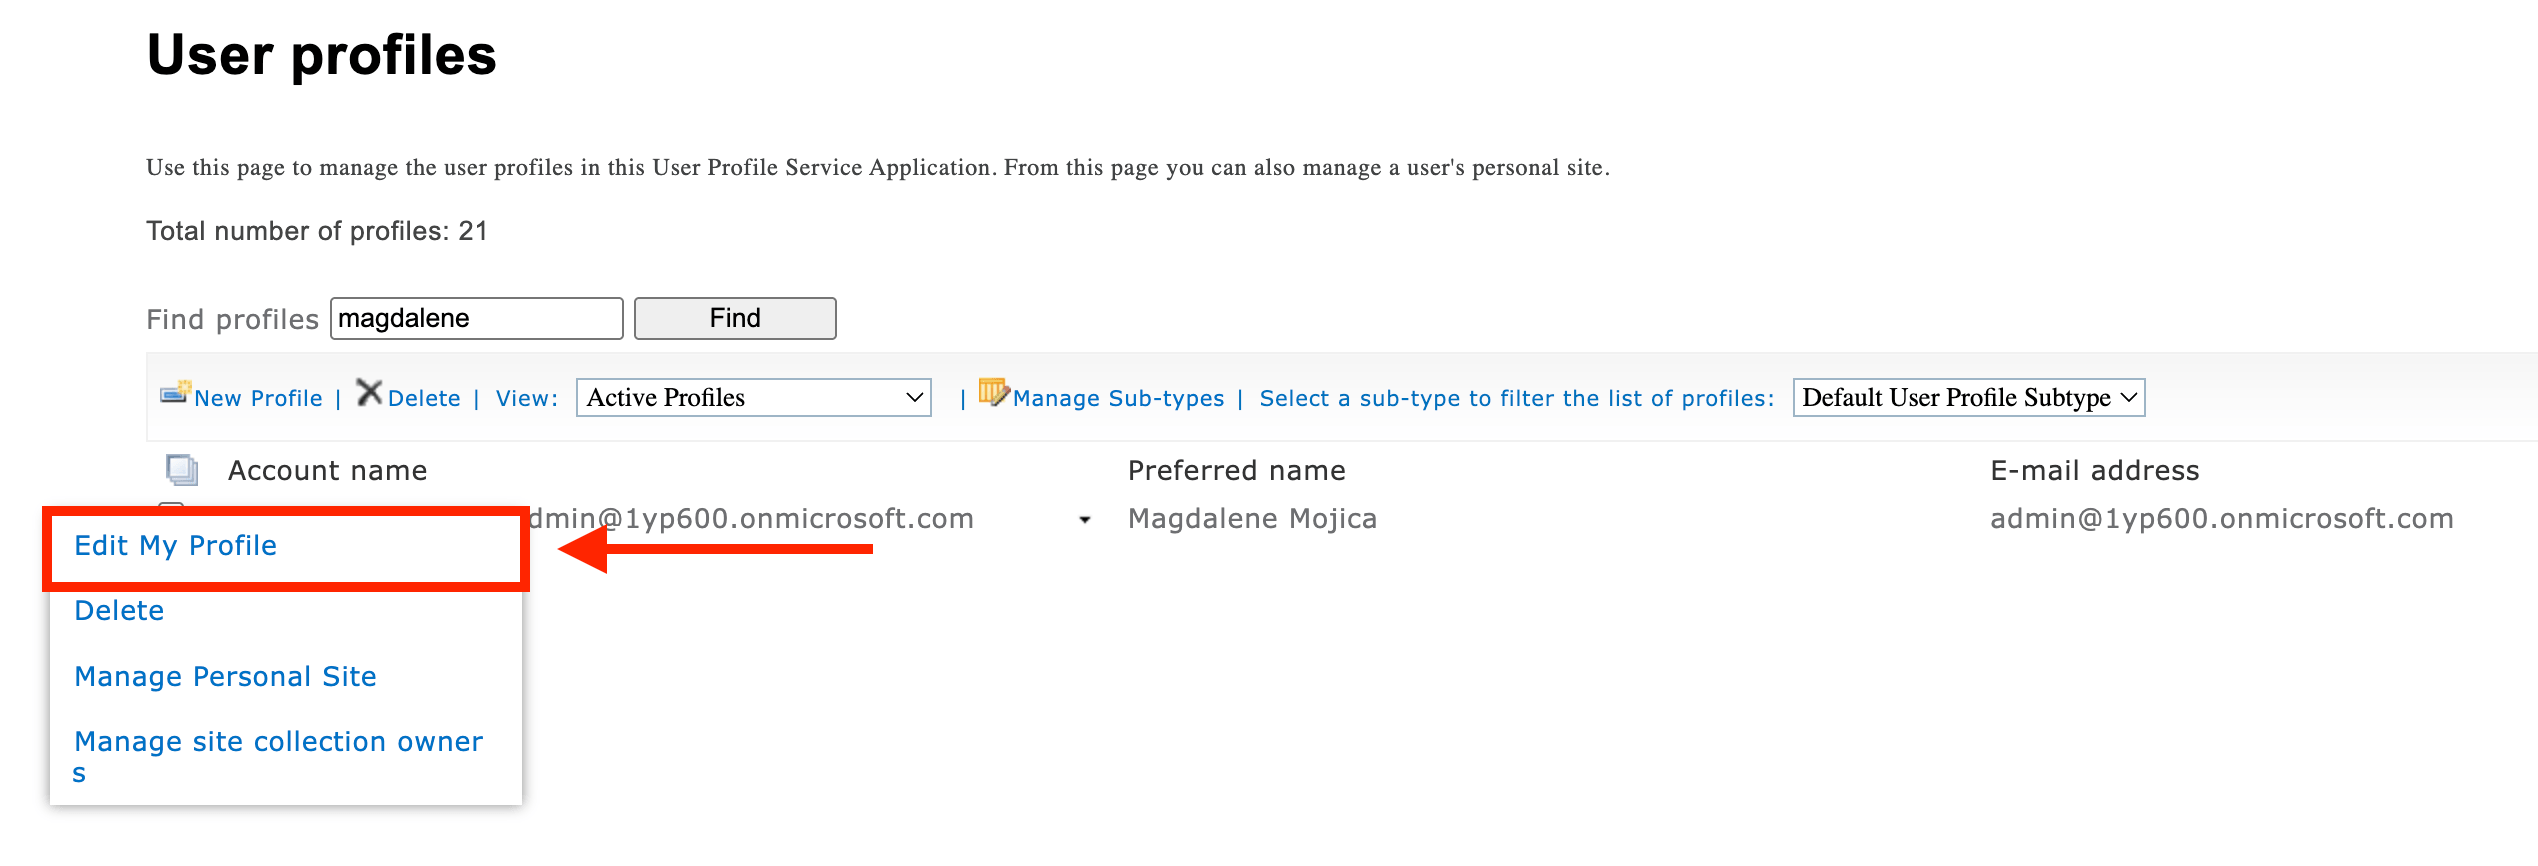
Look for the user you want to edit:
Select Edit My Profile:
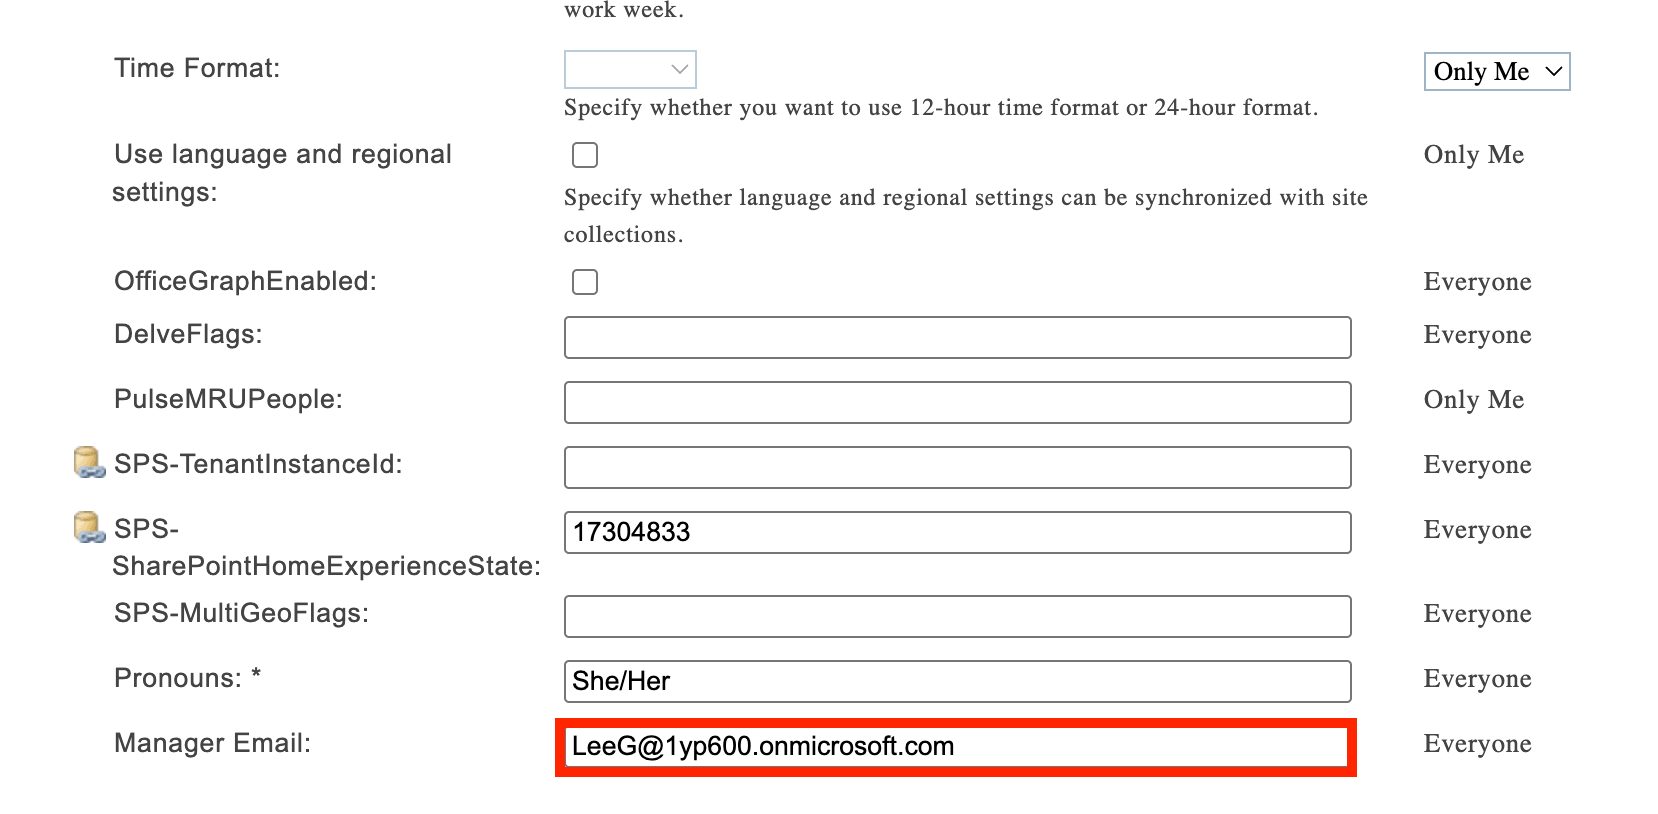
Look for the Manager Email field. Add the email address of the user’s manager:
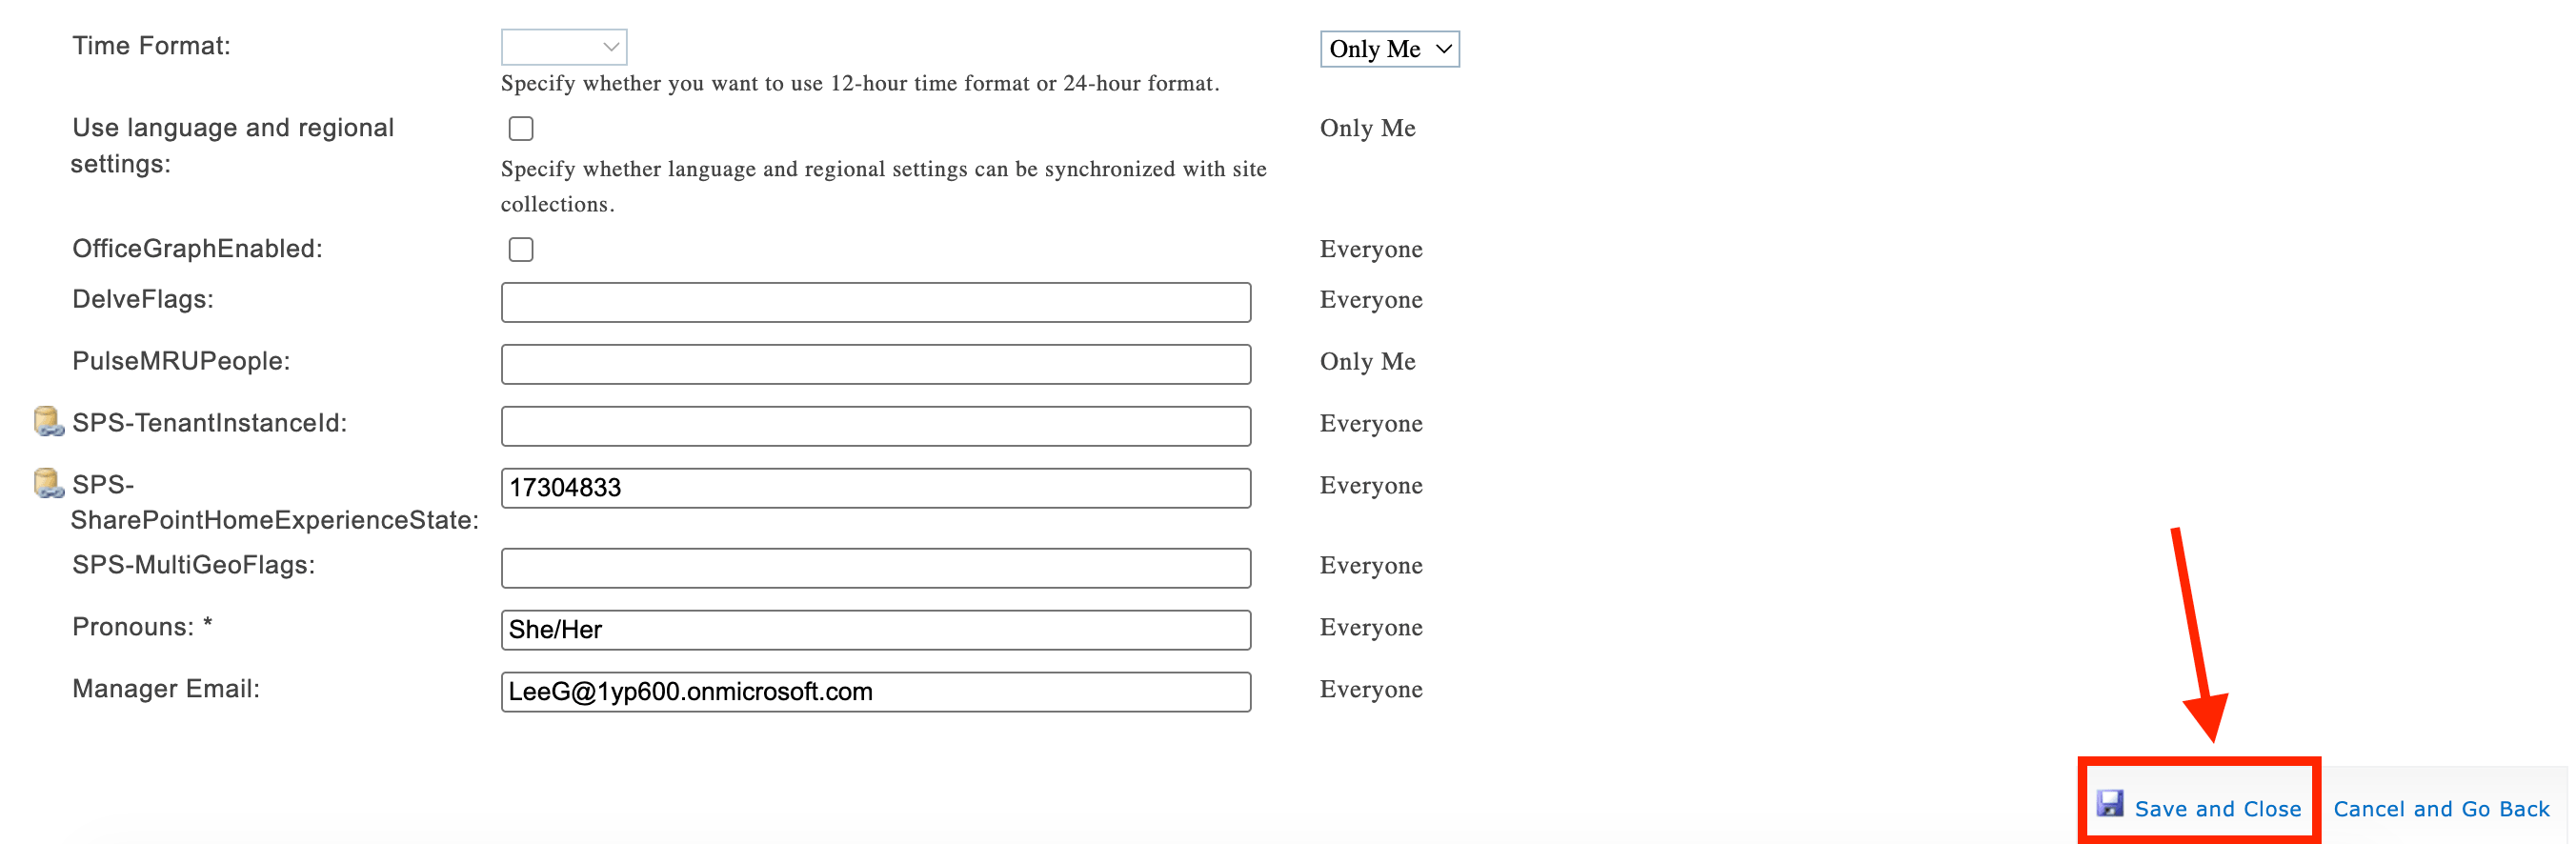
Once done, click Save and Close
Awesome! Repeat the same steps for all the users in your organization. Once done, you can proceed to Part 3.
TIPTo make it easier for your team and to keep your org chart updated, we recommend adding details to this property during your onboarding process.
Part 3: Create a New Managed Property and Map It to ManagerEmail
This section will show you how to create a managed property, which you will map to the ManagerEmail Property that you created in Part 1.
Step 1: Open the Manage Search Schema Page
Go back to the SharePoint Admin Center and Open Search:
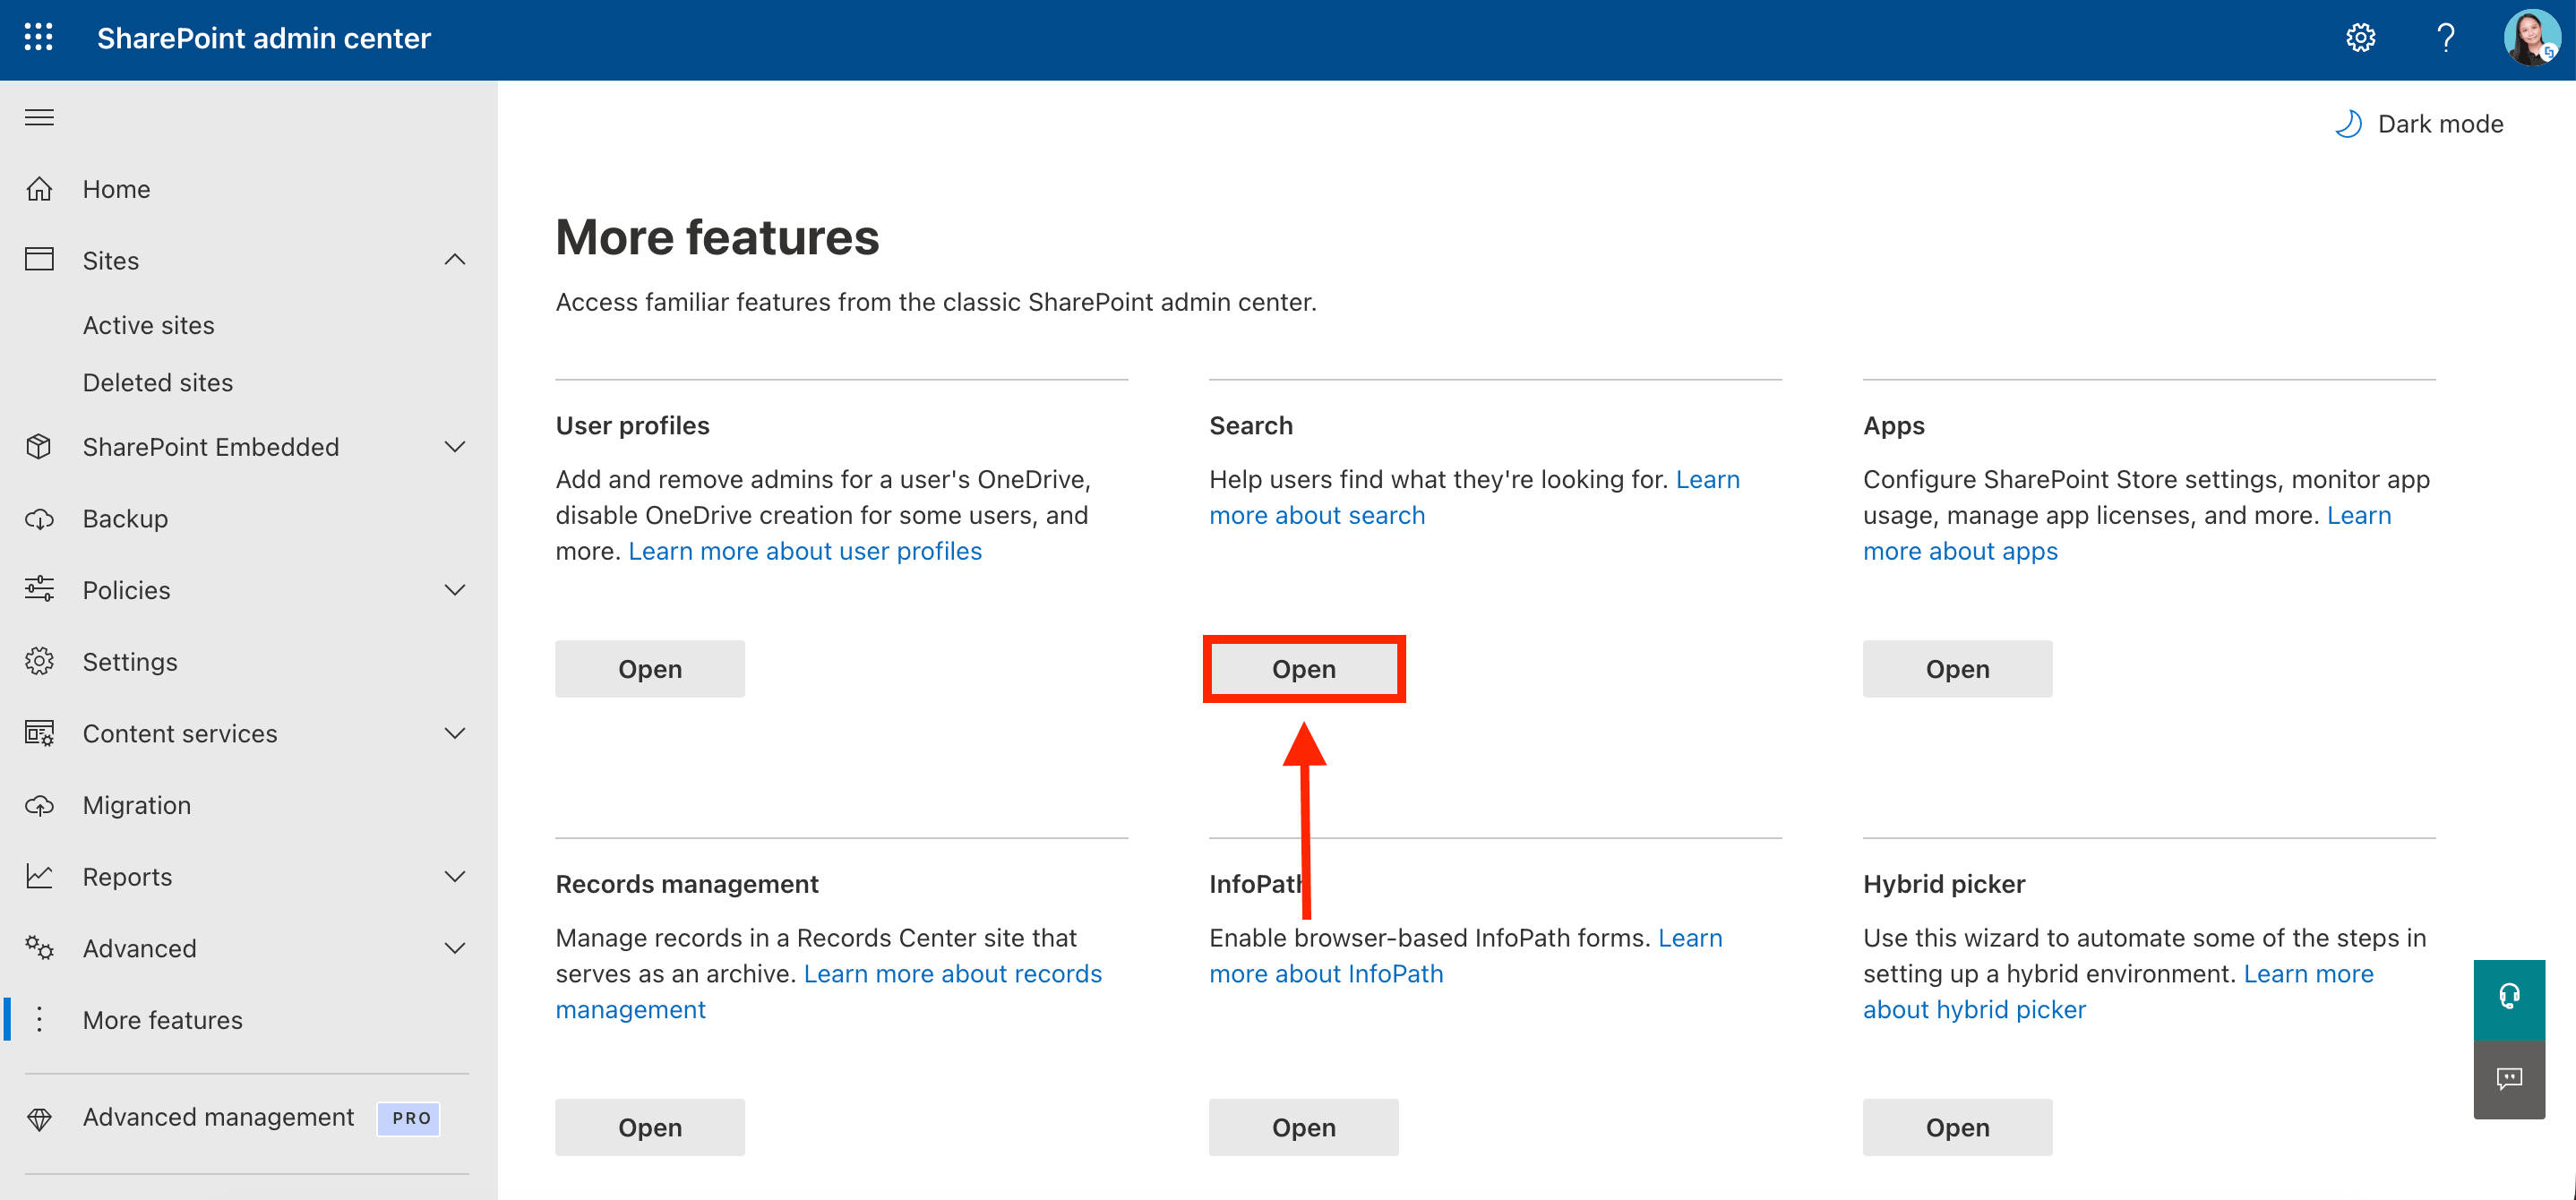
Select Manage Search Schema:
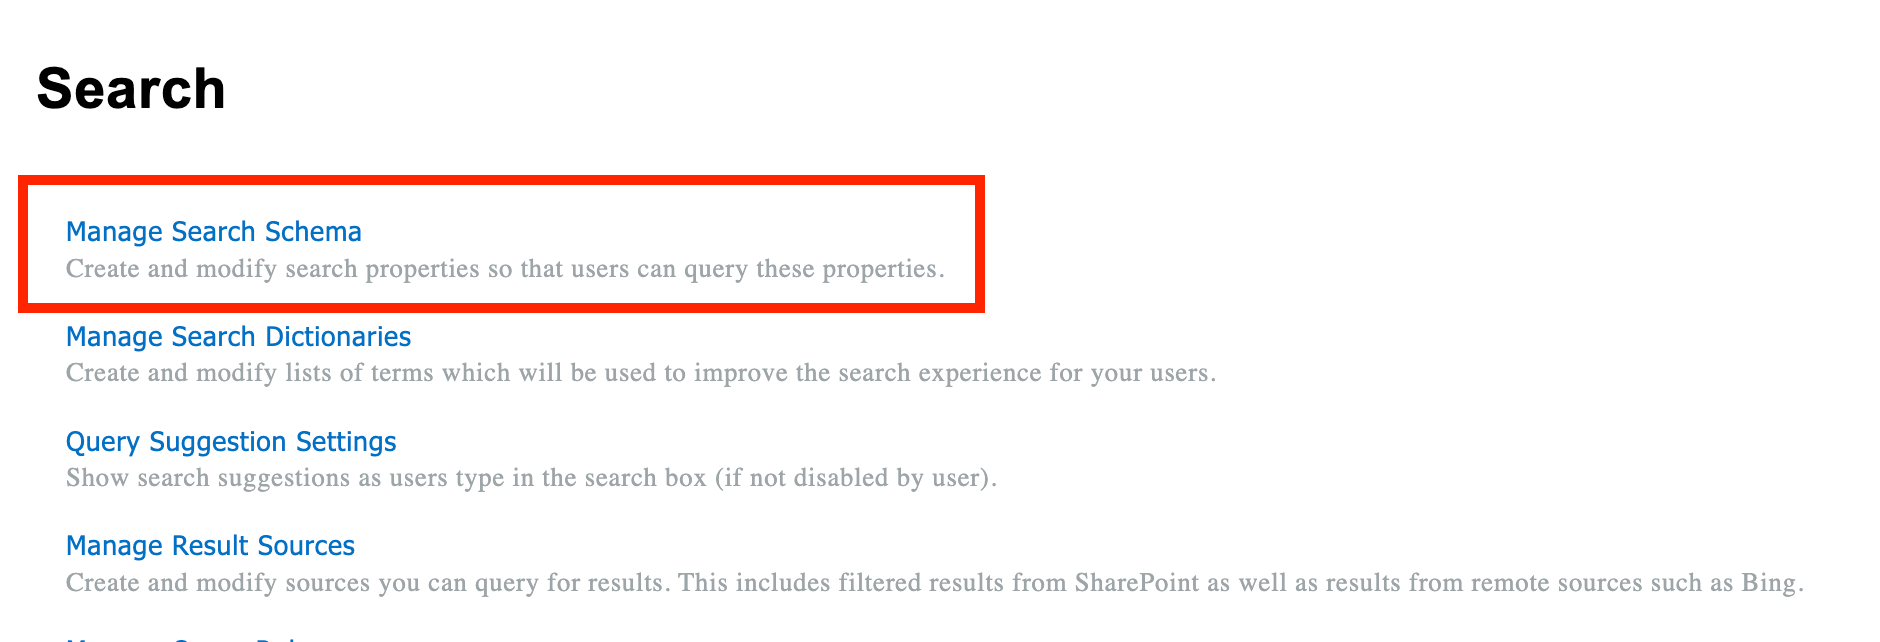
Step 2: Create the New Managed Property
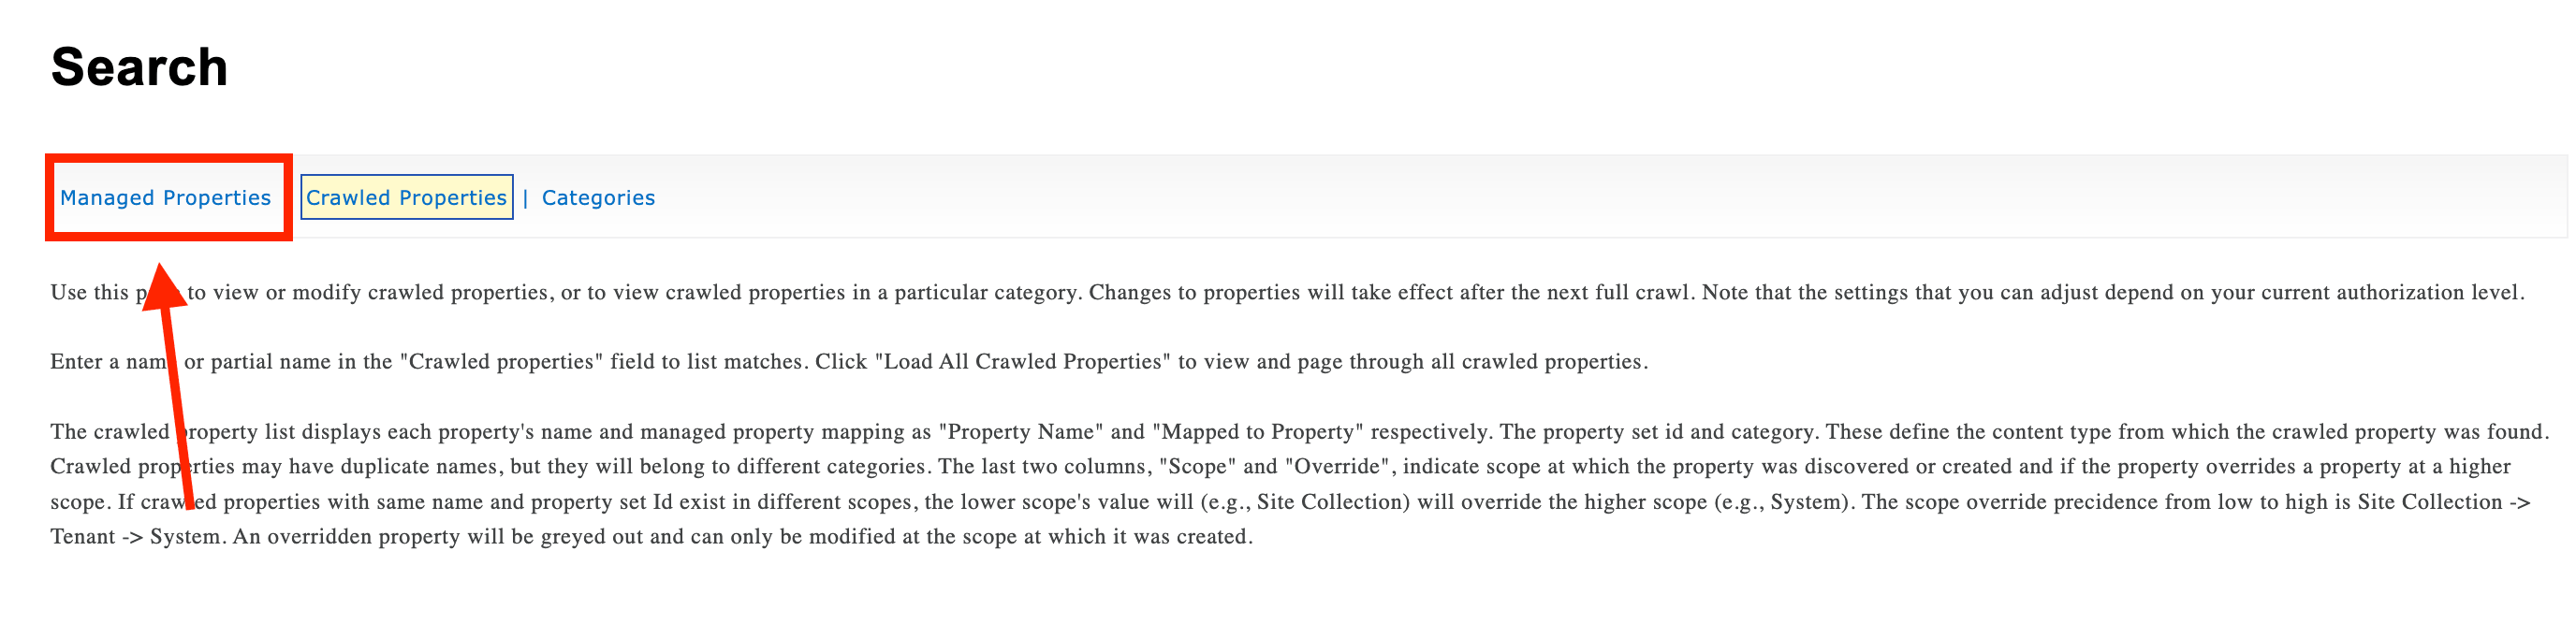
Open the Managed Properties tab:
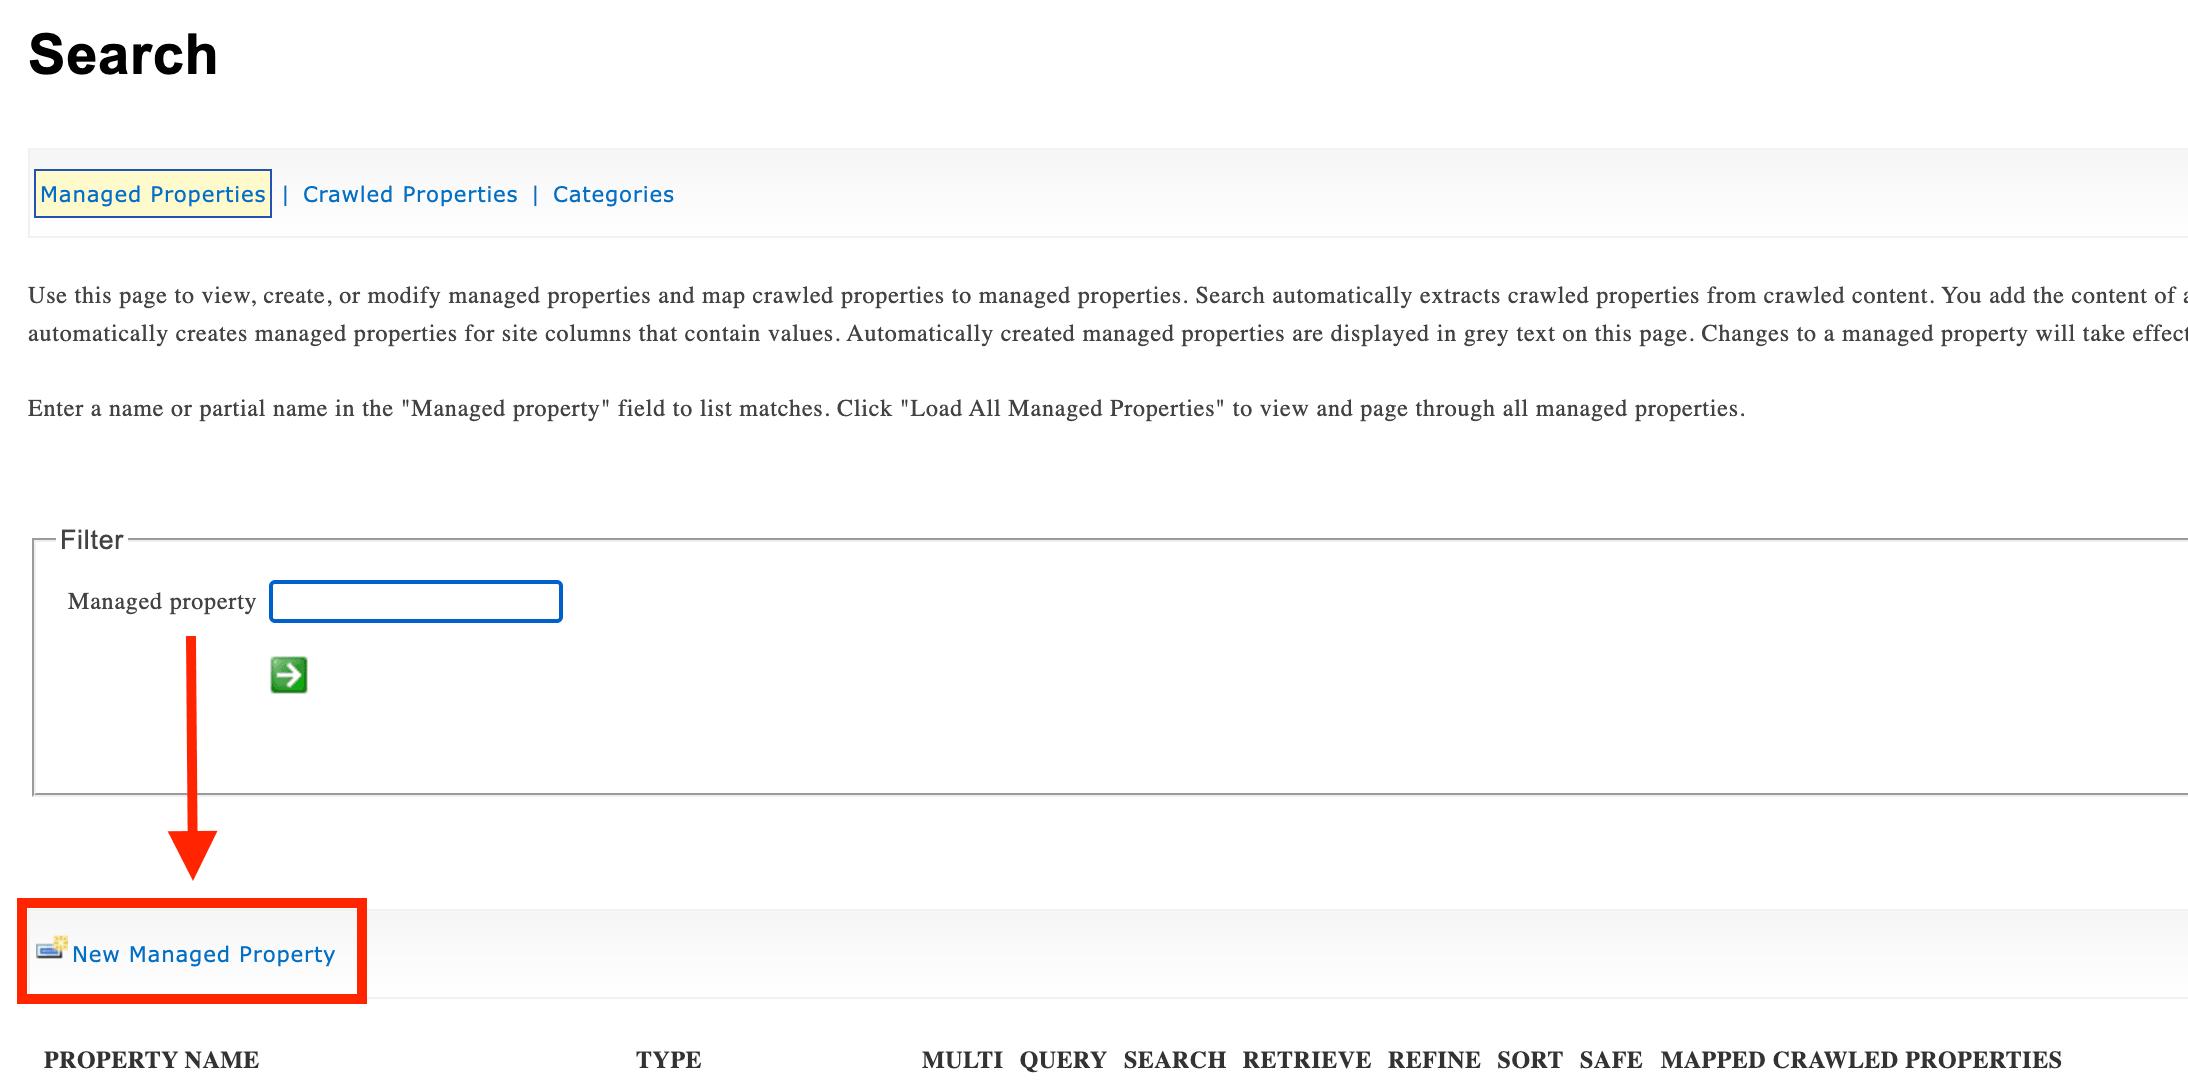
Select New Managed Property:
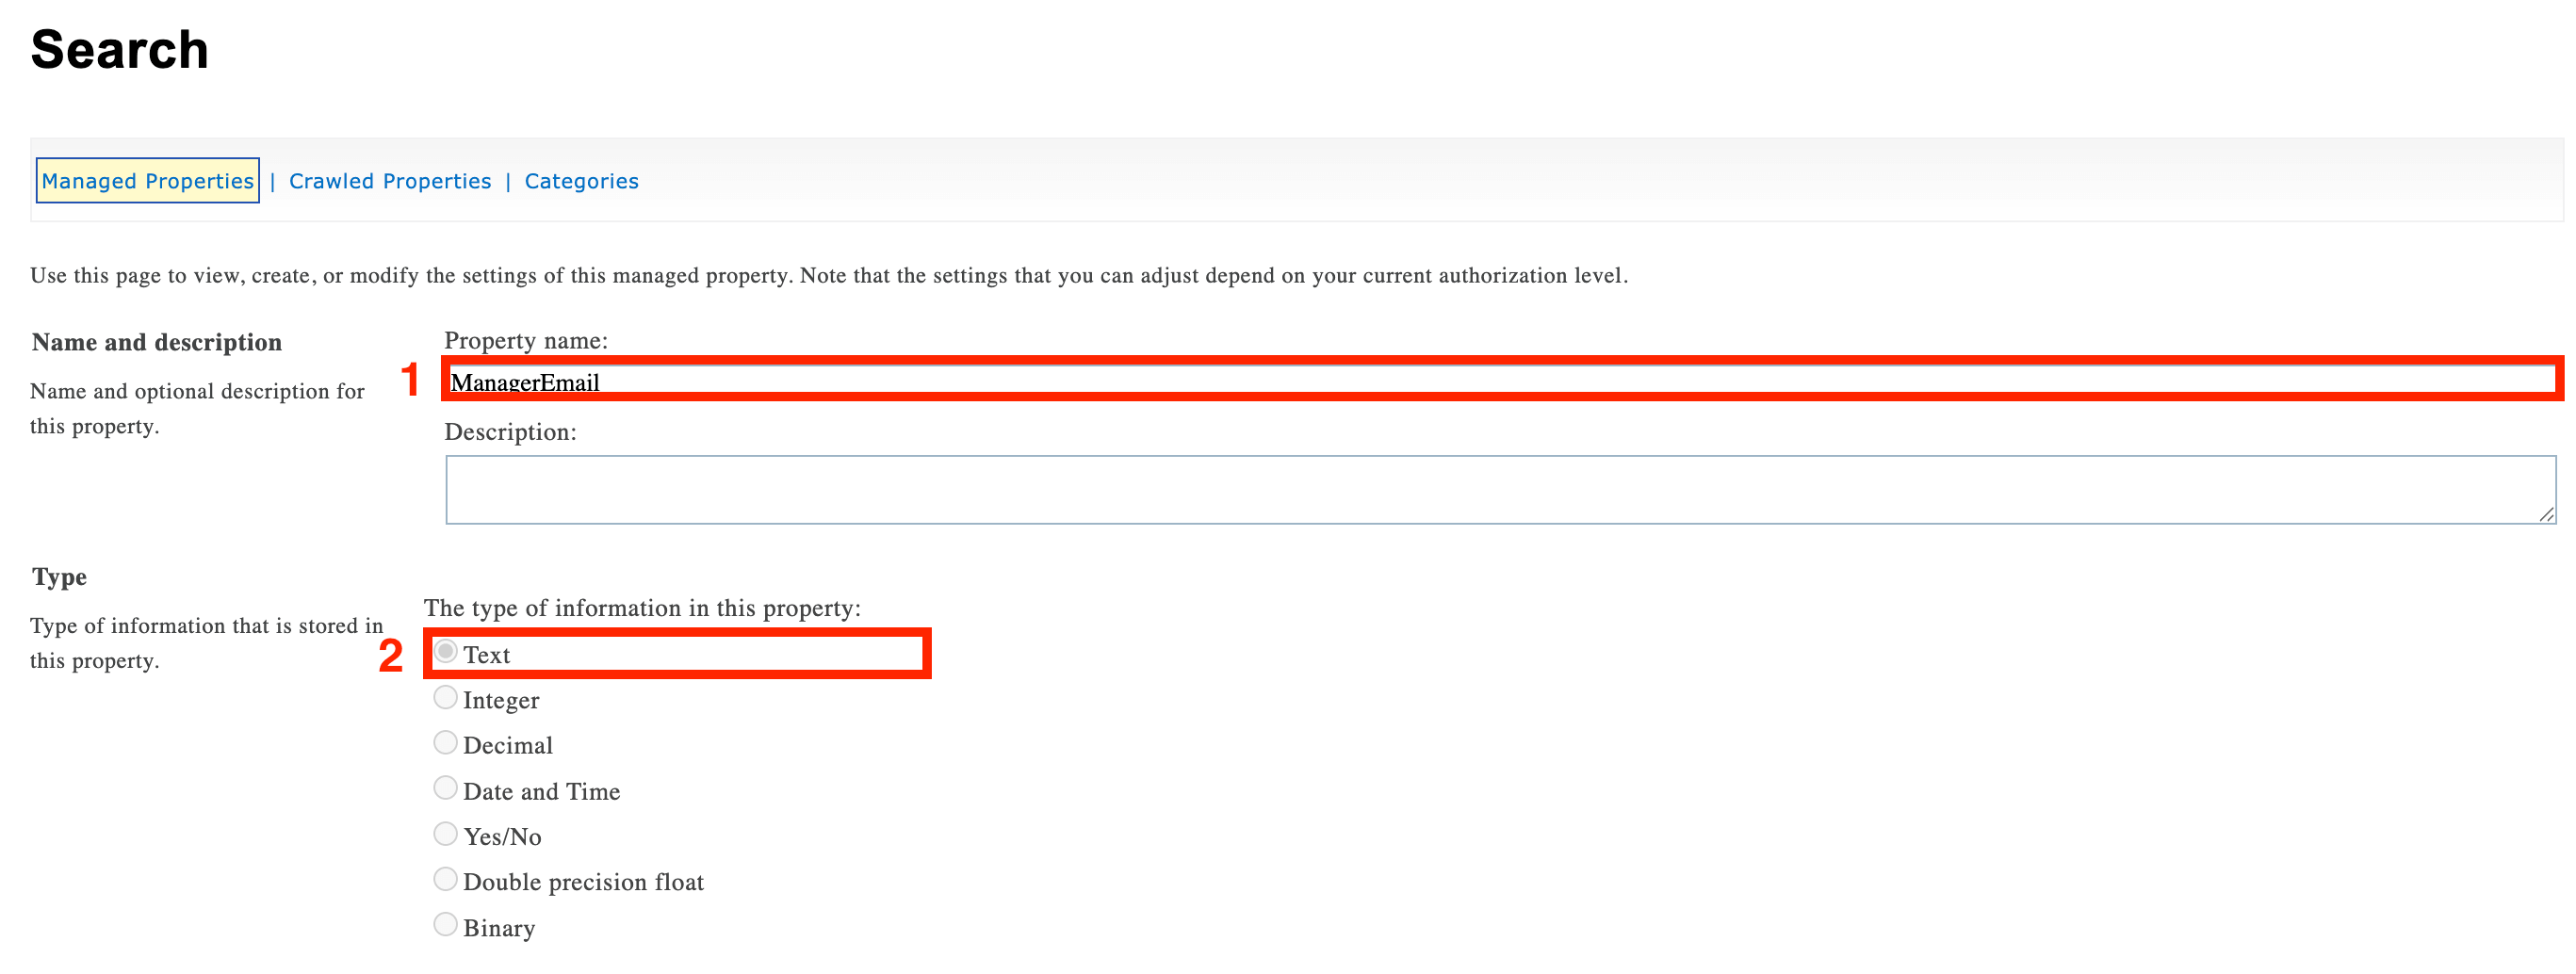
Add the following details:
- ManagerEmail - serves as the Property name
- Text - this is the type of information in the property
Toggle on the following settings:
- Searchable
- Queryable
- Retrievable
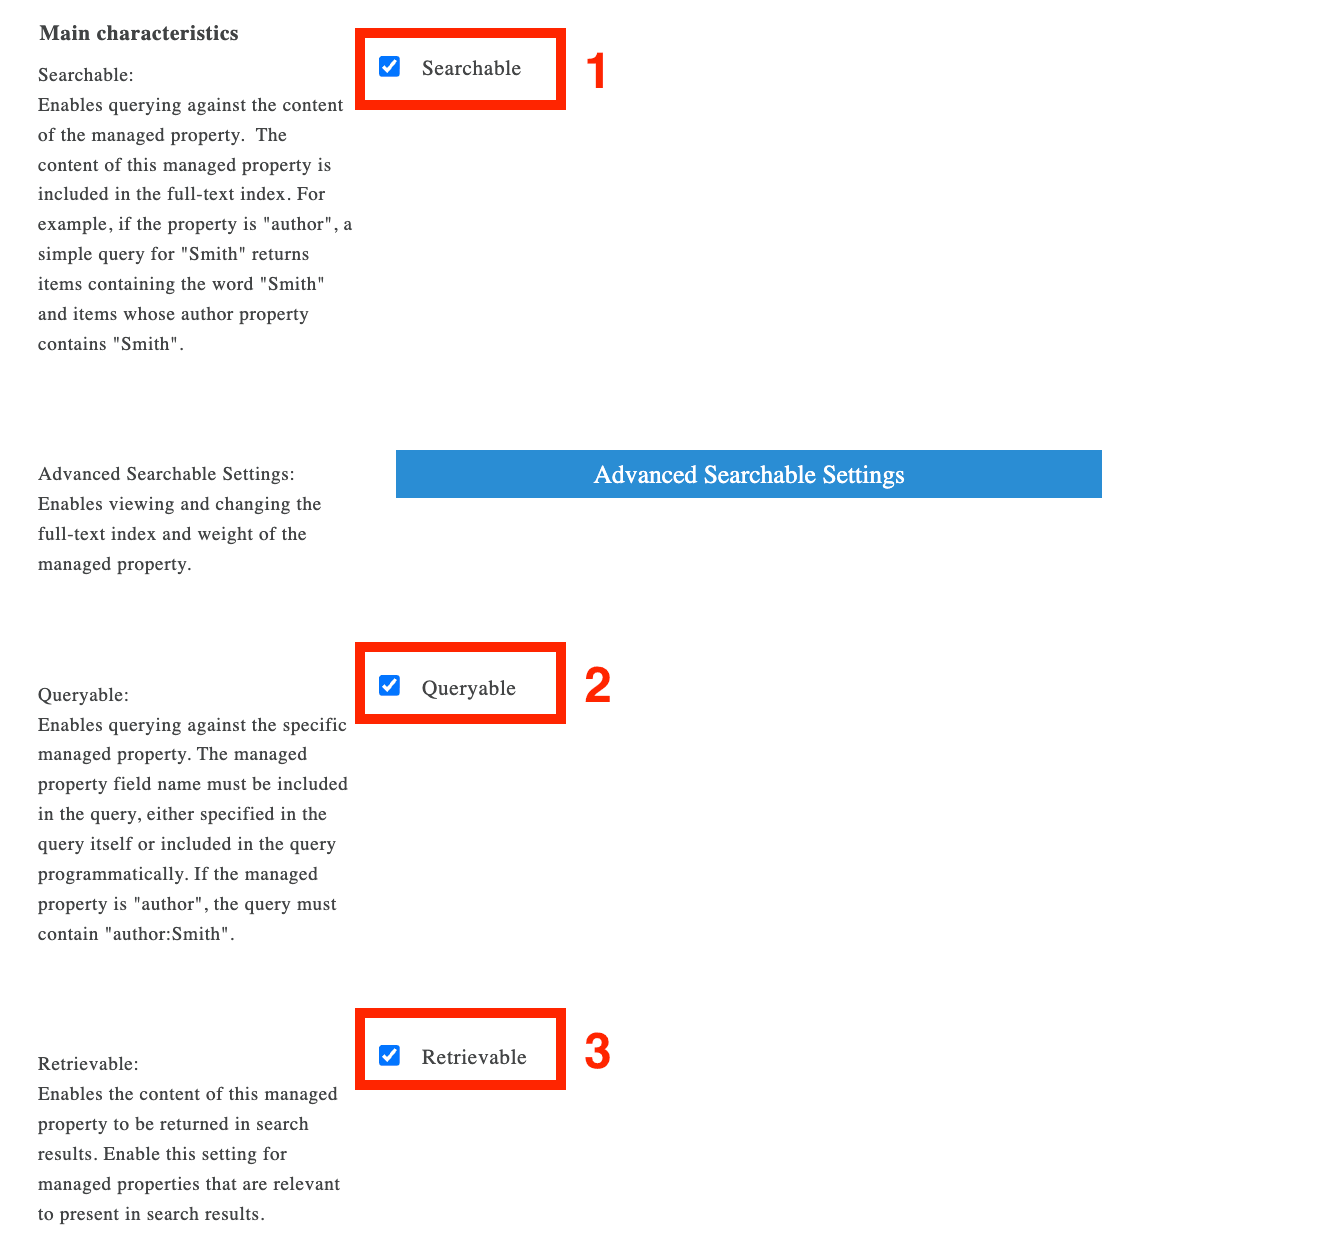
Once you have all the details in place, click OK.
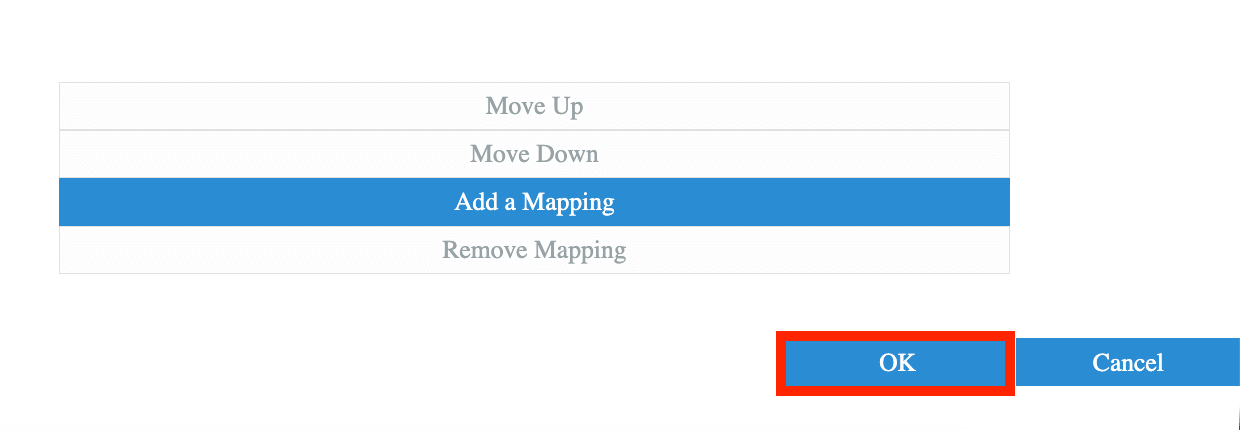
Step 3: Map the Managed Property to the User Profile Property
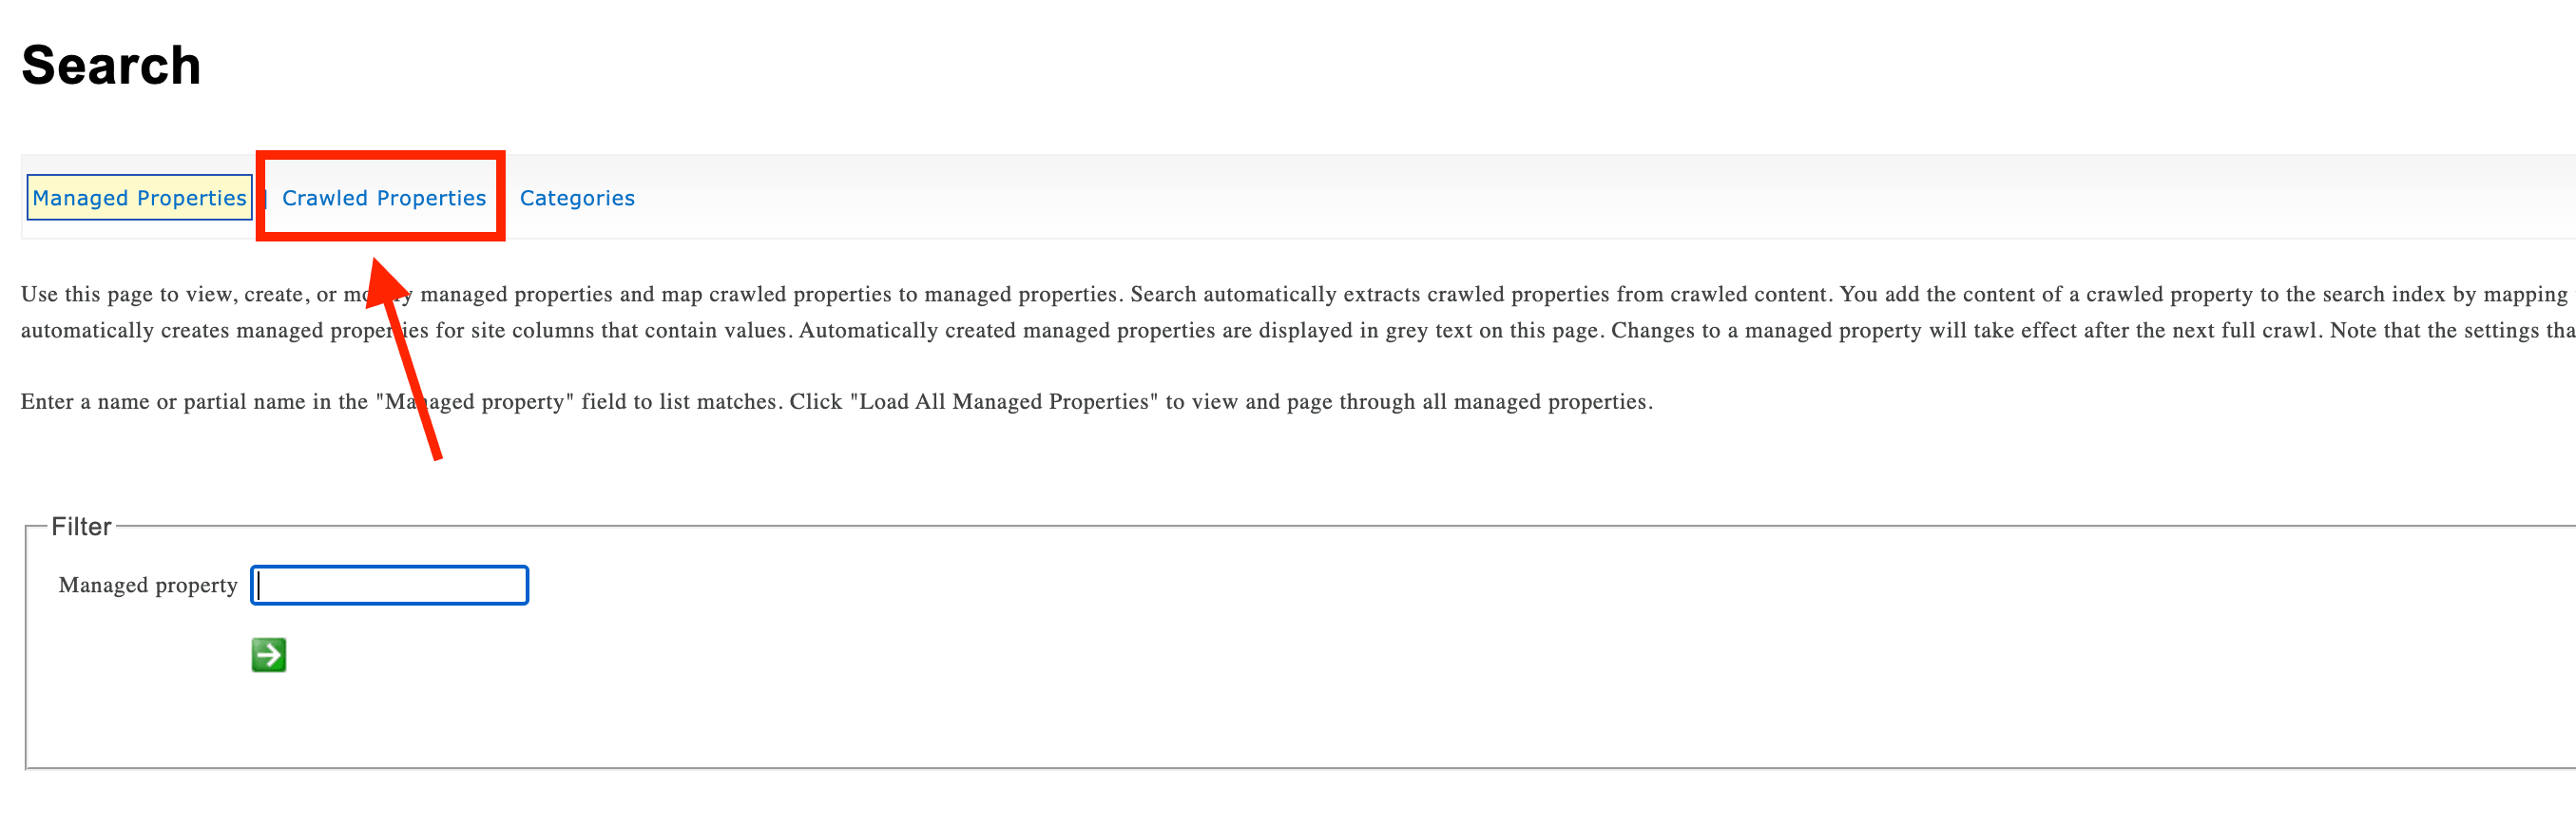
Go to the Crawled Properties tab:
Look for the EmailManager User Profile Property:
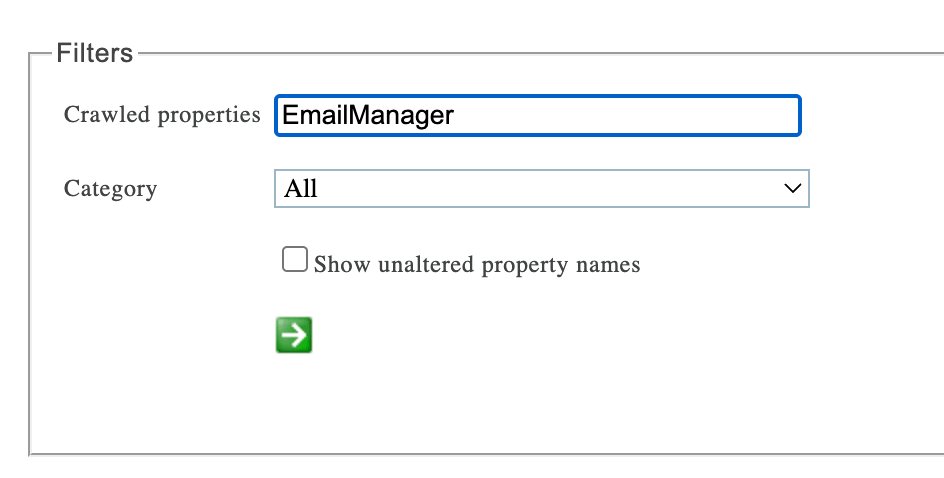
Select it:
NOTEIf you can’t see this property yet, this means that it hasn’t been crawled yet. It usually takes SharePoint a couple of hours to crawl properties.
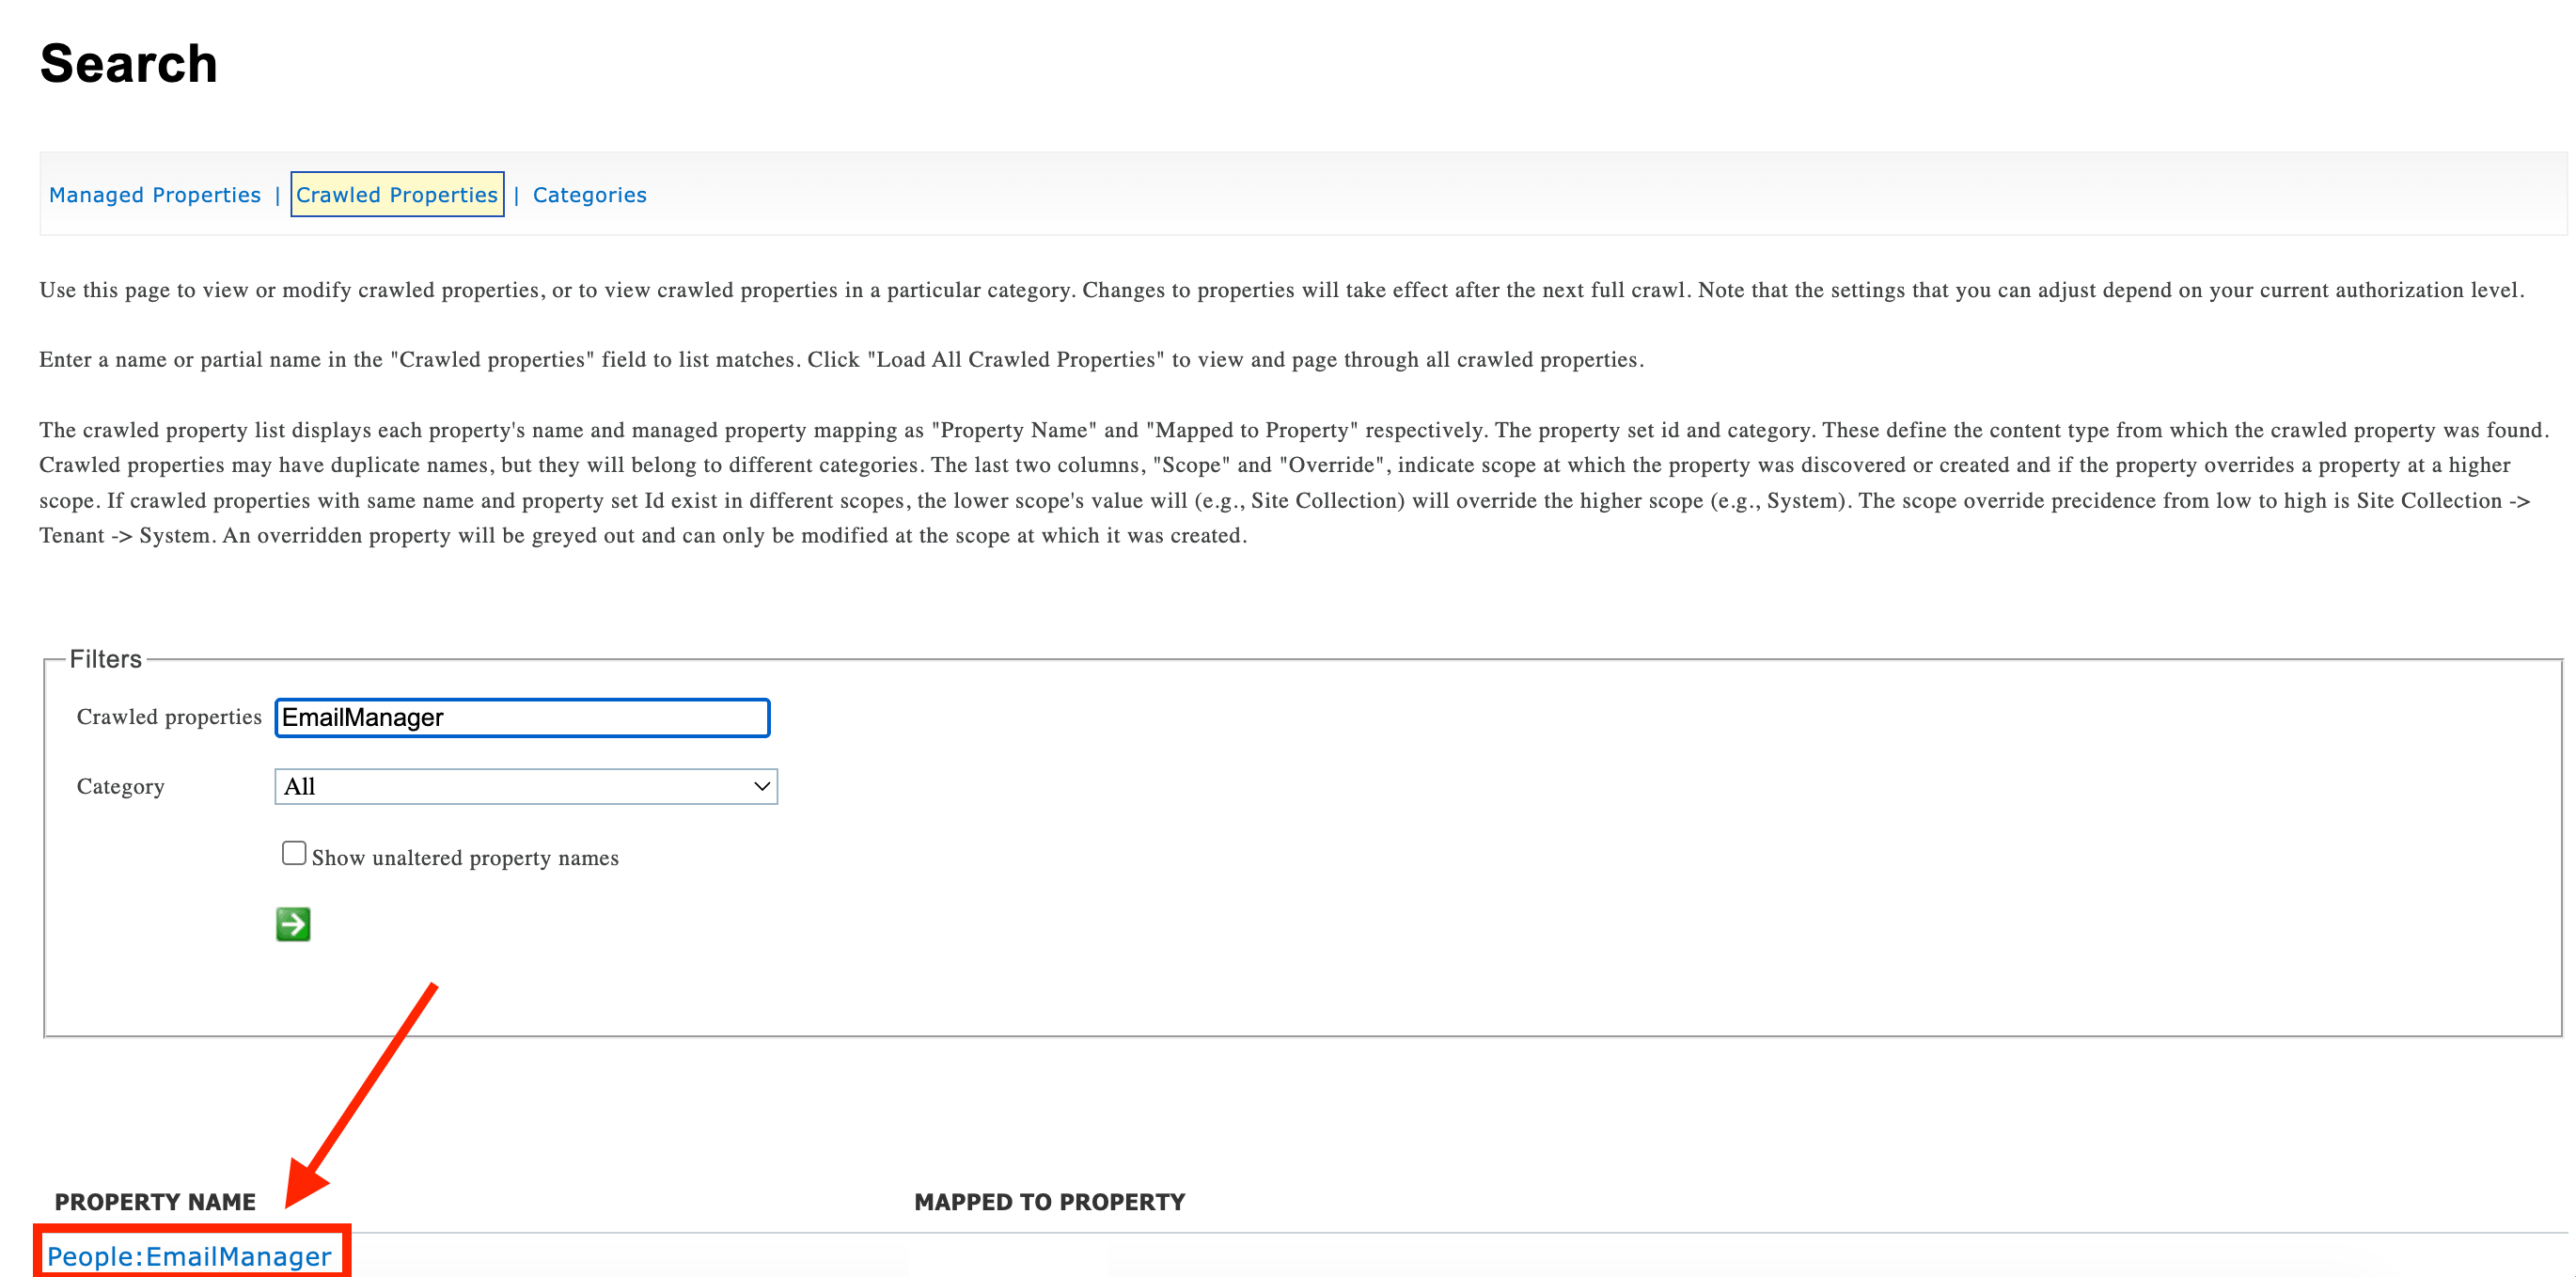
Ciick Add a Mapping:
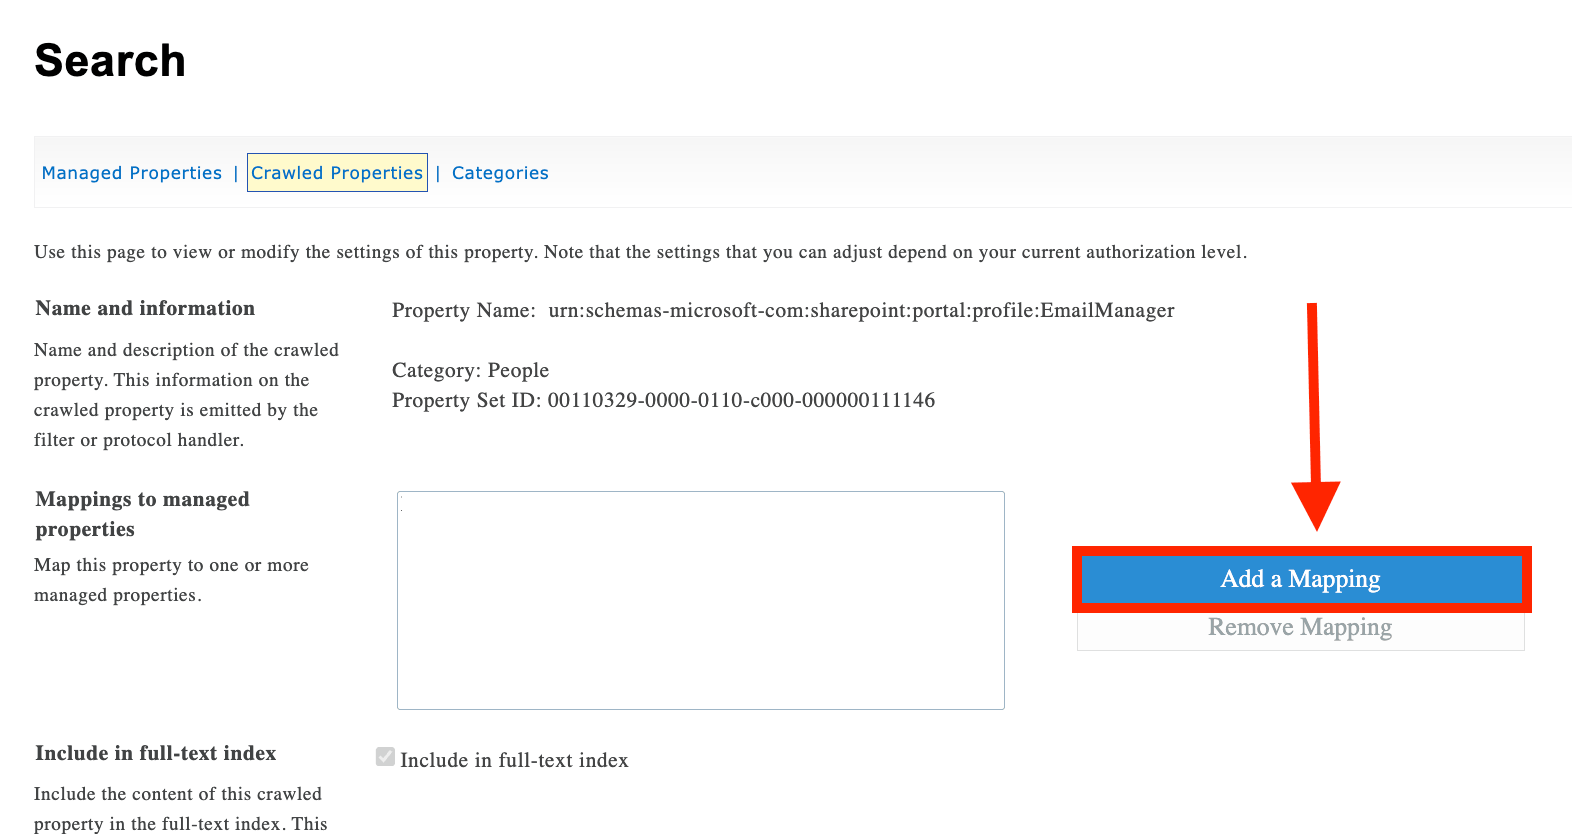
Look for the ManagerEmail Managed Property, select it, and click OK:
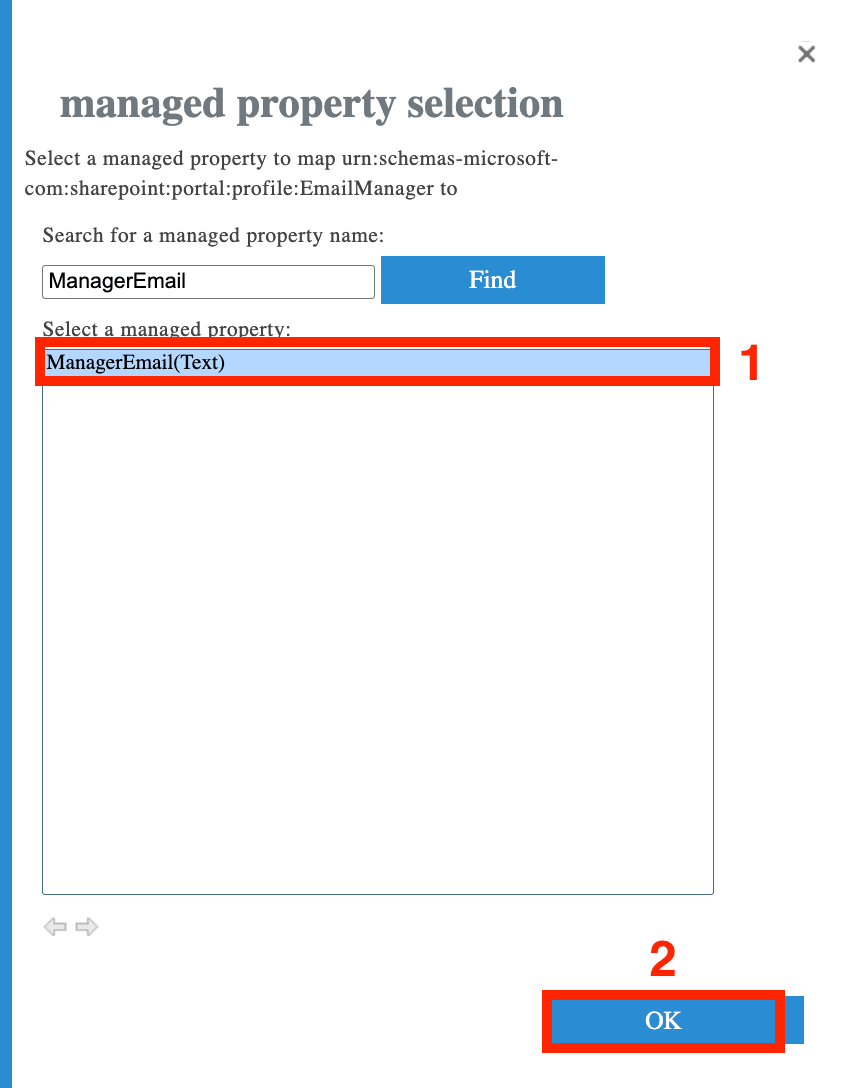
Then, click OK again:
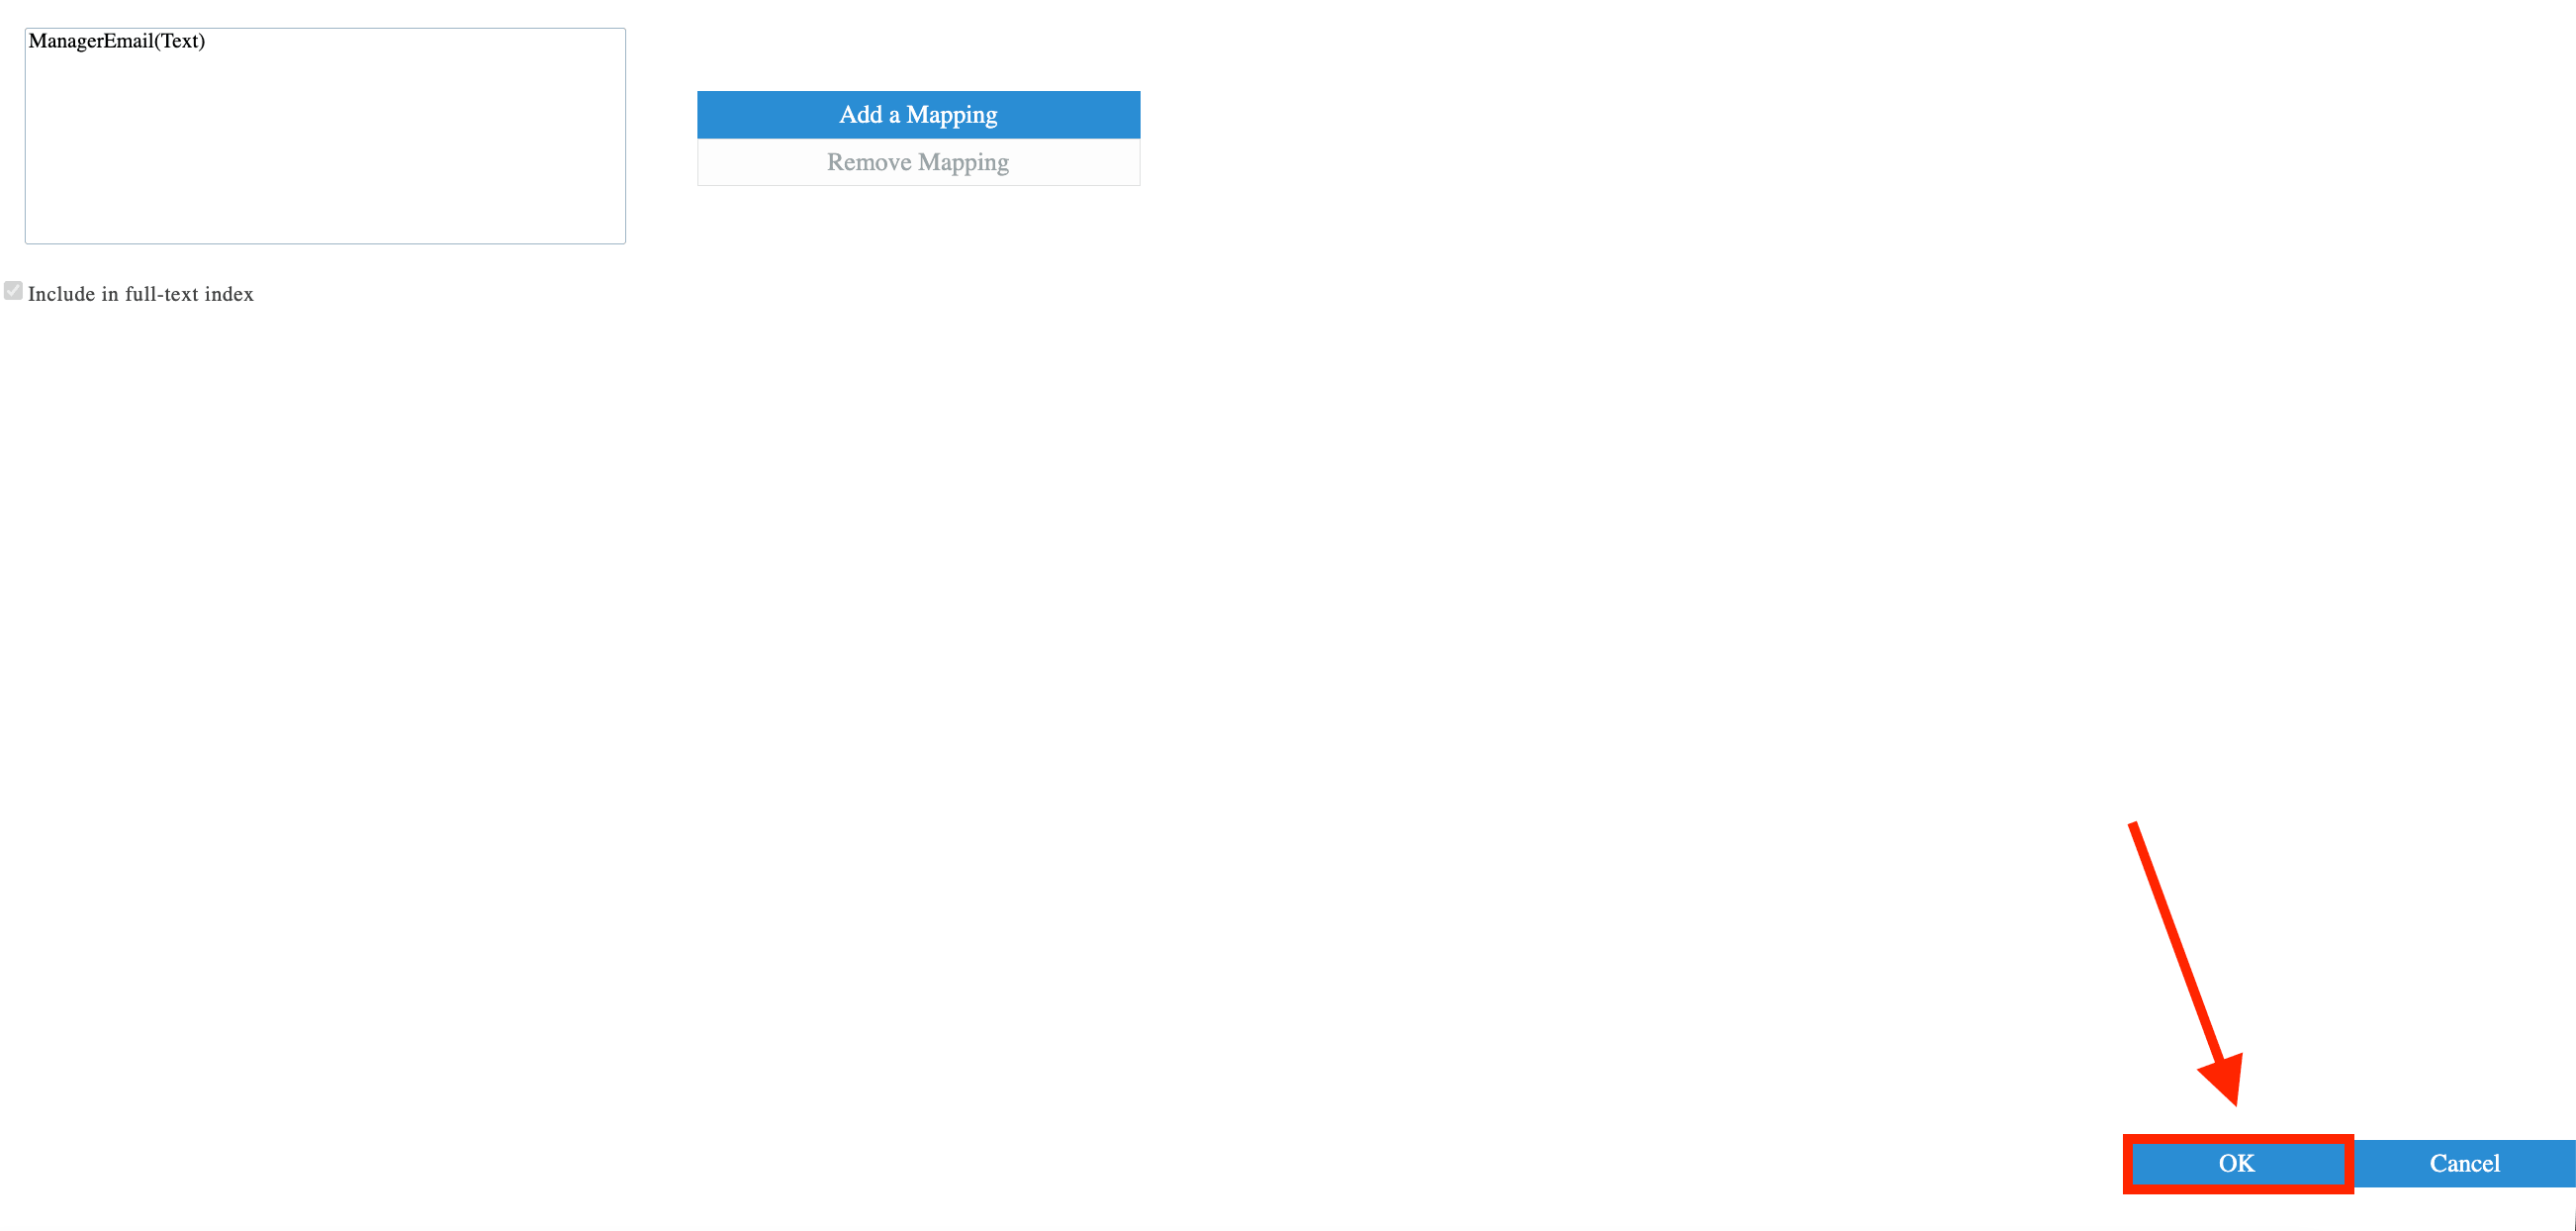
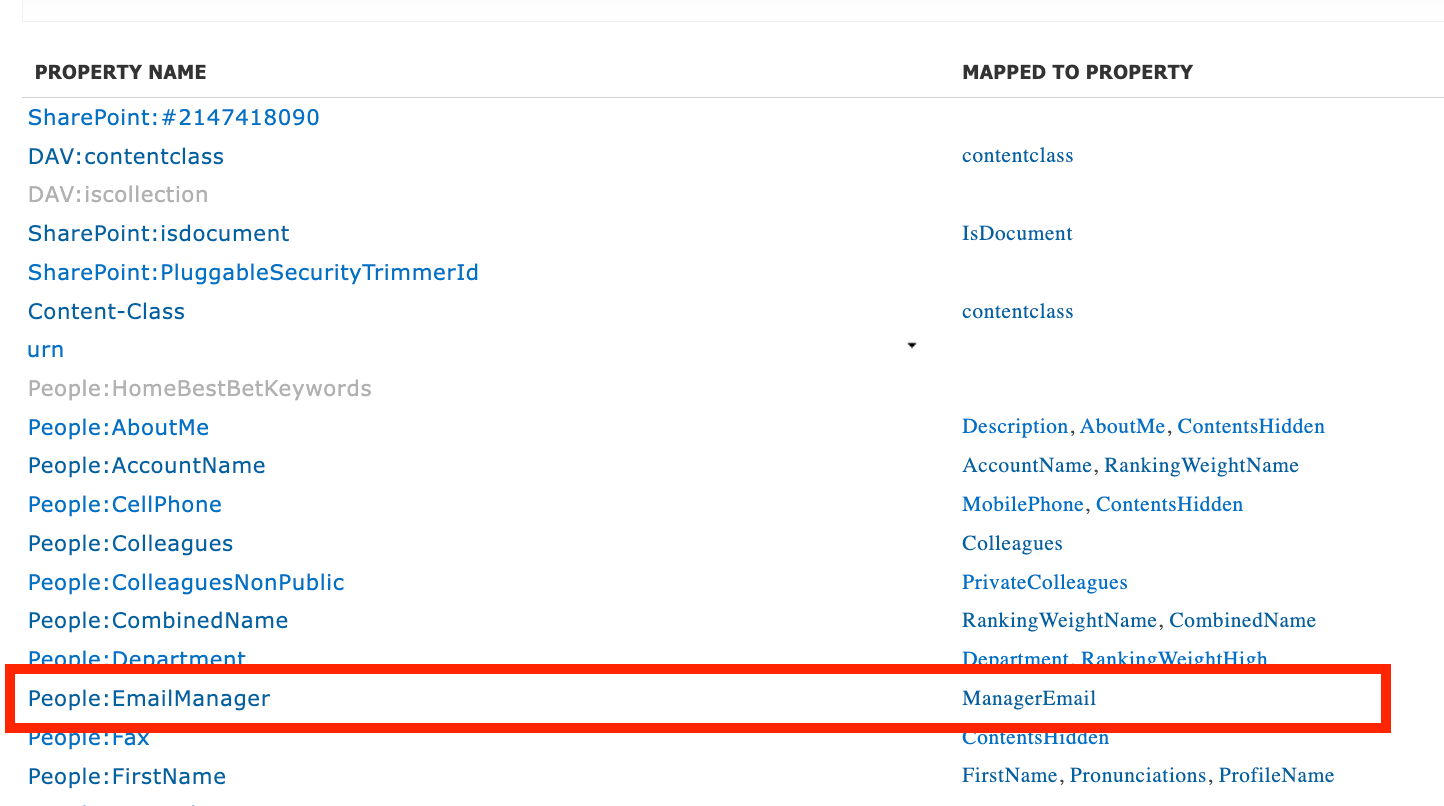
Amazing! You will now see the Email Manager Property mapped to Manager Email. You can now proceed to the actual connection process in Part 4.
Part 4: Connect
This section shows you how to integrate the properties created in the previous parts to the Organization Chart Design Element using the People Search connection.
Step 1: Edit the ShortPoint Web Part
Go to the SharePoint page you want to use and click Edit:
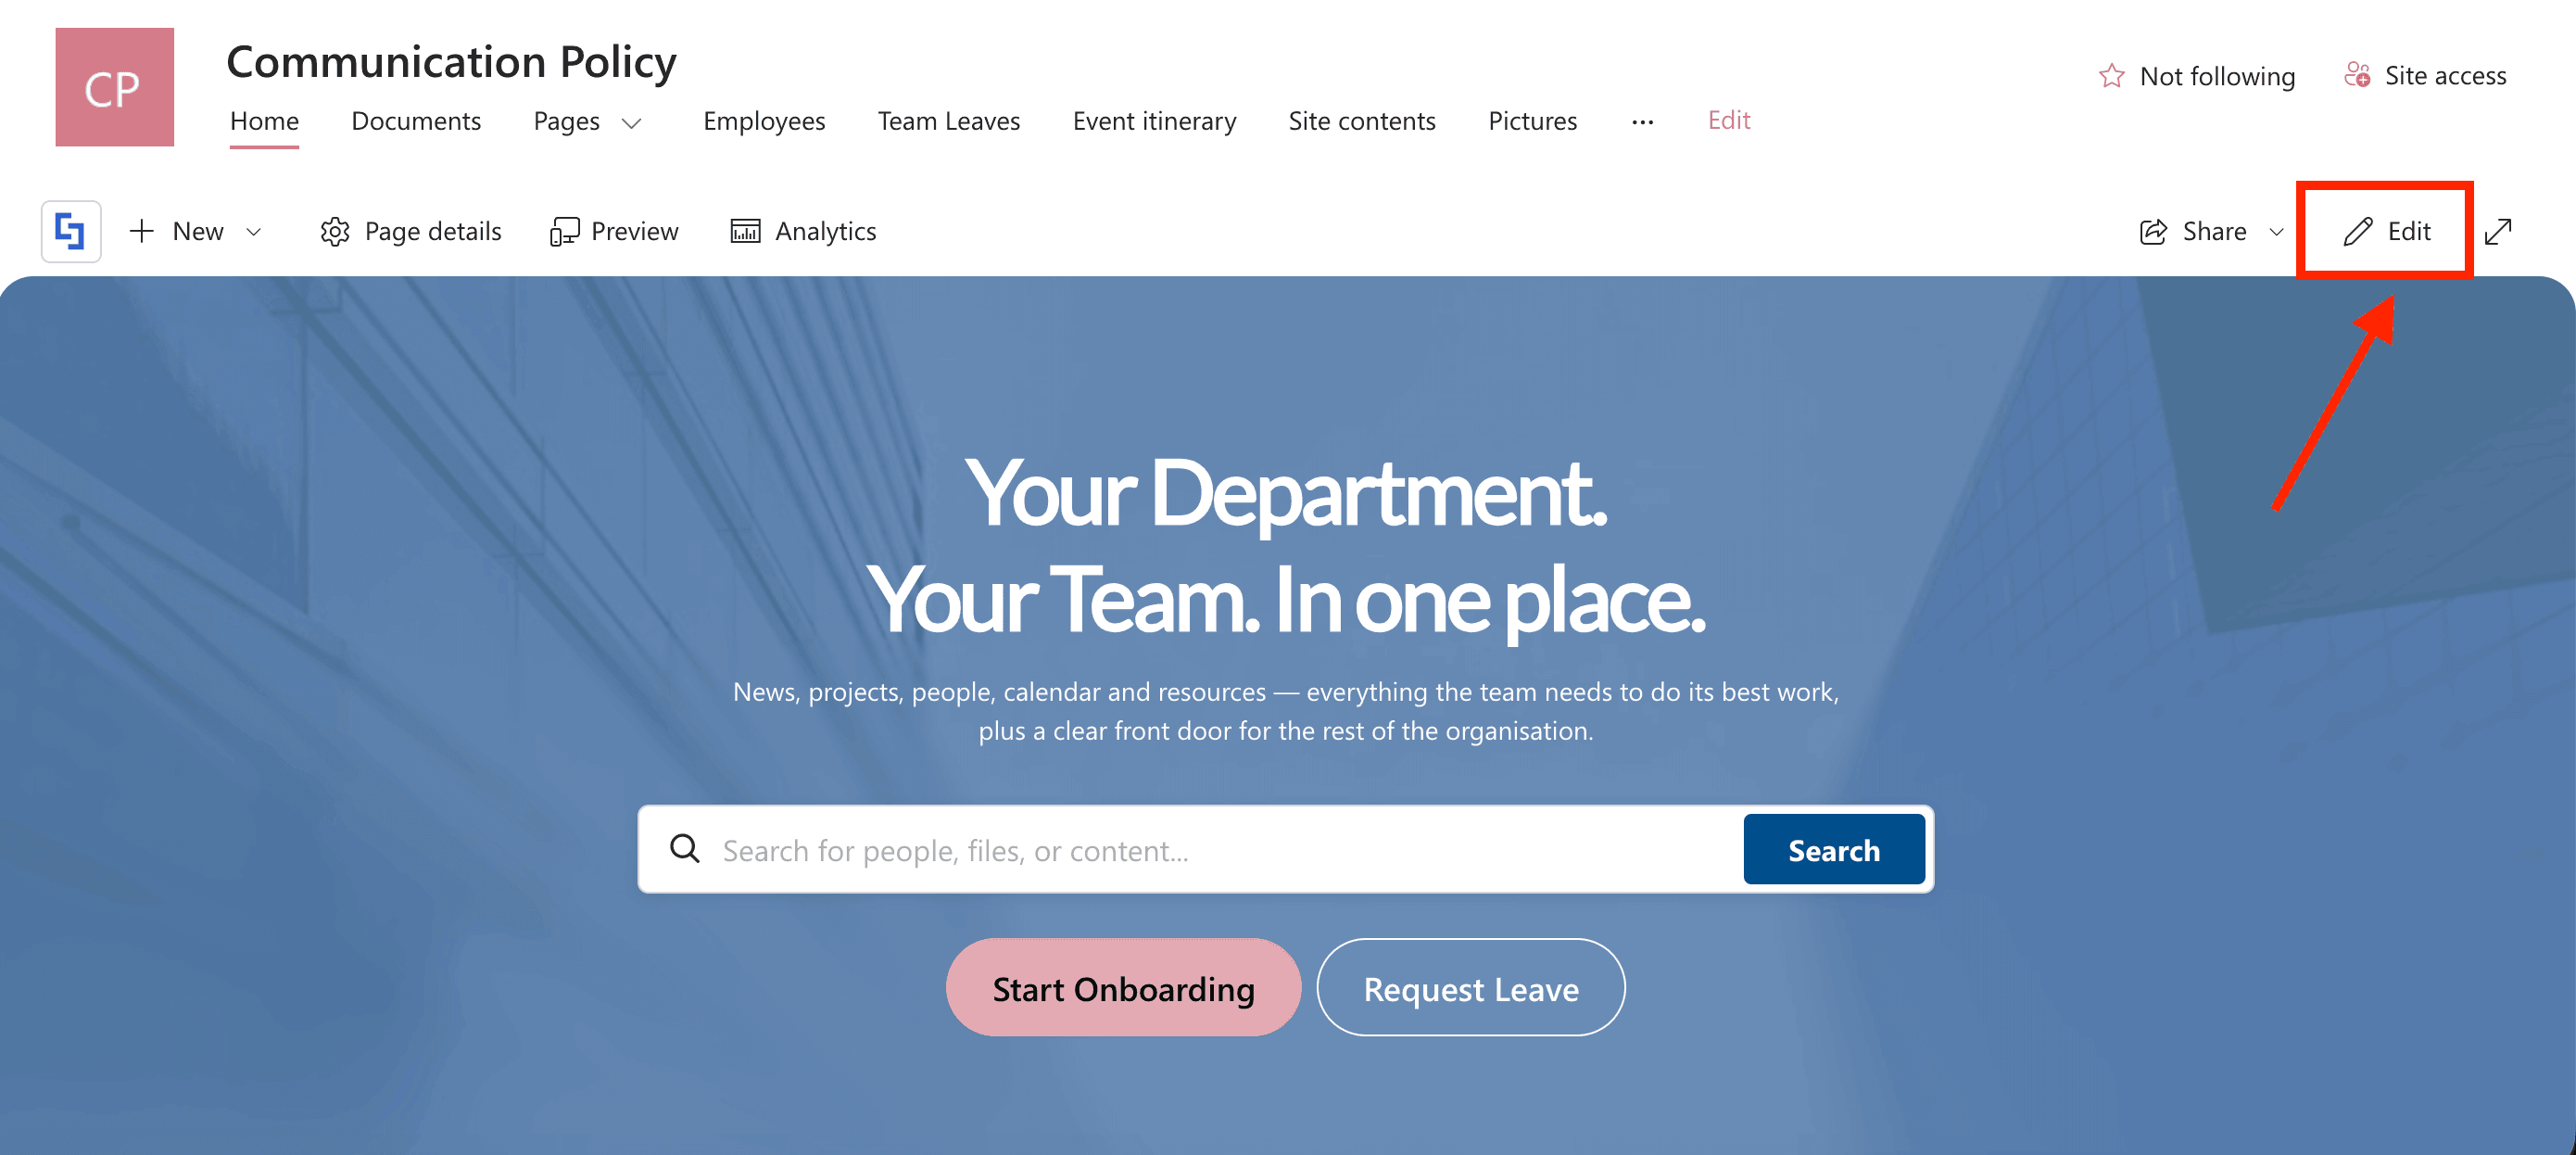
Close the Toolbox:
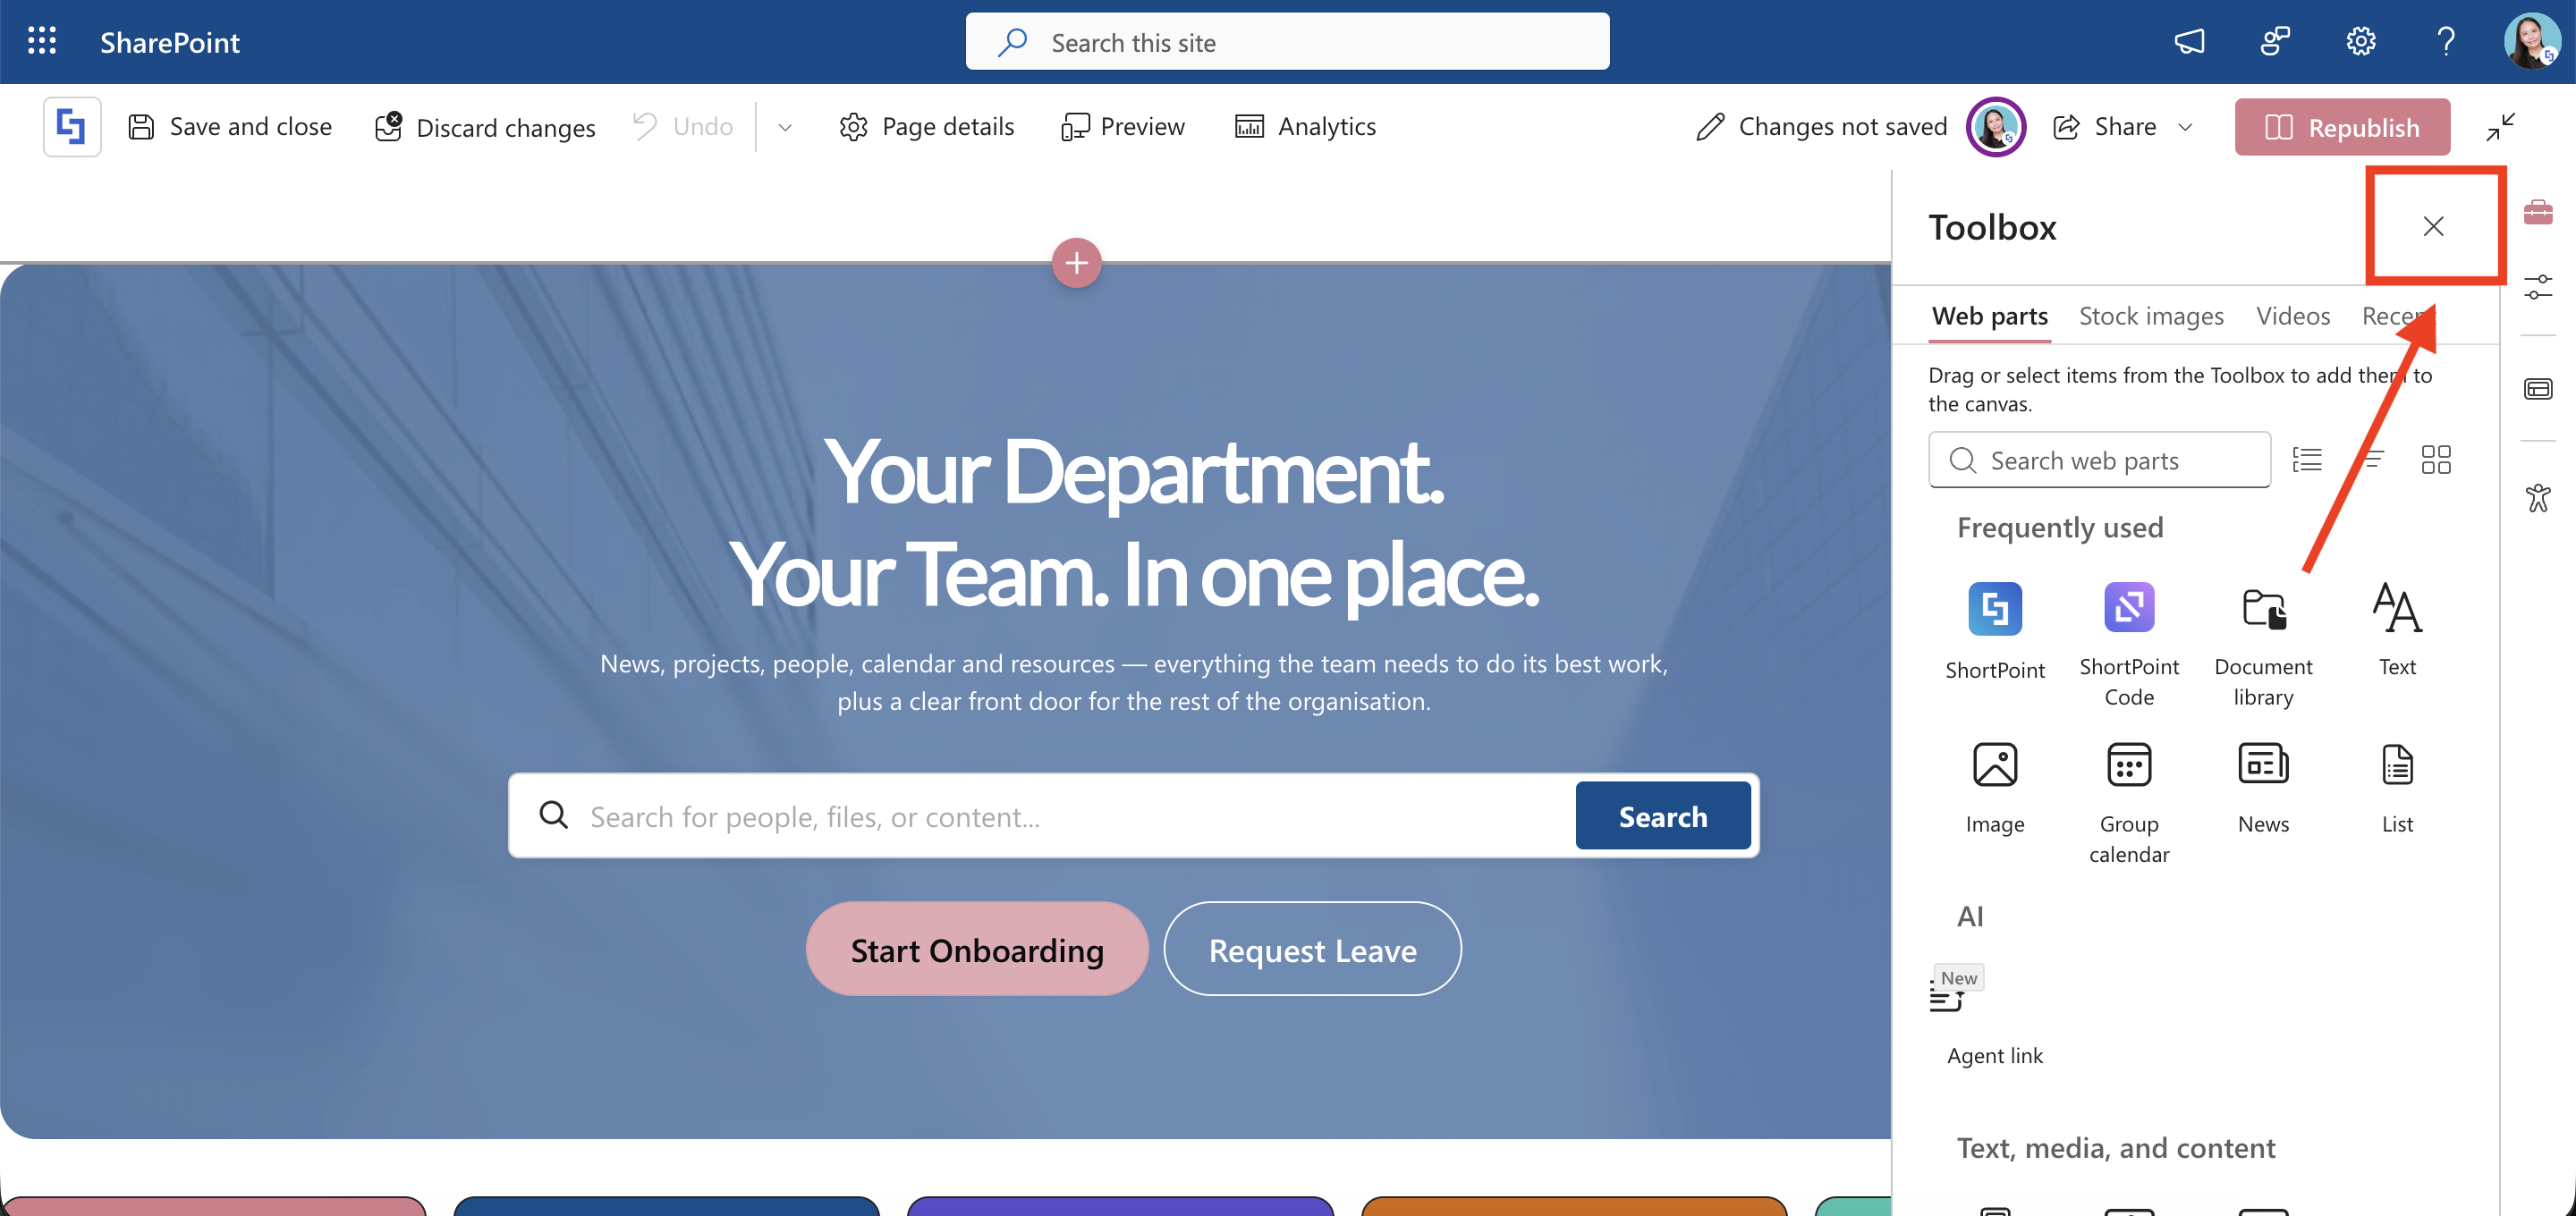
Click the Edit Properties icon:
Step 2: Edit the Organization Chart
NOTEBefore proceeding, make sure you already have the Organization Chart Design Element on your page. To learn how to add it, check out Organization Chart Design Element: How to Create an Organizational Chart in SharePoint.
Click the EasyPass tag of the Organization Chart:
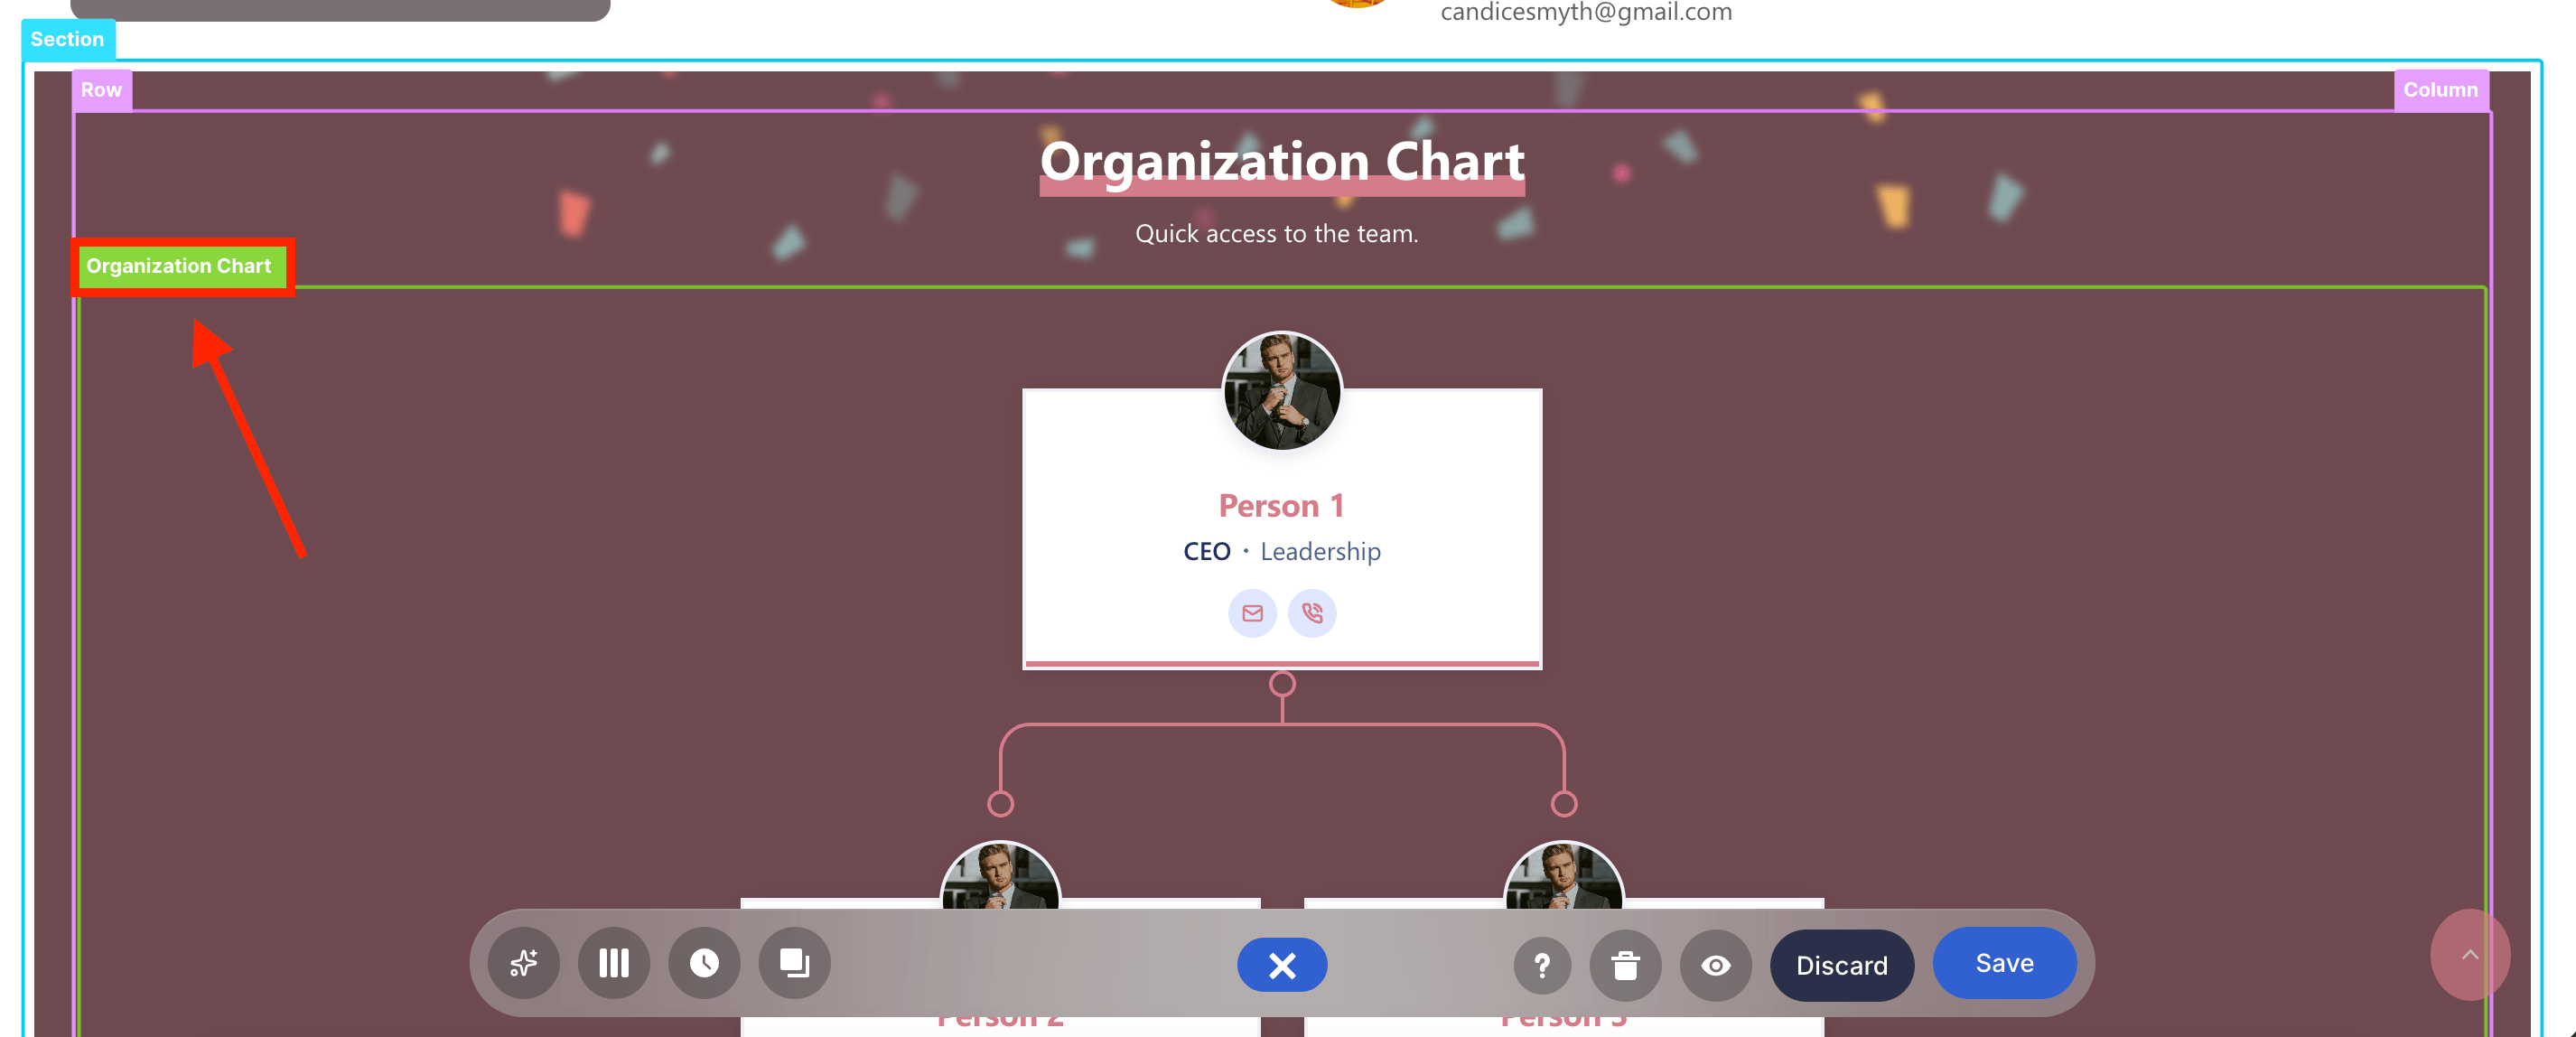
Select the cogwheel icon:

Step 3: Configure People Search
Go to the Connect tab:
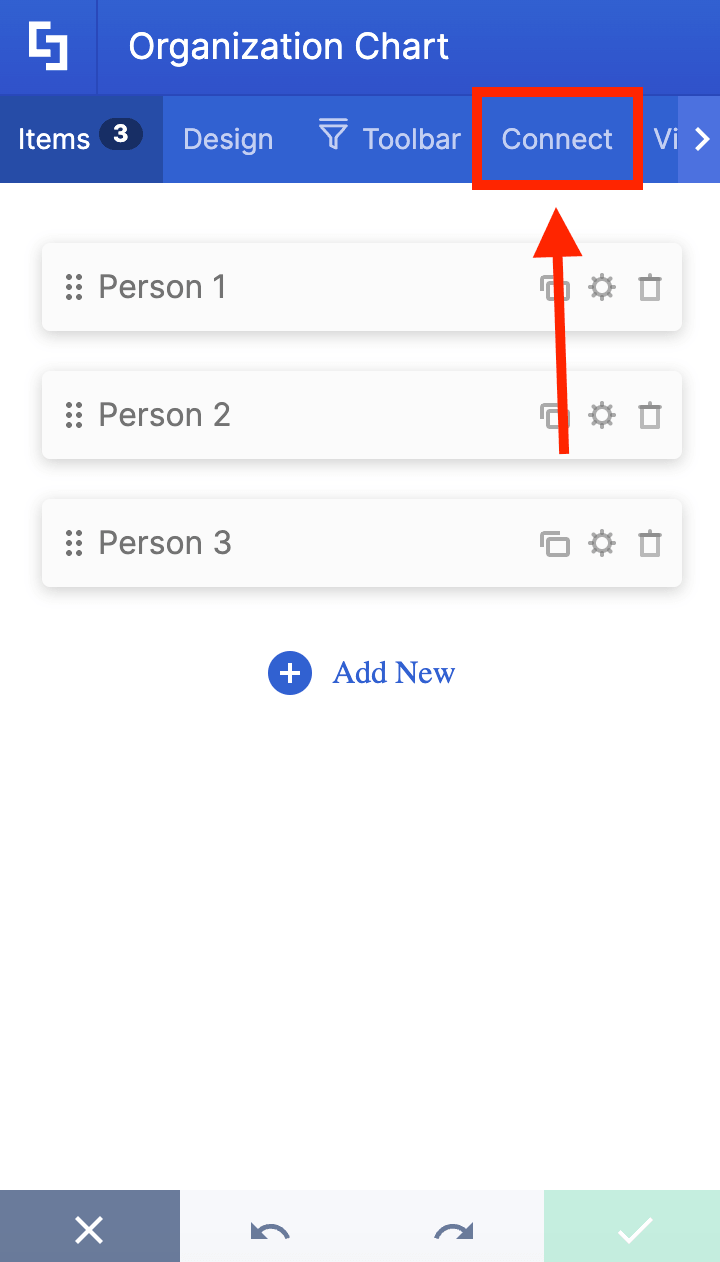
Select Configure:
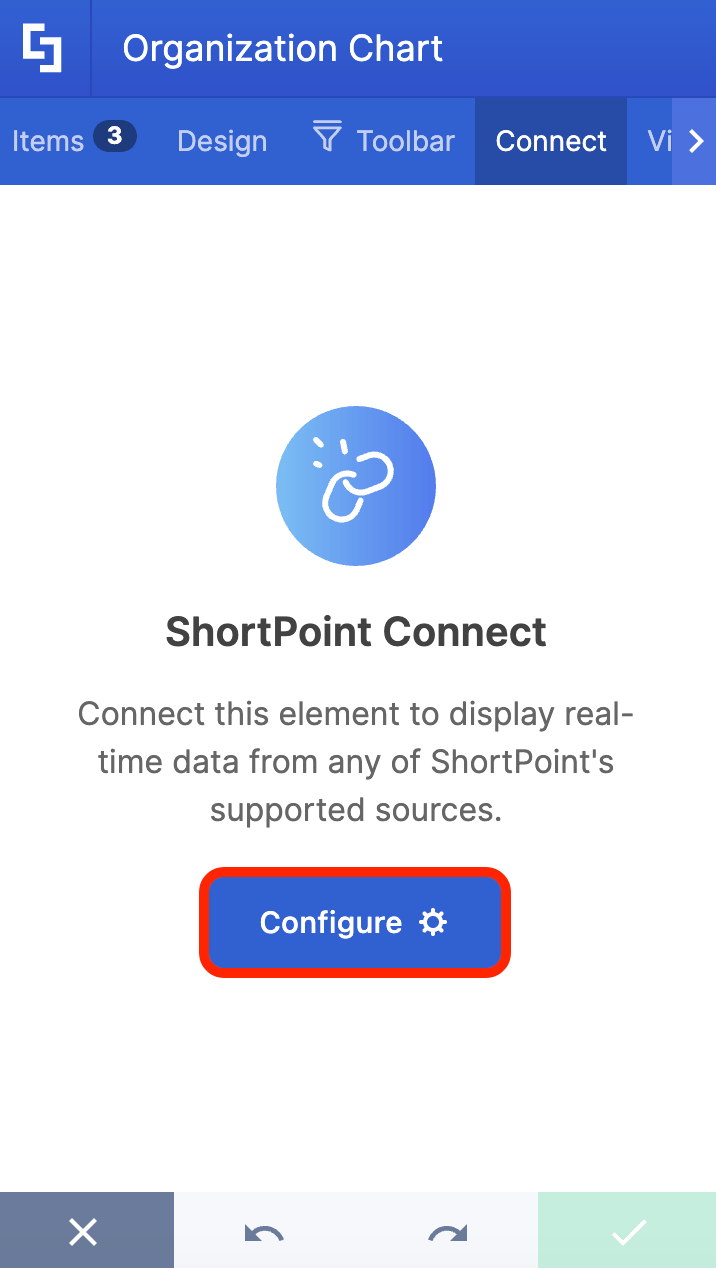
Choose People Search:
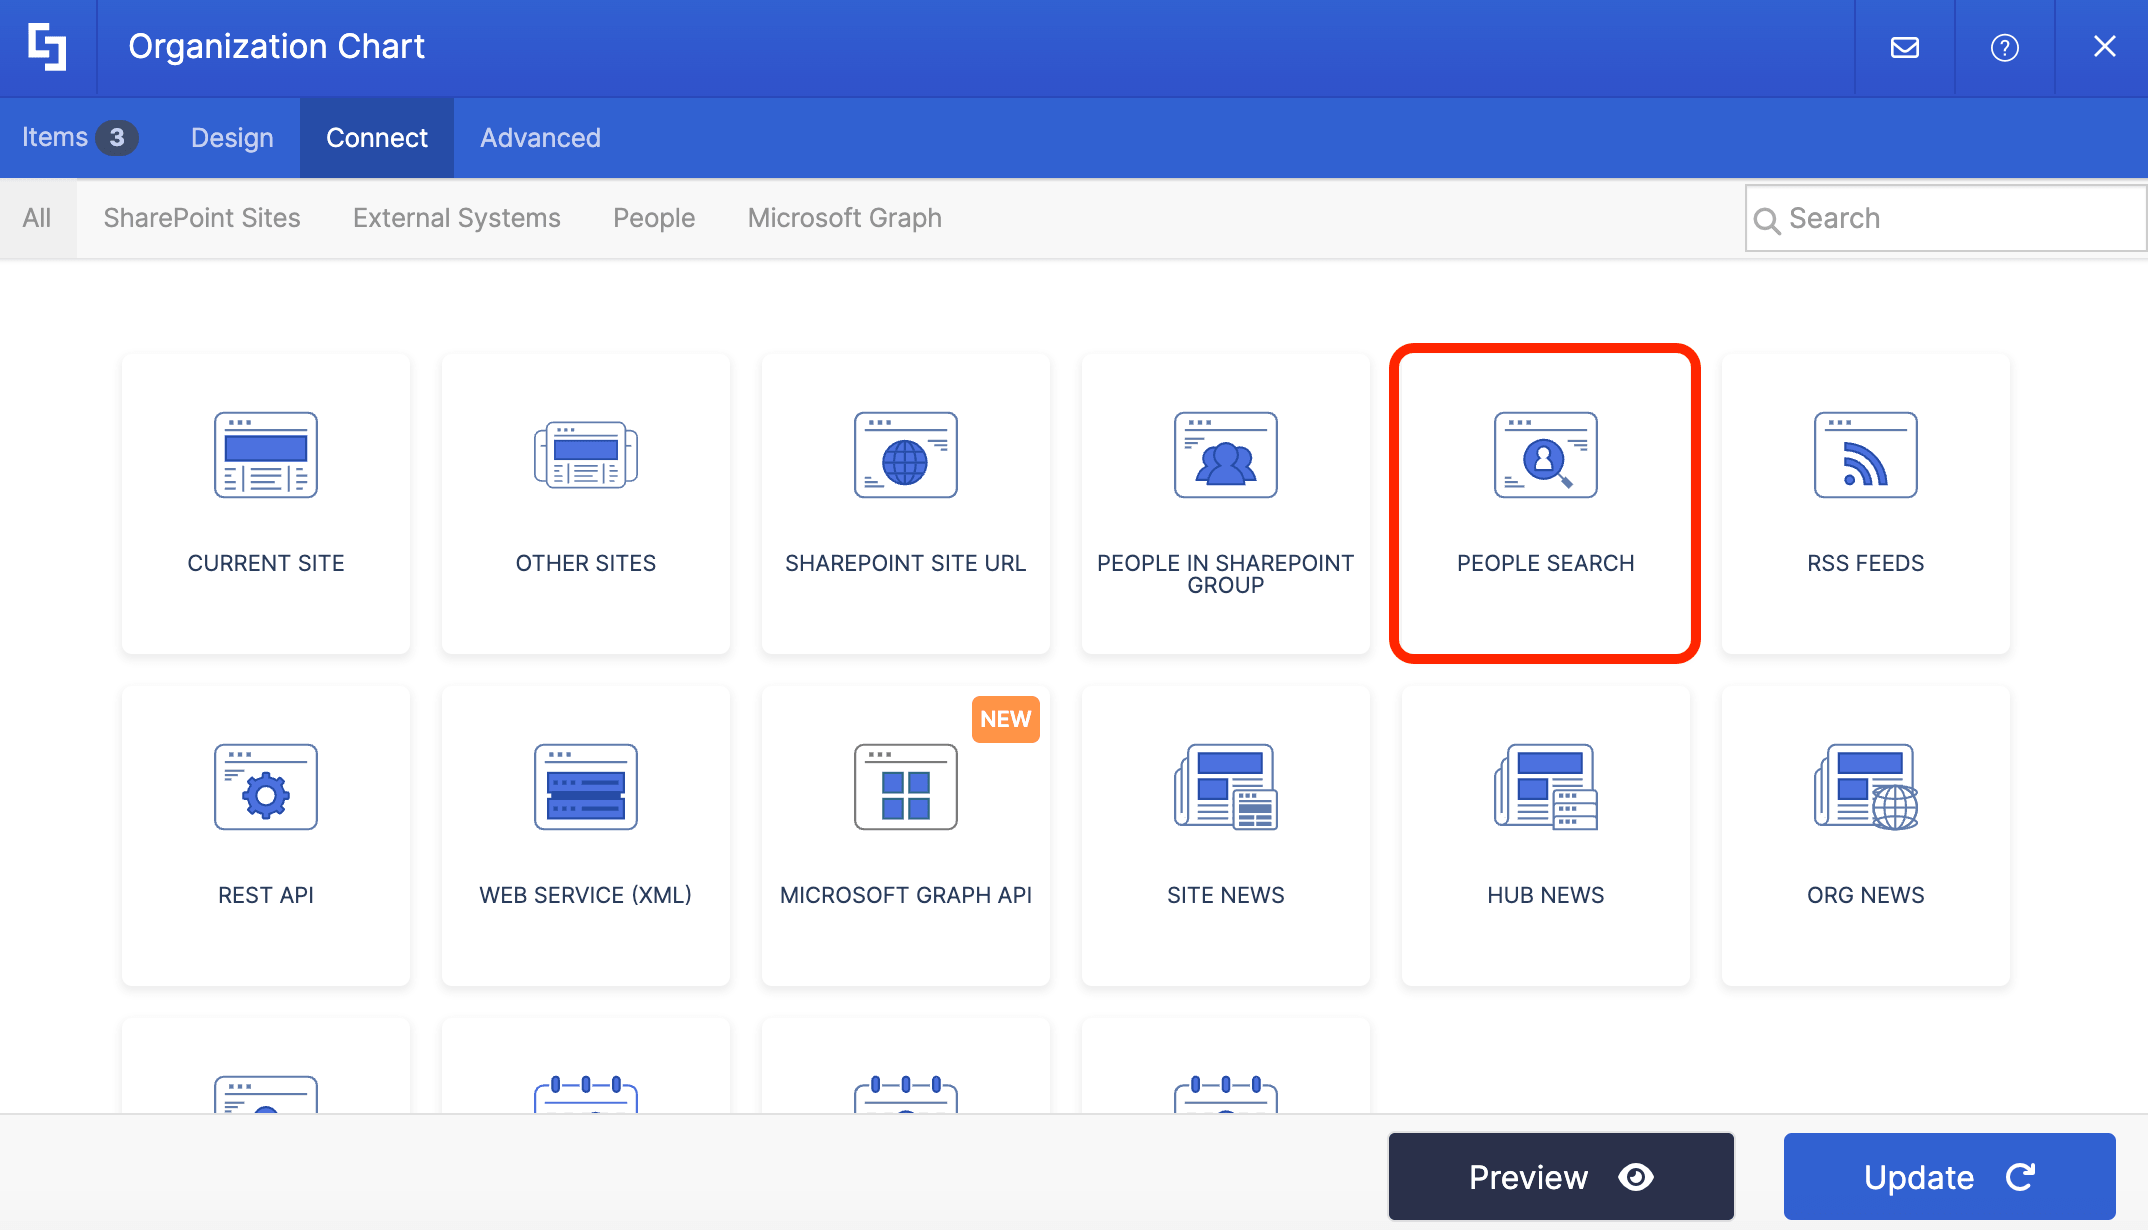
Choose the All People filter:
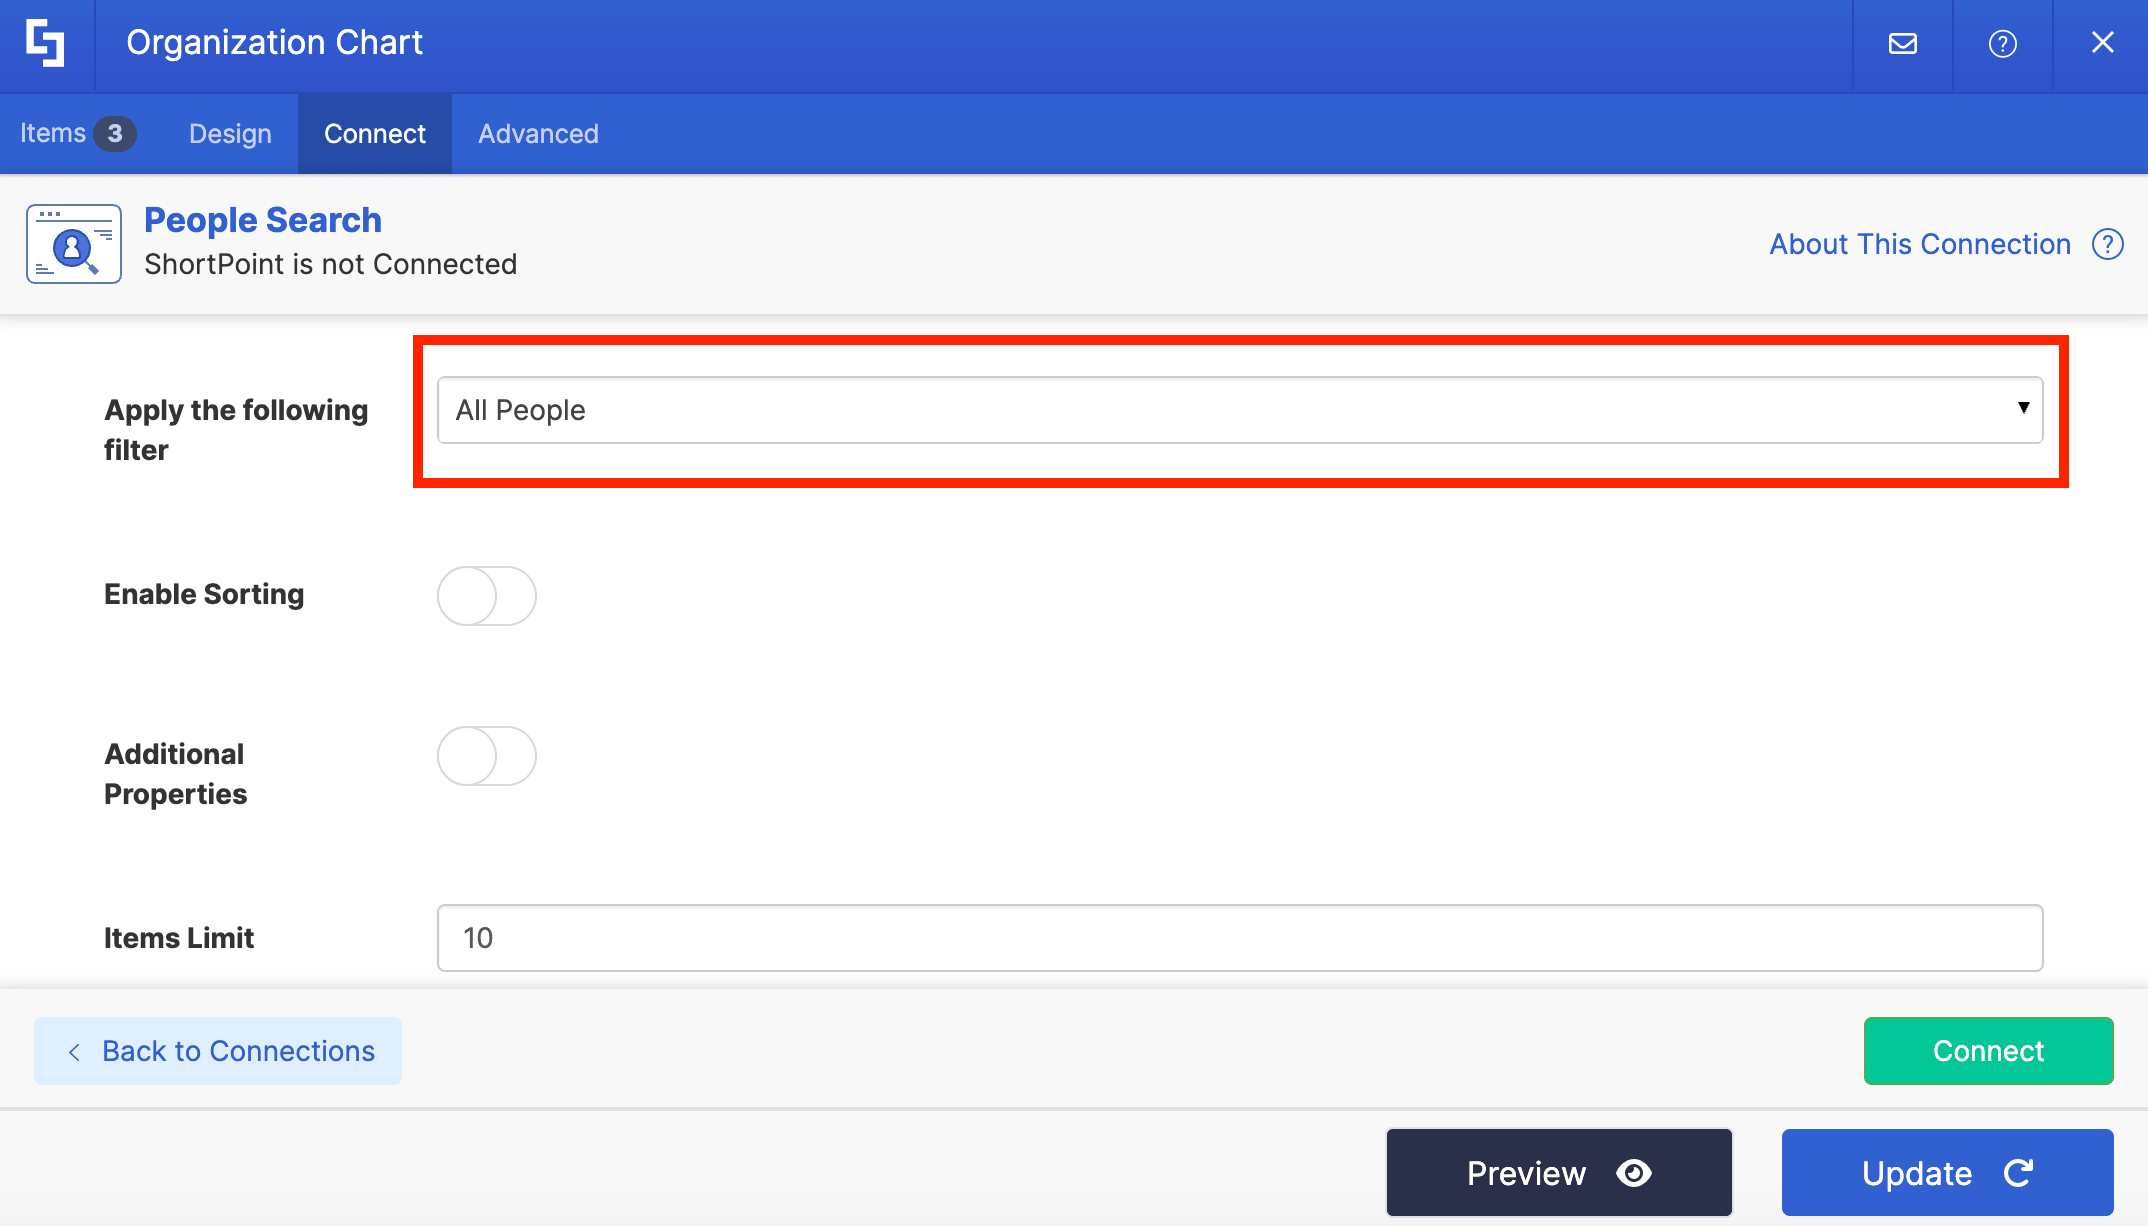
Then, toggle on Additional Properties:
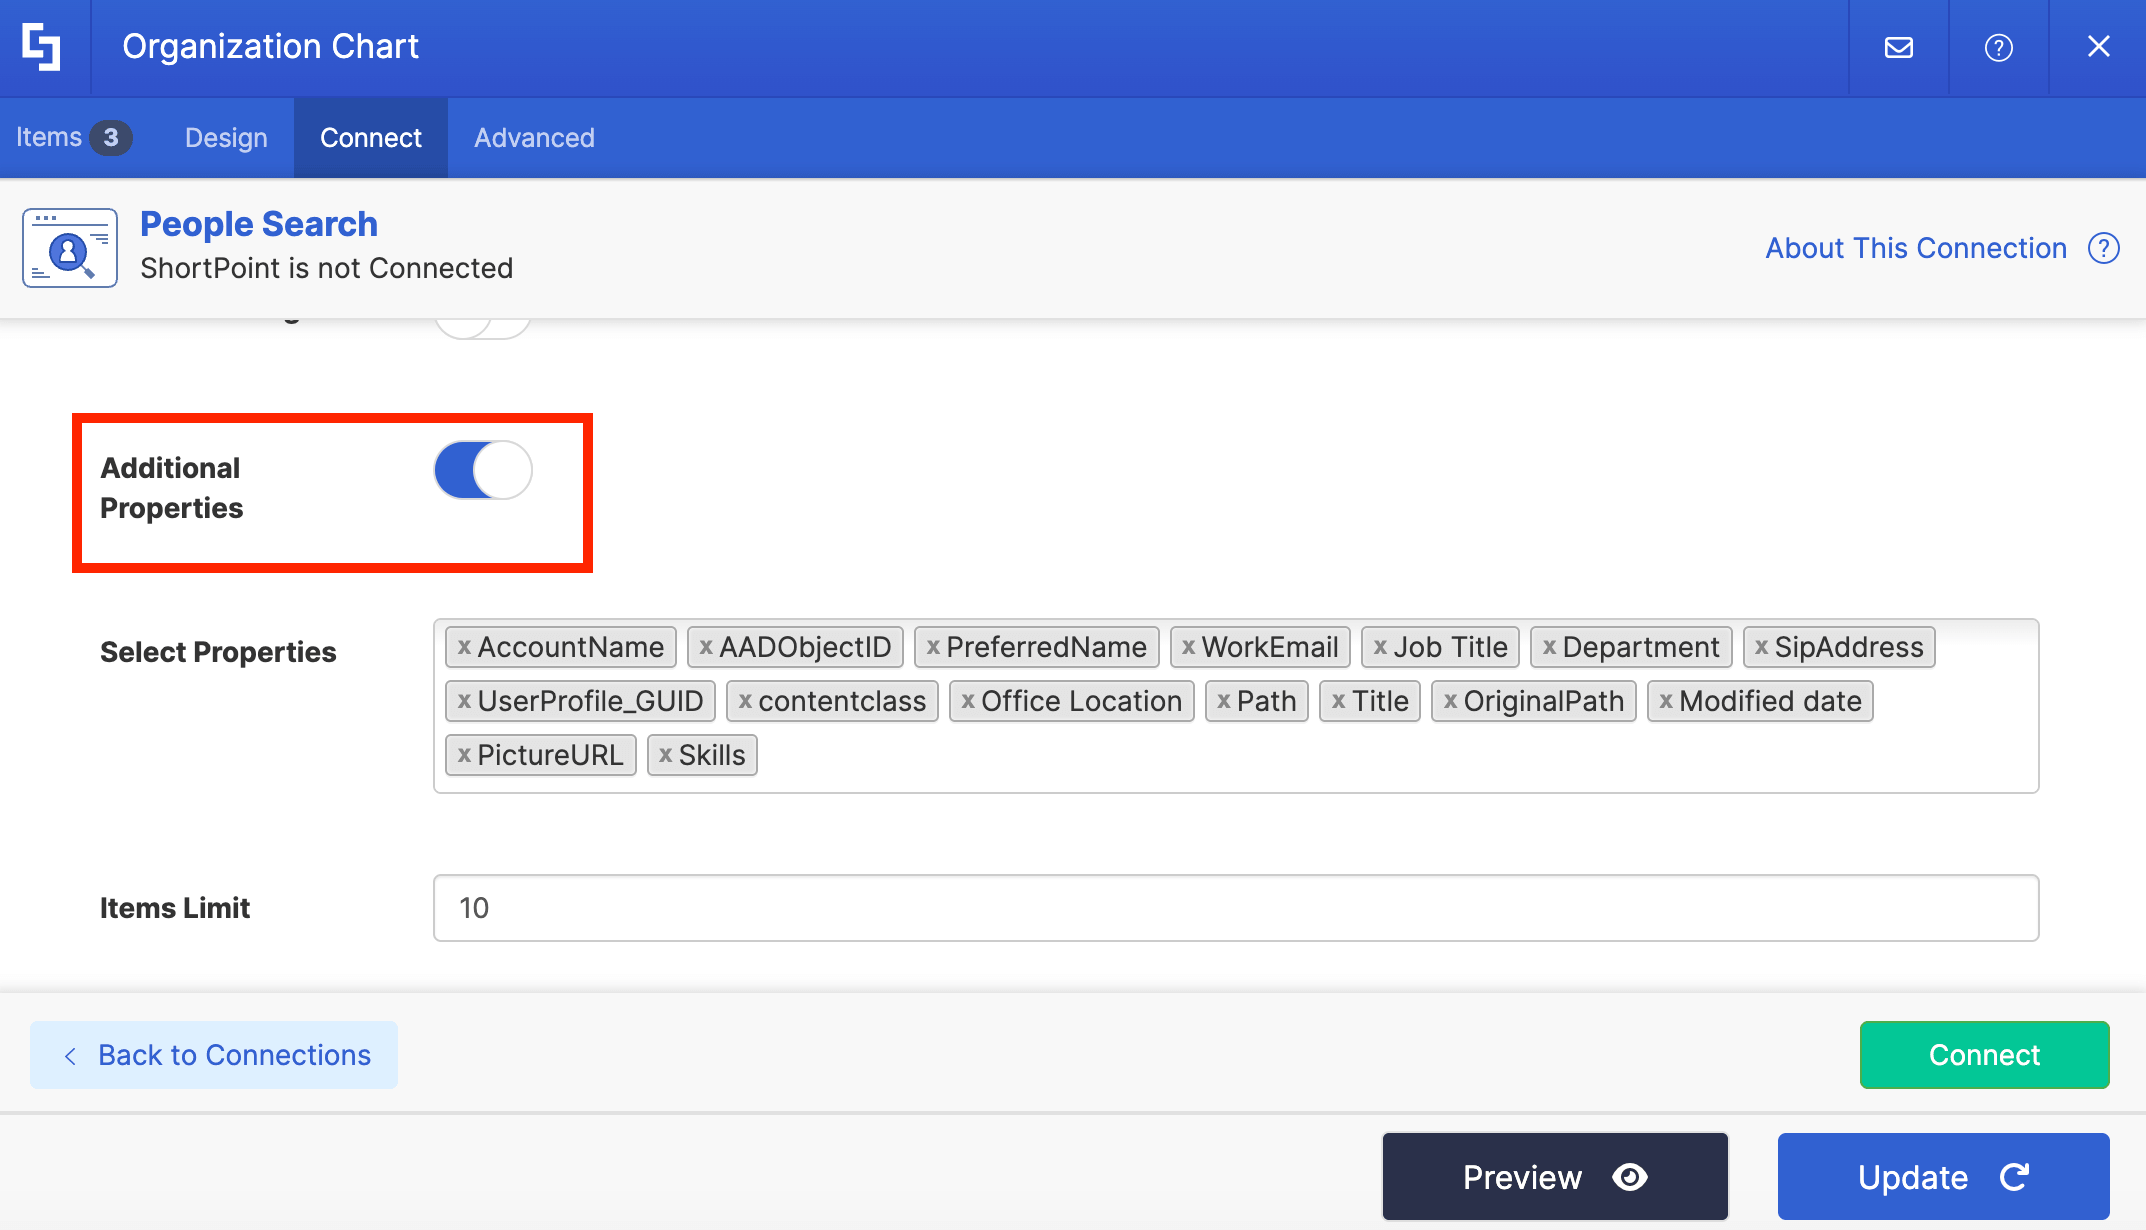
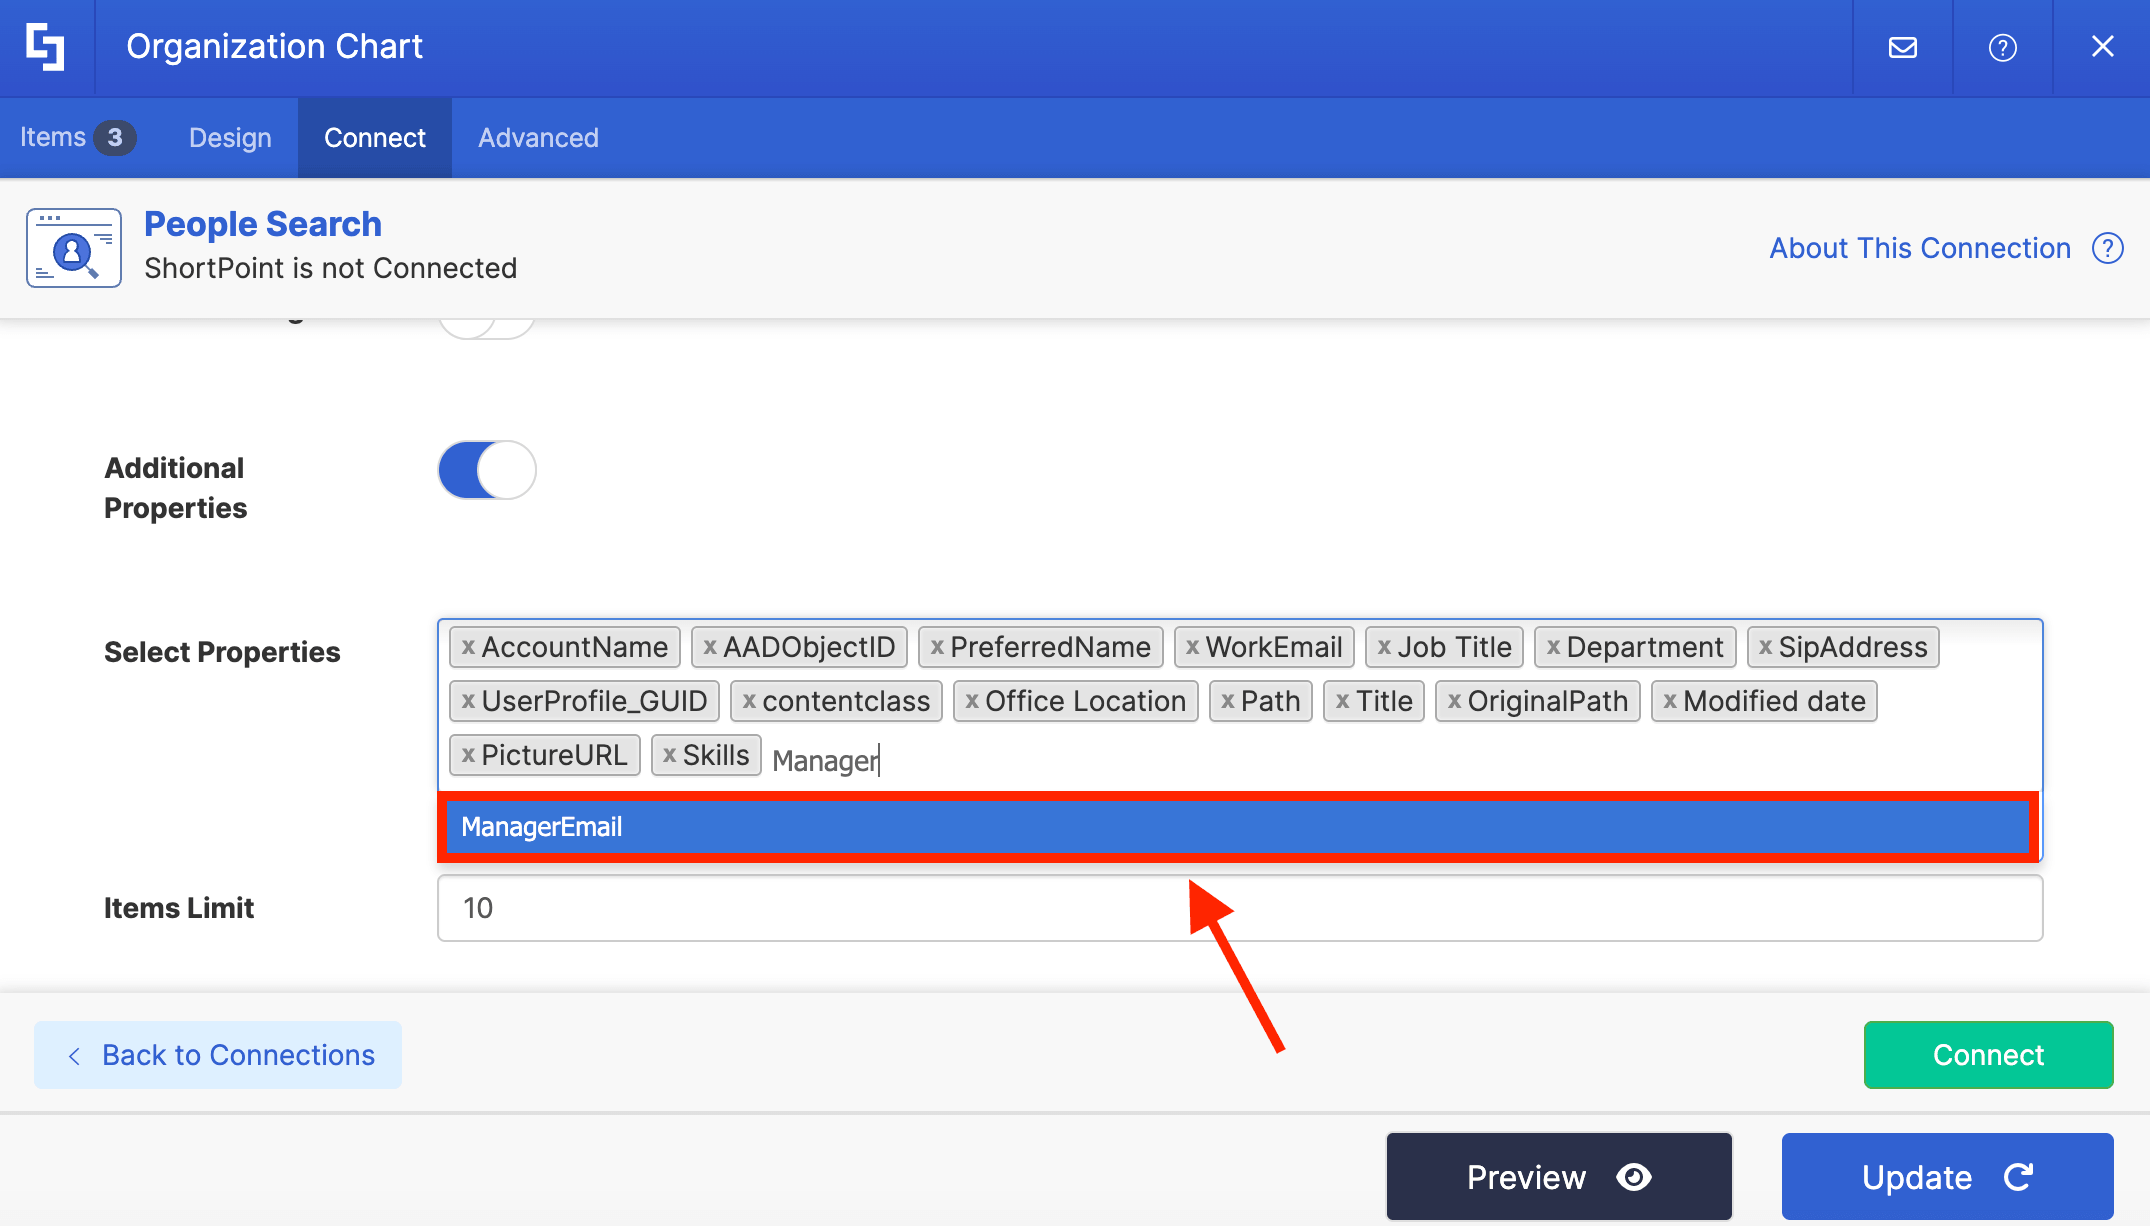
A Select Properties field will appear. Look for ManagerEmail and select it:
Then, set the Items Limit. Make sure that it covers the number of people in your organization.
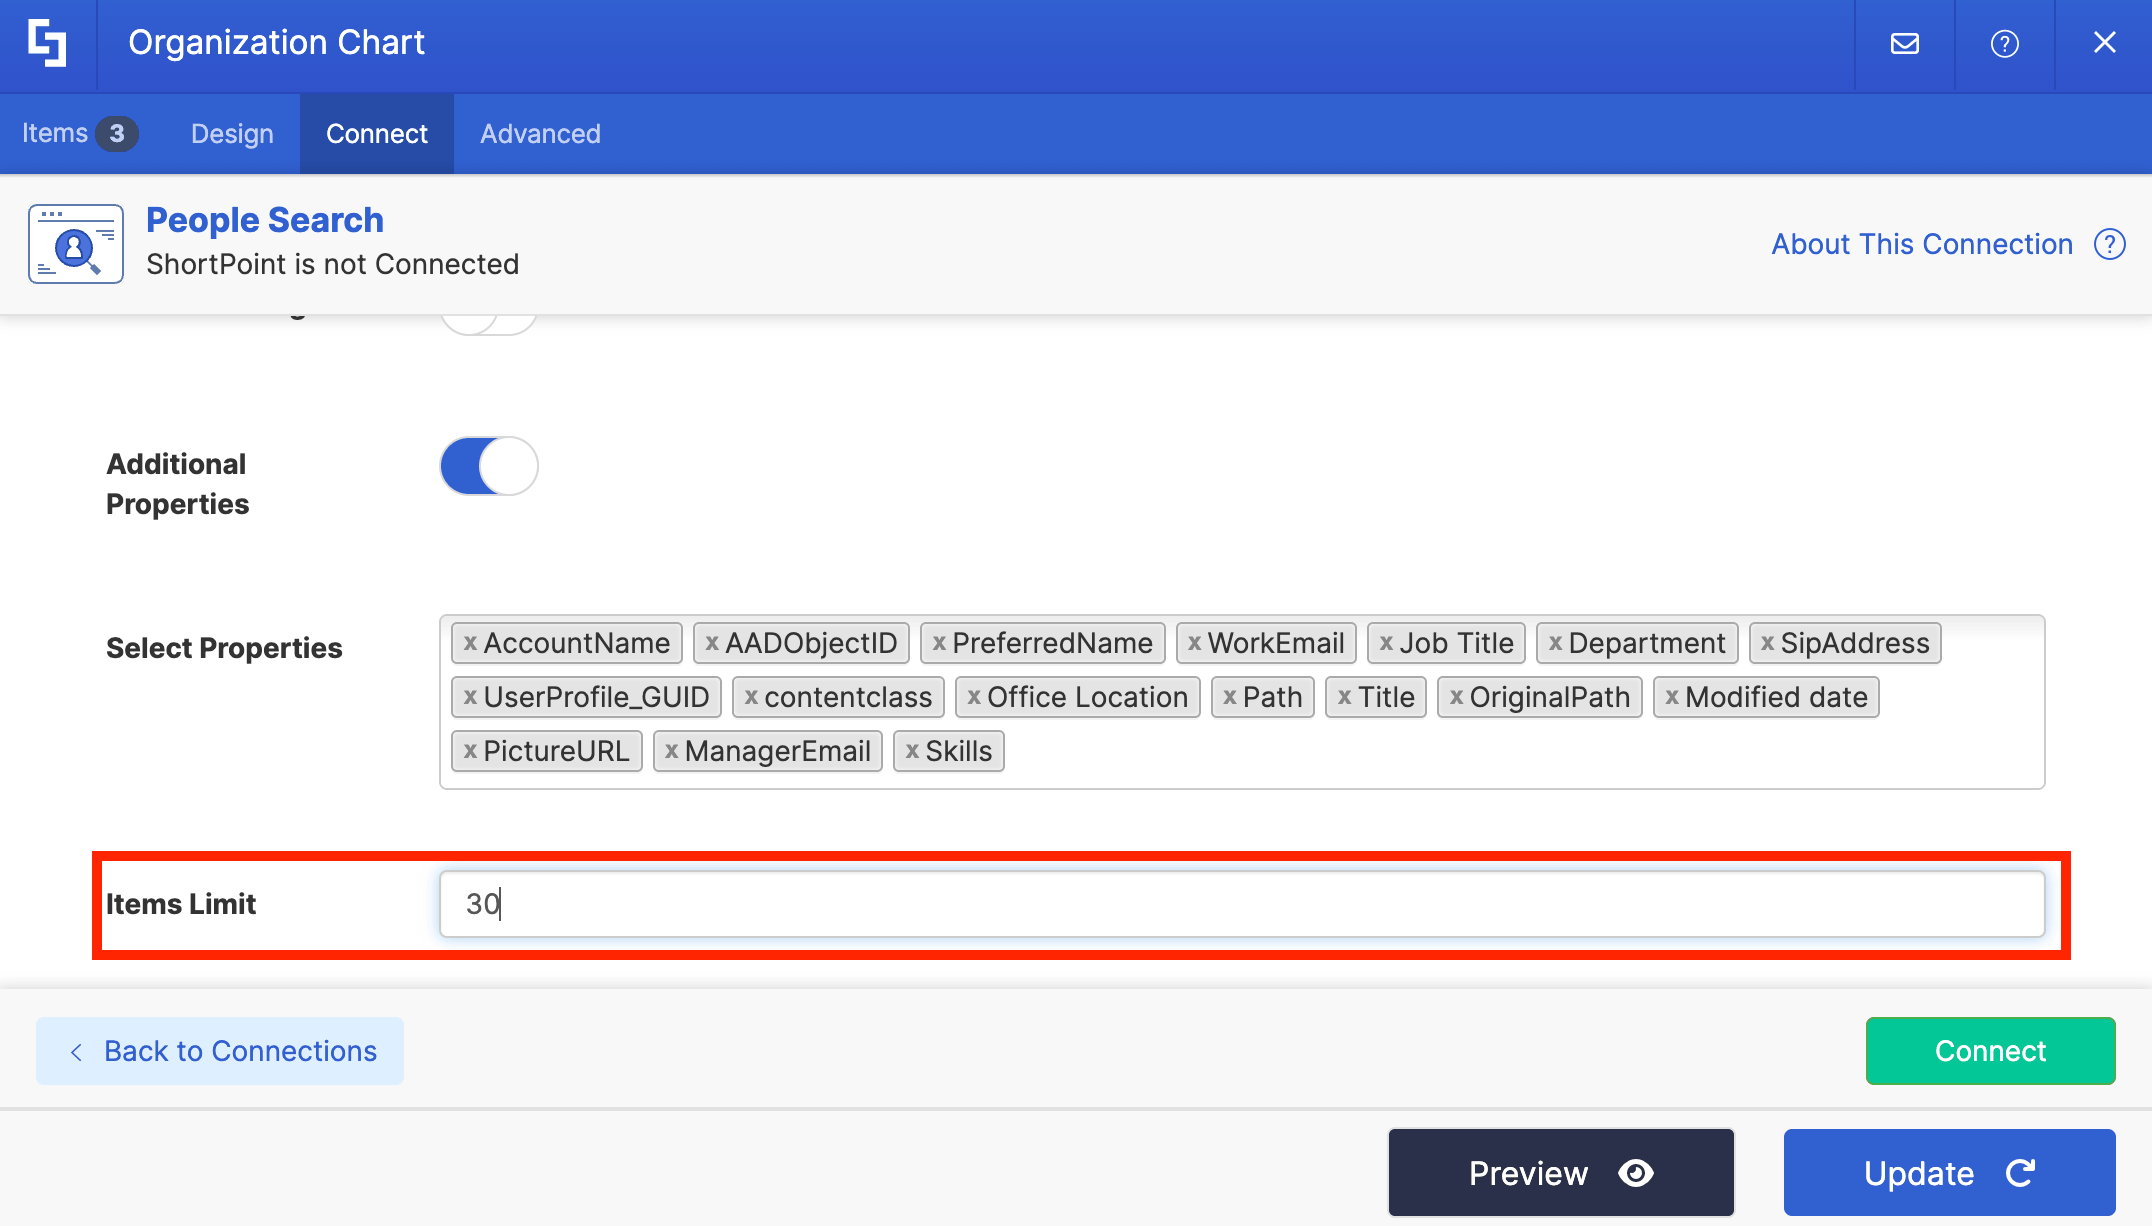
Click Connect:
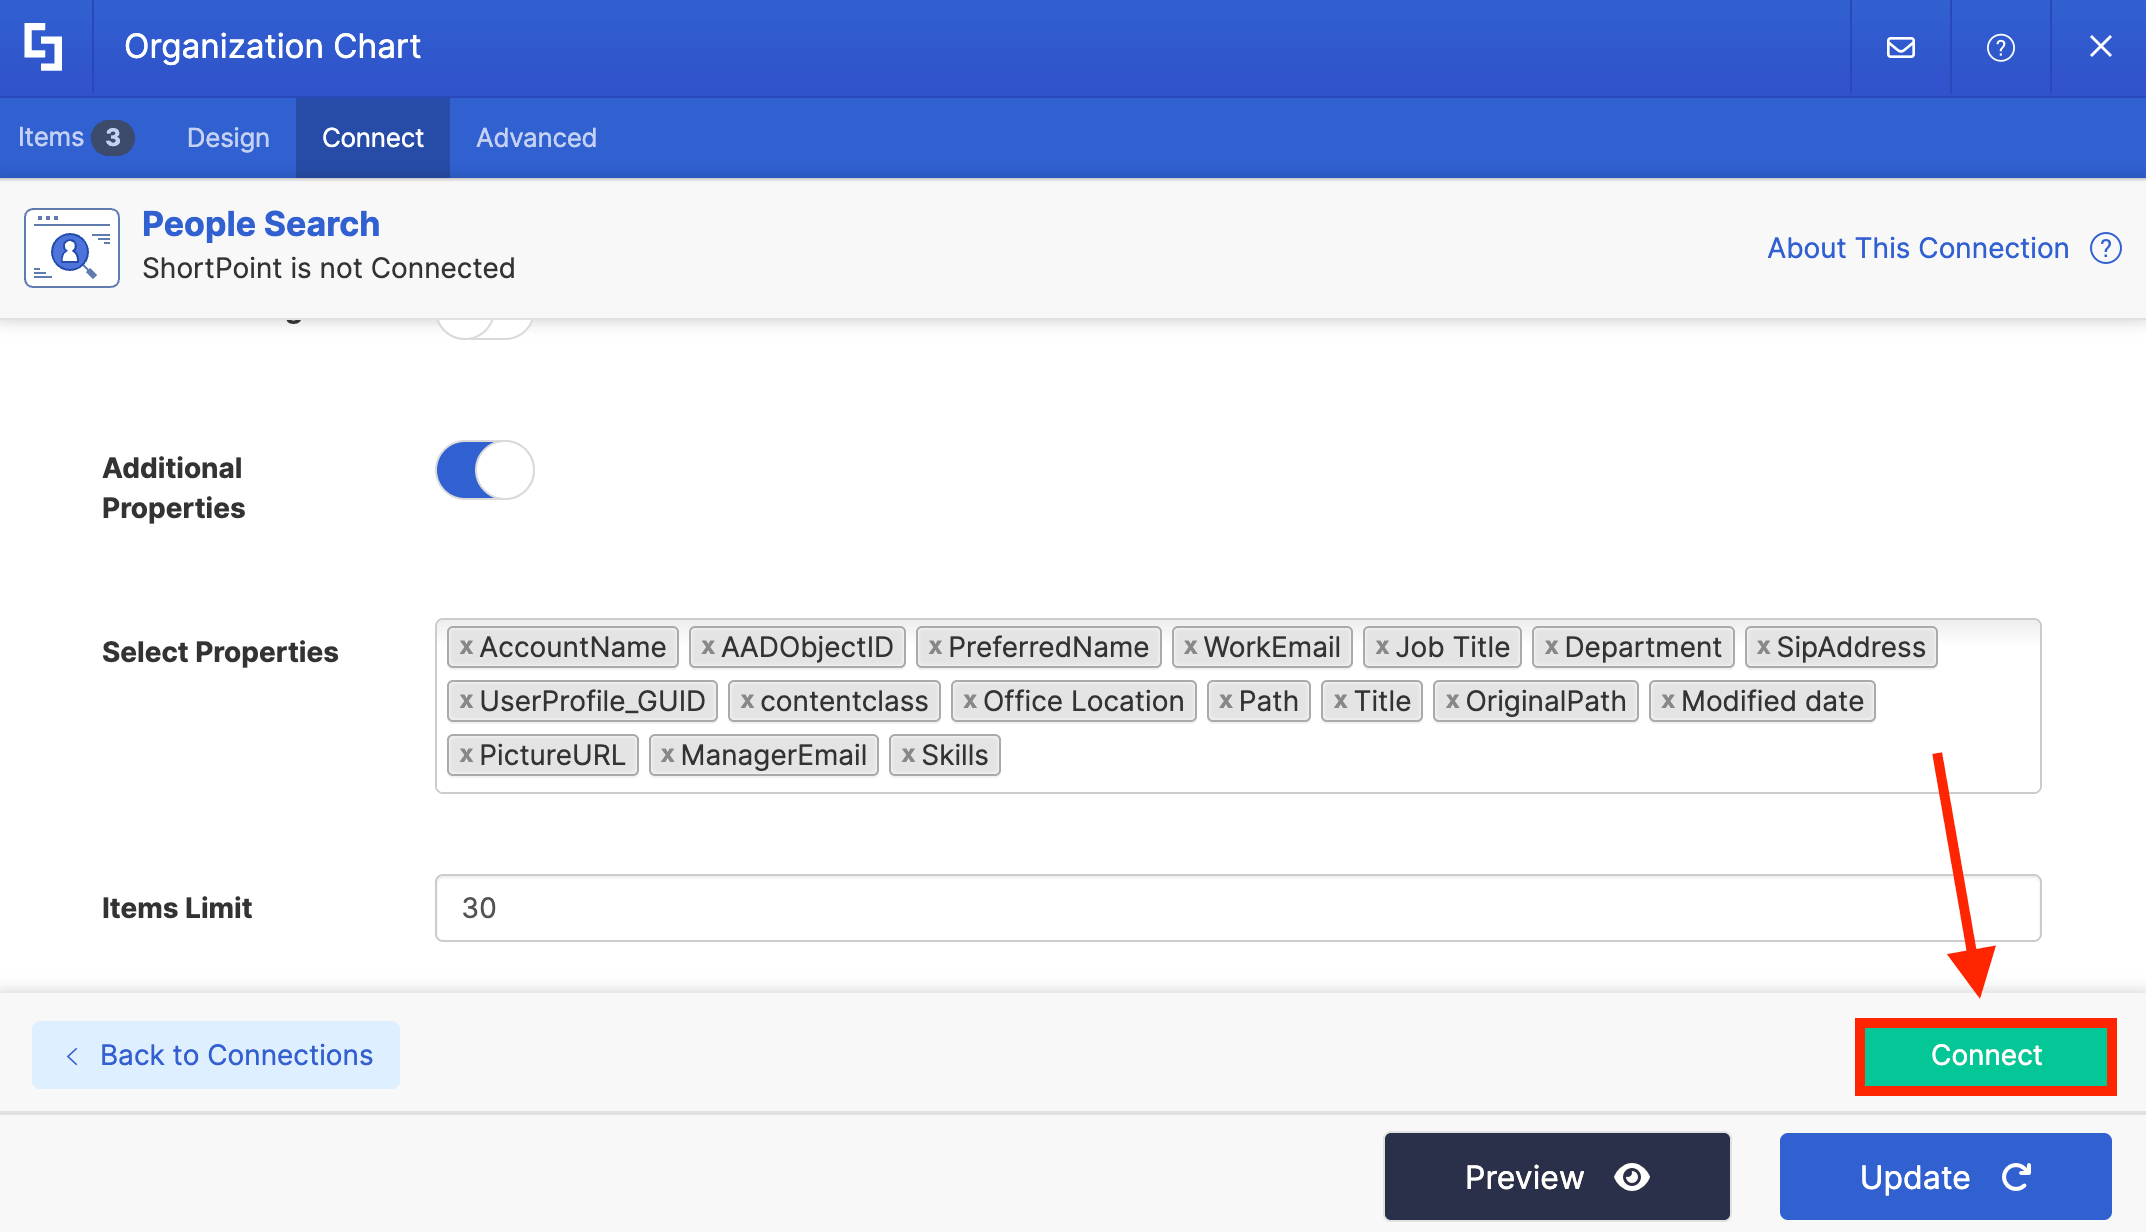
Step 4: Map Properties
Go to the Items tab:
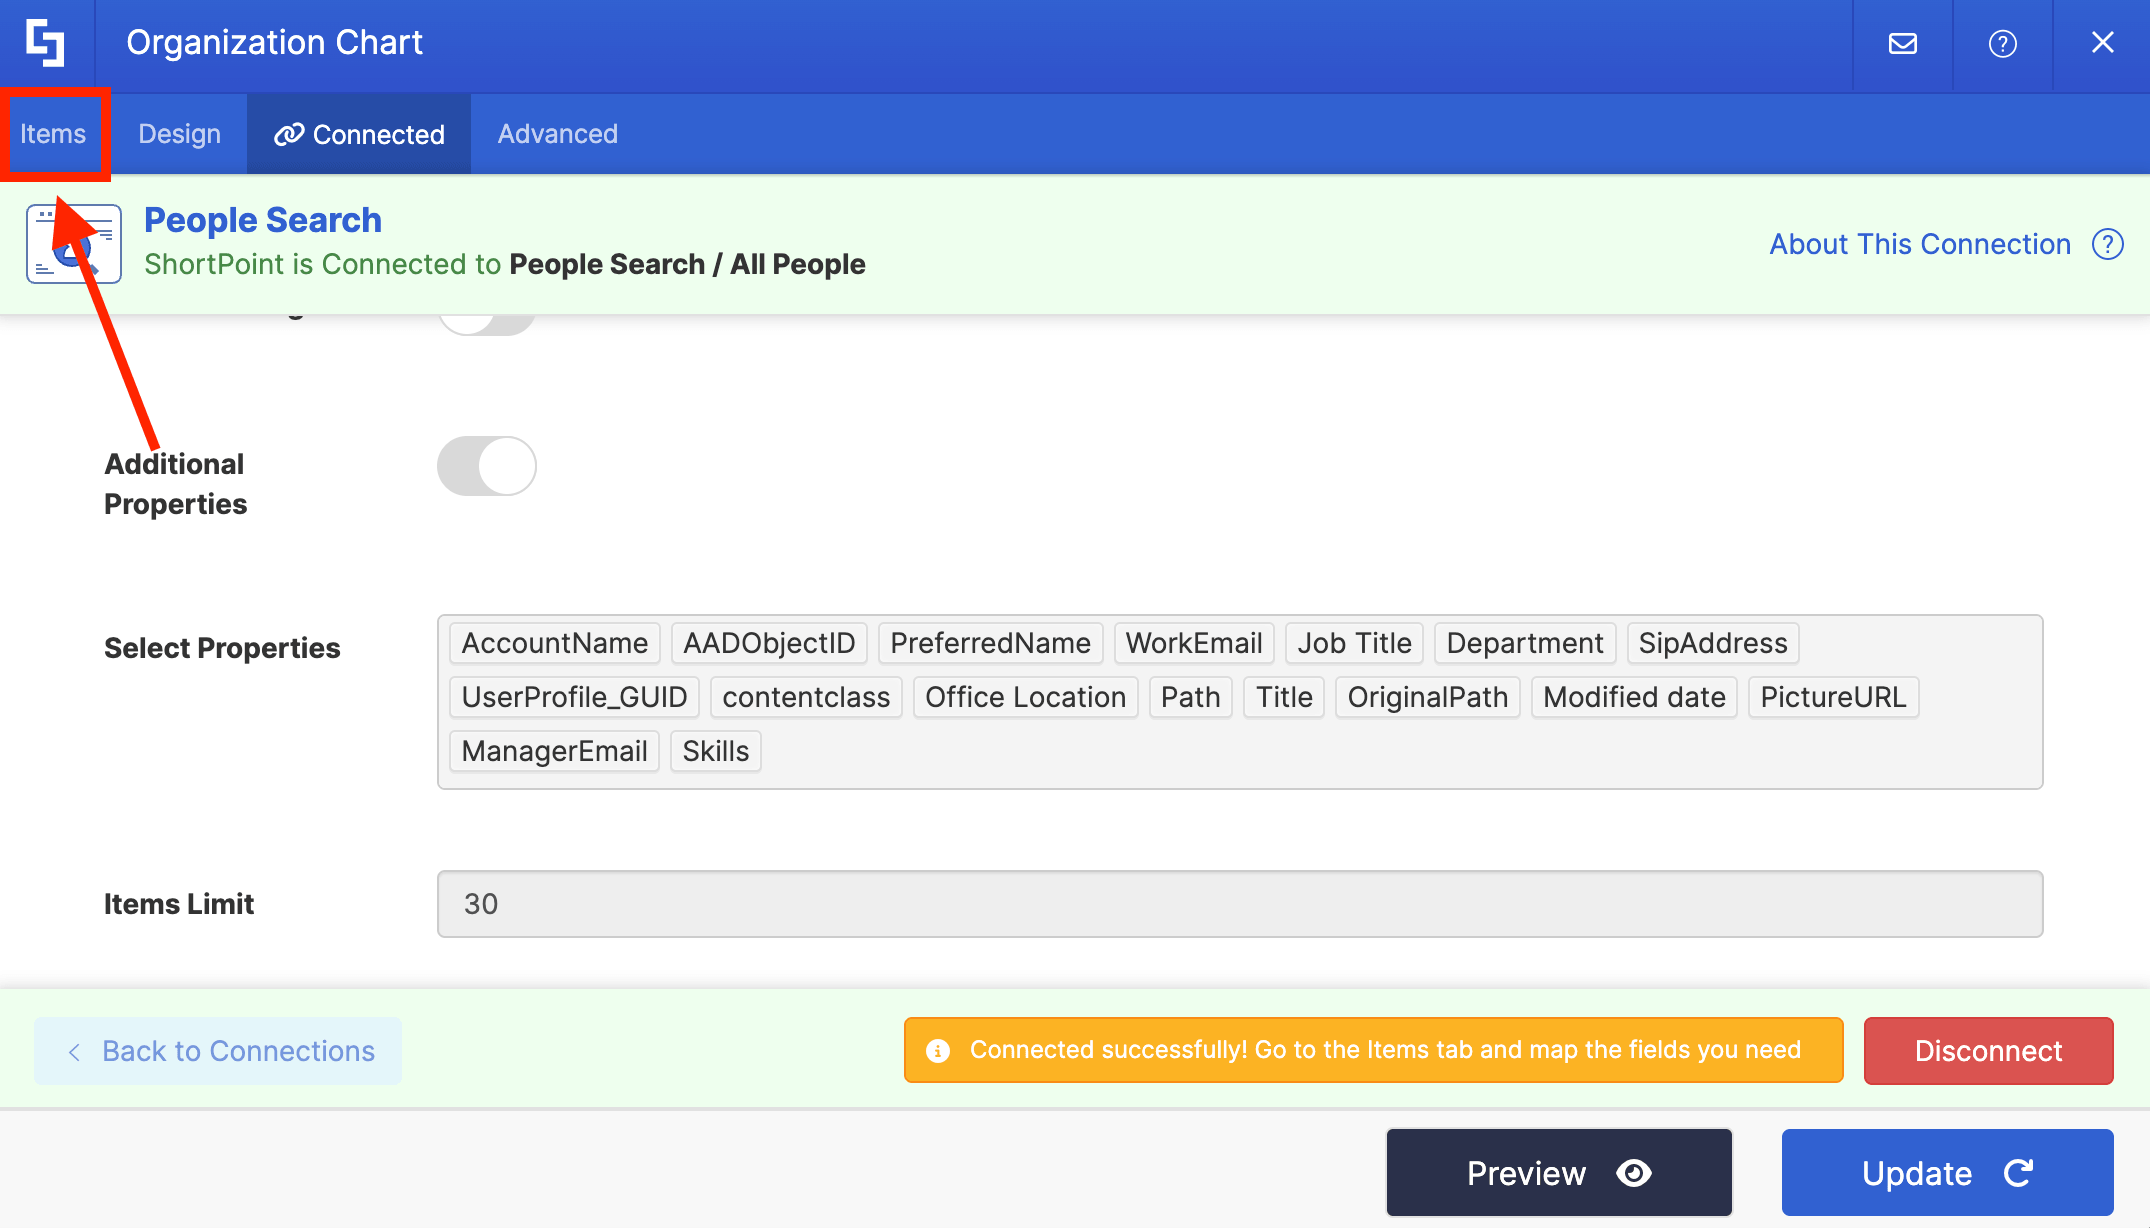
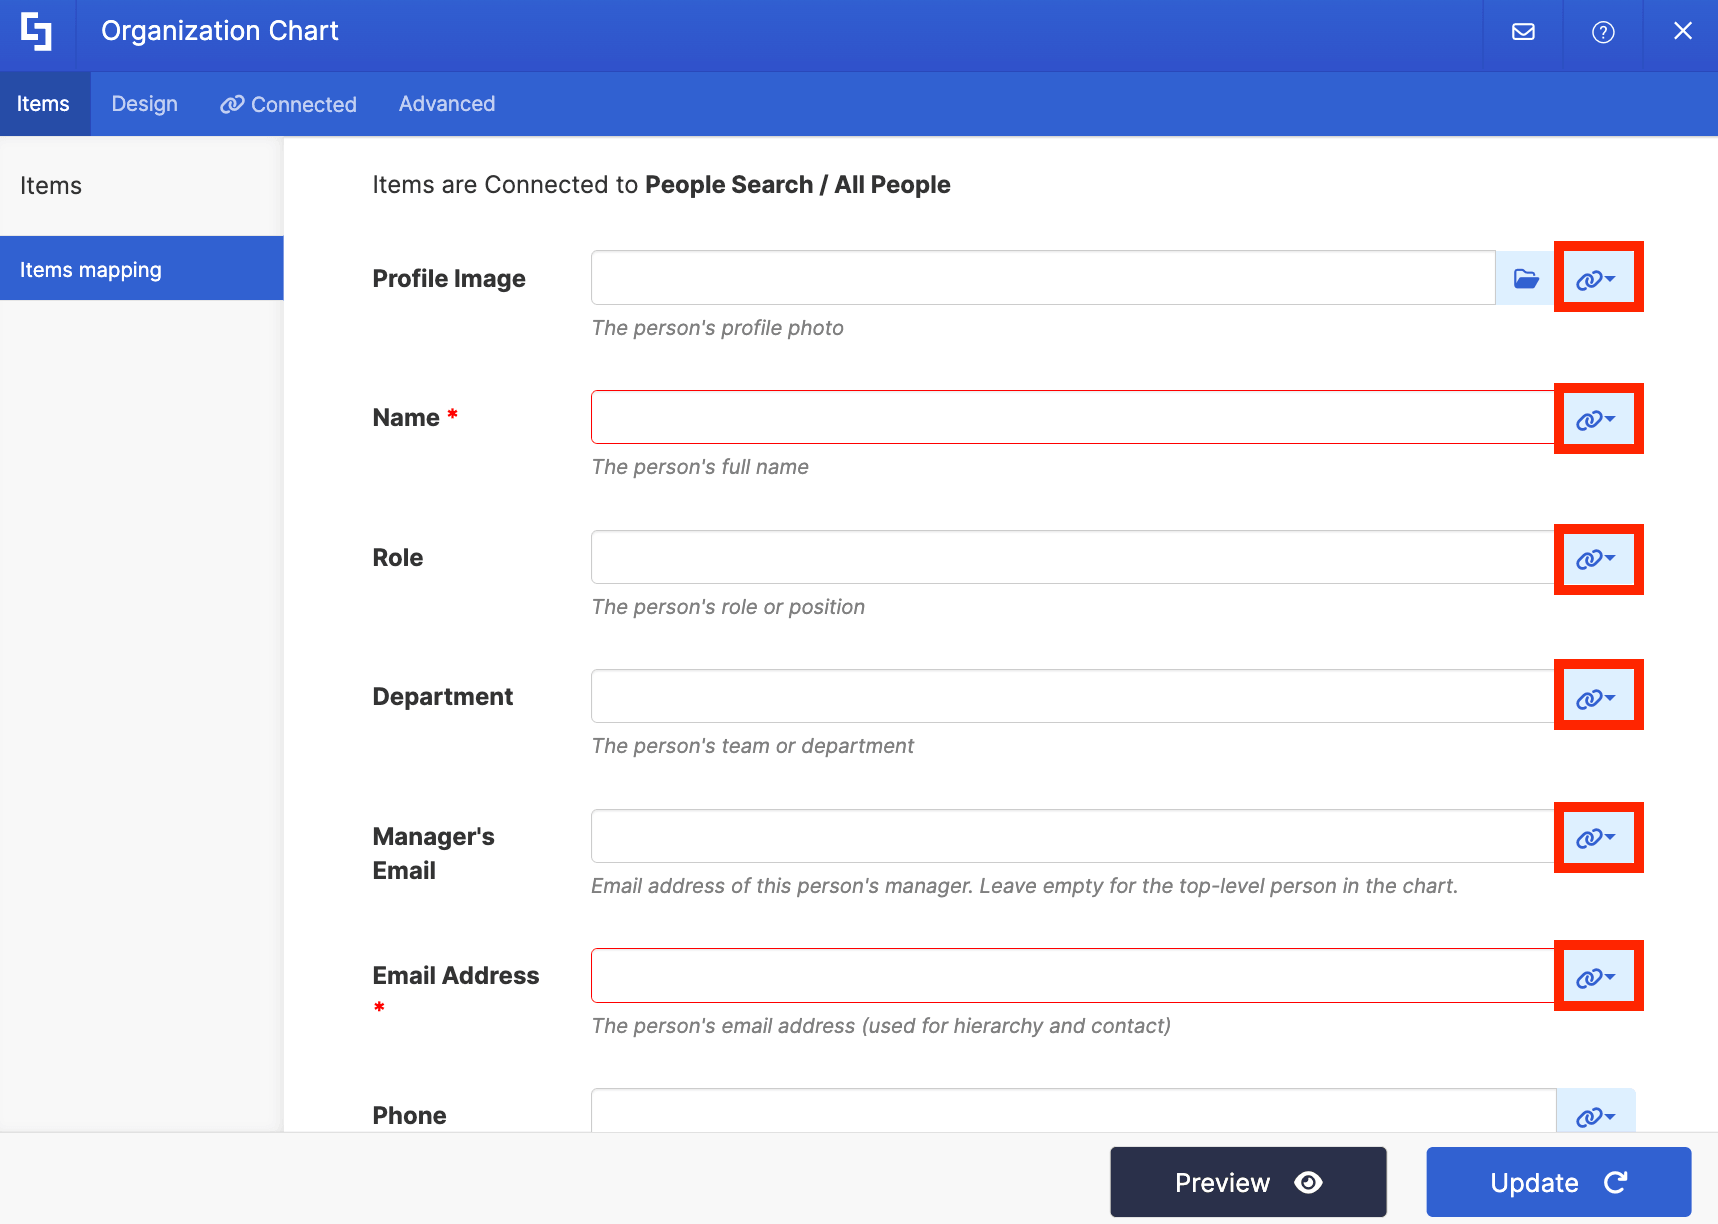
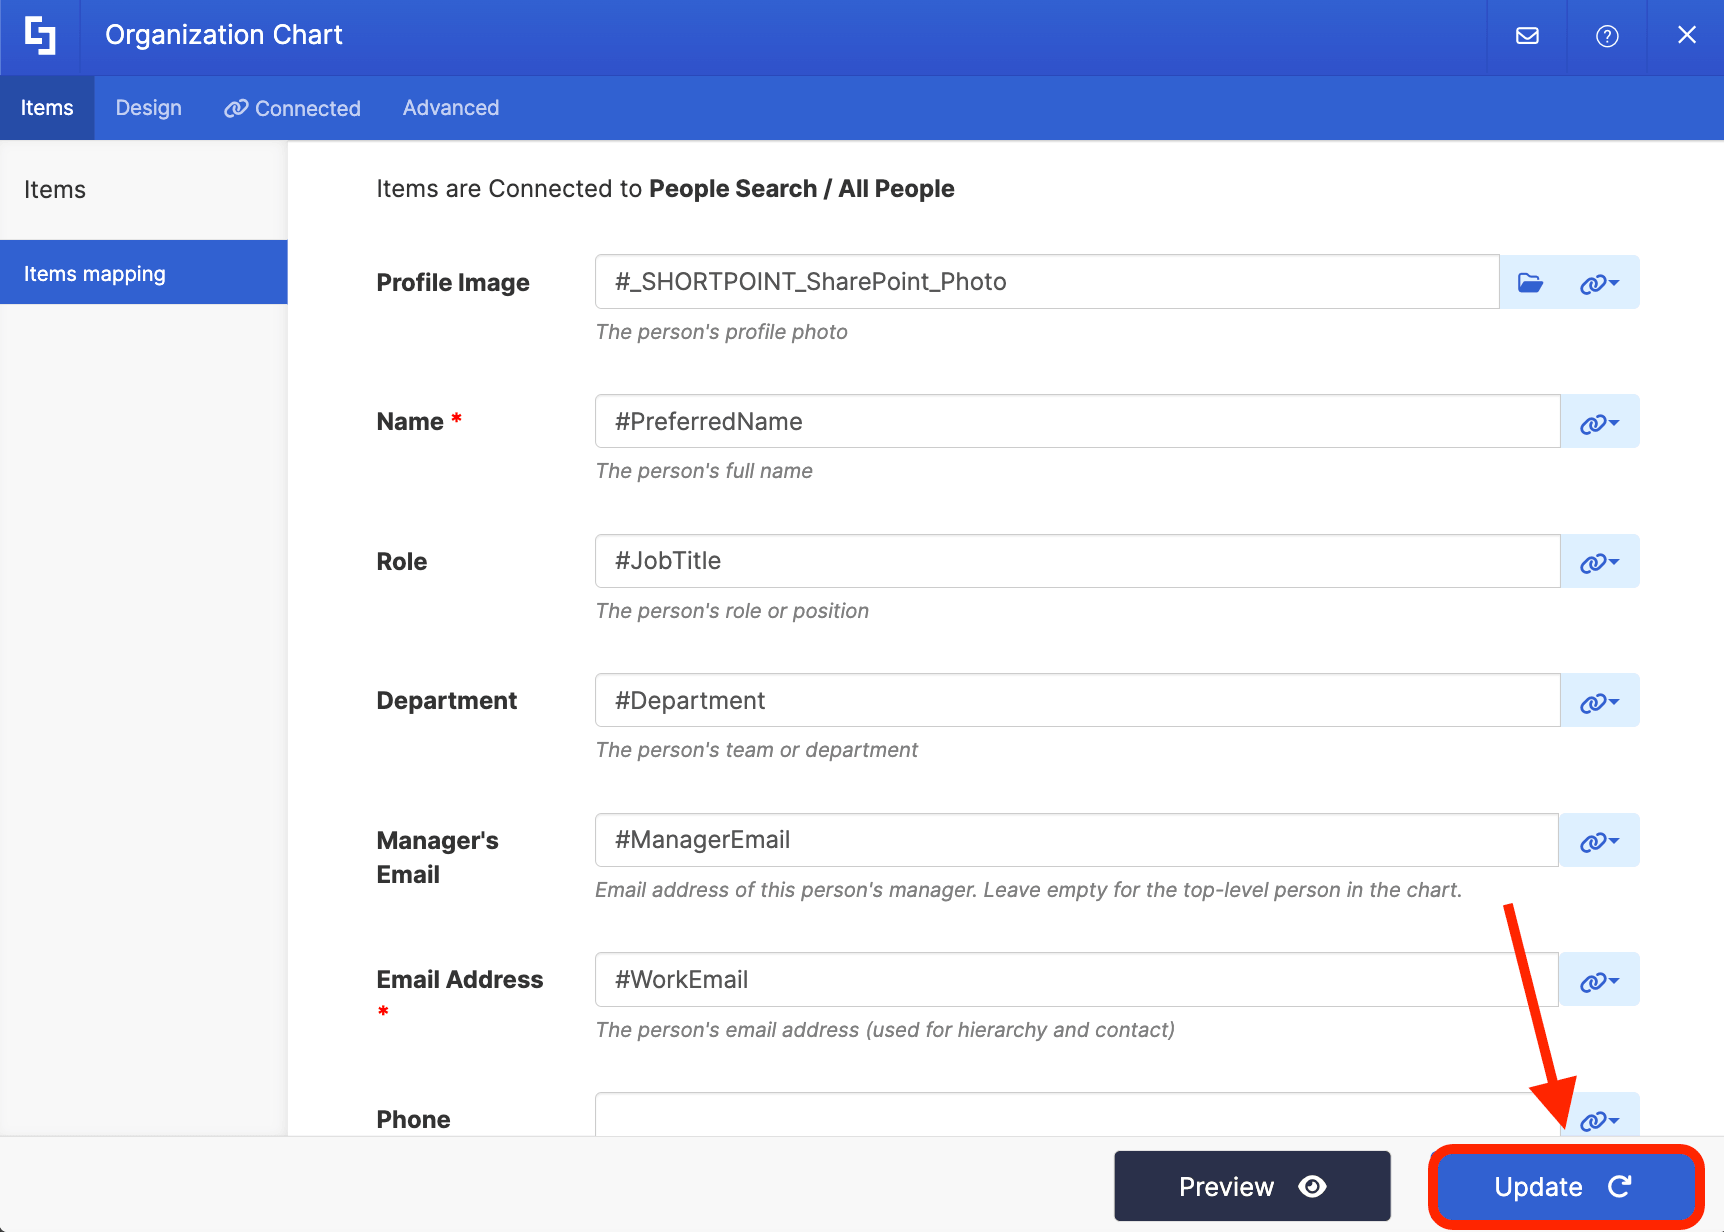
Use the link icon to map the properties you want shown:
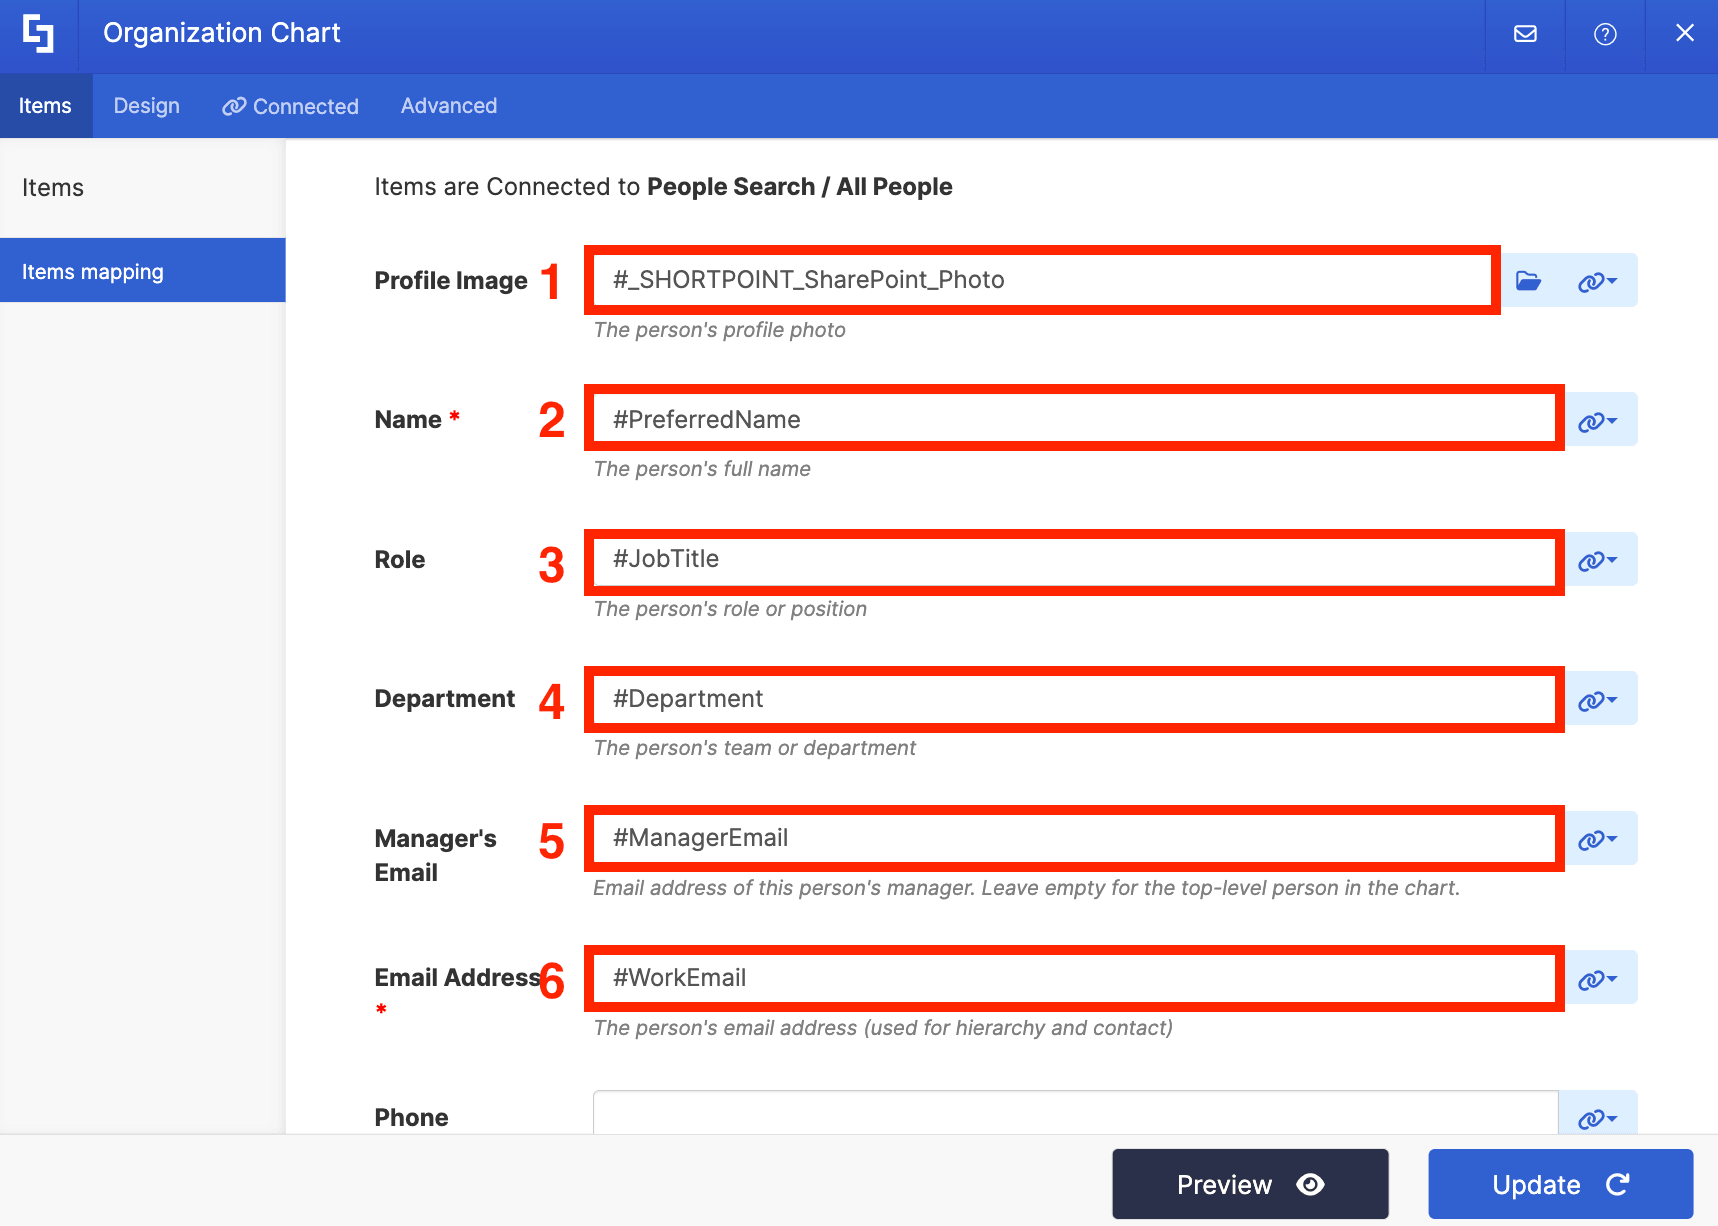
You can map any property you want or copy the mapped properties below. Just make sure to add #ManagerEmail in the Manager’s Email field and #WorkEmail in the Email Address field. These will determine the hierarchy of the org chart.
- #_SHORTPOINT_SharePoint_Photo - shows the image of the employee.
- #PreferredName - shows the name of the employee.
- #JobTitle - shows the work title of the employee.
- #Department - shows the department of the employee.
- #ManagerEmail - plots the email address of the manager. This is essential as this will determine the structure of your org chart.
- #WorkEmail - shows the email address of the employee.
Once done, click Update:
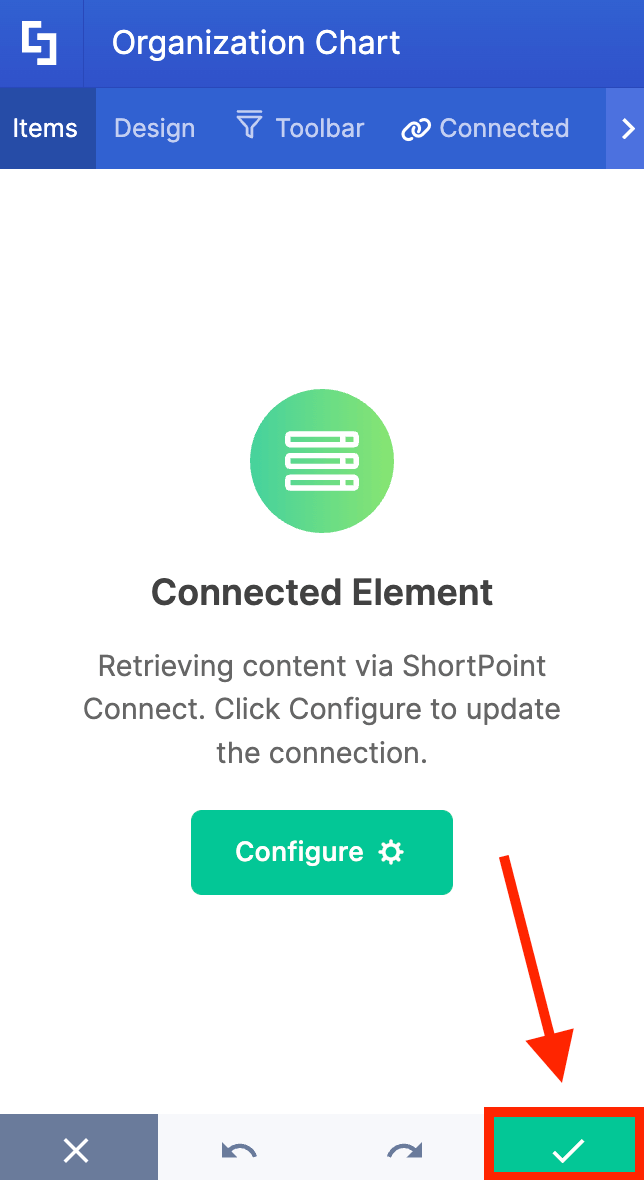
Click the green checkmark:
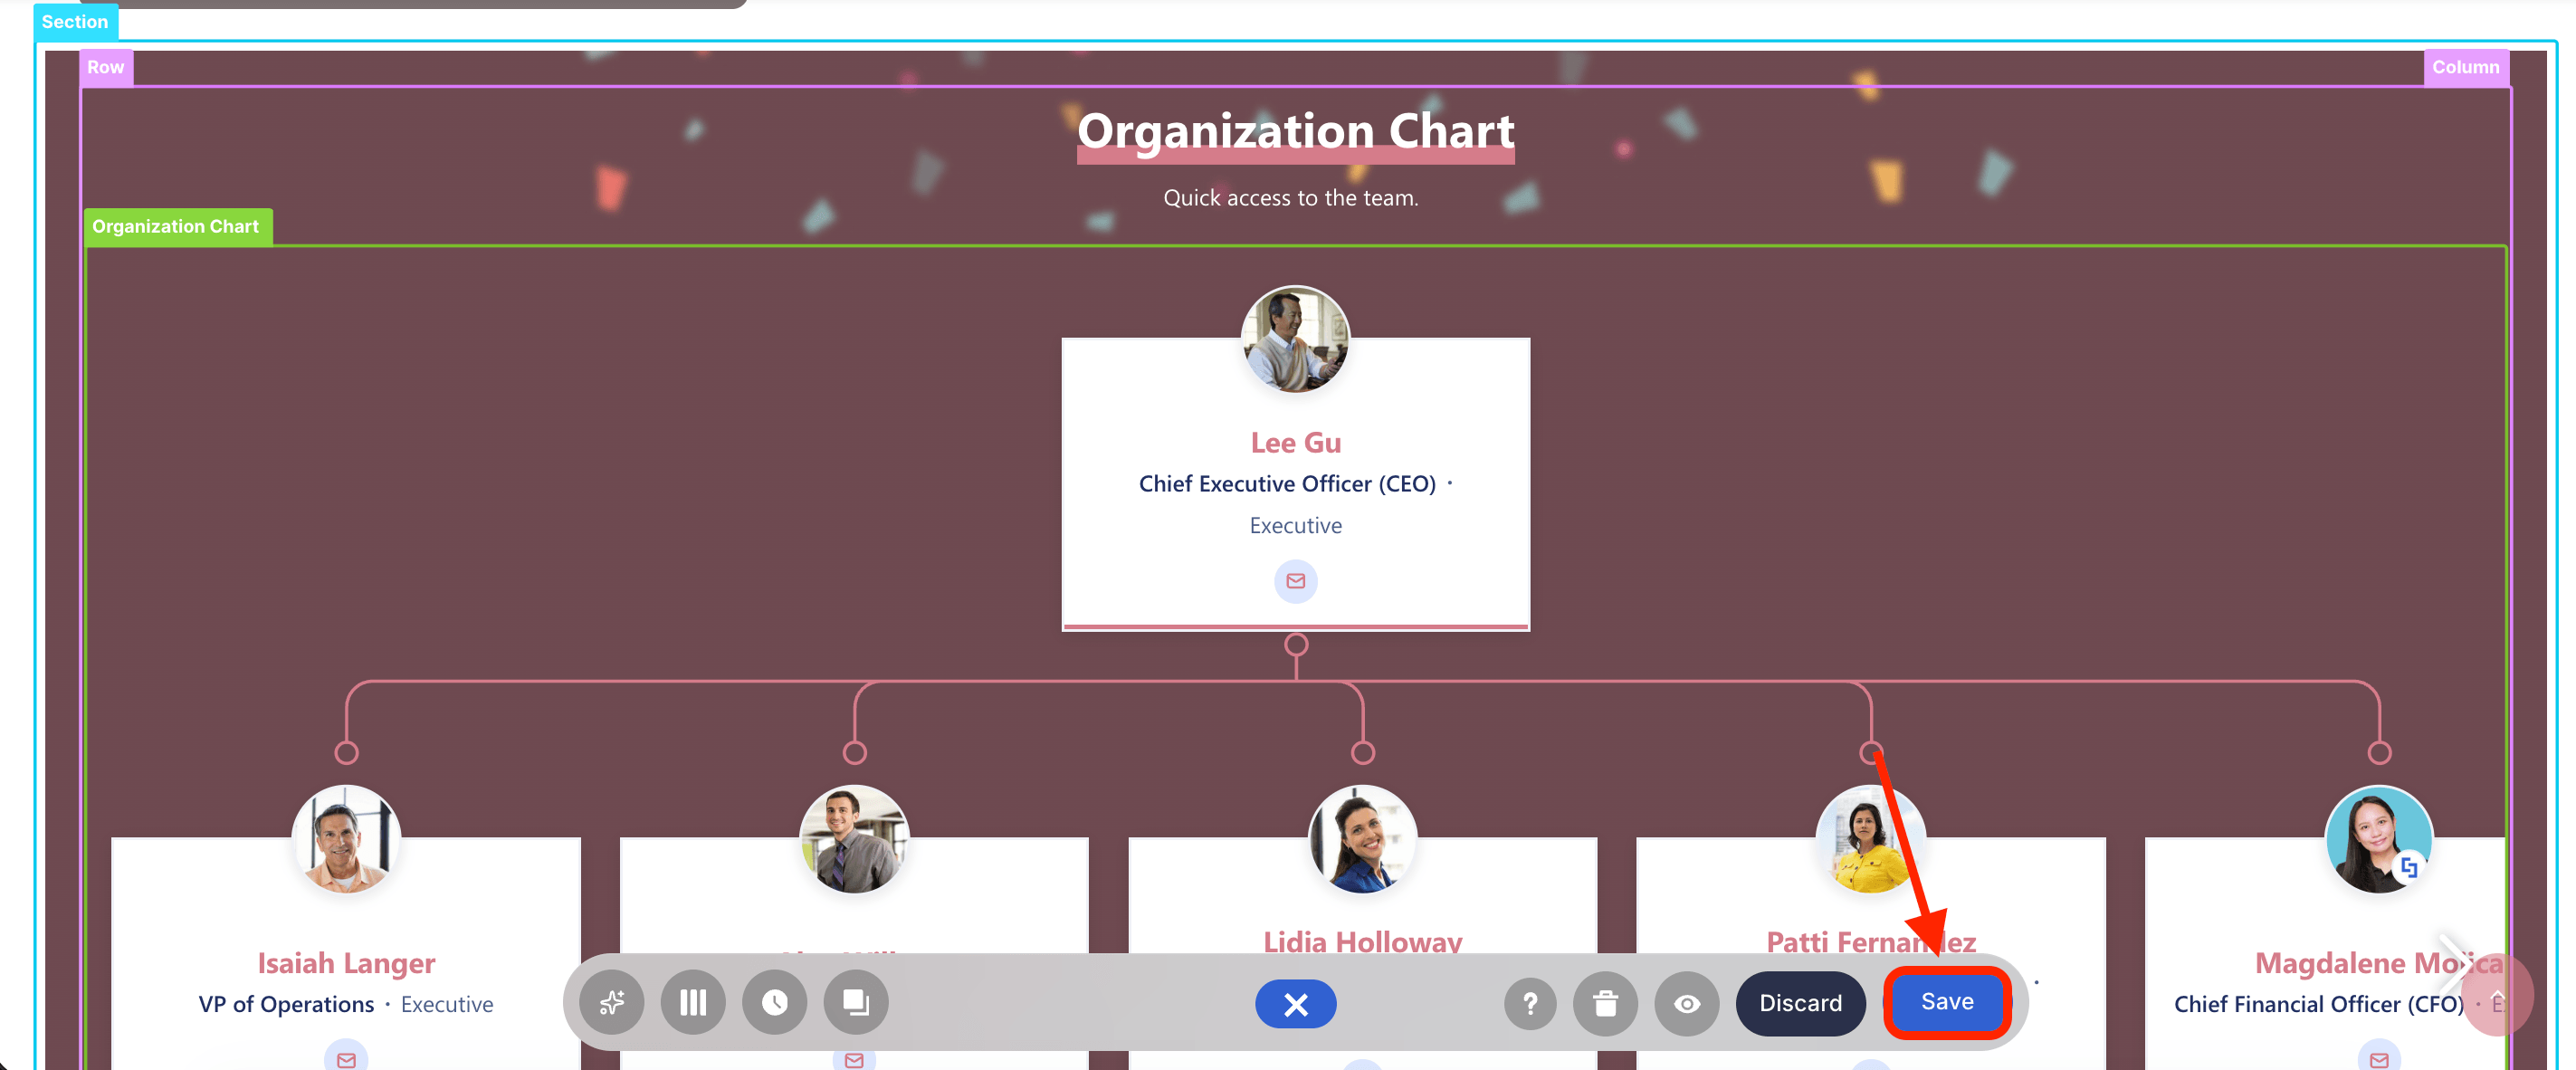
Step 5: Save
Save your changes:
Publish your page:
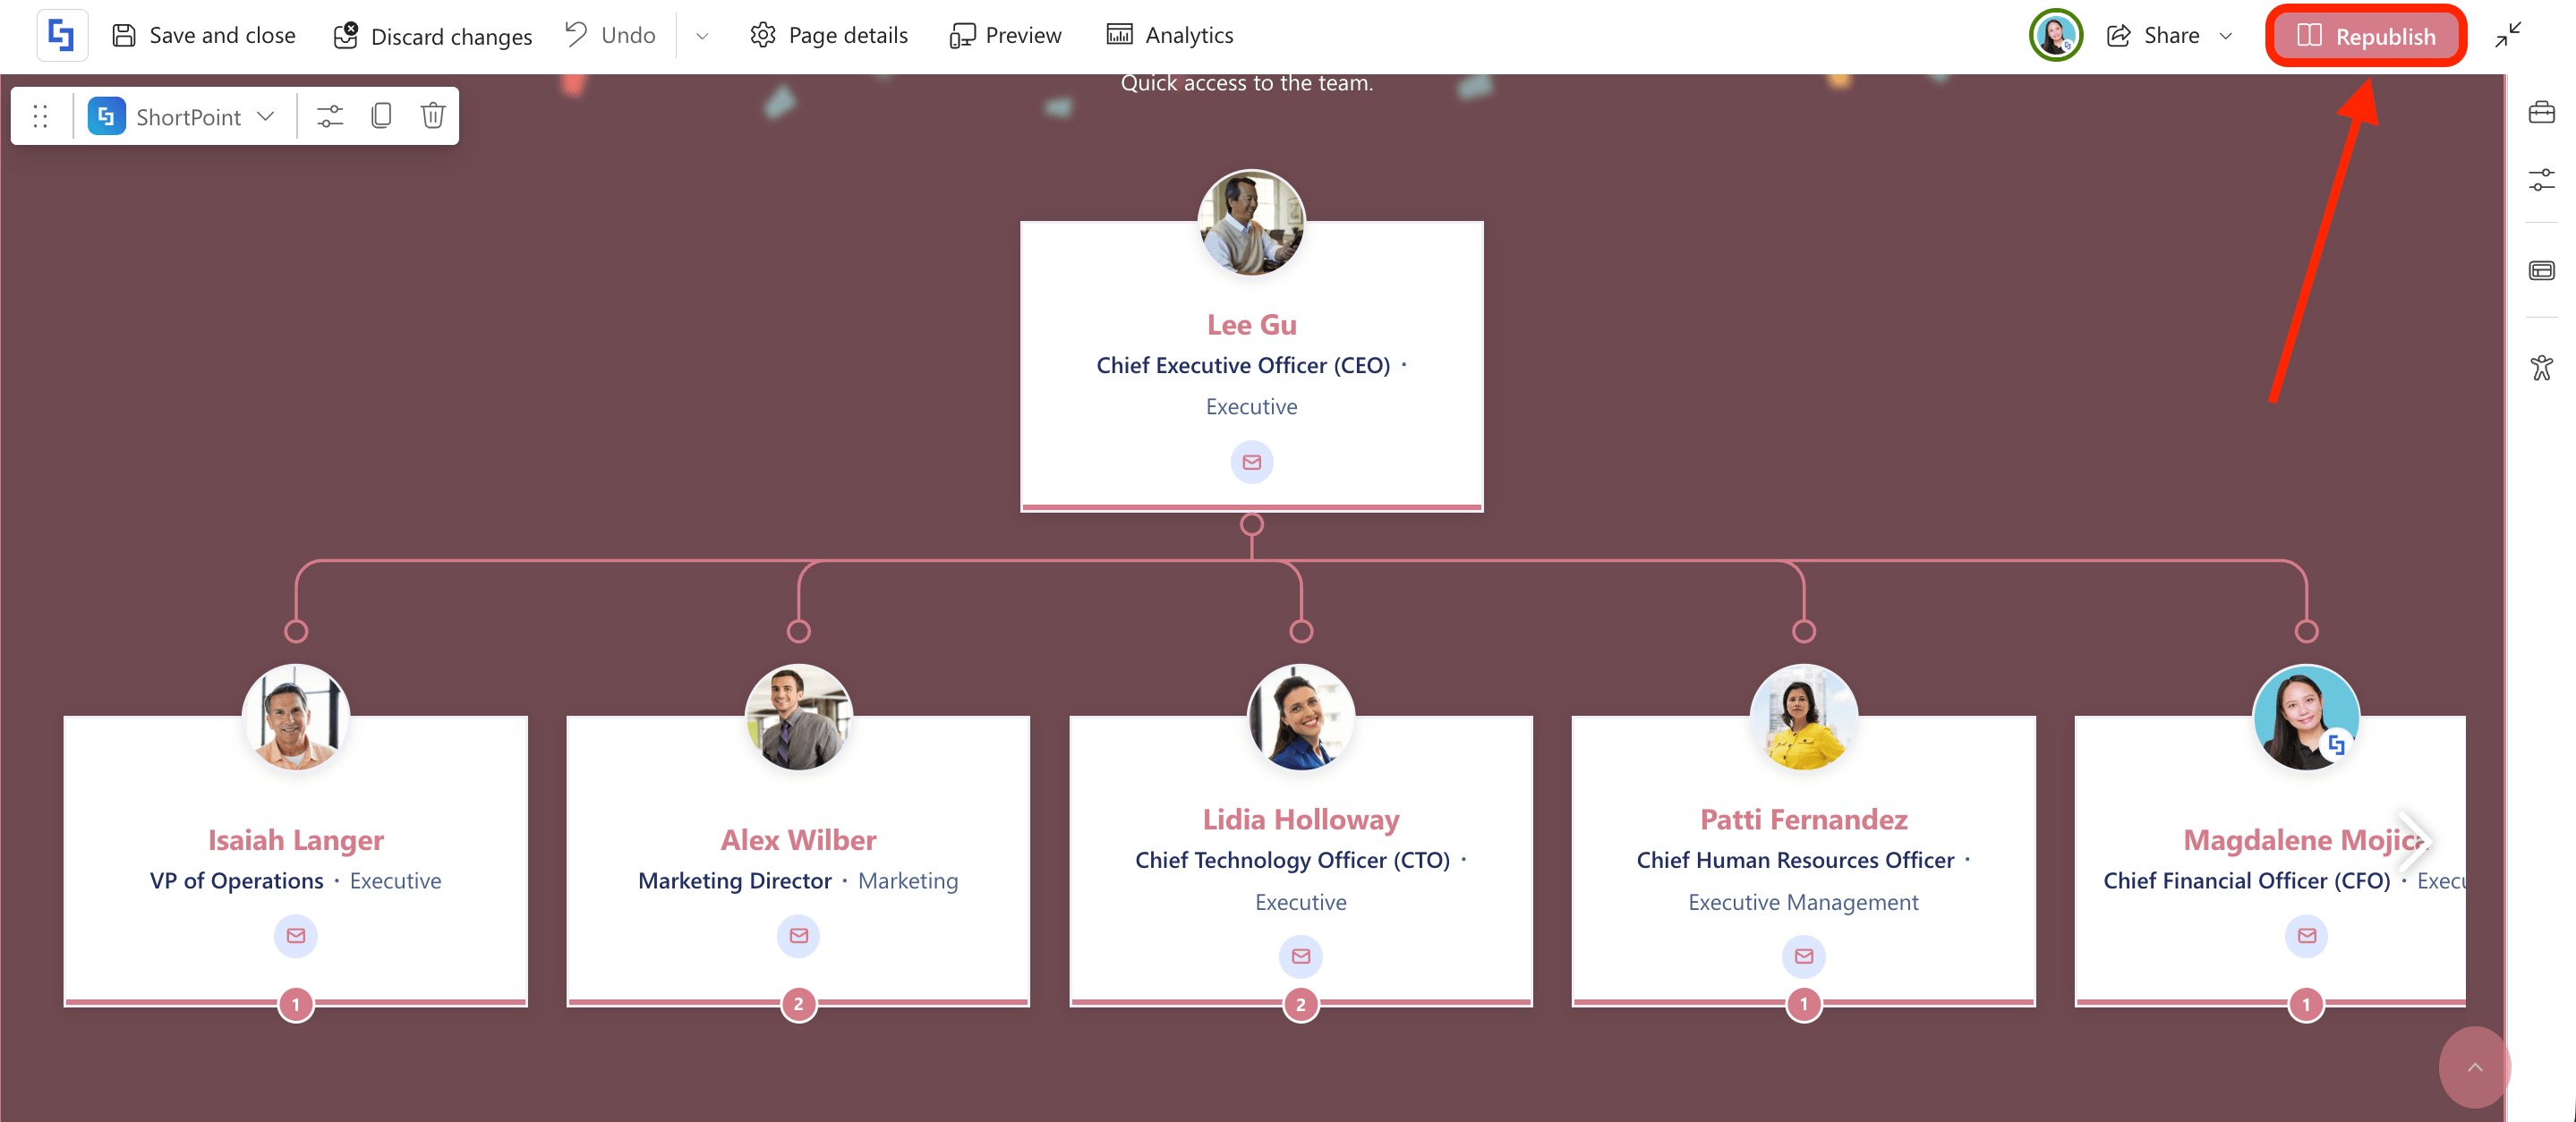
Congratulations! You now have a functional organization chart on your SharePoint page. Your team will now have easy access to the internal structure of your company.
Frequently Asked Questions
What is a dynamic organization chart?
A dynamic organization chart is an interactive and real-time visual representation of a company’s hierarchy that automatically updates when changes occur in the organizational structure. It reflects current reporting lines and team structures without the need for manual updates.
How does ShortPoint’s People Search connection help in building a dynamic org chart?
ShortPoint’s People Search connection integrates with SharePoint’s User Profiles, allowing the organization chart to pull data such as manager email addresses and employee details automatically. This eliminates the need for manual updates and ensures the org chart stays current with structural changes.
What is the purpose of creating an EmailManager property in SharePoint User Profiles?
The EmailManager property stores each user’s manager’s email address, which is essential for mapping reporting relationships. This property allows the dynamic org chart to define the hierarchy and visualize the organization’s structure accurately.
How often should the dynamic org chart be updated?
Because the dynamic org chart connects directly to live data through SharePoint User Profiles, it updates automatically as changes occur. However, it is recommended to keep user profile properties, like the EmailManager field, up to date during onboarding and organizational changes.
Can I customize the information shown on the org chart?
Yes. Using ShortPoint’s mapping features, you can select which user profile properties to display, such as employee photo, name, job title, department, and email address, to create a comprehensive and visually appealing organizational chart.
Is the dynamic org chart suitable for large organizations?
Absolutely. By setting an appropriate items limit and mapping properties correctly, ShortPoint’s dynamic org chart can visualize the entire organization’s structure, making it easier to understand reporting lines and team relationships across different departments.
How does this dynamic org chart improve communication within the organization?
By providing a clear and up-to-date visual representation of reporting relationships and team structures, the dynamic org chart helps employees quickly identify who reports to whom and facilitates easier cross-functional collaboration.
What are the benefits of integrating the dynamic org chart with SharePoint?
Integration ensures that the org chart reflects the current structure without manual intervention, reduces administrative overhead, and allows users to access the company’s hierarchy directly on SharePoint pages, enhancing accessibility and collaboration.
Can new hires use the dynamic org chart to understand the company’s structure?
Yes. New employees can use the dynamic org chart to visualize the organization’s structure from day one, making onboarding smoother by helping them identify managers, team members, and reporting lines quickly.
What is the role of the ManagerEmail managed property in the org chart setup?
The ManagerEmail managed property maps the custom EmailManager user profile property to the search schema, enabling SharePoint to crawl and retrieve manager email data. This mapping is crucial for the org chart to establish accurate reporting relationships and hierarchy.
Related articles