 Try ShortPoint now
Keeping your team connected and motivated can be a challenge. While emails get buried and chat messages scroll out of sight, your SharePoint intranet stands as the central hub of your company culture and office communication.
One of the most effective, high-impact features you can add to this hub is a dedicated Employee of the Month (EOM) section. It turns your intranet from a static file repository into a living, breathing community that promotes employee achievements and rewards.
This article will show you why you should feature your top performers on SharePoint, the importance of recognition, and exactly how to build it using the best tools available.
TABLE OF CONTENTS
- Prerequisites
- What is a SharePoint "Employee of the Month" Section?
- How to Build an Employee of the Month Section in SharePoint
- Best Practices for Launching Your EOM Section
- Frequently Asked Questions
- What is a SharePoint Employee of the Month section?
- How do I create an Employee of the Month list in SharePoint?
- Can I automate the nomination and voting process?
- How can I display the Employee of the Month section dynamically?
- What are the best practices for launching an Employee of the Month section?
- Can I customize the look of the Employee of the Month section?
- How does recognizing employees on SharePoint benefit the company?
Prerequisites
- You must have the latest version of ShortPoint SPFx installed.
- You must be a ShortPoint Designer with an active license.
- You must already have the Person Cards Design Element on your SharePoint page.
What is a SharePoint "Employee of the Month" Section?
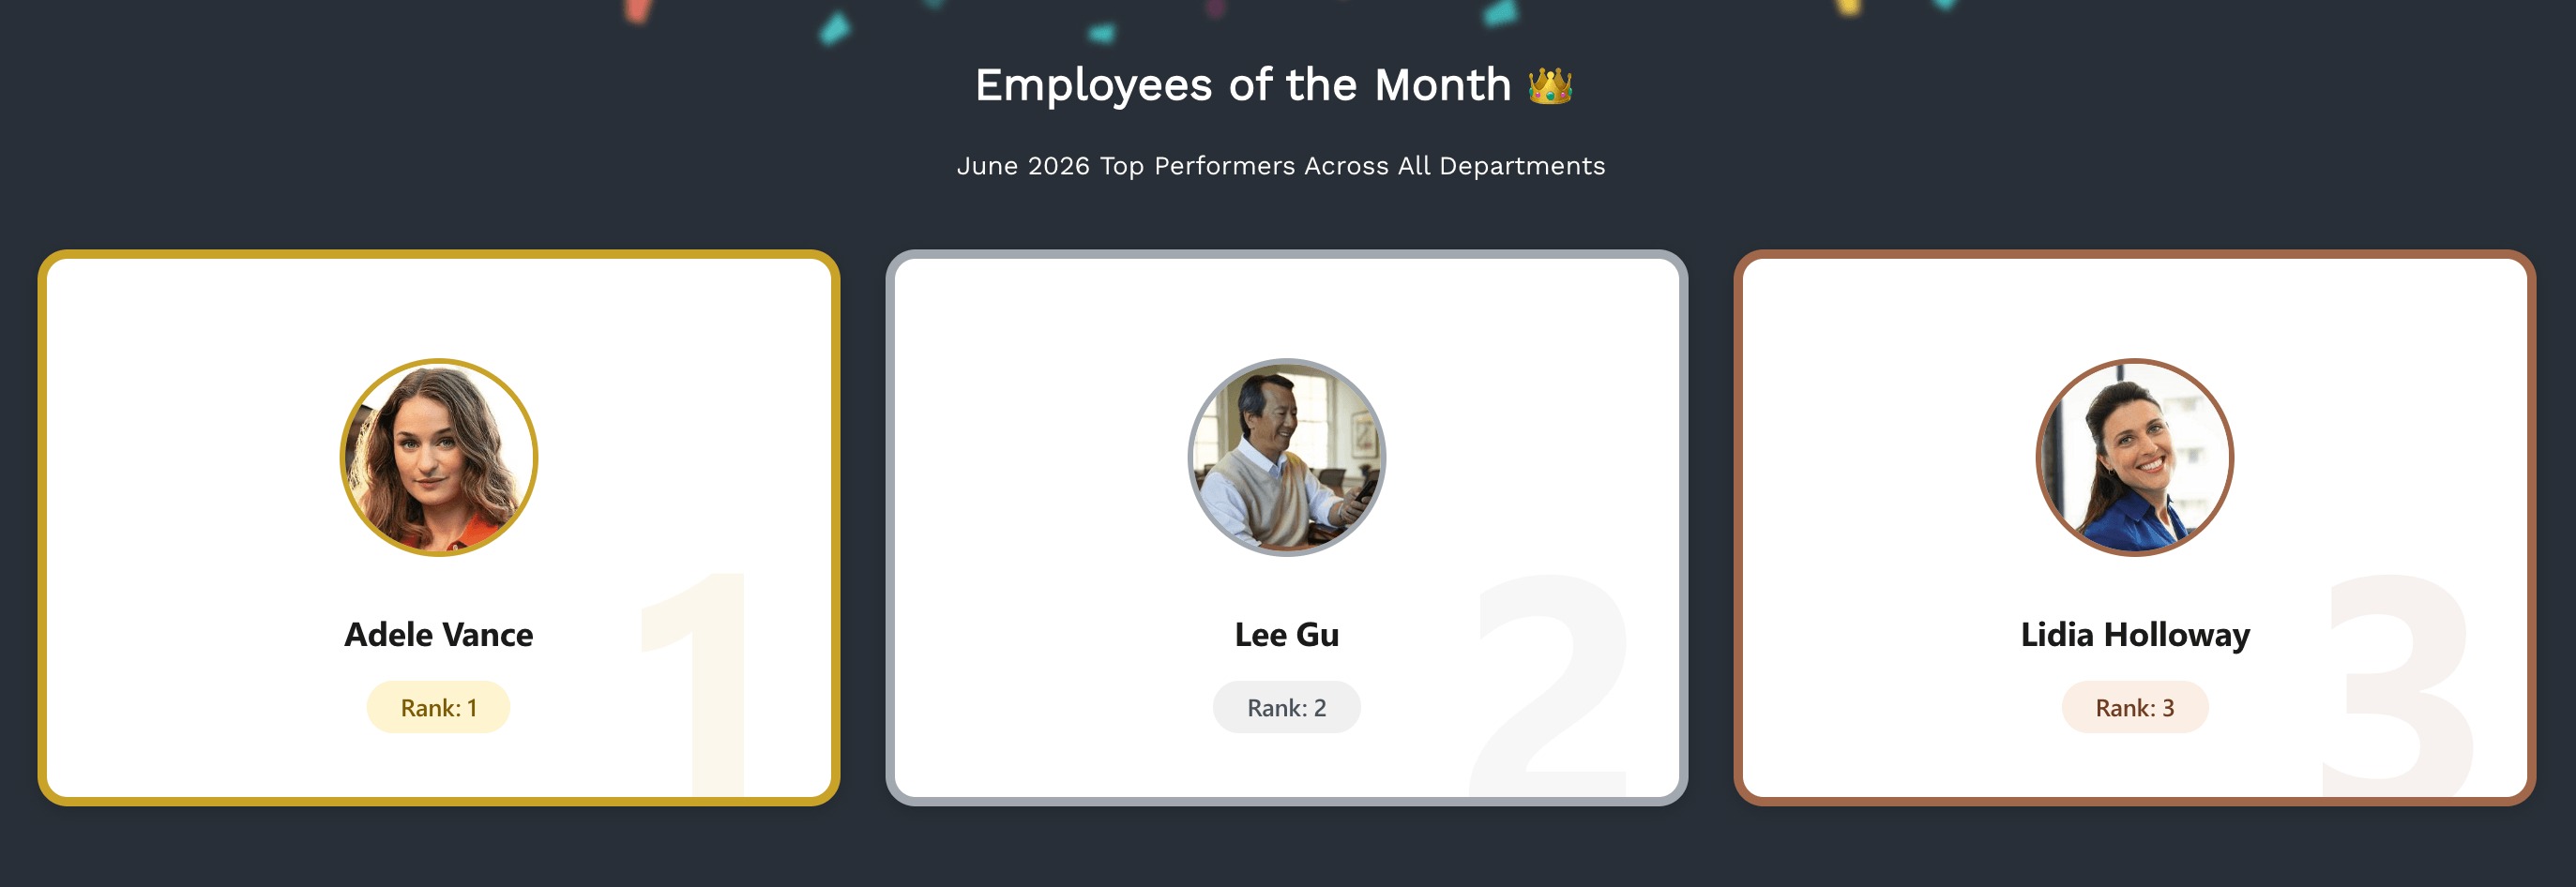
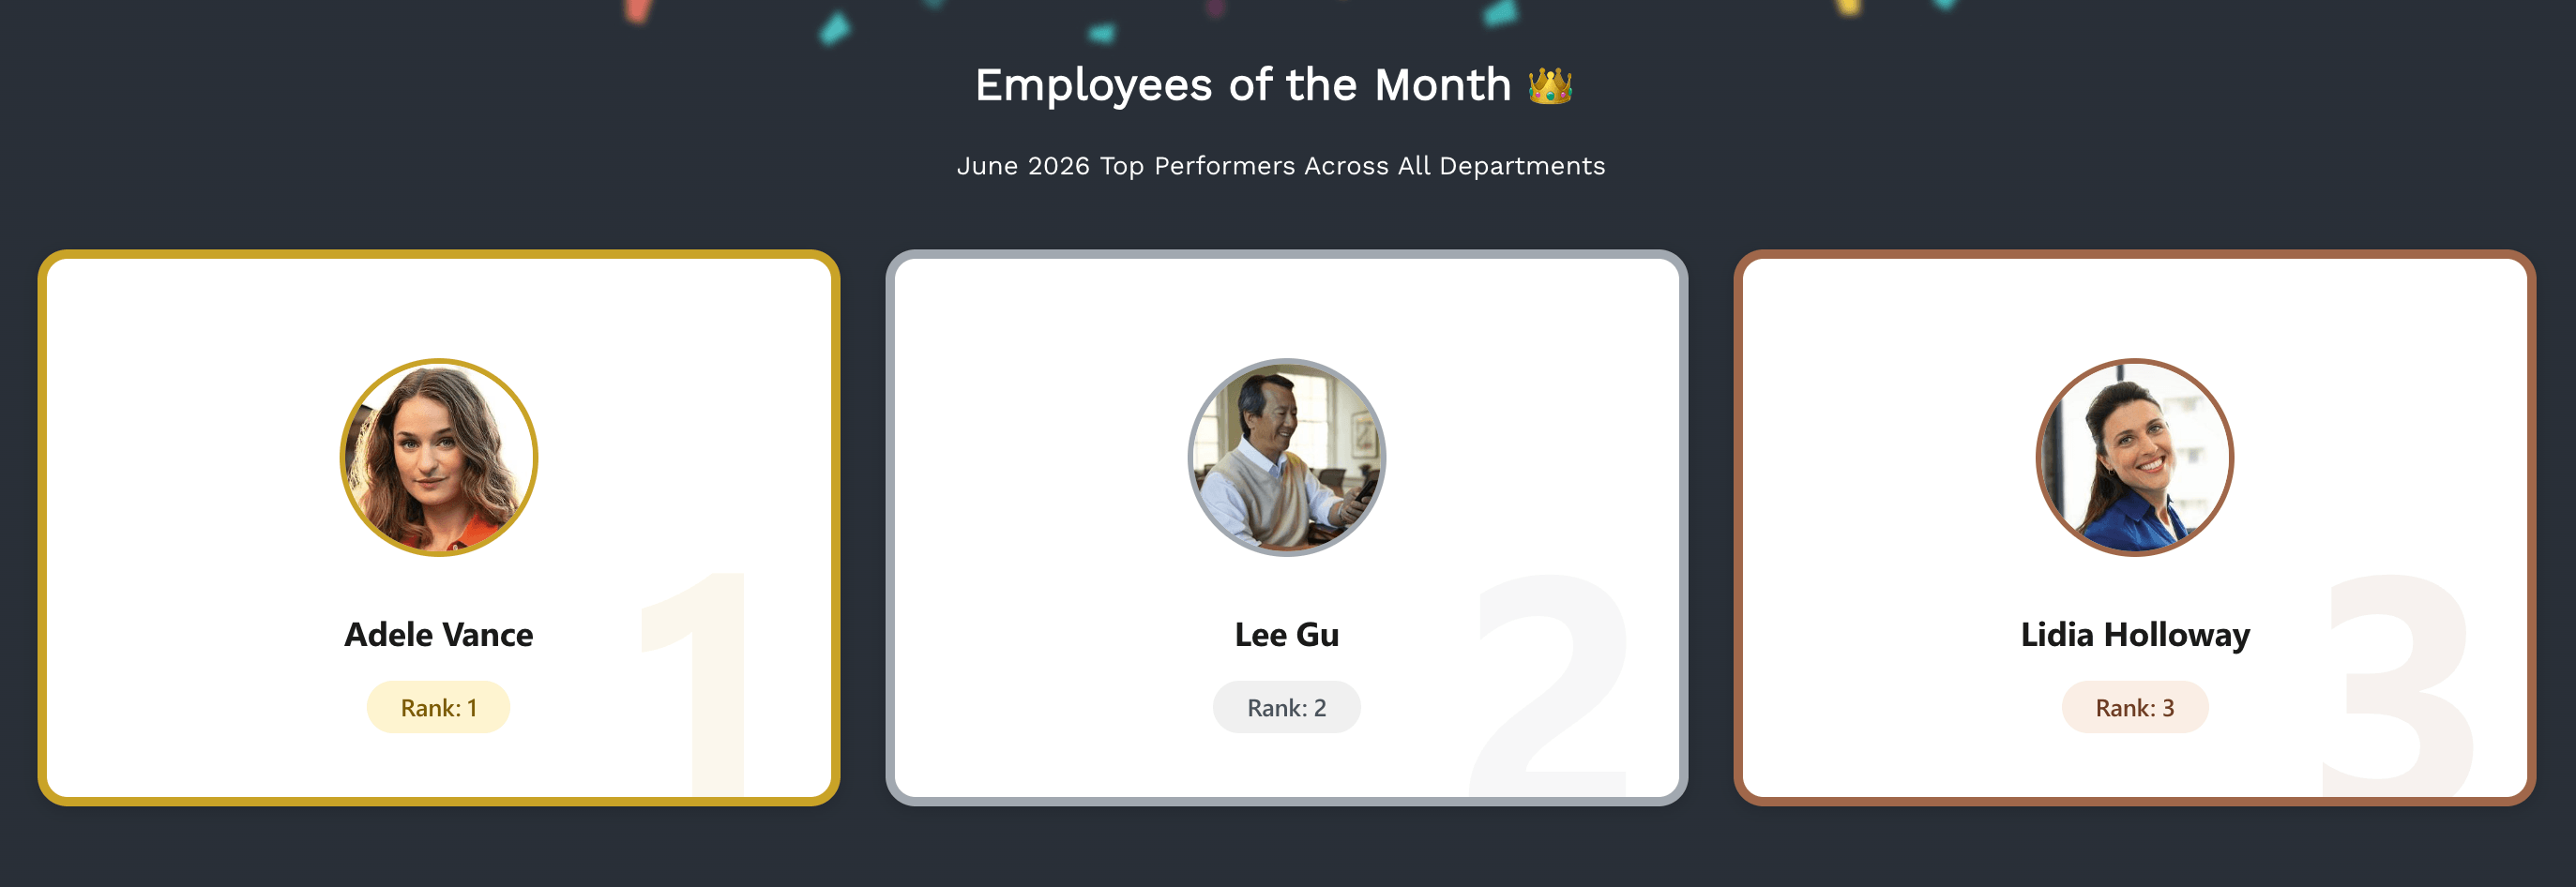
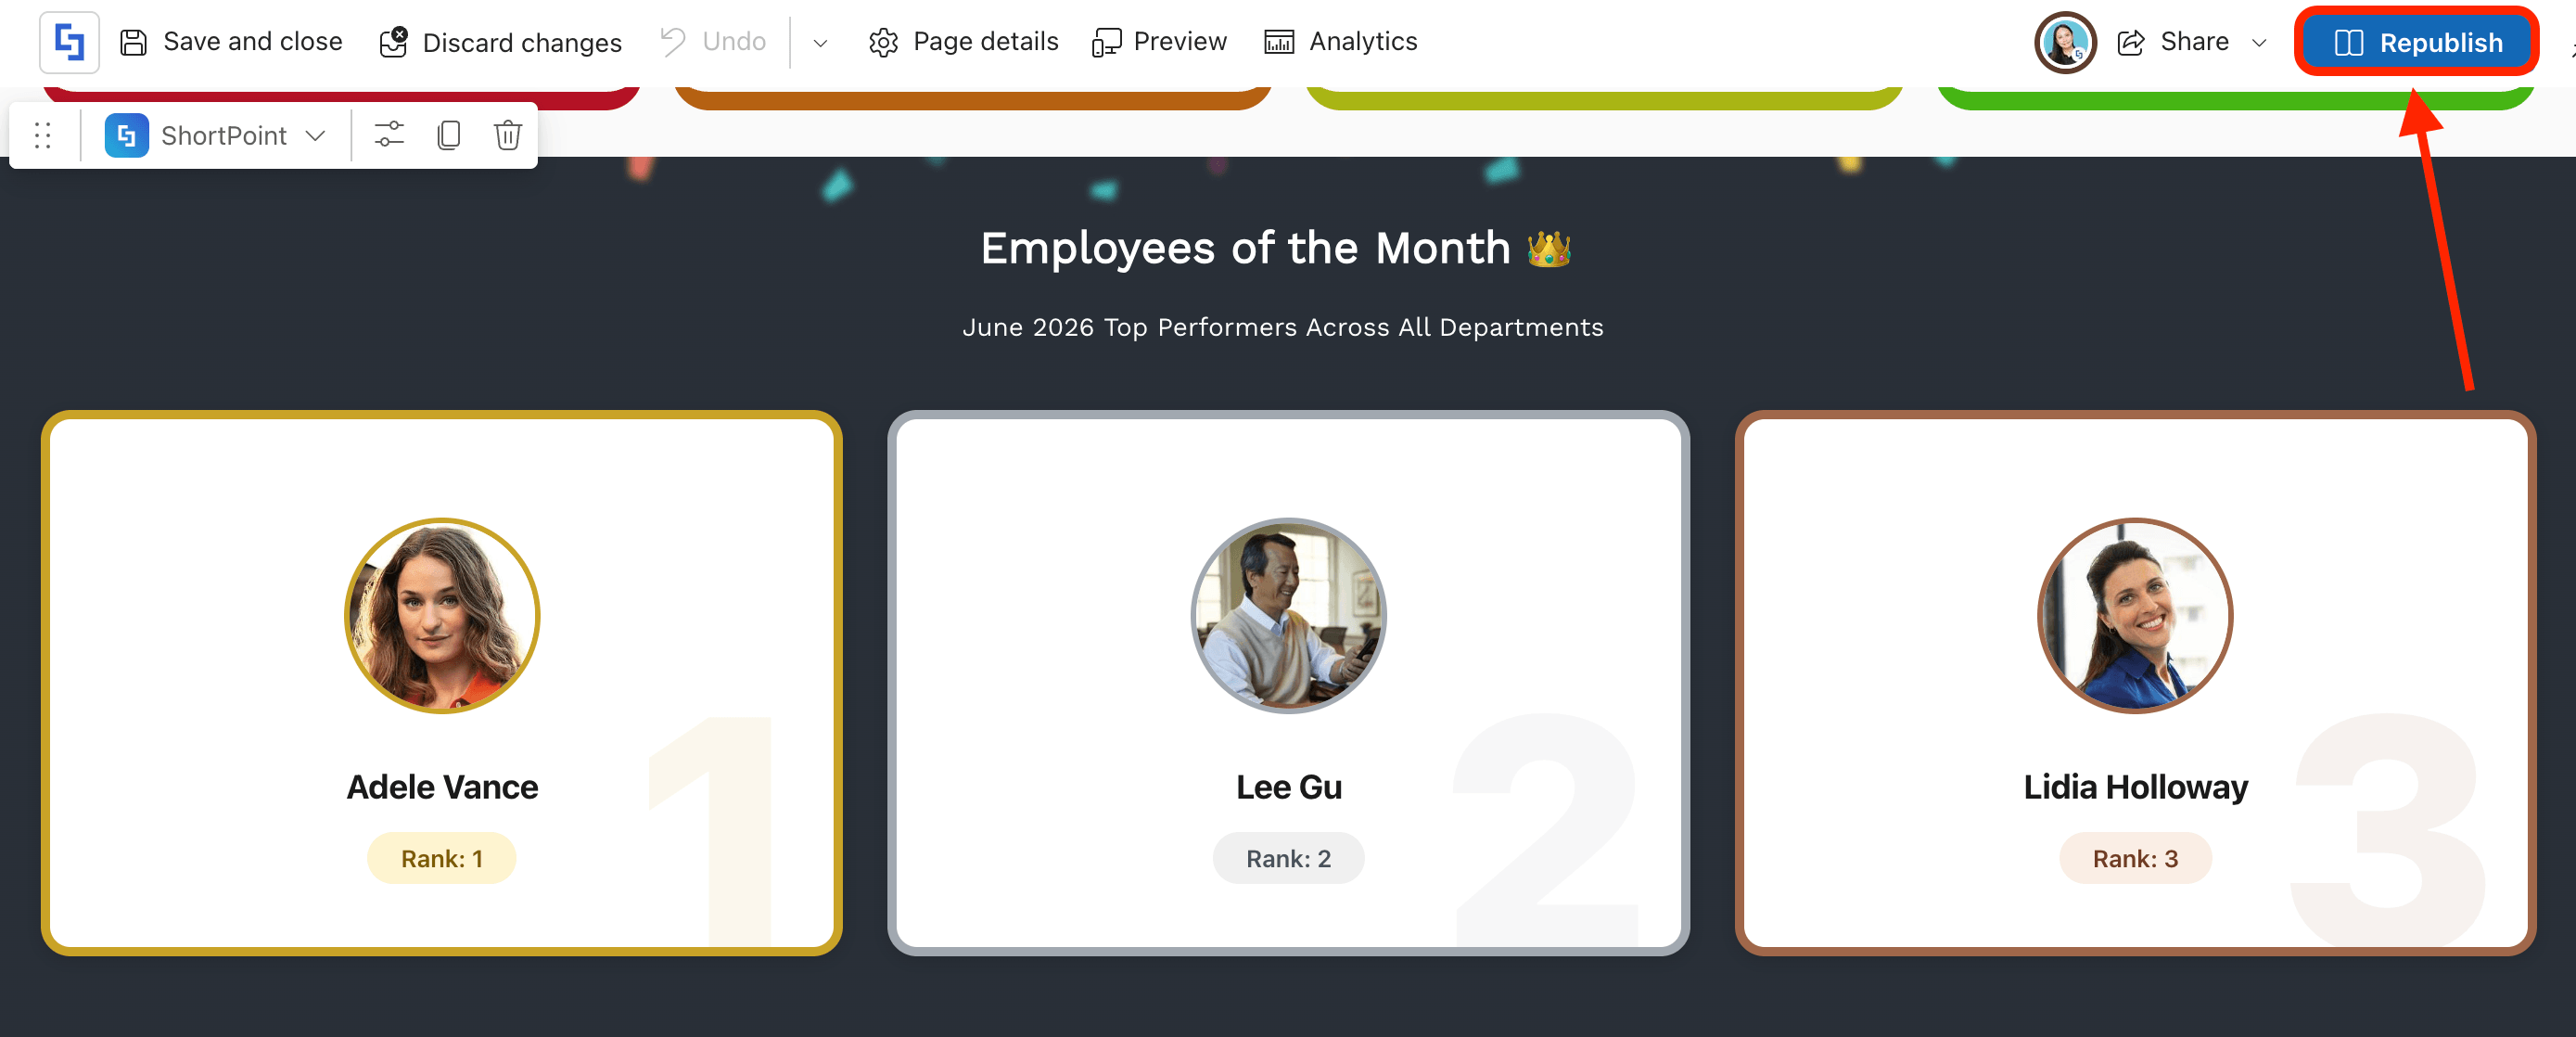
An Employee of the Month section is a visually prominent, dedicated space on your SharePoint main page or communication site. Instead of just a name on a list, a great SharePoint EOM section acts as a digital spotlight for employee recognition.
It typically features a high-quality photo of the honoree and their name. Here's an example to keep you inspired. In the next section, we'll show you how to build it:
Why is it Useful?
Adding this section isn't just about making people feel good; it drives measurable engagement and strengthens company culture with colleague recognition.
- Boosts Employee Morale and Retention: Recognition is a fundamental human need. When employees see their hard work acknowledged, it validates their effort and deepens their loyalty to the company, making them feel truly appreciated.
- Humanizes Remote and Hybrid Teams: An EOM section introduces team members across different departments, putting a face to a name you might only otherwise see on an email thread or in a news post.
- Drives Employee Engagement: Let’s face it: people love reading about people. Adding a social element to your intranet increases daily active users and keeps employees coming back to the platform.
How to Build an Employee of the Month Section in SharePoint
You don’t need to be a developer or a coding wizard to create a stunning SharePoint Employee of the Month section. ShortPoint gives you a simple way to create dynamic EOM content. This means that you won't have to manually update the Design Element every time your EOM changes.
The steps have been divided into two parts for clarity. Make sure to follow them closely to successfully build your Employee Spotlight sections.
Part 1: Create an Employee of the Month SharePoint List
Learn how to create a dedicated SharePoint list for your Employees of the Month. You can have your HR team manage this and update the information month-to-month.
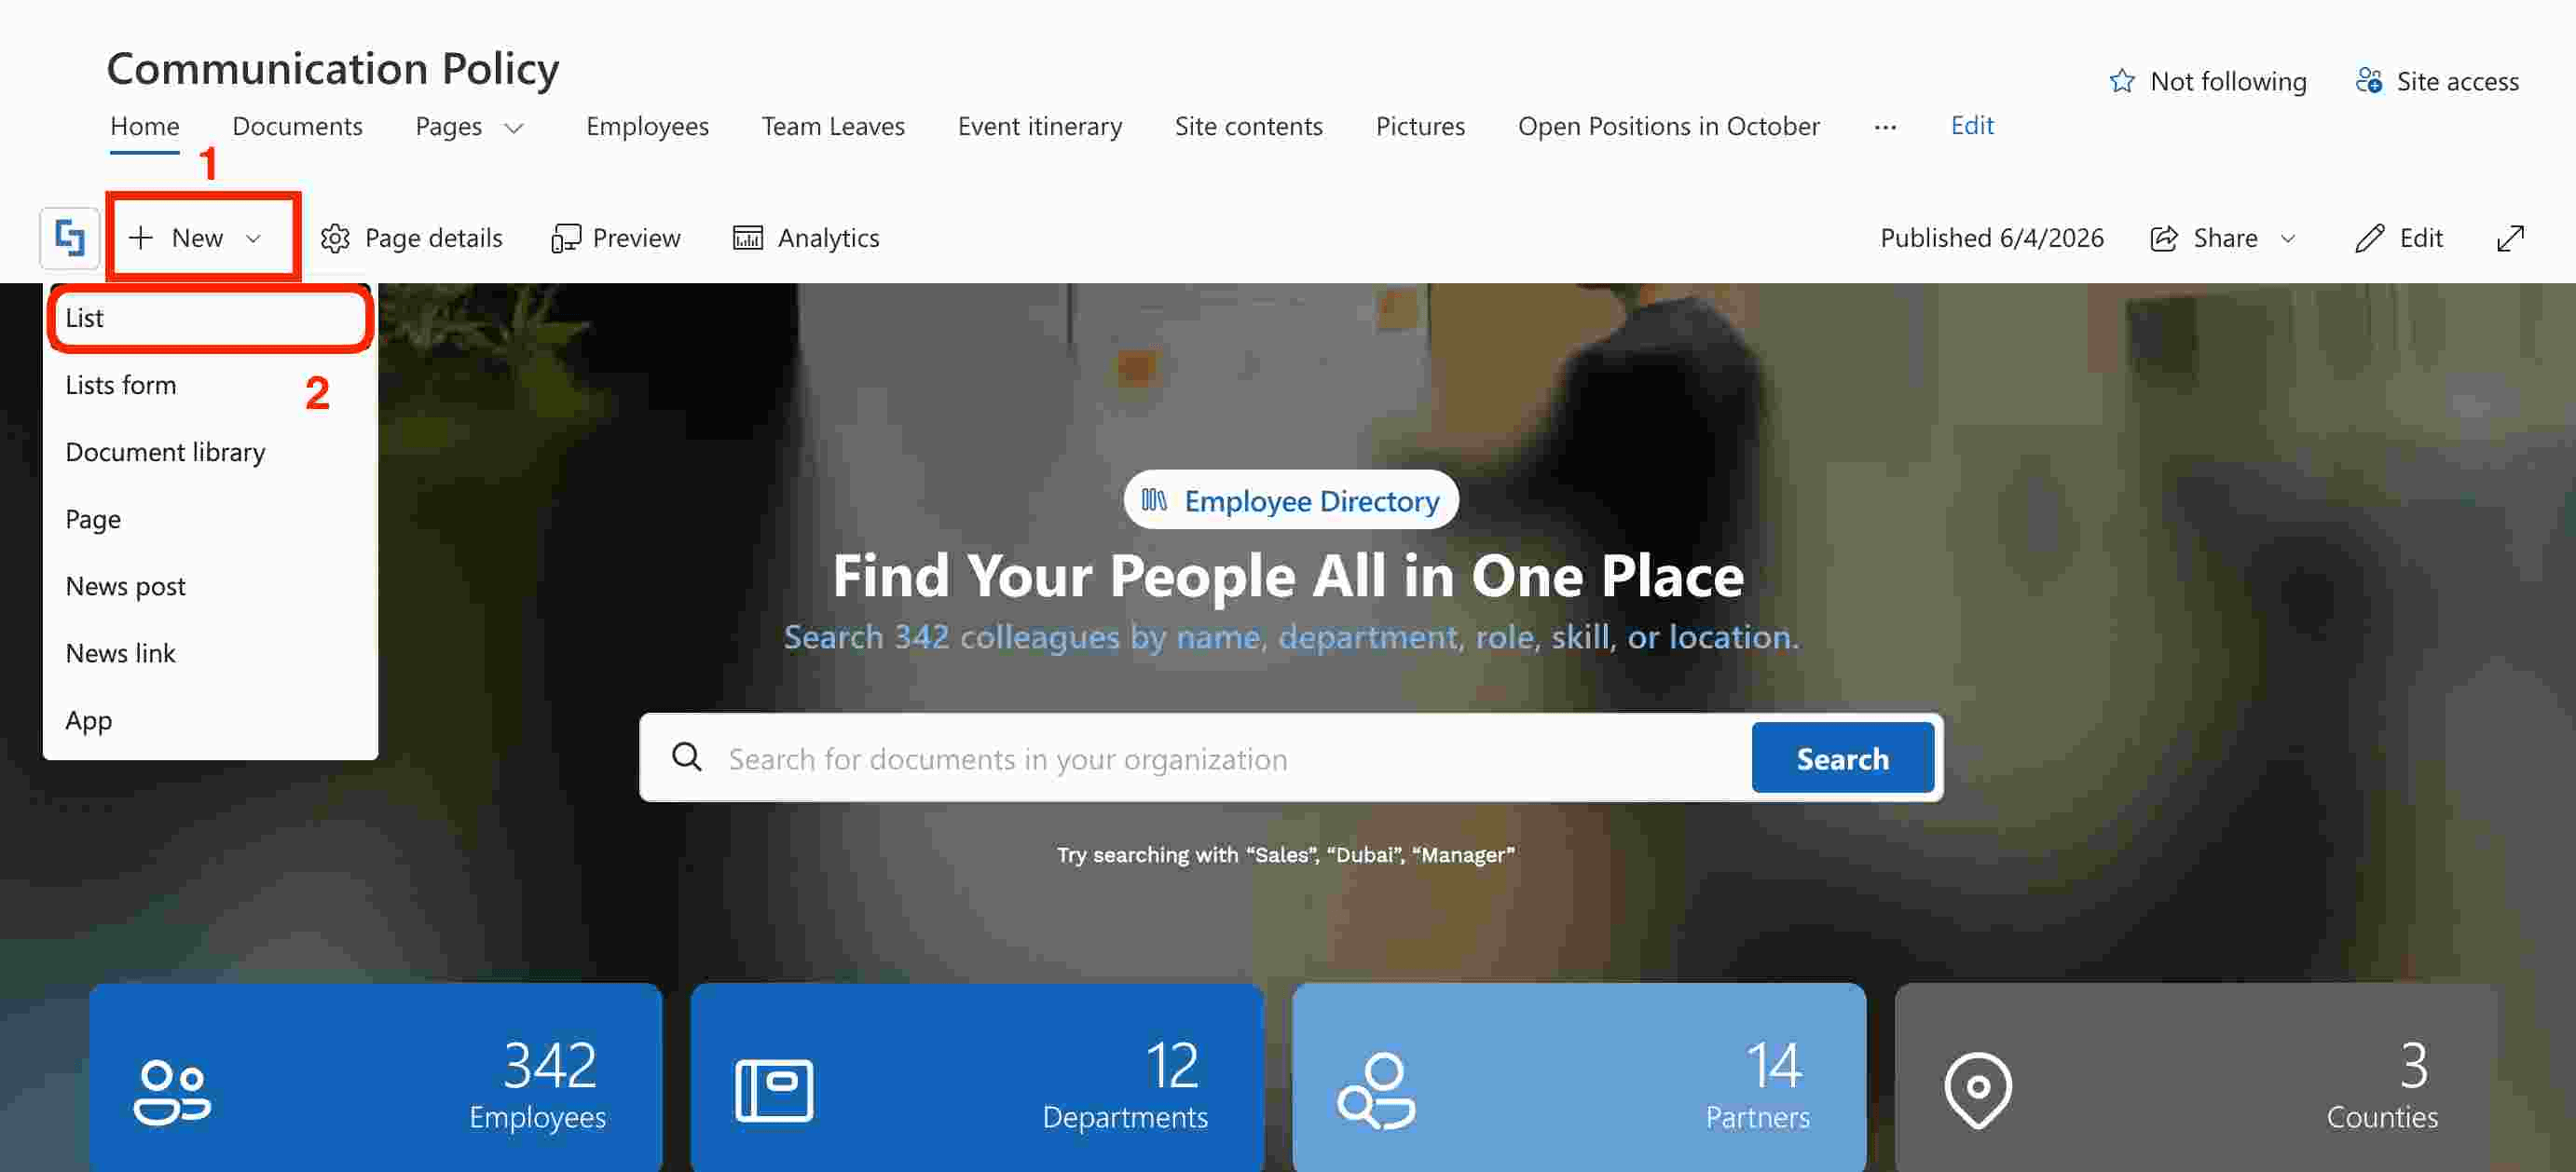
Step 1: Create a SharePoint List
Go to the SharePoint page you want to use, click [1] New, and select [2] List:
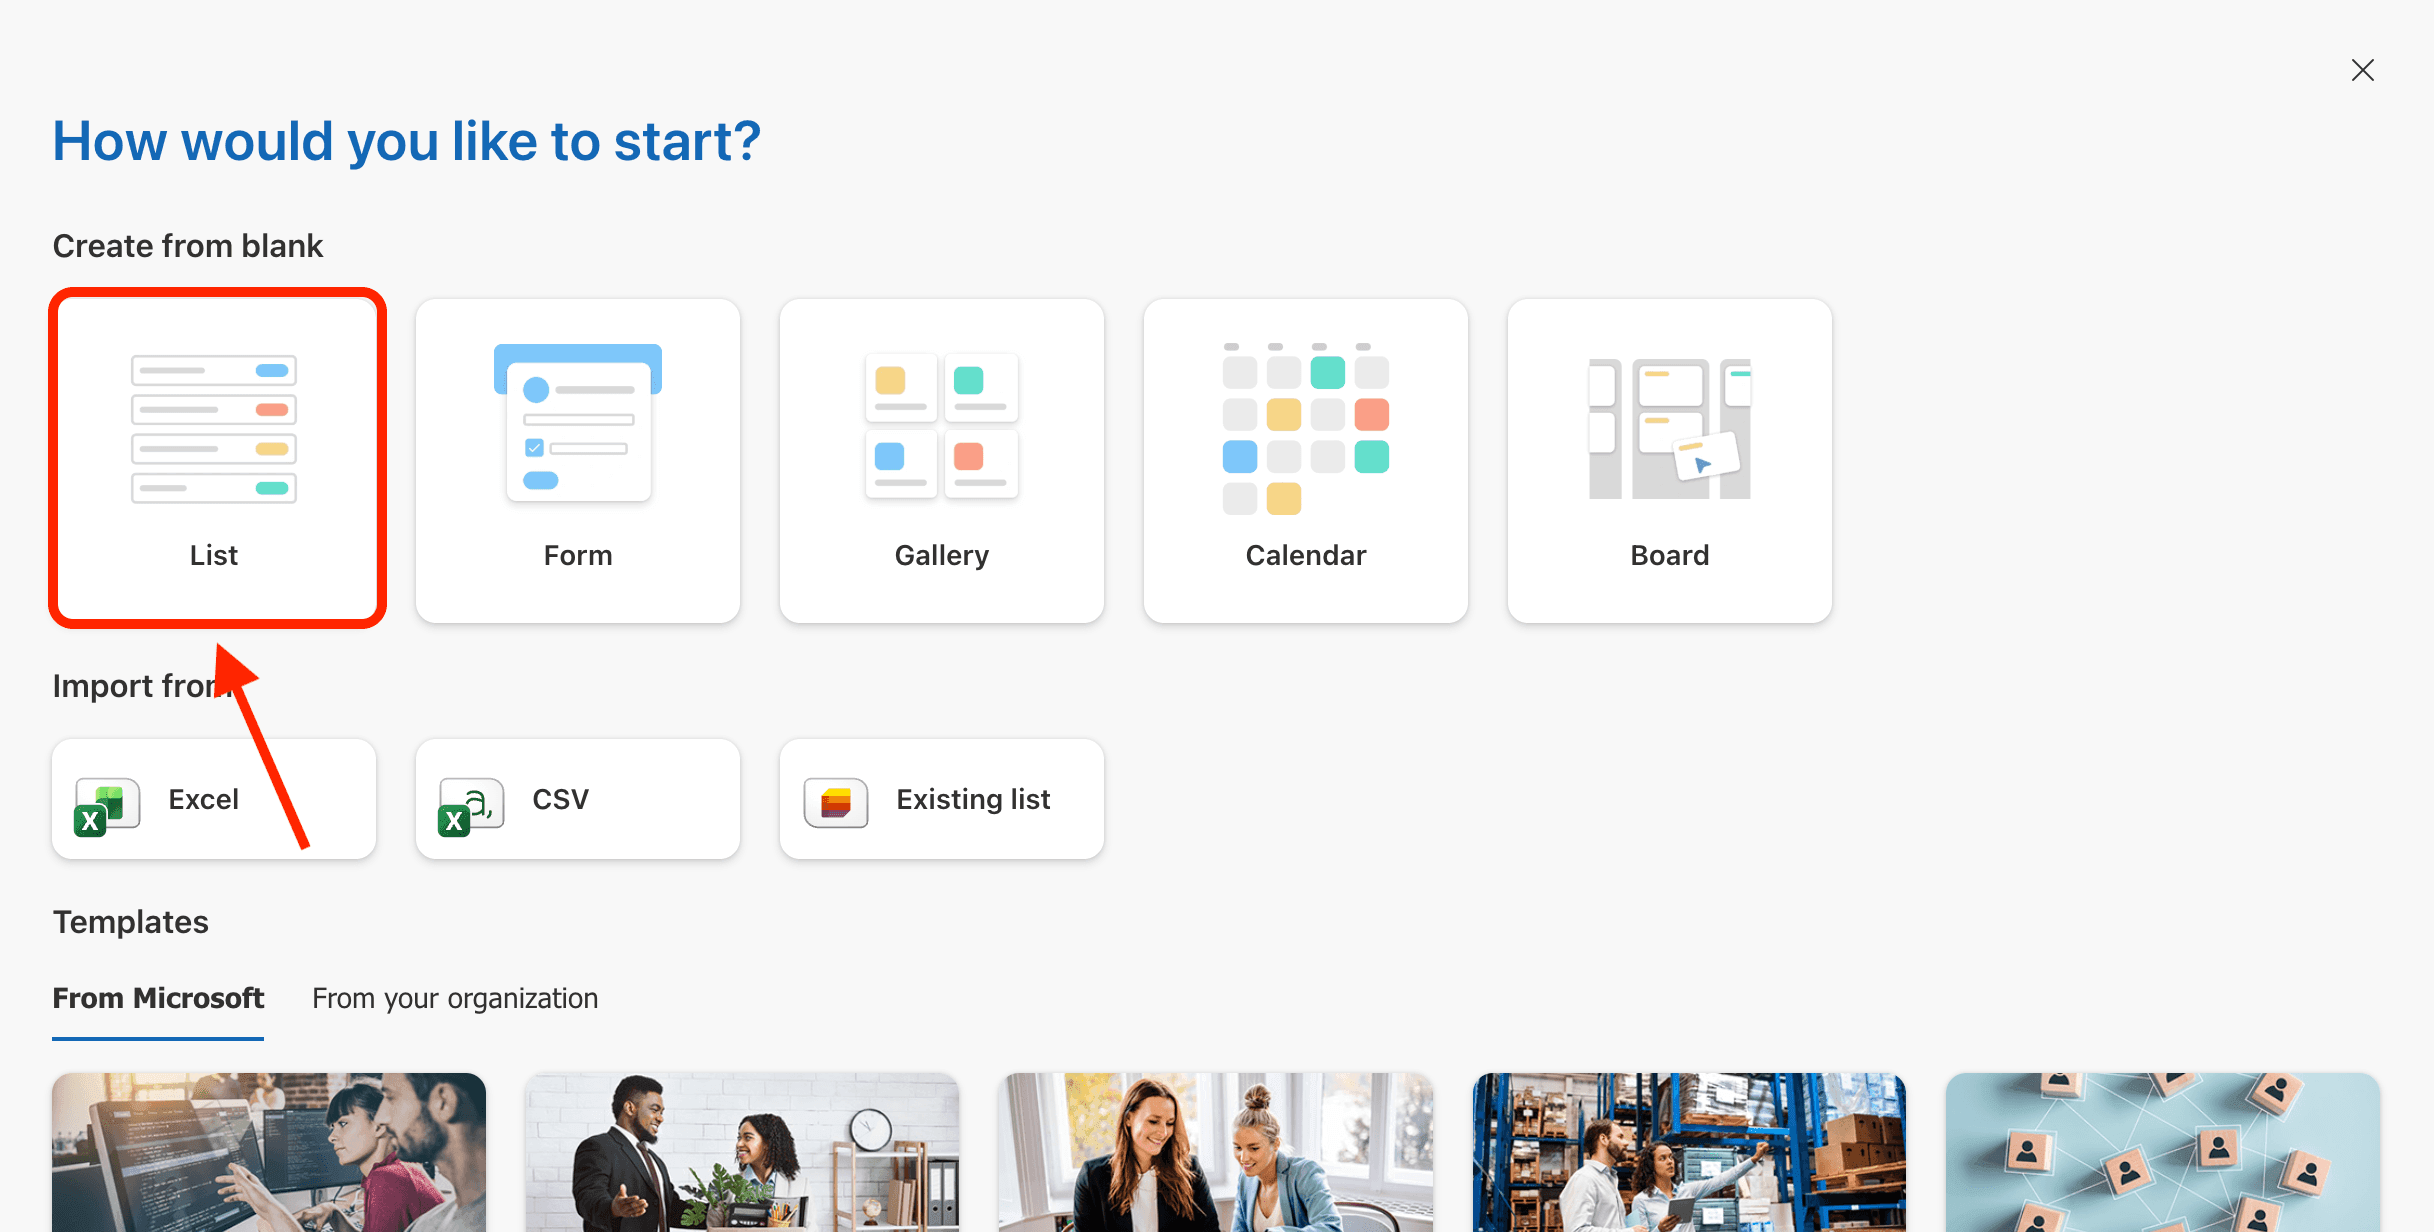
Choose List from the choices:
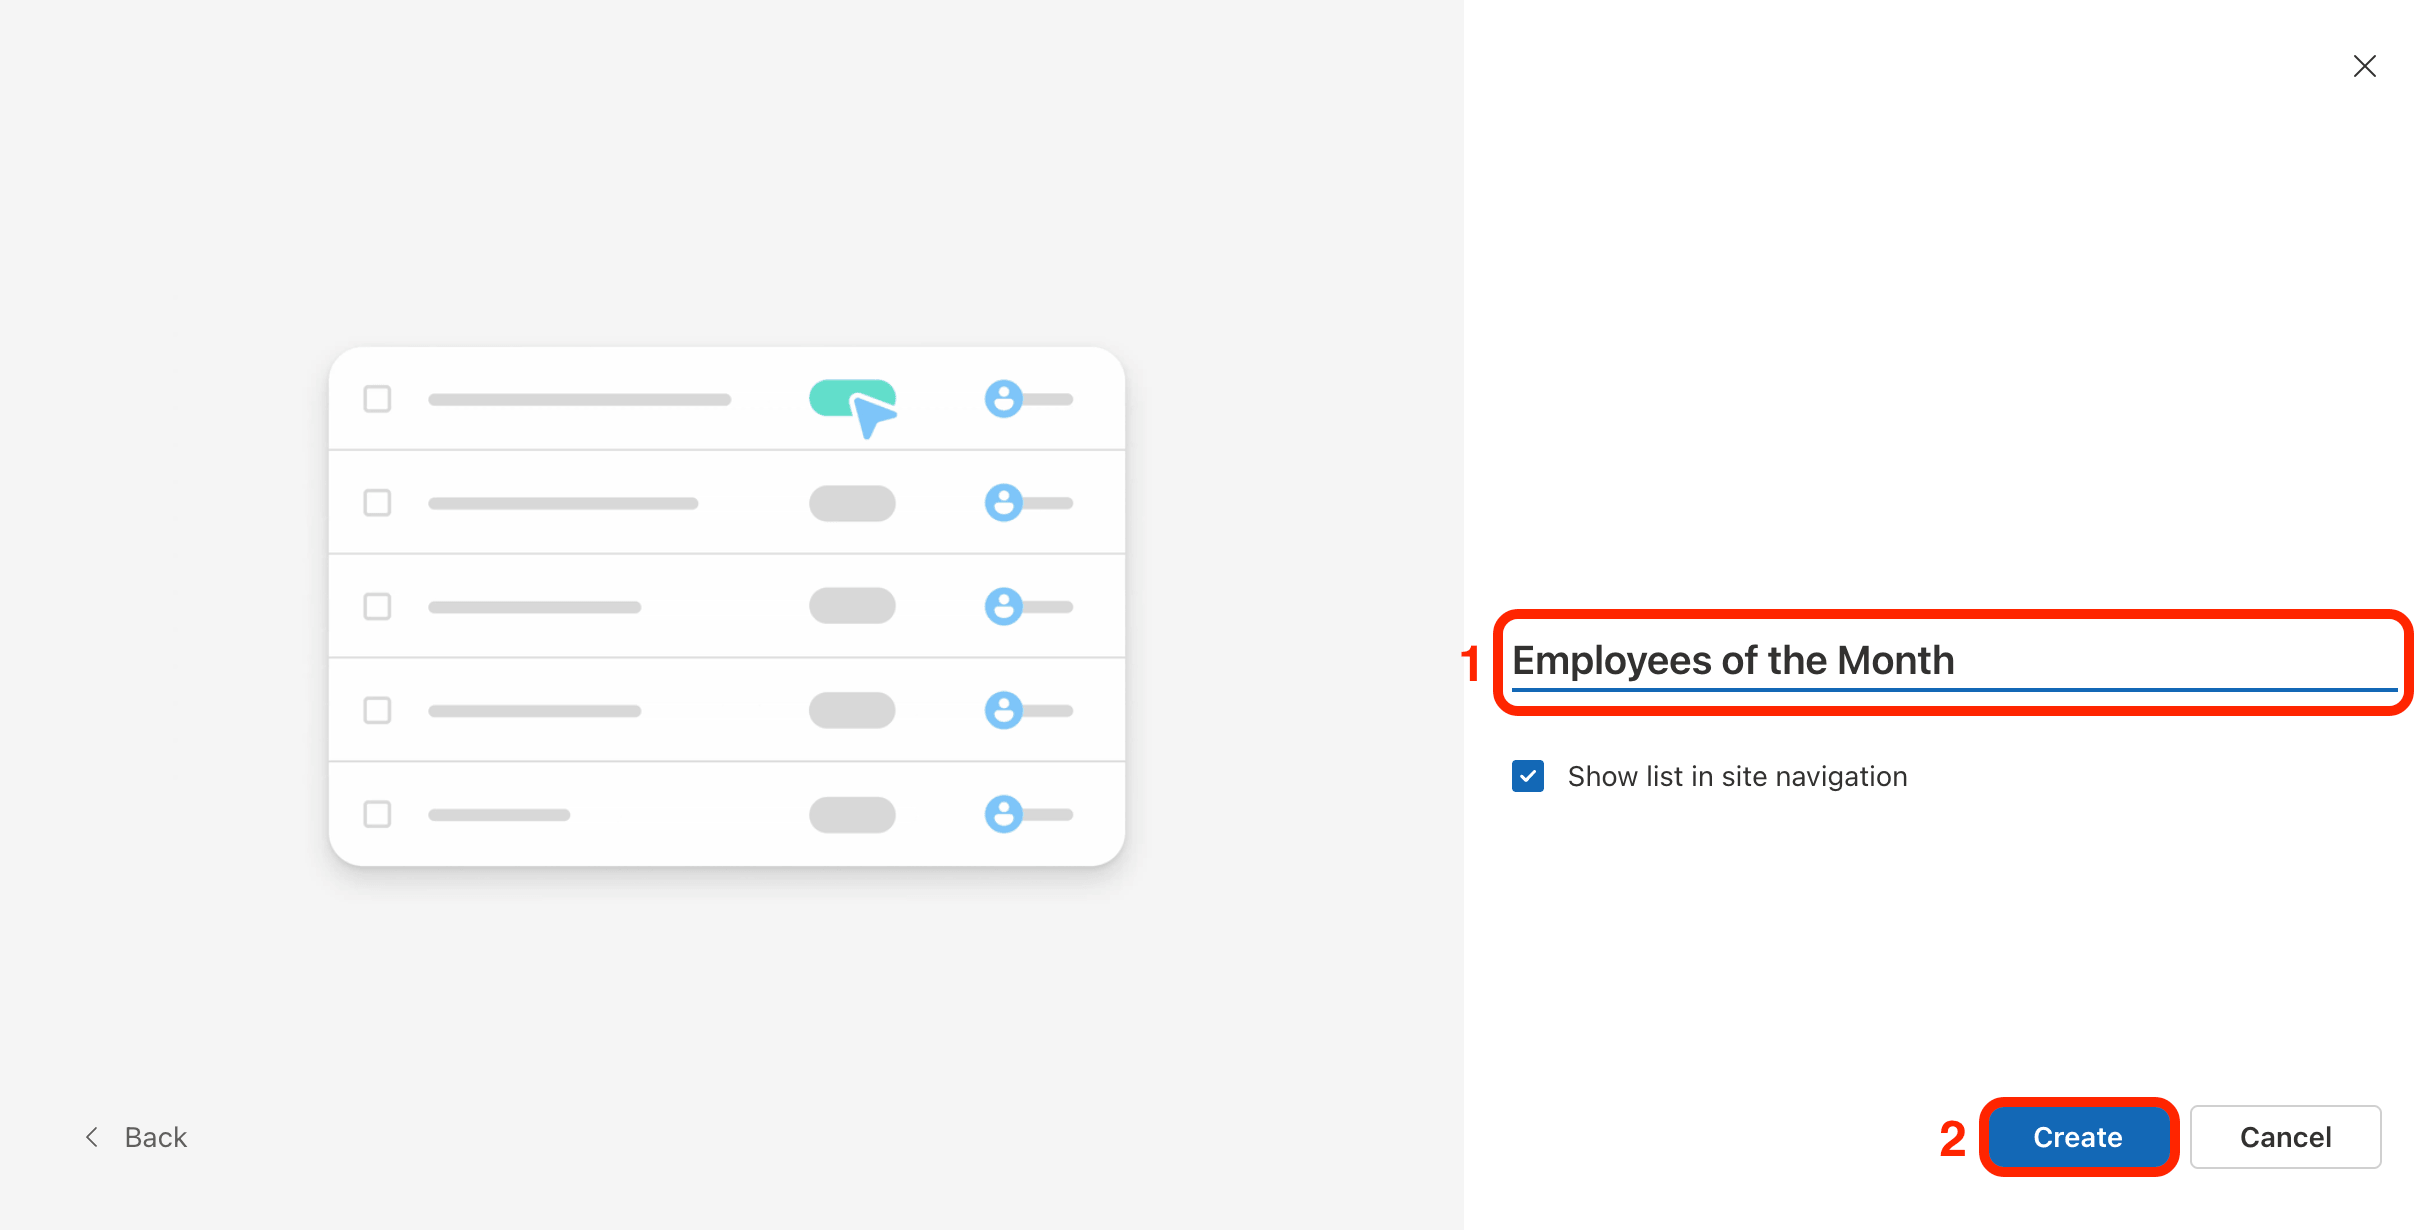
[1] Name your List and click [2] Create:
Step 2: Add Columns
NOTEYou can add more columns as needed. The columns we added in this tutorial are the essential components needed for the dynamic connection.
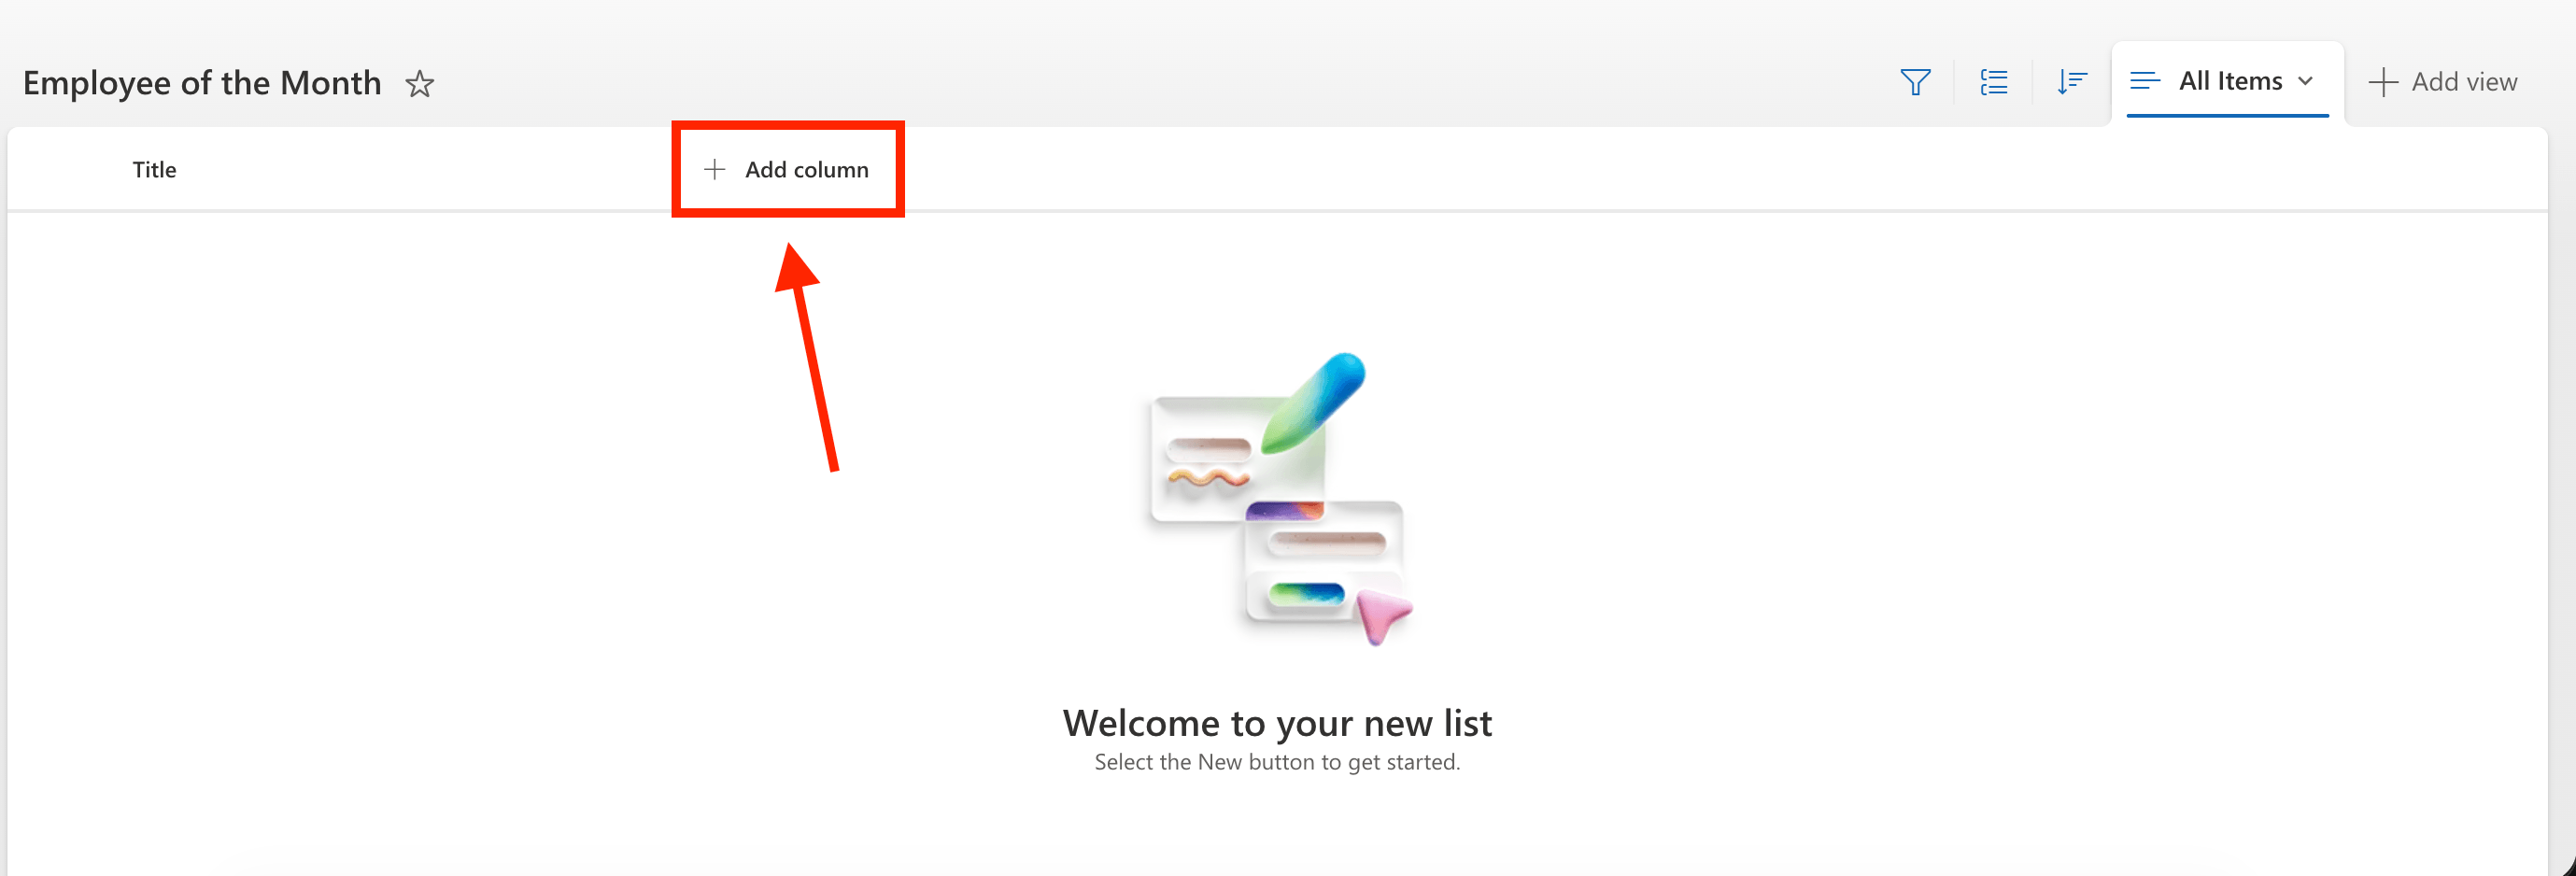
The first column we will make will be the people picker, which will allow you to choose the employees you want to highlight from your organization. Click Add Column:
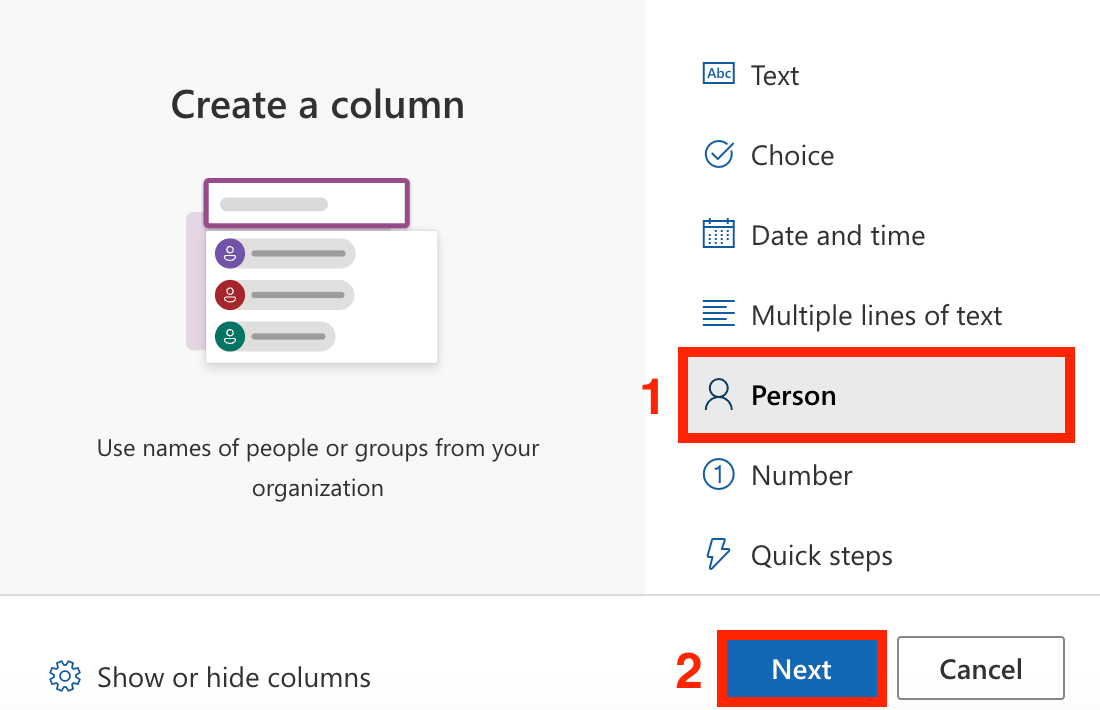
Select [1] Person and click [2] Next:
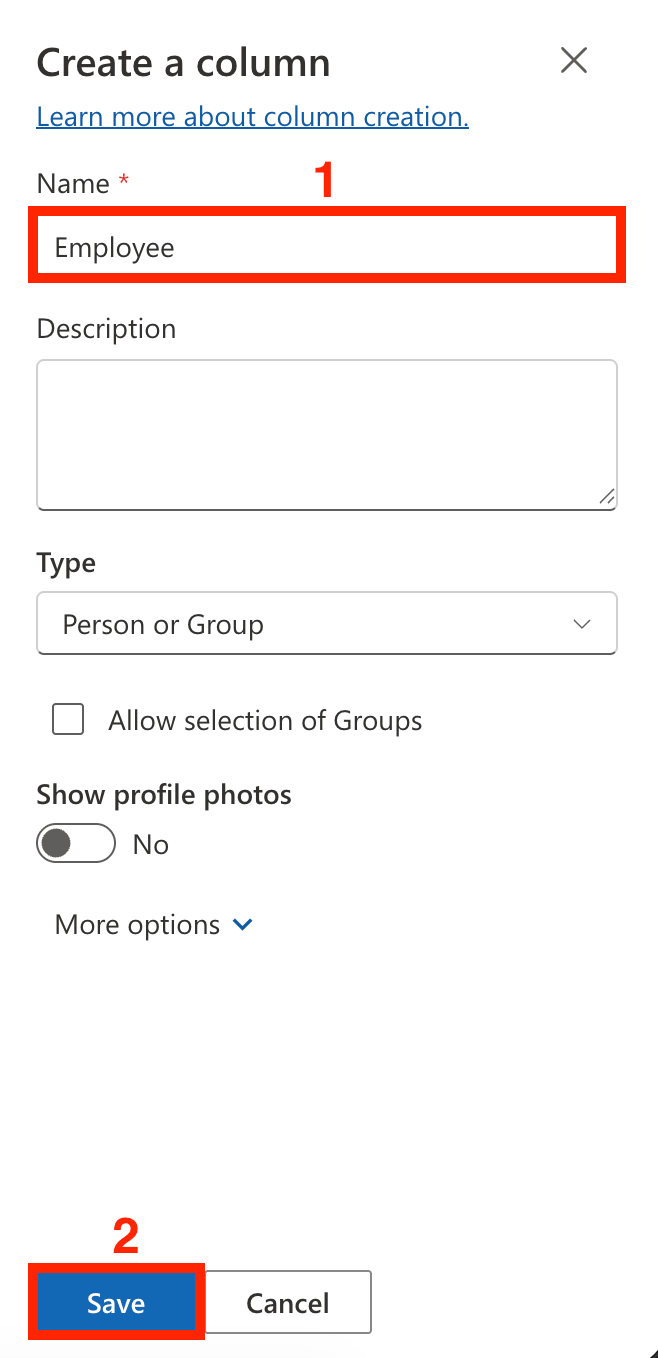
[1] Name the column and select [2] Save:
Since we want to add a ranking for the employees, we will add a Ranking column. To do that, click Add Column:
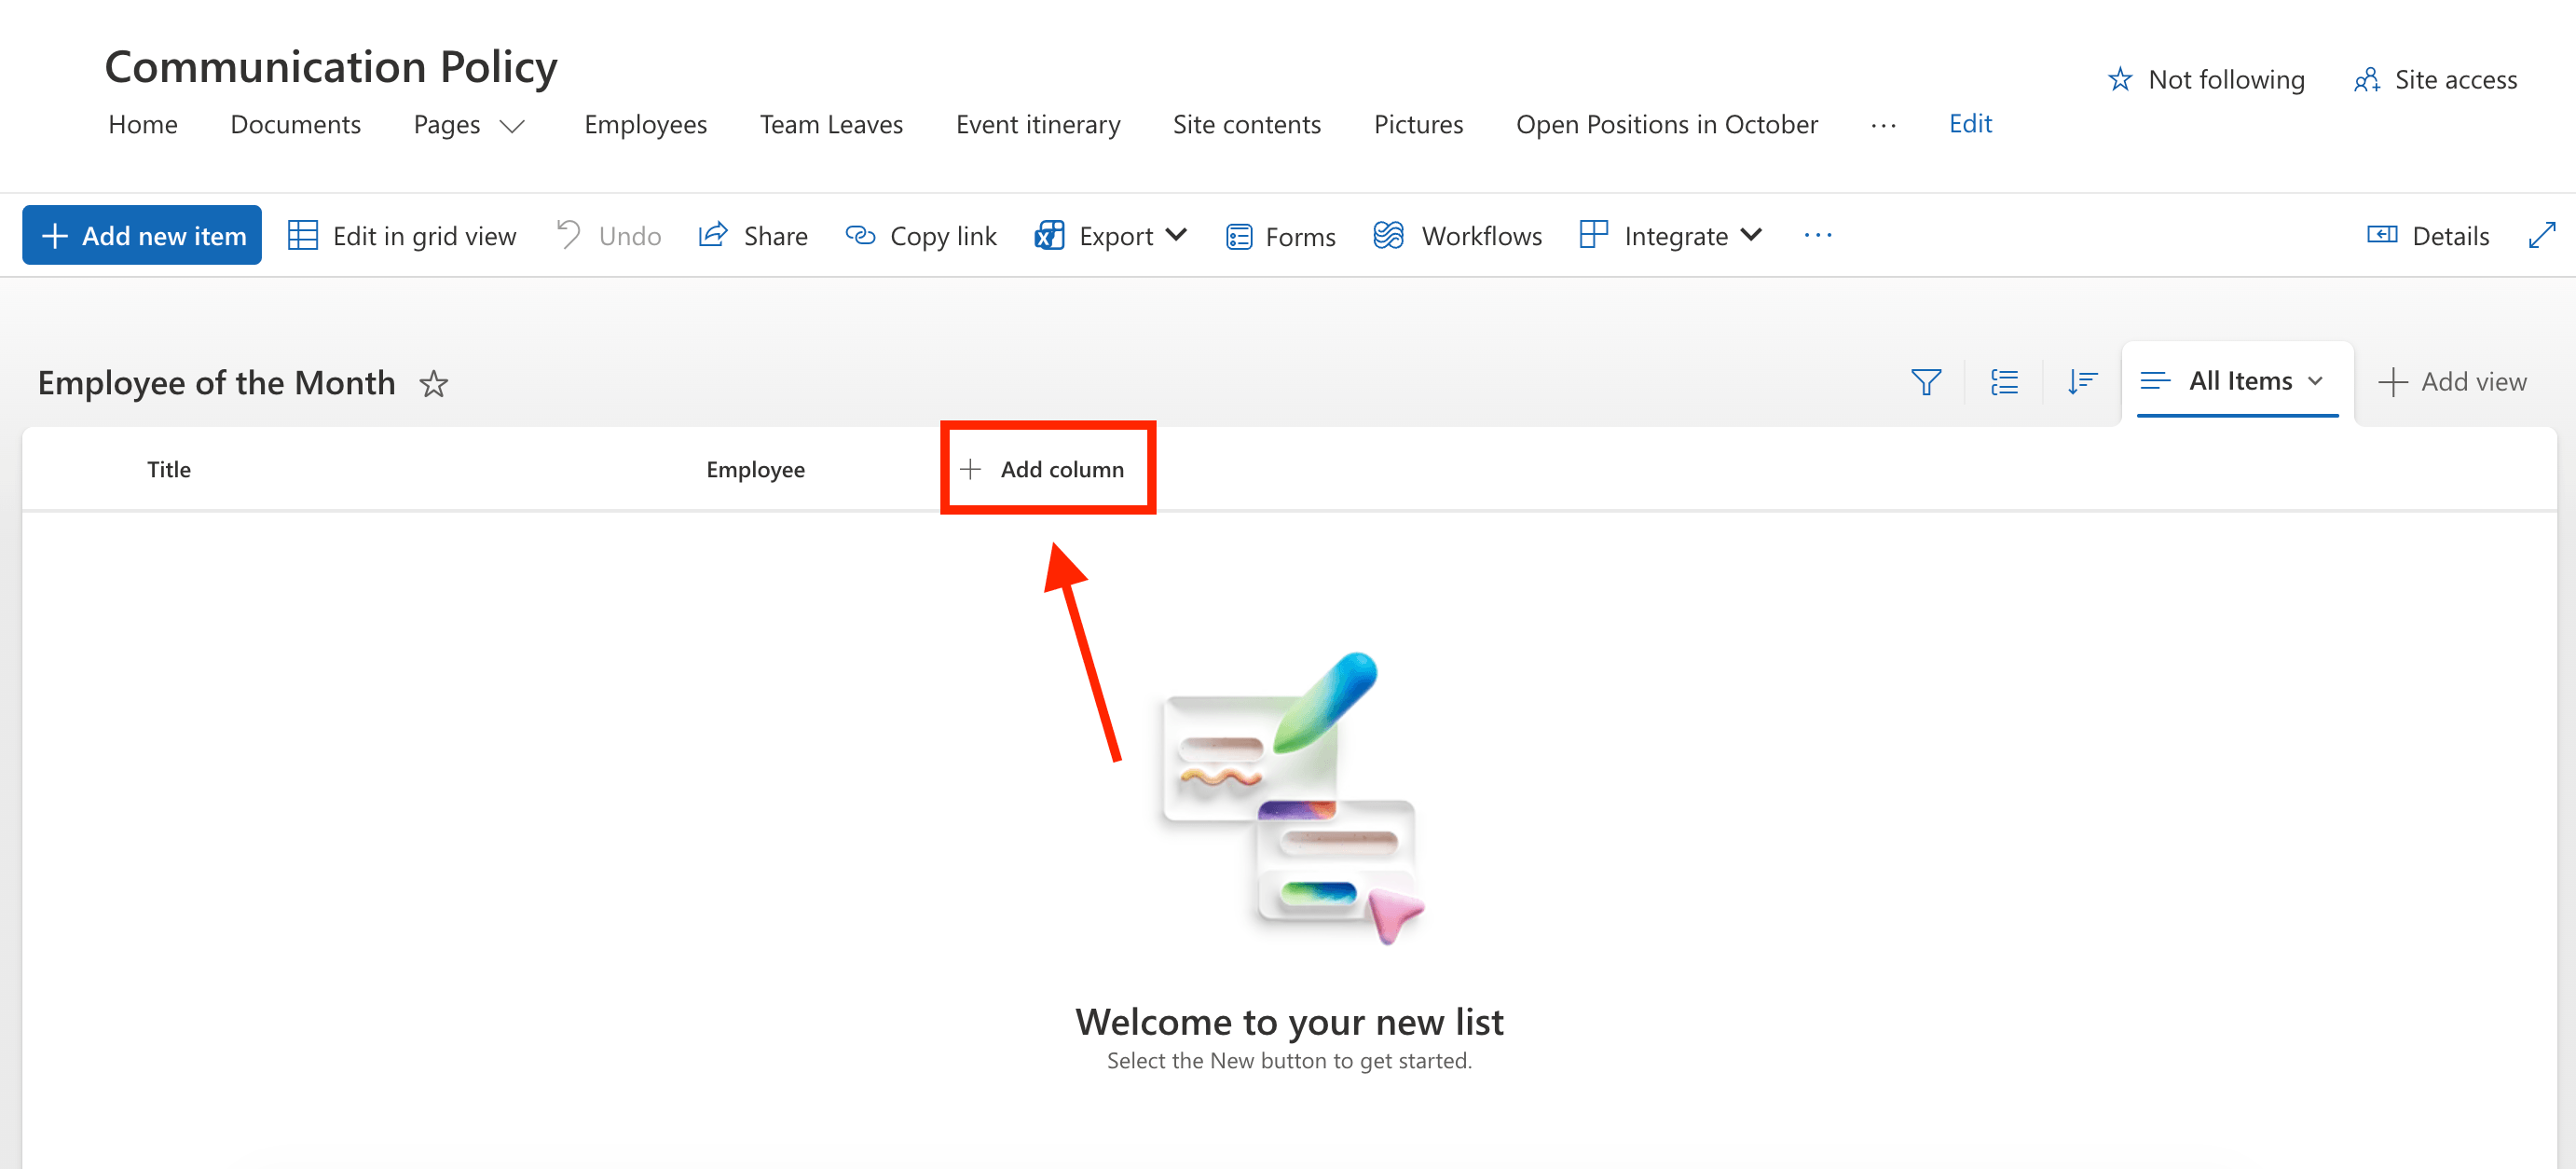
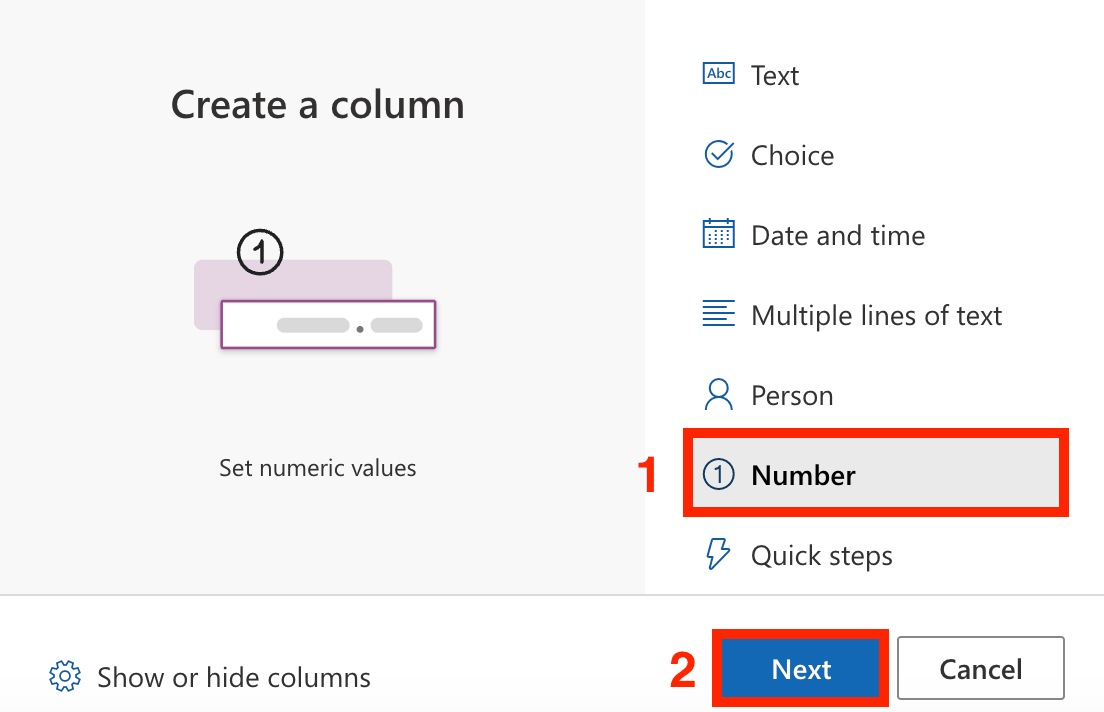
Choose [1] Number and click [2] Next:
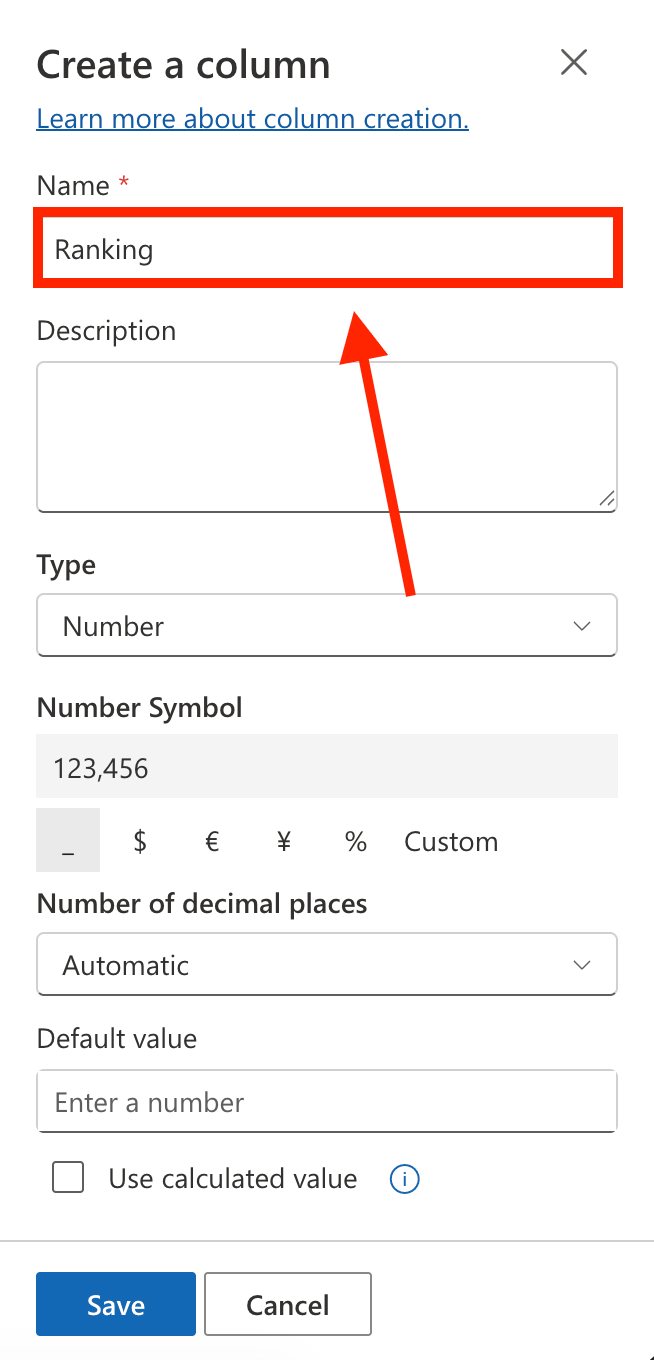
Name the column:
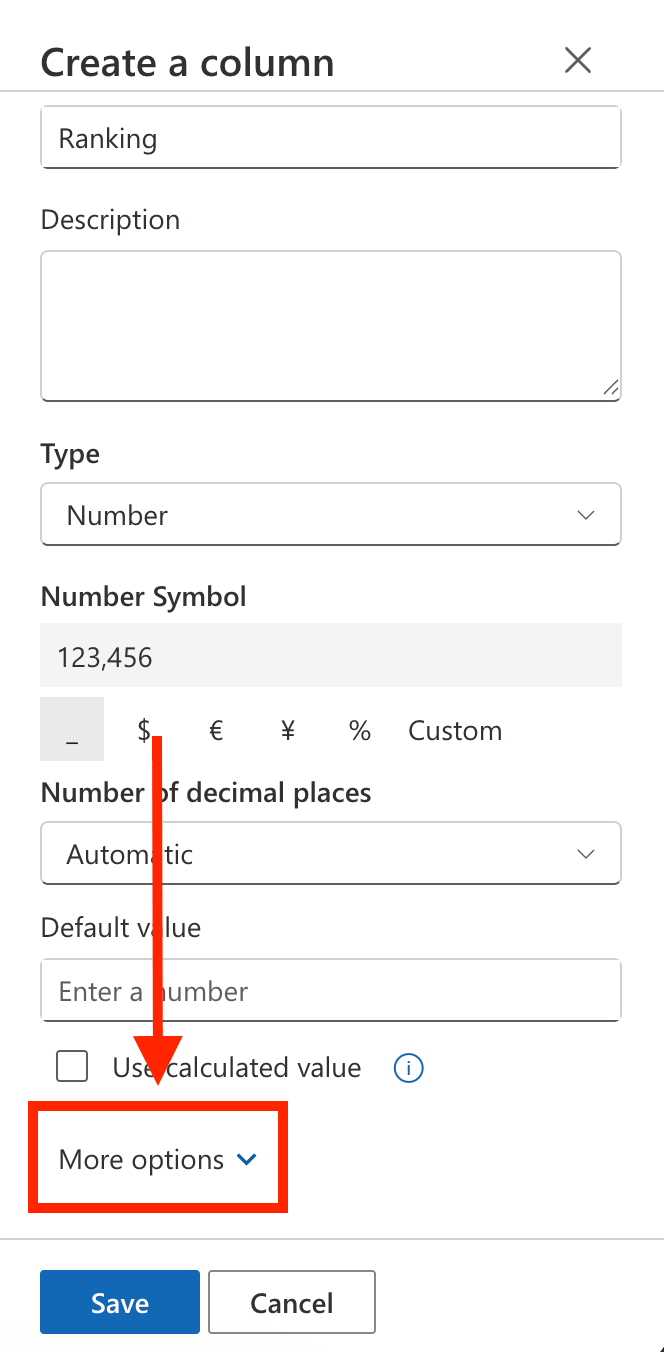
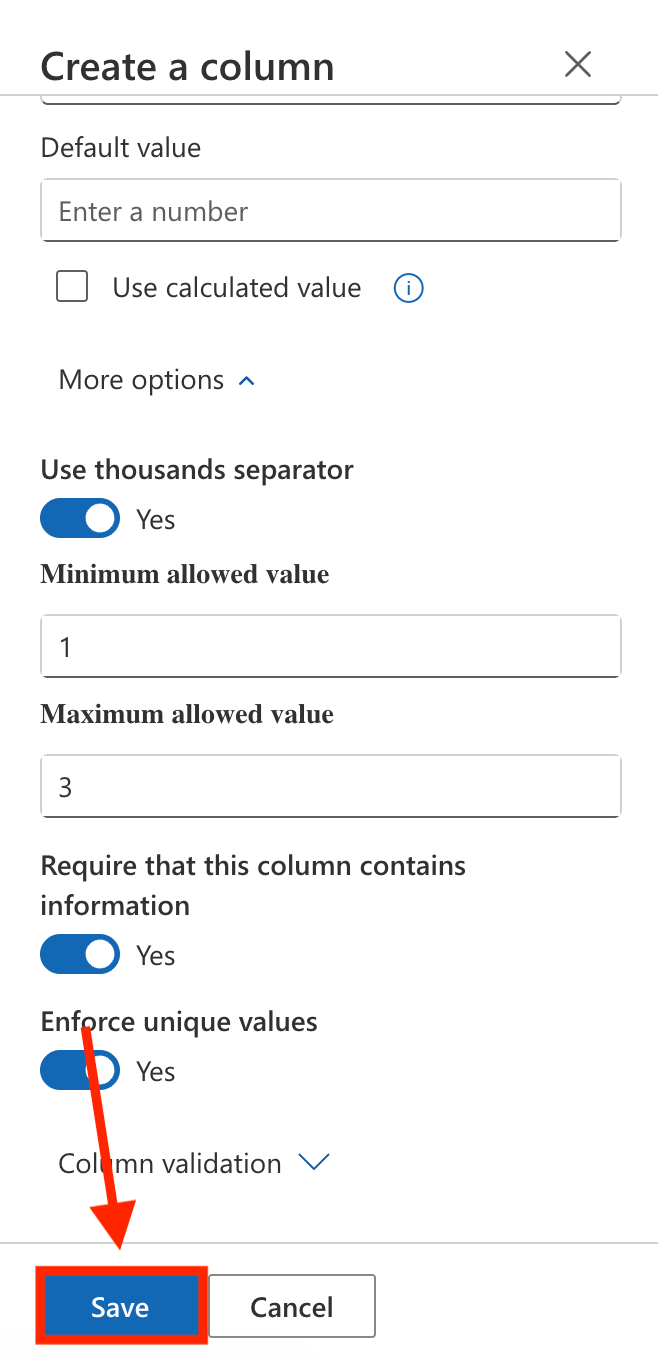
Select More Options:
Set a Minimum and Maximum Value. Since we want to feature 3 employees per month, we added 1 as the minimum value and 3 as the maximum value:

Enable the following:
- Require this column to contain information
- Enforce unique values
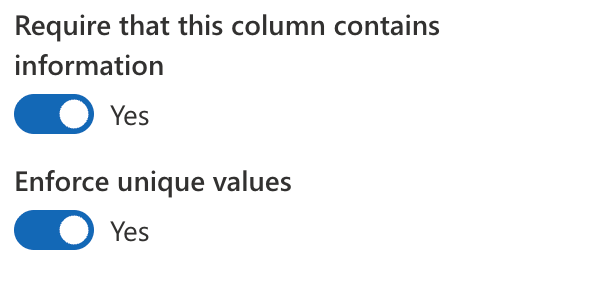
Once done, click Save:
Step 3: Add Employees
Select Edit in grid view:

Then, fill in the details as needed:
Once done, Exit grid view:
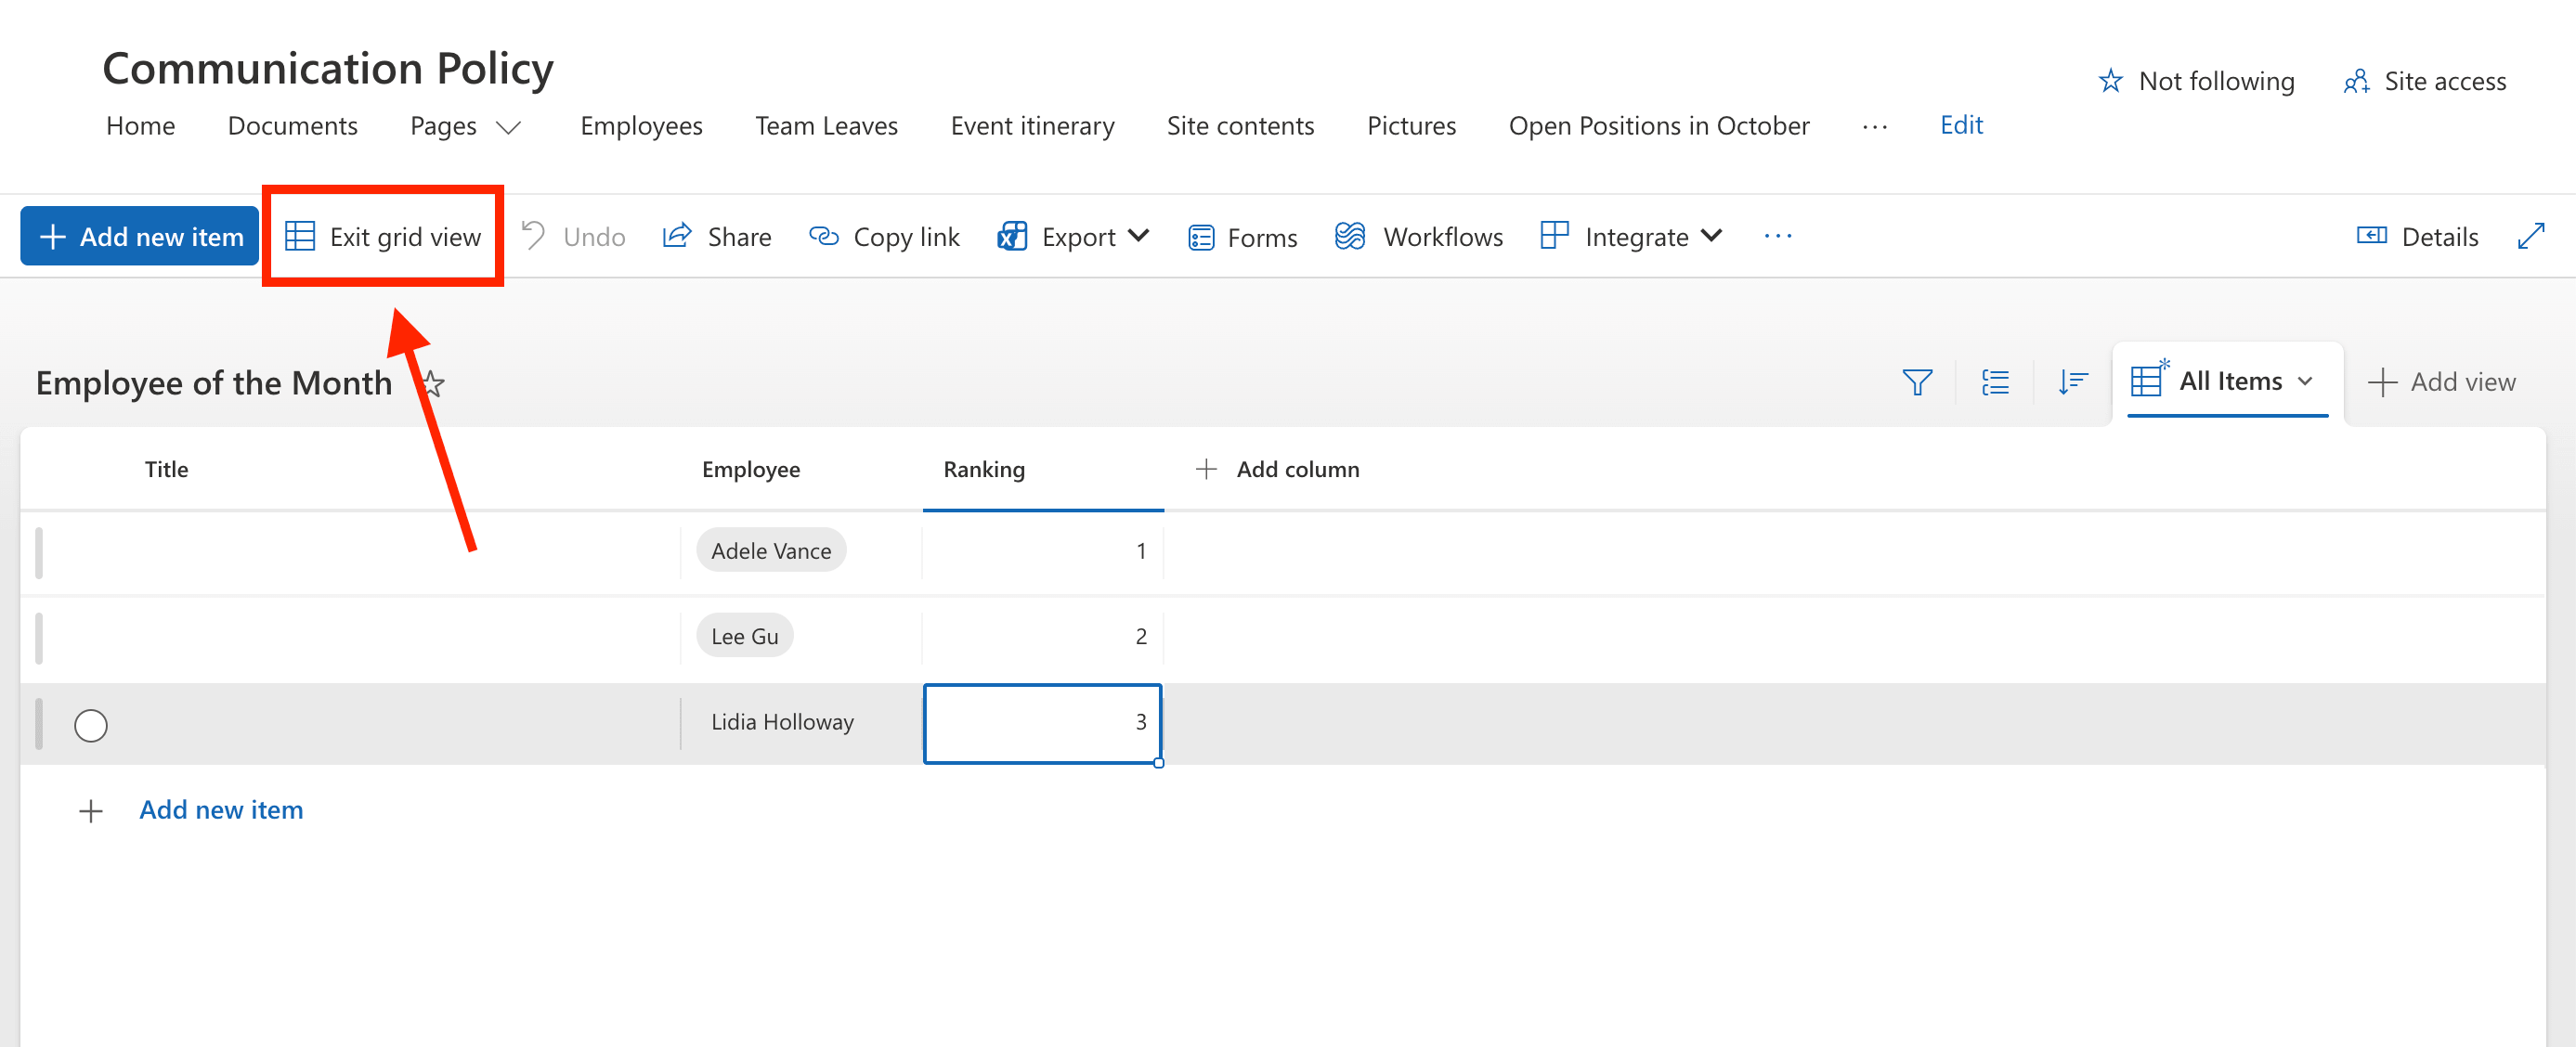
That's it! You now have an Employee of the Month SharePoint list.
Part 2: Connect the SharePoint List to a Person Cards Design Element
Learn how to use ShortPoint Connect to retrieve data from the SharePoint List you created in Part 1 and display that data in a ShortPoint Design Element.
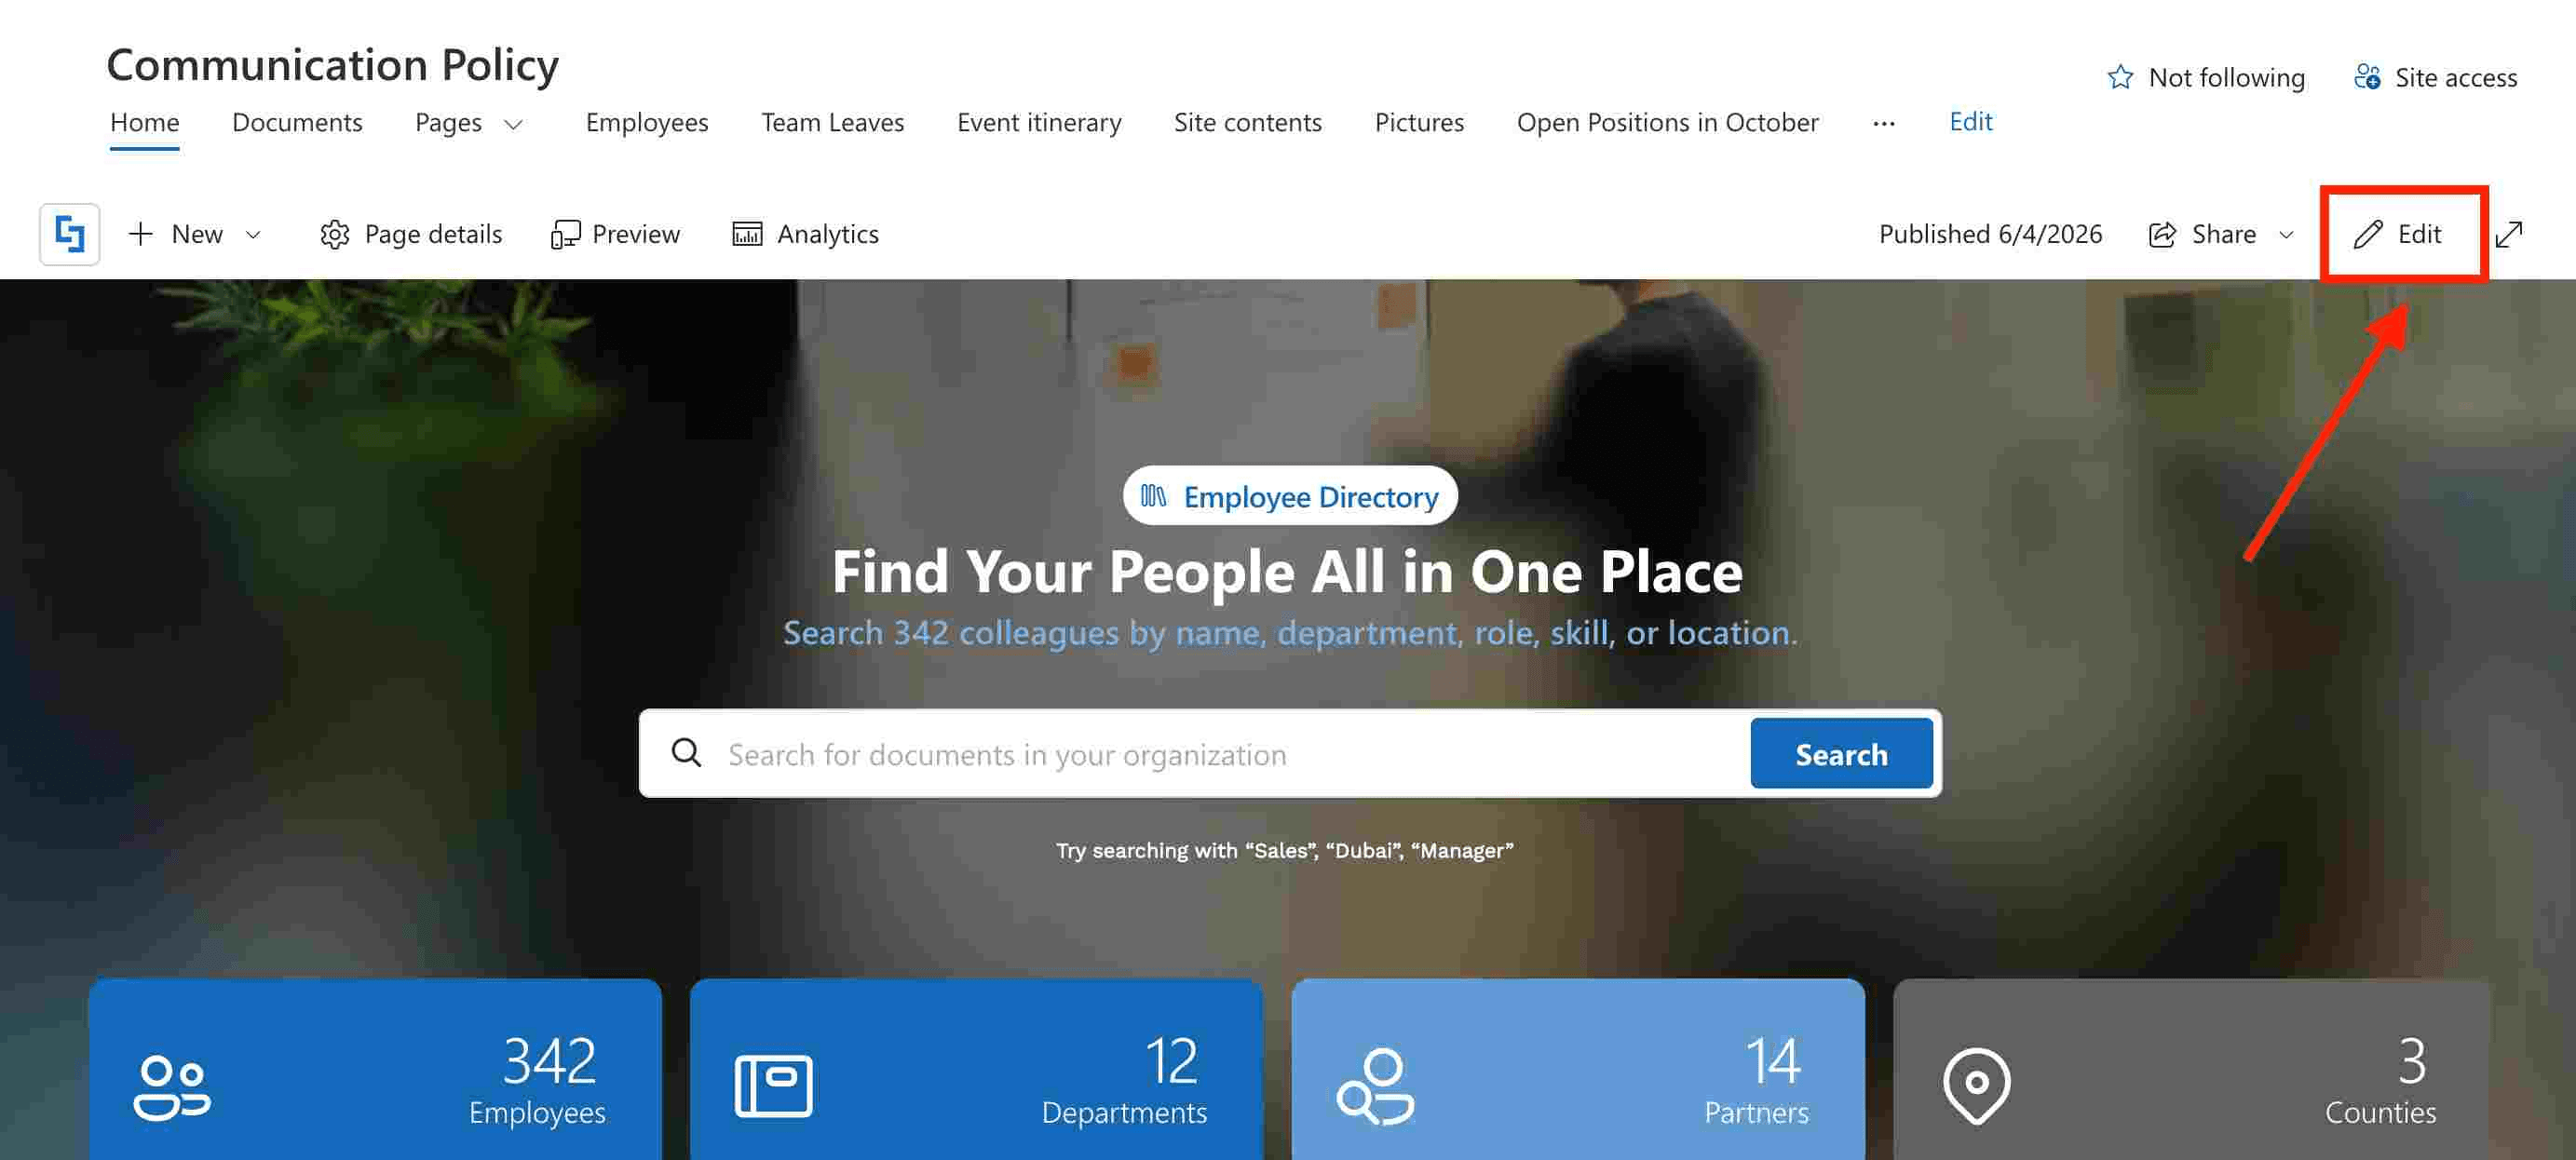
Step 1: Edit the ShortPoint Web Part
Go to the SharePoint page you want to use and click Edit:
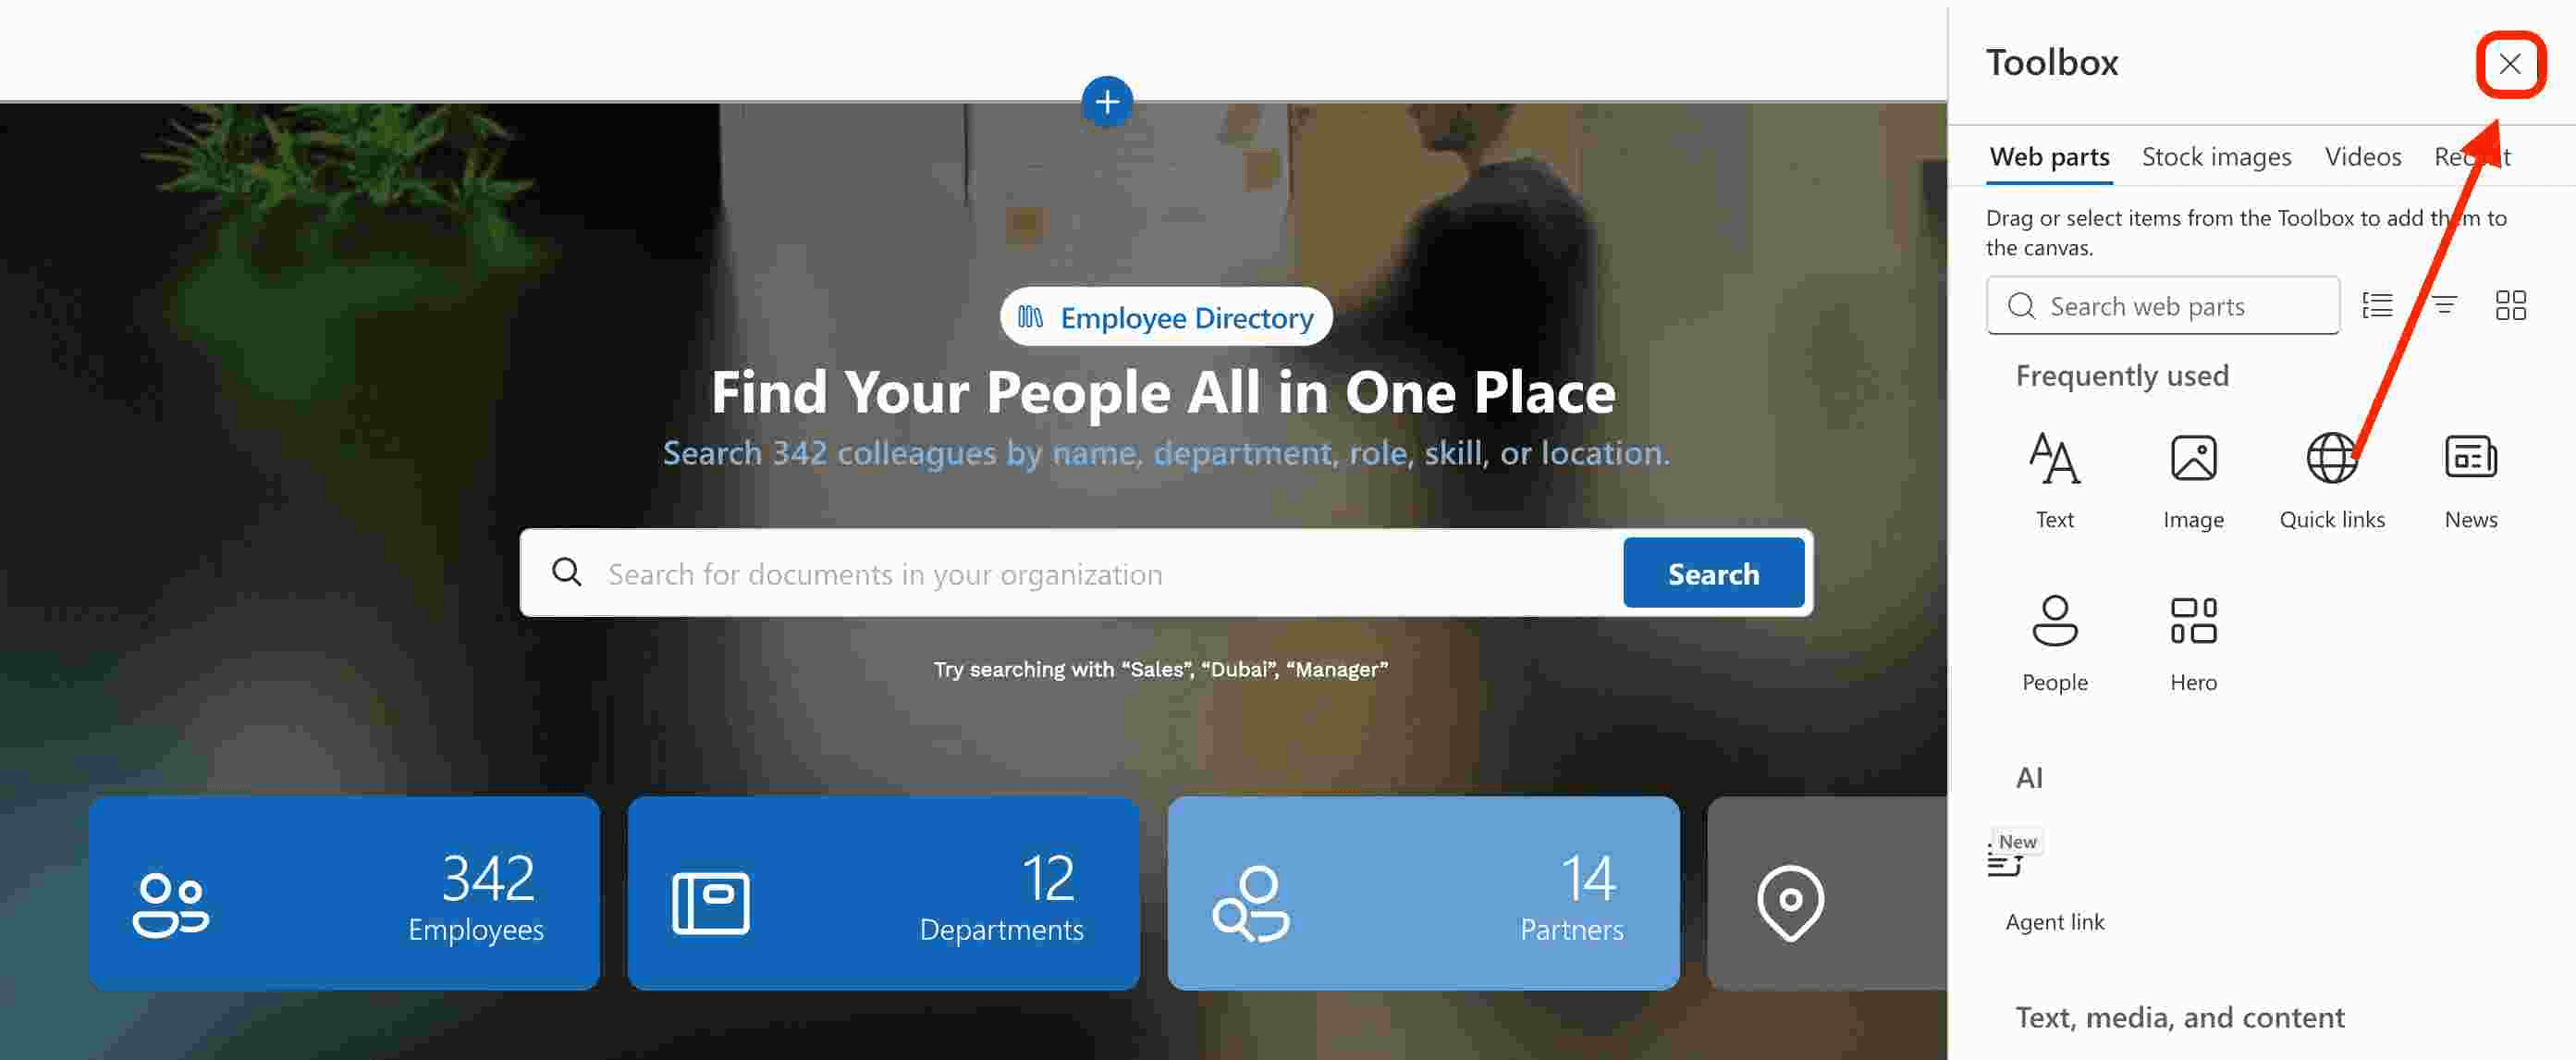
Close the Toolbox:
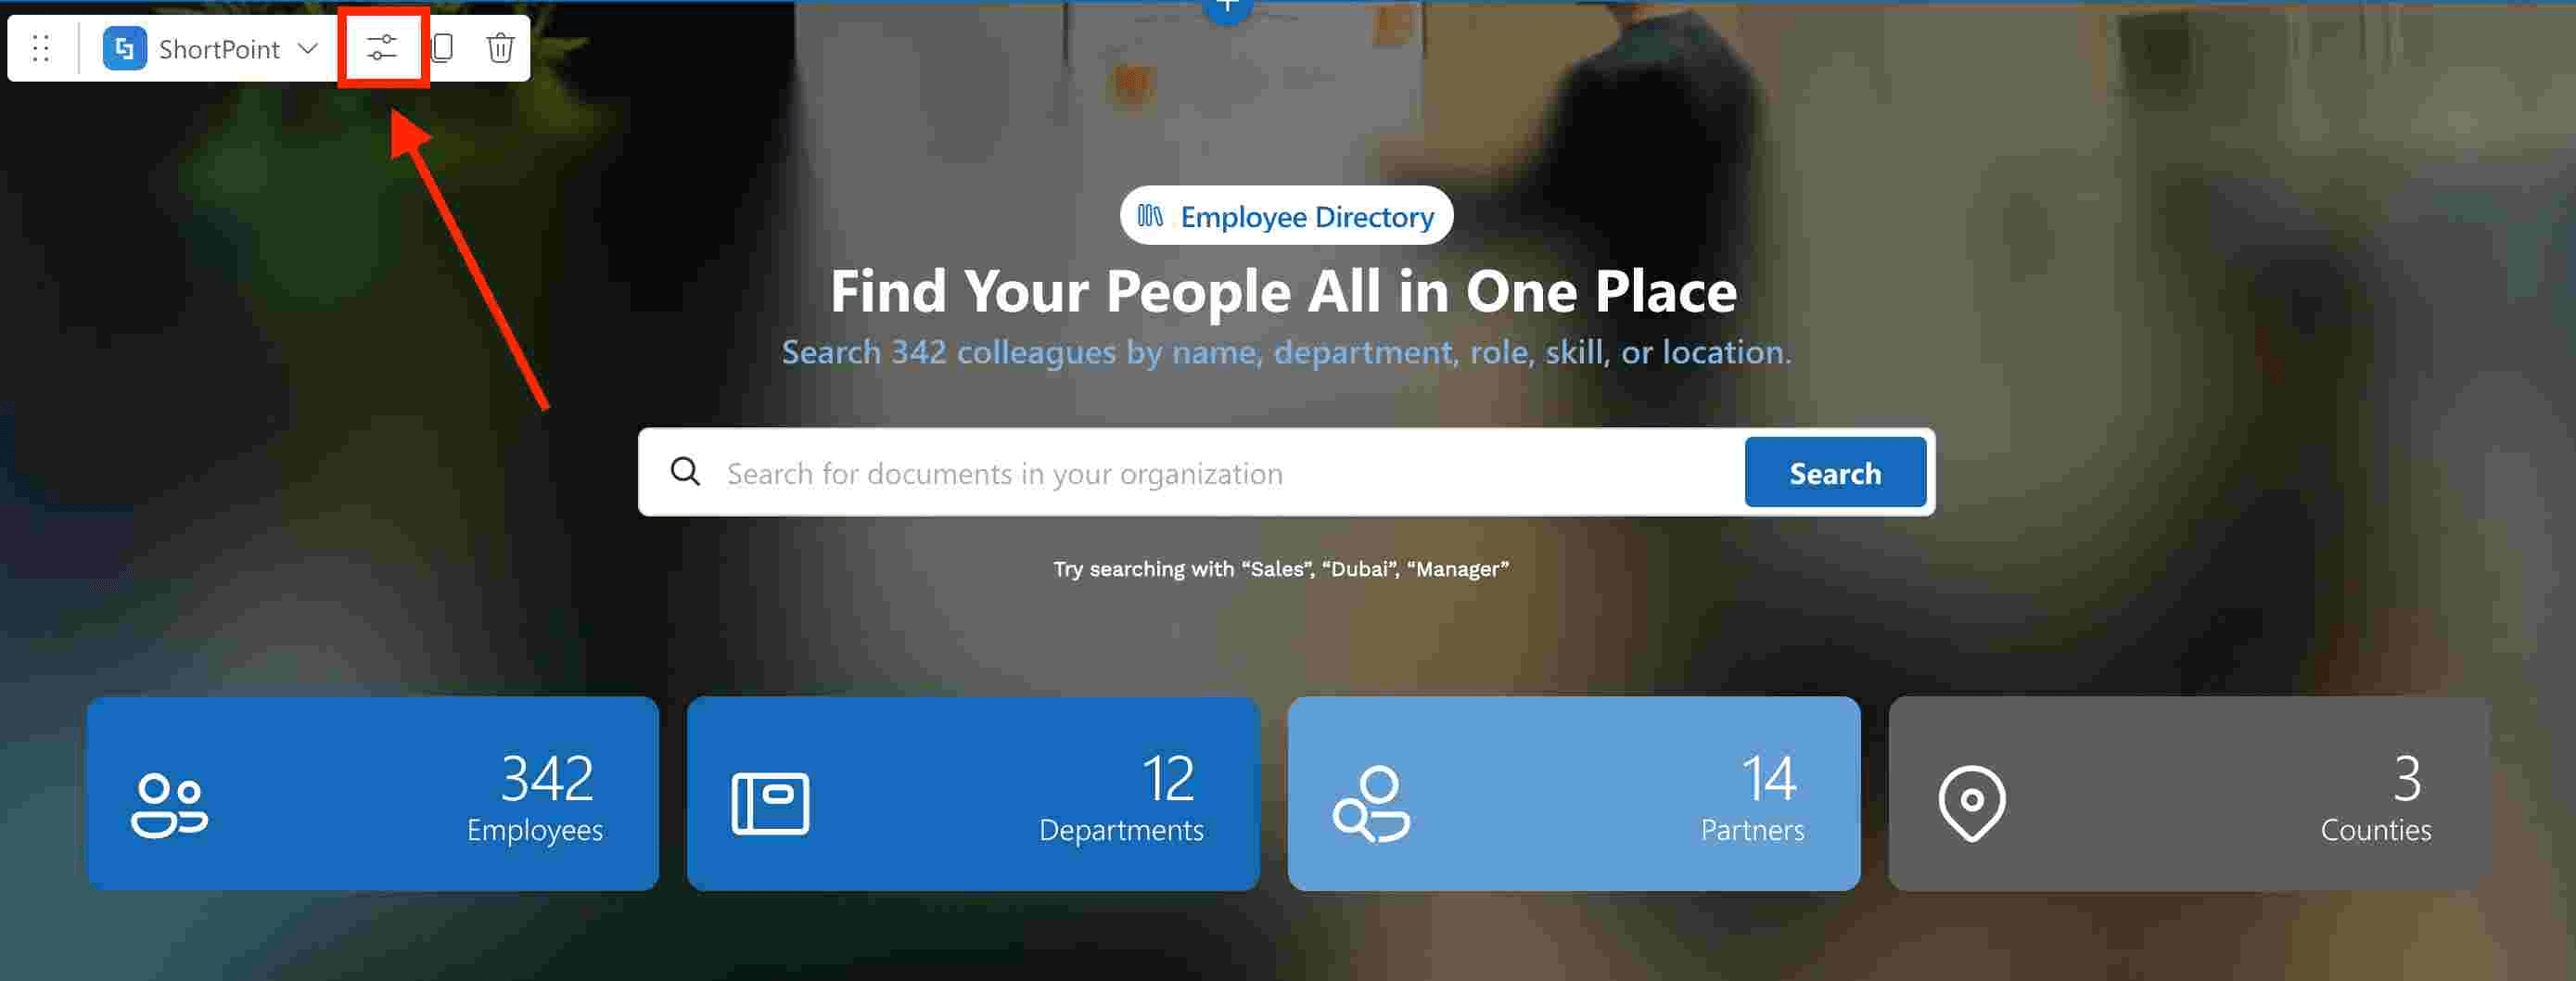
Edit the ShortPoint web part:
Step 2: Edit the Design Element
NOTEYou can use any Design Element you prefer, but we recommend using the Person Cards Design Element.
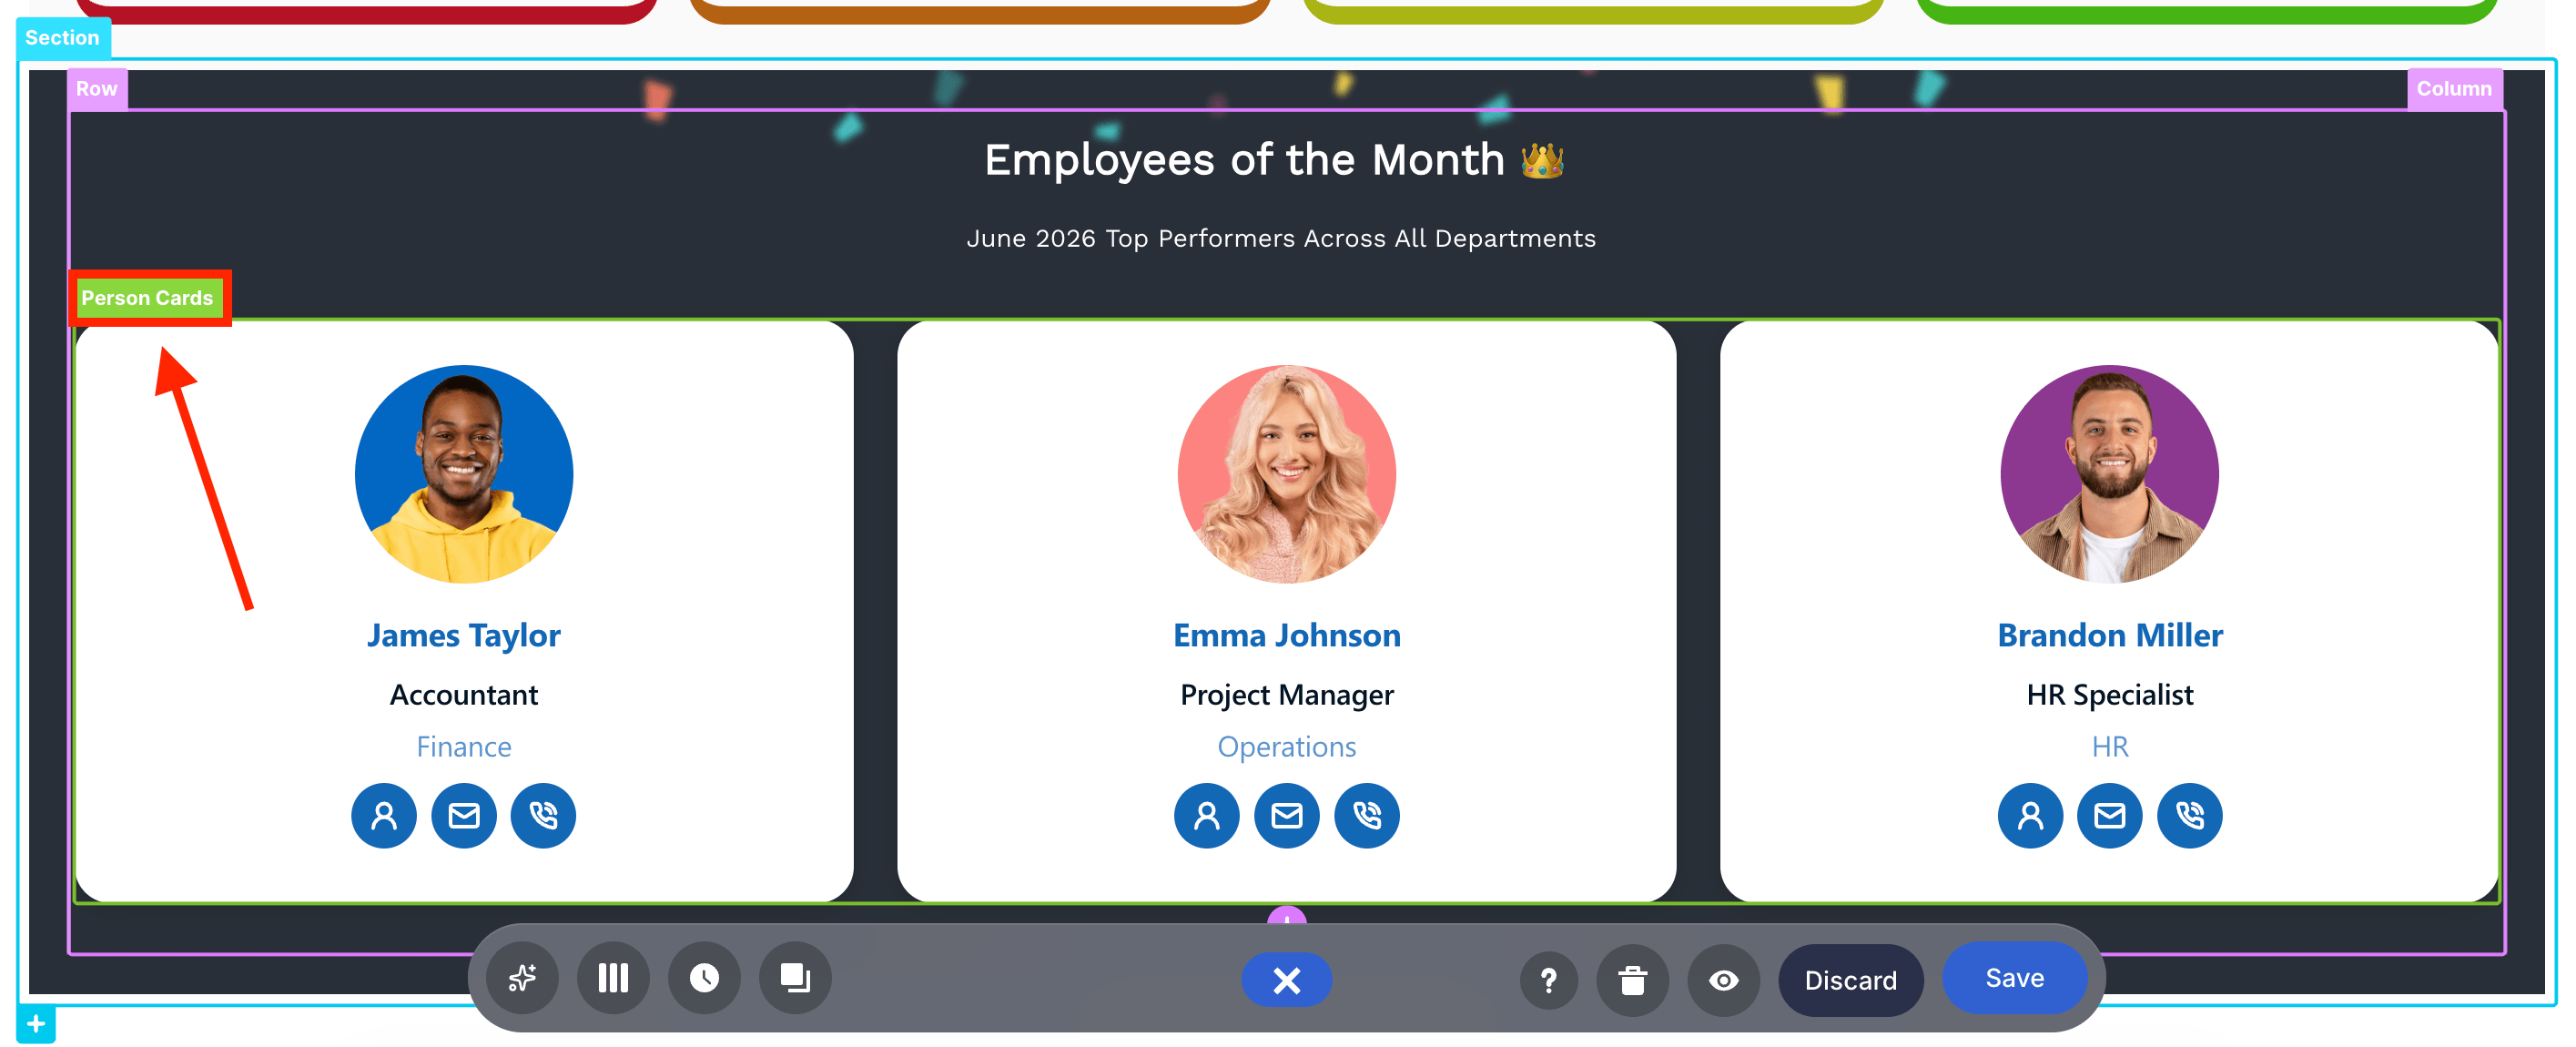
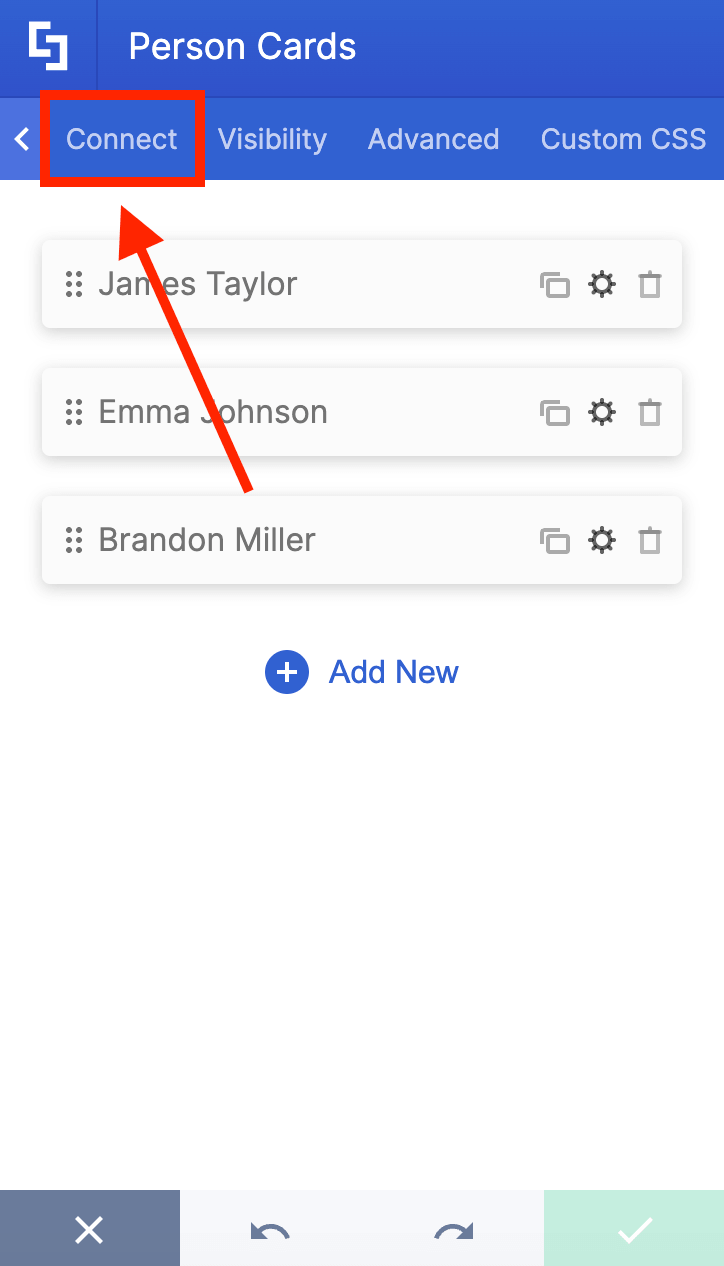
Click the EasyPass tag of the Design Element:
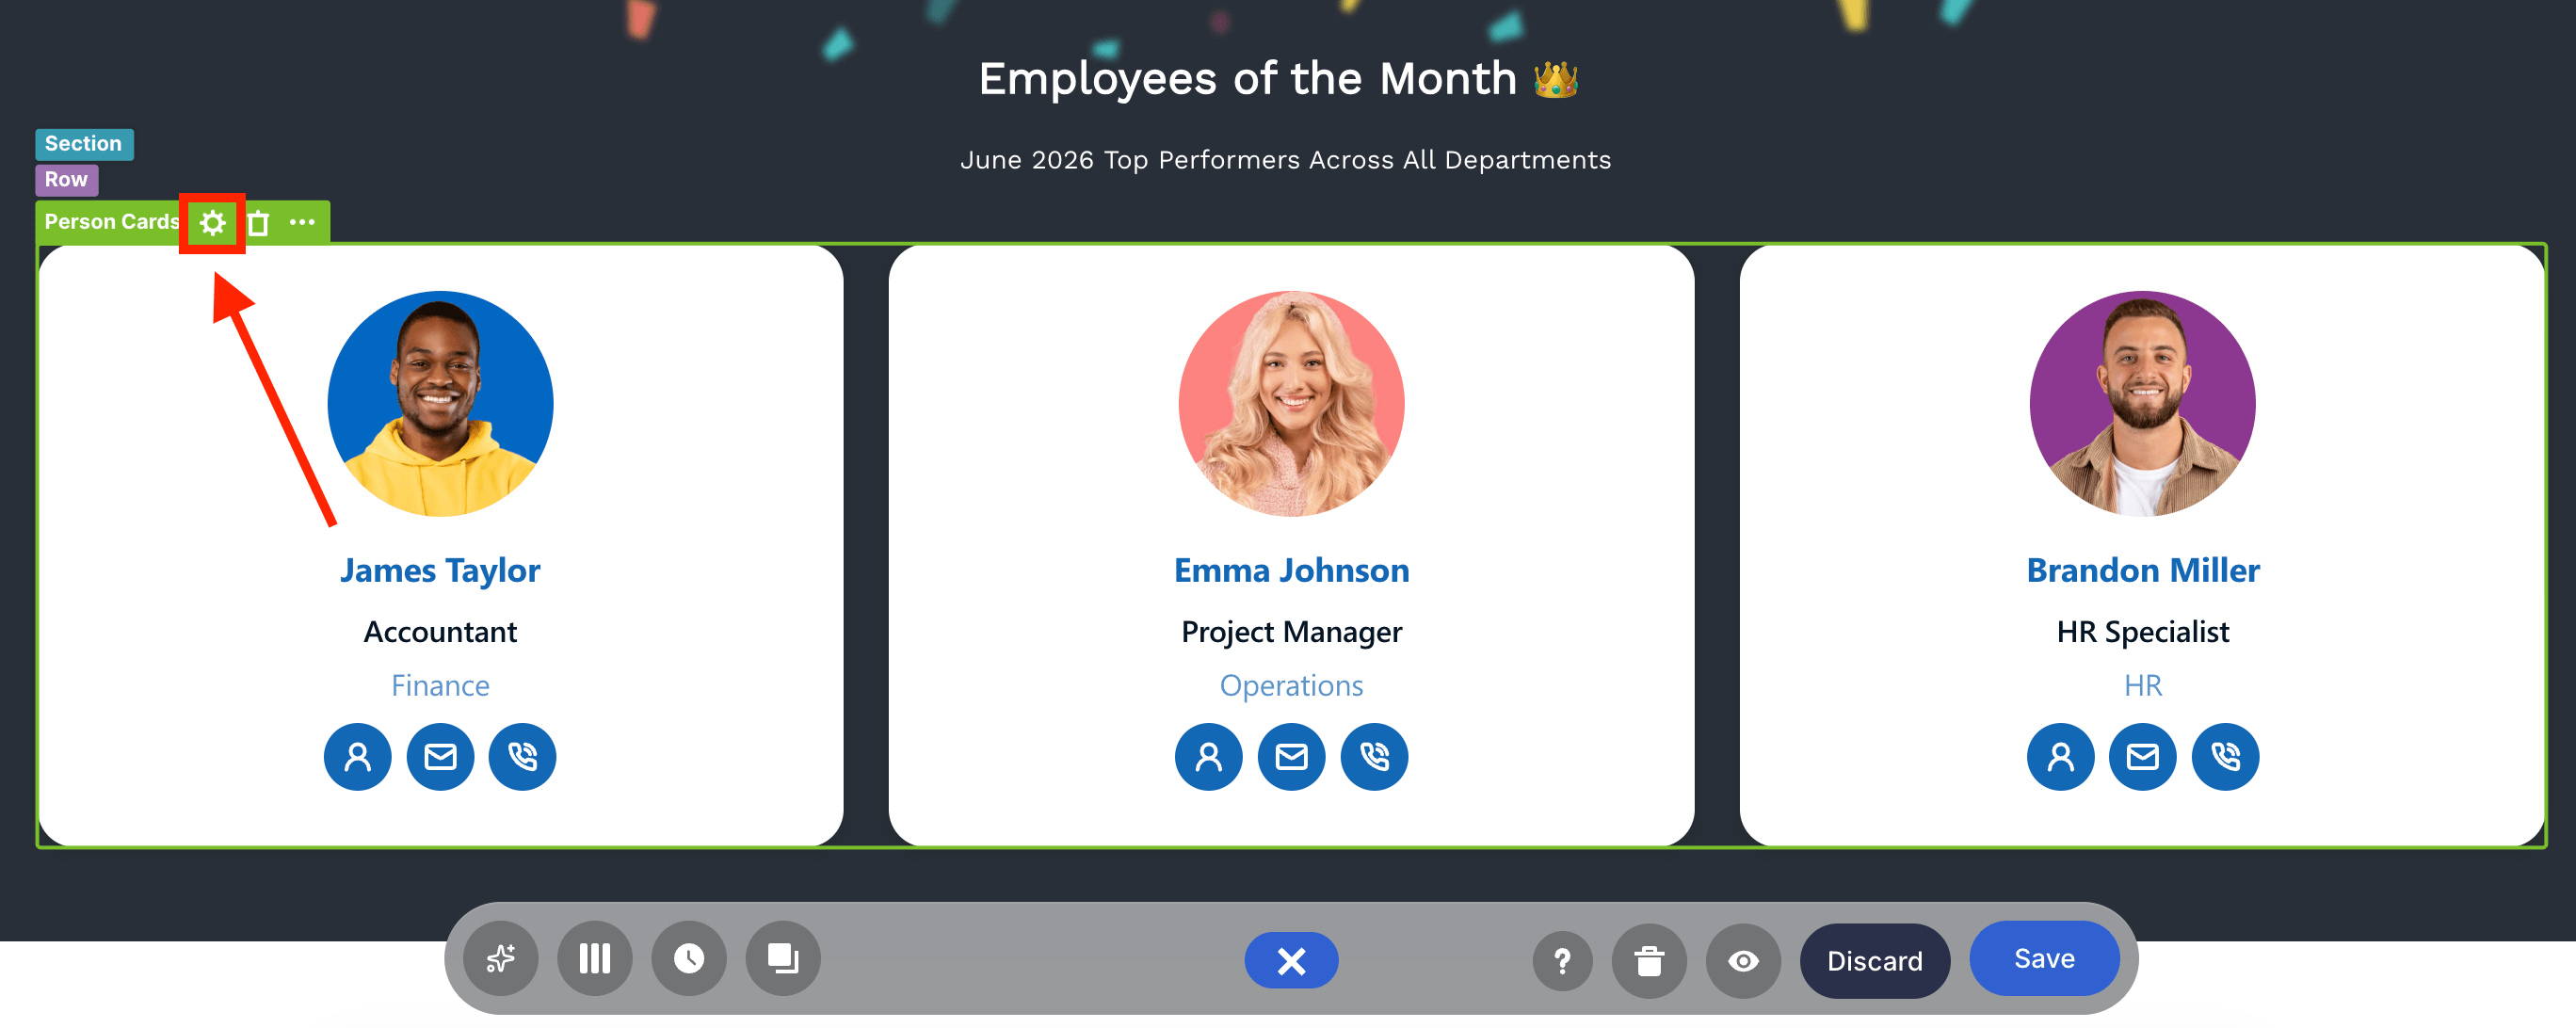
Select the cogwheel icon:
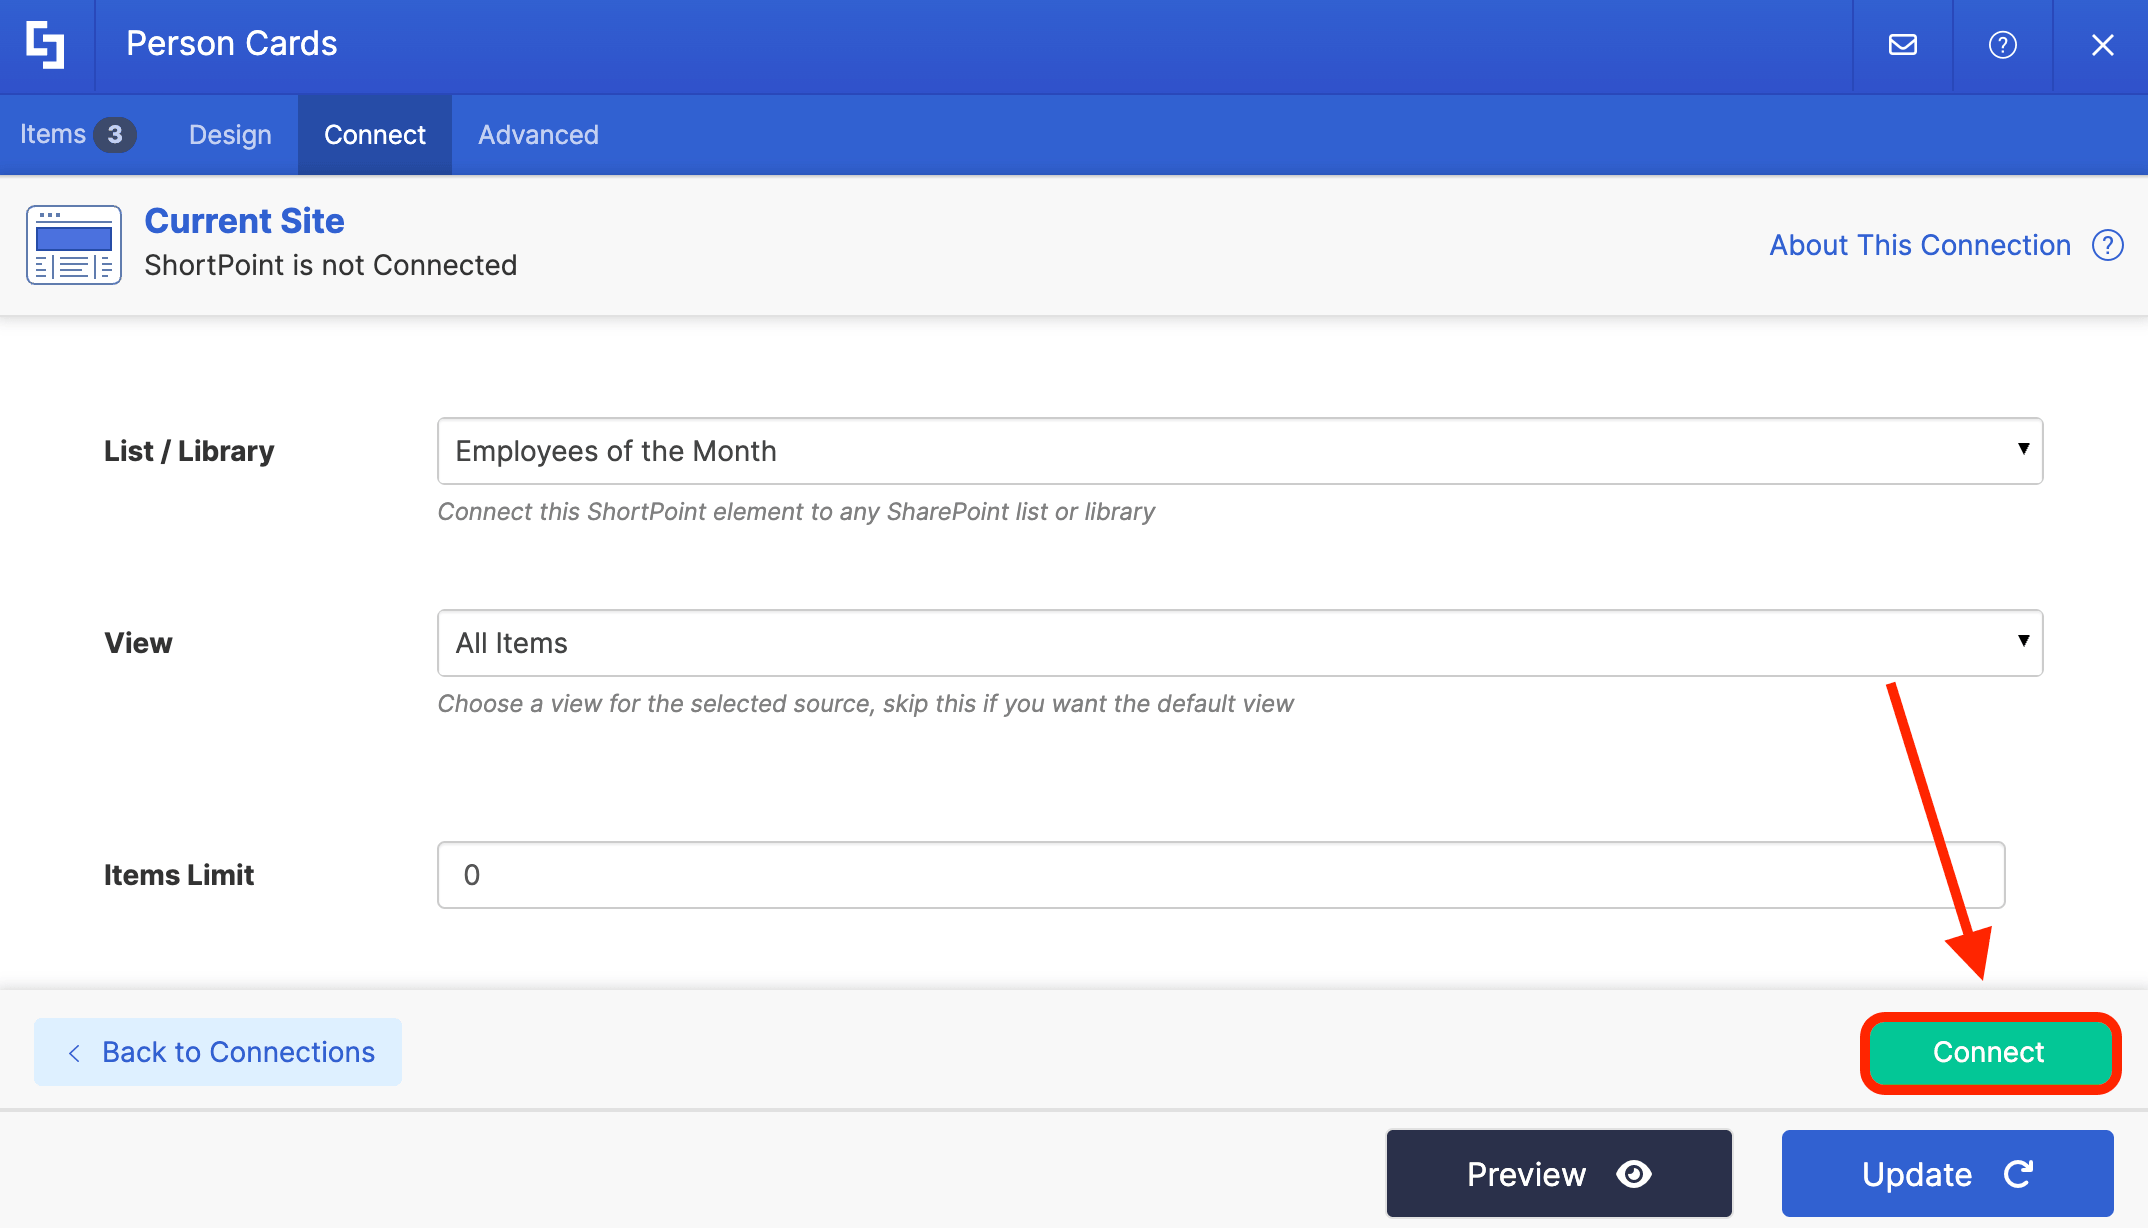
Step 3: Connect
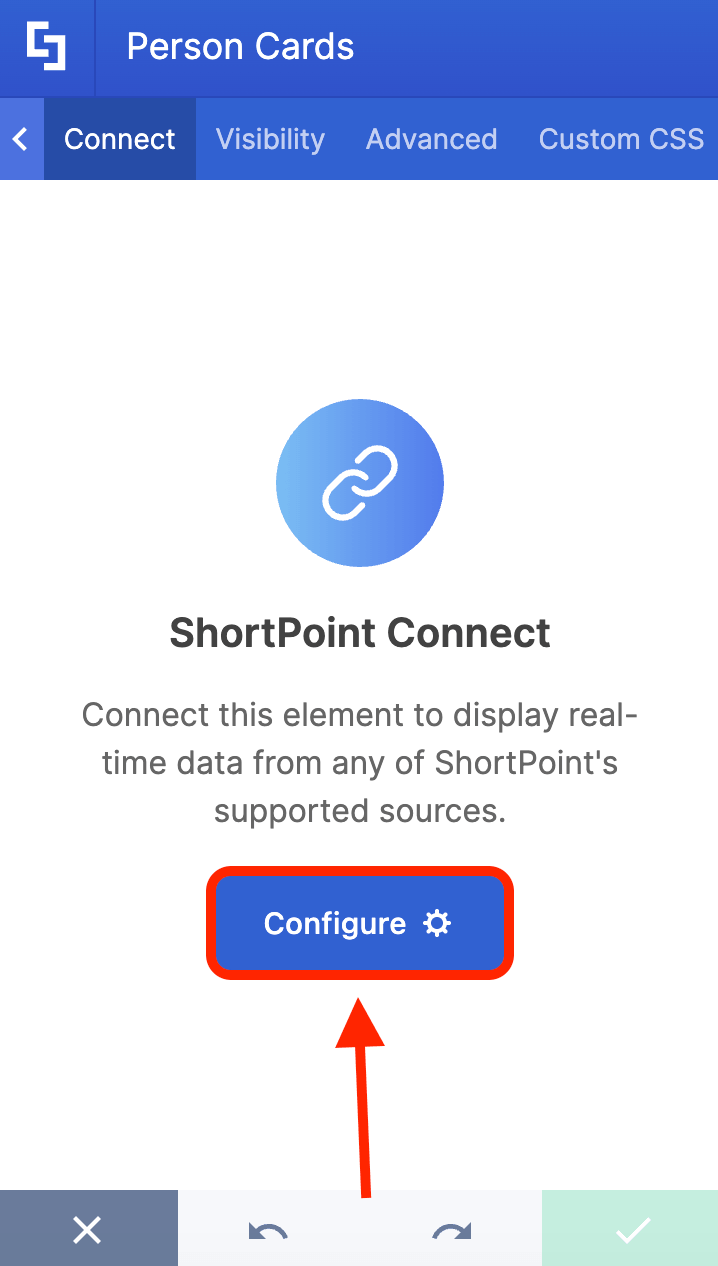
Go to the Connect tab:
Select Configure:
Choose the Current Site connection:

Find the name of your SharePoint List and select it:
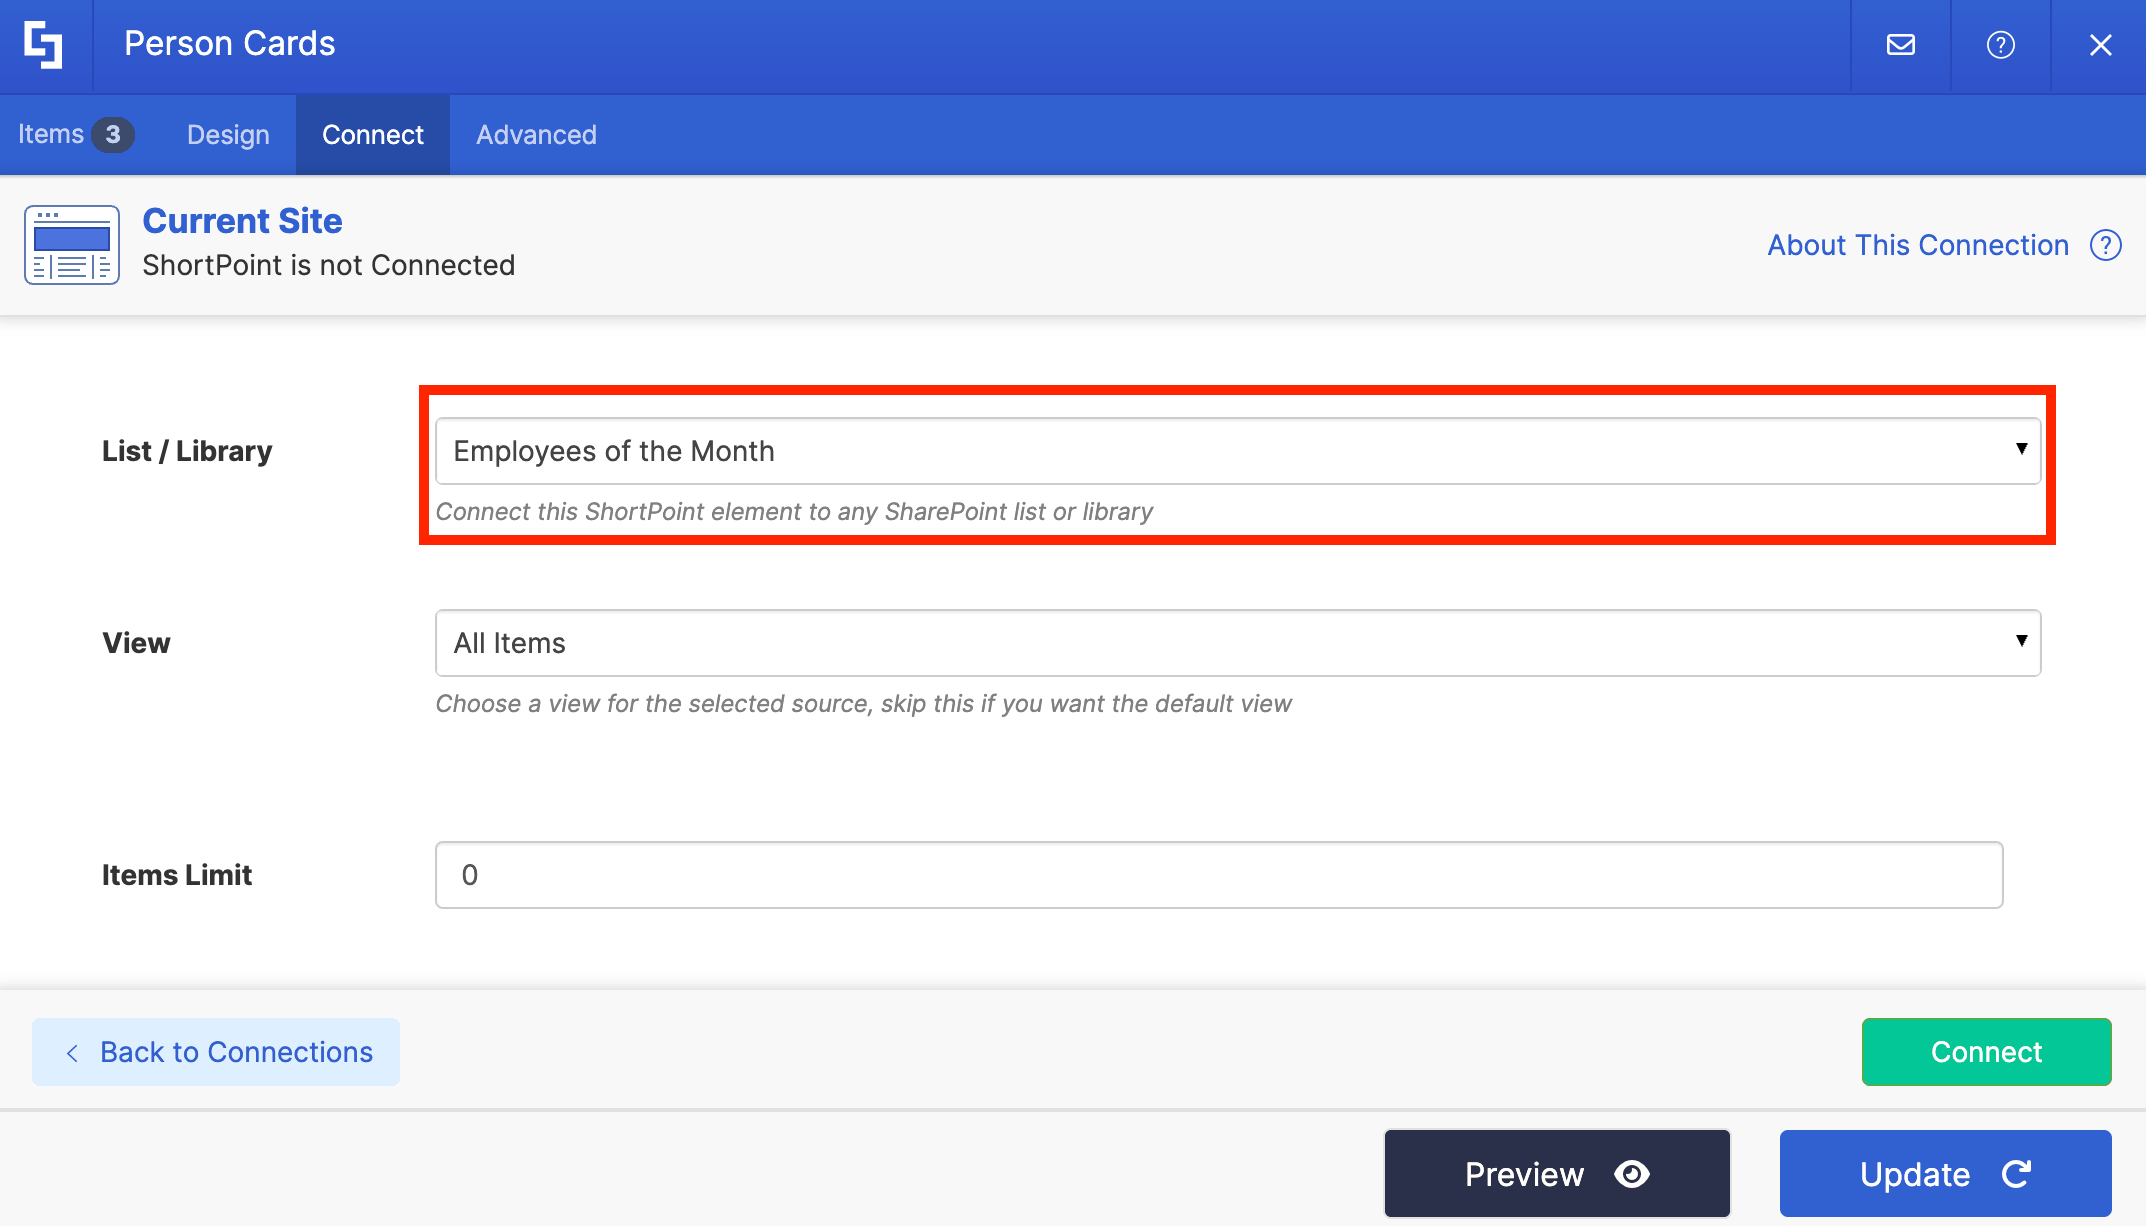
Choose the All Items view:
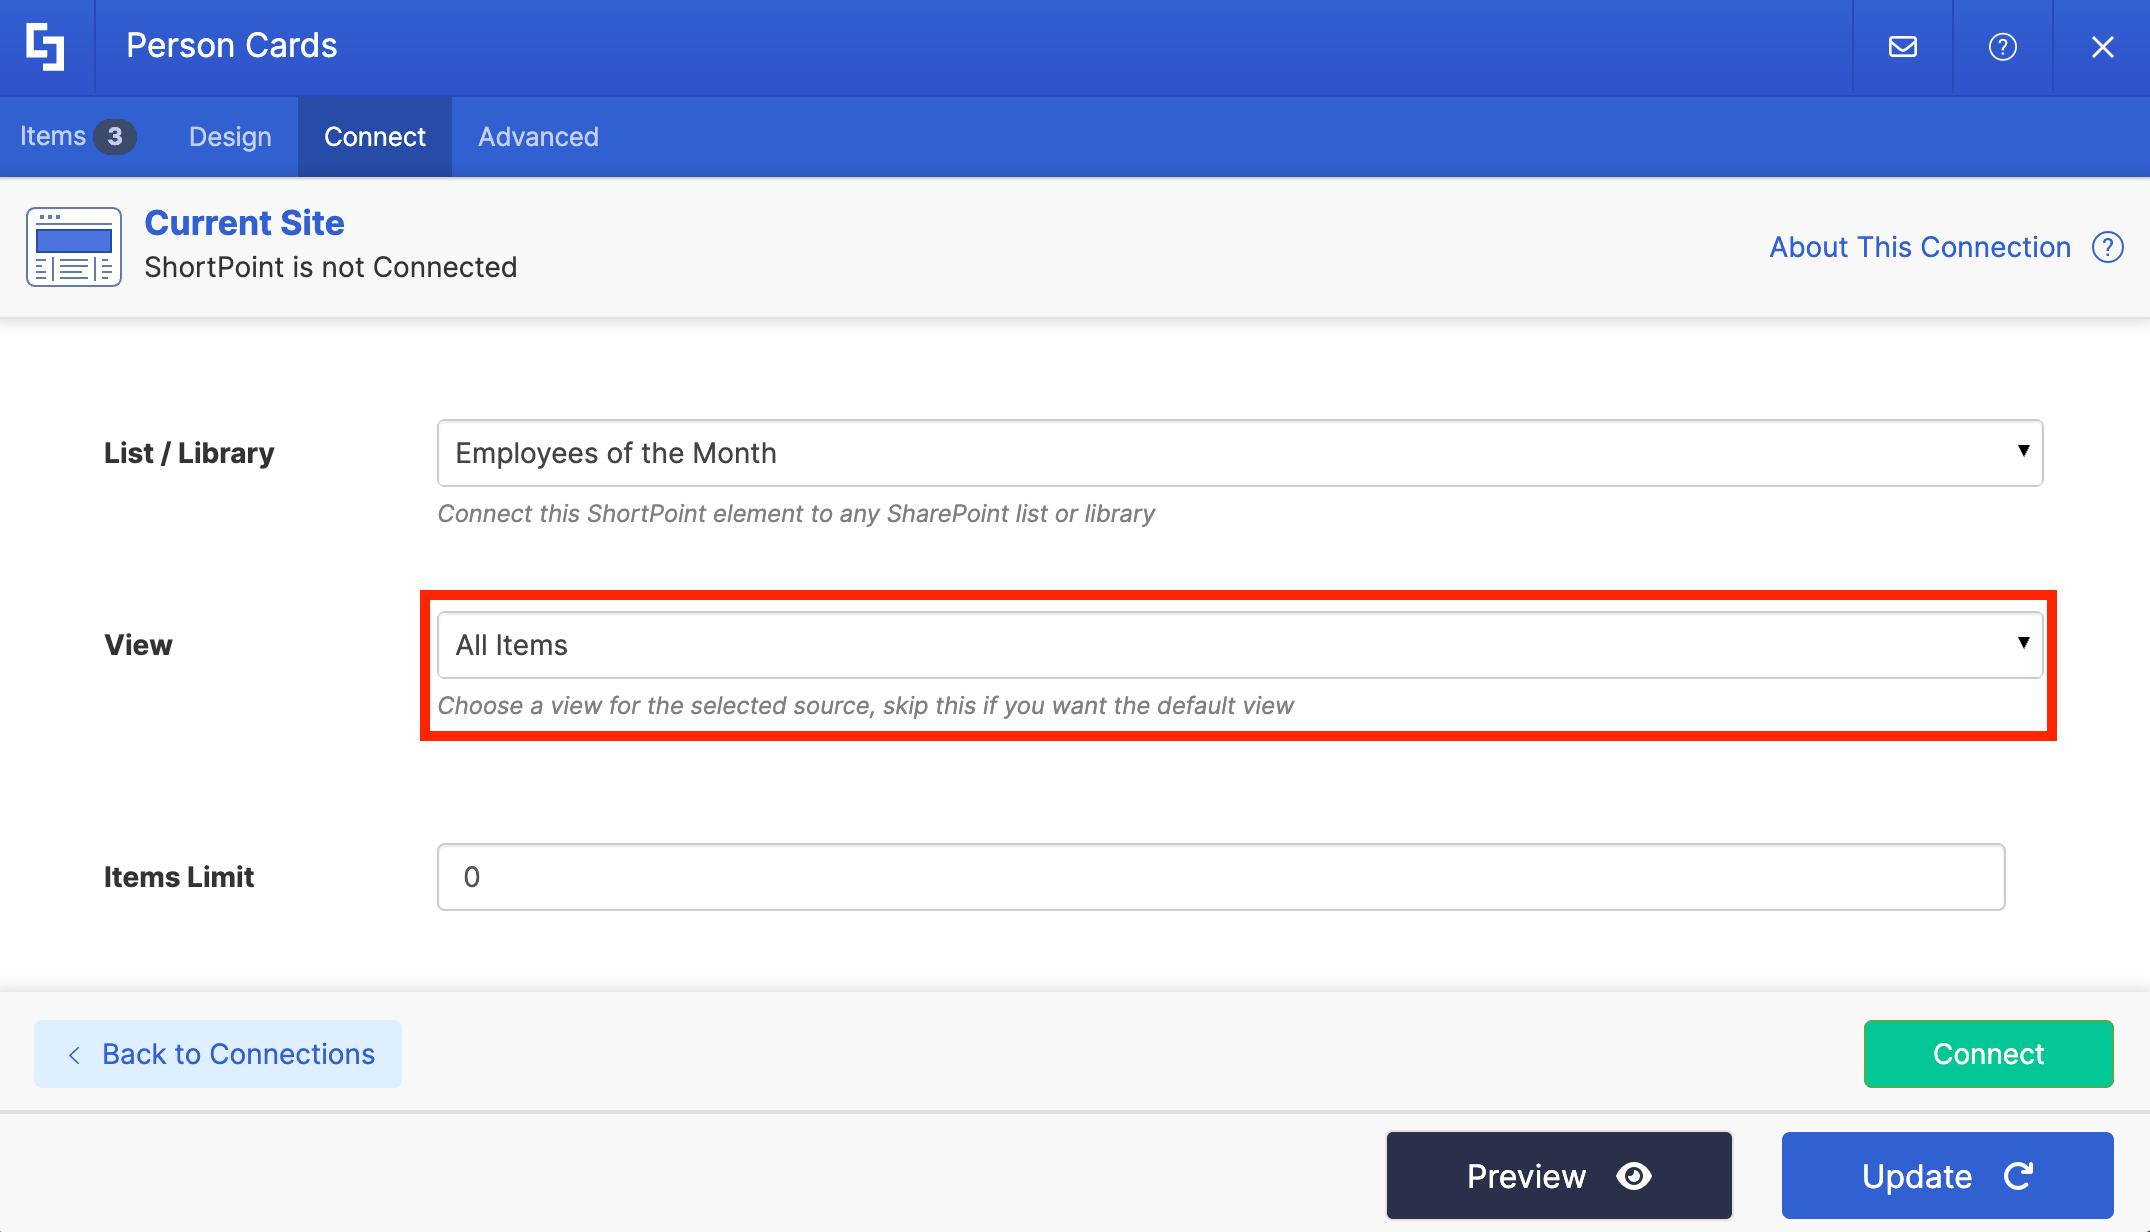
Then, click Connect:
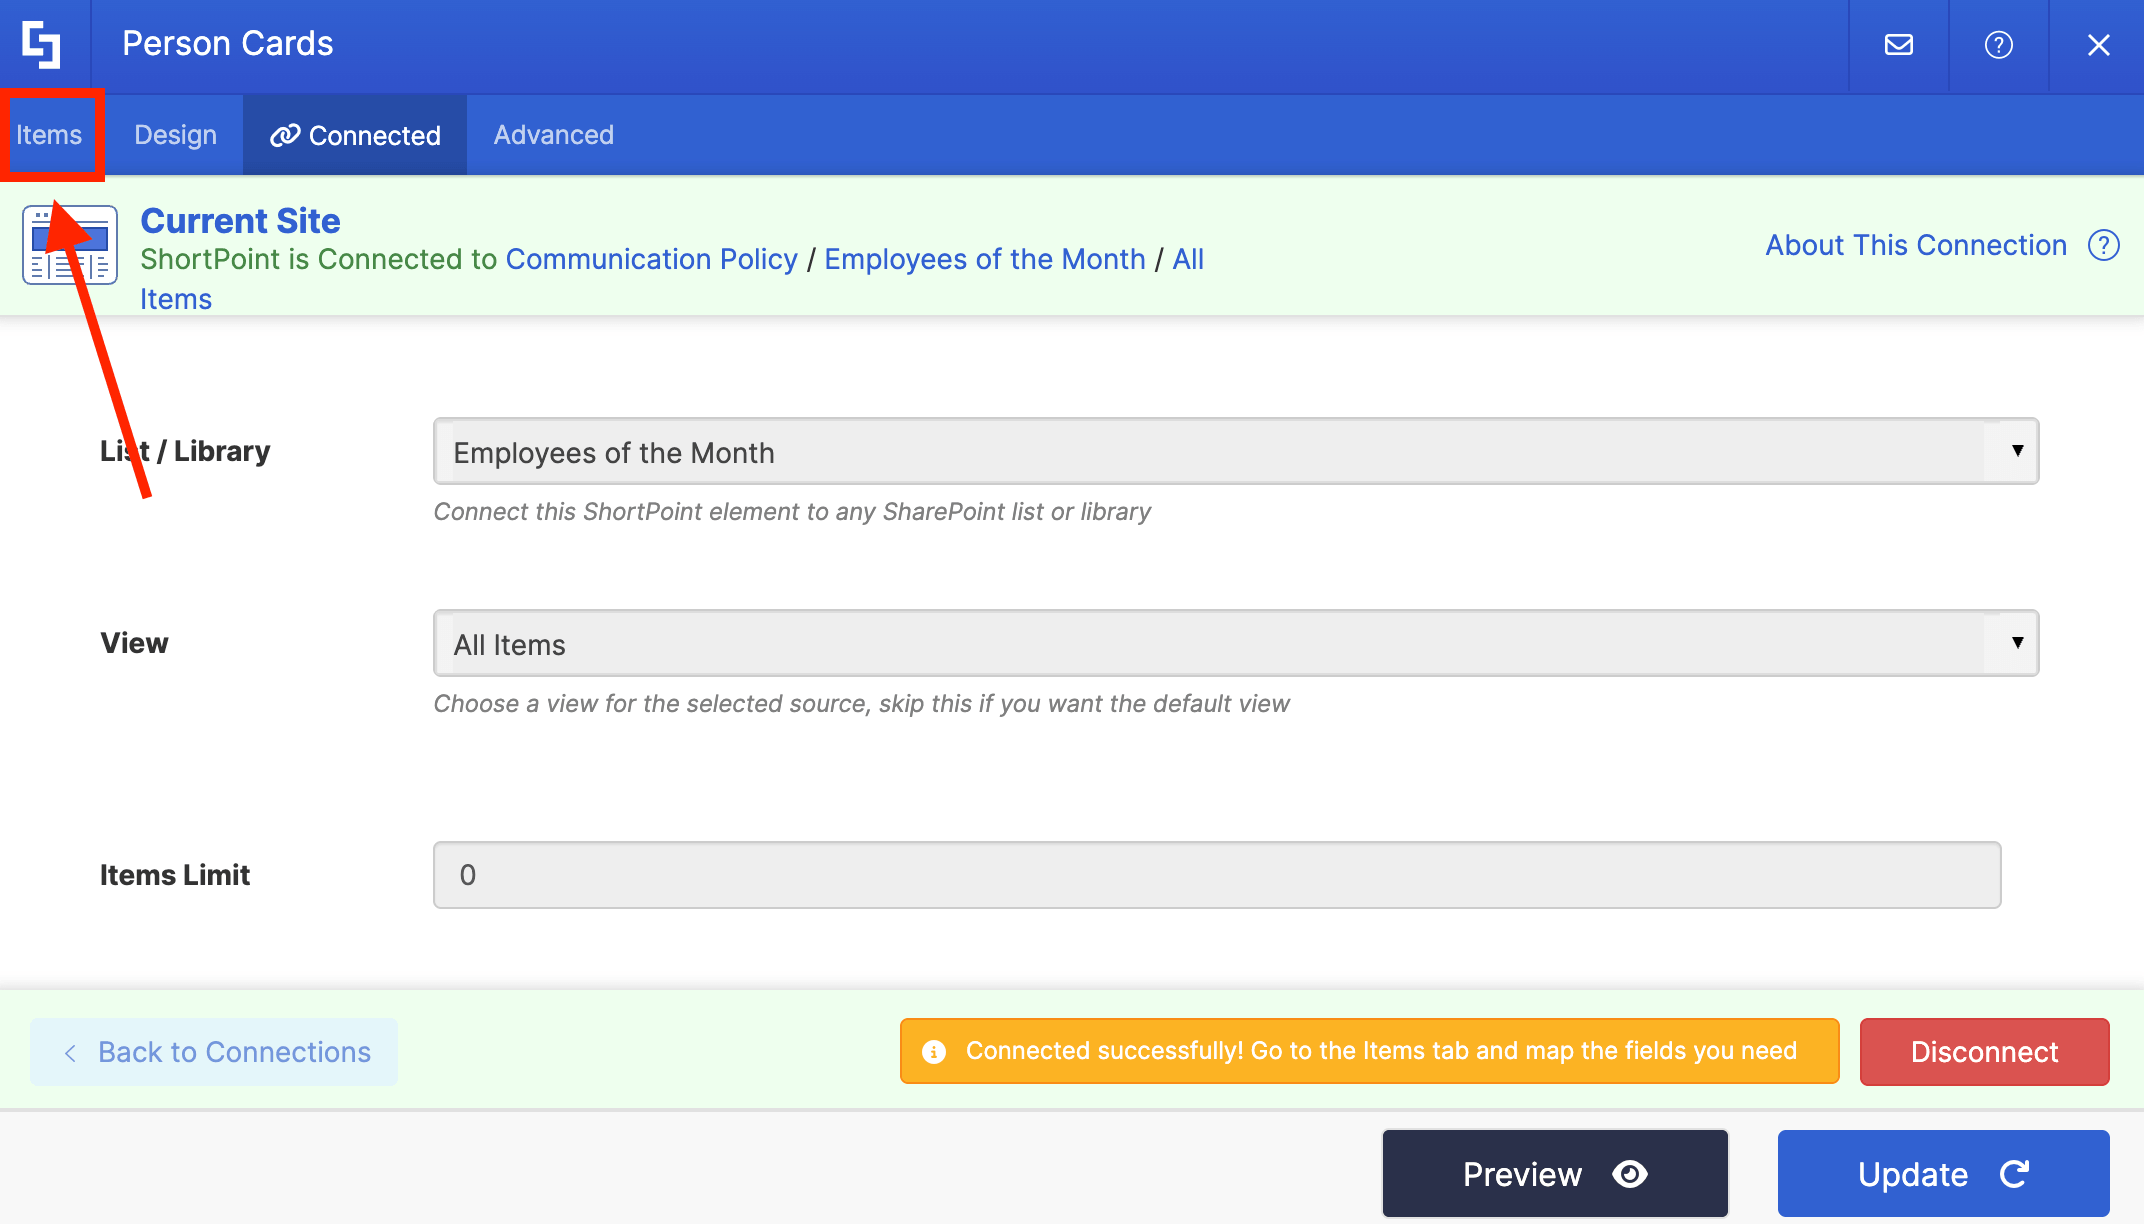
Step 4: Map Items
Go to the Items tab:
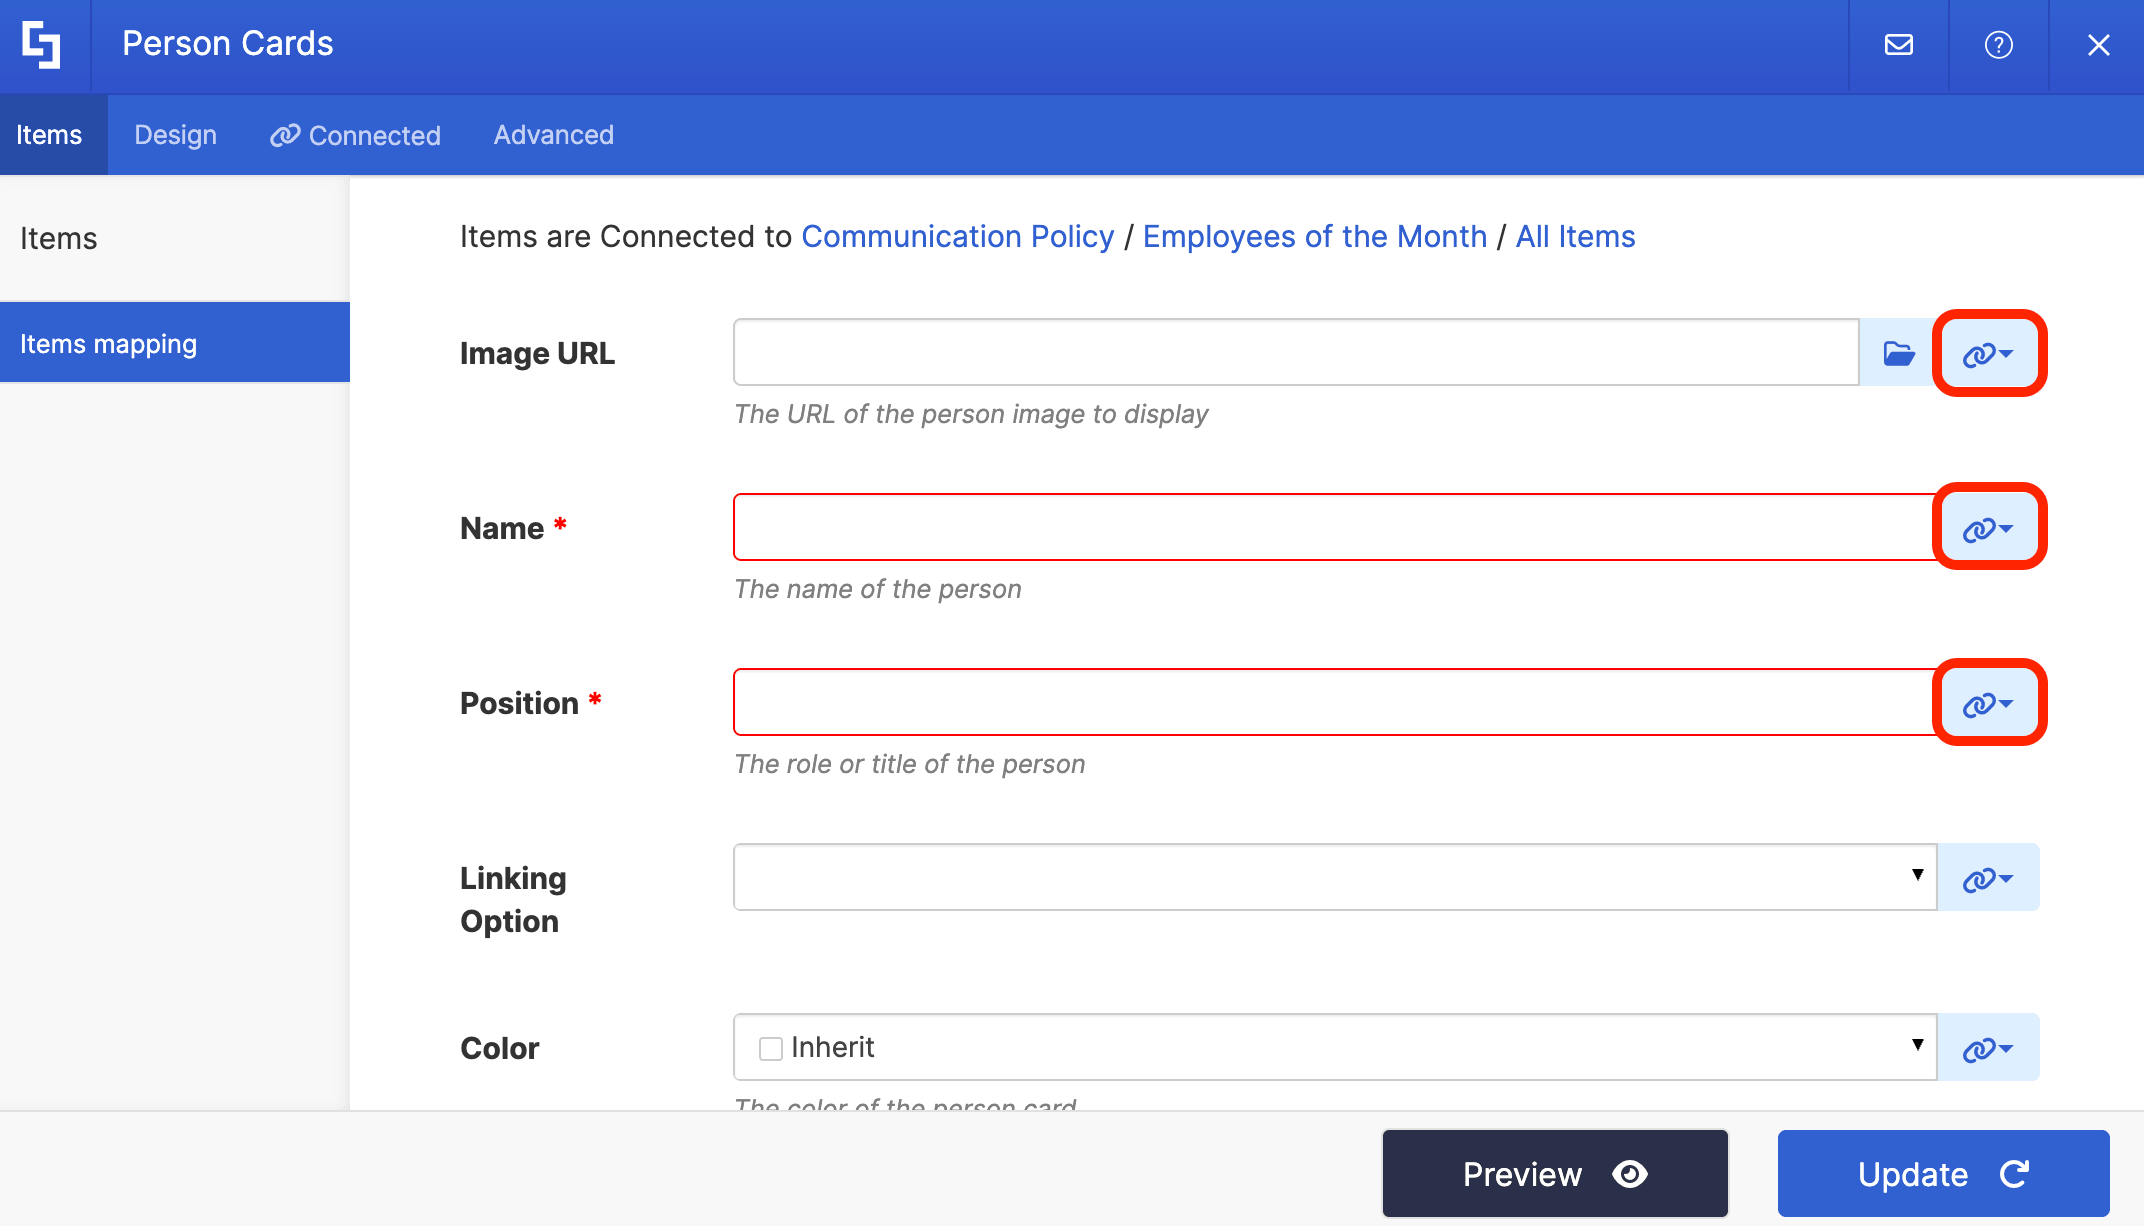
Delete all default content:
Use the link icon to map the properties you want shown:
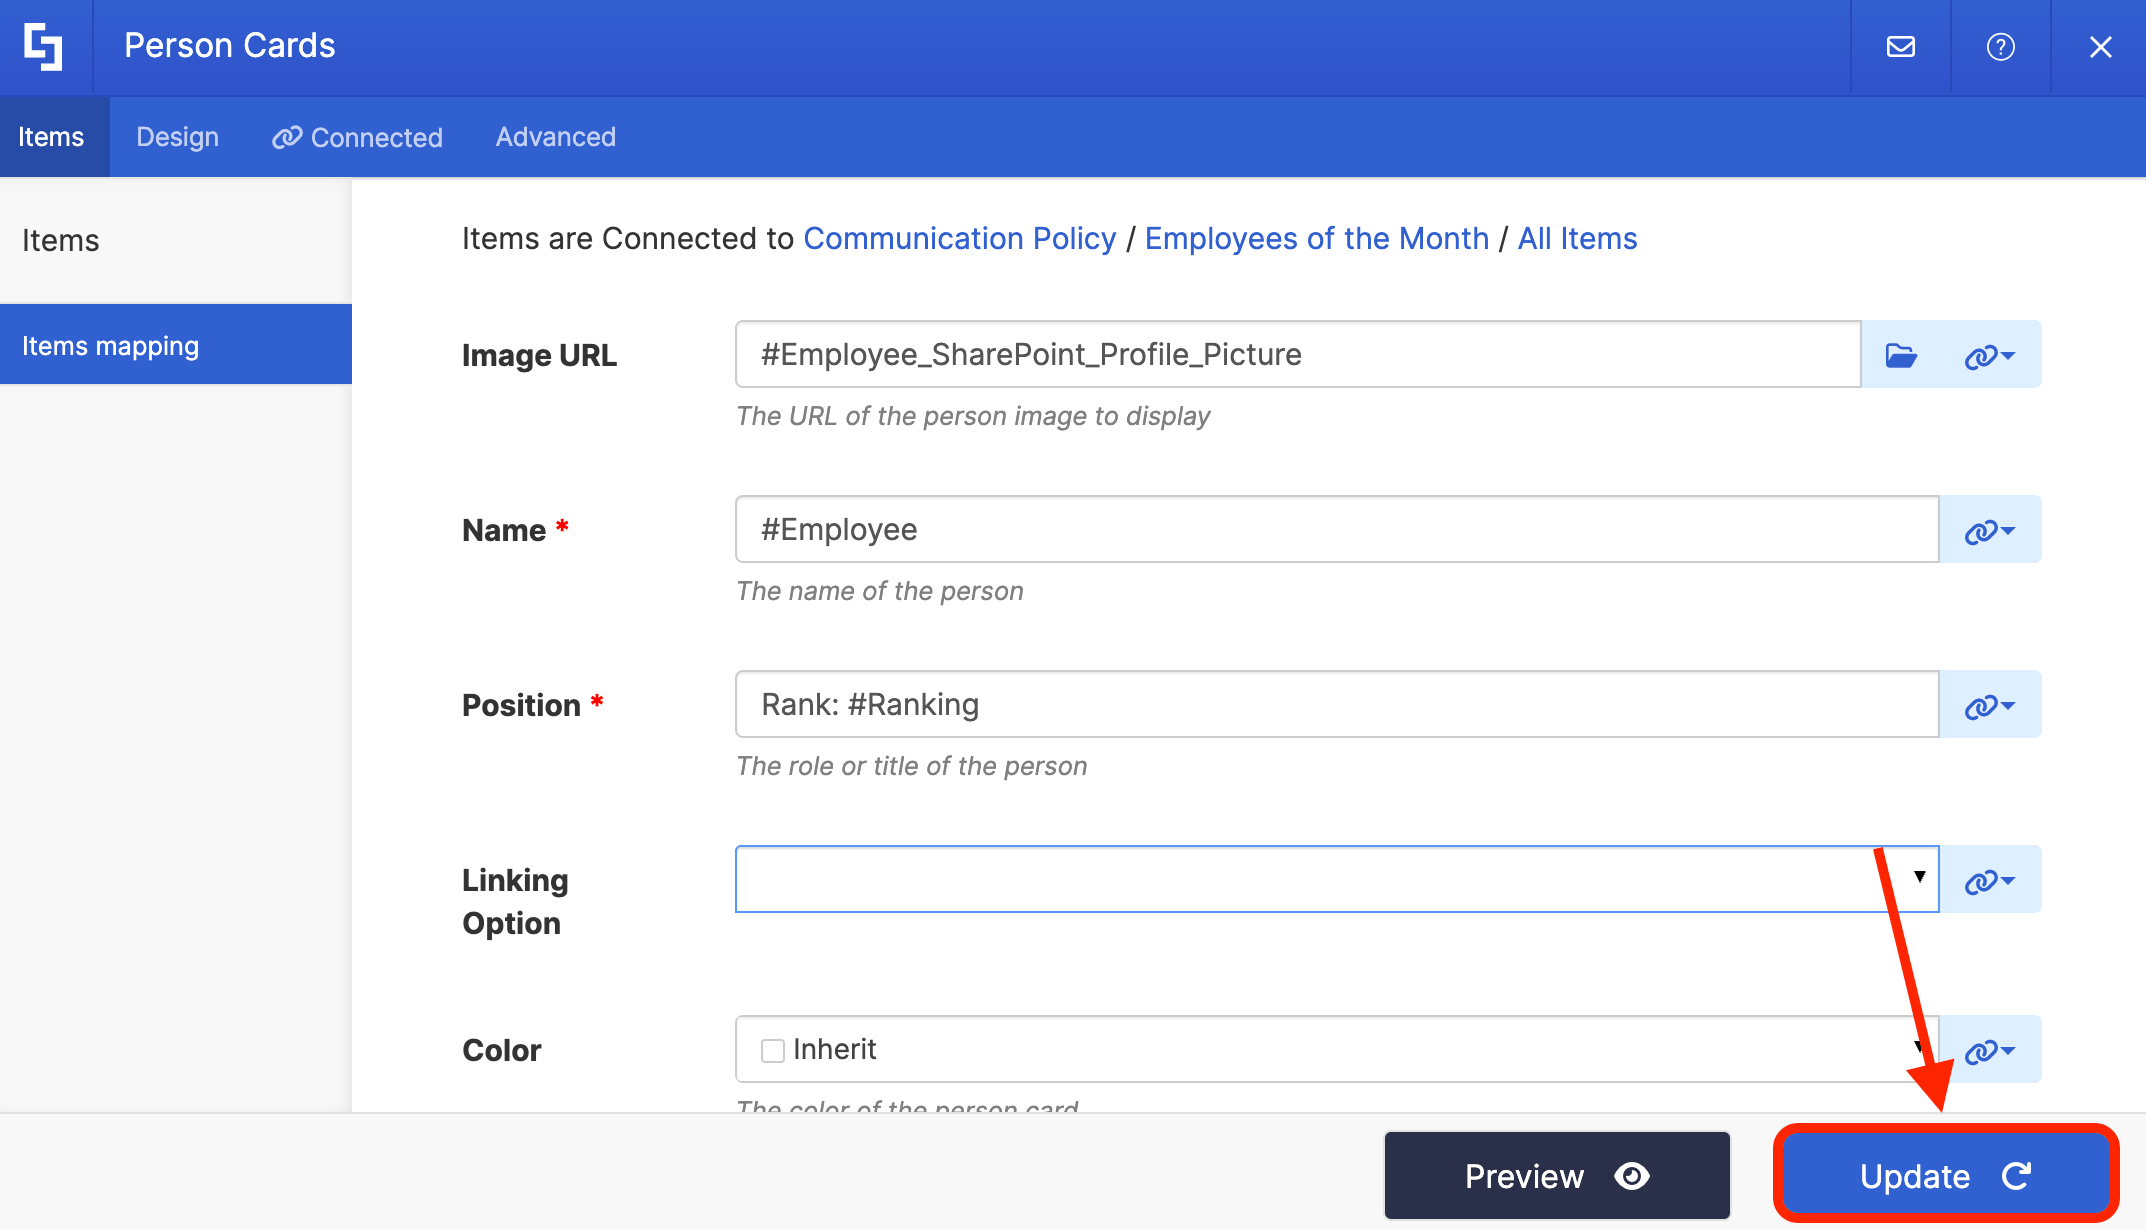
For reference, below is how we mapped the items. You can follow the same mapping or map your own properties:
- #Employee_SharePoint_Profile_Picture - shows the image of the recognized employee.
- #Employee - shows the name of the employee.
- #Ranking - shows their contribution ranking.

NOTEFor more details on Items Mapping, check out ShortPoint Connect: How Items Mapping Works.
Once satisfied, click Update:
Step 5 (Optional): Add Custom CSS
This is an optional step. We've created a Custom CSS for you to better feature and recognize your amazing employees. Copy it below:
/* ── Individual card ── */
.spx-de-person-card {
  position: relative !important;
  background: #ffffff !important;
  border-radius: 16px !important;
  padding: 28px !important;
  text-align: center !important;
}

/* ── Top section layout ── */
.spx-de-person-card__top-section {
  flex-direction: column !important;
  align-items: center !important;
  gap: 16px !important;
}

/* ── Avatar circle ── */
.spx-de-person-card__avatar {
  width: 100px !important;
  height: 100px !important;
  border-radius: 50% !important;
  overflow: hidden !important;
  display: flex !important;
  align-items: center !important;
  justify-content: center !important;
  font-size: 28px !important;
  font-weight: 600 !important;
  margin: 0 auto 12px !important;
}

.spx-de-person-card__avatar-img {
  width: 100% !important;
  height: 100% !important;
  object-fit: cover !important;
  border-radius: 50% !important;
}

/* ── Name ── */
.spx-de-person-card__title {
  font-size: 18px !important;
  font-weight: 700 !important;
  color: #1a1a1a !important;
  margin-bottom: 4px !important;
}

/* ── Rank pill ── */
.spx-de-person-card__description {
  display: inline-block !important;
  font-size: 13px !important;
  font-weight: 600 !important;
  padding: 5px 18px !important;
  border-radius: 20px !important;
  margin-top: 10px !important;
}

/* ── Rank number watermark ── */
.spx-de-person-card::before {
  position: absolute !important;
  bottom: -25px !important;
  right: 16px !important;
  font-size: 180px !important;
  font-weight: 900 !important;
  line-height: 1 !important;
  opacity: 0.09 !important;
  pointer-events: none !important;
  z-index: 0 !important;
}

.spx-de-person-cards > div:nth-child(1) .spx-de-person-card::before {
  content: "1" !important;
  color: #c9a227 !important;
}
.spx-de-person-cards > div:nth-child(2) .spx-de-person-card::before {
  content: "2" !important;
  color: #a0a8b0 !important;
}
.spx-de-person-cards > div:nth-child(3) .spx-de-person-card::before {
  content: "3" !important;
  color: #a0674a !important;
}

/* ── Keep card content above watermark ── */
.spx-de-person-card__top-section,
.spx-de-person-card__content {
  position: relative !important;
  z-index: 1 !important;
}

/* ── 1st card — gold ── */
.spx-de-person-cards > div:nth-child(1) .spx-de-person-card {
  border: 5px solid #c9a227 !important;
}
.spx-de-person-cards > div:nth-child(1) .spx-de-person-card__avatar {
  background: #fdf3d0 !important;
  border: 3px solid #c9a227 !important;
  color: #8a6d0b !important;
}
.spx-de-person-cards > div:nth-child(1) .spx-de-person-card__description {
  background: #fdf3d0 !important;
  color: #7a5c00 !important;
}

/* ── 2nd card — silver ── */
.spx-de-person-cards > div:nth-child(2) .spx-de-person-card {
  border: 5px solid #a0a8b0 !important;
}
.spx-de-person-cards > div:nth-child(2) .spx-de-person-card__avatar {
  background: #f0f0f0 !important;
  border: 3px solid #a0a8b0 !important;
  color: #5a6470 !important;
}
.spx-de-person-cards > div:nth-child(2) .spx-de-person-card__description {
  background: #f0f0f0 !important;
  color: #4a5460 !important;
}

/* ── 3rd card — bronze ── */
.spx-de-person-cards > div:nth-child(3) .spx-de-person-card {
  border: 5px solid #a0674a !important;
}
.spx-de-person-cards > div:nth-child(3) .spx-de-person-card__avatar {
  background: #faede5 !important;
  border: 3px solid #a0674a !important;
  color: #6e3d25 !important;
}
.spx-de-person-cards > div:nth-child(3) .spx-de-person-card__description {
  background: #faede5 !important;
  color: #6e3d25 !important;
}NOTEYou can modify the code as you see fit. You can change the colors, the padding, border-radius, and more.
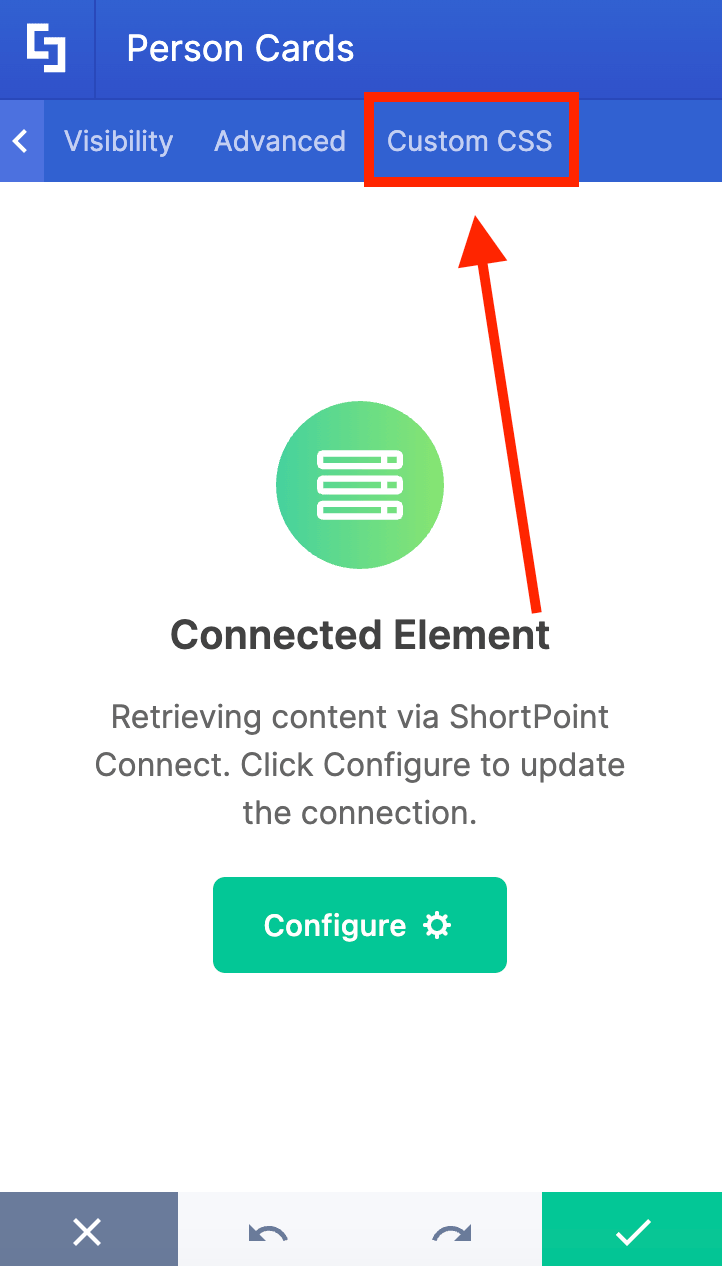
Go to the Custom CSS tab:
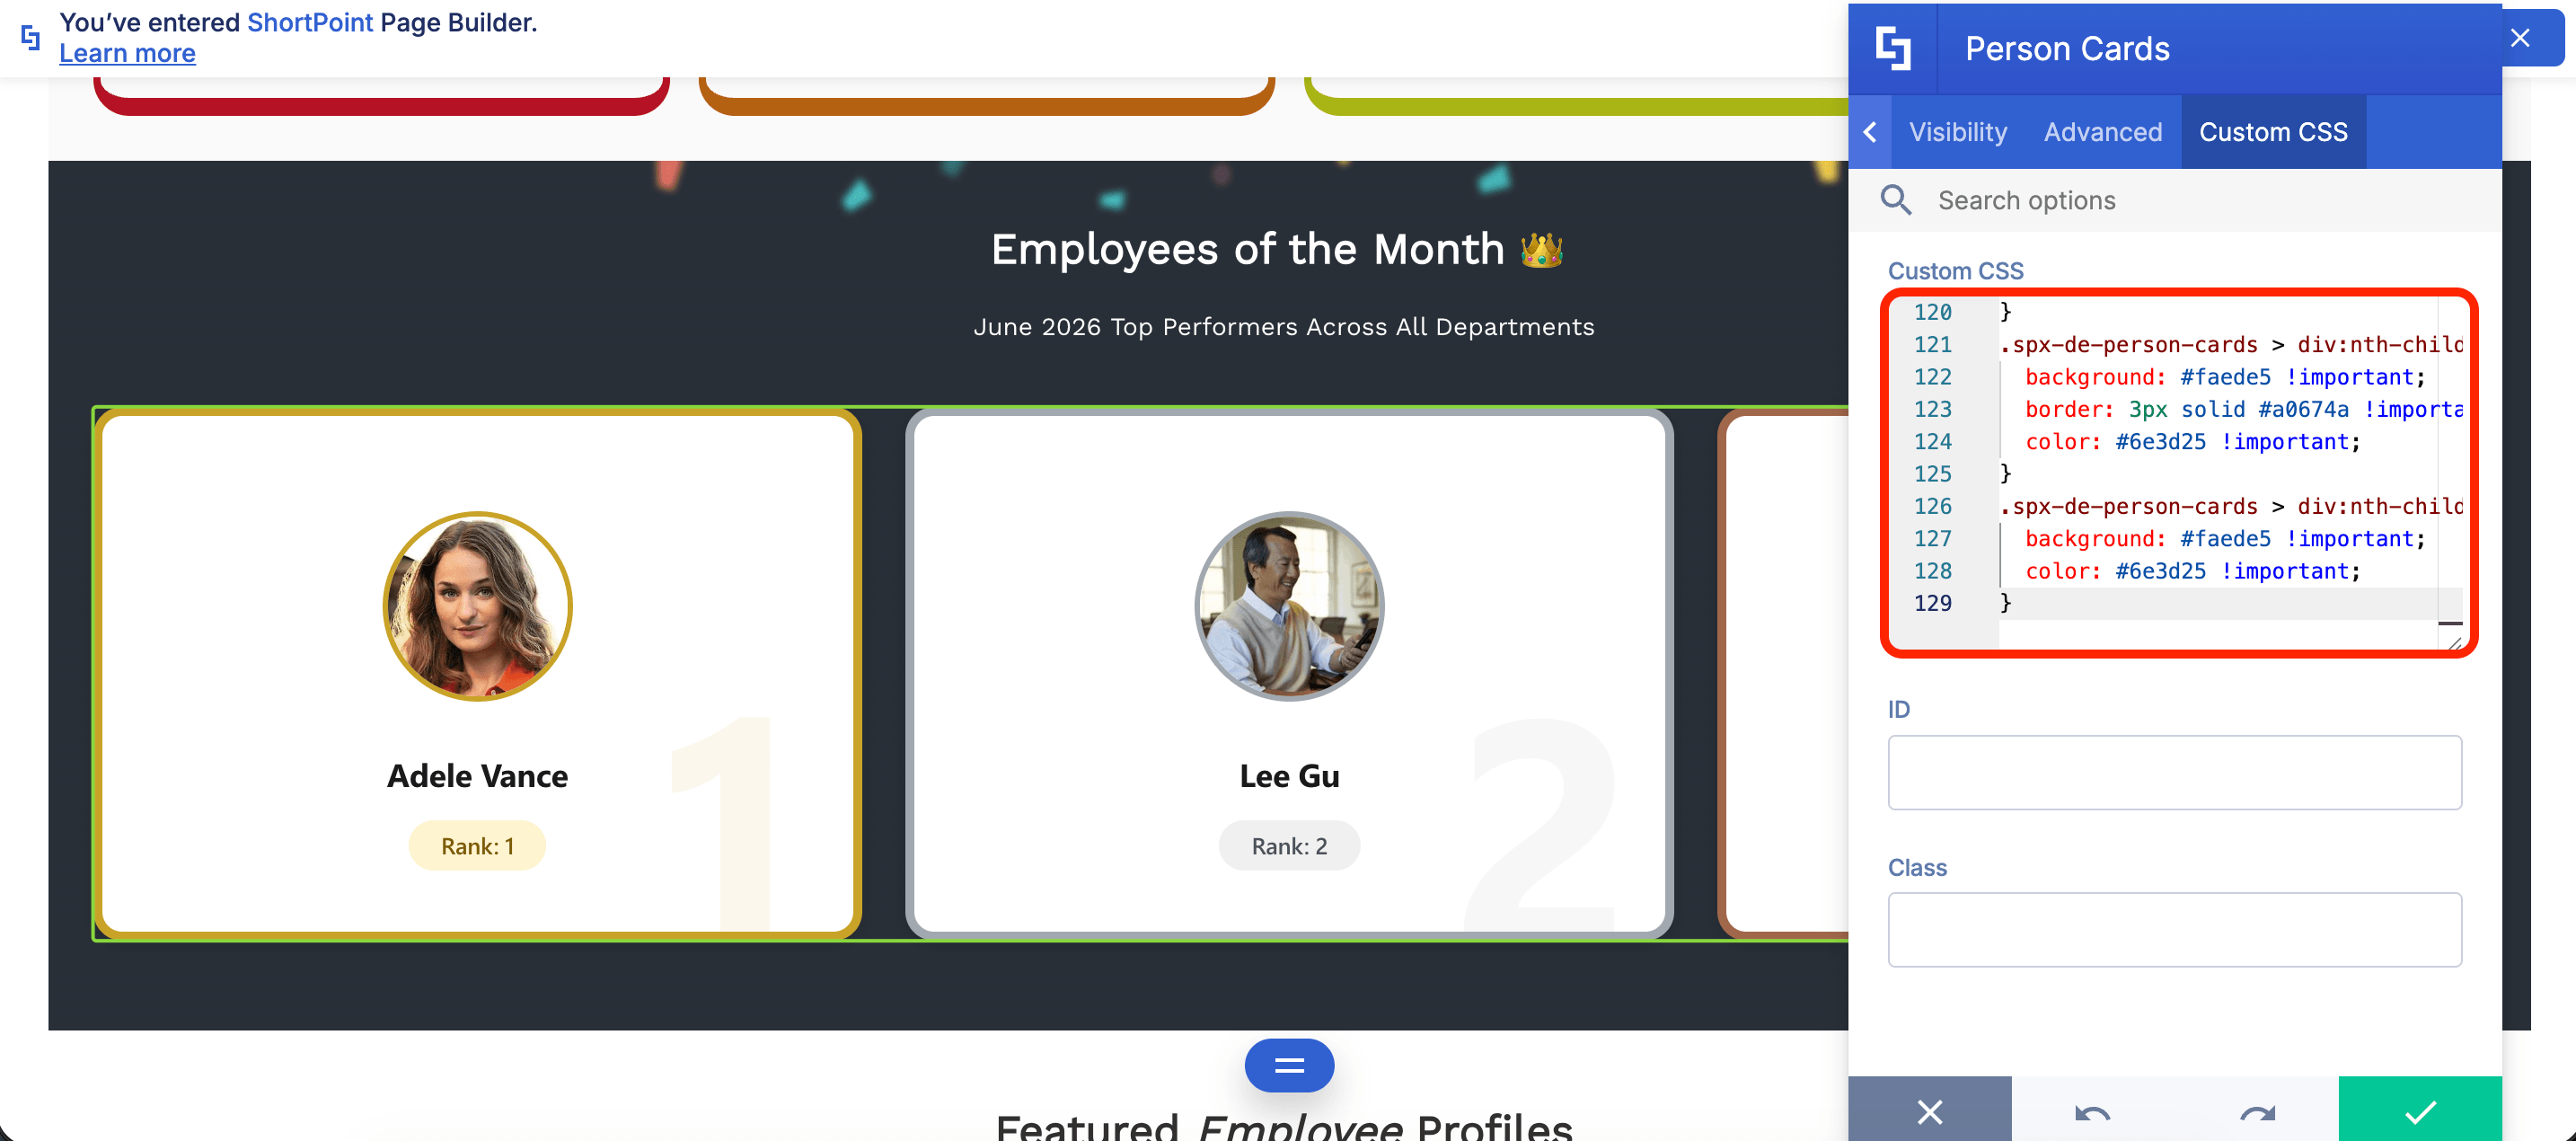
Paste the code in the field provided:
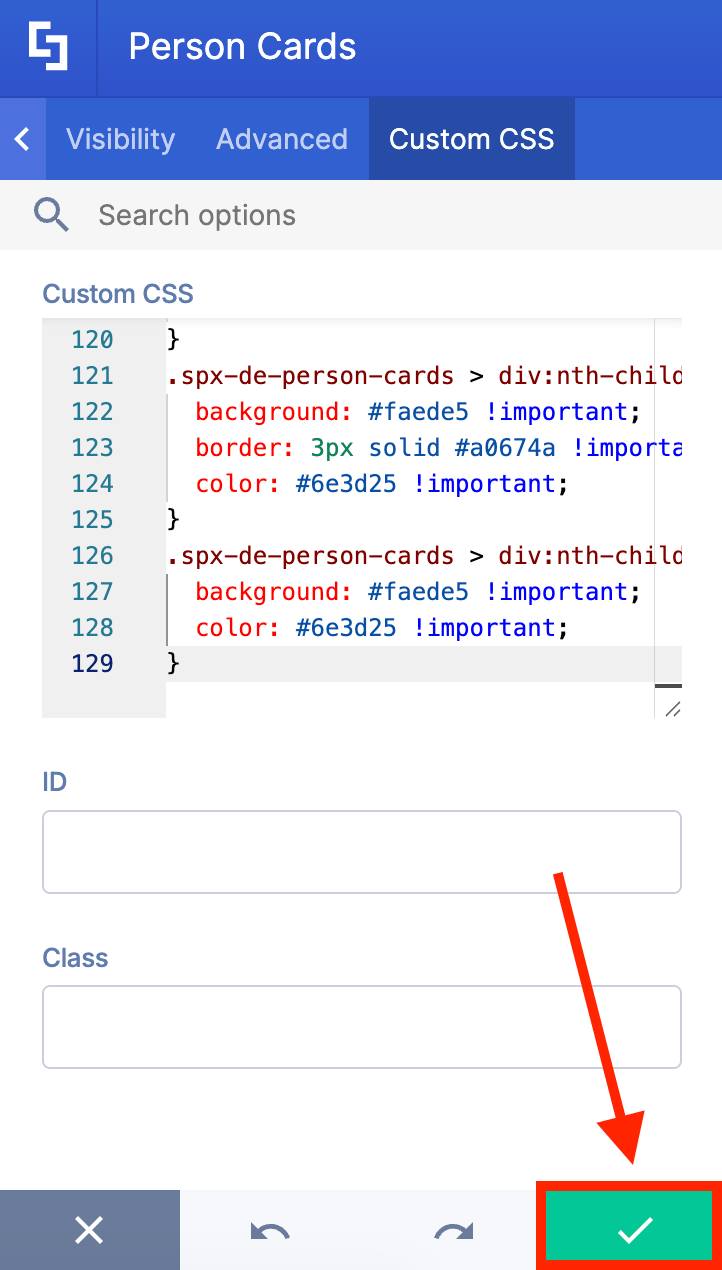
You will now see the Custom CSS applied. Click the green checkmark:
Step 6: Save and Publish
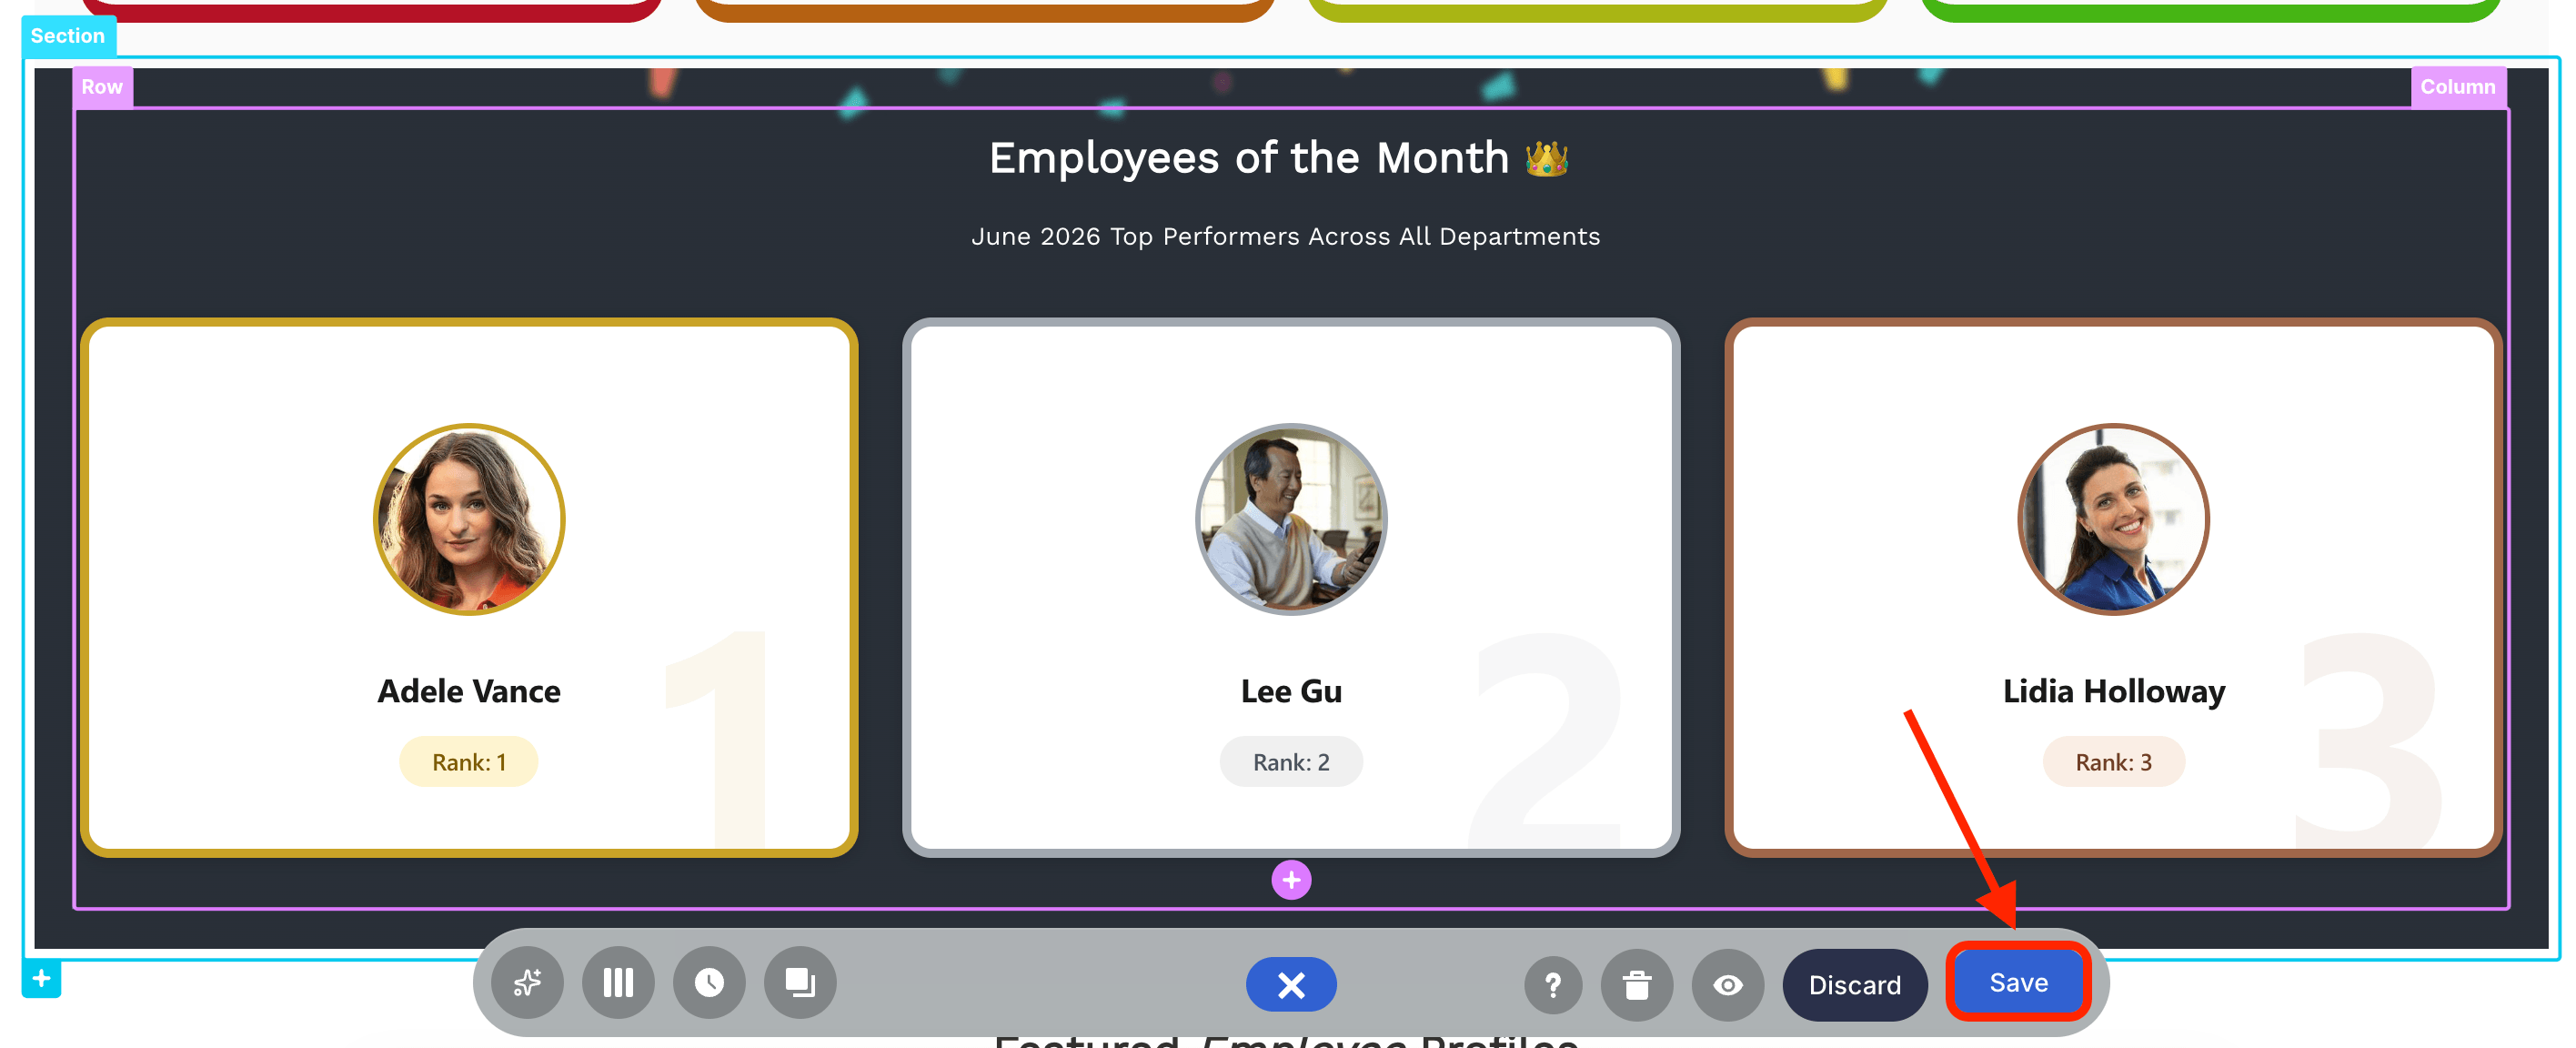
Save your changes:
Publish your page:
Congratulations! You now have a dynamic Employee of the Month section, which your HR team can easily modify using the created SharePoint List.
Best Practices for Launching Your EOM Section
To make sure your new intranet section is a success, keep these quick tips in mind:
- Keep it Consistent: Change the spotlight on the same day every month (e.g., the first Monday), so employees know when to look for it.
- Complete User Profiles: Since the ShortPoint integration uses your organization’s user profiles, ensure that your team members add a corporate headshot in their profiles. This way, the image field will not remain blank.
- Involve the Team: Use a Microsoft Form linked on your intranet to allow peer-to-peer nominations. People will check the EOM section much more eagerly if they had a hand in voting!
Frequently Asked Questions
What is a SharePoint Employee of the Month section?
A SharePoint Employee of the Month section is a dedicated, visually prominent space on your SharePoint intranet site that highlights top-performing employees. It typically features photos, roles, and recognition details to promote employee achievements and boost engagement.
How do I create an Employee of the Month list in SharePoint?
You can create a dedicated SharePoint list with columns such as a people picker for employees, ranking, and other relevant details. This list can be managed by HR to update monthly winners and connect dynamically to your intranet pages using tools like ShortPoint.
Can I automate the nomination and voting process?
Yes, integrating Microsoft Forms with Power Automate can streamline nominations and voting. You can also use PowerApps for enhanced voting experiences, making the process more interactive and efficient.
How can I display the Employee of the Month section dynamically?
Using ShortPoint Connect, you can connect your SharePoint list to design elements like Person Cards that automatically update the display as the list changes, eliminating manual updates.
What are the best practices for launching an Employee of the Month section?
Maintain consistency by updating the spotlight regularly, completing user profiles, and involving employees in the nomination process via peer voting to increase engagement and ownership.
Can I customize the look of the Employee of the Month section?
Absolutely! You can add custom CSS or simply use the built-in customizations for the Design Element you're using. This way, your EOMs are sure to fit your company branding and create a more engaging recognition experience.
How does recognizing employees on SharePoint benefit the company?
Recognition boosts morale, improves employee retention, humanizes remote teams, and increases daily intranet engagement by fostering a positive company culture.
Related articles:
