 Try ShortPoint now
This article will demonstrate how to filter SharePoint list by date range using the date filter widget. This widget will allow your users to quickly narrow down event displays by selecting specific date ranges or time periods.

NOTEFor static Design Elements, you can only add the Date Filter widget to the Date List and Events Design Elements.

For connected Design Elements, you can only use it for the following Design Elements: Image List, Date List, File List, Icon List, Events, Image Titles, Simple List, Tiles, Tabs, Toggles, Accordions, Icon Boxes, Quick Links, FAQs, News Cards, or Person Cards.
TABLE OF CONTENTS
- Prerequisites
- Interactive Tutorial
- Step-by-step Tutorial
- Date Filter Widget Features
- Using the Date Filter
Prerequisites
- You must have ShortPoint version 8.8.2.0 or later installed in your SharePoint environment.
- You must be a ShortPoint Designer with an active license.
- You must already have any of these Design Elements on your page: Image List, Date List, File List, Icon List, Events, Image Titles, Simple List, or Tiles.
Interactive Tutorial
Click Get Started to learn how to filter SharePoint list by date range using the date filter widget:
NOTEYou can activate more than one widget. Check out How to Activate Multiple Search & Filter Widgets to learn how.
Step-by-step Tutorial
Follow the detailed guide below to learn how to add the Date Filter widget:
Step 1: Edit the ShortPoint Web Part
- Go to the SharePoint page you want to use and click Edit:

- Click the close icon to close the Toolbox:

- Select the Edit properties icon:

Step 2: Edit the Design Element
NOTEFor static Design Elements, you can only add the Date Filter widget to the Date List and Events Design Elements.

For connected Design Elements, you can only use it for the following Design Elements: Image List, Date List, File List, Icon List, Events, Image Titles, Simple List, Tiles, Tabs, Toggles, Accordions, Icon Boxes, Quick Links, FAQs, News Cards, or Person Cards.

Make sure you have any of these Design Elements before proceeding.
- Click the Easypass tag of the Design Element you want to use. For this guide, we will use the Events Design Element:

- Select the cogwheel icon:

Step 3: Add the Date Filter Widget
- Navigate to the Toolbar tab:
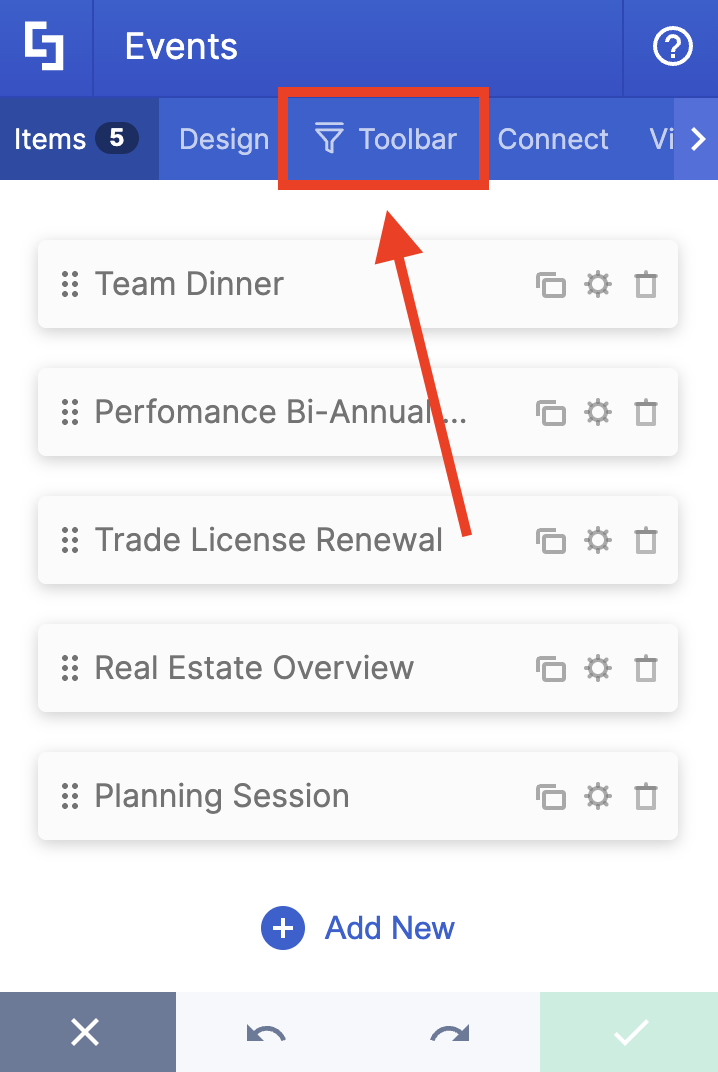
- Click the Date Filter widget:

Step 4: Customize the Date Filter Widget
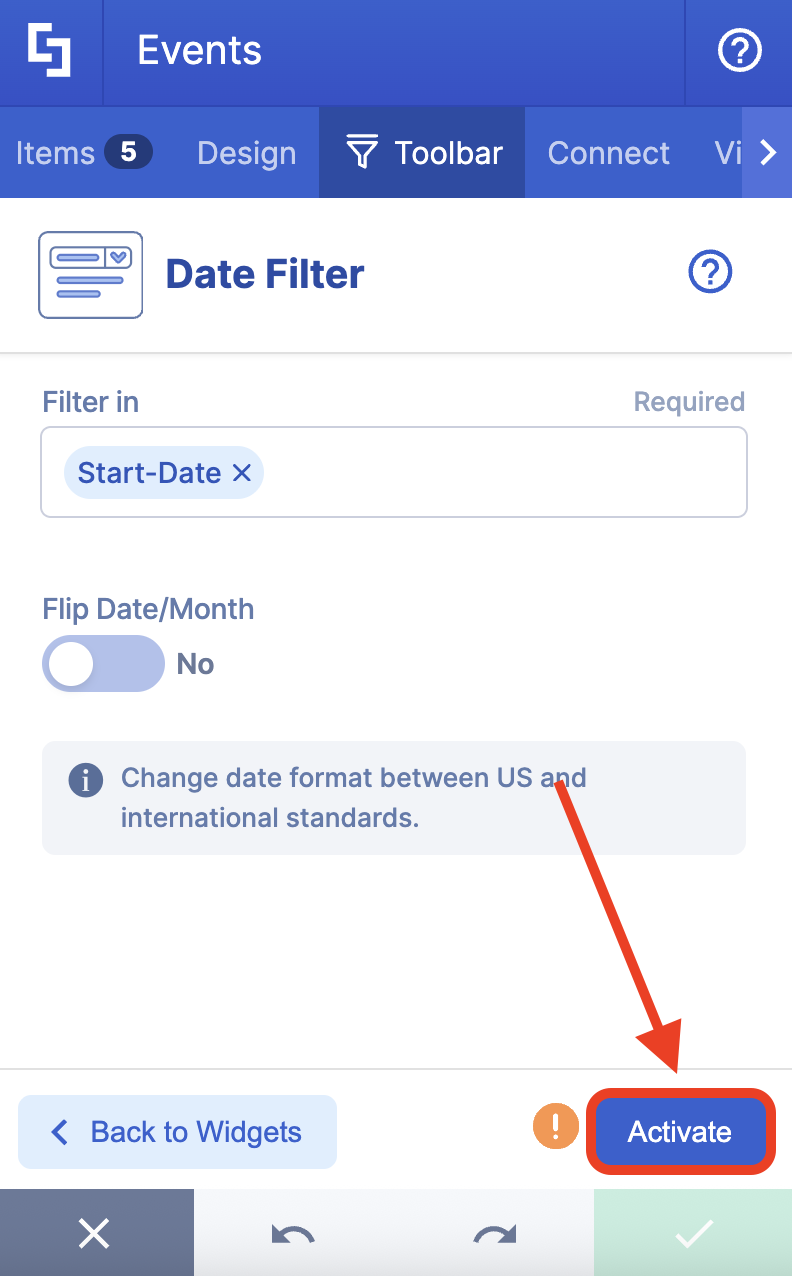
- Choose the Design Element property you want to use.
NOTEThe Design Element properties you see depend on the Design Element you are using.

- (Optional) Enable Flip Date/Month if you want to change the date format between US and international standards.
NOTEWe also recommend enabling Flip Date/Month if you notice that the date filter isn’t working correctly due to the date format.- Click Activate:
NOTEYou can further customize the look of the Date Filter widget using the Settings button of the Search & Filter Toolbar. To learn more about the options inside Settings, check out How to Use Settings to Further Customize the Look of Active Search & Filter Toolbar Widgets.
- (Optional) Click Back to Widgets:

- (Optional) Click Settings:

- (Optional) Customize the Widget Size, Theme Color, Spacings, and/or Color Mode of the active widgets.
- Click the green check mark to apply all changes.
NOTEYou can activate more than one widget. Check out How to Activate Multiple Search & Filter Toolbar Widgets to learn how.
Step 5: Save
- Click the eye icon to see your page in real time:

- Click Save to keep your changes:

That’s it! You now know how to filter SharePoint list by date range using the date filter widget. You can check the next section to see all the modifiable features available for the Date Filter.
NOTEIf you want to remove the Date Filter widget, simply click the Date Filter widget again, select Deactivate, and click the green check mark to apply the changes. You can also check out How to Deactive Active Search & Filter Toolbar Widgets for more details.
Date Filter Widget Features
Below are the features you can customize for the Date Filter widget:
 | Filter in | allows you to choose the Design Element Property you want to filter. |
 | Flip Date/Month | when enabled, this will change the date format between US and international standards. It is also recommended to enable this feature if you notice that the date filter isn’t working correctly due to the date format. |
Using the Date Filter
Now that you know how to activate the Date Filter, let’s explore how to use it. Launch the interactive tutorial to get started:
Custom Filter Options
Using this option, you can select a span between two dates to run a custom filter:

It also has the following options:
 | Clear | allows you to reset your date filter values. |
 | Apply | allows you to apply the selected filter range. |
Pre-determined Filter Options
When you use the pre-determined filter option, you have the following options:
 | Today | shows events happening within the day |
 | Yesterday | shows events that happened yesterday. |
 | This week | shows events happening within the week. |
 | Previous week | shows events that happened the past week. |
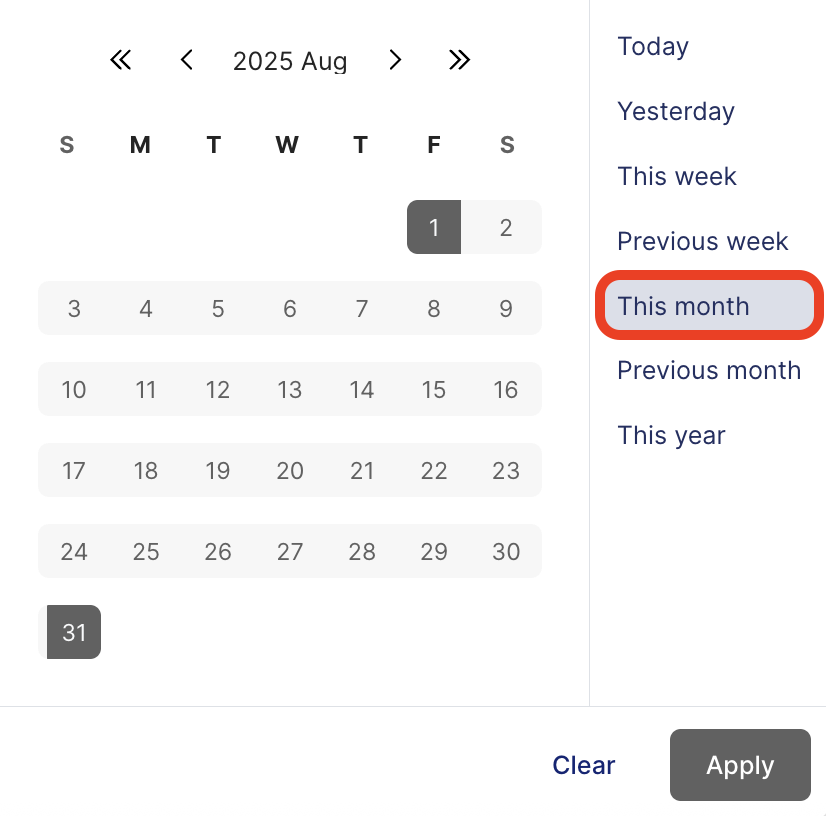 | This month | shows events happening within the month. |
 | Previous month | shows events that happened in the past month. |
 | This year | shows events happening within the year. |
 | Clear | allows you to reset your date filter values. |
 | Apply | allows you to apply the selected filter range. |
That’s it! You can now make the most of the Date Filter widget on your SharePoint pages.
Related articles:
- Getting Started: The Basics of the Search & Filter Toolbar
- Search & Filter Toolbar: How to Use the Search Widget
- Search & Filter: How to Use the Filter Widget
- Search & Filter: How to Use the Sort Widget
- Search & Filter: How to Use the Pagination Widget
- Search & Filter: How to Use the Tabs Widget
- How to Activate Multiple Search & Filter Toolbar Widgets
- How to Deactivate Active Search & Filter Toolbar Widgets
