 Try ShortPoint now
Want to see all the SharePoint sites you have access to? Great news! You can create a SharePoint site list using the ShortPoint REST API Connection! Follow the step-by-step tutorial to learn how to display your SharePoint sites easily.
NOTEThe list will display different sites for each user, showing only the sites they have permission to access.
TABLE OF CONTENTS
- Prerequisite
- What is the REST API Connection?
- Step-by-step Tutorial
- Frequently Asked Questions
- How do I create a SharePoint site list using the REST API connection?
- Will the SharePoint site list show all sites or only those I have permission to access?
- What are the prerequisites for creating a SharePoint site list with ShortPoint?
- What is the benefit of using the REST API connection with ShortPoint for SharePoint lists?
Prerequisite
- You must have the latest version of ShortPoint SPFx installed on your SharePoint environment.
- You must be a ShortPoint Designer with a PRO or Enterprise license. For more information, check out Licensing Options.
- You must already have the Design Element you want to use for the connection.
What is the REST API Connection?
Before we start with the how-to, let's get you caught up first on the ShortPoint Connection you'll use: REST API connection type.
The ShortPoint REST API Connection is a powerful integration feature within ShortPoint that allows you to pull dynamic data from various endpoints, including SharePoint sites, and display it using ShortPoint Design Elements.
Step-by-step Tutorial
Follow the steps below to learn how to create a SharePoint site list in your SharePoint Online page using the REST API connection:
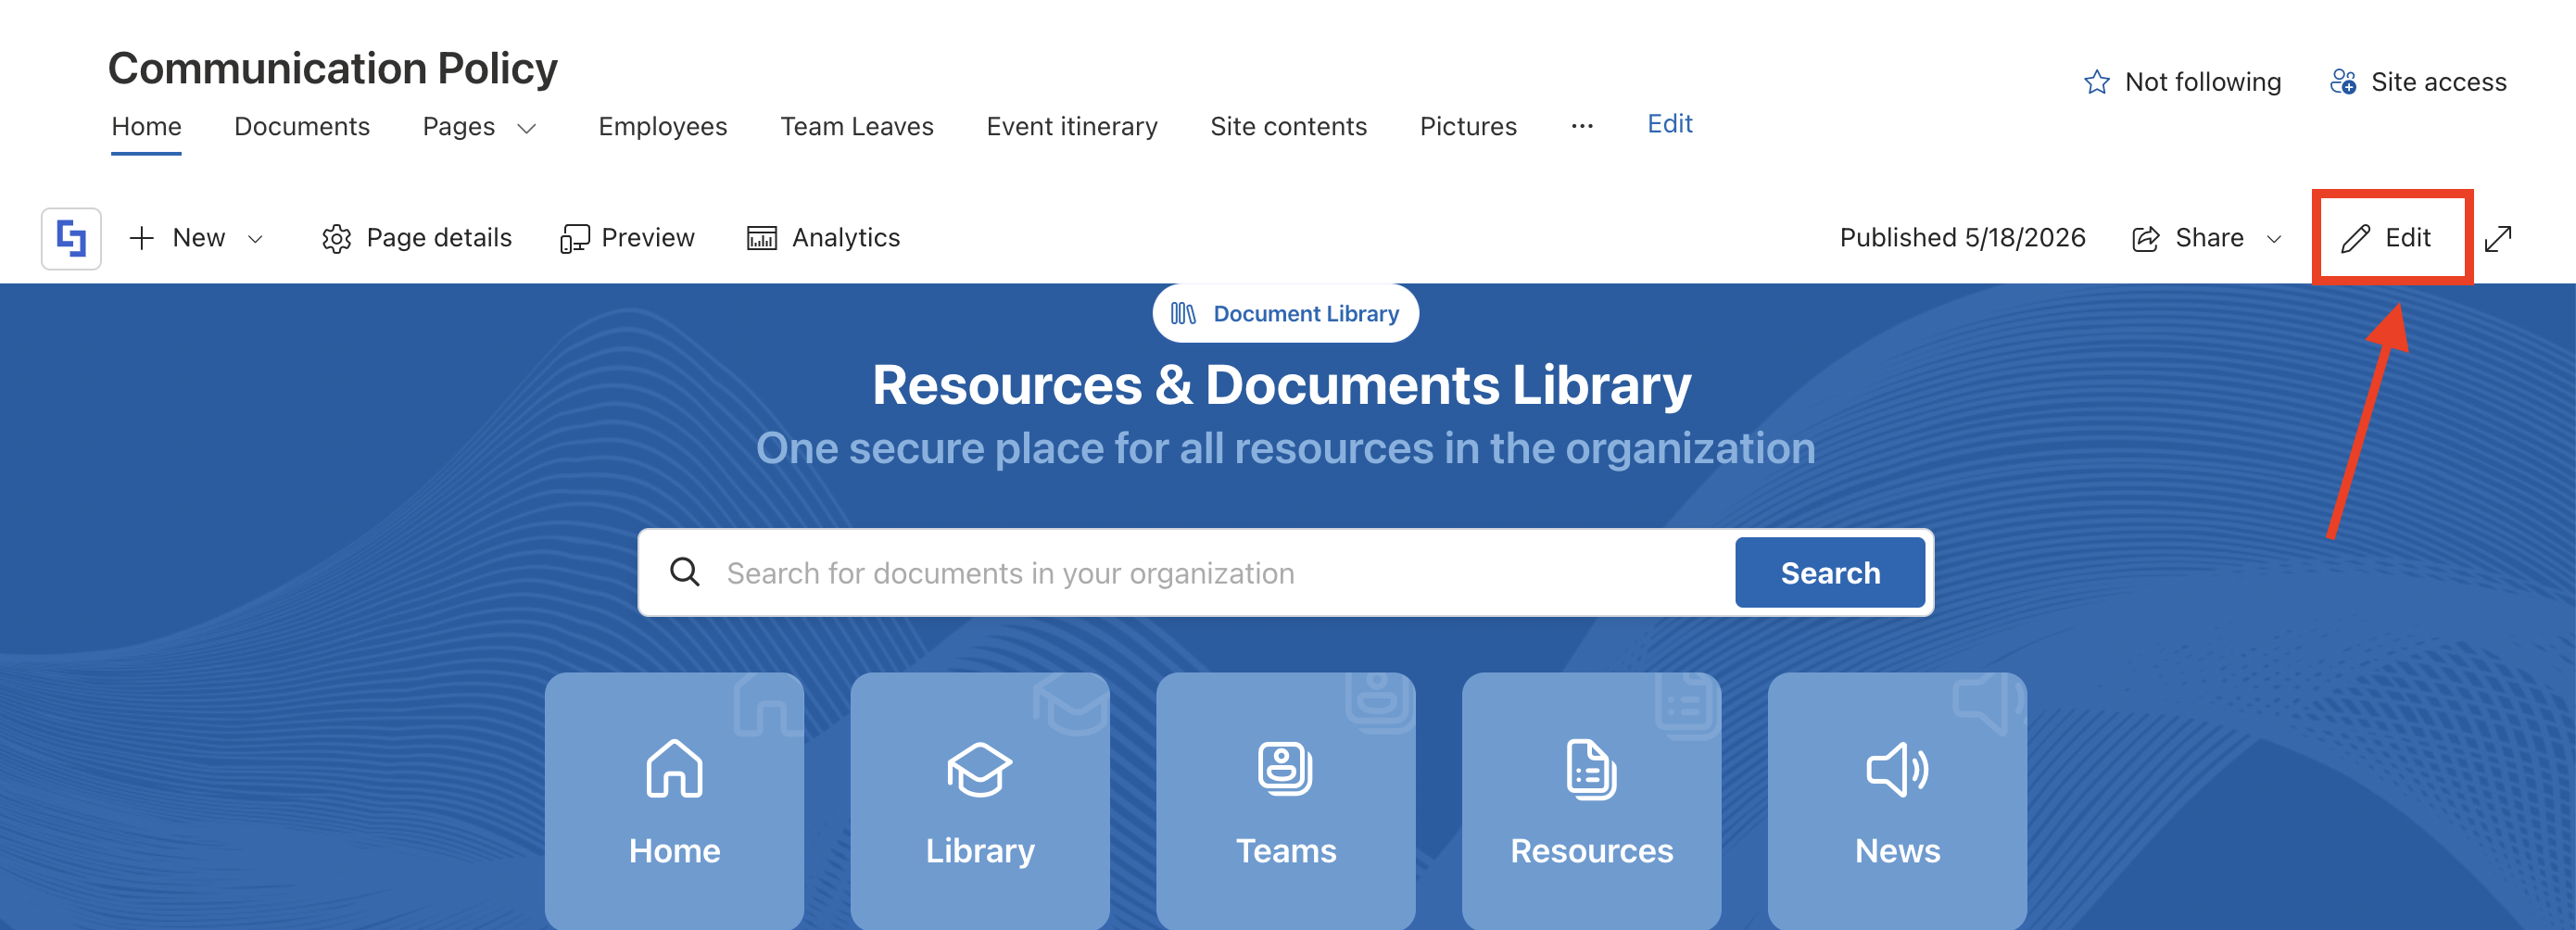
Step 1: Edit the ShortPoint web part
Go to the SharePoint page you want to use and click Edit:
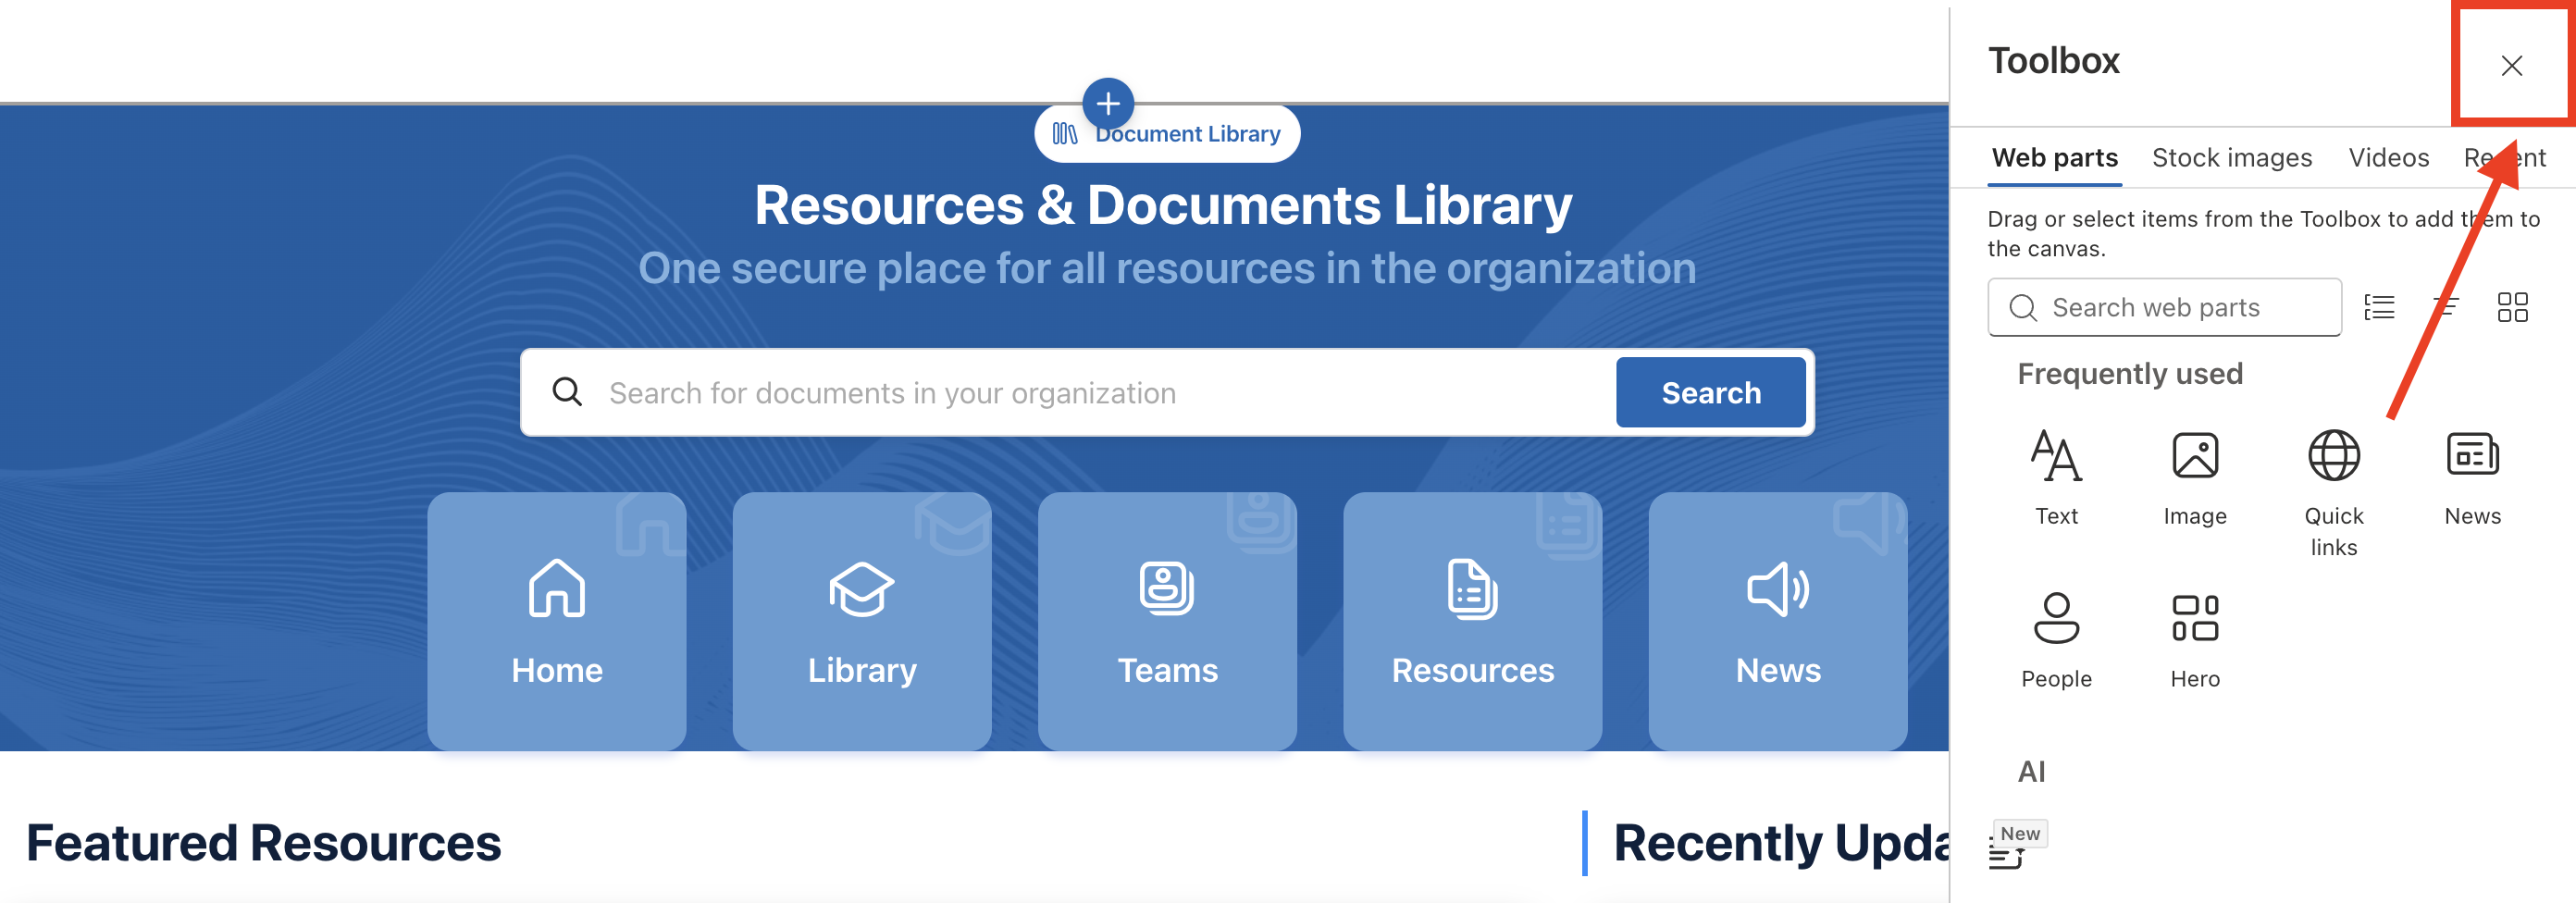
Close the Toolbox:
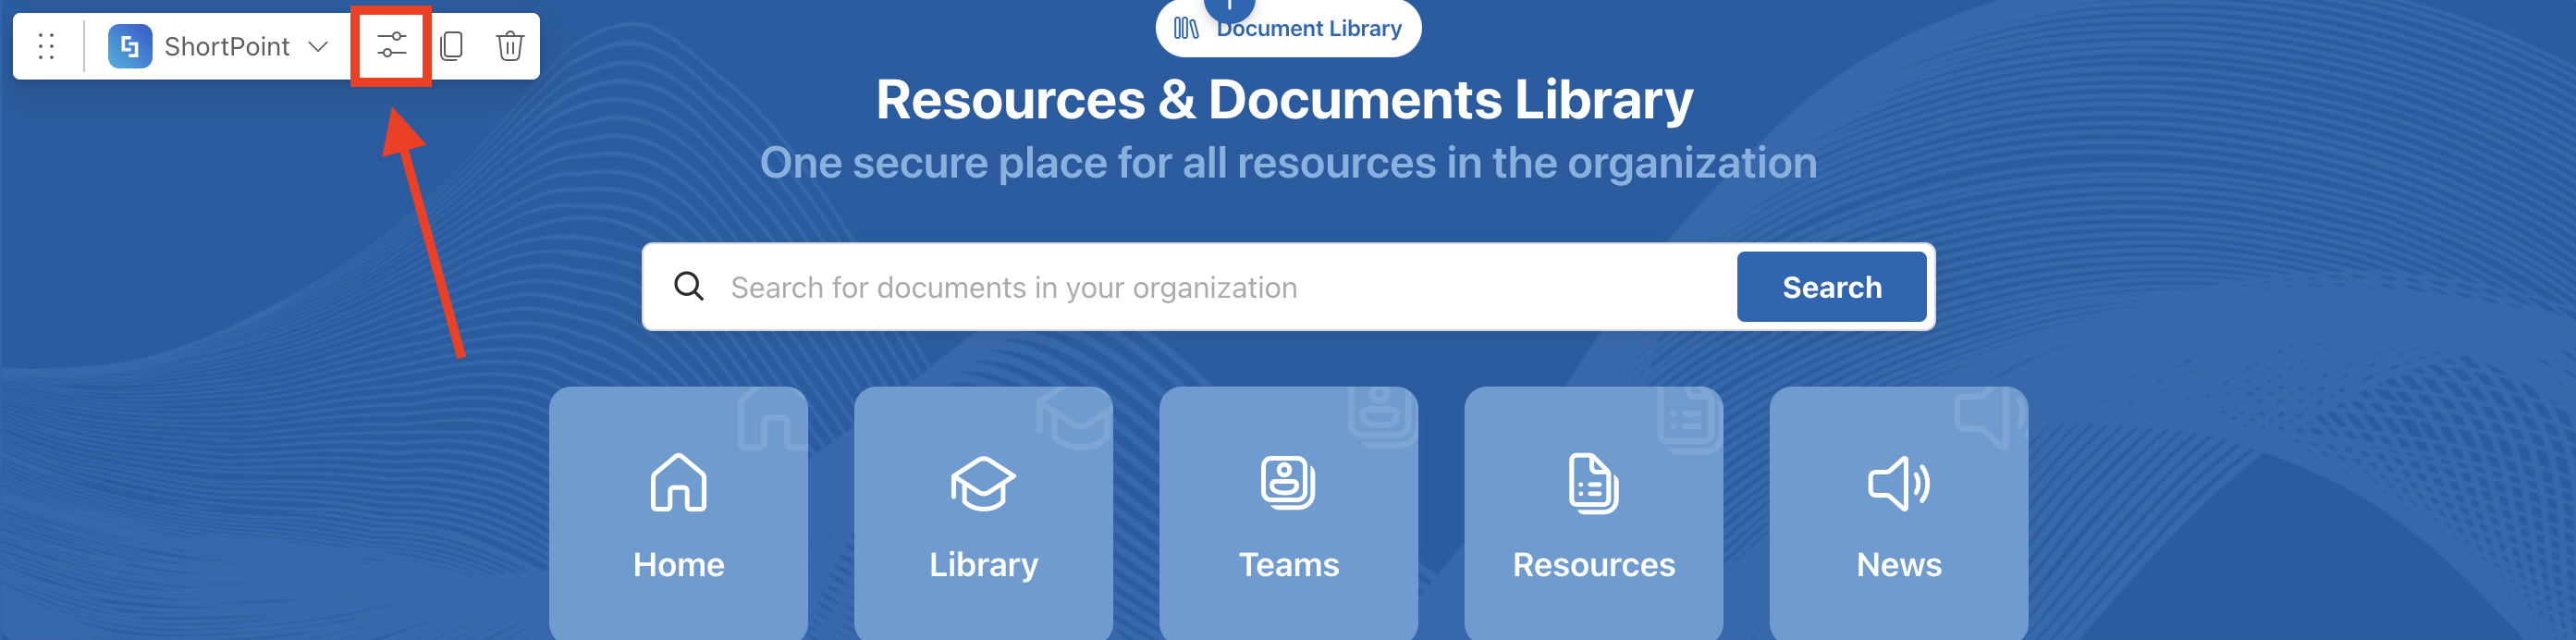
Click the Edit Properties icon:
Step 2: Edit the Design Element
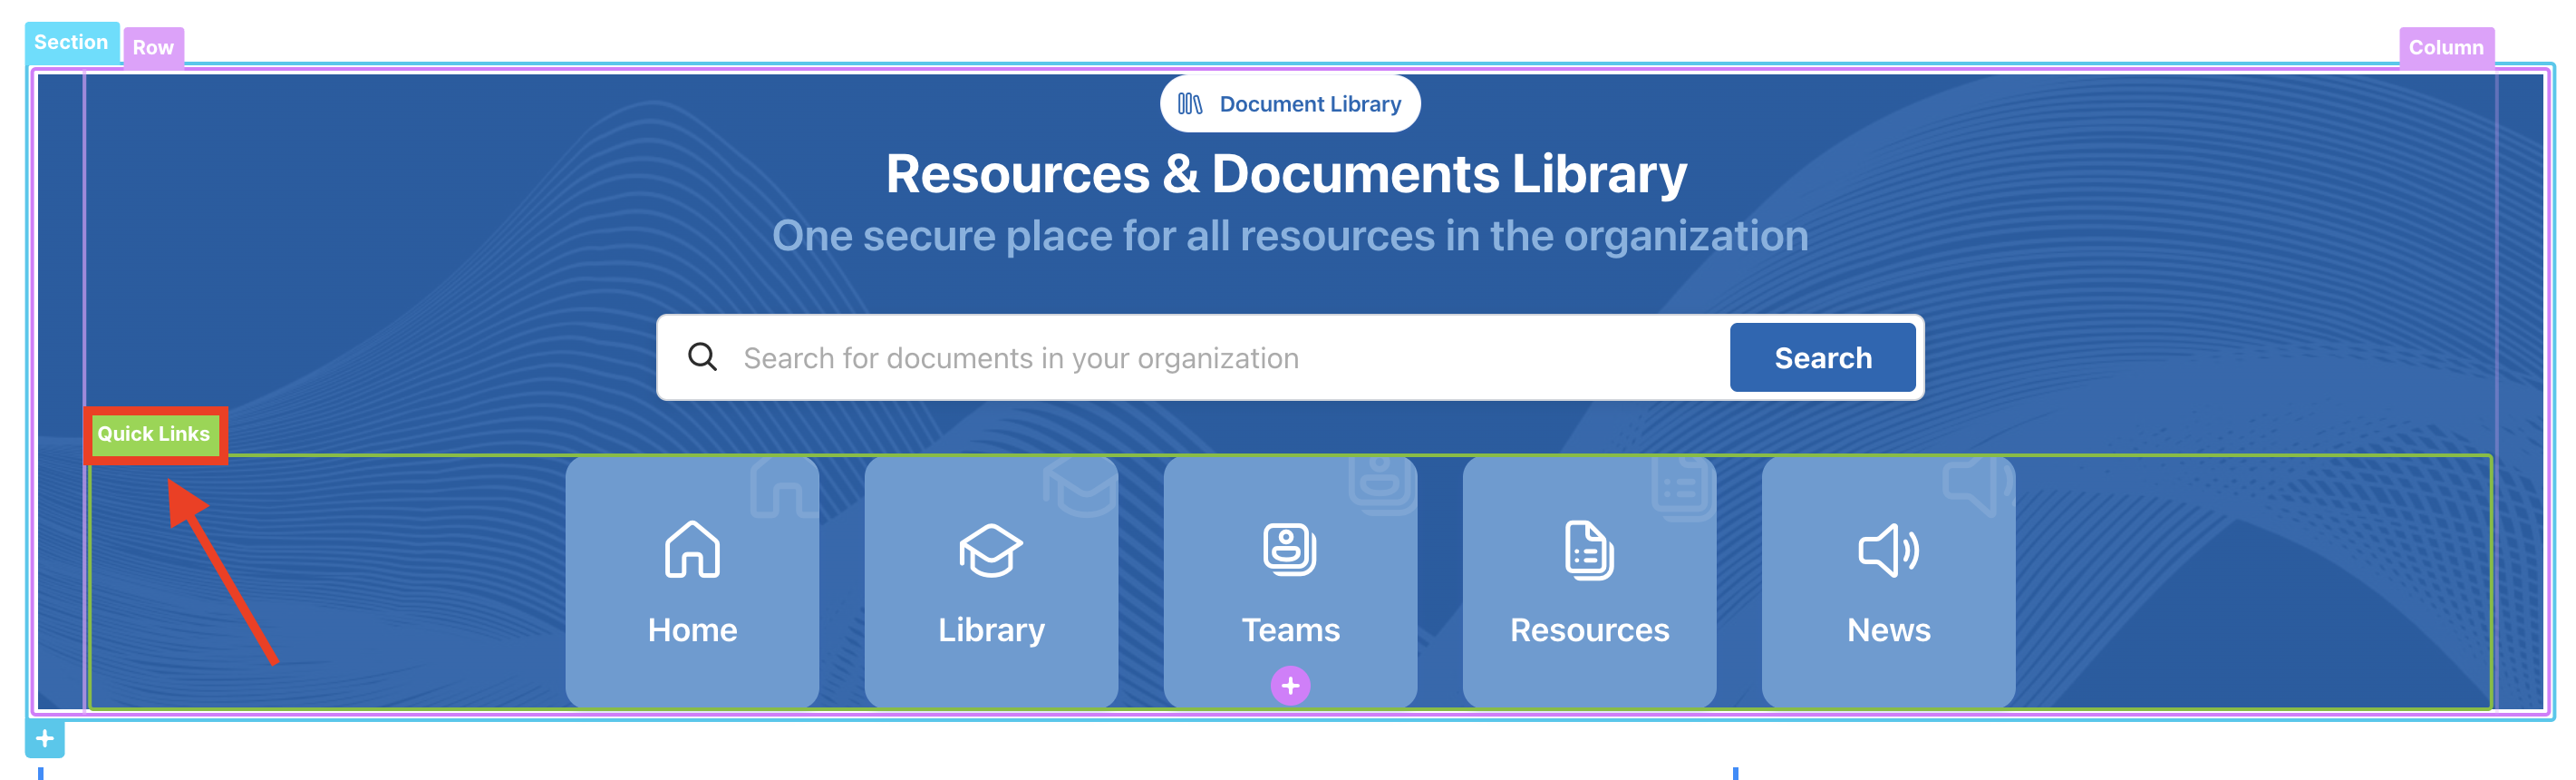
NOTEBefore proceeding, make sure you already have the Design Element you want to use for the connection. We recommend using Design Elements that allow listing of multiple items. For this guide, we will use Quick Links.
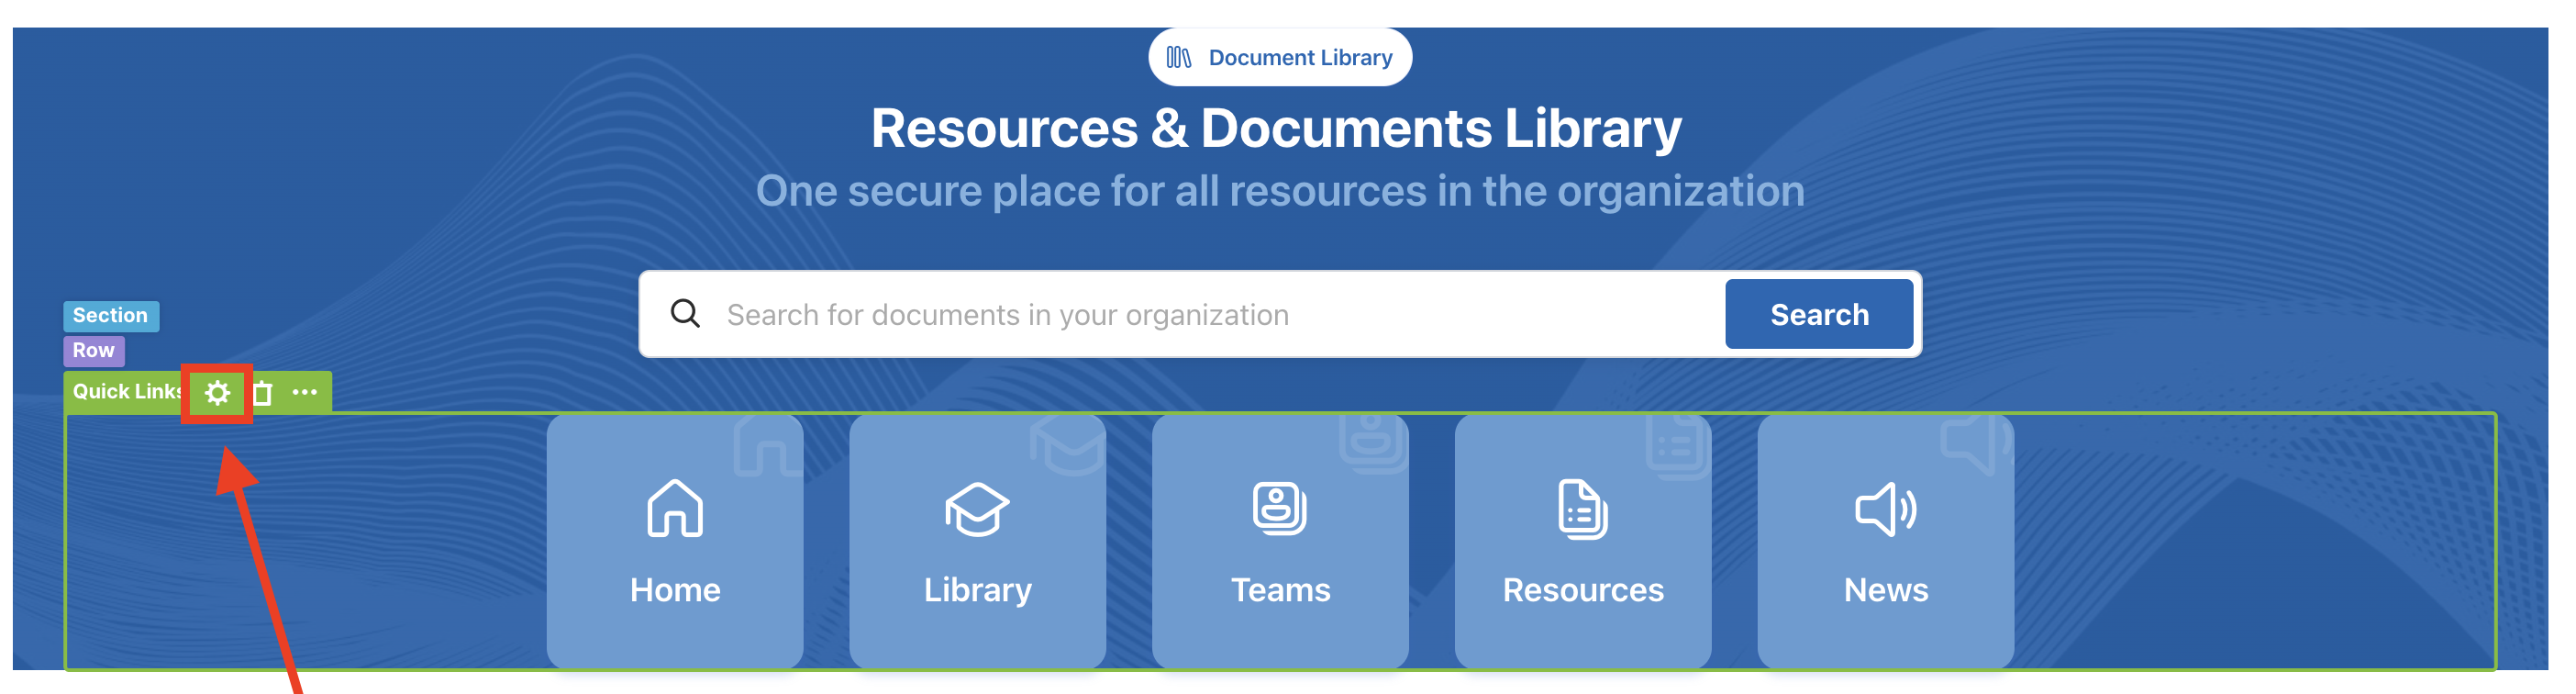
Select the EasyPass tag of the Design Element you want to use:
Click the cogwheel icon:
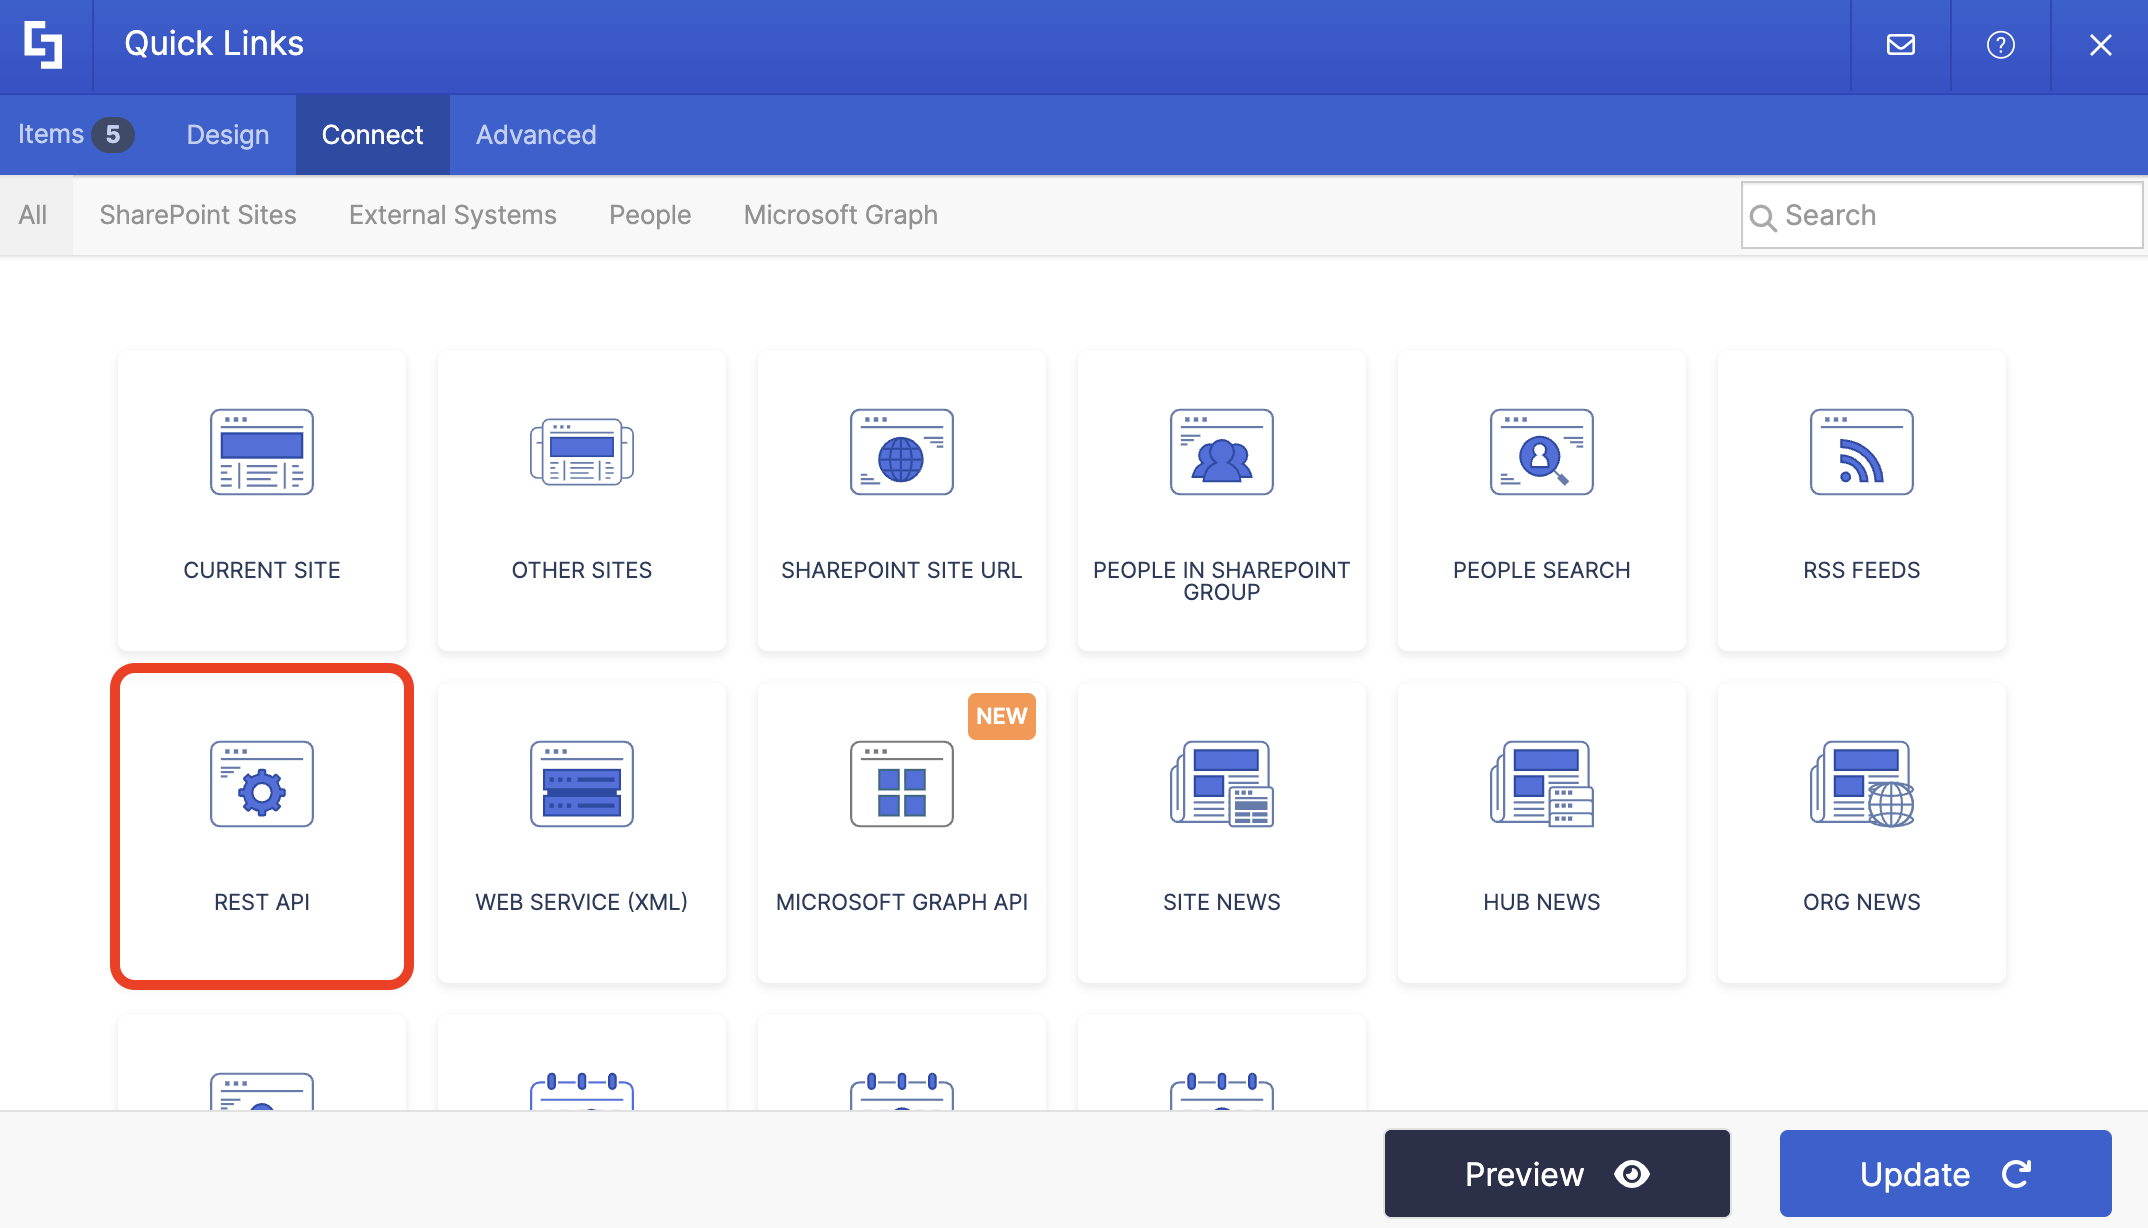
Step 3: Connect Design Element to REST API
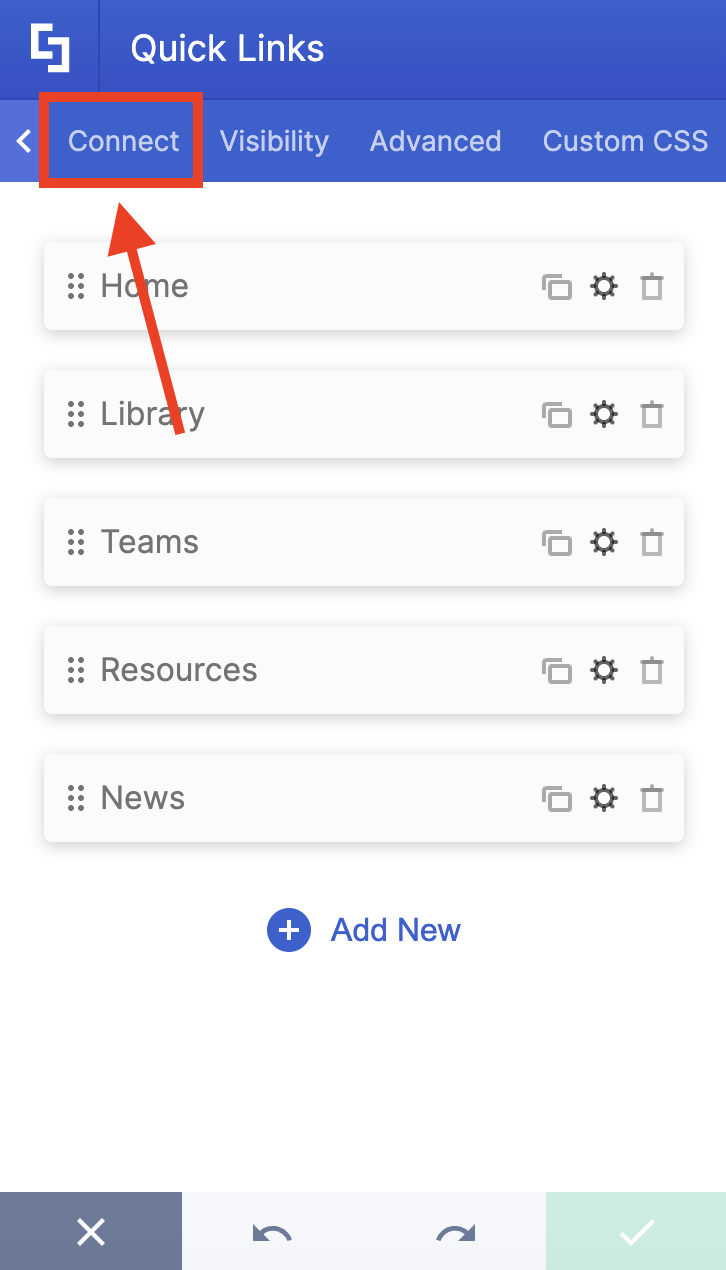
Go to the Connect tab:
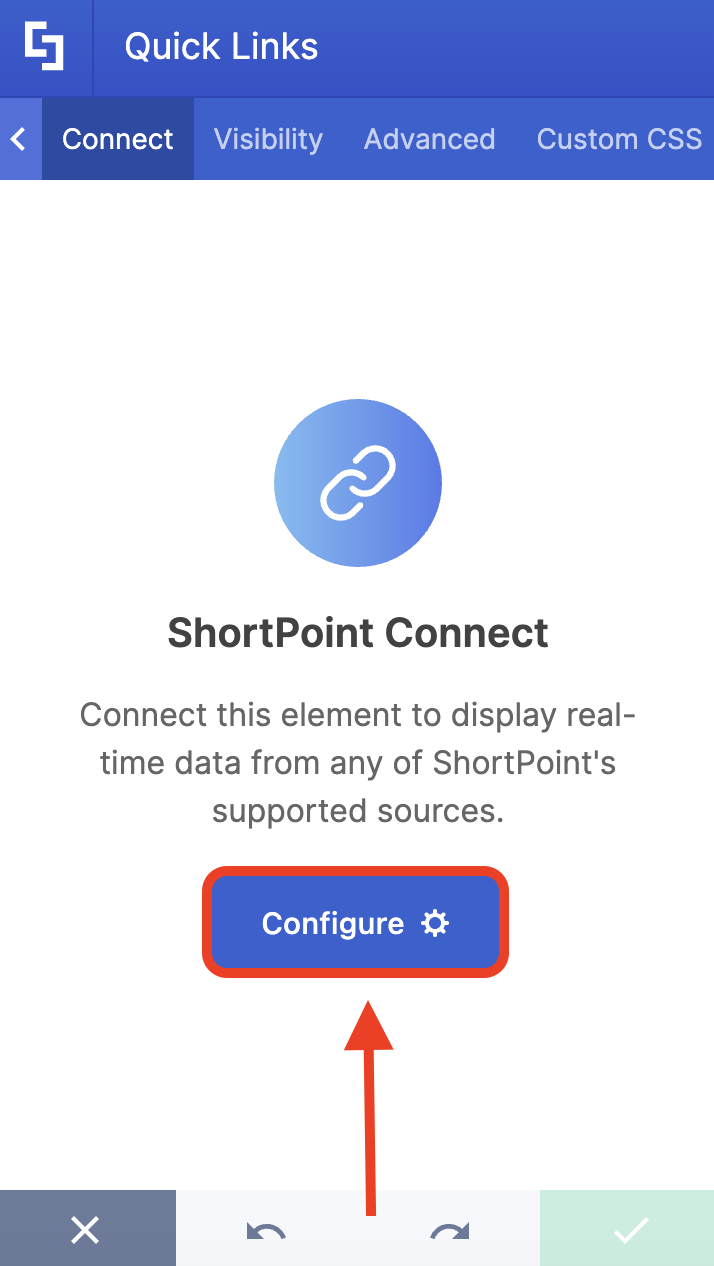
Click Configure:
Select REST API:

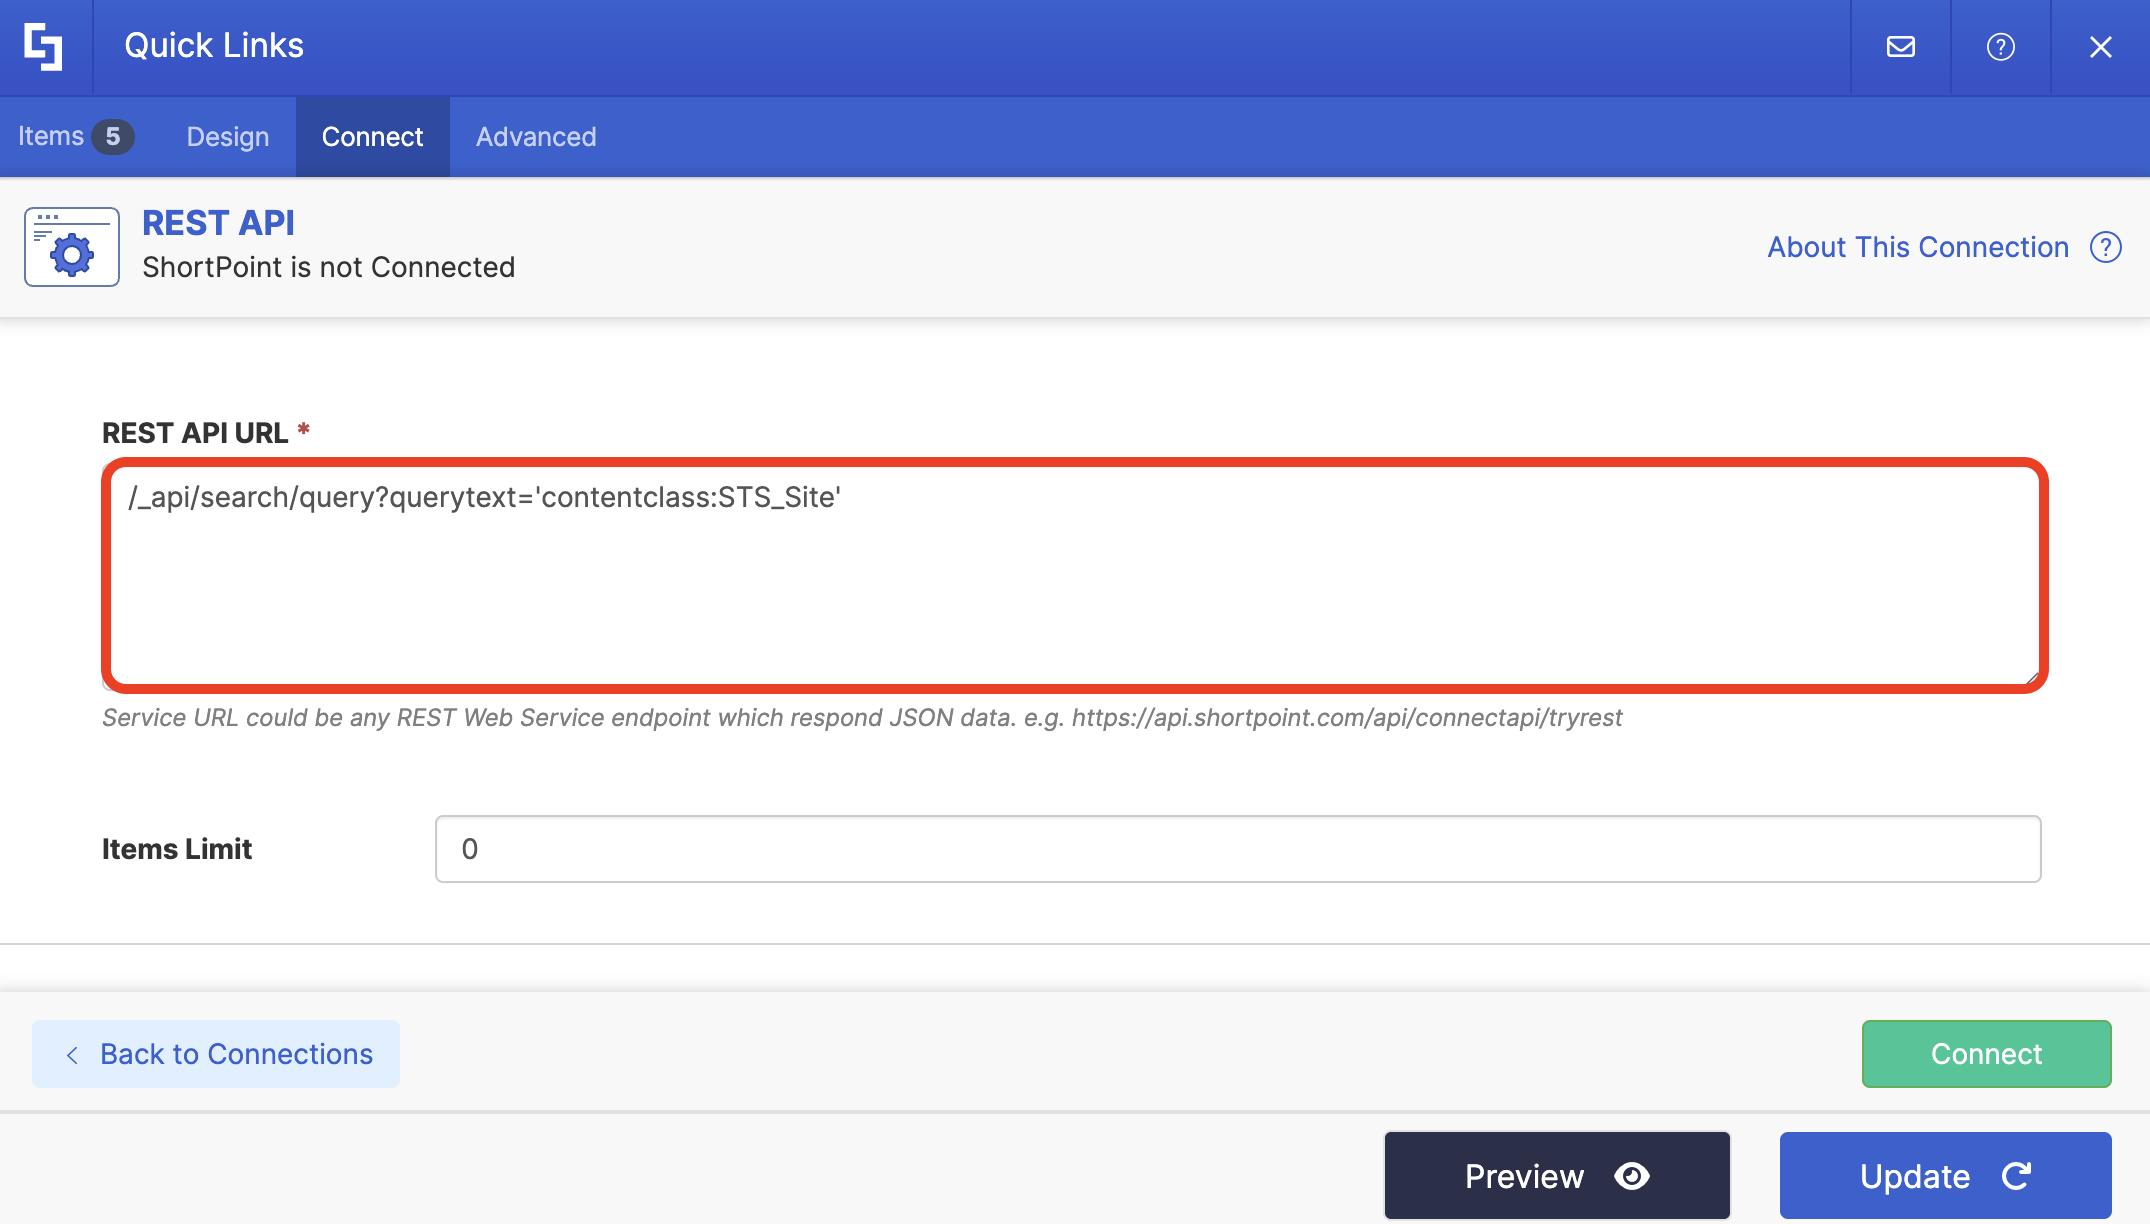
Copy the code below:
/_api/search/query?querytext='contentclass:STS_Site'
Paste it into the REST API URL field:
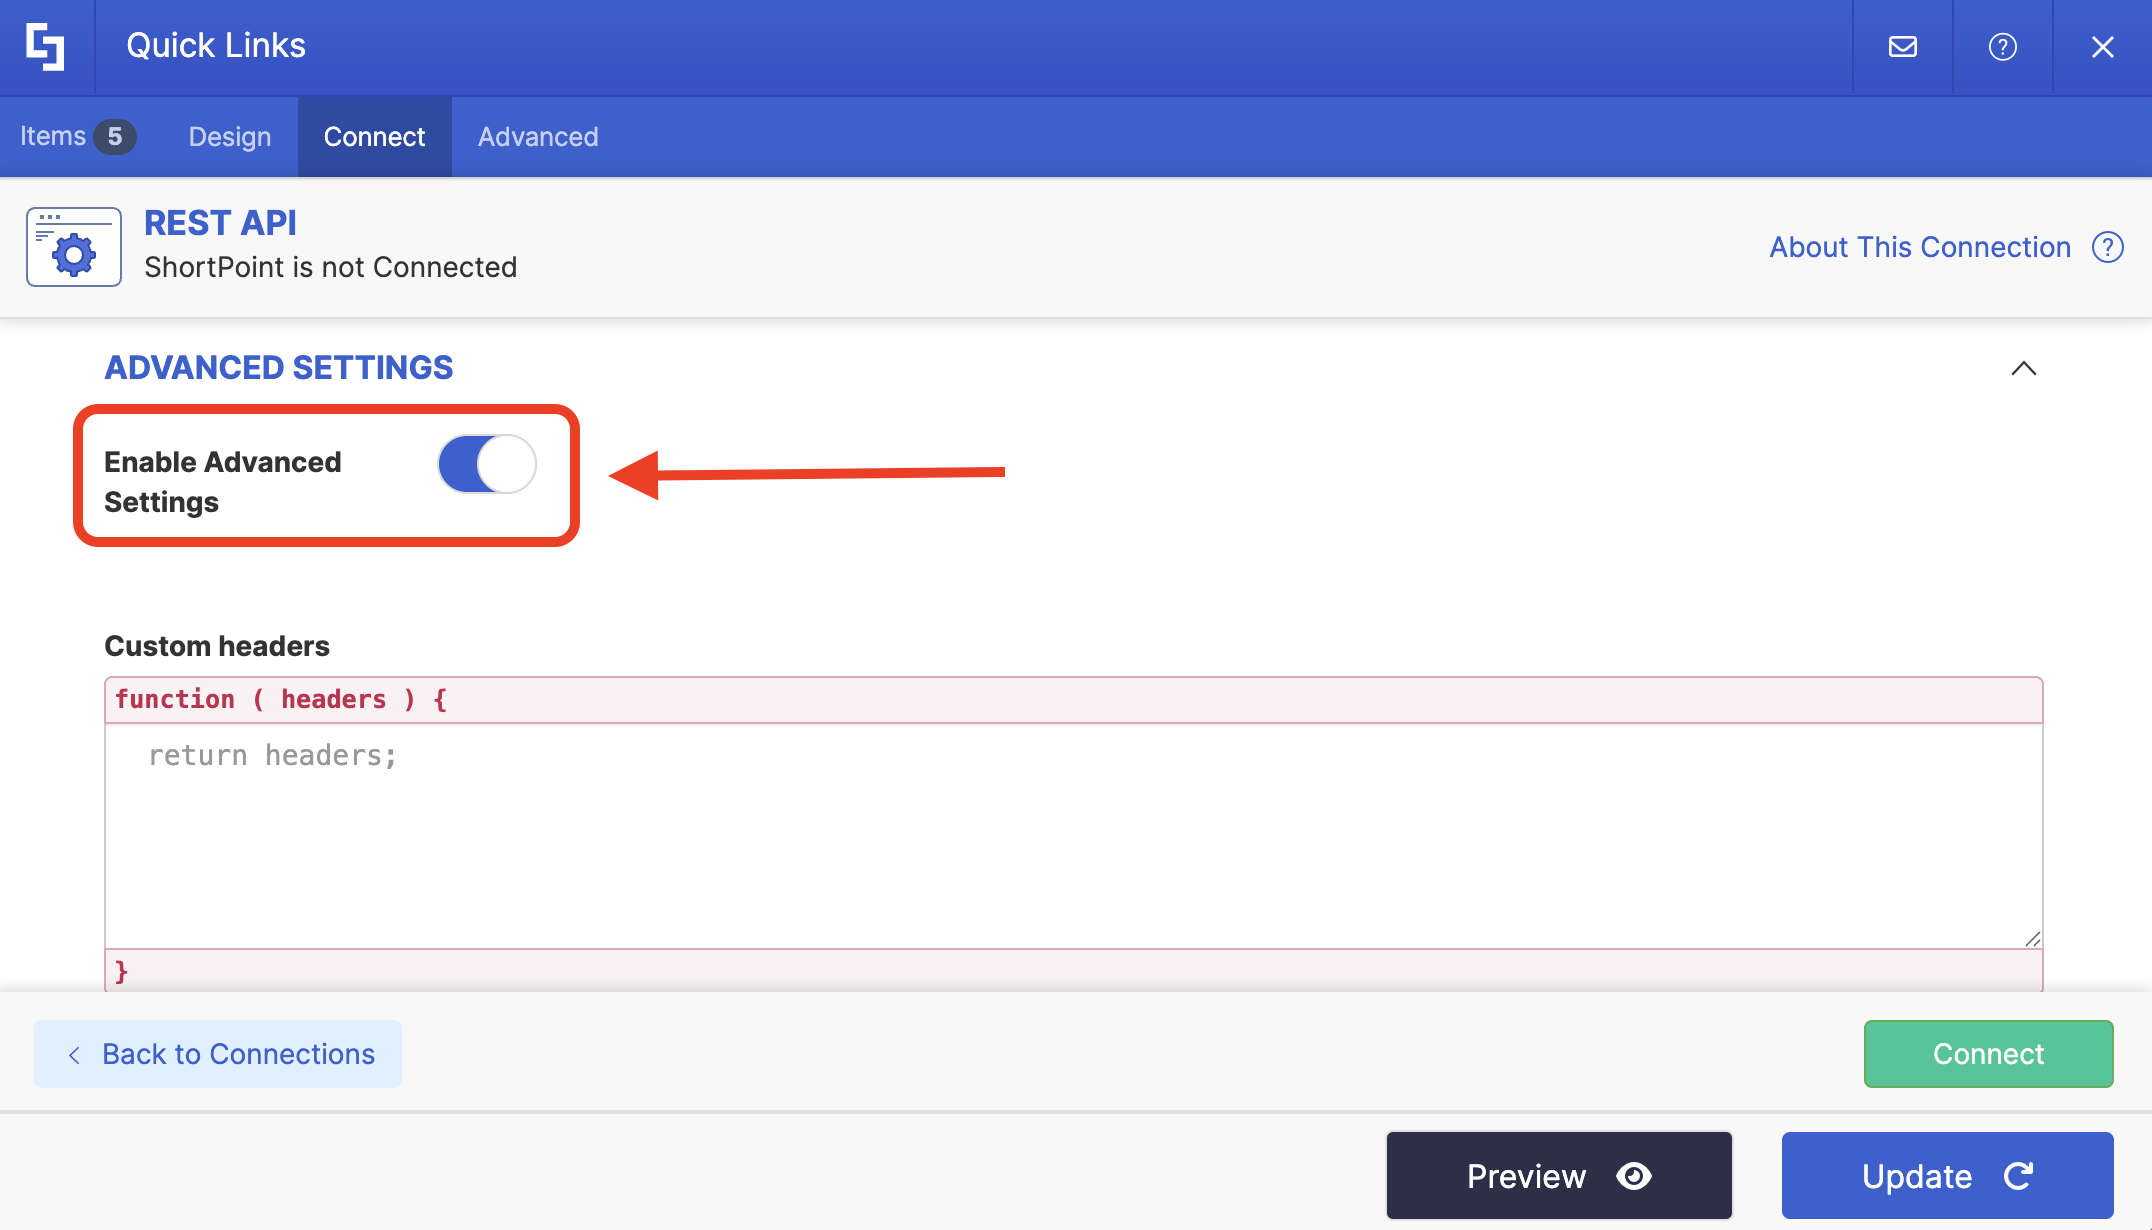
Expand Advanced Settings:

Turn on Enable Advanced Settings:
Copy the code below:
function extractKeyValuePairsArray(dataArray) {
return dataArray.map(data => {
return data.Cells.results.reduce((acc, item) => {
acc[item.Key] = item.Key != "Author" ? item.Value : item.Value.replace("Global Administrator", "").replace("SharePoint App", "").replace("System Account", "").replace(";", "");
return acc;
}, {});
}).filter(x => x.WebTemplate != "SPSPERS");
}
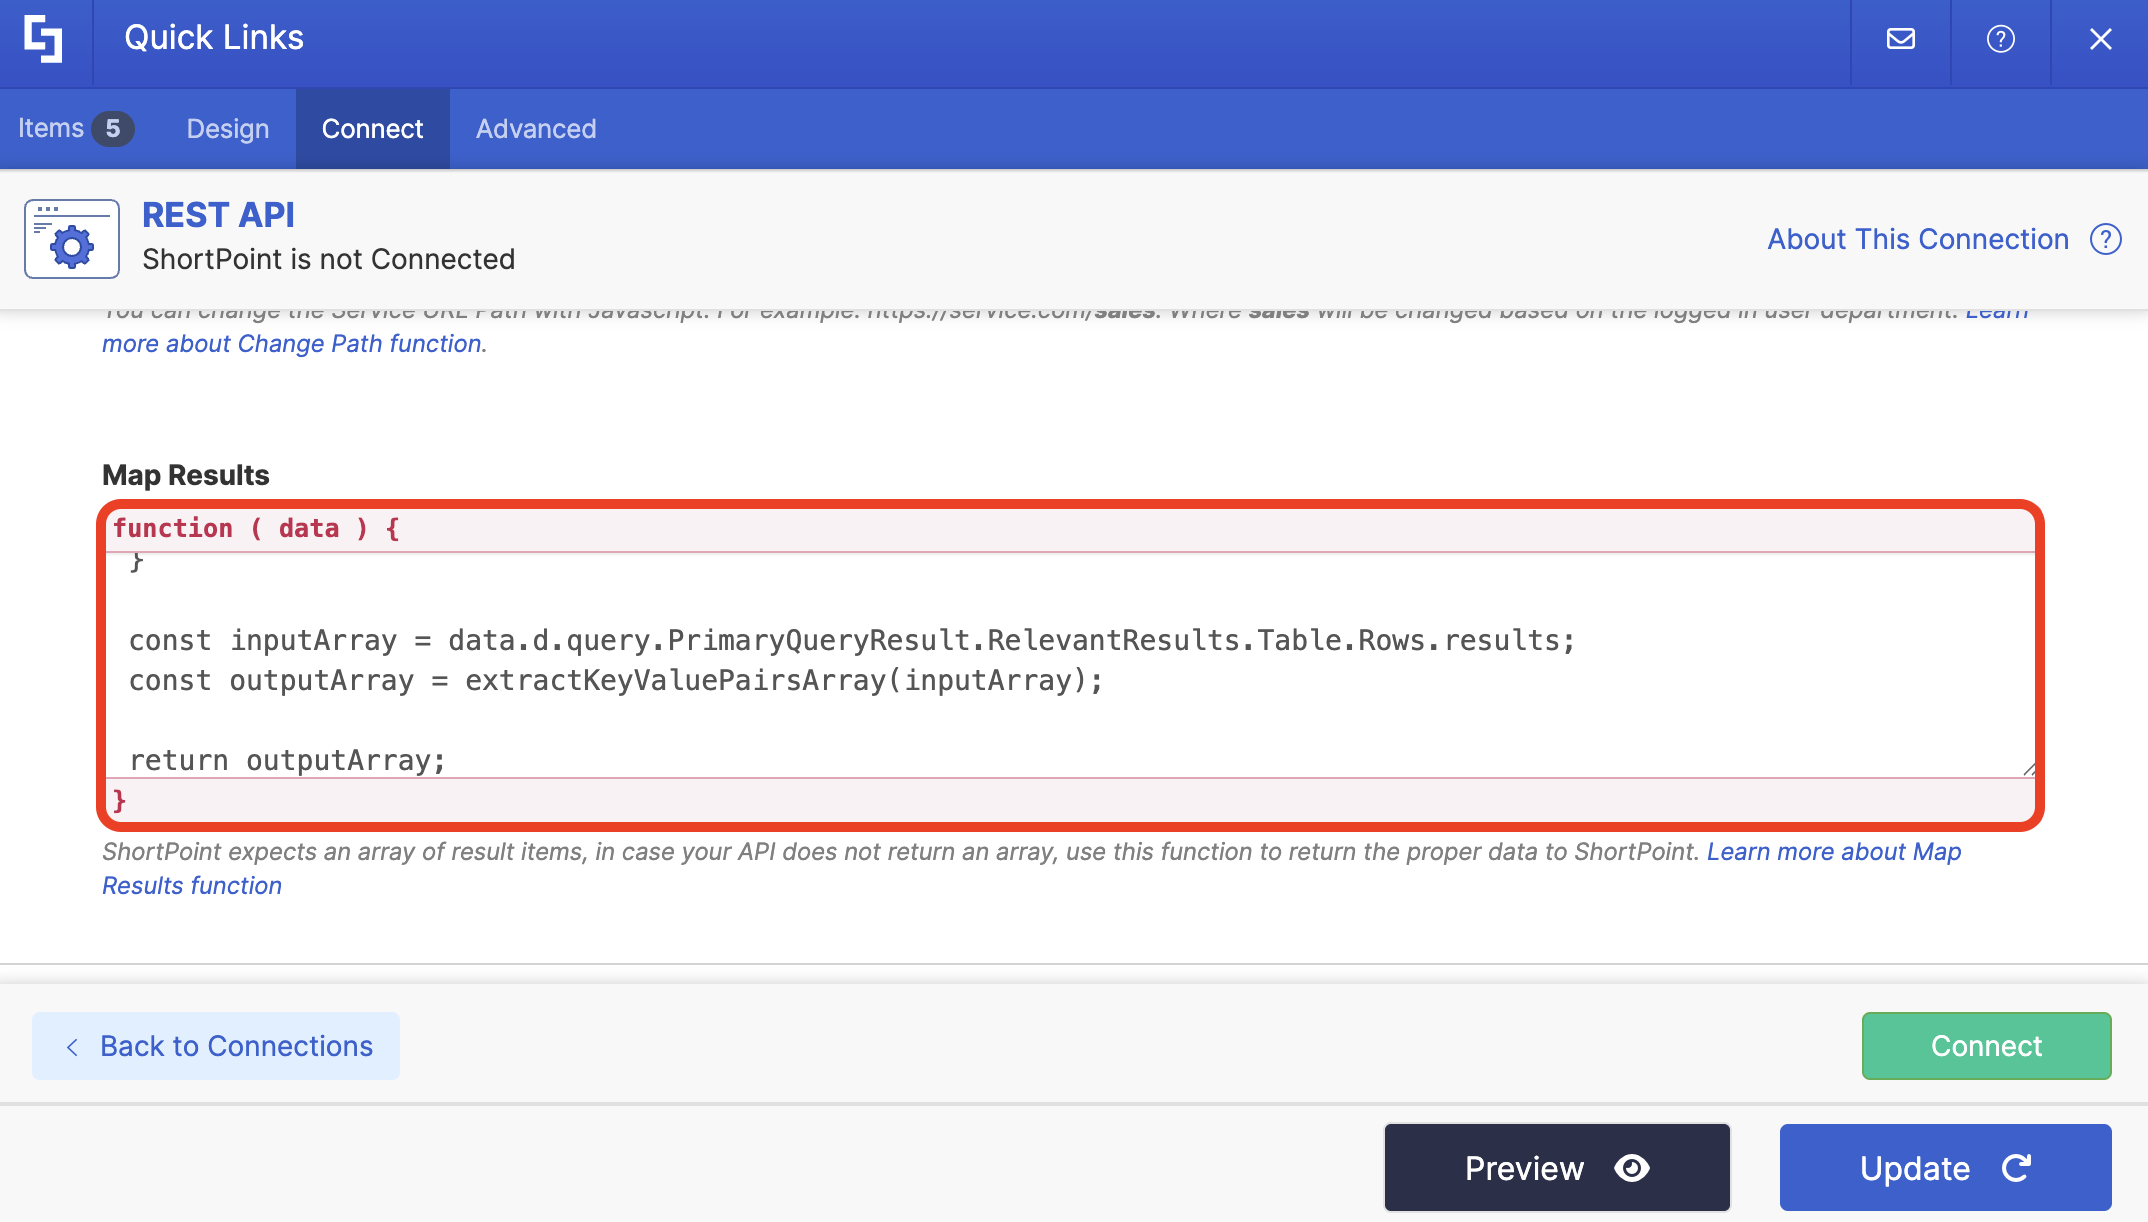
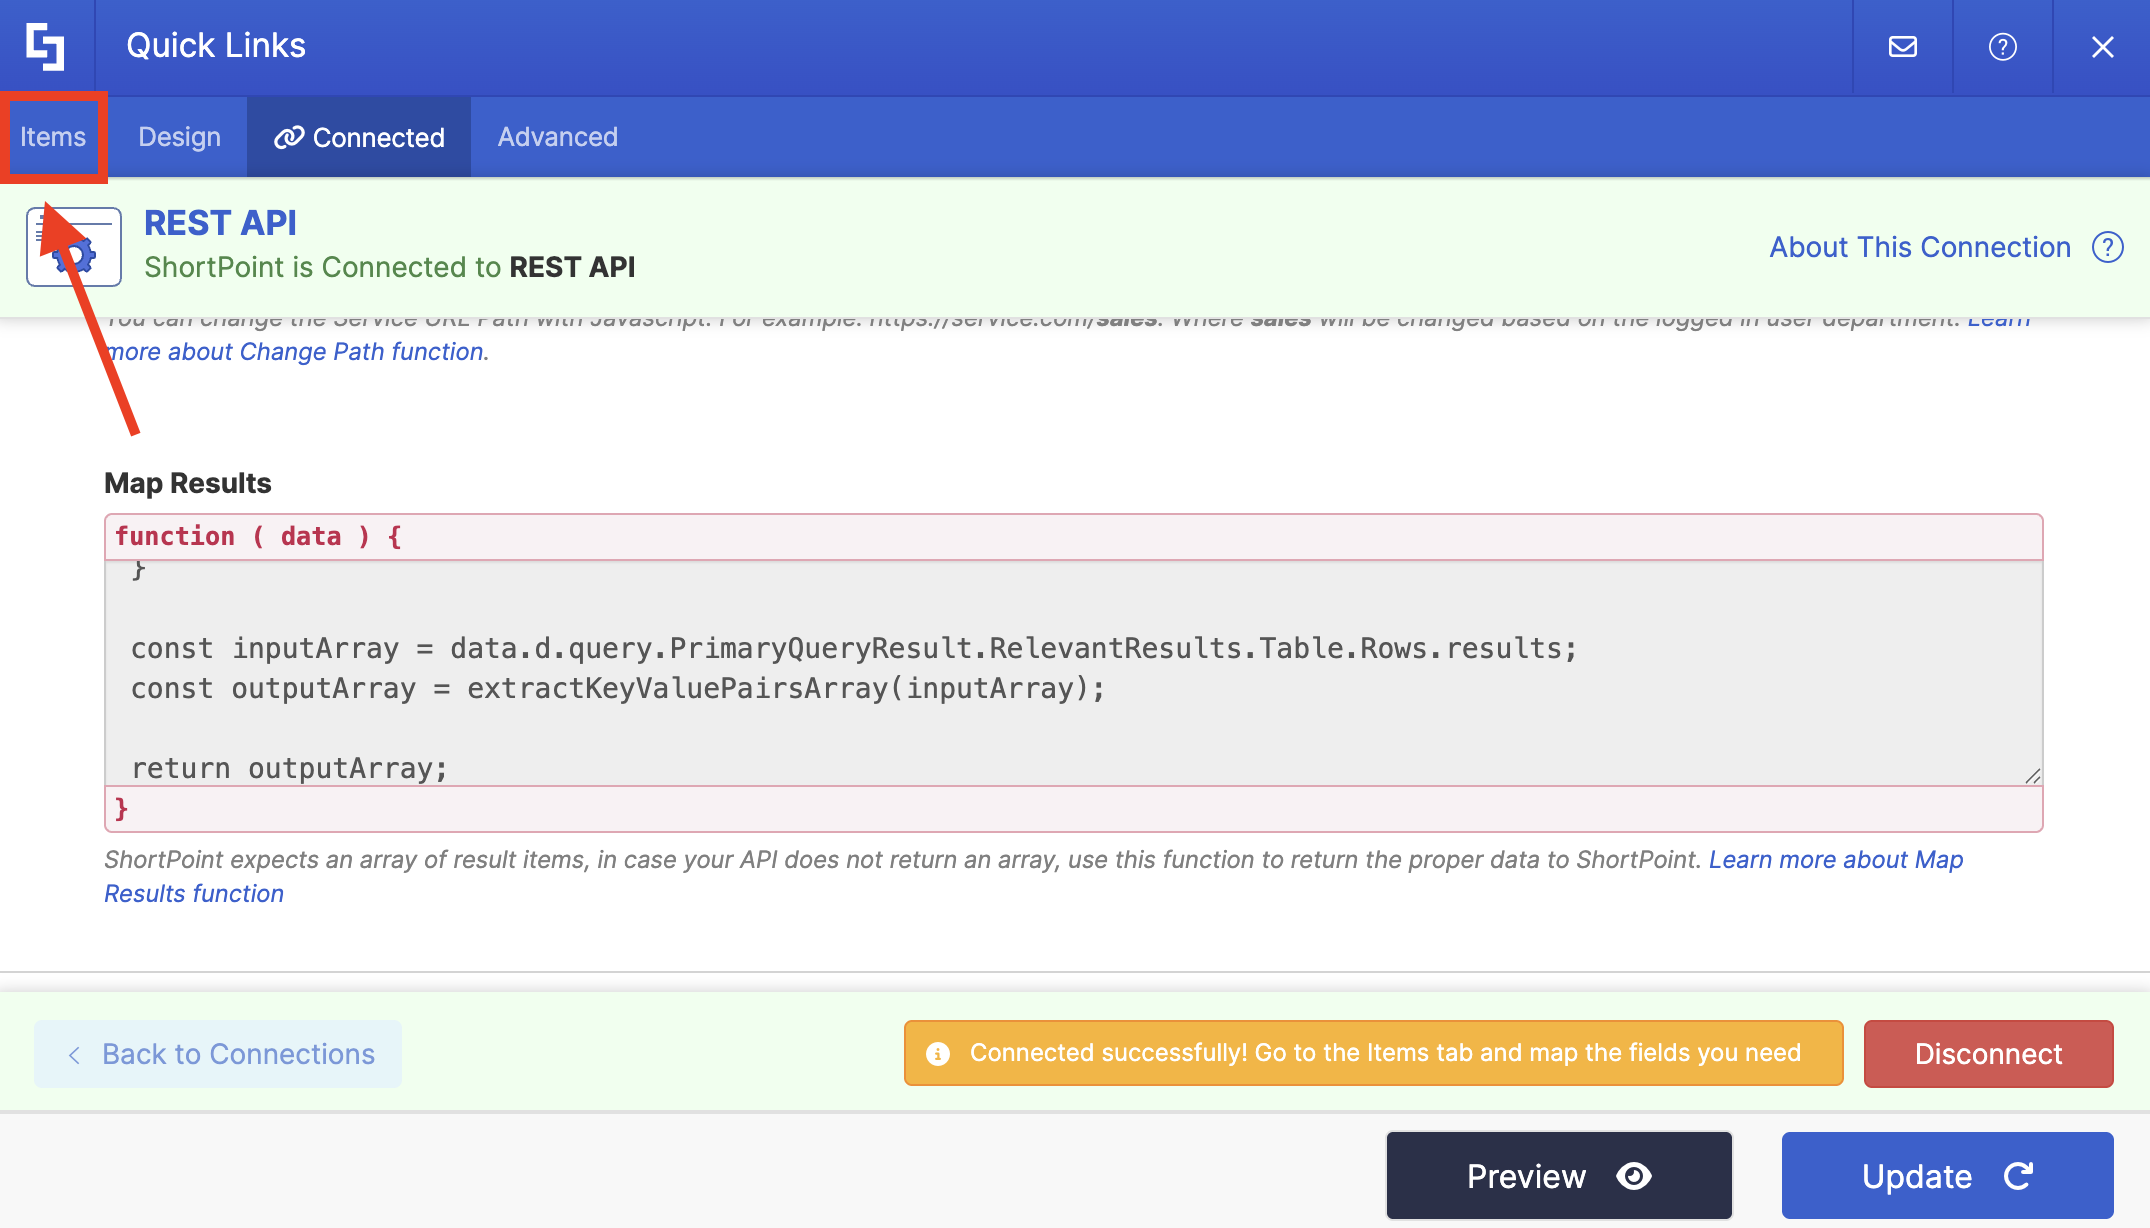
const inputArray = data.d.query.PrimaryQueryResult.RelevantResults.Table.Rows.results;
const outputArray = extractKeyValuePairsArray(inputArray);
return outputArray;Scroll down until you see Map Results and paste the copied code:
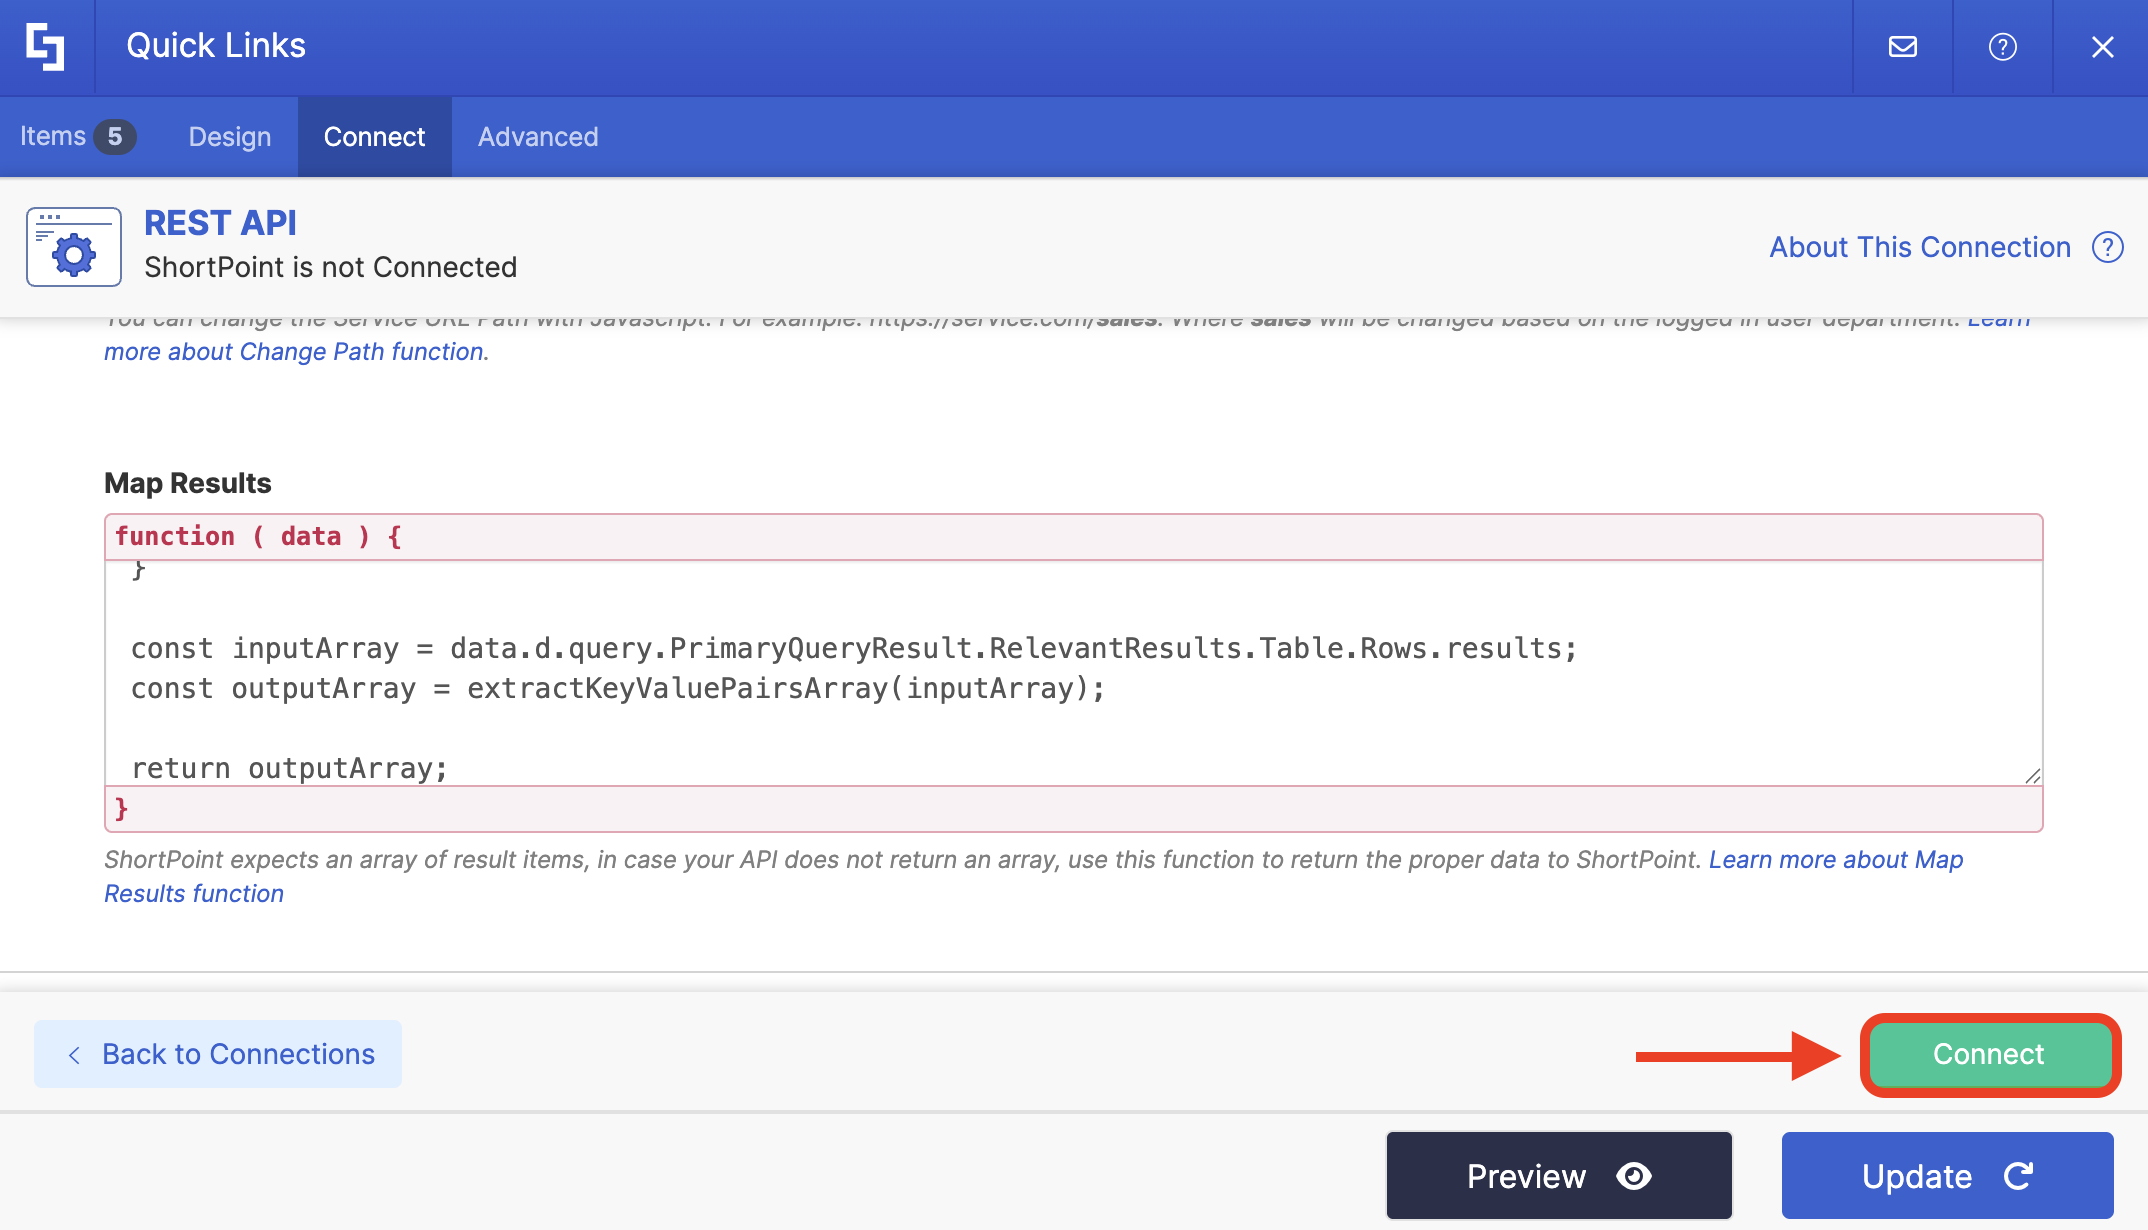
Click Connect:
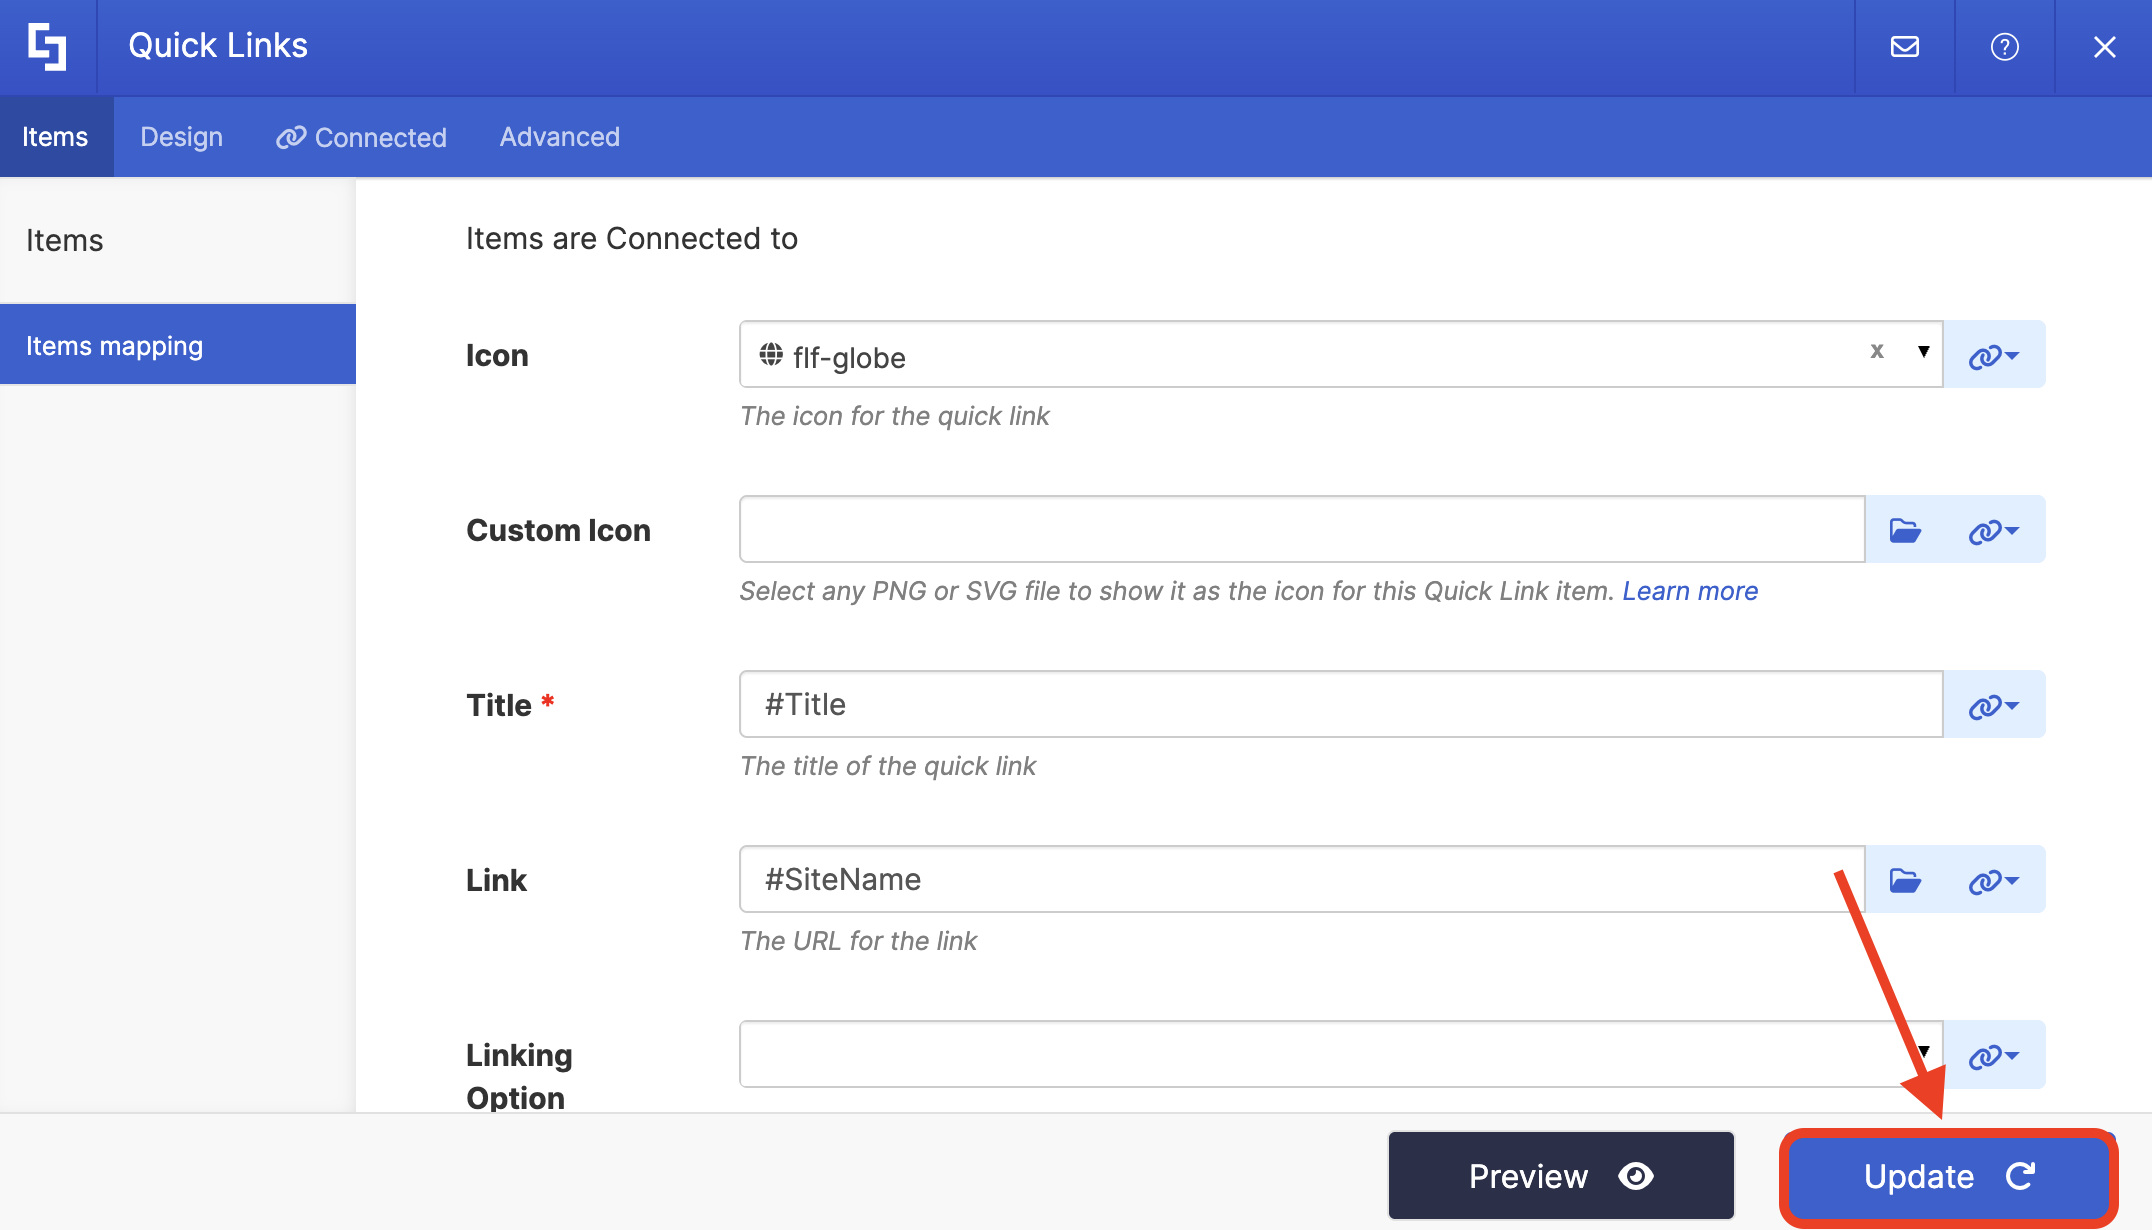
Step 4: Map Items
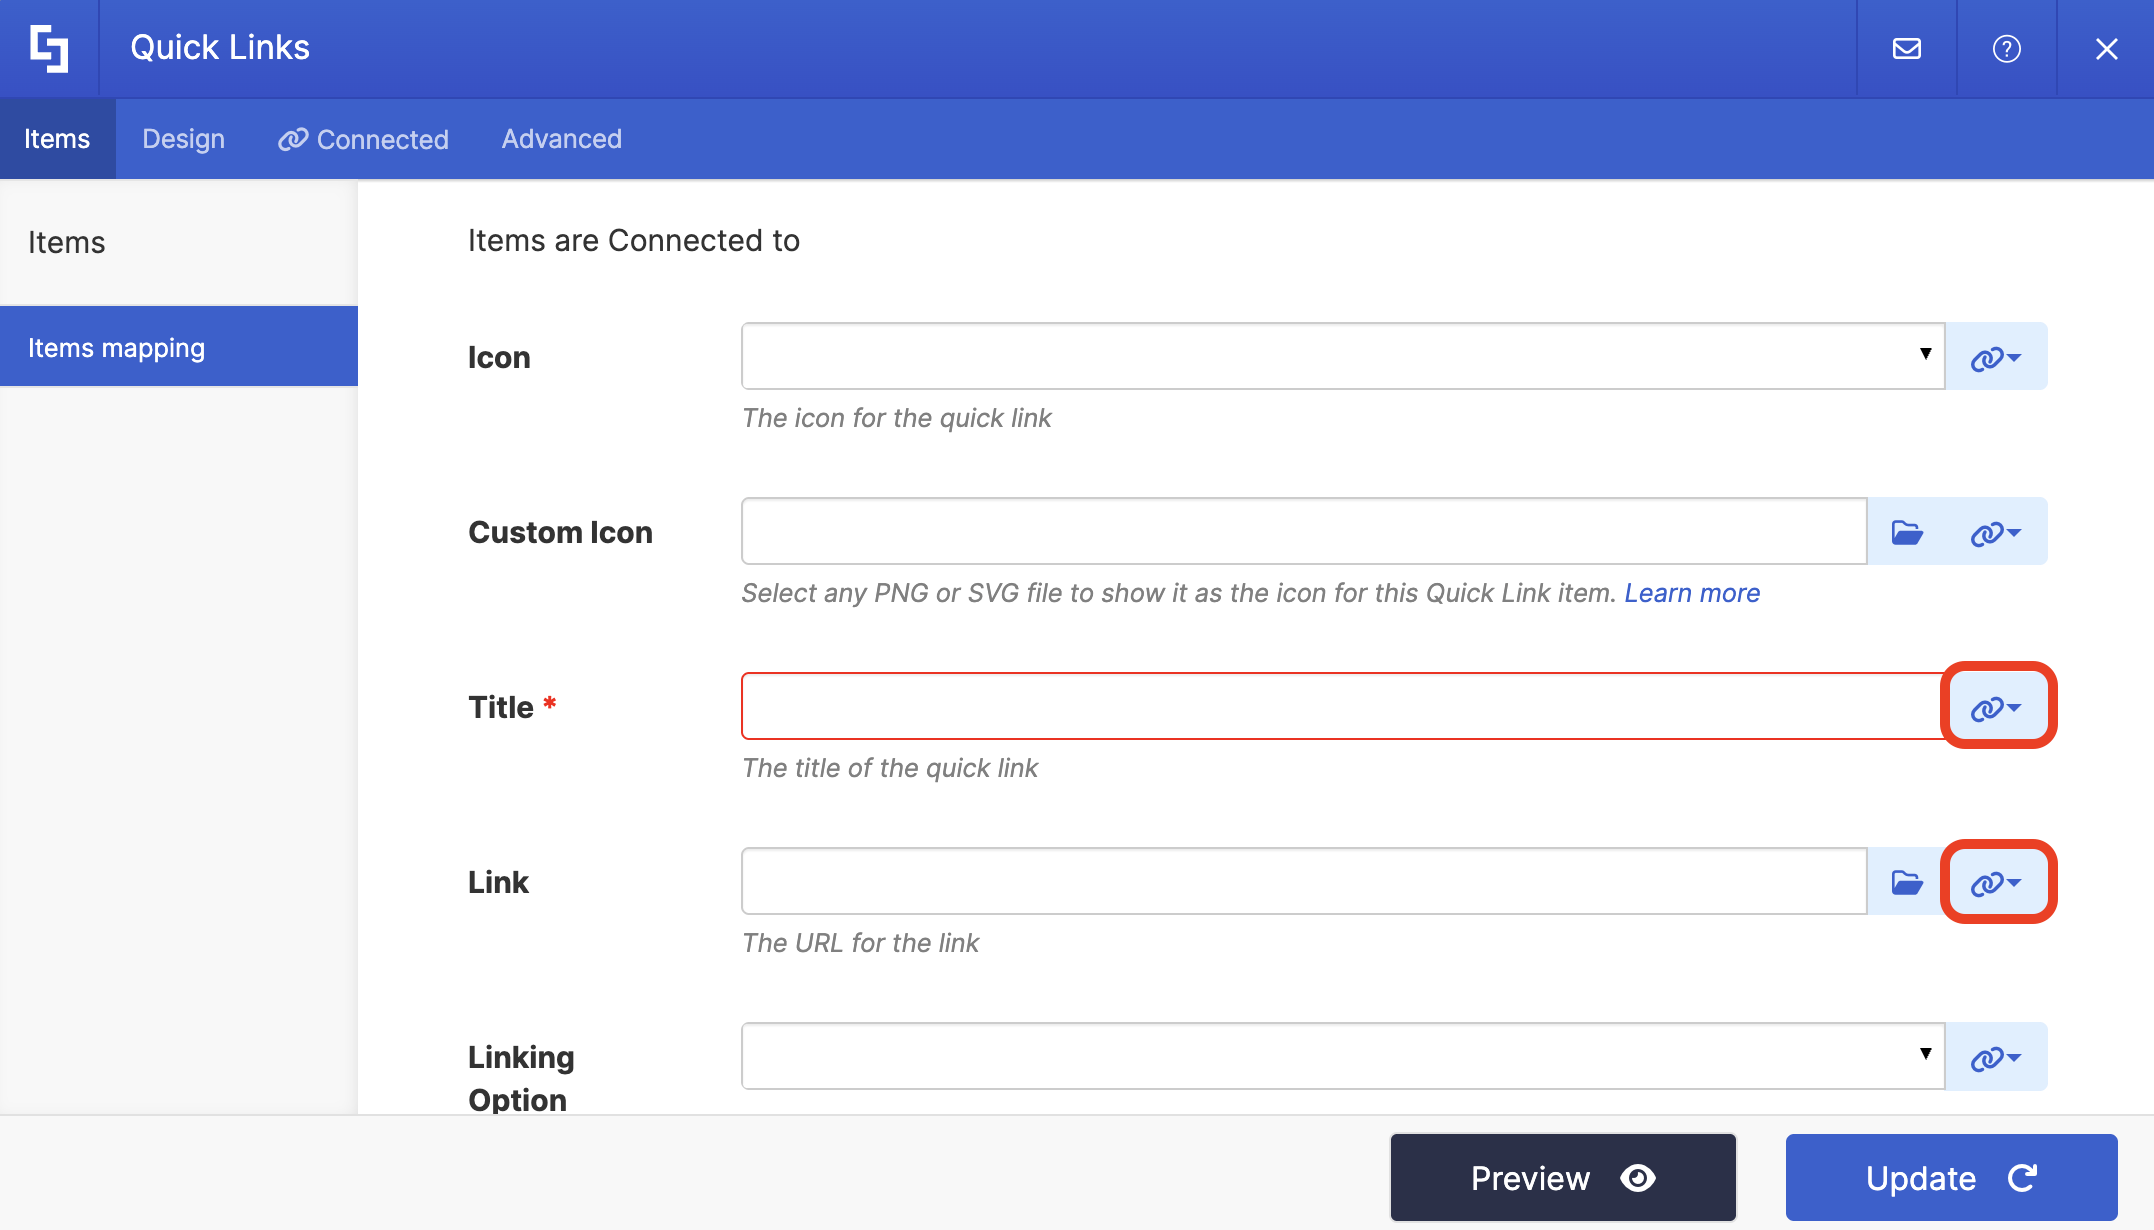
Go to the Items tab:
Delete all default content:
Use the link icon to map the properties you want to appear in the Title, Subtitle, and Link fields:
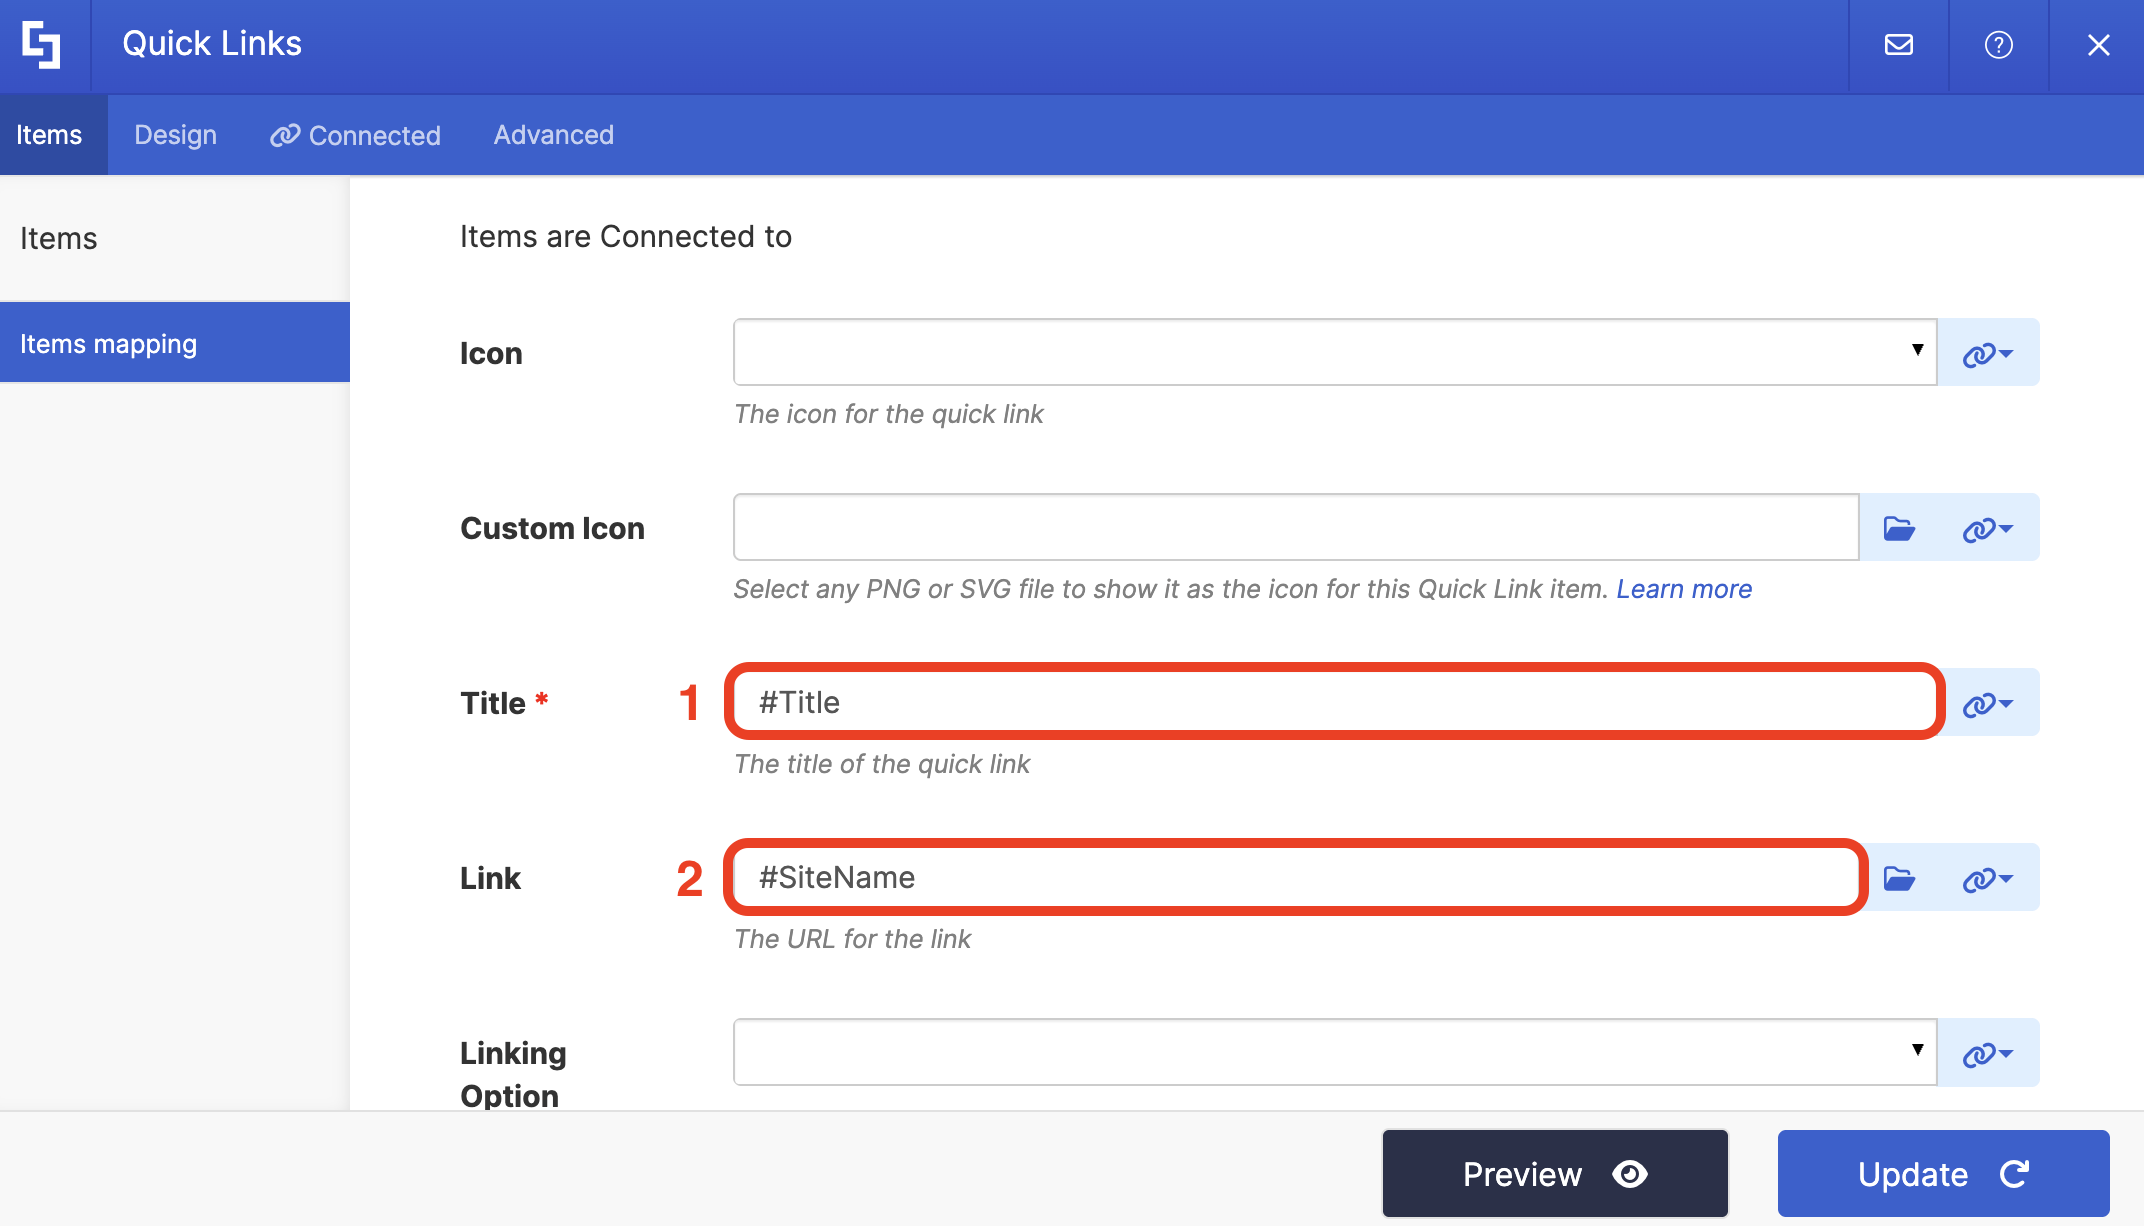
Below is an example of how we mapped the items we want to show in the Icon List:
- #Title - will showcase the name of the site as the title.
- #SiteName - will redirect users to the actual site when they click on an item.
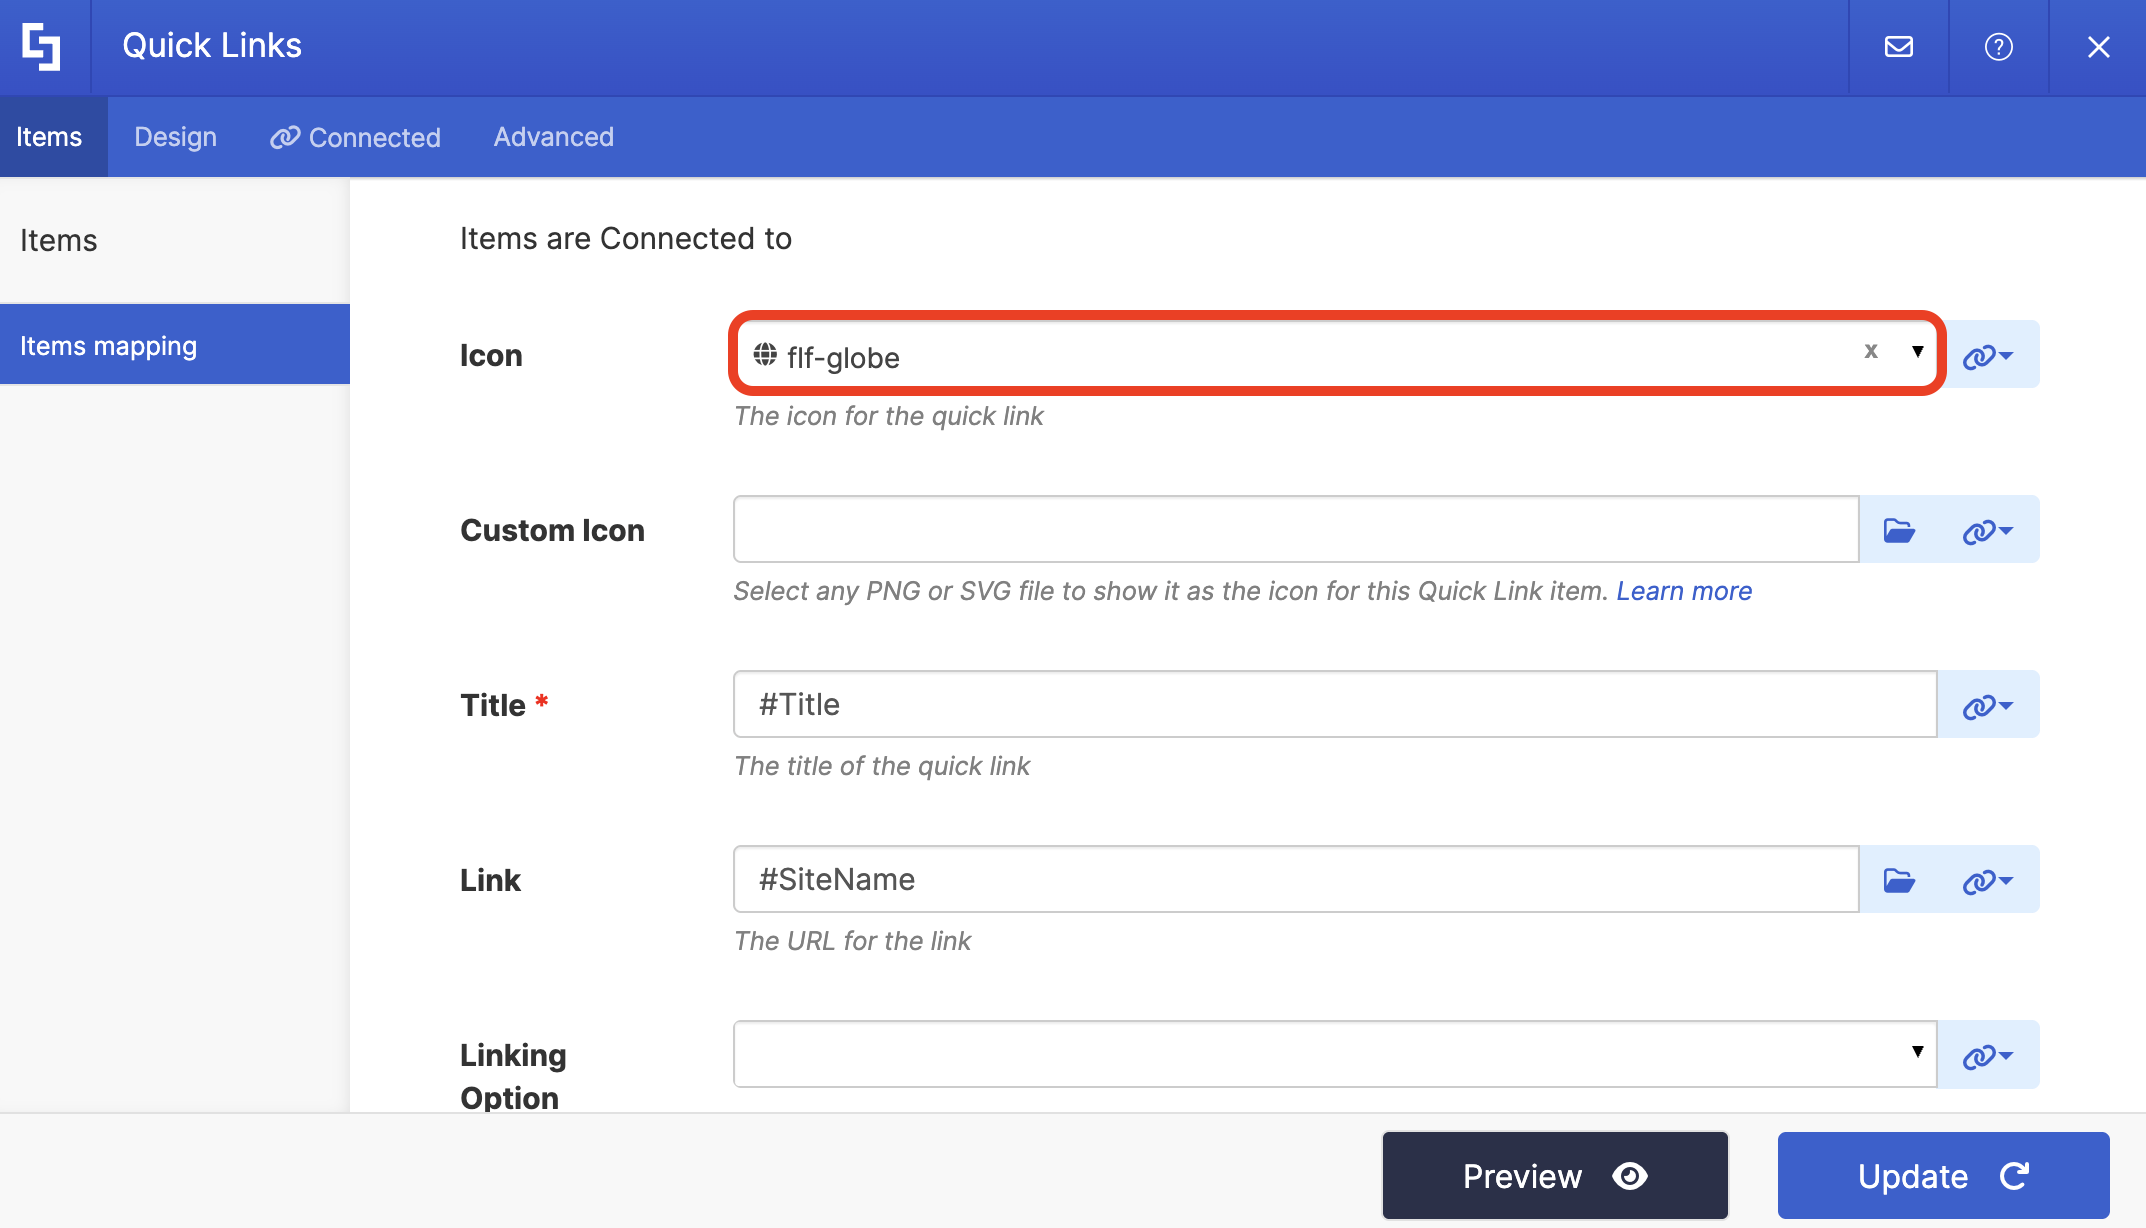
(Optional) If you are using Quick Links, choose the icon you want to be displayed in the Icon field:
Step 5: Save
Click Update once satisfied:
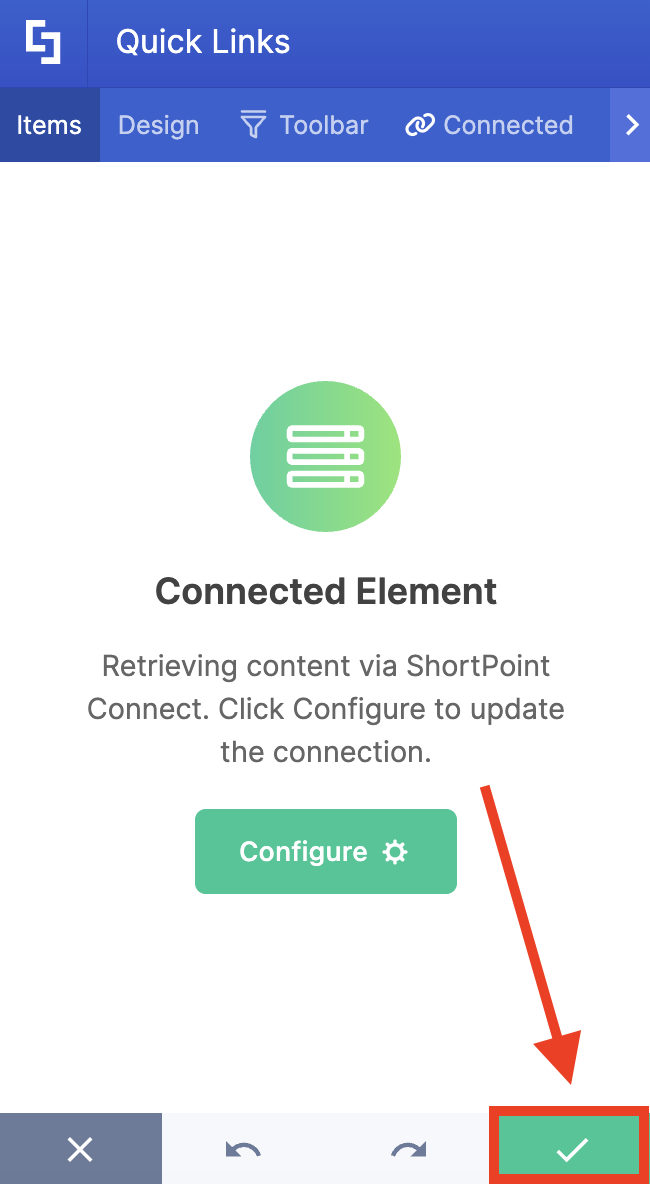
Click the green checkmark:
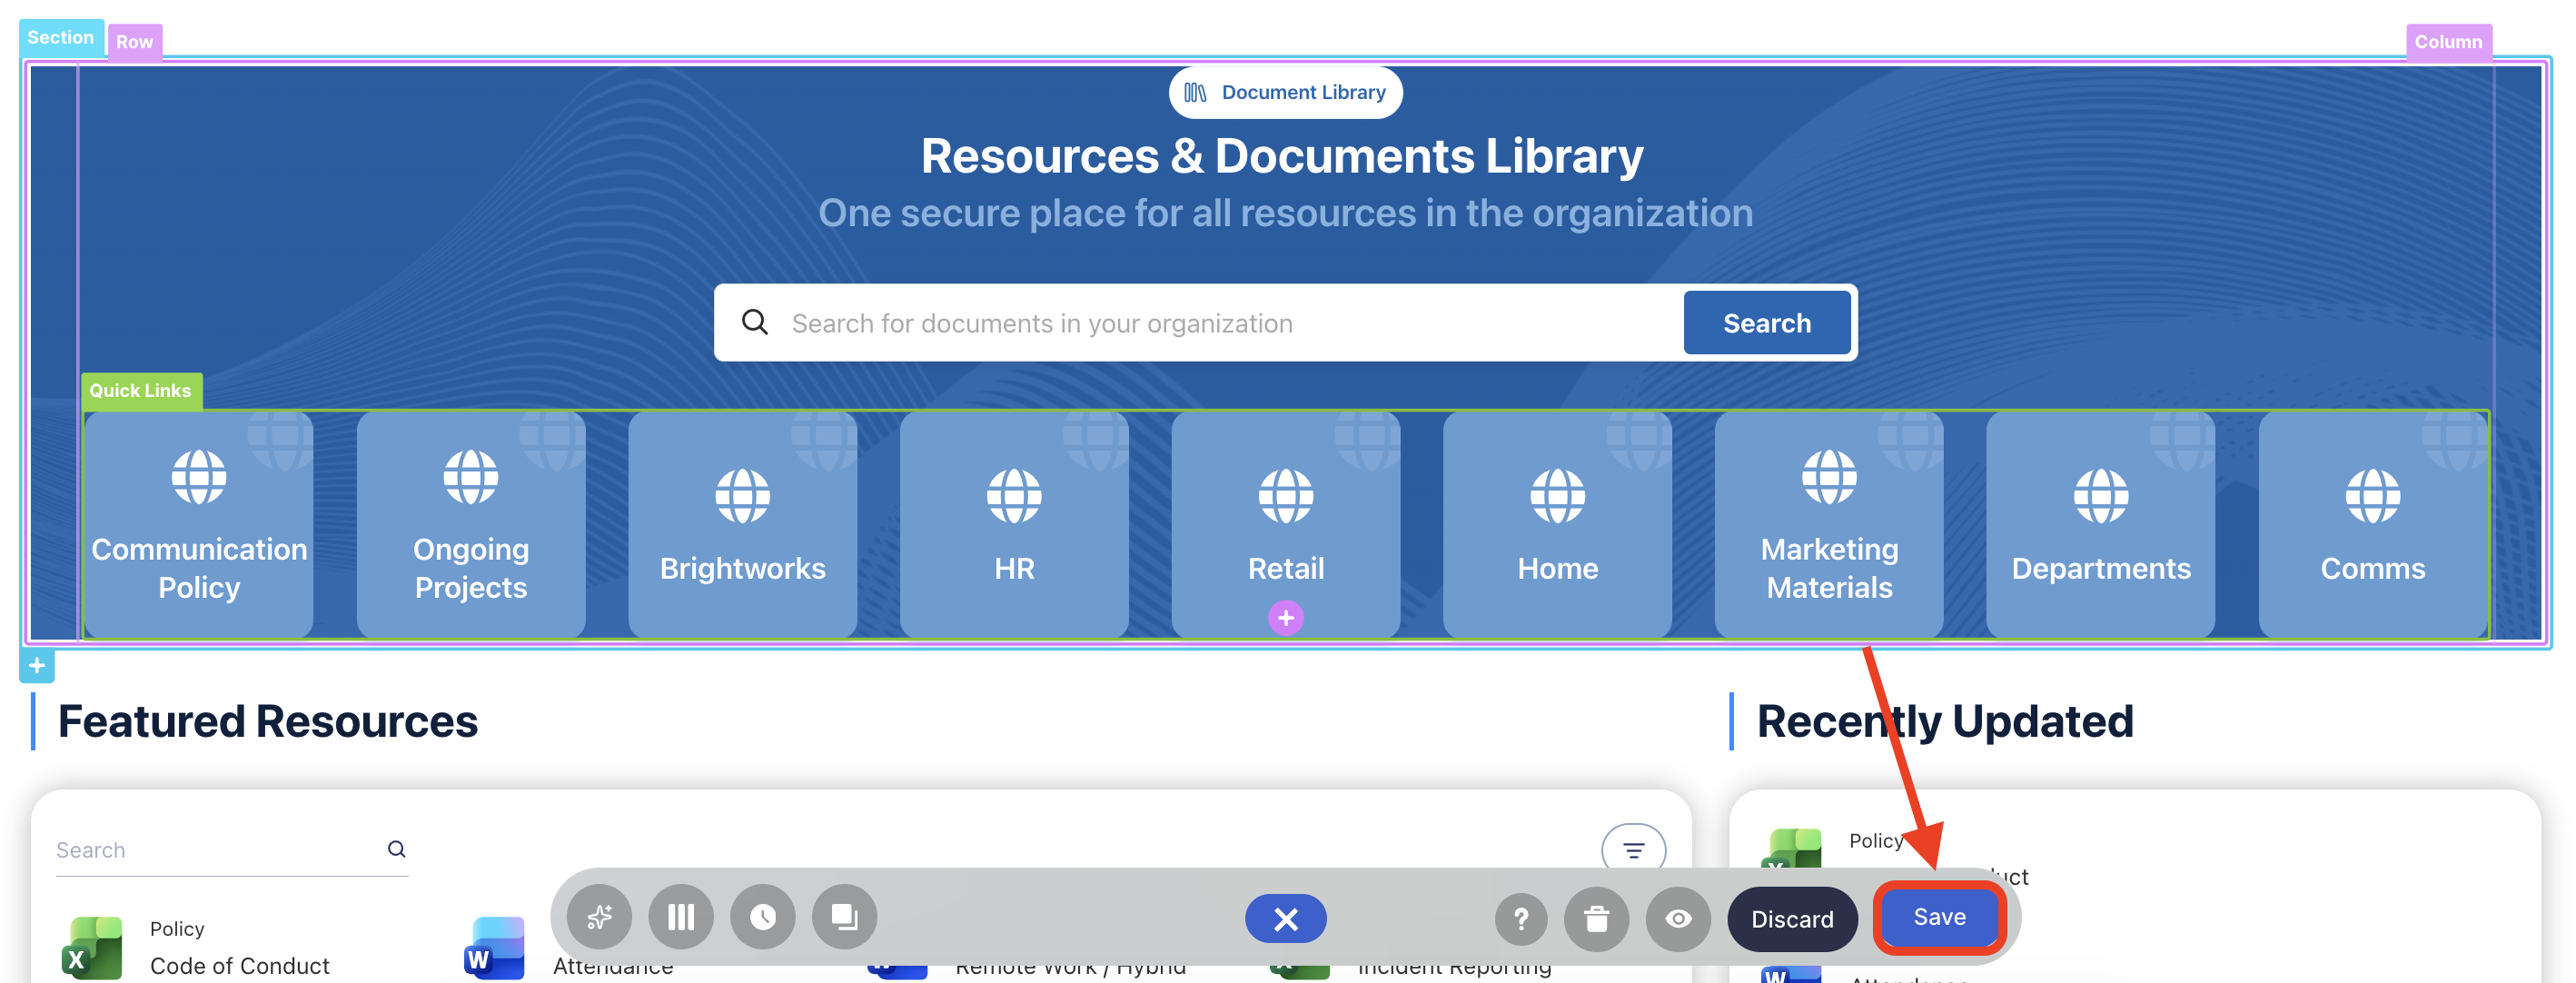
Save your changes:
Publish your page:
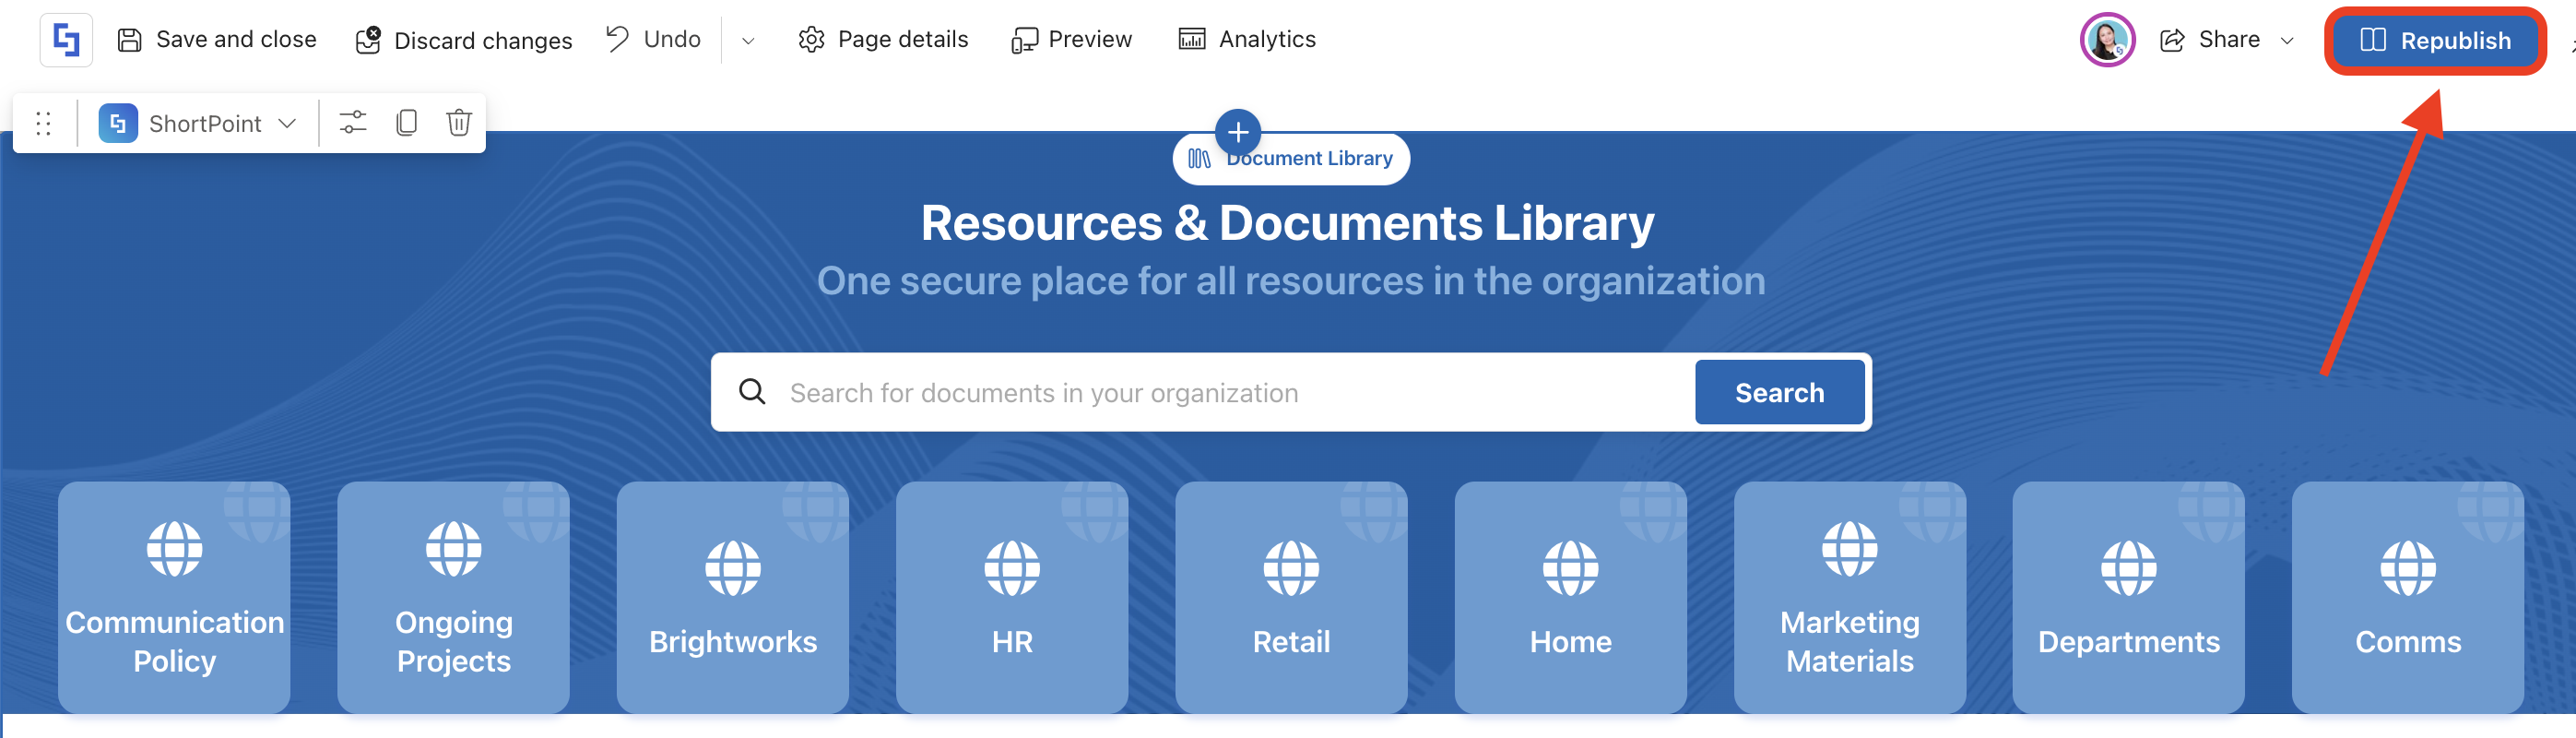
Congratulations! You've successfully created a SharePoint site list that shows all the sites your users can access.
Frequently Asked Questions
How do I create a SharePoint site list using the REST API connection?
You can create a SharePoint site list by using the ShortPoint REST API Connection. This involves editing a SharePoint page, connecting a Design Element like Quick Links to the REST API, and mapping the list items to display site names and links.
Will the SharePoint site list show all sites or only those I have permission to access?
The SharePoint site list displays only the sites you have permission to access, ensuring security and personalized content.
What are the prerequisites for creating a SharePoint site list with ShortPoint?
You need the latest version of ShortPoint SPFx installed, a PRO or Enterprise license as a ShortPoint Designer, and an existing Design Element ready for connection.
What is the benefit of using the REST API connection with ShortPoint for SharePoint lists?
Using the REST API connection, you can pull dynamic site data and get real-time updates, saving time and enhancing user experience.
Related articles:
