 Try ShortPoint now
If you've ever published a SharePoint page packed with corporate acronyms, technical terms, or company-specific abbreviations, you know how easily readers can get lost. The ShortPoint Abbreviation Design Element is a simple but powerful fix for exactly that problem — and once you start using it, you'll wonder how you ever managed without it.

This article walks you through what the Abbreviation Design Element is, how to use it, four practical ways to put it to work, and answers the most common questions people have when getting started.
TABLE OF CONTENTS
- Prerequisites
- What Is the ShortPoint Abbreviation Design Element?
- Interactive Tutorial
- Step-by-step Tutorial
- Abbreviation Features
- Practical Use Cases
- Start Designing with the Abbreviation Design Element
- Frequently Asked Questions
- Do I need to know how to code to use the Abbreviation Design Element?
- What's the difference between adding it from the library vs. the Rich Text Editor?
- Can I control who sees the abbreviation tooltips?
- Can the abbreviation content be pulled from a SharePoint list or an external source?
- Do I need any special permissions to add the Abbreviation Design Element?
- Can I add more than one abbreviation on a single page?
Prerequisites
- You must have the latest version of ShortPoint SPFx installed on your SharePoint environment.
- You must be a ShortPoint Designer with an active license.
What Is the ShortPoint Abbreviation Design Element?
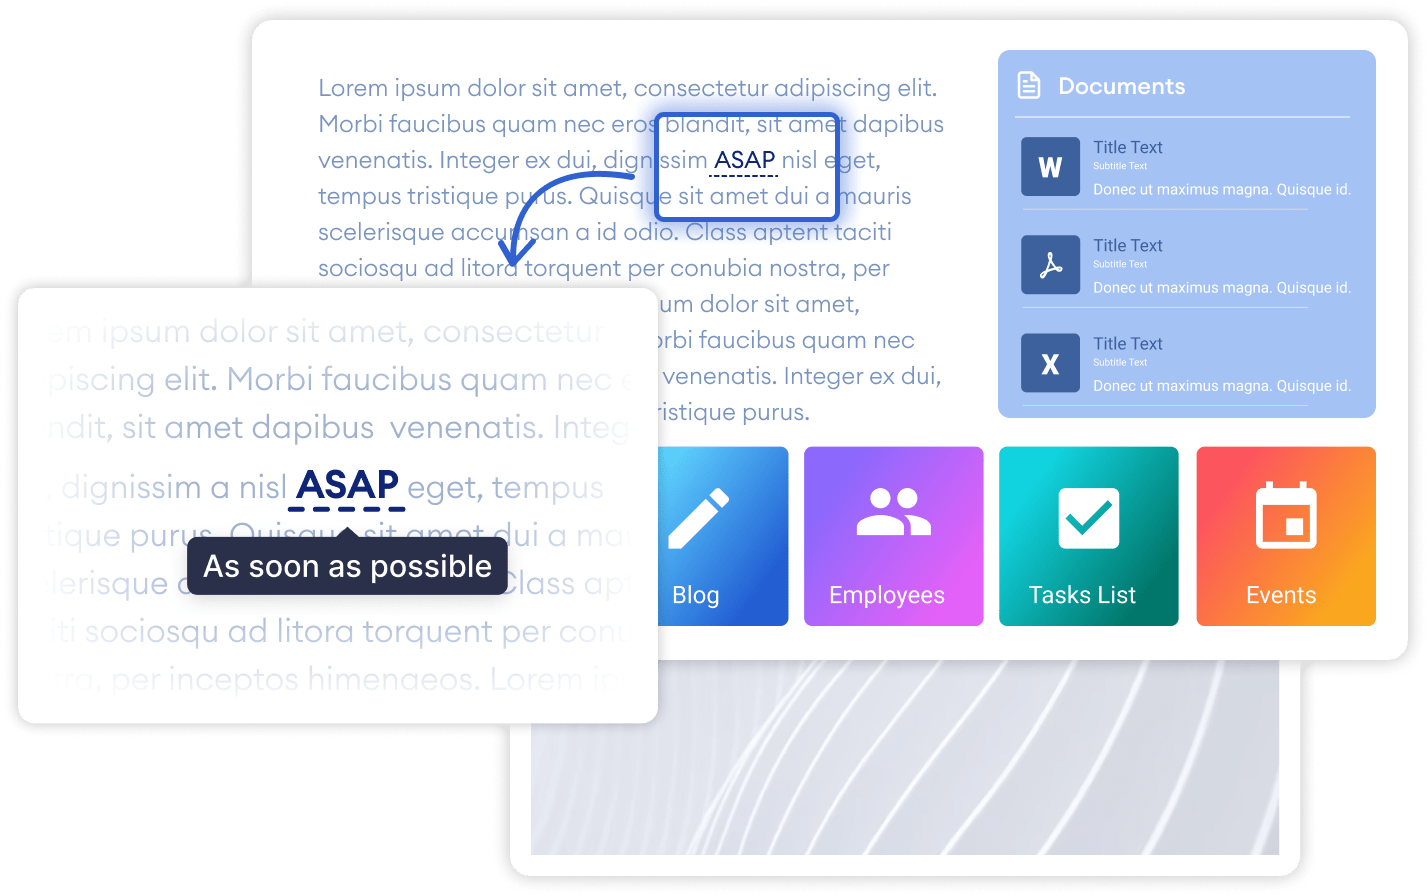
The Abbreviation Design Element is a built-in ShortPoint feature that lets you attach a hidden tooltip to any word or phrase on your SharePoint page. When a reader hovers over the term, a small pop-up appears with the full definition or explanation — without cluttering the page with long footnotes or sidebars.
It works as both a standalone element (added from the ShortPoint Design Elements library):
And as an inline element inside other text-based components, giving you flexibility depending on how your page is structured:

Each abbreviation has two core parts:
- Title — the abbreviated term or short label (e.g., "KPI")
- Content — the full meaning or explanation that appears on hover (e.g., "Key Performance Indicator")
Interactive Tutorial
Start the interactive tutorial to learn the two ways you can customize the Abbreviation Design Element and effectively manage abbreviations in your SharePoint environment:
NOTECheck out Abbreviation Features to see the options you can customize.
Step-by-step Tutorial
Follow the option that best suits your needs:
Option 1: Using the Library of Design Elements
ShortPoint has a library of Design Elements that ShortPoint Designers can add to their page. Follow along to learn how to insert the Abbreviation Design Element using this library.
Step 1: Edit the ShortPoint Web Part
- Go to the SharePoint page you want to use and click Edit.

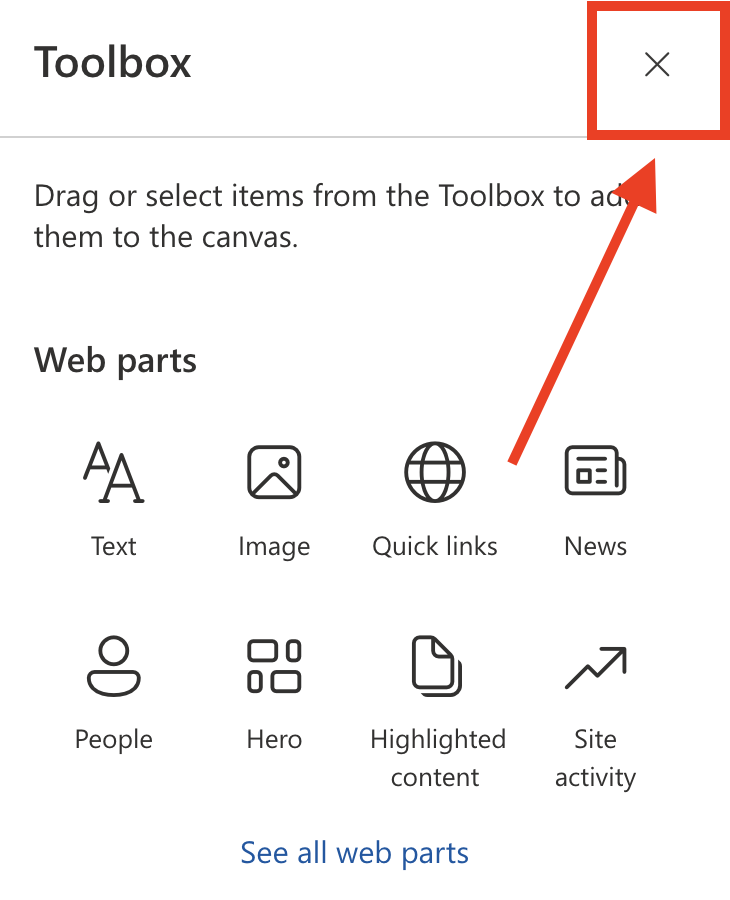
- Close the Toolbox:
- Click the Edit properties icon:

Step 2: Insert the Abbreviation Design Element
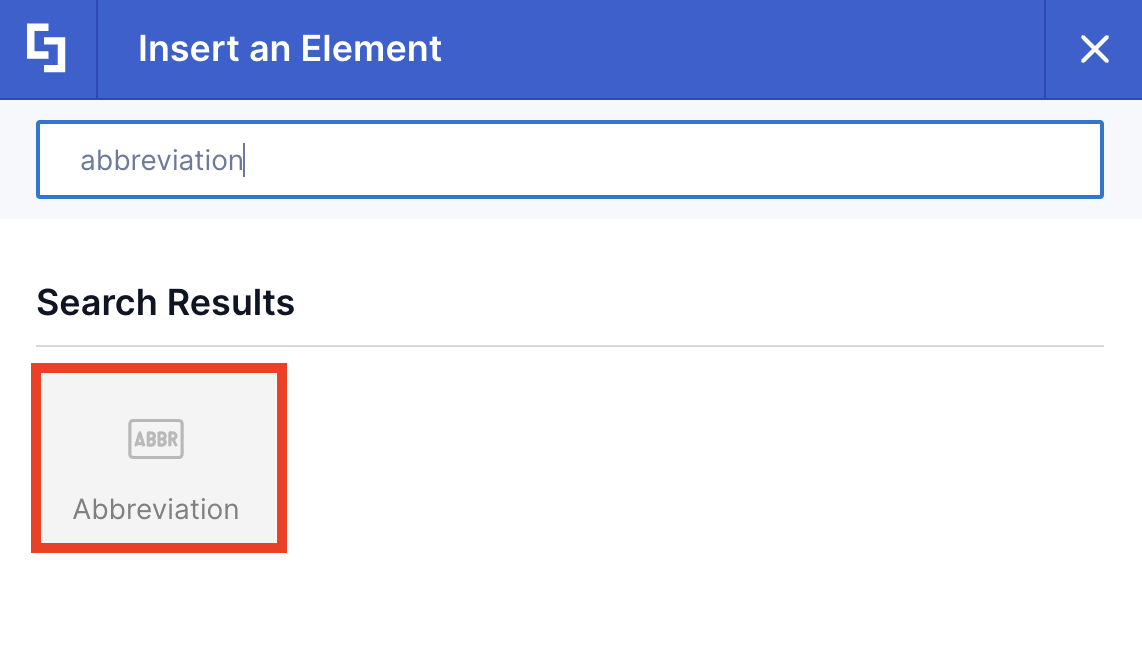
- Click the plus icon.
- Use the search box to look for Abbreviation and click it.
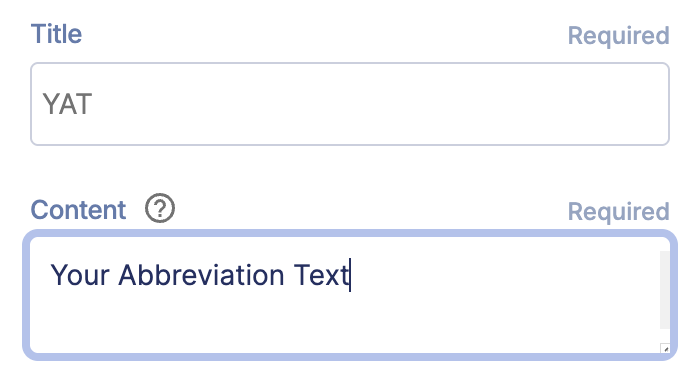
Step 3: Add content
- Add a Title.
- Add Content. This will appear when the user hovers over it.
- Once satisfied, click the green check mark.
NOTECheck out Abbreviation Features to see the options you can customize.
(Optional) Step 4: Add additional content
NOTEYou can add additional content after the Abbreviation.
- Click the plus icon.
- Use the search box to look for Text and click it.
- Add additional content.
- Once satisfied, click the green check mark.
- Repeat Steps 3 and 4 if you wish to add more Abbreviations.
Step 5: Save
- Then, click the eye icon to see your page in real-time.

- Click Save to apply all your changes.

That's it! You now have Microsoft abbreviations on your SharePoint page, making it easier for users to understand and navigate your corporate acronyms and technical terms with clarity and consistency.
Option 2: Using the Rich Text Editor
Abbreviation is an Inline Design Element. This means that you can also insert it into your SharePoint page using the Rich Text Editor, a versatile tool that allows you to customize text content. Follow the steps to learn how to access it.
Step 1: Edit the ShortPoint Web Part
- Go to the SharePoint page you want to use and click Edit.

- Click the ShortPoint tag.
- Select the pencil icon.
Step 2: Insert the Abbreviation Design Element
NOTEThe Rich Text Editor can be accessed in Design Elements with text editing features. This includes the Text Design Element and content-holder Design Elements like Alert, Tab, Panel, List etc.
- Hover over the Text, double-click, and highlight the text you want to turn into an Abbreviation.
- Click the ShortPoint icon.

- Select the Show abbreviation icon.

Step 3: Customize the Abbreviation
- Add a Title.
- Click Apply.
NOTECheck out Abbreviation Features to see the options you can customize.
Step 4: Save
- Then, click the eye icon to see your page in real-time.

- Click Save to apply all your changes.

Congratulations! You can now create Microsoft abbreviations in SharePoint.
Abbreviation Features
Below are the options you can find in the Abbreviation Settings window and the Rich Text Editor:
Abbreviation Settings Window
These are the options you will find if you used Option 1 to add the Abbreviation Design Element:
A. Content tab
The Content tab allows you to edit the content inside the Abbreviation. It has the following options:

 | Title | allows you to add the abbreviation. |
 | Content | allows you to add the abbreviation meaning. |
B. Connect Tab
The Connect tab allows you to link the Design Element to SharePoint sources (List, Document Library, News, etc.) and other external sources (Microsoft Graph API, Teams, Outlook, etc.). For more details about ShortPoint Connect, check out Basic Tutorial: How to Establish Seamless SharePoint Connection with ShortPoint Connect.

C. Visibility Tab
The Visibility tab allows you to specify who can see the Design Element and what type of devices it can be shown on. For more details, check out How to Use the ShortPoint Visibility Feature for Effective SharePoint Access Management.

D. Custom CSS Tab
This tab allows you to use your own CSS, HTML, and Javascript code to customize the Abbreviation Design Element.
NOTECheck out our support article on How to Insert Custom CSS into a Page Builder Element? (Basic Tutorial) to know more about Custom CSS.

Abbreviation Rich Text Editor Options
These are the options you will find if you used Option 2 to add the Abbreviation Design Element:

 | Title | allows you to add the abbreviation. |
 | Content | allows you to add the abbreviation meaning. |
Practical Use Cases
Here’s where the Abbreviation Design Element shines in real-world scenarios.
- Simplifying Technical Documentation
IT teams, developers, and operations staff regularly publish documentation filled with acronyms and technical shorthand. Terms like "DNS," "CI/CD," "VPN," or "SLA" might be second nature to the people writing the docs, but not necessarily to everyone reading them.
By wrapping these terms in the Abbreviation Design Element, you can keep your documentation clean and concise while still making it accessible to a broader audience. Instead of adding a bulky glossary at the bottom of the page, the definition is right there, on demand, exactly when the reader needs it.
- Onboarding New Employees
New hires are bombarded with company-specific language from day one. Whether it's internal project names, departmental codes, or role abbreviations unique to your organization, the learning curve can be steep.
Adding abbreviation tooltips to your onboarding pages means new team members can get up to speed without having to interrupt a colleague every five minutes to ask what something means. It creates a smoother self-service experience and reduces the back-and-forth that typically slows down onboarding.
- Compliance and Policy Pages
Policy pages often contain regulatory terms, legal jargon, or compliance framework references that employees are expected to understand, but rarely do on first read. Acronyms like "GDPR," "HIPAA," "SOC 2," or "PII" appear in policies constantly, and their definitions matter.
Using the Abbreviation Design Element on these pages helps ensure that employees actually understand what they're agreeing to or being held accountable for, without requiring a law degree. It's a small change that can make a measurable difference in comprehension and compliance.
- Product and Project Dashboards
Project dashboards and status pages are full of shorthand — sprint labels, ticket IDs, departmental codes, status flags, and more. For stakeholders who don't live inside the project every day, even a simple status update can feel like reading a different language.
Embedding abbreviation tooltips into these pages helps bridge the gap between project teams and leadership or cross-functional stakeholders. Everyone stays on the same page without the need for a separate glossary document.
Start Designing with the Abbreviation Design Element
The ShortPoint Abbreviation Design Element might not be the flashiest feature in the toolkit, but it's one of those quiet workhorses that makes a real difference in how people experience your SharePoint pages. It reduces friction, improves accessibility, and keeps your pages clean and professional.
Ready to give it a try? Head into your ShortPoint editor and look for the Abbreviation Design Element in the library — you'll have your first tooltip live in minutes.
Just getting to know ShortPoint? Start exploring with a FREE 15-day trial — no commitment, no pressure. Or let us show you around with a one-on-one demo covering the Abbreviation Design Element and all the features ShortPoint has to offer.
Frequently Asked Questions
Do I need to know how to code to use the Abbreviation Design Element?
Not at all. The Abbreviation Design Element is entirely no-code. You add it through either the ShortPoint Design Elements library (by clicking the plus icon in the editor) or by using the Rich Text Editor to highlight existing text and apply the abbreviation from there. No HTML, CSS, or JavaScript knowledge is required — though the Custom CSS tab is available if you want to take things further.
What's the difference between adding it from the library vs. the Rich Text Editor?
Both methods let you define a title and content for your abbreviation. The main difference is context. Using the library is ideal when you're building a new section from scratch and want the abbreviation to stand alone or be paired with other design elements. Using the Rich Text Editor is better when you already have a block of text on your page, and you want to convert a specific word or phrase within it into an abbreviation. In short, it's more of an inline editing experience.
Can I control who sees the abbreviation tooltips?
Yes. The Visibility tab in the Abbreviation Settings window lets you specify which users or groups can see the element, and on which devices (desktop, tablet, or mobile) it should appear. This is useful if you have role-specific content or if certain abbreviations are only relevant to particular teams.
Can the abbreviation content be pulled from a SharePoint list or an external source?
Yes, you can do this through the Connect tab. You can link the Abbreviation Design Element to SharePoint sources like Lists and Document Libraries, or to external sources via the Microsoft Graph API, Teams, Outlook, and more. This is a more advanced use case, but it's a great option for teams who want to manage their glossary content centrally and have it update automatically across multiple pages.
Do I need any special permissions to add the Abbreviation Design Element?
You'll need to be a designated ShortPoint Designer with an active ShortPoint license, and your environment should have the latest version of ShortPoint SPFx installed. If you're unsure whether you have the right access, check with your SharePoint administrator.
Can I add more than one abbreviation on a single page?
Absolutely. There's no limit to the number of abbreviations you can add to a page. You can mix and match standalone abbreviations with inline ones, and stack them alongside other ShortPoint Design Elements as needed.
Related articles:
- How to Customize the Text Design Element
- How to Customize the Button Design Element
- How to Customize the Label Design Element
