 Try ShortPoint now
Use the ShortPoint Microsoft Graph API connection type to display dynamic content from Microsoft 365 applications, SharePoint sites, and other sources through the Microsoft Graph API. It enables you to integrate live Microsoft 365 data directly into your SharePoint sites without writing code. Most importantly, it provides a user-friendly interface for connecting to Microsoft Graph endpoints.
Microsoft Graph API is a unified endpoint that provides access to data and services across the Microsoft 365 ecosystem, including SharePoint, Teams, Outlook, OneDrive, and Azure Active Directory. It allows applications and integrations to retrieve, update, and interact with organizational data through a single, standardized REST API interface.
This article walks you through using the ShortPoint Microsoft Graph API connection, exploring its key features, and applying practical use cases you can implement immediately to build or enhance your SharePoint pages.
TABLE OF CONTENTS
- Prerequisites
- Video Tutorial
- Interactive Tutorial
- Step-by-step Tutorial
- Microsoft Graph API Features
- List of Common Use Cases
Prerequisites
- You have ShortPoint SPFx version 8.6.0.0 or later installed on your Microsoft 365 SharePoint site. This feature is not available for SharePoint 2019 and SharePoint 2016/2013 On-premises environments.
- You have enabled the ShortPoint - Azure AD Services Proxy SPFx app, approved API access permissions, and established Microsoft Graph integration on your SharePoint site. If you haven't done this yet, please refer to our article on How to Enable Microsoft Graph Integration for MS Graph API Connections.
- You are a ShortPoint Designer with either a Pro or Enterprise License. For more details, check out Licensing Options.
Video Tutorial
To help you get started, we've created a quick video walkthrough with our ShortPoint Expert:
Interactive Tutorial
Follow this interactive tutorial to learn how to use the ShortPoint Microsoft Graph API connection:
Explore the Features section to learn about customization options, and visit the Use Cases section to discover common applications for this connection.
Step-by-step Tutorial
There are two ways to enter Microsoft Graph API queries. Follow the option that best suits your needs:
Option 1: Using a Pre-defined Use Case Query
The ShortPoint Microsoft Graph API connection provides a list of commonly used queries you can readily use. Follow the steps below to learn how to use them:
Step 1: Edit the ShortPoint web part
- Open your SharePoint page and click Edit
- Select the ShortPoint web part
- Press the Edit Properties button

Step 2: Edit ShortPoint Design Element
- Navigate to the Design Element you want to connect and click its EasyPass tag.
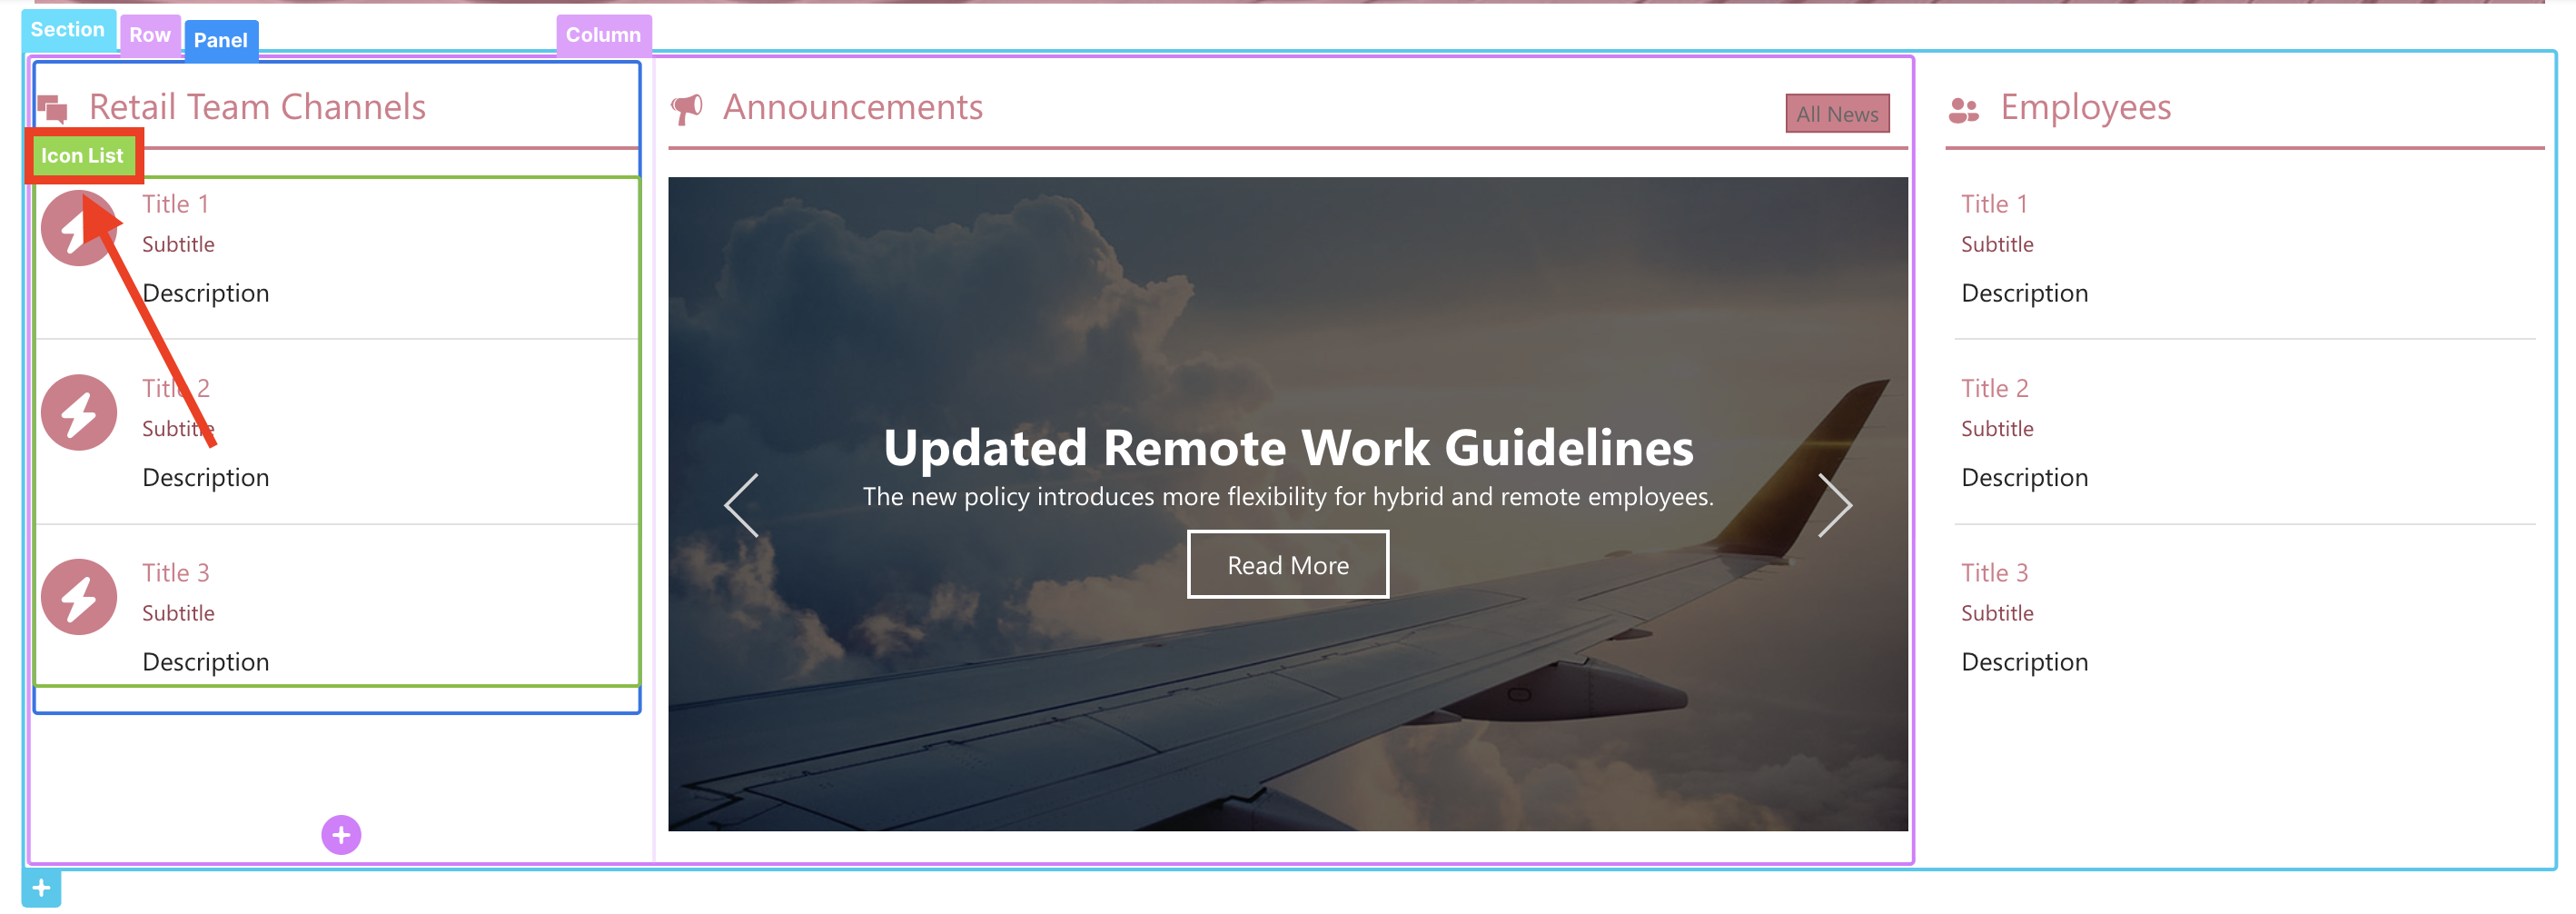
- Open the settings window by clicking the cogwheel icon.

Note: If you haven't added a Design Element to connect yet, you can insert one by clicking the plus button.
Step 3: Select Microsoft Graph API connection
- Go to the Connect tab.
- Select Configure.
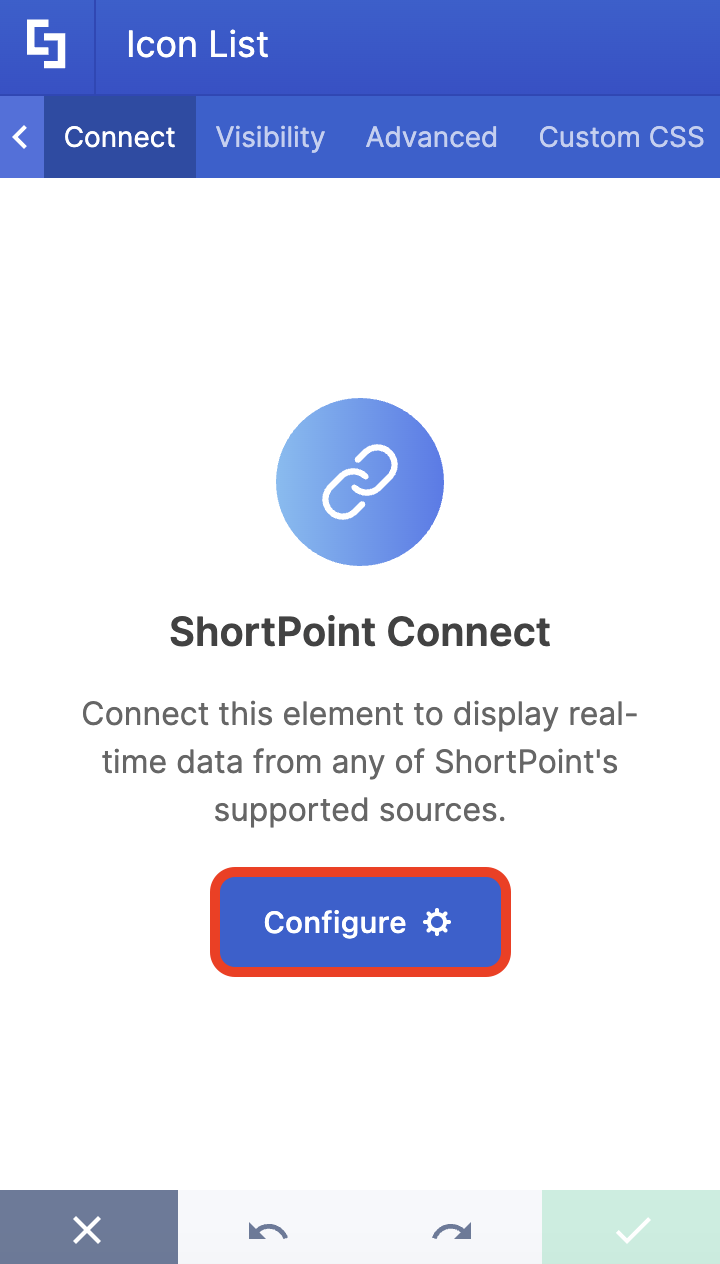
- Choose the Microsoft Graph API connection type

Note: If you haven't enabled the Microsoft Graph API connection yet, follow the steps in our article How to Enable Microsoft Graph Integration for MS Graph API Connections .Step 4: Select a Use Case
- We've provided a library of common Use Cases that you can easily select and apply as needed. Use the [1] tabs to find the Use Case you want to use, or use the [2] search bar:

- Select the Use Case that best matches your desired results. For this guide, we'll use Channels of a Team, which will pull all the channels of a specific team.
- (If required) Some use cases require additional parameters. To get it, click Get Parameter:

- Then, use the arrow icons to look for the specific parameter you need and copy it:

- Click Go Back:

- Paste the copied parameter in the field provided:

- Hit Run query:

- After running your query, you'll see the result under Response Preview. You can browse through it using the arrow icons or toggle on the JSON option to see the results in JSON format:

TIPYou can explore additional use cases and their practical applications in the Use Cases sectionStep 5: Connect
- (Optional) Configure connection settings and performance caching options. You'll find details about these in the Features Section below.

- Once satisfied, hit the Connect button:

You'll know your connection is properly established when the banners turn green and show a successful connection.

Step 6: Map items to display
You can now select which data property from the query results you want to display on the Design Element.
- Switch to the Items tab
- Delete default content
- Click the link icon and map any property that you want into each available field
In our example, we mapped the following fields and selected an icon:
- #displayName in the Title field - shows the names of the channels as the titles
- #createdDateTime in the Subtitle field - shows the date the channels were created as subtitles.
- #webURL in the Link field - redirects user to the Teams channel.

For more information about mapping results, see our ShortPoint Connect: Basic Tutorial article.
Step 7: Update and save
- (Optional) Click Preview to see how the contents of your Design Element will appear
- Once satisfied, apply your changes by hitting Update or Insert.
- Click the green checkmark.

- Do not forget to hit Save and publish your page
Congratulations! You now know how to use the ShortPoint Microsoft Graph API connection. You can explore more use cases in the Use Cases section.

Option 2: Using a Custom Query
The ShortPoint Microsoft Graph API connection allows you to enter your own queries. Follow the steps below to learn how.
Step 1: Edit the ShortPoint web part
- Open your SharePoint page and click Edit
- Select the ShortPoint web part
- Press the Edit Properties button

Step 2: Edit ShortPoint Design Element
- Navigate to the Design Element you want to connect and click its EasyPass tag.

- Open the settings window by clicking the cogwheel icon

Note: If you haven't added a Design Element to connect yet, you can insert one by clicking the plus button.
Step 3: Select Microsoft Graph API connection
- Switch to the Connect tab
- Choose the Microsoft Graph API connection type

NoteIf you haven't enabled the Microsoft Graph API connection yet, follow the steps in our article How to Enable Microsoft Graph Integration for MS Graph API Connections.Step 4: Enter Custom Query
- Select Custom Microsoft Graph API Query:

- Enter your query in the Microsoft Graph API field and click Run query:

- After running your query, you'll see the result under Response Preview. You can browse through it using the arrow icons or toggle on the JSON option to see the results in JSON format:

Step 5: Connect
- (Optional) Configure connection settings and performance caching options. You'll find details about these in the Features Section below.

- Once satisfied, hit the Connect button:
You'll know your connection is properly established when the banners turn green and show a successful connection.

Step 6: Map items to display
You can now select which data property from the query results you want to display on the Design Element.
- Switch to the Items tab
- Delete default content
- Click the link icon and map any property that you want into each available field
In our example, we mapped the following fields:
- #displayName in the Title field - shows the names of the users as the titles.
- #jobTitle in the Subtitle field - shows work titles as subtitles.
- #department in the Description field - shows departments as description.

For more information about mapping results, see our ShortPoint Connect: Basic Tutorial article.
Step 7: Update and save
- (Optional) Click Preview to see how the contents of your Design Element will appear
- Once satisfied, apply your changes by hitting Update or Insert.
- Click the green check mark.
- Do not forget to hit Save and publish your page
Congratulations! You now know how to use the ShortPoint Microsoft Graph API connection.

Microsoft Graph API Features
The Microsoft Graph API connection offers the following features:
Use Cases
This section provides a curated library of common scenarios where the Microsoft Graph API can retrieve data and display it on your page. Learn how to Get Started with Use Cases.

Other Settings
- Date/Time Format - lets you customize how dates and times are displayed. For more details, see How to Use Custom Date and Time Formats with ShortPoint Design Elements.
- Flatten Results - lets you simplify complex data structures by removing nested layers, making the data easier to work with.
- Items Limit - lets you set the maximum number of items displayed in your Design Element.

Advanced Settings
- Enable Advanced Settings - displays advanced settings when you toggle this switch on.

- Custom headers - You can append custom header parameters using JavaScript. For example, you can pass "origin" to allow Cross-Origin Resource Sharing (CORS) for your service. Learn more about the Custom Headers function.

- Change Parameters - You can pass parameters to the URL with JavaScript. For example, you can pass the logged-in User ID. Learn more about the Change Parameters function.

- Change Path - You can modify the Service URL Path using JavaScript. For example: https://service.com/sales, where "sales" changes dynamically based on the logged-in user's department. Learn more about the Change Path function.

- Map Results - If your API doesn't return an array of result items (which ShortPoint expects), use this function to transform the data into the proper format for ShortPoint. Learn more about the Map Results function.

Performance and Caching
Enable Partial Loading - This feature comes enabled by default. When the connection returns more than 20 results, partial loading activates automatically. Additional results will load as the user scrolls. Learn more about the Partial Loading function.

Cache Options - choose from the following:
- Smart Cache+ (Recommended) - This feature allows the element to load quickly from cached data. Once the page finishes loading, it automatically fetches and displays the most recent data in the background.
- Cache for a Set Period of Time - This option lets you specify how long to keep cached data. The cached data will be displayed until the set time period expires, after which the latest data will be retrieved.
- Disable Caching - This option disables all caching on your page, which means the page will always fetch fresh data directly from the source.
Learn more about these caching options and how to improve ShortPoint performance on your SharePoint sites.

List of Common Use Cases
The Microsoft Graph API connection type offers numerous applications for SharePoint pages. Here are detailed tutorials for the most common use cases.
GROUPS
- Groups I Belong To - shows all the groups the current user is a part of. Check out How to Create a List of All the Groups You are Part of to learn more.
- Members of a Group - shows all the members of a particular SharePoint group. Check out How to List All the Members of a Group in SharePoint to learn more.
- Children in a Group's Drive Item (Folder) - shows all the files in a SharePoint group’s OneDrive folder. Check out How to Show All the Files in a Group’s OneDrive Folder to learn more.
- All Groups in My Organization - retrieves a list of groups (alphabetical order) in the signed-in user's organization. To learn more, go to How to Display All Groups In Your Organization with Contact Details
- List a Group's Events - retrieves a list of events from the default calendar of a specified group. To learn more, go to How to Show a Specific Group’s Events in your SharePoint Page.
ONEDRIVE
- My Recent One Drive Items - show all the items in the current user's OneDrive that have been recently modified. Go to How to Show Your Most Recent OneDrive Items to learn more.
- All Items in My Root Drive - retrieves all items in the signed-in user's Drive. For more details, go to How to Show All the Files in Your OneDrive.
- Last Documents Viewed or Modified by Me - shows the documents the signed-in user last modified or viewed. For more details, go to How to Display Recently Viewed or Modified Documents.
USERS
- Filter Users by Department - shows all members of a specific department. Go to How to Display Team Members From a Specific Department to learn more.
- All Users in the Organization - lists all of the users in the organization. To learn more, go to How to Display All the Users in Your Organization in SharePoint.
- My Direct Reports - lists the signed-in user’s direct reports. To learn more, go to How to List All Your Direct Reports in Your SharePoint Site.
EVENTS
- My Events from Specific Calendar - shows all of the current user’s events from a specific calendar. Go to How to Display Events from a Specific Calendar to learn more.
- My Events for the next week - shows all of the current user’s events during a specific period. Go to How to Display Outlook Calendar Events from a Specific Time Frame to learn more.
- User's Events from Specific Calendar - shows the events of a specific user from a specific calendar. Check out How to Show a Specific User Events from a Specific Outlook Calendar.
- List a Group's Events - retrieves a specific group’s event from a specified time frame. For more details, go to How to Show a Specific Group’s Events in your SharePoint Page.
TEAMS
- Channels of a Team - displays all the channels in a Team. Go to How to Create a List of All Channels in a Team to learn more.
- My Teams - retrieves the list of Teams the signed-in user has joined. Go to How to Create a Navigation Menu of All Your Joined Teams to learn more.
- Teams from Organization - lists all the teams in your organization. Check out How to Display All the Teams in Your Organization With Their Contact Information to learn more.
EXCEL
- Rows in a Workbook Table - retrieves a list of rows from a worksheet table. Check out How to Display Rows in an Excel Table for more details.
PLANNER
- Planner Tasks from a Specific Plan - lists all the Planner tasks for a specified plan. Check out How to Show All the Tasks from a Specific Planner Plan for more details.
- My Planner Tasks - lists the signed-in user’s Planner tasks. To learn more, check out How to Display All Your Planner Tasks.
SHAREPOINT
- Subsites of a SharePoint Site - retrieves a list of SharePoint sub-sites based on the selected Site ID. Follow the guide in How to Create a Subsites Navigation in SharePoint.
- My Followed SharePoint Sites - retrieves a list of all SharePoint sites the signed-in user has followed. Go to How to Create a List of All Your Followed Sites for more details.
- Document Libraries in a SharePoint Site - retrieves a list of SharePoint Document Libraries from a specified site. For more details, go to How to Display all Document Libraries from a SharePoint Site.
EMAILS
- My Highly Important Emails -gets the messages in the signed-in user's mailbox (including the Deleted Items and Clutter folders), where the importance property is set to 'high'. Check out How to Display Highly Important Outlook Emails in a SharePoint Page to learn more.
- My Emails - retrieves the signed-in user's emails. Check out How to Showcase Your Outlook Emails in SharePoint for more details.
Related articles:
